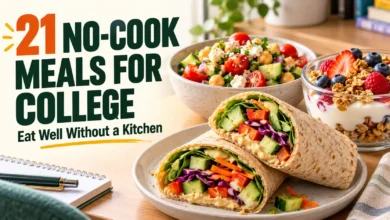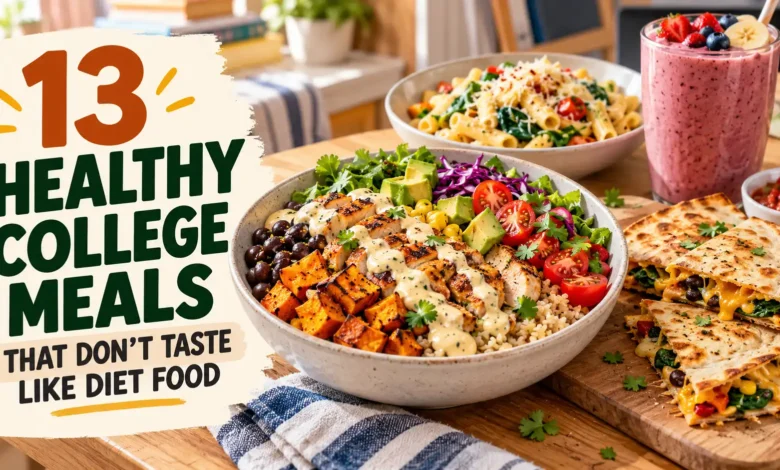
Healthy college meals can still mean creamy noodles, a warm burrito bowl, or a saucy sandwich. The recipes below pair satisfying bases with beans, eggs, chicken, tofu, or yogurt, plus vegetables or fruit and seasonings that do more than a pinch of salt.
Start with the smoky black bean burrito bowl for an easy dinner, the tuna-pickle wrap for a cold lunch, or the apple-cinnamon yogurt bowl when you have five minutes. Every recipe makes one serving; adjust portions or add a side to match your appetite.
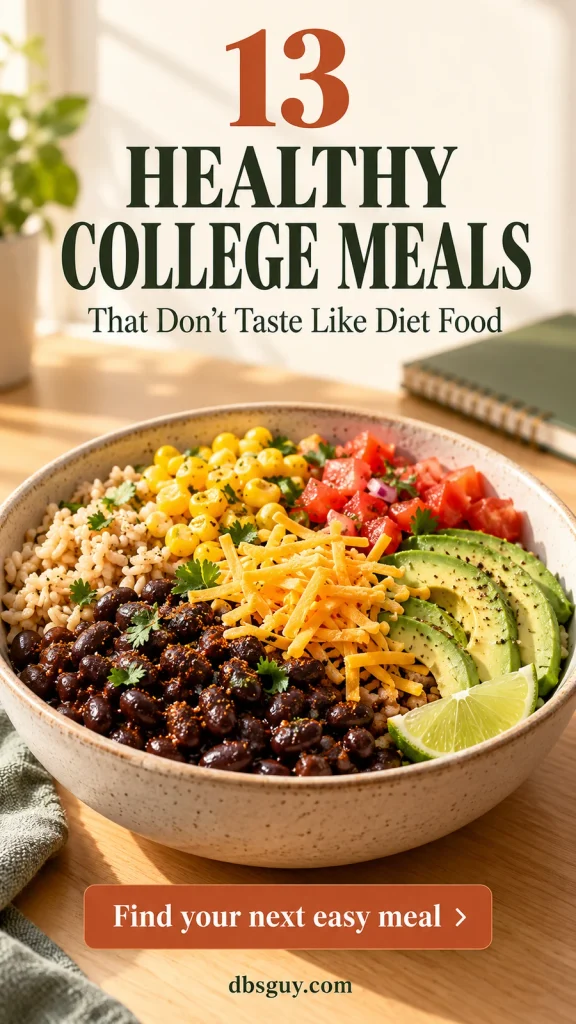
Recipe note: These are research-informed recipes that have not been kitchen-tested by dbsguy.com. Times are estimates. The AI-generated concept images illustrate serving ideas, not photographed test batches.
Pick a meal for the equipment you have
- No cooking: chickpea pitas (4), tuna wrap (7), overnight oats (12), and yogurt crunch bowl (13).
- Microwave: burrito bowl (1), Buffalo sweet potato (2), peanut noodles (3), lentil sloppy joe (8), chicken hummus bowl (9), and tofu rice bowl (11).
- Stovetop: pesto pasta (5), egg tacos (6), and tomato tortellini (10).
These recipes assume you have refrigeration for perishable ingredients and leftovers. Check your dorm’s appliance rules. For microwave meals, use a roomy microwave-safe bowl, a vented microwave-safe cover, and oven mitts; never heat a sealed container. Estimated microwave times assume roughly 1,000 watts, so start short, stir, and check the food rather than trusting the timer alone.
If a microwave is your only cooking option, also read 17 Microwave Mug Meals: Breakfast, Dinner & Dessert in a Mug.
What makes these meals balanced—and worth eating?
Build around a protein source, vegetables or fruit, and a substantial base such as whole grains, oats, bread, or potato. Then add flavor deliberately: lemon for brightness, peanut butter or hummus for creaminess, and fresh vegetables or nuts for crunch. Cheese and sauce can fit; you do not need to strip away every ingredient you enjoy.
Choose whole-grain versions when they suit the dish, and compare sodium on sauces, ready-cooked foods, and canned ingredients. Reduced-sodium soy sauce still contributes salt. Taste the assembled meal before adding more.
1. Smoky Black Bean Burrito Bowl
Makes: 1 serving · Estimated time: About 10 minutes · Equipment: Microwave
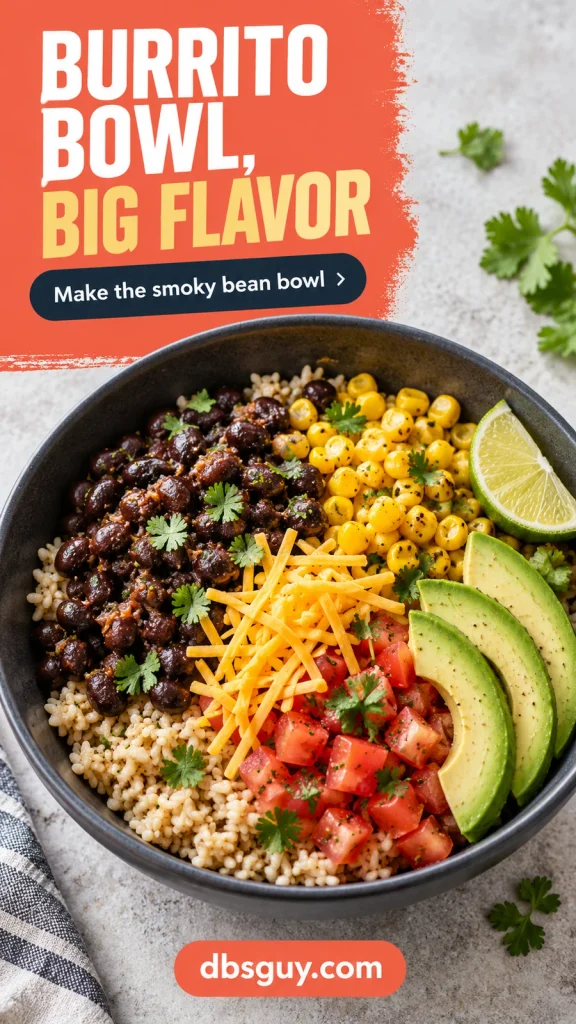
Start here when you want a burrito-shop dinner with very little cooking. Smoked paprika gives the beans depth, lime brightens the rice, and fresh tomato adds a juicy bite beside the creamy avocado.
Ingredients
- ¾ cup cooked brown rice, or a microwave-ready portion prepared according to its label
- ¾ cup canned black beans, drained and rinsed
- ⅓ cup canned corn, drained
- ¼ teaspoon smoked paprika and ¼ teaspoon ground cumin
- 1 tablespoon water
- ½ cup diced tomato
- ¼ avocado, sliced
- 2 tablespoons shredded cheddar
- 2 teaspoons lime juice; salt and pepper to taste
- 1 tablespoon chopped cilantro and 1 tablespoon finely diced red onion, optional
How to make it
- Heat the rice according to its package directions. If using refrigerated leftover rice, reheat it to 165°F.
- In a separate microwave-safe bowl, stir together the beans, corn, spices, and water. Cover with a vented microwave-safe lid and heat for 60 seconds. Stir, then heat in 30-second bursts until hot throughout; refrigerated leftovers must reach 165°F.
- Spoon the beans and corn over the rice. Add tomato, avocado, and cheddar, then finish with lime juice and any optional cilantro and onion. Taste before adding salt.
Keep the tomato and avocado cold until assembly. Warming every ingredient together loses the contrast that makes a burrito bowl appealing.
2. Buffalo Chicken Sweet Potato
Makes: 1 serving · Estimated time: About 15–20 minutes · Equipment: Microwave
A sweet potato makes a substantial base for tangy Buffalo chicken. Plain Greek yogurt adds a creamy finish, while celery supplies the crunch you would miss in a bowl of chicken and sauce alone.

Ingredients
- 1 medium sweet potato, about 8–10 ounces
- 3 ounces fully cooked shredded chicken
- 1–2 teaspoons prepared Buffalo wing sauce, plus more to taste
- 2 tablespoons plain Greek yogurt
- 1 teaspoon water for the chicken, plus 1–2 teaspoons to thin the yogurt
- ⅓ cup finely chopped celery
- Pinch of black pepper
How to make it
- Scrub the sweet potato, dry it, and pierce it several times with a fork. Place on a microwave-safe plate. Microwave for 4 minutes, turn carefully, then cook in 1-minute bursts until a fork slides easily through the center, usually 6–9 minutes total. Let stand for 2 minutes.
- Meanwhile, combine the chicken, Buffalo sauce, and 1 teaspoon water in a microwave-safe bowl. Cover loosely, heat for 45 seconds, stir, and continue in 20-second bursts until the chicken reaches 165°F throughout.
- Split the potato and fluff the flesh with a fork. Add the chicken. Thin the yogurt with 1–2 teaspoons water as needed, drizzle it over the top, and scatter on celery and pepper.
Start with the smaller amount of Buffalo sauce; brands vary in heat and salt. A microwaved sweet potato has tender skin, so the celery is doing the crisp-texture work here.
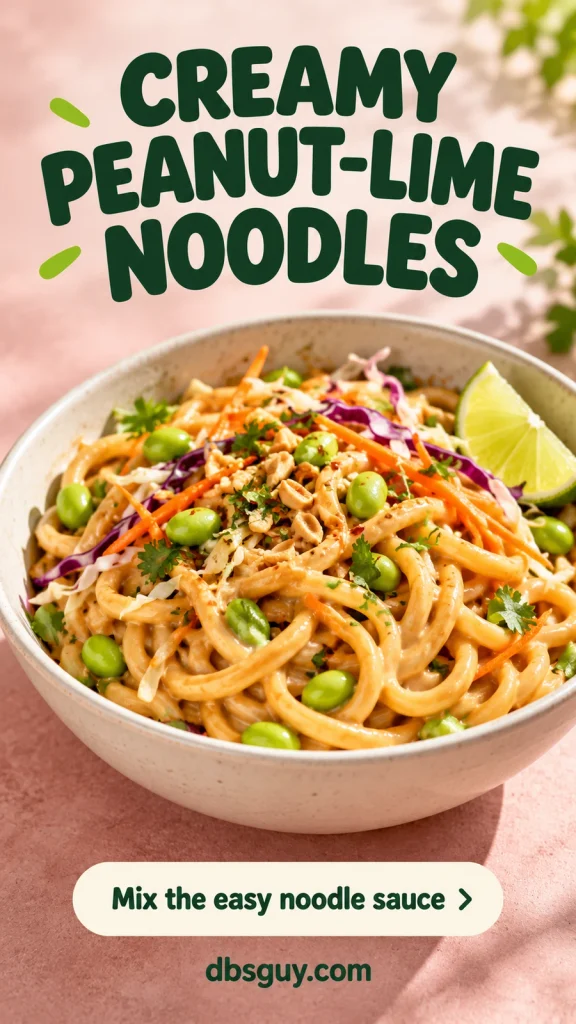
3. Peanut-Lime Edamame Noodles
Makes: 1 serving · Estimated time: About 10–15 minutes · Equipment: Microwave, with microwave-ready noodles
Peanut butter becomes a proper noodle sauce when you loosen it with warm water and add lime. Edamame makes this a more substantial lunch than noodles with a spoonful of sauce, and a handful of slaw mix saves chopping.
Ingredients
- 1 serving plain, fully cooked microwave-ready udon noodles, about 6–7 ounces; not dry noodles
- ¾ cup frozen shelled edamame
- 1 cup undressed shredded cabbage-and-carrot slaw mix
- 1½ tablespoons smooth peanut butter
- 2 teaspoons reduced-sodium soy sauce
- 2 teaspoons lime juice
- 1–3 tablespoons warm water
- ½ teaspoon honey or maple syrup, optional
- 1 tablespoon chopped roasted peanuts and 1 tablespoon chopped cilantro, optional
How to make it
- Cook the frozen edamame according to the package directions, including any standing time. Prepare the noodles using their microwave instructions; drain any excess liquid.
- Whisk the peanut butter, soy sauce, lime juice, and 1 tablespoon warm water in a bowl. Add more water a teaspoon at a time until the sauce flows off the spoon. Add the optional sweetener if you want a rounder flavor.
- Toss the warm noodles and edamame with the sauce, then fold in the raw slaw mix. Add the optional peanuts and cilantro just before eating.
If you only have dried noodles, cook them in a saucepan according to their label first. Sunflower-seed butter can replace peanut butter; check every ingredient label when cooking for an allergy.
4. Lemon Chickpea Pita Pockets
Makes: 1 serving · Estimated time: About 10 minutes · Equipment: No cooking; bowl, fork, and knife
Roughly mashed chickpeas stay inside a pita more easily than whole ones rolling around in dressing. Leave some texture, add plenty of cucumber, and use lemon to keep the filling bright.

Ingredients
- ¾ cup canned chickpeas, drained and rinsed
- 2 tablespoons plain Greek yogurt
- 2 teaspoons lemon juice
- 1 teaspoon olive oil
- ⅛ teaspoon garlic powder; salt and pepper to taste
- ⅓ cup diced cucumber
- ⅓ cup diced tomato, excess juice drained
- ½ cup shredded romaine
- 1 large whole-wheat pita with a pocket
- 1 teaspoon chopped dill or parsley, optional
How to make it
- Mash about half the chickpeas with a fork. Stir in the yogurt, lemon juice, olive oil, garlic powder, and a little pepper. Fold in the remaining chickpeas and taste for salt.
- Mix in the cucumber, tomato, and optional herbs. Cut the pita into two halves and open the pockets gently.
- Line both pockets with lettuce, then divide the filling between them. Eat promptly, or refrigerate the filling separately until you are ready to assemble.
For a dairy-free version, use hummus in place of yogurt and add a teaspoon of water if the filling seems stiff. Draining watery tomato helps keep the bread intact.
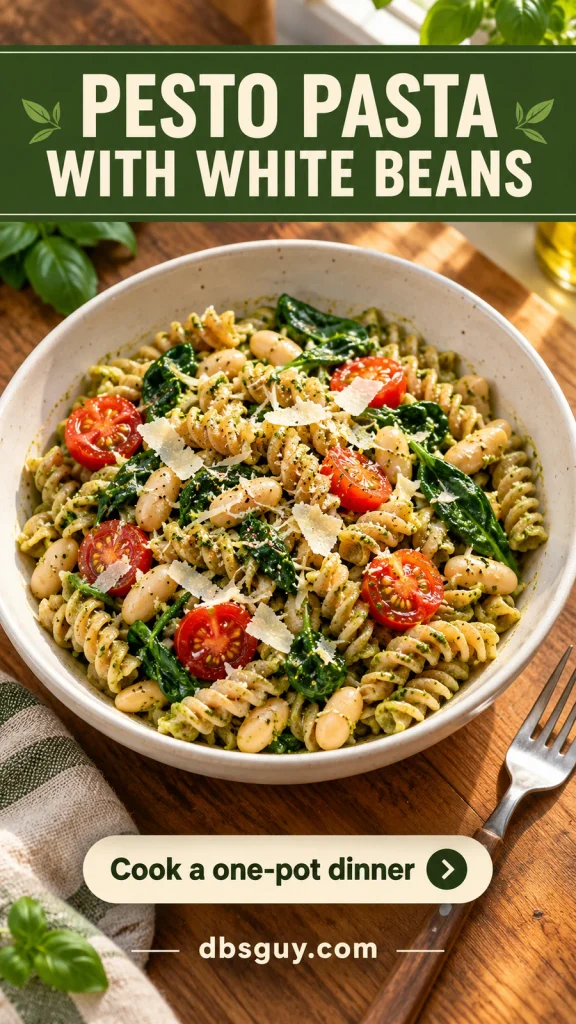
5. Pesto White Bean Pasta
Makes: 1 serving · Estimated time: About 20 minutes · Equipment: Stovetop, saucepan, and strainer
This is a good use for the last few spoonfuls of pesto in the fridge. White beans add a creamy bite beside the pasta, and a little starchy cooking water turns the pesto into a coating sauce instead of a heavy clump.
Ingredients
- 2 ounces dry whole-wheat fusilli or penne
- ½ cup canned cannellini beans, drained and rinsed
- 1 packed cup baby spinach
- ½ cup halved cherry tomatoes
- 1½ tablespoons prepared basil pesto
- 2–4 tablespoons reserved pasta cooking water
- 1 tablespoon grated or shaved Parmesan; black pepper to taste
How to make it
- Bring a saucepan of water to a boil. Cook the pasta according to its package directions. During the final minute, add the beans and spinach to warm them through.
- Reserve ¼ cup cooking water, then drain. Return the pasta mixture to the pan off the heat.
- Stir in the pesto, tomatoes, and 2 tablespoons cooking water. Add a little more water if needed to make a light sauce. Finish with Parmesan and pepper.
Let the residual heat soften the tomatoes rather than simmering them into sauce. Check pesto labels if you avoid nuts or dairy; traditional versions often contain both.
6. Salsa Verde Egg Tacos
Makes: 1 serving · Estimated time: About 15 minutes · Equipment: Stovetop and small skillet
Eggs and black beans give two small tacos enough substance for breakfast or a quick dinner. Salsa verde does the seasoning work, so you do not need a separate spice blend or a long topping list.

Ingredients
- 2 small corn tortillas, about 6 inches
- 1 teaspoon olive oil
- ½ cup canned black beans, drained and rinsed
- 1 packed cup baby spinach, roughly chopped
- 2 large eggs, beaten
- 1 tablespoon water
- 2 tablespoons salsa verde
- 1 tablespoon crumbled cotija or feta, optional
- 1 tablespoon chopped cilantro, optional
How to make it
- Warm the tortillas in a dry skillet over medium heat for about 20–30 seconds per side, just until pliable. Wrap in a clean towel to keep warm.
- Add the oil, beans, spinach, and water to the skillet. Stir over medium heat for 1–2 minutes, until the spinach wilts and the beans are hot.
- Lower the heat to medium-low and pour in the eggs. Gently stir and fold until fully set, with no liquid egg remaining, and the mixture reaches 160°F. Divide between the tortillas and finish with salsa verde and optional cheese and cilantro.
Warm tortillas bend; cold ones tend to crack. Keep the salsa for the finish so you can taste its tang and control how wet the tacos become.
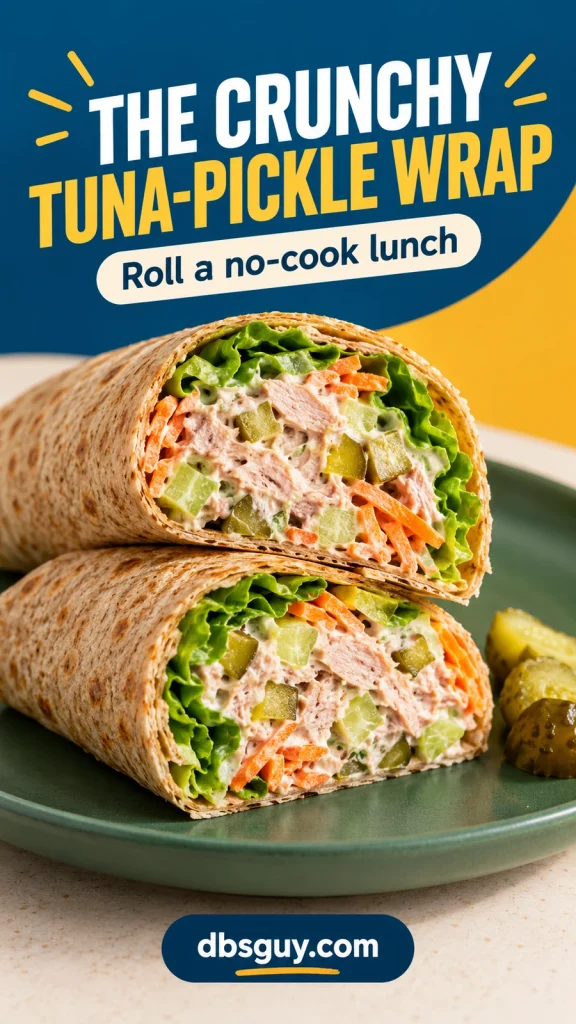
7. Crunchy Tuna-Pickle Wrap
Makes: 1 serving · Estimated time: About 10 minutes · Equipment: No cooking; bowl, fork, and knife
The pickles and mustard make this wrap taste like a deli lunch, while celery, carrot, and romaine give it a fresh crunch. Use a large tortilla so the filling fits without tearing the seam.
Ingredients
- 1 can light tuna in water, 5 ounces, drained
- 2 tablespoons plain Greek yogurt
- 1 teaspoon Dijon mustard
- 2 tablespoons finely chopped dill pickle
- ¼ cup finely chopped celery
- ¼ cup grated carrot
- 1 large whole-wheat tortilla, about 10 inches
- 2 romaine leaves, dried well; black pepper to taste
How to make it
- Flake the drained tuna into a bowl. Stir in the yogurt, mustard, pickle, celery, and pepper. Keep the mixture thick enough to mound on a spoon.
- Lay the romaine down the center of the tortilla, leaving space around the edges. Add the tuna mixture and carrot.
- Fold in the sides, roll tightly from the bottom, and set seam-side down. Cut in half if desired. Keep chilled until eating; use an insulated lunch bag with cold packs for class.
Drain tuna thoroughly before adding yogurt. If the filling is loose, adding more dressing makes rolling harder; a dry lettuce layer helps protect the tortilla.
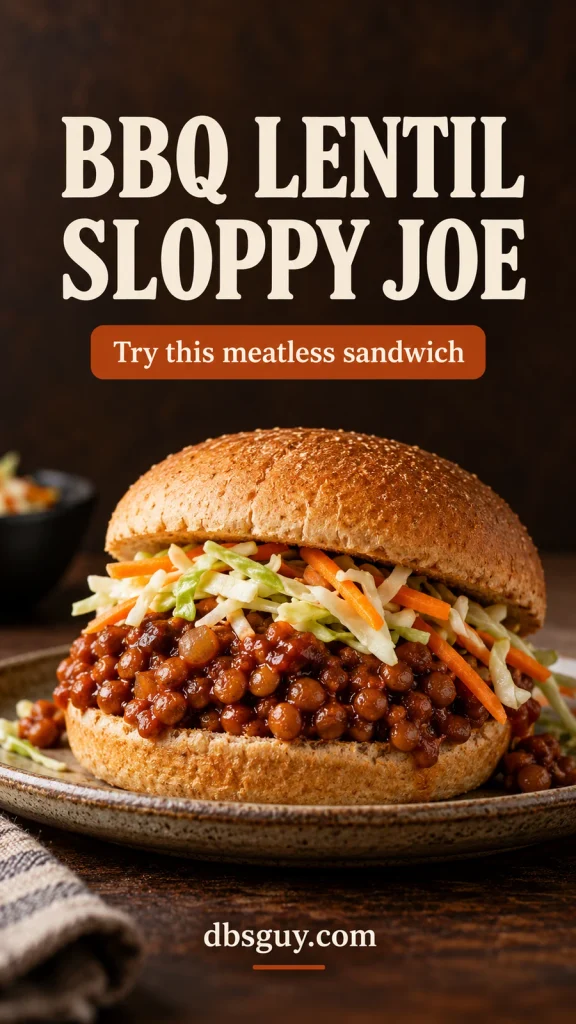
8. BBQ Lentil Sloppy Joe
Makes: 1 serving · Estimated time: About 10 minutes · Equipment: Microwave
Cooked lentils turn a small amount of barbecue sauce into a saucy sandwich filling. A quick cabbage slaw cuts through the sweetness and gives this meatless lunch a different texture from another grain bowl.
Ingredients
- ¾ cup canned or packaged fully cooked lentils, drained
- 1½ tablespoons barbecue sauce
- 1 tablespoon no-salt-added tomato paste
- 1 tablespoon water, plus more if needed
- ¼ teaspoon smoked paprika
- ¾ cup undressed cabbage-and-carrot slaw mix
- 1 teaspoon apple cider vinegar and 1 teaspoon olive oil
- 1 whole-wheat hamburger bun
How to make it
- Stir the lentils, barbecue sauce, tomato paste, water, and paprika in a microwave-safe bowl. Mash a few lentils with the back of the spoon to help the filling hold together.
- Cover with a vented microwave-safe lid and microwave for 60 seconds. Stir, then continue in 30-second bursts until hot throughout; refrigerated leftover lentils must reach 165°F. Add a teaspoon of water if the mixture is too stiff.
- Toss the slaw with vinegar and olive oil. Spoon the lentils onto the bun and top with slaw. Serve immediately, with any extra slaw alongside.
Use cooked lentils, not dry ones. Tomato paste gives the filling body, so you do not have to keep pouring in barbecue sauce to make it coat the lentils.
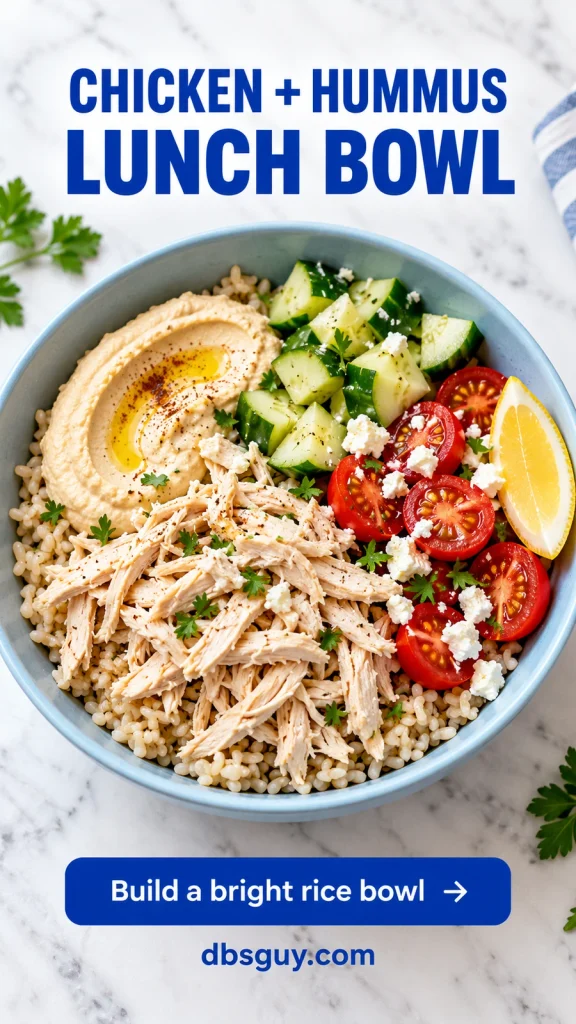
9. Greek-Style Chicken Hummus Bowl
Makes: 1 serving · Estimated time: About 10 minutes · Equipment: Microwave
Hummus works as the creamy element in this chicken bowl, so there is no need to mix a second sauce. Cucumber, tomato, and lemon keep the rice-and-chicken base from tasting like plain leftovers.
Ingredients
- ¾ cup cooked brown rice, or a microwave-ready portion prepared according to its label
- 3 ounces fully cooked shredded chicken
- 3 tablespoons hummus
- ½ cup chopped cucumber
- ½ cup halved cherry tomatoes
- 1 tablespoon crumbled feta
- 2 teaspoons lemon juice
- Pinch of dried oregano and black pepper
- 1 teaspoon olive oil, a pinch of paprika, and 1 teaspoon chopped parsley, optional garnish
How to make it
- Prepare the rice according to its package directions. Reheat refrigerated rice to 165°F.
- Put the chicken in a microwave-safe bowl with 1 teaspoon water. Cover loosely, heat for 45 seconds, stir, and continue in 20-second bursts until it reaches 165°F throughout.
- Add the chicken to the rice. Spoon hummus along one side, then add cucumber, tomatoes, and feta. Finish with lemon, oregano, and pepper. Add the optional garnish if using.
Keep the hummus and vegetables out of the microwave. For a meatless version, replace the chicken with ¾ cup rinsed canned chickpeas.
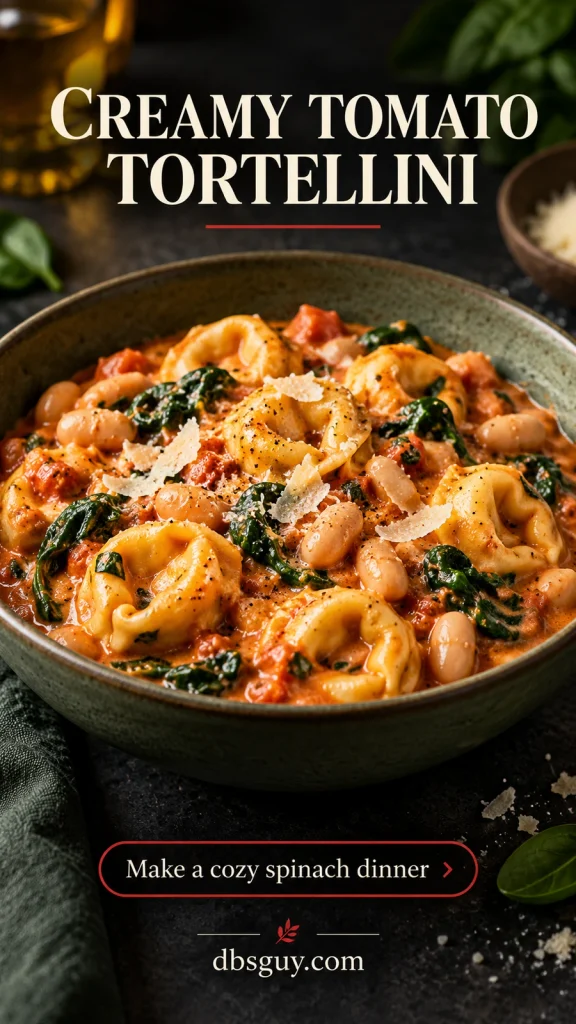
10. Creamy Tomato Tortellini with Spinach
Makes: 1 serving · Estimated time: About 20 minutes · Equipment: Stovetop, saucepan, and strainer
A spoonful of cream cheese softens tomato sauce without turning dinner into a pot of cream. Cheese tortellini brings plenty of flavor on its own; spinach and white beans make the bowl more varied and substantial.
Ingredients
- 3 ounces refrigerated cheese tortellini, uncooked
- ⅓ cup canned cannellini beans, drained and rinsed
- ½ cup prepared marinara sauce
- 1 packed cup baby spinach
- 1 tablespoon plain cream cheese
- 2–4 tablespoons reserved pasta cooking water
- 1 tablespoon grated Parmesan, optional; black pepper to taste
How to make it
- Cook the tortellini in boiling water according to its package instructions, including the full cooking time. Reserve ¼ cup water, then drain.
- Return the empty pan to medium-low heat. Add the marinara, beans, and 2 tablespoons pasta water. Simmer gently for 2–3 minutes, until the beans are hot. Stir in the spinach until wilted.
- Reduce the heat to low and stir in the cream cheese until smooth. Fold in the cooked tortellini. Loosen with more pasta water if needed, and finish with pepper and optional Parmesan.
Cook the tortellini in water first. A small quantity of thick tomato sauce may not provide enough liquid for uncooked pasta to cook evenly.
11. Sesame-Ginger Tofu Rice Bowl
Makes: 1 serving · Estimated time: About 15 minutes · Equipment: Microwave
This bowl leans on ginger, sesame oil, and rice vinegar for flavor. It is a useful option when you want a warm plant-based meal without standing over a skillet, and the tofu stays soft rather than developing a fried crust.

Ingredients
- ¾ cup cooked brown rice, or a microwave-ready portion prepared according to its label
- 4 ounces firm tofu labeled fully cooked or ready-to-eat, drained and cubed
- 1 cup frozen broccoli florets
- 2 teaspoons reduced-sodium soy sauce
- 1 teaspoon toasted sesame oil
- 1 teaspoon rice vinegar
- ½ teaspoon grated ginger, or ⅛ teaspoon ground ginger
- 1 teaspoon honey or maple syrup, optional
- 1 teaspoon sesame seeds, optional
How to make it
- Prepare the rice according to its label. Cook the frozen broccoli separately using its package directions and drain well. Reheat refrigerated rice to 165°F.
- Whisk the soy sauce, sesame oil, vinegar, ginger, and optional sweetener. Toss with the tofu in a microwave-safe bowl, cover loosely, and warm according to the tofu label. If using refrigerated leftovers, heat to 165°F, stirring gently halfway through.
- Spoon the tofu and its sauce over the rice, add broccoli, and finish with optional sesame seeds.
Choose tofu with a label that permits this preparation. If its package requires cooking, follow that method instead of treating a brief warm-up as a substitute.
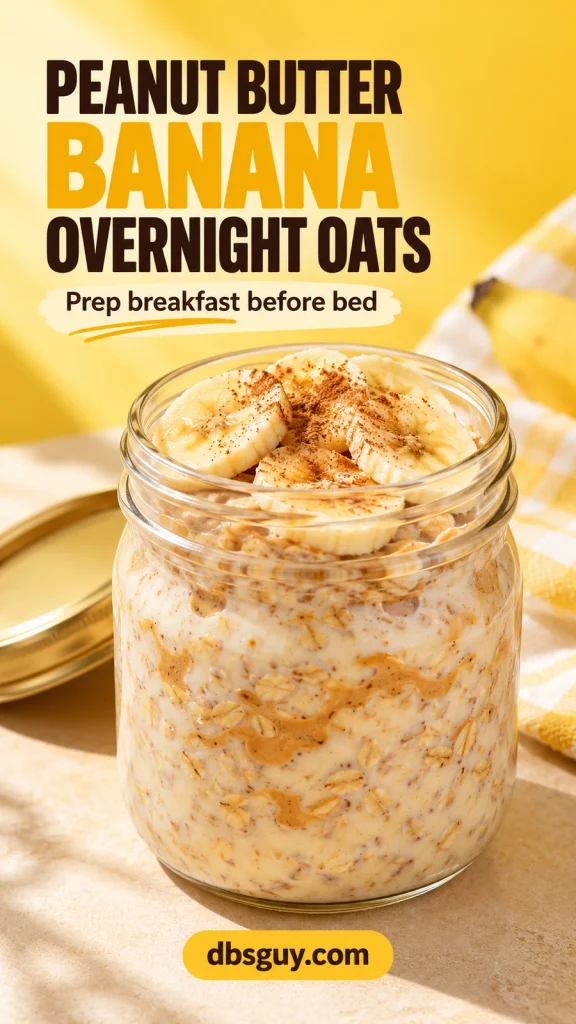
12. Peanut Butter Banana Overnight Oats
Makes: 1 serving · Estimated time: 5 minutes prep, plus at least 6 hours chilling · Equipment: Refrigerator and a lidded 2-cup jar or container
Overnight oats are useful when an early class makes cooking unlikely. Peanut butter gives the oats a richer flavor, and yogurt keeps the texture creamy after a night in the fridge.
Ingredients
- ½ cup old-fashioned rolled oats
- ½ cup milk or plain unsweetened fortified soy milk
- ½ cup plain Greek yogurt
- 1 tablespoon peanut butter
- 1 medium banana, divided
- ¼ teaspoon ground cinnamon
- 1 teaspoon honey or maple syrup, optional
How to make it
- Mash half the banana in the container. Stir in the milk, yogurt, peanut butter, cinnamon, and optional sweetener until combined.
- Stir in the oats, cover, and refrigerate immediately for at least 6 hours or overnight. Leave space at the top so you can stir easily.
- In the morning, stir well and add a splash of milk if the oats are too thick. Slice the remaining banana over the top just before eating; keep the remaining banana half covered in the refrigerator overnight.
Use rolled oats here; steel-cut oats do not soften the same way. For simpler prep, mash one small banana into the mixture and skip the sliced topping.
13. Apple-Cinnamon Yogurt Crunch Bowl
Makes: 1 serving · Estimated time: About 5 minutes · Equipment: No cooking; bowl and knife
Use enough yogurt and fruit to make this breakfast feel like a meal. Granola and walnuts go on last so they stay crunchy against the creamy yogurt and juicy apple.

Ingredients
- 1 cup plain Greek yogurt
- 1 medium apple, cored and diced
- ⅓ cup oat granola
- 1 tablespoon chopped walnuts
- ¼ teaspoon ground cinnamon
- 1 teaspoon honey or maple syrup, optional
How to make it
- Spoon the yogurt into a bowl. Stir in half the cinnamon and the optional sweetener.
- Add the diced apple, granola, and walnuts, keeping some of each visible on top. Dust with the remaining cinnamon and eat right away.
- For a packed breakfast, refrigerate the yogurt and apple in one container and keep the granola and walnuts dry in another. Combine when you are ready to eat.
The fruit and granola already bring sweetness, so taste before adding honey. If you need more breakfast, add a piece of whole-grain toast rather than relying on a larger sprinkle of toppings.
Shop for a few meals that share ingredients
Pick two dinners and one breakfast before shopping. Buying ingredients for all 13 meals at once is a quick way to overwhelm a mini fridge. A few useful overlaps:
- Plain Greek yogurt: use it for the Buffalo drizzle, chickpea filling, tuna wrap, oats, or breakfast bowl.
- Undressed slaw mix: fold it into peanut noodles or pile it onto the lentil sandwich.
- White beans and spinach: use both in the pesto pasta and tomato tortellini.
- Brown rice: portion it for the burrito, chicken hummus, and tofu bowls.
Use smaller packages when you have little cold-storage space. Single portions may cost more per ounce, so compare that tradeoff with how much of a larger package you can safely use or freeze. Prices vary by store; these recipes do not make a fixed per-serving cost promise.
Store leftovers safely in a dorm fridge
Keep the refrigerator at 40°F or below, checked with an appliance thermometer. Refrigerate perishable ingredients and cooked leftovers within 2 hours, or 1 hour when temperatures exceed 90°F. Put hot leftovers in shallow containers and refrigerate promptly rather than leaving them out to cool completely.
Use cooked leftovers within 3–4 days, or freeze suitable portions sooner. Follow a shorter package instruction when one applies, and remember that combining ingredients does not restart their storage clock. Reheat leftovers, including rice and chicken, to 165°F; stir and check several spots with a food thermometer. Follow packaged foods’ cooking and standing instructions. See FoodSafety.gov’s four steps to food safety for the basic handling guidance.
Questions about healthy college meals
What can I make without a stove?
The chickpea pitas, tuna wrap, overnight oats, and yogurt bowl need no cooking. With a microwave, you can also make six of the warm meals above. Read the ingredient labels: the noodle recipe uses fully cooked microwave-ready noodles, and the tofu recipe uses tofu labeled for that preparation.
How do I make a meal more filling?
Keep a substantial base alongside the protein and produce. If a serving leaves you hungry, add more rice, a tortilla, fruit, extra beans, or another side that suits the meal. Your needs can change with your schedule, activity, and appetite; these portions are starting points.
Can I make these vegetarian?
Several already use beans, lentils, eggs, or yogurt. Swap chickpeas for the chicken in the hummus bowl, or use them in the tuna wrap with a little extra dressing. For vegan meals, also check yogurt, cheese, pesto, noodles, and sauce labels; substituting the main protein alone may not be enough.
What if I do not have a reliable refrigerator?
Make only what you can eat immediately from safely stored ingredients. Unopened shelf-stable rice, beans, tuna, or lentils can help when their labels allow it, but opened packages and mixed meals may need refrigeration. Do not plan overnight oats or save chicken, dairy, or cooked rice in an unchilled room.
Choose one meal you would actually look forward to eating, then buy enough for that meal and one useful variation. A repeatable lunch with a sauce you like is more useful than a fridge full of ingredients without a plan.