
To style a Dolly Parton wig, build a little support beneath the crown, cover it with a smooth outer layer, then shape the bangs into a soft sweep. Fluff the existing curls at the sides and finish with a light application of holding spray made for your wig’s fiber. The goal is a rounded silhouette with height above the forehead—not a surface full of visible teasing.
This tutorial focuses on a layered, already wavy or curly costume wig. You can follow the four steps without hot tools. A very straight, thin wig will not turn into a dense country-glam style through teasing alone.
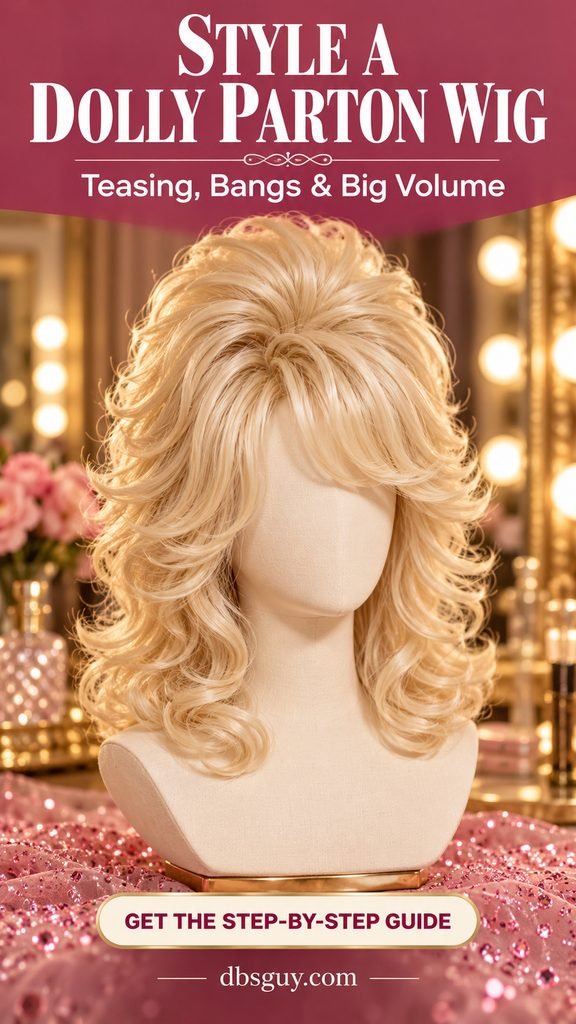
The images are AI-generated styling concepts, not photographs of a tested wig transformation. Your result will depend on the wig’s cut, density, fiber, and construction.
Before You Start: Read the Wig’s Fiber Label
The label decides which tools and products belong near your wig. “Synthetic” and “heat-friendly synthetic” are different instructions.
- Standard synthetic or unknown fiber: Skip curling irons, flat irons, hot rollers, steam, and hot air. Work with the curl pattern already in the wig.
- Heat-friendly synthetic: Follow the specific model’s temperature limit and styling directions if you later choose to reshape it. A heat-friendly label is not permission to use any temperature.
- Human hair, blends, or delicate hand-tied construction: Check the maker’s care guidance. Avoid forceful backcombing around knots, lace, and fine parting areas. An expensive everyday wig is a poor place to learn aggressive costume styling.
For manufacturer guidance on ordinary synthetic fibers, Jon Renau’s synthetic care and styling guide describes gentle backcombing, smoothing the surface, and using a suitable holding spray. It also warns against heat tools on standard synthetic fiber. Your own wig’s instructions take priority.
Gather a Small Styling Kit
- A stable mannequin head or wig block on a secured stand.
- A wide-tooth comb for detangling and separating sections.
- A small teasing comb or wig-compatible teasing brush, if the construction allows it.
- Sectioning clips that release without snagging.
- Holding spray labeled for the wig’s fiber; a compatible detangler only if needed.
- A wig cap or grip, if you use one, and a mirror for the final fit check.
Start with a dry wig that is free of sticky product buildup. If it needs washing, follow its care directions and let it dry completely before creating this style. Plan a practice session before Halloween or your event, especially if you have never shaped the fringe.
Step 1: Detangle, Secure, and Save the Top Layer
Put the wig on the mannequin so the front edge sits where it will sit when worn. Anchor it using the stand’s recommended method. If you use pins, keep them away from delicate lace and hand-tied areas, and remove every pin before putting the wig on.

Separate the ends with your fingers first. Then use the wide-tooth comb on a small section, beginning at the tips and working gradually upward as each lower part becomes free of tangles. Support the section above the comb so you are not pulling against the cap. For defined curls, use your fingers wherever combing would break up the curl pattern.
Make three working areas:
- Bangs: Separate the existing fringe and clip it forward or aside. Leave it out of the crown teasing.
- Cover layer: Lift a thin layer from the visible top and clip it aside. This will hide the supporting texture underneath.
- Hidden crown: Work on the hair just beneath that cover layer, toward the upper back of the head.
Check before continuing: The lengths should separate easily, the stand should not wobble, and there should be enough unteased hair reserved to cover the working area. If the cap is already showing through, build a smaller shape rather than teasing harder.
Step 2: Tease the Hidden Crown in Small Sections
Crown height needs a little support close to the base. Backcombing the whole length creates more tangles than this style needs. Try one small, hidden section first; if the fiber roughens, stretches, or sheds noticeably, stop.
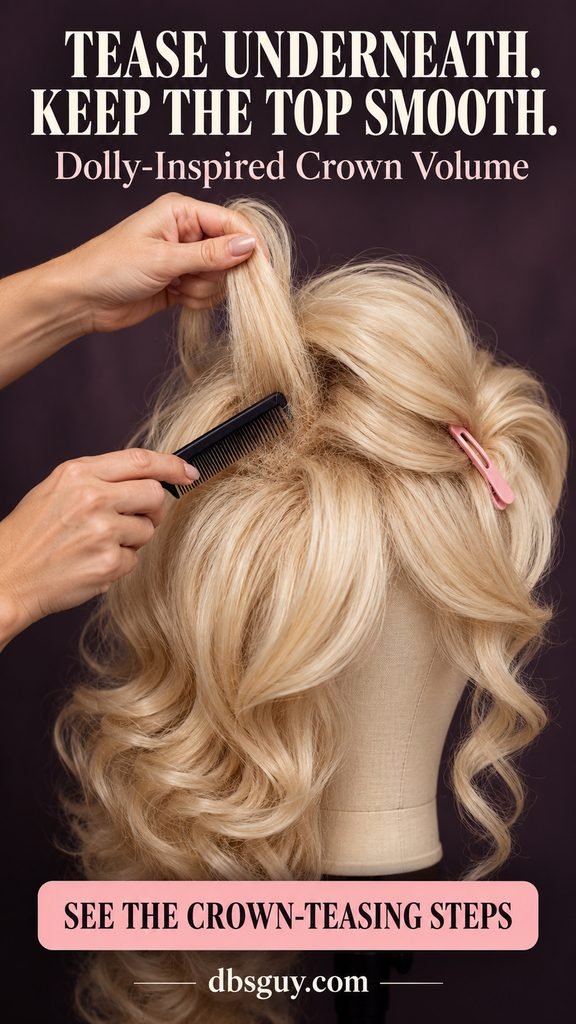
- Lift a narrow section. Start beneath the clipped cover layer. A section about an inch wide is a manageable starting point; use less hair if the comb catches.
- Work near the base. Hold the section upright without yanking it tight. Place the comb a short distance above the cap and make a few gentle strokes down toward the roots, stopping short of the cap itself. Lift the comb away between strokes rather than sawing back and forth.
- Check the support. Release the section briefly. You want a small cushion beneath the hair, not a hard knot. Add another light pass only if the section needs it.
- Build gradually. Repeat on neighboring hidden sections. Step back between sections so the crown grows into a rounded shape rather than one narrow spike.
- Replace the cover layer. Drape the reserved smooth hair over the support. Skim the surface with fingers or a suitable brush; avoid brushing through the cushion you just made.
Leave the fine front edge, lace, and visible parting alone. If a row of wefts appears, move a little of the cover layer over it or reduce the height. More spray will not conceal exposed construction.
How much teasing is enough? Stop when the smooth cover layer holds a soft curve above the head. The height is an editorial styling choice, not a measurement every wig needs to reach. Keep the curl and movement in the lower lengths.
Step 3: Shape Soft Bangs Without Overworking Them
The fringe should connect the tall crown to the face. For the look pictured here, aim for a lightly feathered, off-center sweep with the brow and eye area visible. Start with the bangs already cut into your wig.
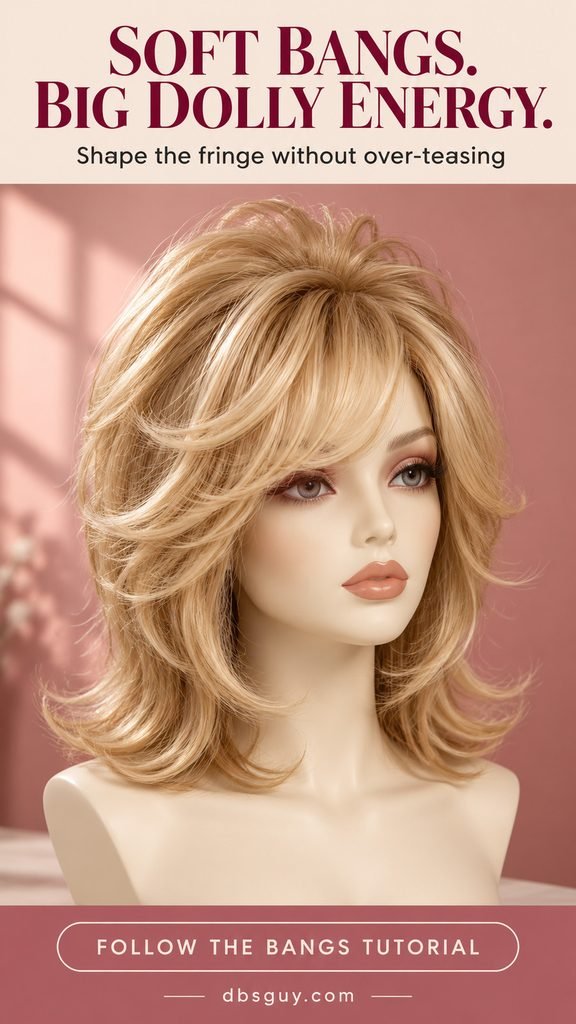
Unclip the fringe and put the wig on briefly to check where it falls. A bang that looks short on a mannequin may sit in your eyes when the cap is positioned correctly. Adjust the cap first; pushing the whole wig backward to shorten the fringe can expose the front edge.
Return the wig to the stand, separate a few small fringe sections with your fingers, and guide them gently to one side. Keep a little air beneath the roots instead of pressing everything flat against the forehead. If the care instructions allow it, use a light mist of water to make the fringe easier to arrange, then let it dry in position. Follow with a small amount of fiber-compatible styling product only if needed.
Standard synthetic bangs usually follow their manufactured shape. Gentle placement can tidy them, but a stubborn forward fringe may need a wig stylist’s help to become a lasting side sweep. Do not increase the heat or pile on spray to force it.
If the bangs are too long: Ask a stylist who works with wigs for a light, feathered fringe that clears your eyes when the wig is fitted correctly. Have the shape checked on you before cutting. Cutting is permanent, and the fringe cannot grow back.
Keep teasing behind the bangs in the hidden crown. Teasing all the short front pieces can turn a soft fringe into a fuzzy wall that is difficult to smooth.
Step 4: Balance the Shape, Add Light Hold, and Check the Fit
Look at the wig from the front and both sides. The crown should form one continuous curve, with enough fullness near the temples to connect it to the curled lengths. Gently lift existing side curls with your fingers, separating a few large clumps while keeping their curl shape.

Skim the outer layer into place, then apply a light mist of compatible holding spray according to the product label. Let it dry before touching it again. Add product only where the shape needs support; a saturated surface can make the finished wig look stiff and separated.
Try the wig on with the cap or grip you intend to wear. Set the adjustable straps for a secure, comfortable fit, and use only attachments appropriate for the wig’s construction. Check these points before leaving:
- Front: The bangs clear your eyes and the front edge stays covered.
- Sides: No weft rows or clipped sections show when you turn.
- Movement: The wig stays in place when you nod and turn your head gently.
- Comfort: There is no painful tightness, pinching, or forgotten styling pin.
- Outfit: Curls do not keep catching on earrings, a collar, or costume trim.
If the outfit is still undecided, the DIY Dolly Parton costume under $50 guide offers a thrift-store approach that pairs naturally with this wig styling. Try the collar and earrings on before making the final adjustments to the ends.
Quick Fixes for Flat, Frizzy, or Uneven Wig Volume
The crown falls flat as soon as you smooth it
You may be brushing through the supporting section. Lift the cover layer, reshape just one small hidden area, and lay the cover back over it. Touch only the surface. If the wig has very little density, choose a lower rounded shape rather than repeatedly backcombing the same fragile fibers.
The top looks fuzzy
Check whether the reserved cover layer was teased by accident. Lay an untouched neighboring section over the rough area if there is enough hair. Avoid pressing down the entire crown to tame one flyaway; that can flatten the shape without solving the exposed texture.
The bangs keep dropping into your eyes
Confirm that the cap has not slipped forward. Refit the wig, then arrange the fringe again. If the length is still wrong, a professional trim is more useful than making the bangs increasingly stiff.
The finished wig looks too wide or uneven
Compare both sides in a mirror before adding more volume. Gently settle a few side curls closer to the head and check the profile again. Often the adjustment belongs at the sides, while the crown can stay as it is.
After the Event: Loosen the Teasing Gently
Remove the wig and all accessories, and put it back on the stand. Work through small sections with your fingers, freeing the ends first and gradually approaching the teased area. Support the fibers above any snag. Use a detangler approved for that wig if its care instructions allow one.
Do not drag a brush from the crown through a tight tangle. If the teasing has become a compact mat, stop pulling and ask a wig stylist about detangling or resetting it. Some costume fibers will not return perfectly to their original texture after backcombing.
Clean only as directed by the maker, let the wig dry fully, and store it without crushing the crown. For a short trip, a roomy wig carrier with the head supported gives the style more space than a tightly packed bag.
Dolly Parton Wig Styling FAQs
Can I get big volume without teasing?
Sometimes. If the wig already has built-in root volume and curls, gentle finger lifting and separating the existing curls may be enough. Start there. A flat, sparse wig has less room for adjustment, so moderate fullness may be a better result than trying to build a towering crown.
Can I use regular hairspray on a synthetic wig?
Choose a holding product approved for the fiber and follow its label. A spray intended for natural hair is not automatically suitable for synthetic fibers. More hold also does not replace the small supporting sections beneath the crown.
Can I use a curling iron just on the bangs?
Only if the specific wig is labeled for heat styling and you follow its stated limits. Unknown or ordinary synthetic fiber should stay away from hot tools, including on the fringe. This tutorial’s main method does not require a curling iron.
Do I need a lace-front wig for a Dolly-inspired costume?
No. A wig with an existing fringe can cover the front edge, provided it fits properly and has enough hair for the style. Choose the cut and density you need rather than assuming a lace front will create volume.
How do I make a last-minute wig look more polished?
Prioritize the visible shape: fit the cap, separate the side curls, tidy the fringe, and smooth the crown. Leave major cutting or fiber reshaping for a practice session. The last-minute Dolly Parton costume guide can help you finish the outfit with pieces you already own.