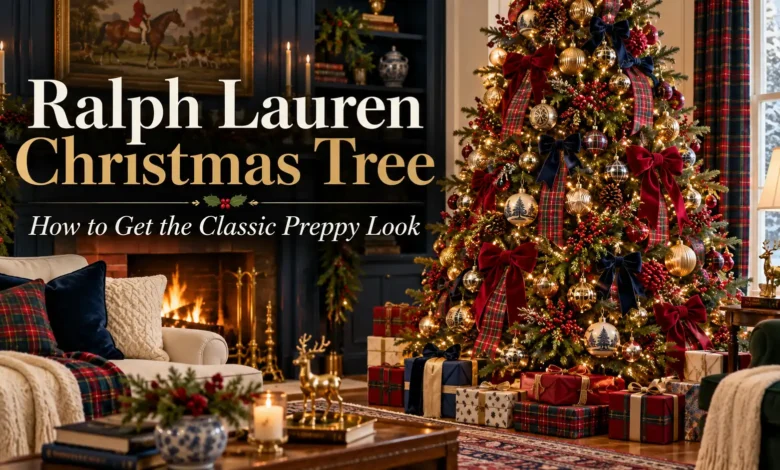
A Ralph Lauren Christmas tree gets its classic preppy look from lush greenery, tartan ribbon, rich red accents, warm white lights, and ornaments that feel collected over time. Start with one plaid you love, repeat its colors through the tree, and add velvet for softness. You can create the feeling with decorations you already own; buying everything from one designer is optional.
The useful part is knowing how to put those ingredients together. This guide walks through the color plan, a manageable ribbon method, ornament placement, and the finishing details that make a tree feel at home in the room.
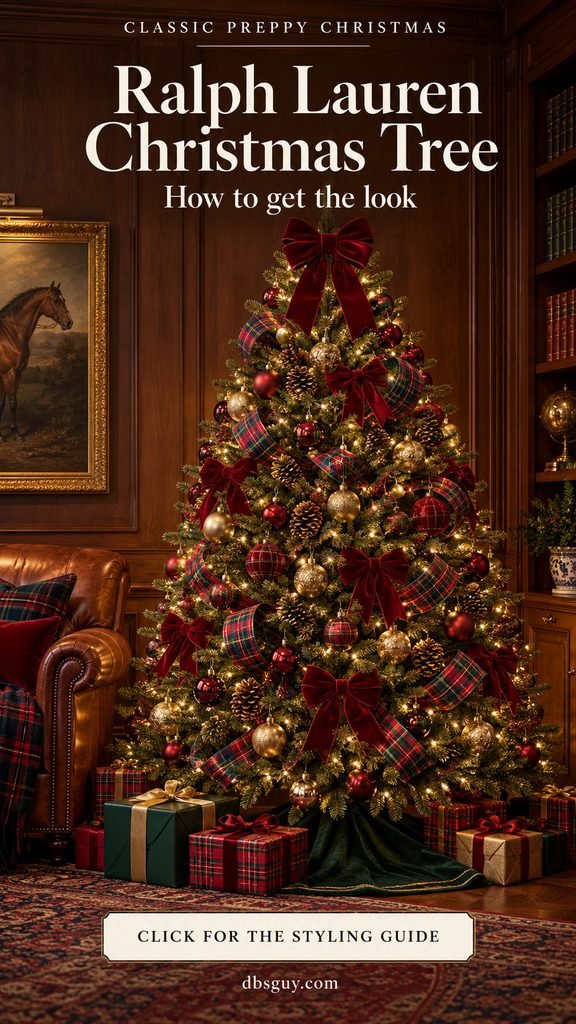
The images in this guide are AI-generated decorating concepts, created to illustrate the styling suggestions. This is an independent, Ralph Lauren–inspired guide, with no brand affiliation.
What Makes the Look Feel Classic and Preppy?
Think of a comfortable traditional room: a wood side table, a favorite armchair, a patterned throw, and a Christmas tree with a little history in its ornaments. The tree belongs to that setting because its colors and textures repeat things already in the room.
Ralph Lauren’s own Deck Your Halls: A Holiday Style Guide describes a range of holiday trees, from simple ribbon and popcorn decorations to collections of glass ornaments. Warm white lights, red and gold, and thoughtful use of plaid are recurring elements. There is room for personality within the style.
For an approachable version, use one dominant tartan, one velvet accent, and a restrained ornament palette. Let the branches remain visible between decorations. That breathing room helps the ribbon, special ornaments, and natural tree shape read clearly.
Before You Buy Anything, Make Three Decisions
- Where will the tree stand? Measure the footprint with the branches spread, then include the stand, skirt, gifts, and the space needed to walk past. Check the height with your intended topper included.
- Which sides need decorating? A tree in a corner usually needs a detailed front and two visible sides. A tree in the middle of a room needs a plan all the way around. This changes your ribbon and ornament quantities.
- What can you reuse? Separate existing ornaments into red, green, gold, neutral, and sentimental groups. Choose the ribbon after you see what is already available.
A plain green tree makes the dark ribbon and velvet easy to see. An artificial tree works well when its branches are shaped carefully; a fresh tree brings its own irregular, natural silhouette. If you already own a flocked tree, keep it and try the same colors on a small section before shopping for the rest.
1. Build the Color Palette and Prepare the Tree
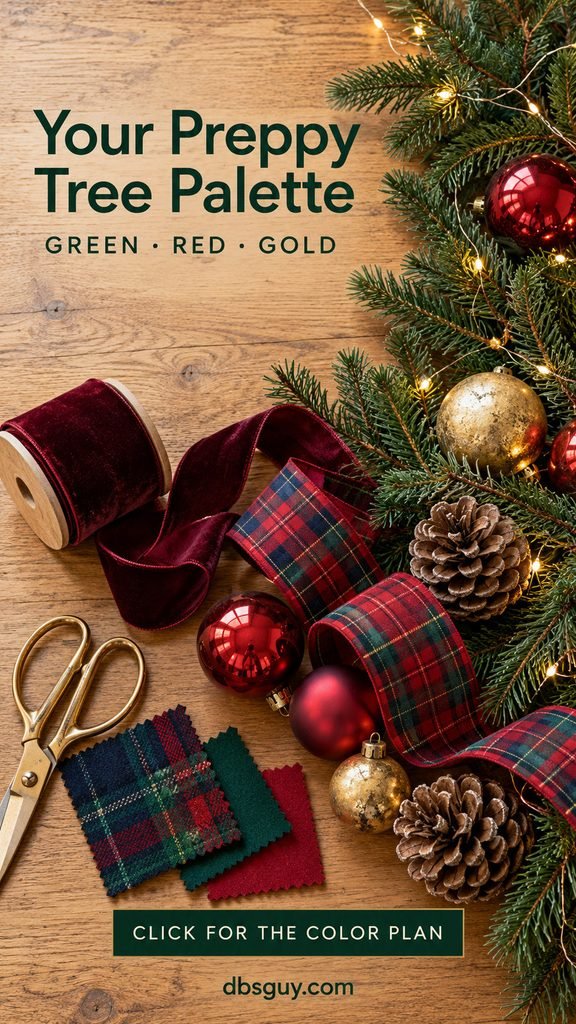
The simplest starting palette is forest green, deep red, and soft gold. Green comes mainly from the tree, red appears in the ribbon and ornaments, and gold adds small points of light. Burgundy velvet fits comfortably beside a brighter red tartan because the colors share a family without looking identical.
Choose your plaid first. A red tartan with green and navy lines gives you several colors to repeat. Black Watch–style tartan, with its dark blue and green checks, creates a quieter foundation; the small-space example later in this guide shows how red accents can keep that combination festive.
Lay the ribbon, a red ornament, a gold ornament, and a velvet sample together beside the tree. Look at them in daylight and with the tree lights switched on. A red that looked perfect under store lighting may appear orange at home, and a pale gold finish may look more yellow beside your other ornaments.
Shape and light the tree before adding decorations
On an artificial tree, separate the tips in different directions, working from the inner branches outward. View it from your usual seat as well as straight ahead. A thin patch can sometimes be improved by opening the branches behind it rather than covering it with another ornament.
Warm white lights suit this plan. For a tree that is not prelit, distribute some lights nearer the trunk and some toward the outer branches, following the light manufacturer’s directions. Check the glow before you add ribbon. If the topper has its own cord, plan that route now so you do not have to pull it through a finished tree.
Also Read: 19 Ralph Lauren Inspired Christmas Tree Ideas for a Cozy Plaid Holiday
2. Add Tartan Ribbon in Short, Relaxed Sections
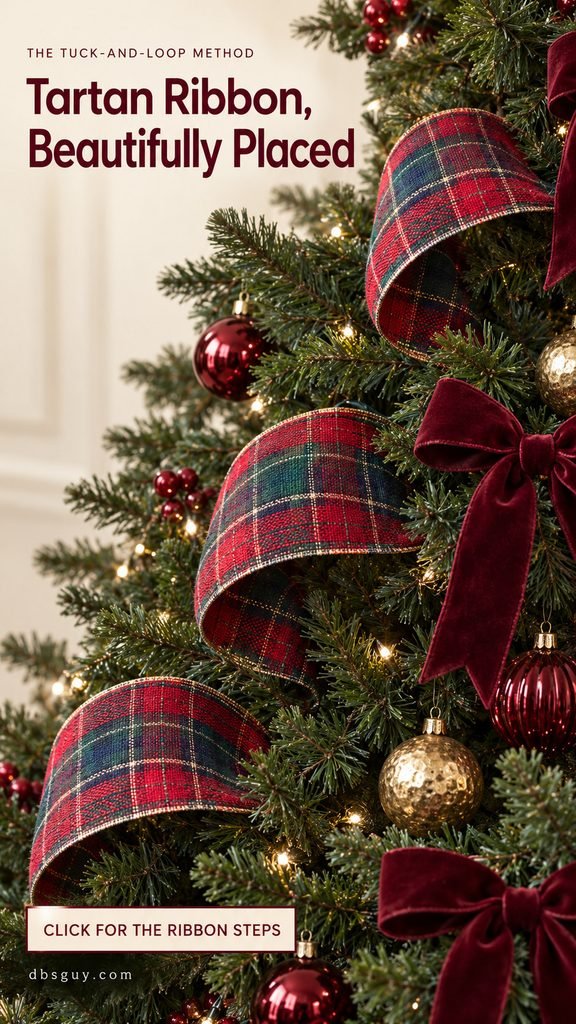
For this look, ribbon should travel through the branches with gentle movement. Short sections are easier to adjust than a single long spool, particularly when you are decorating the front and sides of a tree.
On a typical 6- to 7-foot tree, 2½-inch wired tartan ribbon is a useful starting width. It is wide enough to show the pattern and easier to shape than unwired fabric. On a slim or shorter tree, try a narrower ribbon or smaller loops before committing to the full spool.
- Make one trial section. Cut a piece about 24–30 inches long. This is a starting measurement; branch spacing and the size of the loop determine the final length.
- Hide the first end. Tuck several inches inside the foliage and secure it to a sturdy branch with a small green chenille tie. On an artificial tree, a flexible branch tip may hold the ribbon in place.
- Bring the ribbon forward. Form a loose outward loop, leaving the tartan facing the room. Avoid pulling it tight against the needles.
- Tuck the next point back in. Secure the ribbon farther down and slightly to one side. Depending on the piece length, make another smaller loop or tuck the remaining end out of sight.
- Repeat with gaps between sections. Place the next piece along a relaxed diagonal path, then shift to another part of the tree. Avoid matching every loop to the same height.
Stand back after three sections. If the ribbon looks like a horizontal belt, move one tuck point higher and another lower. If the pattern disappears, bring the loop farther forward. The goal is a visible rhythm of plaid and greenery, not an unbroken covering.
How much tartan ribbon should you buy?
Count the sections you intend to use rather than relying on tree height alone. For example, 18 sections at 24–30 inches each use 12–15 yards. Add about 20% for adjustments and cutting: that becomes roughly 15–18 yards. Two 10-yard spools would cover this particular front-and-side plan with some spare ribbon.
That calculation is an editorial example for spaced loops, not a universal allowance. A broad tree, bigger loops, a ribbon topper, or decorating all the way around will require more. Test one section and estimate the number of placements before buying additional spools.
Also Read: How to Put Ribbon on a Christmas Tree: 7 Beautiful Styles for Beginners
3. Layer Ornaments So the Tree Feels Collected

A box of matching baubles can provide the foundation, but a few varied finishes and meaningful pieces give the tree character. Mix satin red with glossy red, then add softly aged gold. A bell, wooden horse, pinecone, or family ornament can supply the detail that makes the arrangement feel personal.
For a simple starting mix, imagine dividing your ornaments into three groups: roughly half plain baubles, about a third textured or differently shaped pieces, and the remainder favorites you want to feature. These are loose styling proportions, not a requirement or a reason to replace existing decorations.
Place the ordinary pieces deeper and the favorites forward
Hang some plain ornaments inside the tree where they are still visible between the branches. Put more distinctive shapes on the outer branches, with a little room around them. The contrast in depth keeps everything from sitting on the surface like a flat display.
Distribute the larger ornaments first, working across the visible tree rather than completing one patch at a time. Fill between them with medium and smaller pieces. When several red ornaments cluster together, move one to an area that needs color instead of adding another gold ornament to hide the problem.
Check the branch before hanging a heavier bell or glass ornament. It should support the piece without drooping into the ornament beneath it. Use secure hangers, and keep fragile or small loose decorations away from areas children or pets can reach.
Add velvet bows after the main ornament placement
Small burgundy bows can soften the tartan and help you finish awkward gaps. A 1- to 1½-inch velvet ribbon is a manageable choice for these smaller accents. Start with one bow in the upper part, another on the opposite side around the middle, and a third lower down; add more only where the tree needs them.
The close-up illustrates a useful balance: a brass-tone bell and wooden rocking horse stand forward, while red and gold baubles sit at several depths. You can create the same balance with sentimental ornaments in place of either special piece.
Also Read: 21 Christmas Tree Bow Ideas That Turn Simple Ribbon Into a Statement
4. Finish the Top and Give the Base a Deliberate Look

The top and bottom act like the frame of the tree. A medium velvet bow, as shown on the cover, continues the color story without introducing a new motif. A favorite star can work just as well. Test the topper against the tree’s shape and the ceiling clearance before securing it.
For a bow topper, make one on the worktable first. Start with a width that looks proportionate to the upper branches, then shorten the tails if they hide ornaments or overwhelm a narrow tree. Attach it to a firm branch or suitable support rather than asking the delicate top tip to carry all the weight.
Choose either a patterned skirt or patterned gifts as the main detail
The illustrated base uses a plain forest-green velvet skirt so the tartan wrapping can stand out. If your skirt is tartan, try mostly solid gift paper with velvet or satin ribbon. This lets one large patterned surface lead while the other details support it.
Arrange larger boxes toward the back and smaller ones in front, leaving part of the skirt visible. Two or three wrapping papers are plenty: deep green, kraft, and your chosen tartan make a useful combination. Empty reusable boxes are an option before the actual presents are ready.
Keep the skirt within the planned tree footprint. On a fresh tree, leave easy access to the stand so you can check and refill the water. Gifts should not conceal a cable connection or spill into the route people use to cross the room.
Also Read: 21 Budget Christmas Tree Decorating Ideas That Make Affordable Ornaments Look Expensive
5. Connect the Tree to the Room—and Scale It Down When Needed
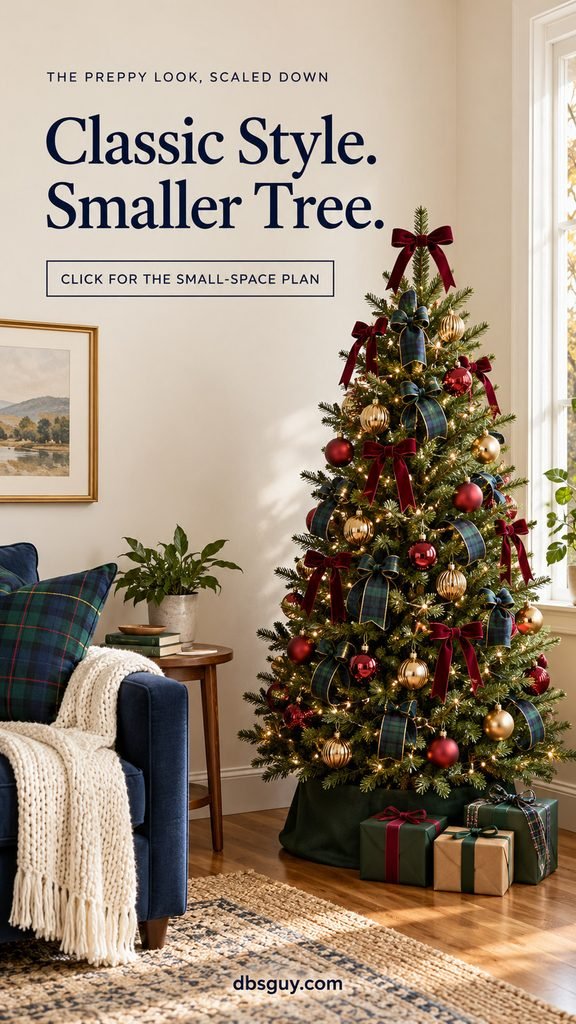
A preppy tree can look comfortable in a light apartment as well as a dark wood-paneled room. Repeat one of its colors in a pillow, a throw, or an existing piece of furniture. The small-tree concept pairs navy-and-green tartan with a navy sofa and an ivory knit throw; red and gold ornaments keep the tree connected to the same holiday palette.
Use what the room already offers. A brown leather chair supplies warmth without another decoration. A wood table adds texture. If your sofa is gray or cream, a single plaid cushion and a burgundy bow on the tree may be enough to establish the relationship.
For a slim tree, reduce the size of the decorations
Try smaller ribbon loops, narrower bows, and a mixture weighted toward small and medium ornaments. Leave enough open branches to preserve the slim silhouette. A large ribbon loop that looks balanced on a broad tree can cover a whole section of a narrow one.
Measure the tree’s widest point rather than judging it by height alone. Keep gifts close to the stand and use a fitted skirt or an appropriately sized collar. If a floor tree would interrupt the walkway, a tabletop tree on a sturdy existing surface can carry the same palette; use lighter ornaments and scale the ribbon down again.
Finish by looking at the tree from the entrance and from your usual seat. Move any standout ornament that disappears from both viewpoints, and remove a decoration if it makes the outline feel crowded. The most useful final adjustment is often moving something you already have.
Also Read: 17 Small Christmas Tree Decorating Ideas That Won’t Take Over Your Living Room
A Practical Starter Shopping List
For the front-and-side decorating plan on a moderately full 6- to 7-foot tree, this is a starting worksheet. Check existing supplies first and revise the quantities after your trial ribbon section.
- Tartan: around 15–18 yards for the 18-section example above; buy matching dye lots when possible.
- Velvet: about 8–10 yards as an initial allowance for several small bows and a modest topper. Larger multiloop bows can use substantially more.
- Plain ornaments: begin with 36–48 red and gold baubles in mixed sizes and finishes, then assess the gaps. A wide or fully decorated tree may need many more.
- Special details: pull together 8–12 favorites, bells, pinecones, or other accent pieces. You do not need every motif.
- Useful supplies: secure ornament hangers, green chenille ties, sharp scissors, a stable step stool, and a skirt or collar that fits the stand.
If you are working to a small budget, prioritize the tartan ribbon and branch shaping. Reuse plain ornaments, add just a few velvet bows, and coordinate the gift wrapping. Those choices change several large visual areas without requiring a new collection of decorations.
Keep the Cozy Setting Safe
Place the tree at least 3 feet from heat sources, including fireplaces, radiators, candles, and heat vents. Do not let it block an exit. For a fresh tree, add water to the stand daily and remove the tree when it becomes dry.
Inspect lights for damaged cords or loose connections, follow the manufacturer’s limits for connected strands, and switch tree lights off before leaving home or going to bed. These precautions follow the U.S. Fire Administration’s holiday fire-safety guidance. You can create a warm room with tree lights and lamps while keeping flames away from the branches and ribbon.
Questions About the Ralph Lauren Christmas Tree Look
Do I need Ralph Lauren ornaments or decorations?
No. Tartan, velvet, greenery, and a coherent color palette establish the style. Use family ornaments or unbranded pieces you like. An authentic branded ornament can be a personal addition, but the whole tree does not depend on one.
Does the ribbon go on before or after ornaments?
For the method in this guide, prepare and light the tree, add the tartan, then place the ornaments. Finish with small velvet bows and the base. This gives you space to secure the ribbon without knocking ornaments off their branches. Check a wired topper’s cord route during the lighting stage.
Can I mix tartan with velvet?
Yes. Let tartan provide the pattern and use solid velvet for the bows. Choose a velvet color that appears in or relates closely to the plaid. If the arrangement feels busy, remove one competing pattern before changing the entire color palette.
Why does my tree look crowded rather than layered?
Look for oversized ribbon loops, too many ornaments at the same depth, or several statement pieces touching. Move plain baubles farther into the foliage, reduce one loop, and leave a little green space around the pieces you want people to notice.
How can I keep the look from feeling too dark?
Make sure the lights are distributed through the visible tree, allow some gold ornaments to face the room, and borrow a lighter texture from your surroundings—such as an ivory throw. You can keep the dark tartan while making the setting feel brighter.
Begin with one ribbon sample and a few ornaments on a small area of the tree. Once the colors and loop size feel right, repeat that combination through the visible branches. A consistent palette, varied textures, and a few meaningful pieces will do more for this classic preppy look than adding another decoration to every gap.