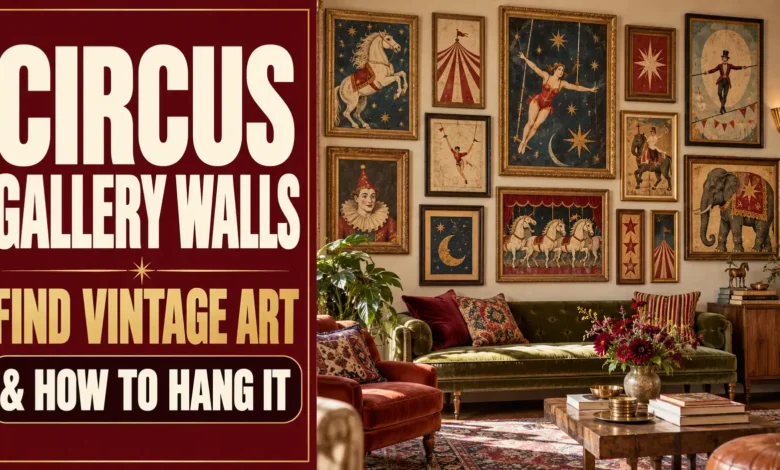
A circus gallery wall works best when you choose one memorable poster, repeat a few colors, and plan the frames before making holes. Start with three to five pieces: a tent scene, a performer illustration, and a quieter ticket or program design. You can build the collection with genuine vintage paper, new reproductions, or downloadable scans—as long as you know which you are buying.
This guide shows where to look, what to check before ordering, and how to turn your finds into a wall that feels collected rather than crowded.
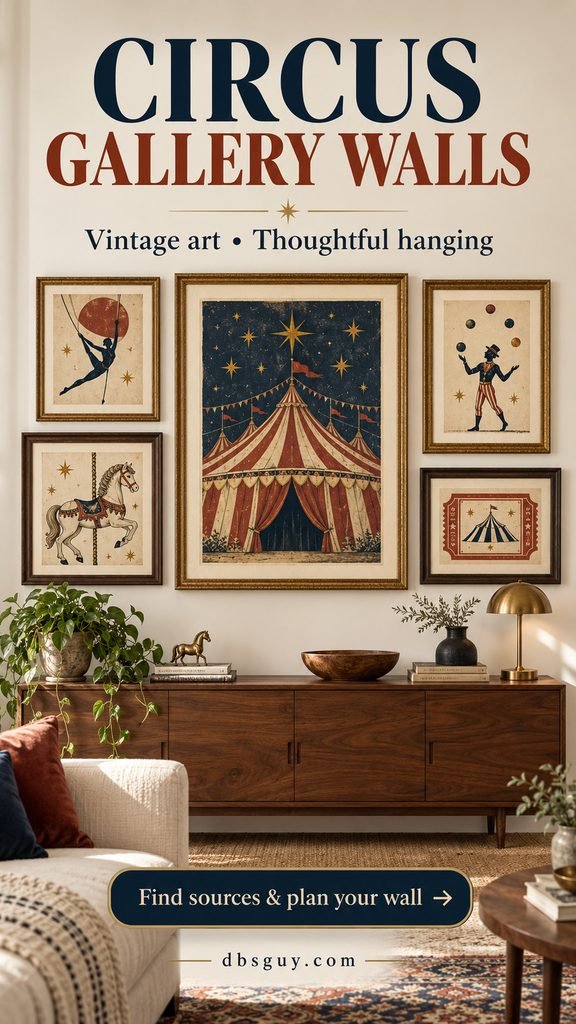
The visuals in this guide are AI-generated styling concepts, including the vintage-inspired artwork. They illustrate arrangements and materials, not authentic collectible posters or documented completed rooms.
Where to find vintage circus art
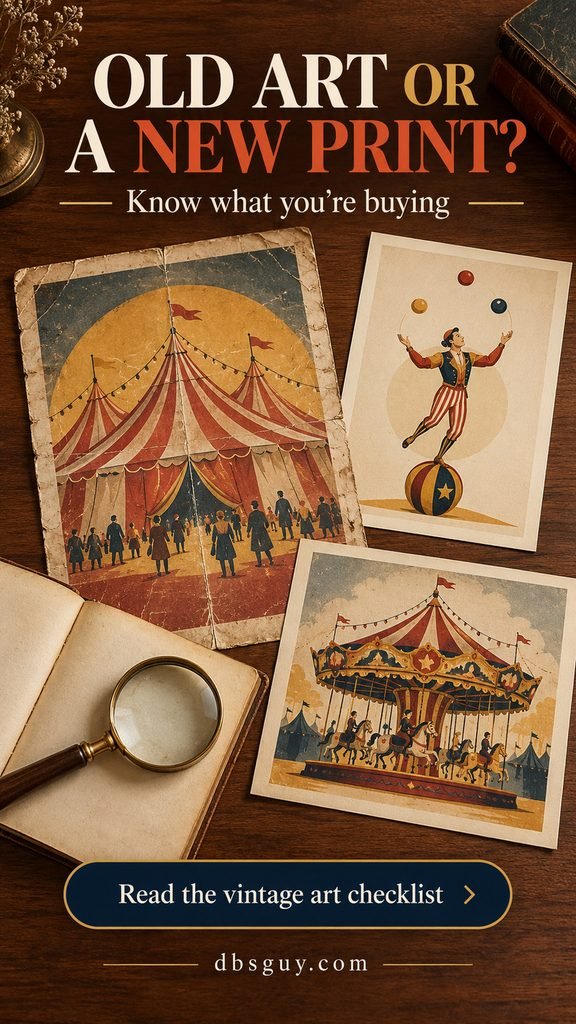
First, separate the age of the image from the age of the paper. A poster design from 1900 can be sold as a print made last week. Both can look lovely on a wall; only one is an original period object.
- Original vintage poster: a physical sheet produced in the period stated by the seller. Condition, provenance, and restoration history matter.
- Reproduction print: a new physical print of an older design. Evaluate its paper, color, crop, and print quality.
- Digital download: a file you print yourself or through a print shop. Check pixel dimensions, permitted use, and included aspect ratios.
- Vintage-inspired artwork: a newly created design with an old-fashioned look. Buy it for its style without treating it as a historical artifact.
Library of Congress: start with documented historical images
The Library of Congress circus, carnival, and rodeo poster collection is a useful starting point for researching historical circus imagery. Search by performer, circus name, or subject rather than only “vintage wall art.” Try “circus acrobats,” “circus bicycle,” or “Forepaugh Sells poster.”
For a specific example, its record for Kilpatrick’s famous bicycle ride describes a circus poster from around 1900 and lists a “No known restrictions on publication” rights advisory. Read the individual record and its download options before choosing a file. That advisory on one item does not establish the status of every poster in the collection.
Choose the largest suitable download offered, then check it with your printer. Some records provide only limited online image access; a thumbnail is useful for browsing, not for enlarging into wall art.
Specialist poster dealers: look here for original period sheets
If you want a collectible original, a specialist dealer gives you more useful information than a styled room mockup. For example, AntikBar’s acrobatic cyclists circus poster listing identifies the work as an original, gives its decade and artists, and lists the sheet dimensions and backing status. Use that level of detail as a shopping benchmark; availability can change.
Ask for clear photographs of the actual sheet, its margins, and any damaged or repaired areas. Request the seller’s attribution, condition report, and return terms. For a US buyer ordering internationally, compare the full delivered cost—including shipping and any applicable import charges—with your framing budget.
Etsy: useful for prints, but read past the search title
The Etsy vintage circus poster marketplace mixes physical vintage items, reproductions, and digital artwork. Even a search containing “original” can return downloads. Open the listing and confirm what actually arrives.
For a download, ask whether the file includes the whole poster or a crop. For a shipped print, check whether dimensions refer to the paper, printed image, or framed piece. A warm cream background on your screen may print more yellow than expected; a small proof is a sensible first purchase before ordering a larger size.
Antique shops, estate sales, and paper dealers: shop for character carefully
These are places to look for programs, admission tickets, postcards, and small prints that can sit beside an anchor poster. Availability is unpredictable, so take your wall measurements and color notes rather than expecting a complete set.
Ask whether a piece is a period item or a later souvenir edition. Look for tears, brown spotting, tape stains, cropped margins, and evidence of repairs. Do not open an old sealed frame in the shop without permission. An attractive frame can be worth considering separately, but damaged paper may need specialist care.
Check these details before buying or printing
- Actual format: original sheet, new print, or digital file?
- Artwork dimensions: what is the complete sheet size, including borders?
- Condition: are folds, discoloration, restoration, or backing described?
- Crop: will the performer, lettering, and margins remain visible?
- File quality: what are the pixel dimensions, rather than just the advertised DPI?
- Use and cost: what use is permitted, and what will printing, delivery, matting, and framing add?
For a crisp-print planning example, an 8 × 10-inch image at 300 pixels per inch needs 2,400 × 3,000 pixels. This is a calculation, not a guarantee: a blurry or heavily compressed source will not become sharp simply because its file is large. Ask the print shop what resolution suits your chosen size and viewing distance.
Keep the original proportions. If a poster does not fit an 8 × 10 opening, fit the whole image within that space with borders, choose a different opening, or order a custom mat. Stretching the file distorts the art; automatic cropping can cut off the very lettering that makes it interesting.
Build a collection that feels intentional
Choose the anchor first. A tent scene or bold performer poster gives the wall a subject; the smaller pieces should support it. In the concepts below, rust red, mustard, navy, and cream recur across the artwork. Your own posters may be much brighter—repeat two of their colors in the surrounding pieces rather than trying to mute every image.
Mix visual intensity, too. A detailed poster looks better beside a simple silhouette or a ticket with open space than beside four equally busy advertisements. Read the wording before displaying historical art: select images whose language and subjects you are comfortable living with, especially in a family space.
For a warmer room around your collection, our modern boho living room ideas offer ways to pair mixed frames with wood, textiles, and relaxed seating.
Three circus gallery wall layouts to choose from
The measurements here are suggested starting points, not installation rules; the concept images are not scale drawings. All frame dimensions mean outside dimensions, measured edge to edge. The size printed on a store-bought frame often describes the image opening instead; measure the assembled frame before planning your wall.
1. A collected cluster with one larger anchor
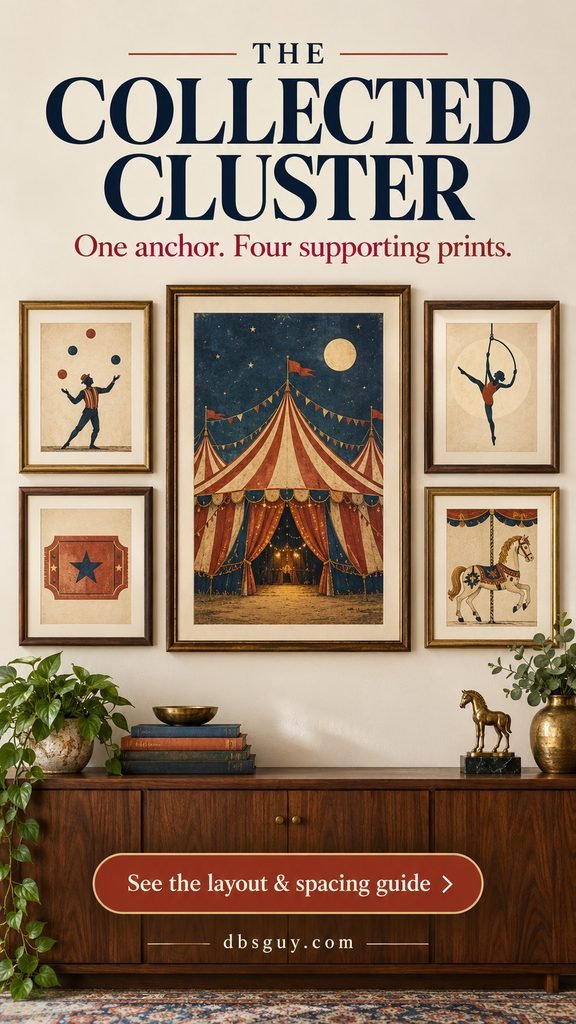
Use five frames above a sideboard or sofa: one tall anchor in the center, with two smaller pieces stacked on each side. The concept combines a tent poster with a juggler, ticket, acrobat, and carousel horse. A little variation in frame finish gives the collection character; consistent cream mats keep it connected.
For an easy measured version, try a center frame about 18 × 30 inches and four side frames about 11 × 14 inches. With 2-inch gaps between columns, the grouping is roughly 44 inches wide. Each side stack is 30 inches tall when its two frames have a 2-inch gap; align their overall top and bottom edges with the anchor.
That arrangement suits a substantial piece of furniture. As an editorial starting point, a gallery width around two-thirds of the furniture width often feels balanced. Test it with paper first. If the wall reads too busy, simplify one supporting image before adding more frames.
2. Three matching frames in a quiet row
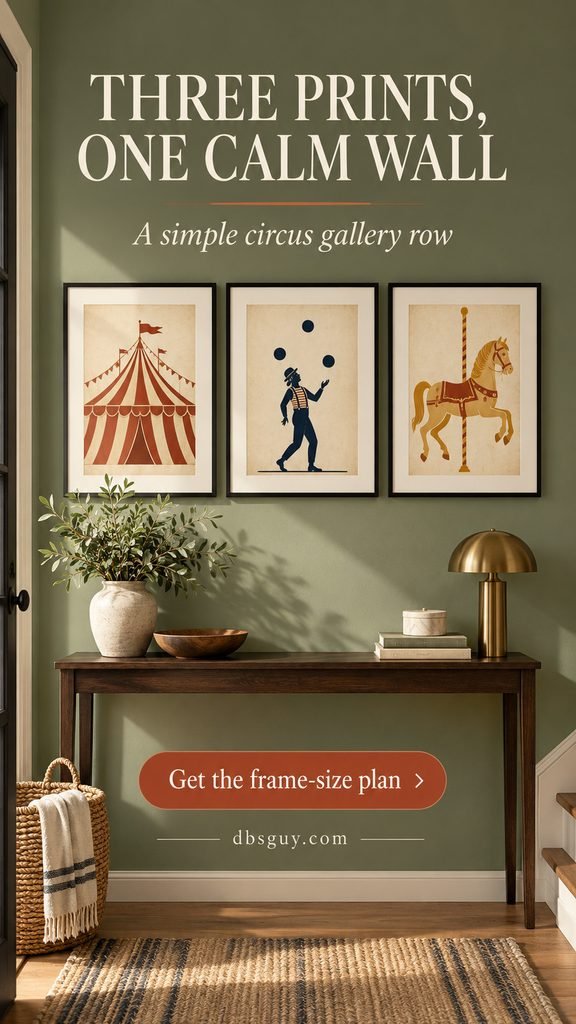
A straight row gives playful art a calm structure. Choose three equally sized frames, one mat color, and three different subjects—a tent, juggling figure, and carousel horse. Align both the tops and bottoms, and keep the gaps equal.
Three frames measuring 12 × 16 inches outside, separated by two 3-inch gaps, create a 42-inch-wide grouping. This can work above a slim console or compact sofa if the furniture and wall have enough width. Let the mats accommodate differently proportioned images rather than cropping every poster to match.
Black frames look crisp against sage or ivory walls. The common frame is doing the organizing here, so the art can vary in color without making the arrangement look accidental.
3. A vertical trio for a narrow wall
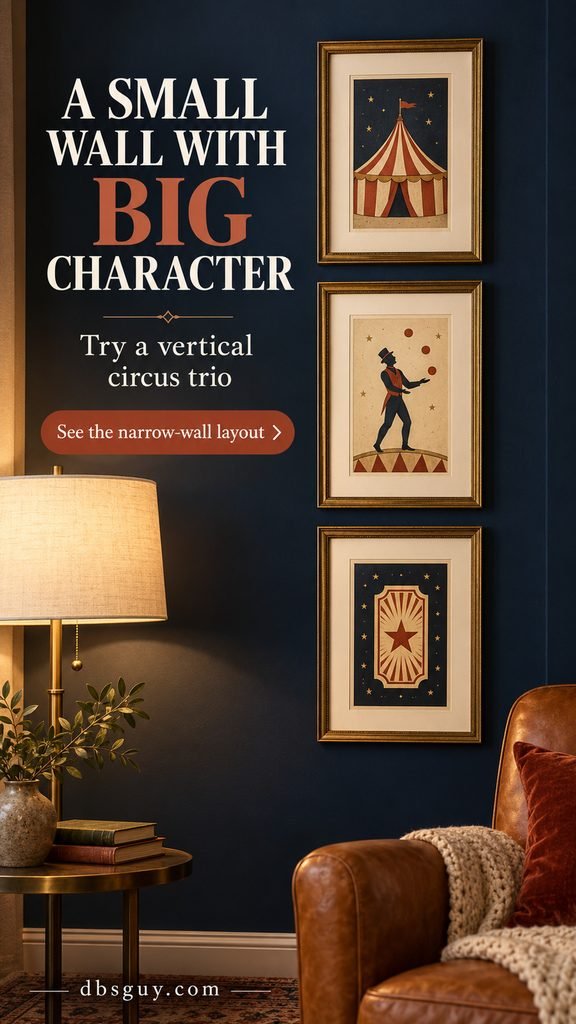
Stack three frames in a single column beside a reading chair or on a narrow entryway wall. The navy-wall concept uses brass frames and pale mats to give each small image a clear outline.
Three outside frame sizes of 10 × 14 inches, with two 2-inch gaps, make a column about 46 inches tall and 10 inches wide. At a grouping center of 58 inches from the floor, its bottom would be about 35 inches high and its top about 81 inches. Check that both ends fit the actual space and clear nearby furniture.
For the surrounding corner, see our cozy reading nook ideas for small spaces. If you prefer the darker backdrop and antique-metal finish, our dark academia decor ideas offer related palettes and vintage accents.
Frame vintage paper with care
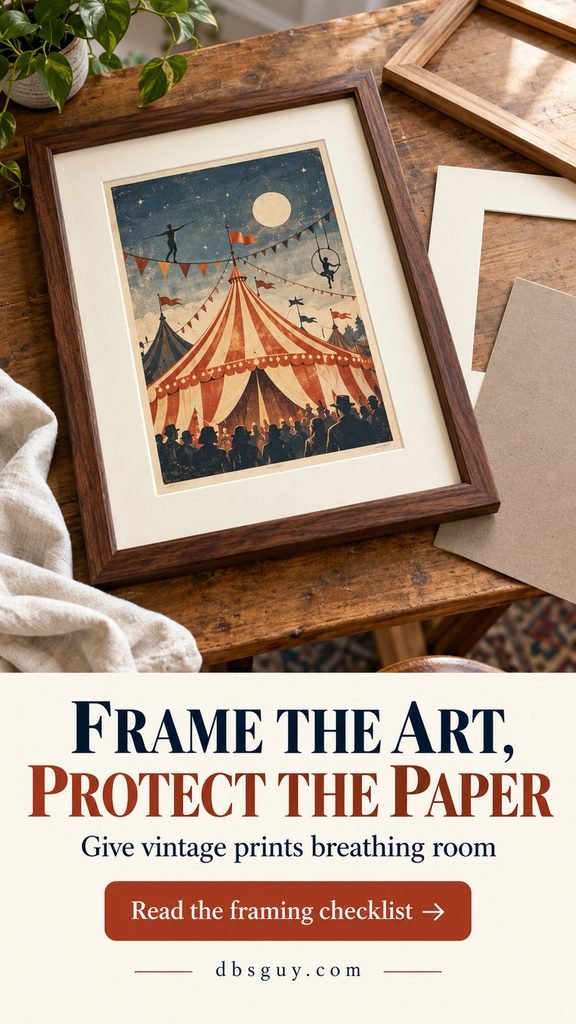
A generous mat gives a busy poster breathing room. For new reproductions, choose a mat and frame that show the whole image and any meaningful margins. For original vintage paper, ask a framer about conservation materials rather than fixing the sheet in place with household tape or glue.
The Canadian Conservation Institute’s framing guidance explains the role of suitable backing materials and spacing between artwork and glazing. Ask for an acid-free mat and backing, a mounting method appropriate to the paper, and enough separation to prevent the art touching the glass or acrylic.
Keep valuable paper out of direct sunlight and away from heating vents or damp locations. The institute’s basic care guide for art on paper notes that light damage is irreversible and recommends considering UV-filtering glazing. Such glazing helps; it does not make a sunny window safe for indefinite display. Leave cleaning and repairs of fragile originals to a paper conservator.
At the framing counter, say: “I want the whole sheet and its margins visible, with conservation matting and mounting suitable for this paper. Please quote the finished outside dimensions and weight.” Those last two details make your hanging plan much easier.
How to hang your circus gallery wall
Gather kraft paper, a pencil, measuring tape, level, scissors, and wall-safe temporary tape. You will also need hanging hardware suited to each finished frame’s weight and your wall material. Inspect the frame’s existing wire, D-rings, or sawtooth hanger before choosing the wall fixing.
Step 1: Set the grouping’s width and position
Measure the available wall and the furniture below it. For art above a sofa or sideboard, try leaving approximately 6–8 inches between the furniture top and the lowest frame as a styling starting point. Adjust for tall cushions, objects on the sideboard, and the room’s proportions.
On an open wall, try a grouping center around 57–60 inches from the floor, then adjust for how people use the space. These are design suggestions, not safety standards. Treat the whole collection as one shape; every individual frame does not need to sit at eye level.
Step 2: Arrange the finished frames on the floor
Outline the available wall area with paper or a measuring tape and place the frames inside it. Try 2–3-inch gaps first. Measure between the outside frame edges, keeping the gaps visually consistent even when frame profiles differ.
Photograph the arrangement to check balance. One heavy dark frame can pull the eye to a corner; moving it toward the anchor or pairing it with another dark detail may solve the problem. Finalize the matting before this stage so your measurements reflect the finished pieces.
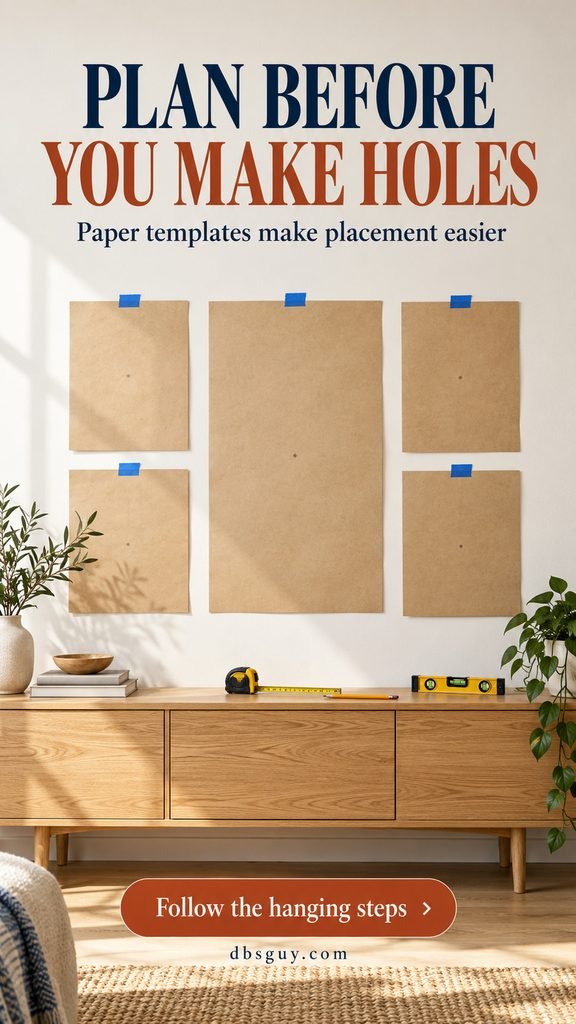
Step 3: Transfer the arrangement with paper templates
Trace each frame’s outside edge onto kraft paper, cut it out, and label the template lightly. Tape the shapes to the wall in your chosen arrangement. Test temporary tape in an inconspicuous spot and use a product suitable for the finish.
View the templates from the doorway and from your normal seat. Check the overall width, bottom clearance, and gaps. A level helps confirm straight rows and columns; it cannot tell you whether the whole grouping feels too high.
Step 4: Mark the actual hanging points
The top edge of a frame is not where the nail goes. For a wire-hung frame, pull the wire upward at the intended support point until taut, then measure down from the frame’s top edge to that point. Transfer that offset onto the paper template.
For two D-rings, measure each ring’s position from the top and side edges. Mark both points on the matching template. Check your hook’s geometry too: the nail entry point may sit above the part that supports the wire or ring. If a frame uses two hooks, measure the taut wire in that two-hook configuration.
Step 5: Install suitable hardware and level the frames
Identify the wall material before drilling. Choose fixings rated for the load and suitable for drywall, plaster, masonry, or a stud, as applicable. Check for concealed services at the proposed fixing points, and follow the hardware instructions; use an installer when the wall construction or a heavy frame makes the job uncertain.
Hang the anchor first, then work outward, checking each gap against the plan. Remove the paper templates and level the frames. Recheck the arrangement from across the room before making any final adjustments.
If you want to use picture-hanging strips
Use them only when the product approves your wall surface, frame size, and weight. Command’s current FAQs advise against wallpaper and heavily textured surfaces, and explain that adding extra strips does not automatically increase capacity.
Follow the exact package’s preparation, pressing, waiting, and removal instructions. The brand’s picture-hanging strip guide includes a one-hour adhesive-building wait after reinforcing the wall strips. For valuable originals or heavy glazed frames, discuss a mechanically fixed solution with your framer or installer.
Questions to settle before the last frame goes up
Can I mix original vintage art with reproductions?
Yes. Keep the mat color or a repeated accent color consistent, and give the original the framing care it needs. The wall does not have to be a matched collectible set to feel cohesive.
How many pieces should I start with?
Start with three for a row or vertical column, or five for the cluster shown here. A small finished grouping gives you a clear place to begin. Add pieces later only if the wall has room and the arrangement benefits.
Can I hang circus art in a nursery?
You can use the theme, but place the gallery on a wall away from the crib and out of a child’s reach. Choose subjects and wording thoughtfully, and use secure hardware appropriate to the frames. A cheerful wall does not require glass-framed art over a sleep space.
How do I stop the wall looking like party decorations?
Keep the theatrical details inside the artwork. Simple furniture, substantial mats, and a limited mix of frame finishes let the posters feel like a collection. If the room already has strong stripes or patterns, the matching three-frame row is an easy starting point.
What is the most useful first purchase?
Choose one anchor you would still enjoy on its own. Confirm its size and format, price the finished frame, and make a paper template before buying the supporting art. That one decision gives the rest of the wall a direction.