
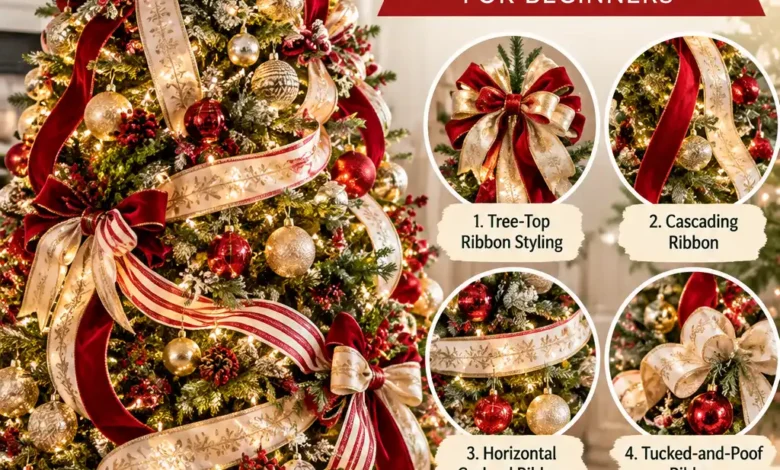
A beautiful roll of ribbon can look surprisingly awkward once it reaches the tree. The loops fall flat, the ends keep slipping out, or one long strip covers every ornament you love. If that sounds familiar, start with a smaller piece and a better attachment point.
The easiest way to put ribbon on a Christmas tree is to secure one end inside the branches, let a soft loop come forward, then tuck and secure the ribbon again. Wired edges help the loop hold its shape. Work with one sample before cutting the rest of your roll, and adjust the size to suit the branches in front of you.
That basic tuck can create several different looks. You can also use a loose spiral, curled accents, or flowing velvet strands. The seven styles below explain what to use, how to place it, and what to change when the ribbon refuses to cooperate.
Prepare the tree and make one secure tuck
Shape an artificial tree’s branches before decorating, following its instructions. On a real tree, work with the natural branch spacing. Check and place the lights before adding ribbon so you can see the gaps and keep the light cords accessible.
For most beginner layouts, placing the main ribbon before the smaller ornaments makes adjustments easier. If you have oversized or sentimental ornaments with specific spots, position those first and guide the ribbon around them. Small ribbon ties can be added at the end.
To make a tuck, pinch the ribbon near its end into a narrow neck. Place that neck beside a sturdy interior branch, where surrounding needles can hide it. Gently secure it with a green chenille stem around the ribbon and branch. On a suitable artificial tree, a flexible foliage tip may hold the pinch; follow the tree manufacturer’s guidance.
Attach ribbon to the branch, keeping light wires and sockets free. Fold exposed fastening ends inward. Avoid pulling a branch into position just to meet the ribbon; move your attachment point instead. Give the visible fabric enough slack to curve forward without sagging.
Keep the tree at least 3 feet from heat sources, never use lit candles on it, and turn tree lights off before bed or leaving home. Water a real tree daily. Follow the light manufacturer’s instructions and replace damaged light strings before decorating.
1. Soft vertical ribbon cascade
This creates flowing lanes of ribbon down the tree, with soft folds disappearing into the greenery between loops. It suits a classic, full tree and leaves space between the lanes for favorite ornaments.

Use: wired ribbon around 2½–4 inches wide. Start with one 3–4-foot test strip, about 90–120 cm, and adjust it for the number and size of loops you want.
- Secure the upper end inside the branches near the top of your first lane. Keep the printed or decorative face pointing outward.
- Bring the ribbon forward into a rounded billow. Pinch and secure it lower down, leaving enough fabric between the anchors to hold a soft curve.
- Repeat down the strip. When it ends, begin another piece near the hidden finishing point so the eye follows a flowing lane.
- Add the next lane farther around the tree. Let some loops lean slightly left or right, and widen the spacing as the tree broadens.
If it looks stiff: vary the loop sizes a little and shift one tuck sideways. If the ribbon sags, shorten the distance between attachment points. Keep the foliage visible between the lanes.
2. Relaxed spiral ribbon wrap
A spiral gives the tree a clear sweep of color around its shape. The ribbon travels around the tree in one descending route, with space between each turn for greenery and ornaments.
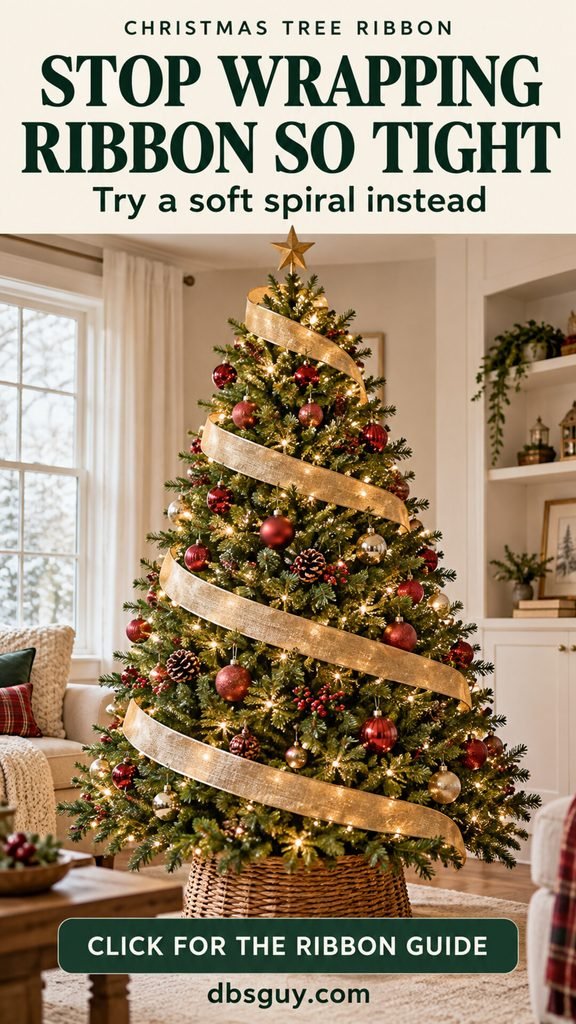
Use: one roll of wired ribbon. A 2½-inch width is a practical first choice for a medium or full tree; test a narrower ribbon on a slim tree.
- Secure the starting end on an interior branch near the upper back of the tree. Leave the ribbon on its roll while you plan the route.
- Move around the tree at a gentle downward angle. Unwind a little ahead of yourself so the ribbon has room to curve.
- At natural branch pockets, tuck a small pinch inward and secure it. Allow the fabric between those points to sit loosely among the outer needles.
- Continue downward, checking the greenery visible between the turns. Cut and secure the final end near the lowest branches once you like the spacing.
If the wrap looks tight: release one attachment point and feed in more ribbon before securing it again. Pulling harder will flatten the curve. Leave a little extra slack where the tree widens toward the base.
3. Individual ribbon loops
Short, separate loops are a forgiving choice when you want ribbon accents without following a continuous route. Each piece can move independently, which makes this style useful on an already decorated tree.

Use: firm wired ribbon around 2½ inches wide. Try a 12–18-inch sample, about 30–45 cm; a smaller loop may need less.
- Curve the strip into a single teardrop-shaped loop, bringing both cut ends together. Leave enough length at the ends to pinch and fasten them.
- Secure those ends together beside an interior branch. Position the rounded part forward so the ribbon face shows.
- Place the next loop at a different height and angle. Spread a few samples across the upper, middle, and lower tree before adding more.
- Adjust each loop’s wired edges into a smooth curve. Keep clear spaces between the pieces so the arrangement remains light.
If a loop keeps flattening: make the loop smaller or use firmer ribbon. If the cut ends show, move the attachment behind a nearby cluster of needles. You can remove one piece without disturbing the rest.
4. Layered diagonal ribbon swags
Two ribbons can give a simple arrangement a richer finish. Here, a narrower accent lies over a wide base, and the pair sweeps diagonally across the front in separate soft swags.

Use: two coordinating wired ribbons, such as a 4-inch ivory base and a 1½-inch burgundy accent. On a smaller tree, try a 2½-inch base with a narrower accent.
- Cut one trial pair of equal-length strips. Lay the narrow ribbon over the wide one, leaving some base fabric visible on each side.
- Pinch both strips together at one end and secure them inside the upper portion of your chosen swag.
- Guide the pair diagonally down and across the front, allowing a shallow, rounded curve. Secure the other ends inside a lower branch pocket.
- Shape each ribbon separately so the accent stays visible. Add another independent swag at a different height, leaving room for ornaments between them.
If the layers bunch: loosen the ends and give the narrower strip a little more slack. Fasten the layers at their tucked points rather than repeatedly binding them along the visible curve. Test one pair before cutting a batch.
5. Loose corkscrew ribbon curls
Corkscrew curls bring a playful, dimensional accent to the branches. They work especially well when you want a few small bursts of movement among plain ball ornaments.
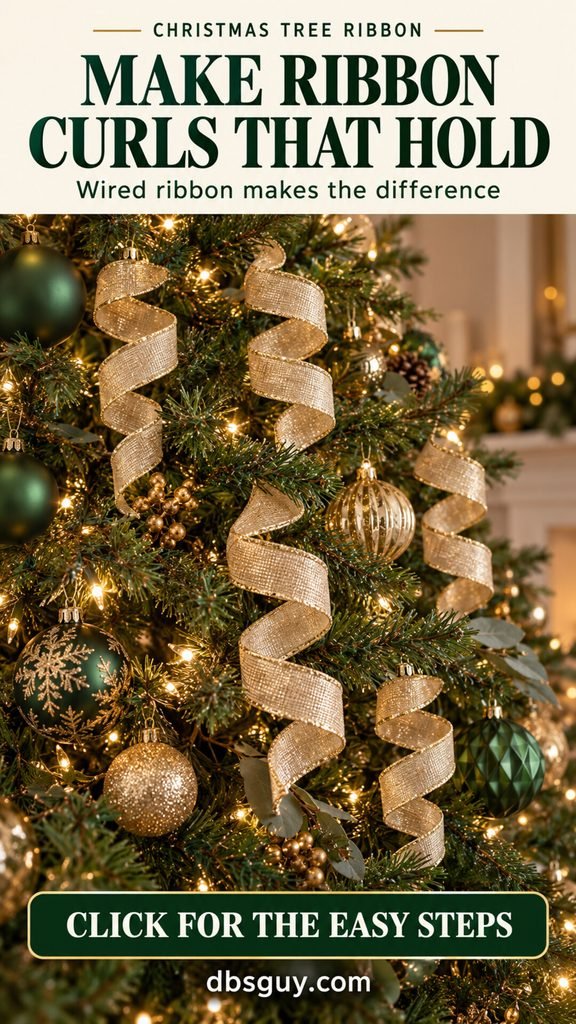
Use: wired fabric ribbon that holds a rounded shape. A 1½–2½-inch width is a useful starting range. Test a 2–3-foot piece, about 60–90 cm, before deciding on the finished drop.
- Wind the strip loosely around your hand or a smooth cardboard tube to form a coil. Keep the ribbon flat as you wind it.
- Slide the coil off. Hold the outer end and gently draw the inner end out of the center to open the coil into a loose spiral.
- Shape the wired edges so the turns separate cleanly. Secure the upper end on an interior branch and let the curl hang forward.
- Repeat in a few open areas, varying the drops slightly. Leave enough room that the curls do not catch on neighboring ornament hooks.
If the curl falls open: shorten the strip or try firmer wired ribbon. Soft unwired velvet will not hold this spring shape reliably. Wider curls usually need a little more breathing room around them.
6. Long velvet ribbon streamers
Long, narrow streamers give the tree a graceful silhouette while keeping plenty of greenery visible. Soft velvet is lovely here because it follows the branches and hangs naturally.
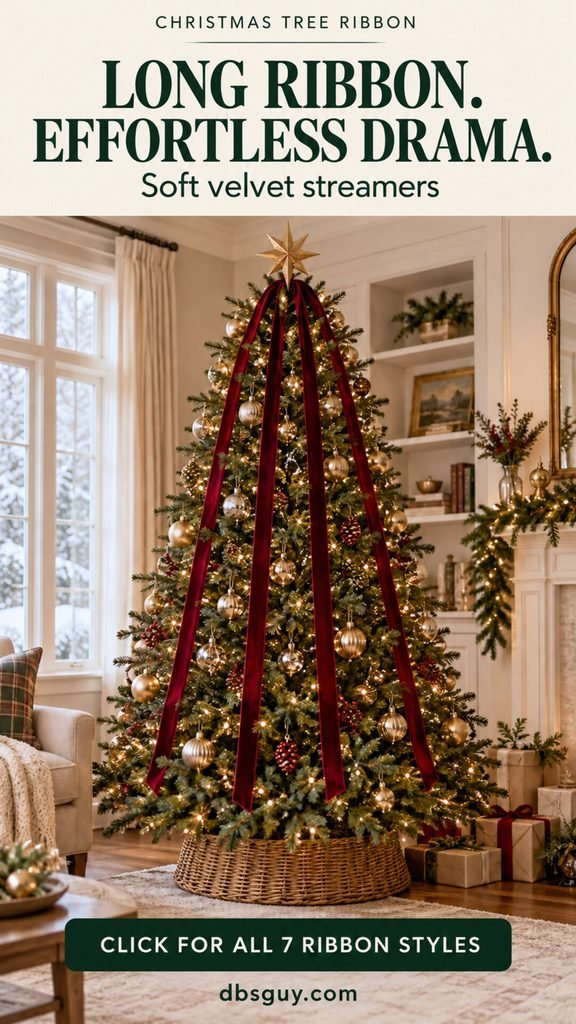
Use: unwired velvet or satin ribbon around 1–1½ inches wide. Measure each drop from its attachment point to the branch where you want it to finish, allowing extra length for fastening.
- Choose a sturdy upper attachment point for each strand. If you use a topper, keep its fitting and any light connections accessible.
- Secure the ribbons individually near their upper ends, hiding the fastenings among the needles. Spread the strands toward the front and sides.
- Let each strand settle over the tree’s shape. If one slips sideways, add a discreet loose fastening where an interior branch can support it.
- Trim the ends after placement, varying their lengths slightly. Keep the tails near the lower branches and clear of the floor and tree stand.
If the tree looks crowded: remove a strand before adding ornaments to balance it. On a slim tree, a few narrow streamers can carry the whole look. Keep the attachment gentle so the upper branches stay upright.
7. Simple ribbon ties on ornaments
This is an easy way to repeat one ribbon color across ornaments you already own. A small knot and two tidy tails add softness without taking up much branch space.

Use: narrow unwired ribbon around ¼–½ inch wide, light ornaments, and their existing secure hangers. Try a 10–14-inch sample, about 25–35 cm, and adjust it for your preferred tail length.
- Leave the ornament’s original hanger in place. Pass the decorative ribbon around the top loop beside the hanger, without pulling on or removing the cap.
- Tie a small knot and let two tails hang beside the ornament. If the fabric slips, add a second knot without overtightening the loop.
- Trim the ends neatly at an angle. Check that the added ribbon does not interfere with the hanger.
- Repeat on a handful of ornaments at different heights. Turn some tails gently to the side so the ornament faces remain visible.
If the accent overwhelms the ornament: shorten the tails or use narrower ribbon. Start with a few sturdy, lightweight ornaments; you do not need to add ties to every piece on the tree.
Choose ribbon that suits the shape you want
Look at the ribbon’s edges before you look at its color. Wired ribbon has thin wire along its sides, which lets you shape rounded loops and curls. Unwired ribbon hangs more softly and works well for long streamers or small ornament ties.
For a first project, these widths are useful starting points:
- 2½-inch ribbon, about 6 cm: a manageable choice for loops and cascades on many medium or full-size trees.
- 4-inch ribbon, about 10 cm: a bolder option for broad swags on a full tree. Test it against the branches before committing.
- 1–1½-inch ribbon, about 2.5–4 cm: useful for narrow streamers, accent layers, or a smaller tree.
- ¼–½-inch ribbon, about 6–13 mm: suitable for neat decorative ties on ornaments.
Width alone will not tell you how a ribbon behaves. A firm woven ribbon and a soft velvet ribbon can make very different loops, even with wired edges. Bend a small section into a curve: if it immediately collapses, plan smaller loops or choose a flowing style.
Choose one main color that already appears in your ornaments or room. Ivory can brighten dark greenery; burgundy gives a warm, traditional look; gold catches the light. For layered ribbon, pair a broad solid with a narrower contrasting texture so both remain visible.
How much ribbon do you actually need?
Tree height gives you only part of the answer. A slim 7½-foot tree with a few ribbon accents can use much less than a wide tree of the same height covered on every side. Continuous wrapping and double layers also change the amount.
For cut-piece styles, measure one finished sample and multiply by the number of pieces you plan to place. Include the ribbon hidden in each tuck.
For example, suppose one loop uses a 24-inch strip and you want 16 loops. That is 384 inches of ribbon. Divide by 36 to get about 10.7 yards. Allowing an extra 20% for trimming and adjustments brings this example to roughly 12.8 yards; round up to the roll sizes available. That buffer is a planning allowance, not a fixed decorating rule.
For a cascade, measure one completed lane and multiply by your planned lanes. For a spiral, loosely drape the ribbon around the tree along your intended route before cutting it. For streamers, measure each top-to-bottom drop separately. Calculate each ribbon separately when you use two layers.
If the tree sits against a wall, decide which sides are visible from the doorway and seating area. Start there. You can leave an unseen back lightly decorated and use the saved ribbon elsewhere.
Fix the small details before adding more ribbon
Once your main arrangement is in place, look at the tree from the spot where you normally enjoy it. A single adjustment often helps more than another roll of ribbon.
- One area looks heavy: move a ribbon accent into a quieter part of the tree, or remove it. Check the upper, middle, and lower portions separately.
- A cut end keeps appearing: move the pinch deeper beside a branch cluster and hide it with the nearby needles. Keep the visible curve outside the tuck.
- The ribbon hides your favorite ornament: move the tuck to a neighboring branch or make that loop smaller. Give the ornament its own clear space.
- A pattern faces backward: undo the nearest attachment, turn the fabric face outward, and secure it again. Check each new section before continuing.
- The arrangement looks different with the lights on: check it in daylight and in your evening lighting. Reposition a dark ribbon accent if it disappears into the greenery.
Add the remaining ornaments into the spaces your ribbon has created. Then check the ribbon again: hanging an ornament can nudge a loop or pull a streamer sideways. Finish those small corrections before deciding the tree needs more decoration.
Christmas tree ribbon questions
Can I put ribbon on a real Christmas tree?
Yes. Choose sturdy branches and secure the ribbon gently with soft chenille stems or suitable ties. Work with the tree’s natural shape, and avoid forcing the branches to bend like artificial foliage. Keep the stand accessible for watering.
Can I add ribbon after the ornaments are already on?
Yes. Individual loops and small ornament ties are especially convenient for this. Move delicate ornaments out of the immediate work area while you fasten a piece, then replace them. A continuous spiral is easier when more branches are clear.
What ribbon looks best on a slim or pencil Christmas tree?
Try a narrower ribbon, smaller loops, or a few long streamers. Start with one sample and view it from across the room. If it hides most of the tree’s width, reduce the ribbon width or the loop size.
Can I reuse cut ribbon next Christmas?
Yes. Remove the fastenings gently and keep useful strips together by style or length. Loosely roll flat pieces, and protect shaped loops from being crushed in storage. You can reshape sound wired edges when you decorate again.
Let one ribbon style lead the tree
Choose the look you want to see across the room: flowing vertical lanes, a loose spiral, scattered loops, layered swags, little curls, long velvet strands, or small ornament accents. Begin with one sample, secure it well, and check how it sits among your branches.
You can always move a tuck or remove a loop. Give the greenery and your favorite ornaments room to show, repeat the ribbon where it adds something, and stop when the whole tree feels balanced.




