
The easiest January nail art to practice at home is a few white dots over a winter-blue base. You only need to place the dots and lift the tool straight up. Once that feels comfortable, try lining them up along a tip, filling a small corner, or crossing three thin strokes into a winter star.
The five designs below use regular, air-drying nail polish. Start with one accent nail and leave the others plain. You can learn the movement without having to repeat it perfectly across both hands.
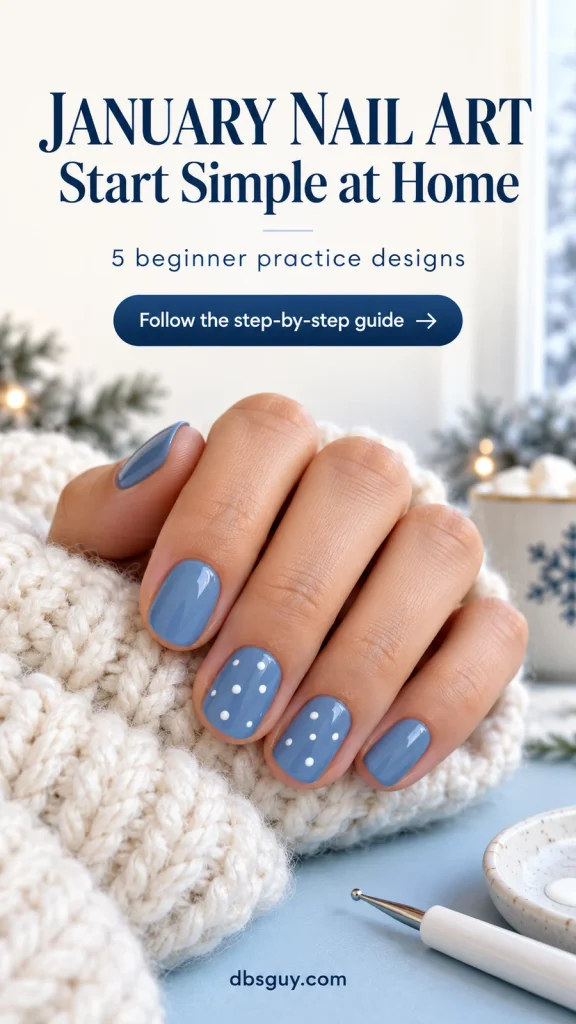
The images in this guide are AI-generated design concepts, including the practice-tip illustrations. They show intended colors and placement; they do not document tested manicures or guarantee identical results.
Choose Your First Practice Design
- New to holding a dotting tool? Start with scattered snow dots. Uneven spacing belongs in the design.
- Ready to practice spacing? Try the dotted winter tip on one nail.
- Prefer using a brush? Choose a frosted corner or soft glitter fade.
- Want to try linework? Save the three-stroke star for last.
Short nails work for all five. Keep the decoration small enough that you can still see the base color around it. You do not need extensions or a different nail shape to begin.
Set Out a Small, Useful Nail-Art Kit
For your first session, choose one design and gather only its supplies:
- Regular nail polish in your base color and an opaque white for painted details.
- A base coat and top coat suitable for the polish system you use, following its label.
- A small ball-ended nail dotting tool for dots, or a fine nail-art brush for corners and lines.
- A clear-base silver glitter topper if you choose the fade.
- A file, polish remover, lint-free pads, and a small cleanup brush.
- A disposable polish palette or piece of foil and spare nail-art practice tips.
You do not need every winter color pictured here. Blue and white cover the snow dots and star; a sheer pink and white cover the dotted tips. Swap in a color you already own if the contrast is clear.
Check that your chosen polish is an air-drying lacquer. Follow its application and drying directions; the steps here are not instructions for lamp-cured gel. Use your products in a ventilated space as their labels direct.
Prepare the Base Before Adding Any Art
Remove old polish and smooth rough nail edges. Leave your cuticles alone rather than cutting them for a cleaner-looking border. The American Academy of Dermatology’s manicure guidance advises against cutting or forcefully pushing back cuticles and recommends moisturizing after polish removal.
Clean and dry the nail surface according to your polish’s preparation directions. Apply the recommended base coat, if required, then build the base color in thin coats. Keep a narrow margin between polish and skin.
Allow the base to dry as directed before using a tool over it. If a dotting tool dents or pulls the color on a practice tip, the base is not ready for that pressure. A surface can look dry before the layers underneath have hardened, so avoid treating one universal waiting time as a guarantee.
Put a small drop of your detail polish on the palette. Make a few test marks on a spare tip before approaching your nail. Refresh the drop when it becomes thick or stringy instead of repeatedly dragging it across the design.
1. Scattered Snow Dots on Dusty Blue
This is the most forgiving place to start because the dots do not need to form a pattern. A dusty-blue background gives the white enough contrast, while open space keeps a short nail from looking crowded.
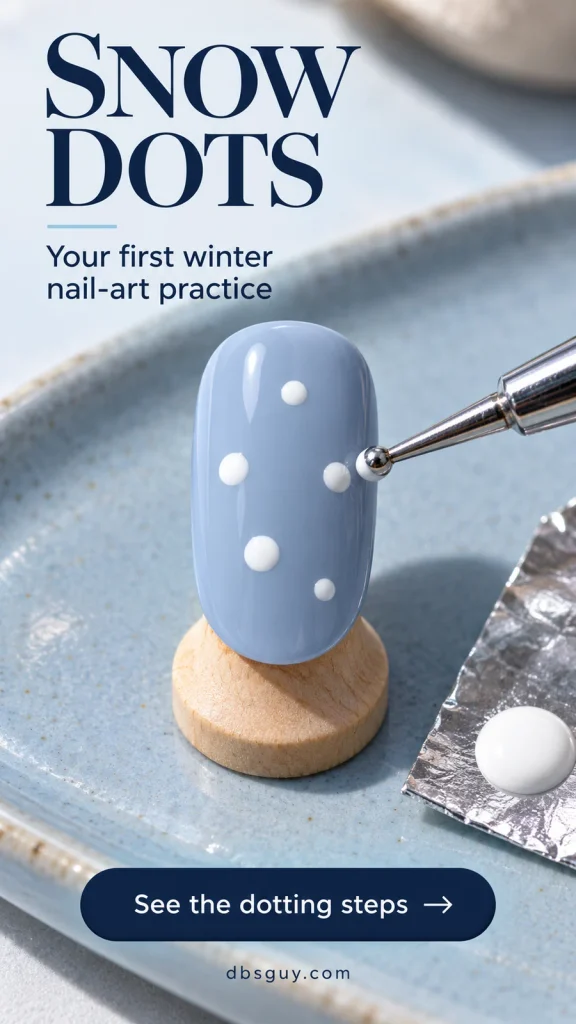
- Paint your base dusty blue and let it dry as directed.
- Touch the small ball of the dotting tool into white polish. Test one dot on a practice tip to check the size.
- Lower the tool straight onto the nail, then lift it straight off. Avoid dragging it sideways.
- Add four more dots in uneven positions, leaving blue visible between them. Reload when you need a fuller dot; use a lighter touch for a smaller one.
- Let the white dry as directed before sealing with your compatible top coat.
Begin on the ring finger only. If five dots crowd your actual nail, stop at three. The image shows five on a practice tip so you can see how much empty blue surrounds each mark.
If a dot becomes a blob: use less polish and lighter pressure on the next attempt. Do not keep nudging the wet edge into a circle; that can turn a small mistake into a much larger patch. If it bothers you, remove and repaint that one nail.
Also Read: 21 Short December Nail Ideas That Make Tiny Details Stand Out for more ways to scale a small accent to a short nail.
2. Dotted Winter Tips Over Sheer Pink
A dotted edge is a useful next exercise: you are still making the same small marks, but now their spacing matters. Keep the dots separate so the result reads as a light dotted tip rather than a solid white French band.
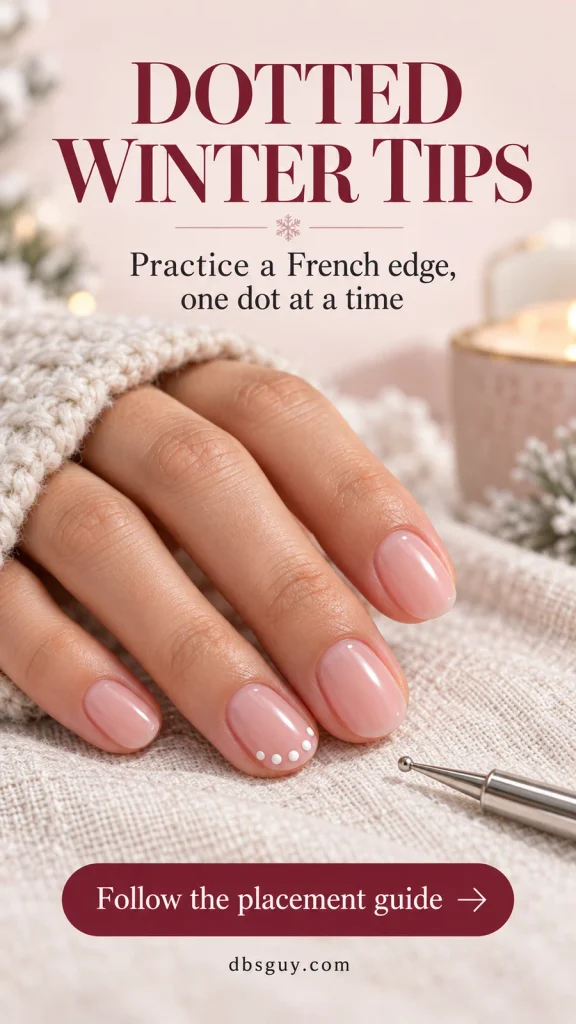
Start with a sheer pink base. On the ring nail, place the first white dot at the center of the free edge—the outer tip, away from the cuticle. Add one dot toward each side, then another between each side dot and the center. That gives you five points following a shallow arc.
Reload the tool consistently and test the first dot after each reload if its size changes. Leave a small pink gap between neighboring dots. Keep the marks on the nail surface; they should not spill onto the fingertip.
For a very narrow nail, make a three-dot version: center, left, and right. You can keep every other nail plain pink, just as the reference does. Repeat the dotted edge on more fingers only after the first placement feels manageable.
If the arc looks lopsided: check where your center dot sits before adding extra dots to compensate. Practicing the center-first sequence is more useful than filling every gap.
Also Read: 15 Simple December Nails That Look Polished With Minimal Effort for other small accents and sheer-base looks you can adapt for winter.
3. A Small Frosted Corner on Lavender
A white corner gives lavender nails a winter detail without asking you to draw a curved French smile line. This design introduces a short straight boundary and a little controlled filling.
- Apply your lavender base and allow it to dry as directed.
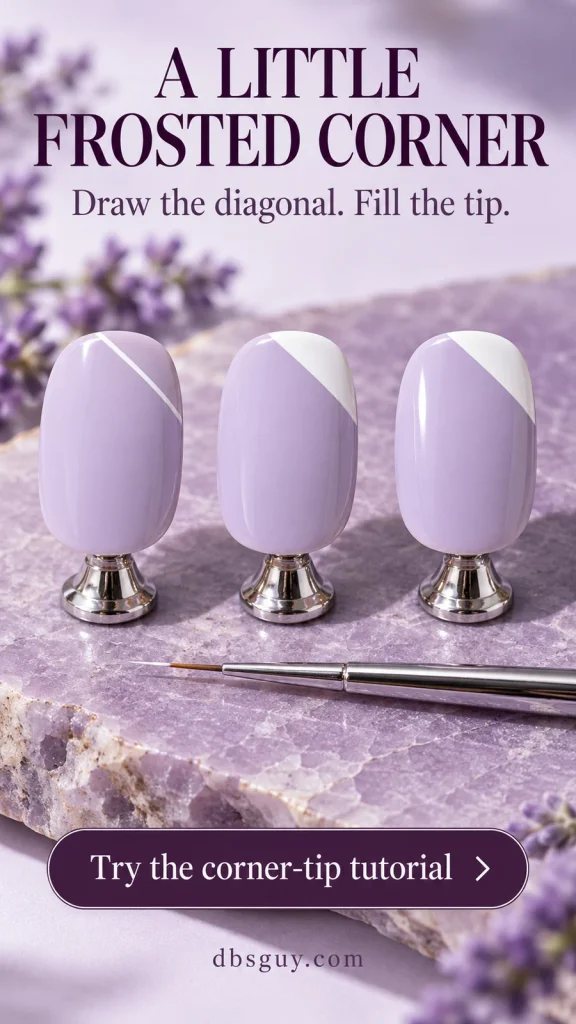
- Use a lightly loaded fine brush to draw a short diagonal across one corner of the free edge. Keep the corner small.
- Fill the triangle between that line and the outer edge with white polish, using short strokes.
- If the white needs more coverage, let the first thin layer dry as directed before adding another.
- Finish with the compatible top coat after the detail is ready.
The reference shows the boundary, filled corner, and finished concept on separate practice tips. Most of each nail remains lavender, and part of the free edge stays lavender too. Put the design on one accent nail before deciding whether to repeat it.
If the corner keeps getting larger: stop trying to straighten the wet boundary. On your next practice tip, draw a shorter diagonal farther out toward the edge. A smaller triangle gives you less area to fill and preserves more of the base.
Also Read: 19 December Nails White: Snowy Shades From Milky to Bright if you want to compare softer and brighter white finishes.
4. A Soft Silver Glitter Fade on Taupe
Choose this when a crisp painted edge feels frustrating. The goal is a gradual change in sparkle: more silver at the tip, fewer particles toward the middle, and plain taupe near the base.
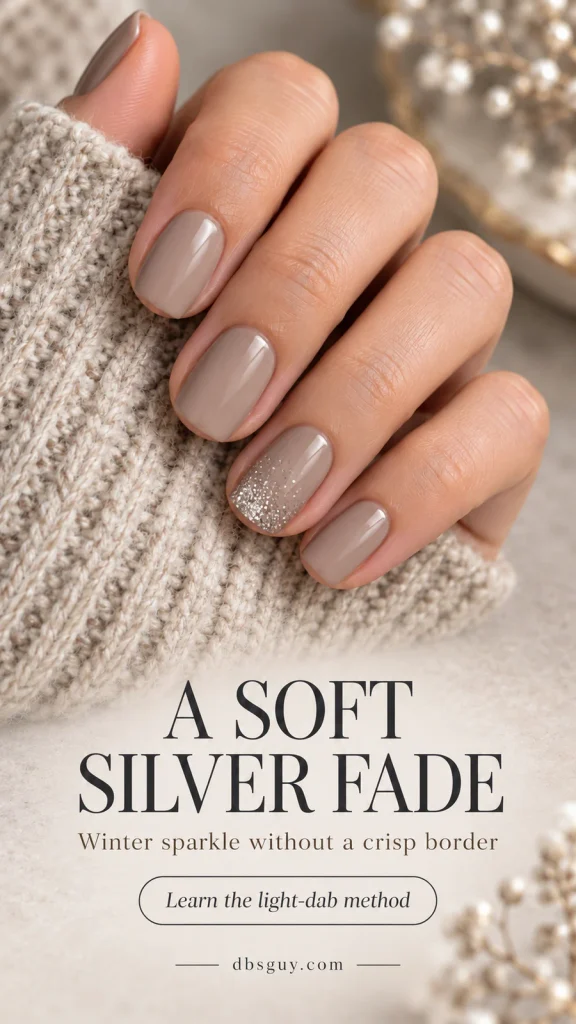
Use a silver glitter topper with a clear base over dry mushroom-taupe polish. A full-coverage silver metallic polish will make a solid patch rather than the scattered effect shown here.
- Wipe excess clear polish from the brush against the bottle neck.
- Lightly dab a little glitter along the free edge of the ring nail.
- With the smaller amount left on the brush, place a few particles slightly farther down the nail.
- Stop around the midpoint and leave the lower half plain. Assess the fade before adding another thin application, following the product’s drying directions.
Keep the other nails glossy taupe. You do not need identical glitter placement on both hands; the useful skill is controlling where the sparkle becomes sparse.
If the fade looks like a thick silver band: use less product and place fewer particles below the tip on your next attempt. Avoid building repeated wet layers just to move one glitter piece. Follow the topper’s finishing and removal instructions, and remove the polish rather than picking it off.
Also Read: 23 Winter Nail Designs: Snowflakes, Chrome and Cozy Knits to compare this soft sparkle with other cold-weather finishes.
5. A Three-Stroke Winter Star on Navy
This small asterisk gives you a winter-night detail without drawing a branched snowflake. It is the most precise exercise in the guide, so practice the strokes on spare tips before painting your accent nail.

- On a dry navy practice tip, use a fine liner brush and opaque white polish to draw one short vertical line.
- On another practice tip, draw a small X. Work toward two lines that meet at one center point.
- Combine the drills on a fresh tip: draw the vertical line, then one diagonal through its center, followed by the opposite diagonal through the same point.
- Leave navy visible around all six rays. Once the shape feels manageable, repeat one small star near the center of your ring fingernail.
- Let the detail dry as directed, then finish with your compatible top coat.
Rest your wrist on the table and use only enough pressure to keep the bristles touching the surface. If a long stroke feels wobbly, make each line as two short strokes meeting at the center. Keep the remaining nails plain navy.
If the middle becomes a white lump: reduce the amount of polish on the brush and resist retracing every line. A small, slightly uneven star still leaves the pattern readable; a heavily filled center can hide all six rays.
Also Read: 15 Elegant January Nail Art Ideas to Pair With Your Winter Jewelry when you want to adapt a simple accent to the pieces you wear every day.
Keep the Second Hand Manageable
Practice on the hand you find hardest to paint before doing the easier one. Set both forearms on the table, rest the painting hand against a stable surface, and rotate the finger you are painting when that gives you a better angle.
You can also simplify the second hand on purpose. Five snow dots on one ring finger and three on the other still share the same idea. For the linework design, try a single star on your easier hand and one white dot on the other. You are practicing control, so the finished hands do not have to be exact copies.
Finish Without Dragging the Design
Follow the detail polish and top coat instructions before sealing. Use light pressure and avoid repeatedly brushing the same spot. If the white streaks on a practice tip, adjust the drying time or finishing method before applying top coat to the rest of your nail art.
Keep a small cleanup brush nearby for stray polish on surrounding skin, using remover as directed. Avoid flooding the nail edge with remover, which can disturb the base color. After removal, moisturize your nails and the surrounding skin.
Beginner January Nail-Art Questions
Can I do these designs without gel or a UV lamp?
Yes. These are regular-polish versions using air-drying color, detail polish, and a suitable top coat. Check the labels when choosing supplies; do not substitute a lamp-cured gel and follow the same drying steps.
What can I use if I do not have a dotting tool?
A clean bobby pin with an intact rounded end can be a practice substitute, though its dot may be larger than you want. Test the size on a spare tip first and keep the end on the nail surface, away from skin. A small nail dotting tool gives you more choice over the size.
How long should I wait before adding nail art?
Use your polish’s directions as the starting point. The base needs to tolerate the tool without denting, lifting, or dragging. Check on a practice tip painted alongside your nails rather than repeatedly touching the manicure. Thick dots may need more drying time than a thin brushstroke.
Which design should I try on very short nails?
Choose three scattered snow dots on one accent nail. They need little space and do not depend on a visible free edge. If you prefer the dotted tip, use three small dots near the outer edge with clear gaps between them.
Do I have to paint all five designs?
No. Choose one for your first session and repeat it on a few spare tips. When the movement becomes more comfortable, paint one accent nail and keep the rest a single winter color. That gives you a finished manicure and one clear skill to practice next time.