The easiest December manicure starts with a finish you can paint neatly: glossy berry red, a sheer pink, or a fine champagne shimmer. If you want a seasonal detail, add one small accent after the base is ready. You can get a dressed-up result without a different design on every finger.
These 15 simple December nails range from brush-only color to a few looks that use a sticker, dotting tool, or guide. The fine French tips and half moon take more control, so choose a solid or sticker accent if you want the least fiddly option.

The visuals are AI-generated design concepts for dbsguy.com, not photographs of completed salon manicures. Colors, fine details, and reflections will vary with your nails, products, and lighting.
Choose Your Starting Point
- Only want to use the polish brush? Try berry red, sheer milky pink, champagne shimmer, the evergreen-and-gold accent, or the winter neutral palette.
- Want a recognizable holiday detail? Choose one star, snowflake, bow, or tree sticker.
- Prefer a small painted accent? Start with gold dots or a loose glitter fade before attempting a precise tip.
For the regular-polish versions below, have a nail file, your chosen colors, a suitable base coat and top coat, and polish remover nearby. Remove old polish, even out any rough edges, and follow your products’ preparation directions. Apply thin color coats and allow the recommended drying time between them. Extra decoration does not remove that waiting time.
1. Glossy Berry Red
Berry red is the straightforward choice when you want the color to carry the manicure. A short rounded-square shape gives the deep shade a tidy outline, and the glossy finish works with a sweater during the day or a dress in the evening.
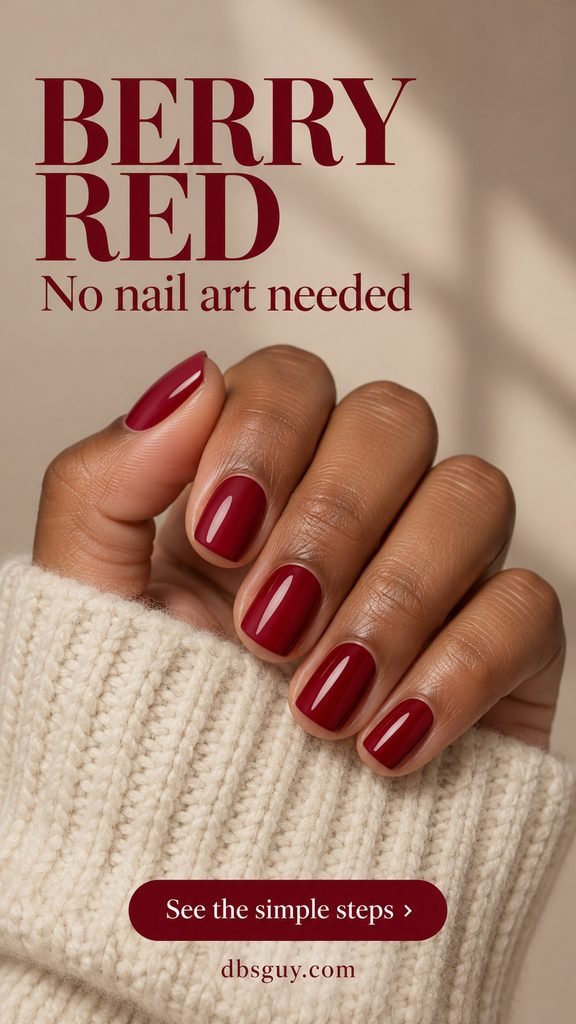
Use a berry-red cream polish without glitter. With a lightly loaded brush, begin just above the cuticle and draw the color toward the tip, then cover each side. Leave a narrow, even margin around the skin rather than trying to fill every last space. Build coverage in thin coats according to the label, then finish with your compatible top coat.
If your polish looks almost brown indoors, check a painted swatch in daylight before doing both hands. The aim here is a visible red-berry tone; you do not need nail art to make it feel seasonal.
2. Sheer Milky Pink
A translucent pink suits December days when you want your nails to look finished without choosing an obvious Christmas color. The natural free edge should remain faintly visible through the polish. That softness is what separates this look from an opaque pastel-pink manicure.
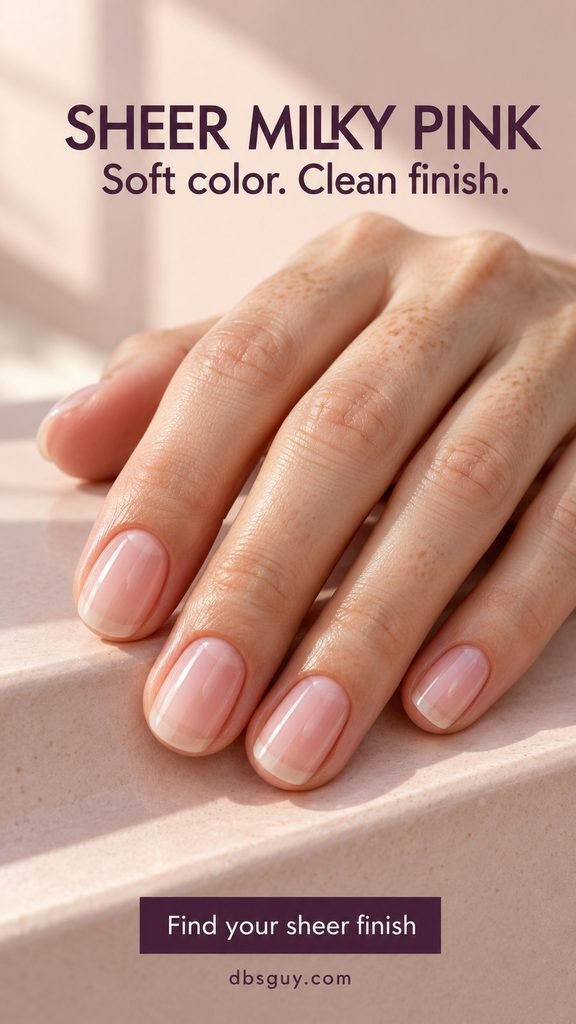
Look for a polish described as sheer or translucent. Apply a thin coat, let it dry as directed, and decide whether you want another. Judge the result by how evenly the pink sits, not by whether it hides the nail completely.
A sheer shade cannot conceal every natural variation in nail color, and adding heavy layers can defeat the light effect. If you prefer more coverage, choose a softly opaque pink on purpose. Keep the short oval shape and skip an added white tip for this version.
3. Fine Champagne Shimmer
Champagne shimmer gives you a little evening shine without drawing a line or placing a sticker. Choose a polish with fine reflective particles distributed throughout the color, rather than a clear topper filled with large glitter pieces.

Paint the whole nail as you would a single color. A pale gold with a beige undertone gives the soft look shown here; a brighter yellow gold will create a stronger metallic effect. Check the finish under both room light and a window so you know which version you are choosing.
Keep the application thin and resist adding extra coats solely to make the sparkle denser. Follow the polish’s coverage directions. If your outfit already has sequins, this fine shimmer offers a smaller-scale reflective detail without another pattern to coordinate.
4. Evergreen With One Gold Accent
This is a two-polish design with no small artwork: dark evergreen on four nails and a full gold-shimmer ring finger. The change of finish gives the set a focal point while keeping every nail simple to paint.

Set both colors out before starting and decide which nail gets gold on each hand. Paint the green nails, then the gold accent, using each formula’s recommended number of coats. The gold should cover the entire accent nail; it is not a stripe, tip, or sprinkling of loose foil.
A fine shimmer is the closest match to the image. A chunky gold glitter may need a different application and removal routine, so check its directions before swapping it in. Keep the green nails plain to preserve the clear one-accent arrangement.
5. Midnight Navy With One Silver Star
A tiny silver star makes navy feel like a winter evening without painting a miniature night sky. Put the star on the ring finger and leave the other nails glossy navy.
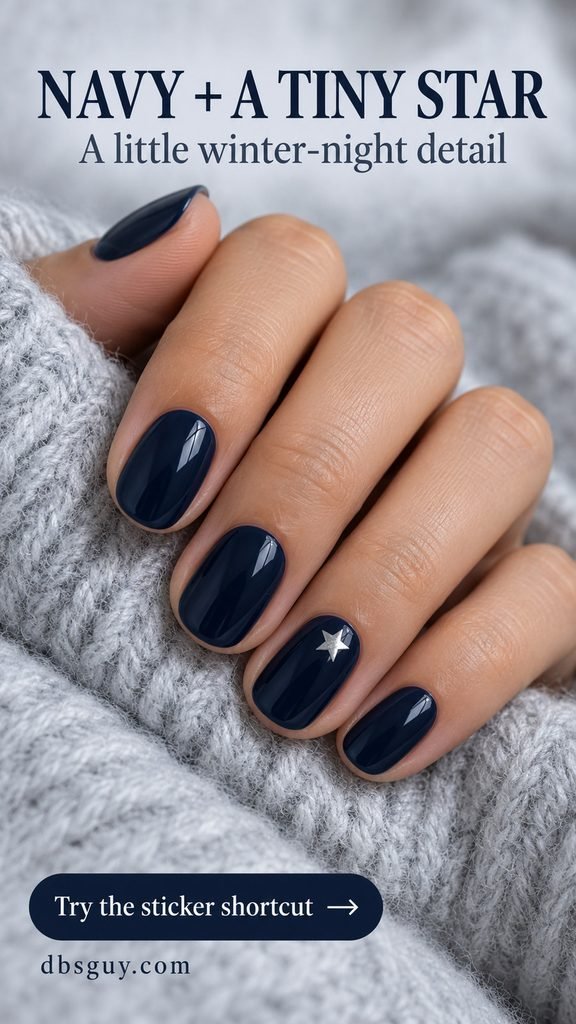
Choose a small, flat nail sticker that leaves visible navy on every side. Once the color is dry enough for sticker application, position the star slightly above the center of the nail with tweezers. Press it down gently and apply a compatible top coat if the sticker instructions call for one.
Do not substitute a large star that folds around the side of the nail; choose a smaller sticker instead. A flat decal keeps the design visually close to the nail surface. This one also works after Christmas because the motif is not tied to a particular holiday.
6. A Narrow White Micro French
The micro French keeps a familiar white tip but shrinks its width. A sheer rosy base and a slim curved edge give short nails definition without covering much of the pink.
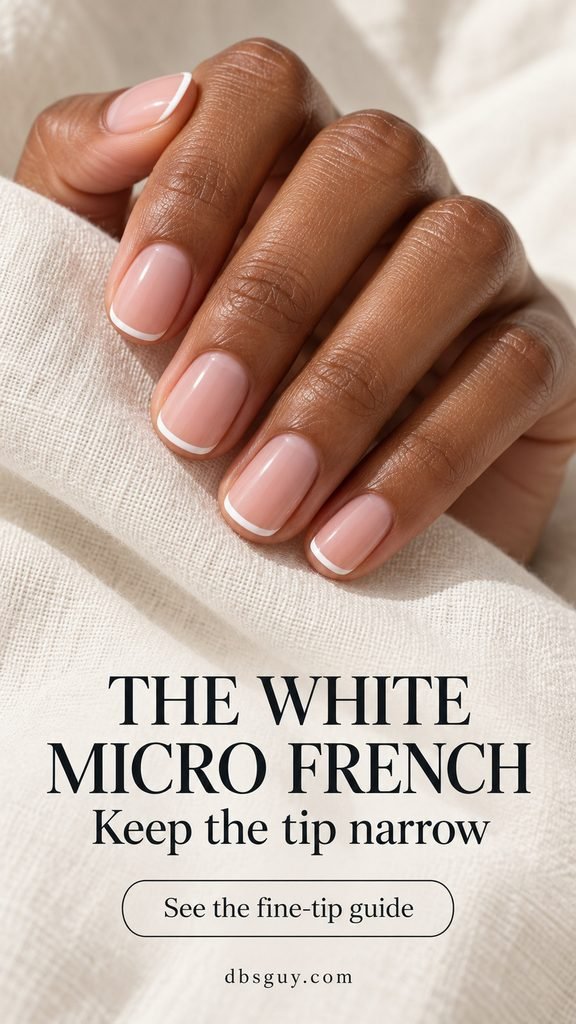
After the base is ready, use a fine nail-art brush to trace the free edge with white polish. Rest your painting hand against the table for support and keep the band proportional to the nail. If you use adhesive French guides, follow their directions and wait until the base can tolerate the adhesive; a surface that is merely touch-dry may still mark.
This is one of the more precise options here. Ask a nail technician for “short nails, a sheer pink base, and a very narrow white smile line” if painting the second hand feels awkward. For more compact placements, browse our 21 Short December Nail Ideas That Make Tiny Details Stand Out.
7. Cranberry-Red Corner Tips
A diagonal corner gives you a small piece of holiday red without painting a curved French band. Most of the nail stays sheer pink, including part of the free edge.
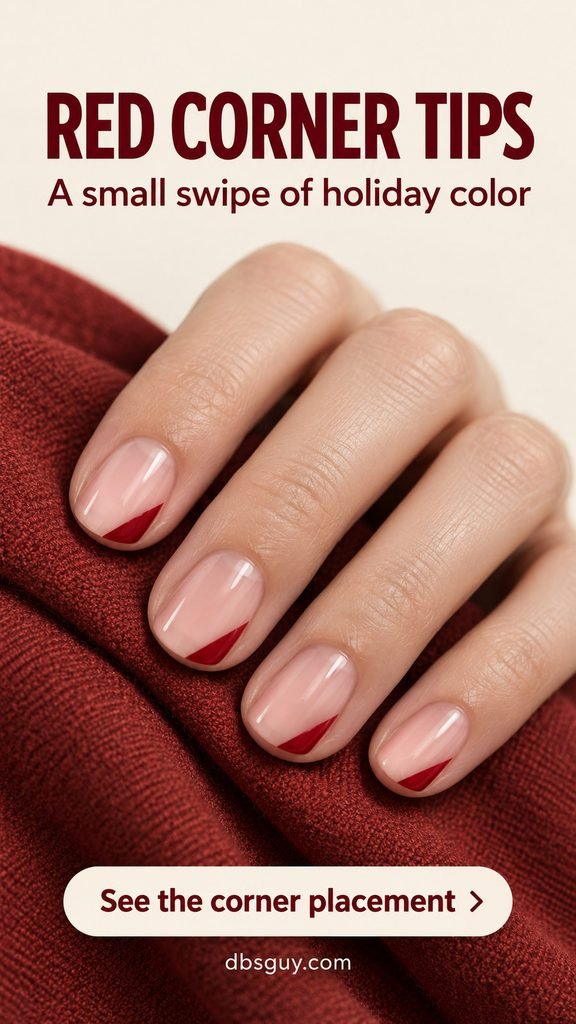
Work on one side of the tip. With a small nail-art brush, draw a short diagonal boundary across that corner and fill the little triangle toward the edge. Repeat the same general direction on the other nails. The red should occupy a corner, not turn into a thick stripe across the whole tip.
For less detail work, put the red corner on the ring finger and thumb only. You can also use a nail-art guide over a sufficiently dry base, following the guide’s application and removal instructions. This look still needs a clean boundary, so practice one nail before committing to ten.
8. A Soft Silver Glitter-Tip Fade
Choose this when you like a decorated tip but do not want to draw a crisp border. Silver glitter sits most densely at the free edge, then breaks into scattered pieces toward the middle of a sheer blush nail.
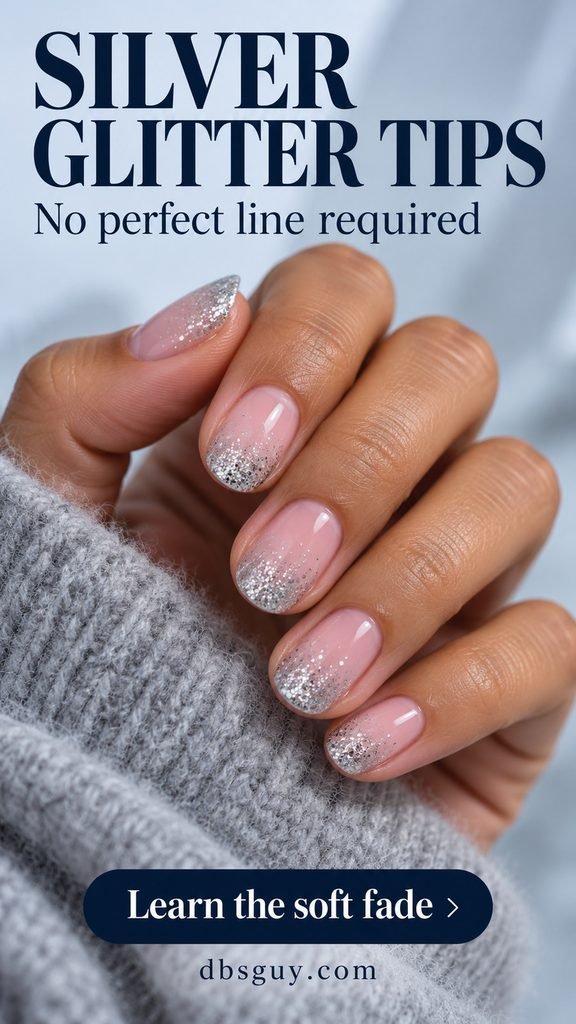
Use a silver glitter topper with a clear base. Wipe excess clear polish from the brush, then dab a little glitter onto the tip. Use the remaining, lighter amount to place a few particles just below it. Stop before the glitter reaches the base of the nail.
Build the fade gradually rather than loading the entire tip at once. If your brush deposits a solid blob, wipe it off on the bottle neck before the next nail. Finish according to the products’ directions, and plan to use the glitter polish’s recommended removal method rather than picking at the finish.
9. Mushroom Taupe With Gold Dots
A small gold circle near the base gives a neutral taupe manicure a deliberate detail. Repeating the placement across the hand makes the set feel coordinated without a larger motif.
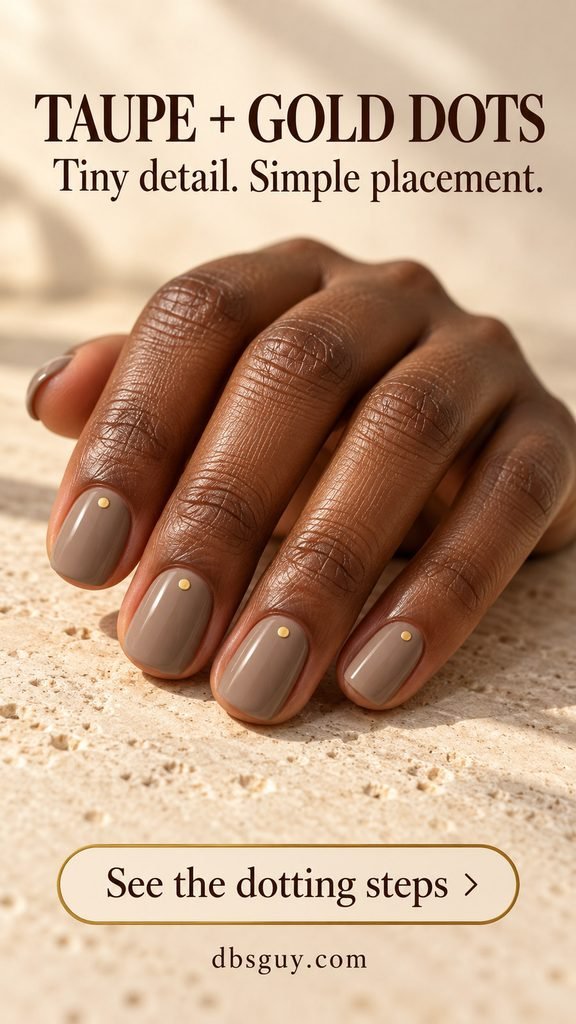
For a painted version, put a little metallic gold nail polish on a disposable palette. Touch a small dotting tool into it, then make one light dot on each dry taupe nail. Place the dot near the cuticle with a clear gap from the skin. Practice the pressure on a spare nail tip first; a heavy touch can make the circle larger than you intended.
The image’s gold circles have a crisp, stud-like appearance. Tiny flat circular nail stickers offer another way to get that shape. Choose paint or a flat sticker if you prefer to skip raised decorations around knit sleeves.
10. Milky White With One Snowflake
One silver snowflake on milky white gives you a winter motif without drawing six tiny branches by hand. Keep the other nails plain so the snowflake remains the detail you notice.
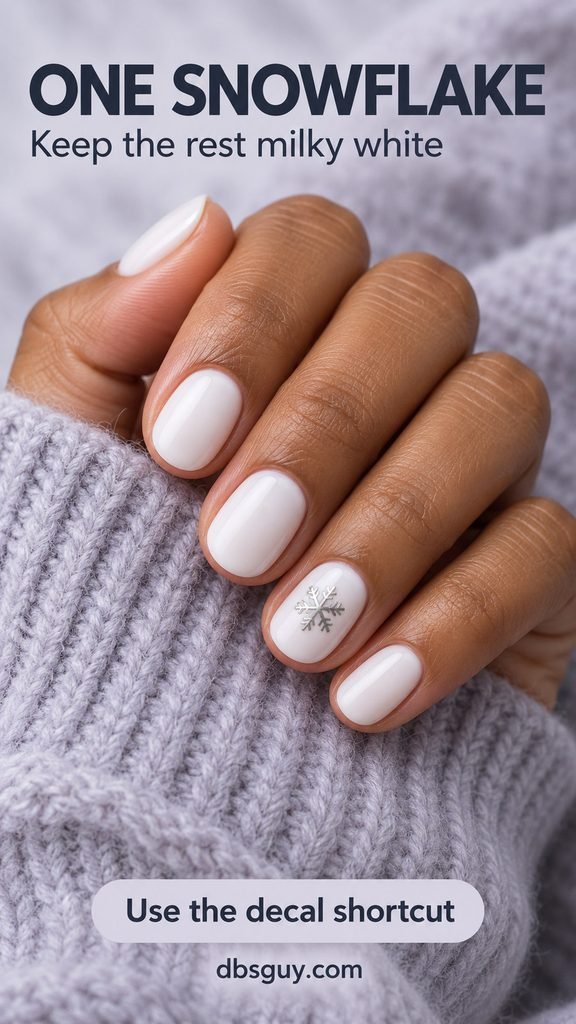
Choose a white polish with soft, opaque coverage for this version. Apply it in thin layers as directed. When the base is ready, add one small silver snowflake nail sticker to the center of the ring fingernail, keeping all its points within the nail’s borders.
A very pale silver sticker can disappear against white, so compare the two before application. Look for a decal with enough metallic contrast to show its shape. Use the sticker’s sealing directions, and leave off extra dots, gems, or glitter if you want the uncluttered finish shown here.
11. A Three-Color Winter Neutral Palette
This mixed-color manicure changes the shade from finger to finger while keeping every nail a plain cream finish. Dusty rose, mushroom taupe, and warm ivory sit together softly, without any lines to align.
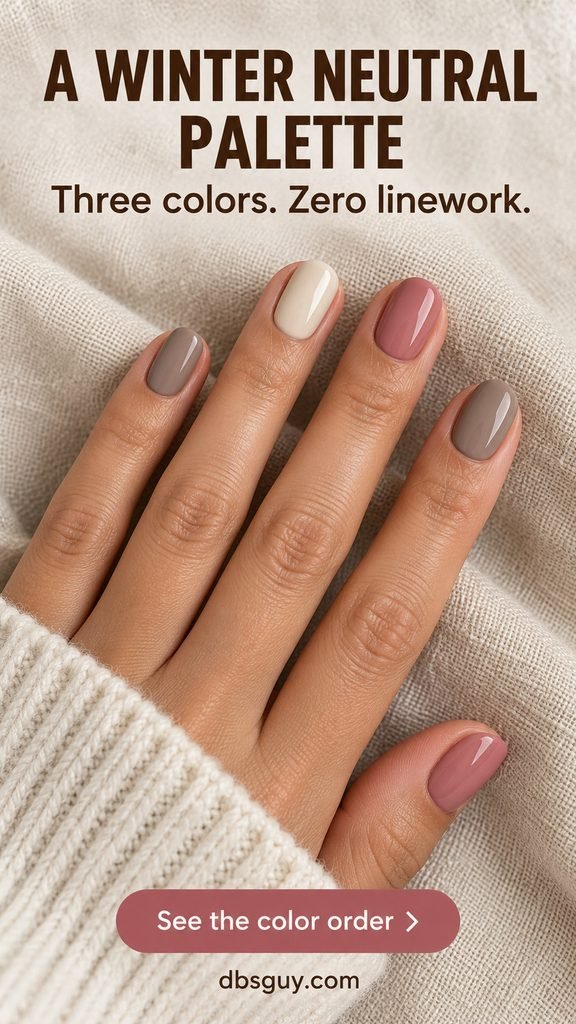
To copy the image, use dusty rose on the thumb and middle finger, taupe on the index and little finger, and ivory on the ring finger. Repeat that order on the other hand. Arrange the bottles in order before you paint so the palette feels planned.
The tradeoff is supplies: you need three colors instead of one. This is a useful choice if you already own compatible shades. Choose similar depth and warmth, and keep the same glossy finish throughout; a very bright white or neon pink would change the gentle balance of this particular set.
12. One Burgundy Half Moon
A little exposed semicircle at the base changes a burgundy manicure without decorating all ten nails. In this version, only the ring finger has the sheer-pink half moon; the surrounding nails are fully burgundy.
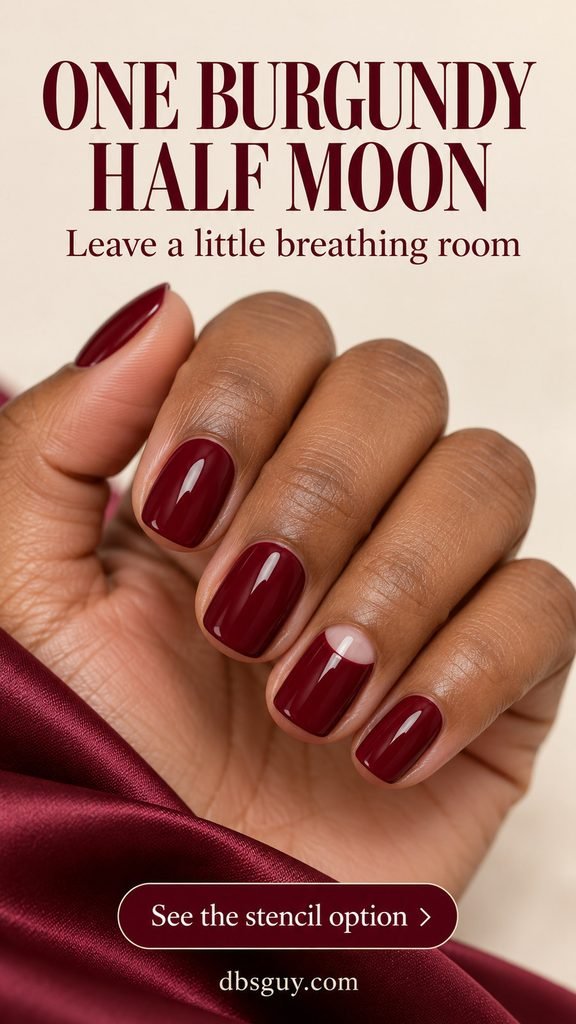
Start the accent nail with a sheer pink base. Once it is sufficiently dry for the guide you are using, position a curved nail-art stencil so it protects a small area by the cuticle. Paint the exposed area burgundy, then remove the guide at the stage its instructions recommend. Complete any further coats and finishing steps according to that product system.
Keep the semicircle shallow enough that burgundy still fills most of the nail. This option adds waiting and stencil placement, so it is less convenient than a solid color. A technician can create the same placement if you want the shape without doing the guide work yourself.
13. A Single Red Ribbon Bow
A little red bow gives sheer blush nails a Christmas detail while leaving most of the set almost bare. Use a flat nail sticker with two small loops and short tails instead of a raised bow charm.
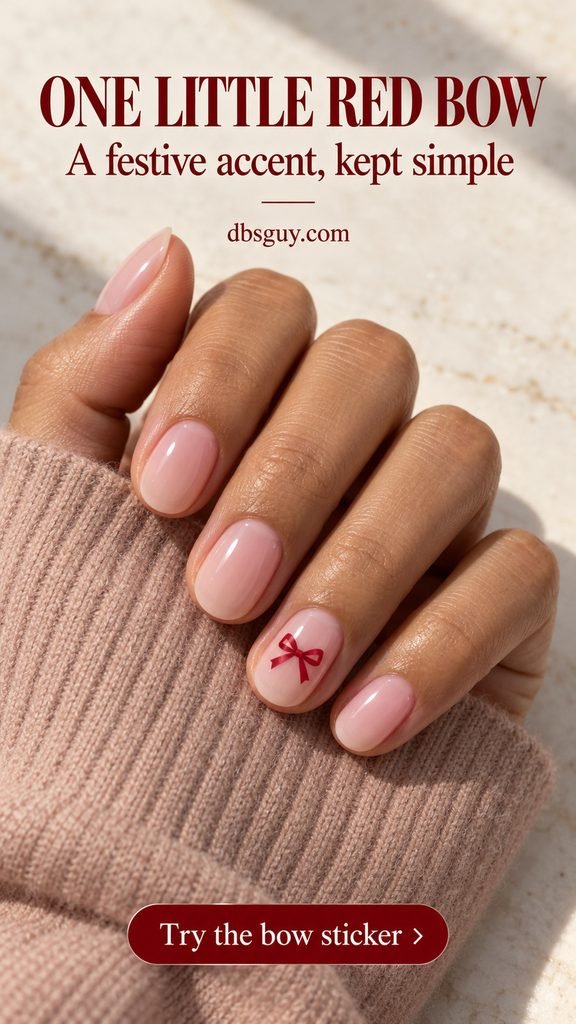
Place the sticker in the center of the ring fingernail after the sheer base is ready. Check the full bow, including its tails, against the width of your nail before peeling it from the sheet. If it needs to wrap onto the skin or sidewalls, it is too large for this look.
The remaining nails need only the same sheer pink and finish. For a more elaborate version for another occasion, our 27 Christmas Nail Ideas From Classic Red to Unexpected Twists offers a wider range of holiday references. Here, keep the one bow as the focal point.
14. Ivory With One Lengthwise Gold Stripe
A gold stripe down one ivory nail gives the manicure a graphic detail without a pattern to repeat. It is a useful alternative to a glitter finish when you want the gold to stay in one clear place.

Paint every nail warm ivory. On the dry ring fingernail, use a fine nail-art liner brush and metallic gold polish to draw one thin line from near the base toward the free edge. Rest your hand on a stable surface, work with a lightly loaded brush, and stop short of the surrounding skin.
A narrow, self-adhesive nail stripe is another option if its directions suit your polish system; keep its ends within the nail and seal as directed. Avoid adding a second line simply to cover a wobble. One neat stripe is the whole design.
15. A Tiny Evergreen Tree
A miniature green tree gives a sheer-pink manicure an unmistakable December accent. Three simple tiers and a small trunk are enough; you can skip ornaments, garlands, and a separate star.
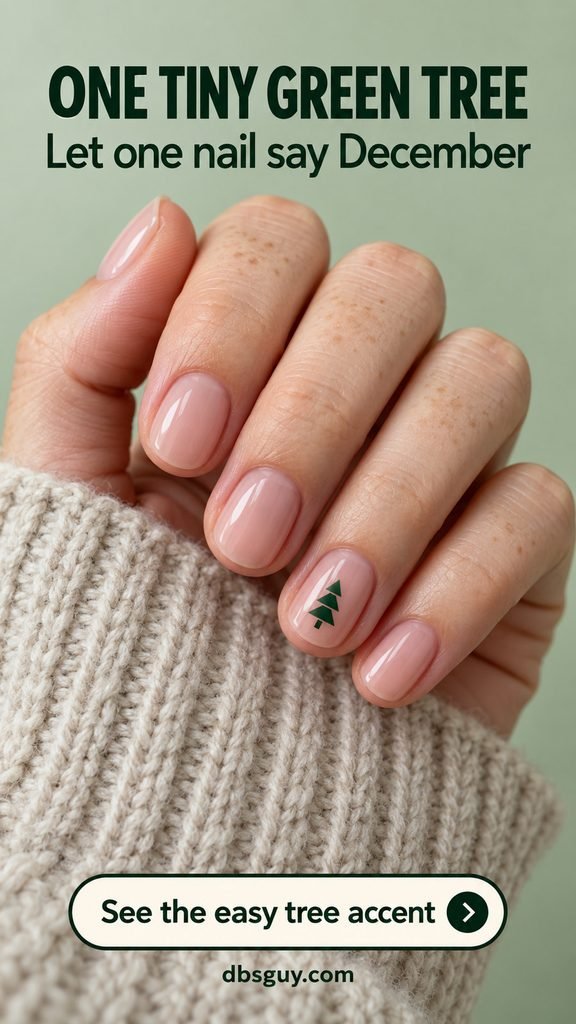
The least detailed route is a small flat tree nail sticker. Place one on the ring finger after the base is ready, leaving a pink margin around the top, sides, and trunk. Use tweezers to position it and follow the sticker’s finishing instructions.
If you prefer to paint, practice three small stacked green triangles on a spare nail tip first. A sticker will be the more manageable choice if those edges feel fiddly, especially on your non-dominant hand. Keep all the other nails sheer so this remains a single-accent design.
The Small Finishing Steps That Matter
Check the edges before adding more decoration. A little polish on the skin can distract from an otherwise simple manicure. If needed, use a small cleanup brush with an appropriate polish remover to tidy the stray color, keeping the remover away from the finished nail as much as possible.
Follow your polish and top coat directions for drying; a shiny surface does not tell you exactly when the layers underneath are ready for pressure. Leave time before pulling on gloves or reaching into a bag.
For nail care, the American Academy of Dermatology’s manicure guidance recommends moisturizing nails after polish removal and avoiding cut or forcefully pushed-back cuticles. At a salon, ask how tools are cleaned and choose a clean workstation.
Frequently Asked Questions
Which simple December nails are easiest for a beginner?
Start with a single color or finish: berry red, sheer milky pink, or fine champagne shimmer. They use the bottle brush without extra placement work. For your first accent, try one small sticker on a dry base before attempting French tips or a half moon.
Can I do these looks with regular nail polish?
Yes. These concepts use ordinary color, glitter or shimmer lacquer, and optional nail-art tools or stickers; they do not require extensions or magnetic effects. Buy stickers, guides, base coat, and top coat that are suitable for your polish system. Regular lacquer does not need a gel-curing lamp.
What works if my nails are very short?
Solid color, sheer pink, and an all-over shimmer do not depend on extra tip space. For a star, bow, tree, or snowflake, choose a decal small enough to sit inside your actual nail. Skip a large motif or wide French band if it leaves no room for the surrounding color.
How do I keep stickers from spoiling the finish?
Start with the base condition specified by the sticker maker. Use a motif that fits entirely on the nail, press it down as directed, and use a compatible finishing coat if required. Thick stickers and curled edges will not necessarily disappear under extra top coat; change the sticker or simplify the design.
How long should I allow for one of these manicures?
The painting time depends on your skill, number of coats, and accents, while drying depends on the products. A solid color takes fewer separate design steps than a French tip or stencil. Use the label’s drying guidance when planning your evening instead of assuming every “simple” design is a five-minute manicure.
Which looks still make sense after Christmas?
Sheer pink, berry red, champagne shimmer, taupe with gold dots, the neutral palette, and ivory with a gold stripe all work beyond the holiday. Choose one of those if you prefer a reference you can reuse through winter; refresh the polish when needed rather than expecting one application to cover the season.