

Start with the jewelry you reach for most: a silver watch, a gold signet, rose-gold hoops, or pearl studs. Then borrow one detail for your manicure—the metal, the stone color, or the softness of its shine. You can make the connection with a single accent nail.
These 15 elegant January nail art ideas give you specific pairings, placement details, and ways to simplify the artwork for shorter nails. There are pale everyday options, deeper evening shades, and a mixed-metal French for the days when you wear both gold and silver.
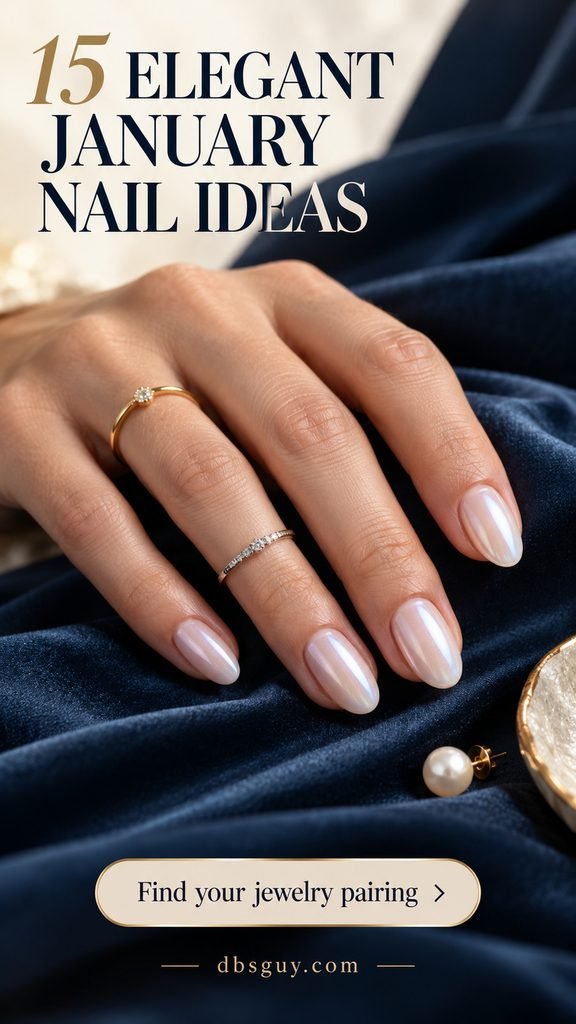
The visuals are AI-generated design concepts for dbsguy.com, not photographs of completed salon work. Use them to discuss color, placement, and finish with your nail artist; actual results will vary.
Choose a Starting Point From Your Jewelry Box
- Mostly silver or white-metal jewelry: Try icy-blue silver curves in idea 2, charcoal dots in idea 5, or the navy constellation in idea 8.
- Mostly yellow gold: Start with the garnet seam in idea 3, cashmere double tips in idea 4, or espresso finish play in idea 9.
- Rose gold: Compare the defined blush outlines in idea 6 with the softer mauve glow in idea 11.
- Pearls: Choose an all-over oyster sheen in idea 1 or a small painted-dot accent in idea 13.
- A mix of metals: Idea 14 repeats both finishes within the same French tip.
These are styling suggestions, not rules about which colors you can wear. A warm gold ring can look striking against cool blue. Decide whether you want that contrast or a closer color connection before choosing the polish.
1. Oyster Pearl Glaze With Pearl Studs
An oyster-white glaze picks up the soft luster of pearl jewelry without drawing another pattern beside it. Keep the base slightly translucent and the sheen fine. The short oval shape in the reference gives this pairing an easy daytime feel with cream sweaters or a white shirt.
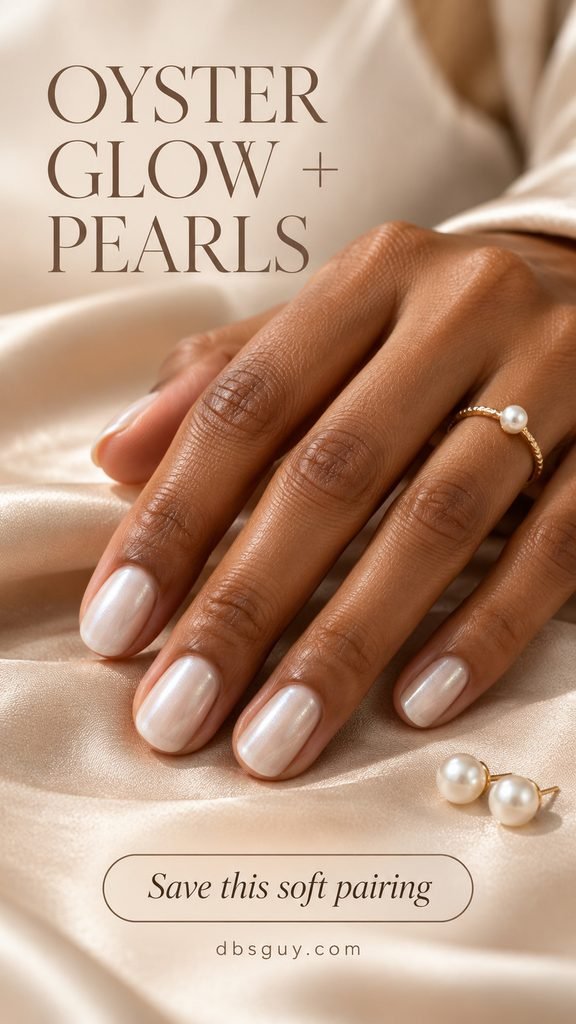
Ask for a milky oyster shade with a delicate pearl reflection, and show how much natural nail you want visible. Compare the finished swatch with your actual pearls: a stark white polish can feel quite different beside a cream-colored earring. A sheer pearl lacquer is a regular-polish interpretation; a powder glaze uses a different application system. Choose the finish you like rather than assuming the two will look identical.
Also Read: 19 Neutral December Nail Ideas That Go With Every Holiday Outfit.
2. Icy Blue With Silver Side Curves
Give a silver band a cool-colored companion with powder-blue nails and one slender silver curve on each middle and ring nail. The line runs along a side of the nail, curling gently inward near the tip. Leaving the other nails plain makes the placement easy to see.
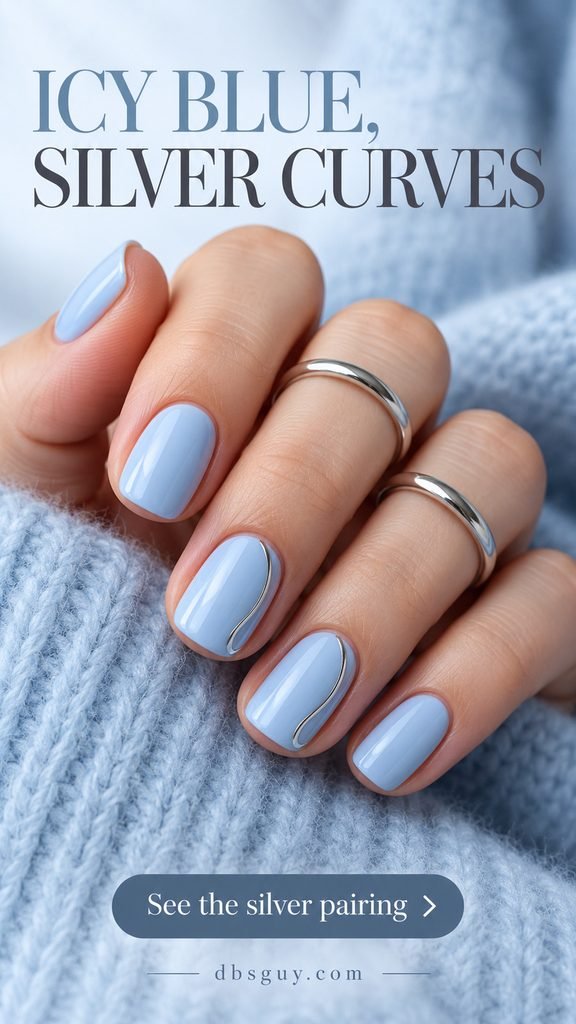
Ask your artist to keep blue visible on both sides of each curve; a heavy metallic border would change the effect. On very short nails, keep just one curved accent on each hand. Silver nail-art polish offers a painted version, while a chrome detail can give a sharper metallic reflection. A plain silver ring works well here because its uninterrupted surface echoes the line.
3. Garnet Red With One Gold Seam
If you wear a red-stone ring, use a deep garnet manicure to repeat the color and one thin gold stripe to pick up the setting. There is a January connection, too: GIA identifies garnet as January’s birthstone, although garnets occur in several colors beyond red.
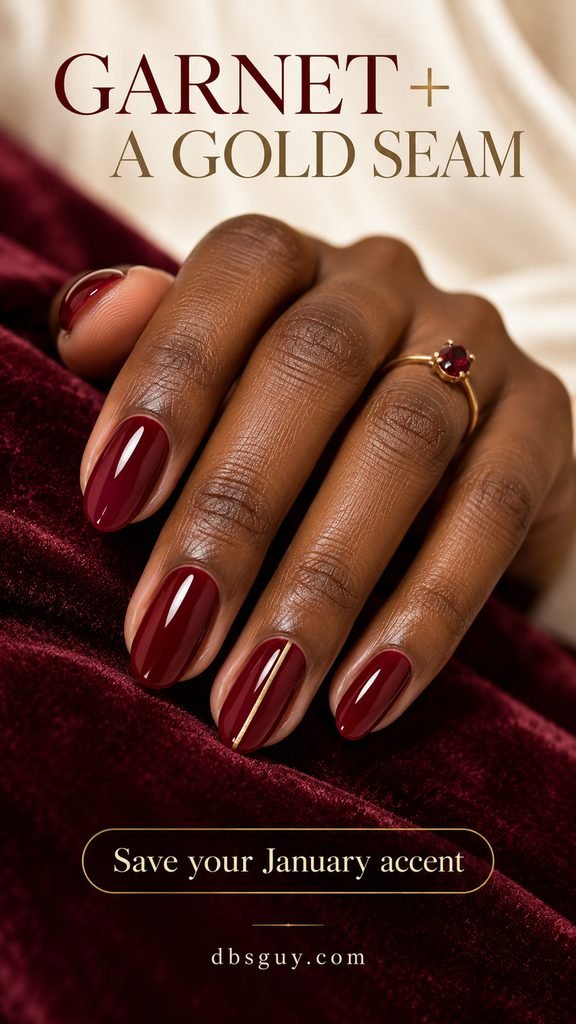
Keep every nail glossy red except the ring nail, which gets a single gold line down its length. Request a narrow seam with red showing clearly on either side. If your jewelry already has an ornate setting, skip extra dots or foil. A simpler line is easier to read beside the stone, and the dark-red base still supplies plenty of color when you take the ring off.
4. Cashmere Beige With Double Gold Tips
Two fine gold curves give beige nails the rhythm of stacked rings. One line follows the free edge; the second sits just below it, separated by a visible strip of beige. That gap is the detail that distinguishes this design from an ordinary gold French.
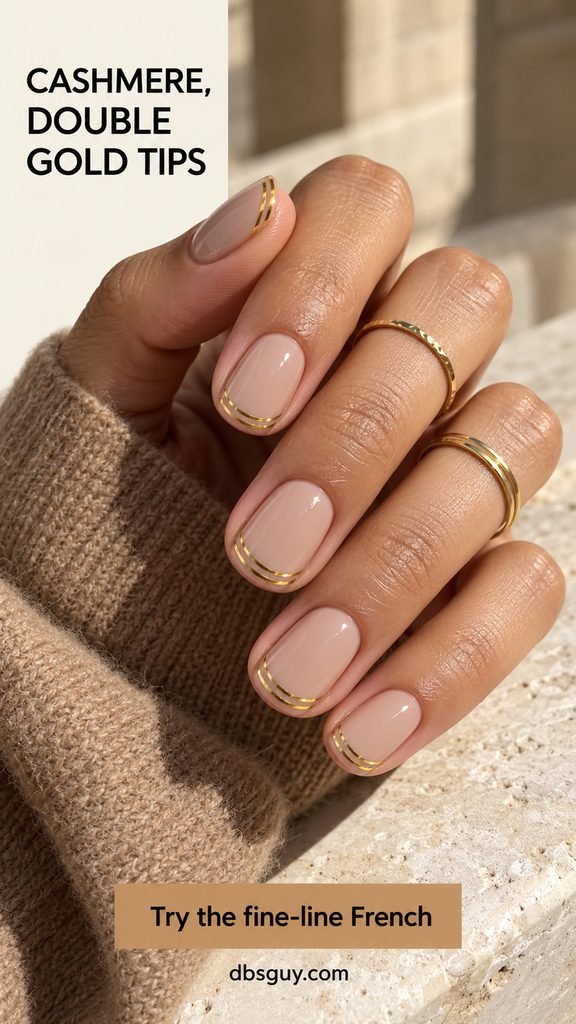
Bring a favorite gold band to the appointment so you can compare the warmth of the metallic finish. Ask your artist to demonstrate the two lines on one nail first. If the lines merge at your preferred length, switch to a single gold edge on the shorter nails. The short squoval shape shown here keeps the double curve neat beside camel knitwear and fine gold rings.
Also Read: 15 Simple December Nails That Look Polished With Minimal Effort.
5. Charcoal Nails With Three Silver Dots
A silver watch and charcoal polish already make a coordinated pair. Add three tiny silver dots in a vertical column on the ring nail for a small point of interest. Keep the rest of the manicure a plain glossy gray so the dots do not get lost among other decorations.
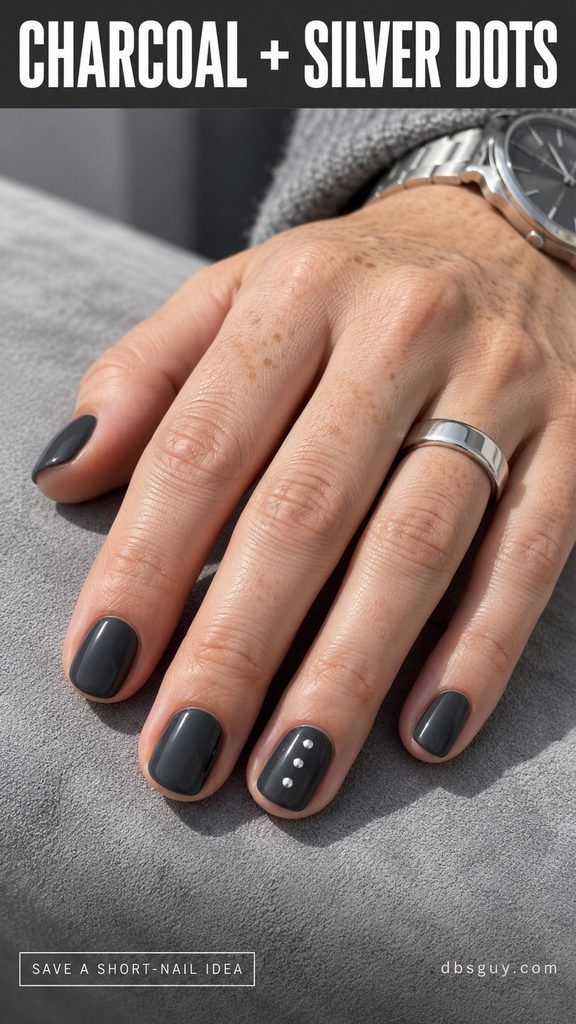
This is a useful design for very short rounded nails because the artwork needs little width. For a regular-polish version, use a small dotting tool and nail-art polish after the base has dried as directed. Make a practice row on a nail swatch first; equal spacing matters more than making the dots large. Choose painted dots rather than studs if you want the detail to remain flat.
6. Sheer Blush With Rose-Gold Outlines
Instead of covering blush pink with sparkle, trace the shape of two accent nails in rose gold. The middle and ring fingers in the reference have fine perimeter outlines, while the surrounding nails stay plain. Those open pink centers let the warm metal remain the defining detail.
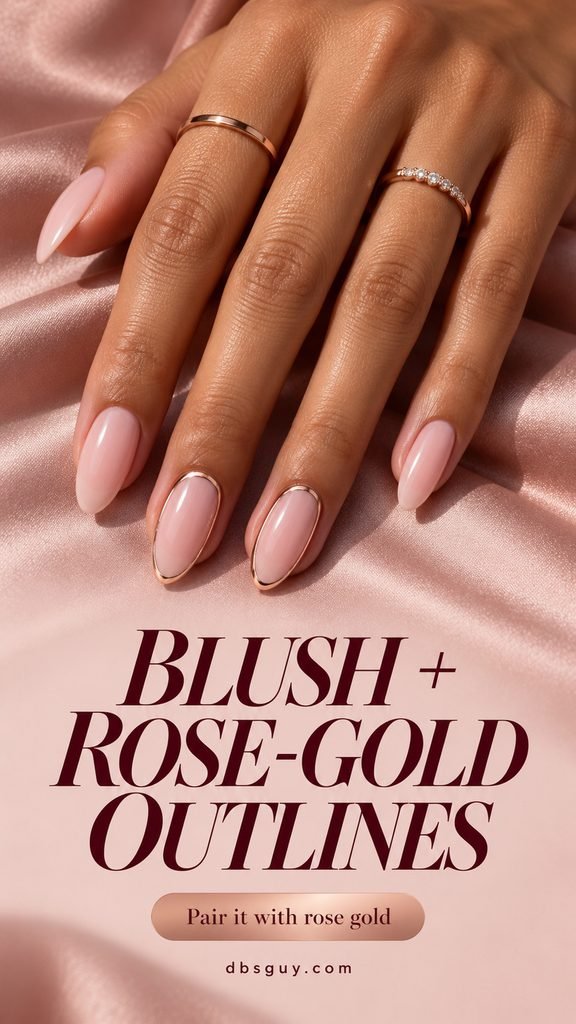
Pair this with delicate rose-gold bands or small hoops when you want a close color connection. Full outlines demand precise placement, so treat this as a salon reference if fine linework is new to you. Ask for the metallic line to sit entirely on the nail, with a clean margin from the skin. For a shorter version, outline only one accent nail and keep its center uncluttered.
7. Creamy Ivory With One Black Curve
A broad gold signet makes a strong statement on its own. Creamy ivory nails with one sweeping black curve give it a graphic backdrop without adding a second metallic pattern. Put the curve on the ring nail and keep the other nails plain ivory.
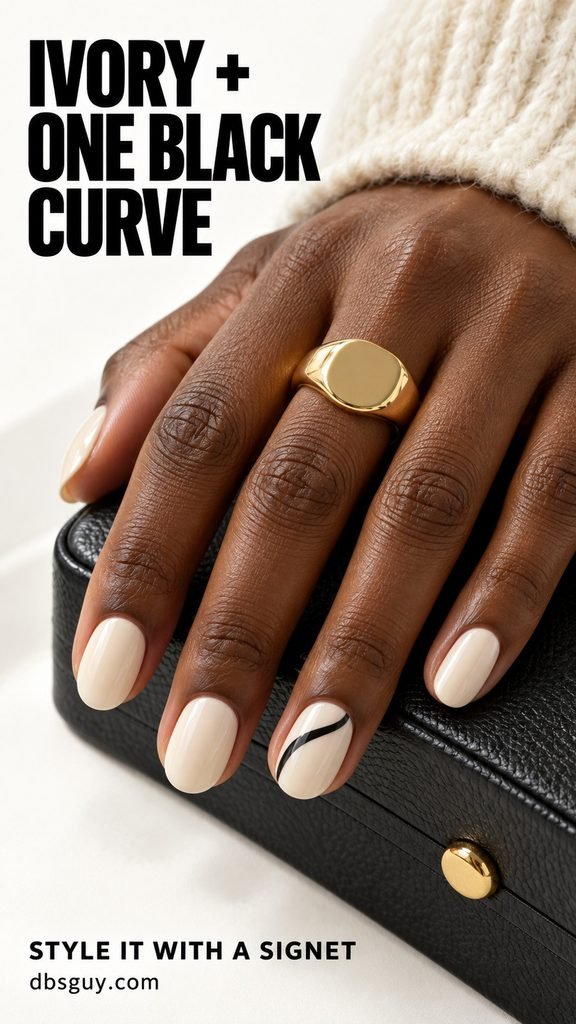
Request one tapered, gently bending stroke rather than a network of fine lines. The contrast should be visible at arm’s length. The gold stays in the jewelry, while the nail art connects with a black bag, belt, or coat button. If you wear a silver signet instead, the same ivory-and-black palette still works; there is no gold painted onto the nails to coordinate.
8. Midnight Navy With a Silver Constellation
Three small four-point stars and a tiny dot turn one navy nail into a winter-night accent. The rest of the set stays glossy midnight blue. Try it beside a clear-stone ring in a white-metal setting, where the silver artwork can repeat the setting’s brightness.
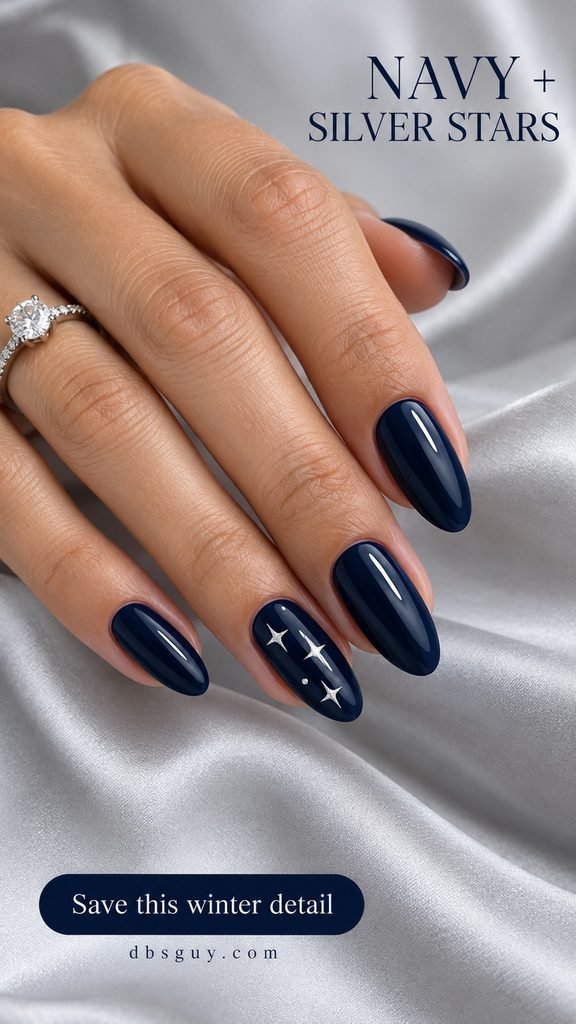
Leave navy space between the stars and keep the motif within the nail’s borders. A medium almond shape gives the design room, but you can reduce it to one star and one dot on a short oval nail. A suitably sized flat nail decal is an alternative to painting the points. Show your artist the spacing you like rather than asking for a whole sky of tiny stars.
Also Read: 23 Winter Nail Designs: Snowflakes, Chrome and Cozy Knits.
9. Espresso With Matte-and-Gloss Diagonals
For a sculptural gold ring, try nail art made from finish rather than another color. Keep the manicure deep espresso. Give the middle and ring nails a diagonal division between matte and gloss, with the remaining nails matte.
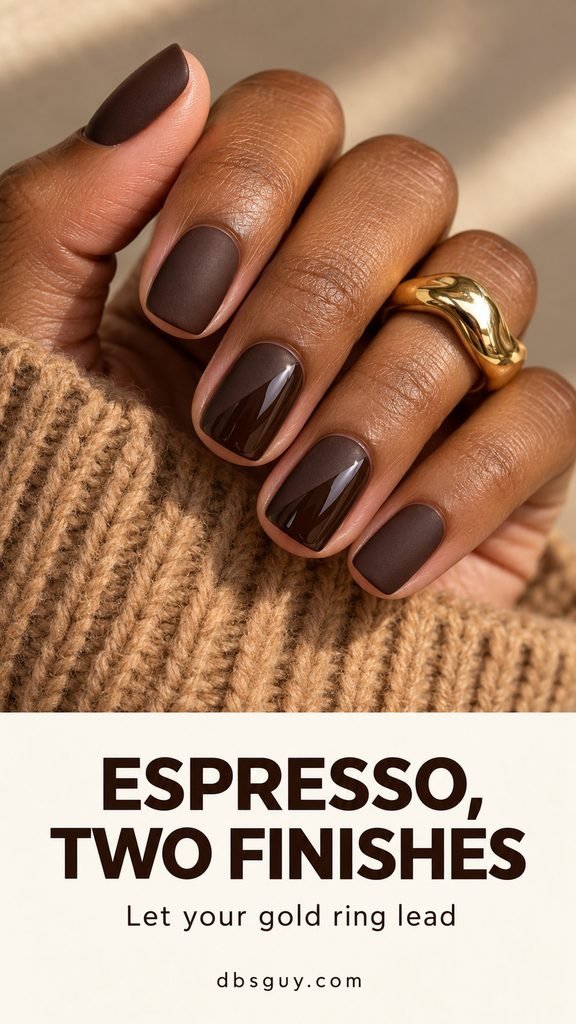
The glossy panels catch a reflection while the matte sections stay softer, creating a detail you notice as the hand moves. Ask to see one finished accent under ordinary light before repeating it. A compatible matte top coat and glossy top coat can create a regular-polish interpretation, but the boundary takes control. Do not finish the entire set with gloss afterward, which would cover the contrast you planned.
10. Sage Marble With a Small Gold-Foil Accent
Muted sage offers a softer background for a green gemstone than matching every nail to the stone’s deepest color. Keep four nails solid sage and reserve the ring nail for cream-and-green marbling with a small gold-foil detail near one side.
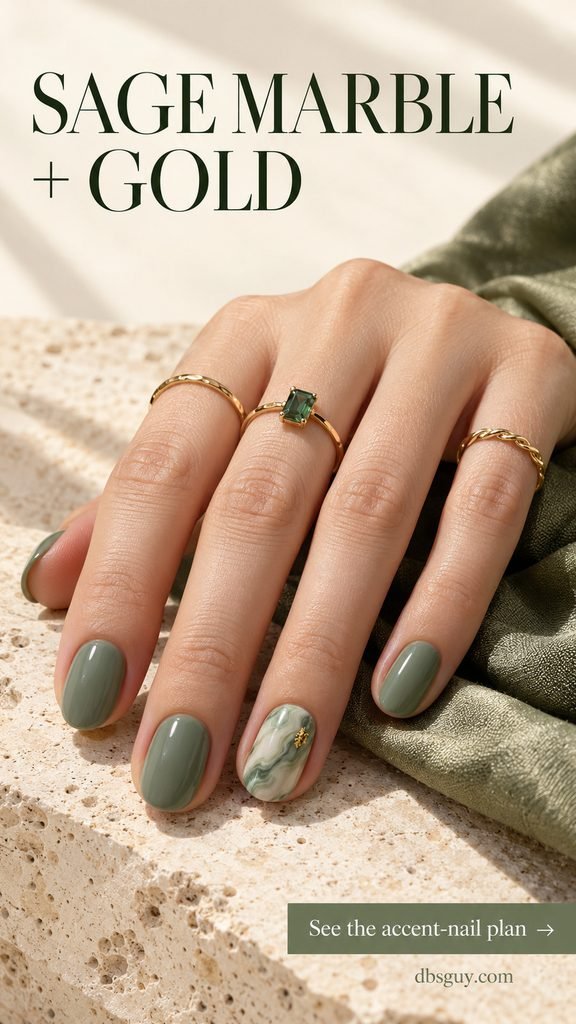
Ask for irregular, flowing veins with visible cream space, not an all-over striped pattern. The little foil accent repeats a yellow-gold setting without turning the whole nail metallic. For short nails, one broad marble swirl is clearer than many tiny veins. A simpler home adaptation is a sage manicure with one cream accent nail; keep the same jewelry pairing even if you leave the marble work to a professional.
11. Dusty Mauve Velvet With Rose-Gold Hoops
Dusty mauve gives rose gold a deeper companion than pale blush. A soft diagonal magnetic highlight adds movement across each nail, so the finish itself provides the decoration. The almond shape shown here makes that changing reflection easy to see.
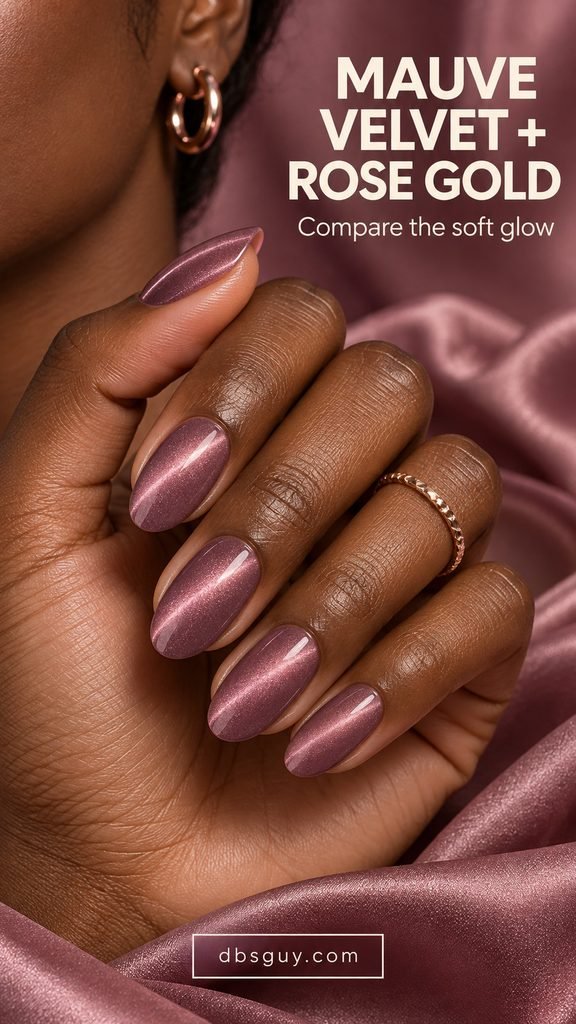
At the salon, request a mauve magnetic finish with a soft diagonal glow, and compare a sample from more than one angle. “Velvet” describes the visual effect; the nail surface remains smooth. The application depends on the magnetic product used. For regular polish, a fine mauve shimmer is an alternative, with a more evenly distributed reflection. Keep extra metallic artwork off this set so the glow and your hoops remain the main details.
12. Smoky Quartz Wisps With Antique Gold
If your jewelry has a smoky brown stone or an antique gold setting, try translucent taupe nails with darker brown wisps on two accents. The middle and ring nails carry the pattern; the others stay plain and translucent. It gives you a stone-inspired connection without trying to duplicate every facet of the ring.
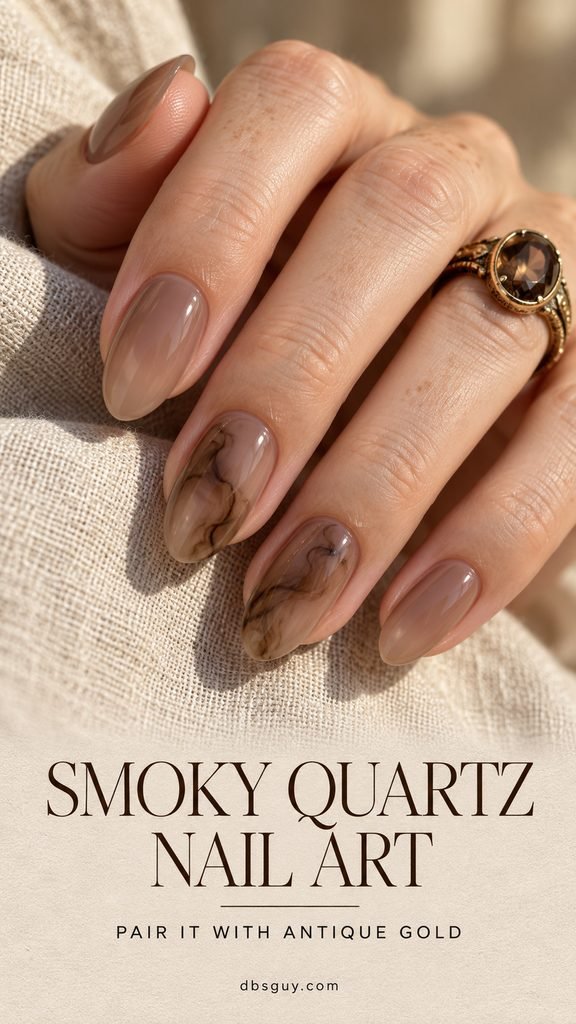
Show your artist that the brown should look layered and smoky, with some lighter areas still visible. Opaque chocolate polish with sharp white veins would create a different design. Keep the pattern to one accent if your nails are short. This pairing suits an oatmeal sleeve particularly well because the light fabric makes the translucent brown easier to distinguish from a nearly black manicure.
13. Milky Pink With a Painted Pearl-Dot Arc
A little arc of ivory dots can echo a pearl ring or necklace while keeping the nail art flat. Use a milky pink base and place five small painted dots in a shallow semicircle near the base of the ring nail. Leave the other nails plain.
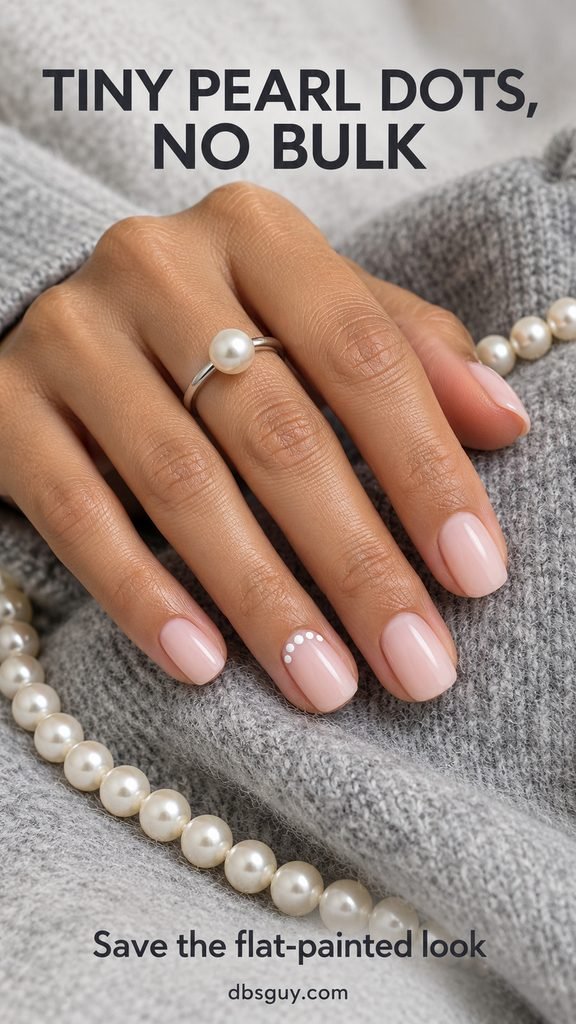
Specify dots of polish, not glued-on pearls. Ask for a small, even gap between each dot and a clear margin from the skin. If five dots crowd a narrow nail, use three slightly smaller dots rather than squeezing them together. For a home version, practice the arc on a swatch and let the color dry according to its directions before adding the dots. A silver pearl ring offers a cool setting for this soft pink-and-ivory combination.
Also Read: 19 December Nails White: Snowy Shades From Milky to Bright.
14. Gold-and-Silver Split French Tips
When you wear a gold band beside a silver one, repeat both metals within the same tip. Each French edge has a gold half and a silver half meeting at the center, over a sheer warm-beige base. Keeping that arrangement consistent makes the mixed-metal idea feel deliberate.
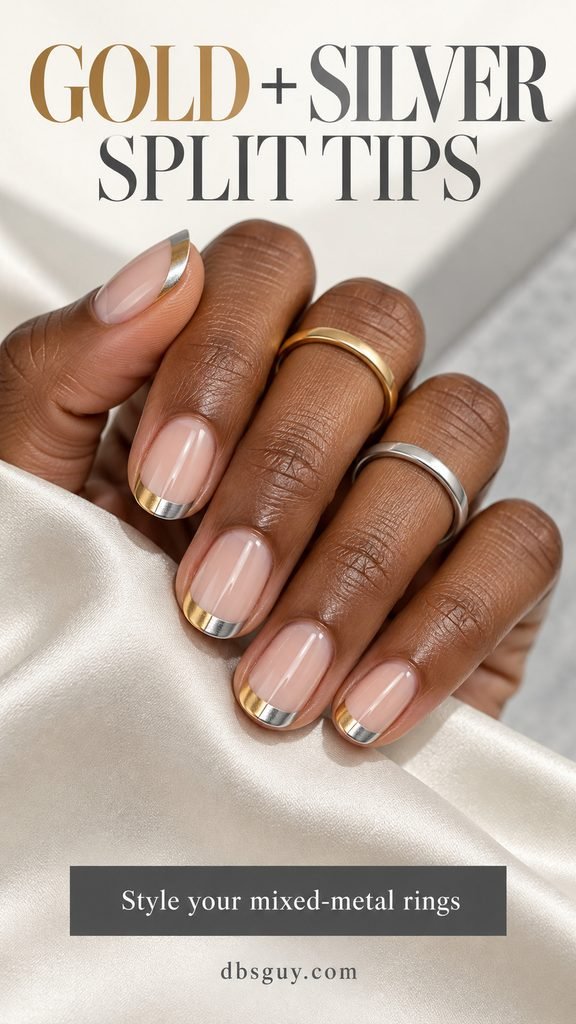
Decide which side gets gold before the first nail is painted, and show your artist the same orientation across the set. Ask for an even band with enough sheer base left visible. On very short nails, put the split tip on two accents and leave the others plain. Fine metallic nail-art polish offers a softer-reflecting version; a chrome finish can make the division look more reflective.
15. Plum With a Silver Crescent Below a Bare Half-Moon
Deep plum gives a fine silver ring a rich evening backdrop. On the ring nail, leave a small bare-looking half-moon at the base and place fine silver glitter along its curved edge, fading slightly into the plum below. The other nails stay plain and glossy.
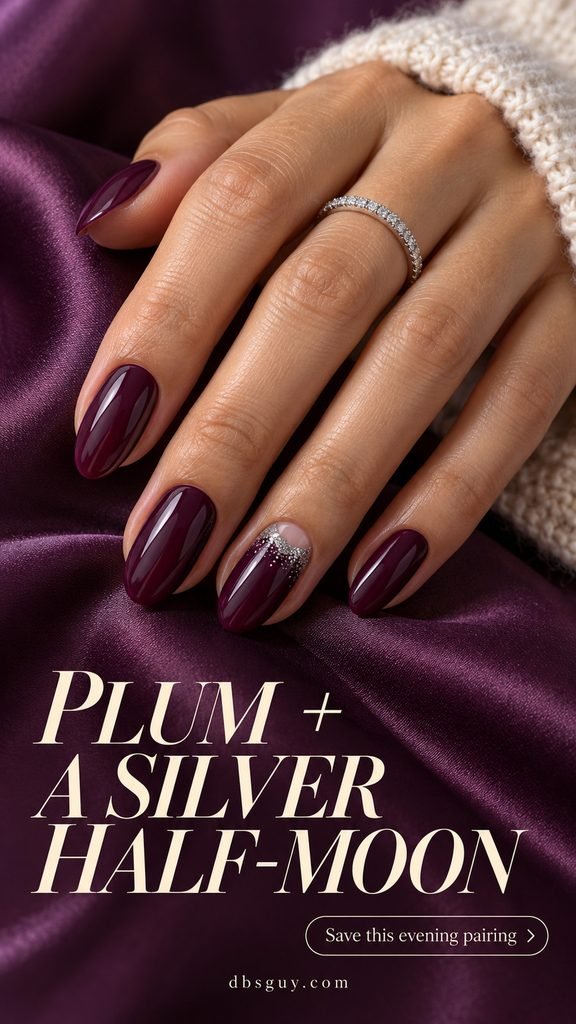
The placement matters: the sparkle belongs near the base, while the tip remains plum. Ask for a smooth finish with a clean margin from the skin. If the half-moon is too fiddly for a home manicure, keep a full plum base and add a small, loose silver-glitter fade near the bottom instead. Pair it with a narrow pavé band rather than a large cluster ring when you want the crescent to stay noticeable.
Also Read: 21 New Year’s Nails to Ring In the Year Sparkling.
Make the Pairing Work With Your Everyday Rings
Before choosing a design, set out the rings and watch you actually wear during a normal week. If you have a large colored stone, decide whether to repeat its color, as with garnet, or use a quieter background, as with sage beside a deeper green stone. With plain metal bands, the nail art can supply more of the detail.
Check the polish swatch beside your jewelry in daylight and ordinary room light. You are comparing warmth, contrast, and the scale of the decoration—not trying to find a perfect match. A very yellow metallic stripe may look different beside a pale gold band, and a full reflective finish may feel busier than a few painted dots.
Take one full-hand reference and point out the exact feature you want to keep. Tell your artist your preferred length, which nails get artwork, and whether you want flat painted detail. If you are using regular polish at home, follow the base, color, and top coat directions, including drying times. Use products intended for nails; keep jewelry and loose fabric away until the manicure is fully dry.
Questions About Elegant January Nail Art
Do my nails have to match my jewelry metal?
No. Repeating the metal is one styling option, while contrasting it is another. Blue nails with a gold ring or ivory nails with a silver signet can feel just as intentional. Repeat one element—color, shape, or finish—if you want an easy connection without matching everything.
Which designs are easiest to adapt for short nails?
Start with the oyster pearl finish, three silver dots, the single black curve, or a simplified pearl-dot arc. Those ideas leave most of the nail open. Reduce the number of small details before adding length simply to copy a reference.
Which looks can I attempt with regular polish?
A pearl lacquer, charcoal dots, a single gold stripe, and a small glitter fade are reasonable starting points if you have the appropriate polishes and tools. Double French lines and full outlines need more precision. Magnetic velvet, powder-chrome details, and layered stone effects depend on the products and technique; choose a simpler interpretation or bring the reference to your nail artist.
How can I keep the manicure feeling like January instead of Christmas?
Choose the detail you would enjoy without a holiday theme: a curved metal line, a stone-inspired accent, or a quiet pearl finish. With rings and winter clothing providing the context, the manicure does not need trees, ornaments, or red-and-green artwork to feel seasonal.
