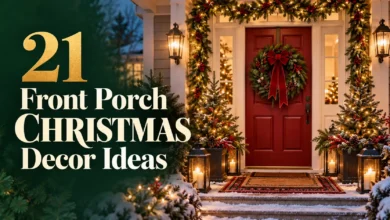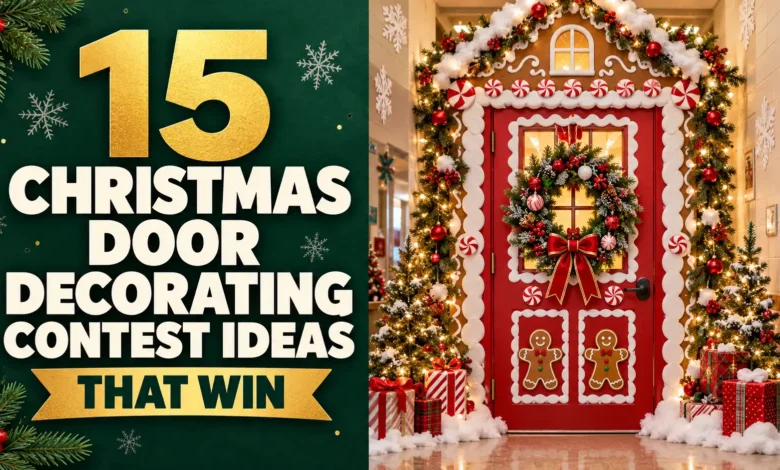
A door that tells one clear story is easier to remember than a door covered in every decoration in the supply closet. Think a gingerbread bakery, a giant snow globe, or Santa disappearing down a paper chimney—then give that idea enough room to shine.
These Christmas door decorating contest ideas include a visual concept, the main supplies, and a practical way to build each look. They focus on indoor office and classroom doors where decorations are permitted. A thoughtful design can make a strong entry, but the winner still depends on your contest’s rules and judging criteria.
Need a quick choice? Try the giant gift in idea 12 for fewer cutouts, the penguin party in idea 11 for a group project, or the snow globe in idea 2 for a dramatic centerpiece.
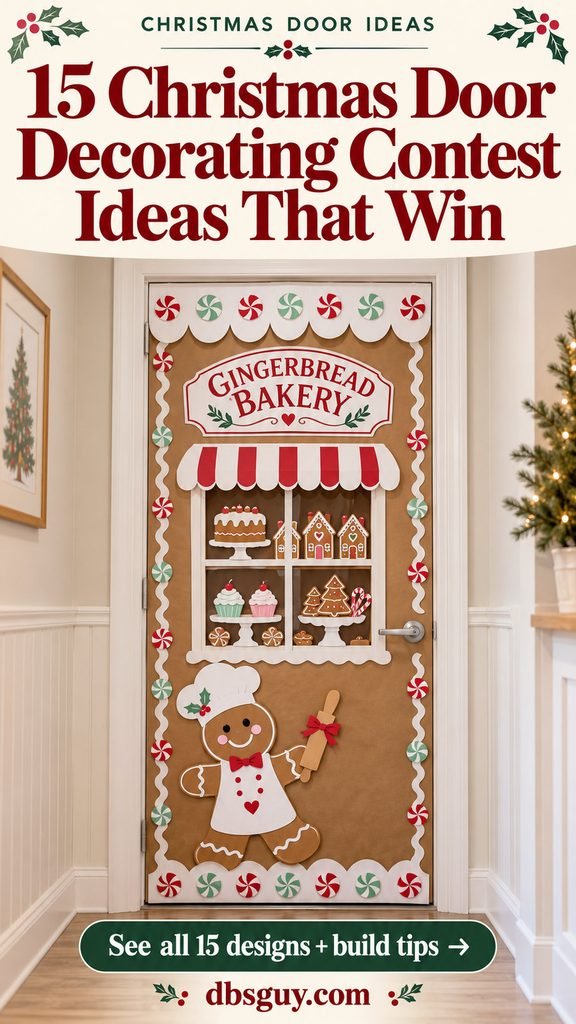
The images are AI-generated decorating concepts, not photographs of completed contest entries. Use them as visual guides and adapt the layouts to your actual door.
Before You Start: Measure the Door and Read the Rules
Ask the organizer or facilities team whether that specific door may be decorated, which materials and attachments are allowed, and whether there is a coverage limit. Check the judging rubric, budget cap, installation deadline, and removal date before buying supplies. For a December contest, confirm these details in November if the schedule allows.
Measure the usable door face and mark the handle, lock, hinges, glass, signs, and required labels on a sketch. Keep those features visible and usable. Decorations must not interfere with opening, closing, or latching. In workplaces, OSHA’s exit-route requirements also call for unobstructed routes and working fire doors. Building rules may prohibit decorating a door altogether; move the design to an approved display board in that case.
For the designs below, start with scissors, a ruler, a pencil, approved craft paper or cardstock, and a surface-compatible attachment method permitted by your building. Glue craft pieces to their paper backing rather than directly to the door. Keep the floor clear, and never join the moving door to its frame with trim.
1. Turn the Door Into a Gingerbread Bakery
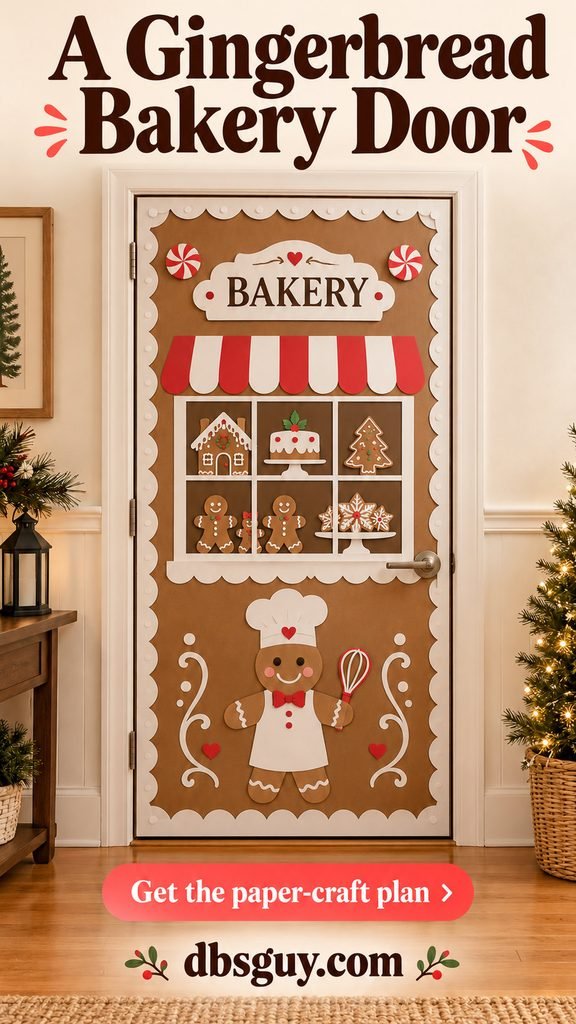
Give the familiar gingerbread house a job: make it the neighborhood Christmas bakery. A cookie display and one gingerbread baker create a little scene people can understand as they walk past.
Gather: approved brown backing paper, white paper for icing, red and mint cardstock, and a dark sheet for the illustrated bakery window.
Fit the brown backing to the permitted area, keeping the door edges and hardware clear. Add a white scalloped border inside that area. Add a flat red-and-white striped paper awning above the display. Build a flat display window with a few oversized paper cookies, then place the gingerbread baker below it. Two peppermint disks can finish the upper corners without crowding the scene.
For a classroom, let students design cookies on matching circles. In an office, give the bakery a department-inspired name. Keep the cookie outlines bold and the icing thickness consistent; tiny sprinkles are a finishing detail, not the main attraction. Use paper candy throughout so the decoration does not become a food display.
2. Build a Giant Paper Snow Globe
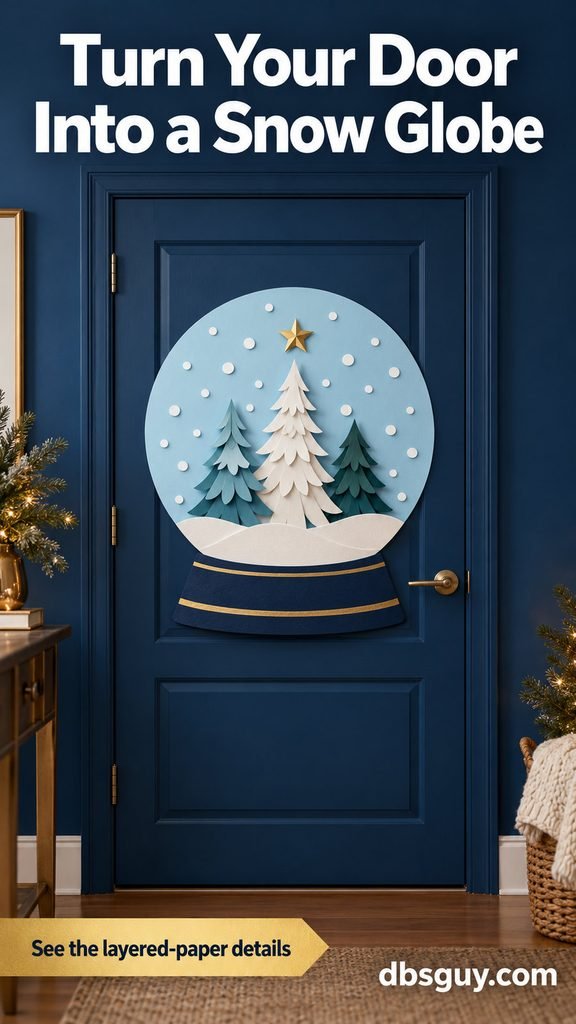
A snow globe works especially well when the contest rewards a strong overall composition. The circle becomes the focal point, while the dark space around it keeps the door from feeling busy.
Use navy backing paper, an icy-blue circle or rounded globe shape, a navy pedestal with gold paper trim, three tree silhouettes, and small white paper dots. Size the globe from the space left after marking the hardware and any required glazing; it does not need to stretch from edge to edge.
Arrange a snowbank across the lower part of the globe. Place one taller tree behind two shorter ones, then add a small gold star above them. Slight overlaps create a sense of depth without a plastic dome or projecting frame.
The detail that matters: leave some blue visible between the trees. Too many trees flatten the composition. Adhere every snow dot individually instead of adding loose glitter or confetti. If your group prefers a winter theme, this design can stay up after Christmas when the display rules allow.
3. Send Santa Down the Wrong Chimney
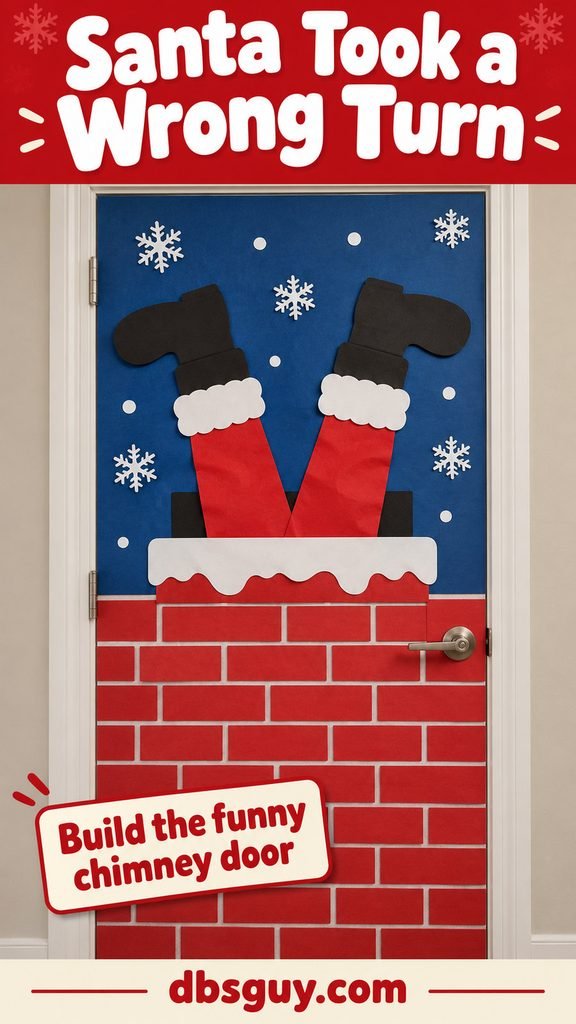
For a funny Christmas door decorating contest entry, let the picture carry the punch line. Santa’s boots sticking out of a chimney need very little explanation.
Make the lower portion of the door a flat red-paper chimney. Draw the mortar lines with a ruler, or assemble wide brick rectangles on a separate backing. A black paper opening sits at the chimney’s top. Above it, add two red trouser legs, white cuffs, and two black boots tilted slightly apart.
Keep the chimney top below the boot shapes so their position reads clearly. The image uses a blue upper background and a few snowflakes; those quiet areas help the red legs stand out.
A short caption such as “Delivery Detour” can work if your contest values humor, but it is optional. Skip a stuffed Santa or a real chimney box. Flat shapes are easier to fit around the door’s working parts, and consistent brick spacing makes a homemade entry look more deliberate.
4. Create a North Pole Mailroom
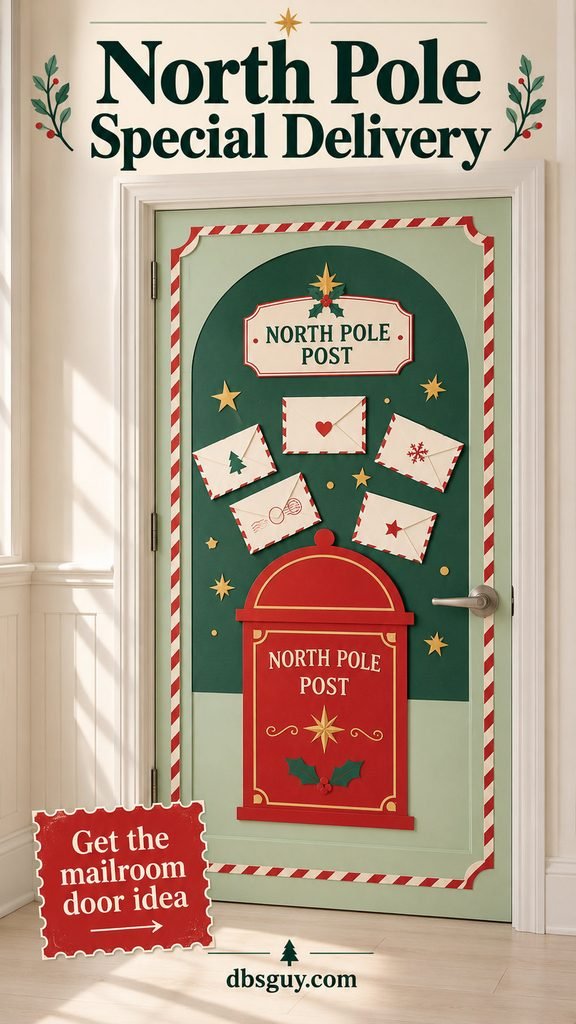
A North Pole mailroom suits an office that wants something playful with room for team participation. It also gives a classroom a natural place to display short seasonal writing.
Choose mint backing, dark green trim, a large red mailbox silhouette, and white envelope cutouts. Put the mailbox slightly below the visual center and arrange the envelopes in a loose upward fan. A simple “North Pole Post” sign is enough to identify the scene.
Make the mailbox from paper; do not cut a slot in the door or attach a heavy container. Participants can write a kind note or holiday wish on the envelope graphics before you mount them. If you want to collect actual messages, use a separate approved collection spot away from the doorway.
Repeat one envelope size and keep the striped border narrow. The red mailbox should remain the largest, clearest shape. Leave a quiet margin beside the real handle so the decoration does not visually hide how to enter the room.
5. Make a Layered Paper Christmas Tree
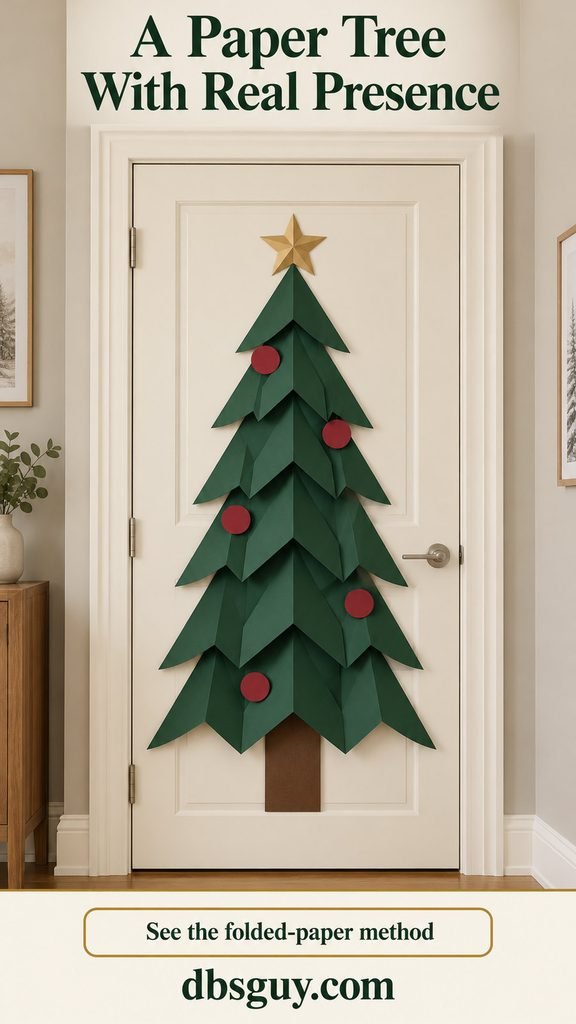
This is a good choice for a grown-up office or a contest where tidy workmanship matters more than a crowded scene. The limited palette lets the paper folds do the decorating.
Cut five green chevron-shaped tiers, increasing their width toward the bottom. Lay them on the floor first and adjust the overlaps until the outer edges form a tree. Add a small brown trunk, a gold paper star, and five burgundy circle ornaments.
Crease each tier lightly to create shallow ridges, then attach it securely to the backing. Keep the folds modest and within your building’s permitted projection. Make the ornaments flat so they do not pull the folded sections forward.
The lowest tier needs clear space around the hardware; shorten or narrow the whole tree rather than trimming an awkward hole through its shape. For coordinating crafts elsewhere in the room, these DIY paper Christmas decorations offer more ways to use a restrained paper palette.
6. Dress the Door in an Ugly Christmas Sweater
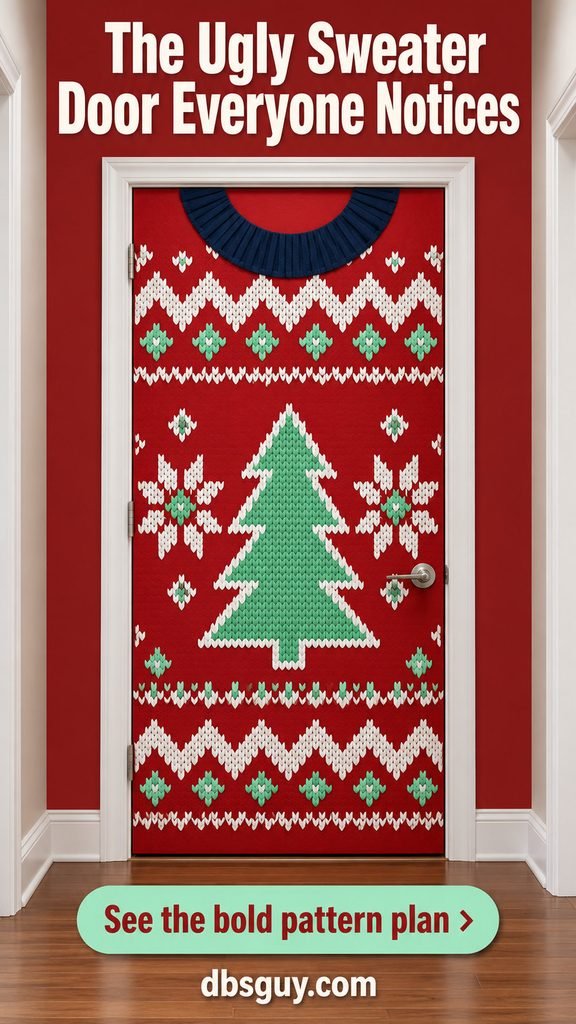
An ugly sweater door can be wonderfully loud while still looking organized. The trick is to repeat a few big motifs instead of covering the backing with unrelated scraps.
Use red paper as the sweater body. Add a dark collar graphic at the top, white zigzag bands near the top and bottom, and one large green tree in the middle. Paper snowflakes on either side give the design a Fair Isle feeling without requiring actual knitting.
Make a short pattern sample before cutting every piece. Fold paper strips to help repeat the same zigzag spacing, and draw a faint center line on the backing so the tree and collar align.
Invite contributors to decorate identical ornament circles if participation counts in your contest. Keep their additions inside a planned band so the main pattern survives. There is no need to add sleeves outside the door or hang a real sweater over it—the rectangular door can carry the joke on its own.
7. Open a Peppermint Sweet Shop
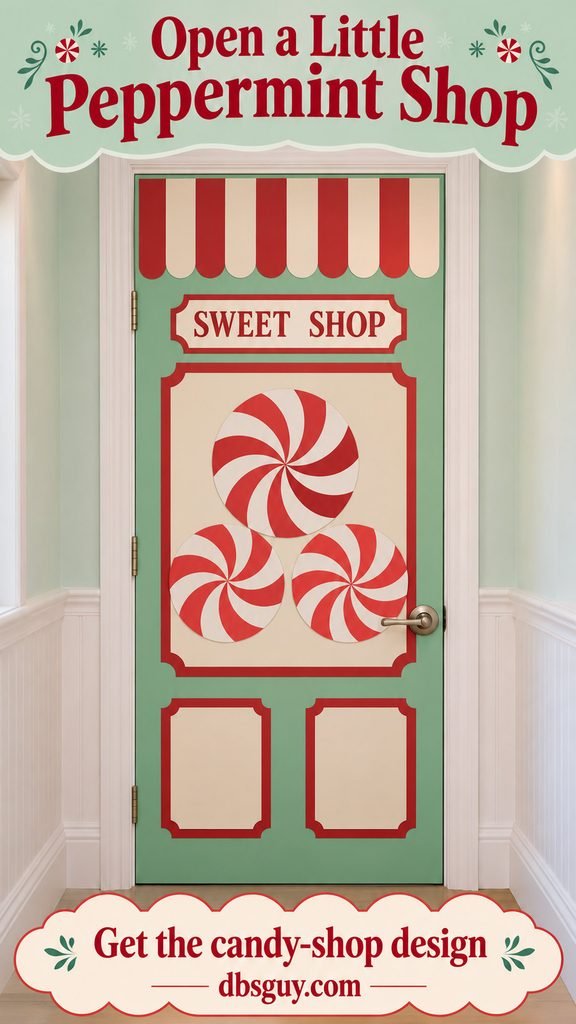
The peppermint shop is brighter and more graphic than the brown-paper bakery. Choose this version if you love crisp red-and-white stripes and want a cheerful storefront look.
Cut a flat striped awning shape for the top of the permitted display area. Beneath it, add a cream display-window rectangle with a narrow red outline. Three large peppermint disks fill the window; a mint background gives the white shapes enough contrast.
To make a swirl, start with a white circle and add evenly spaced red curved wedges that meet near the center. Trace one finished circle to keep the three disks consistent. Avoid wrapping them in loose cellophane; the printed candy shapes already communicate the theme.
Keep the awning flat against the backing rather than projecting over the doorway. If you want to carry the palette into a separate outdoor display, see these Candy Cane Lane outdoor Christmas decor ideas. Use materials suited to each location.
8. Build a Storybook Christmas Fireplace
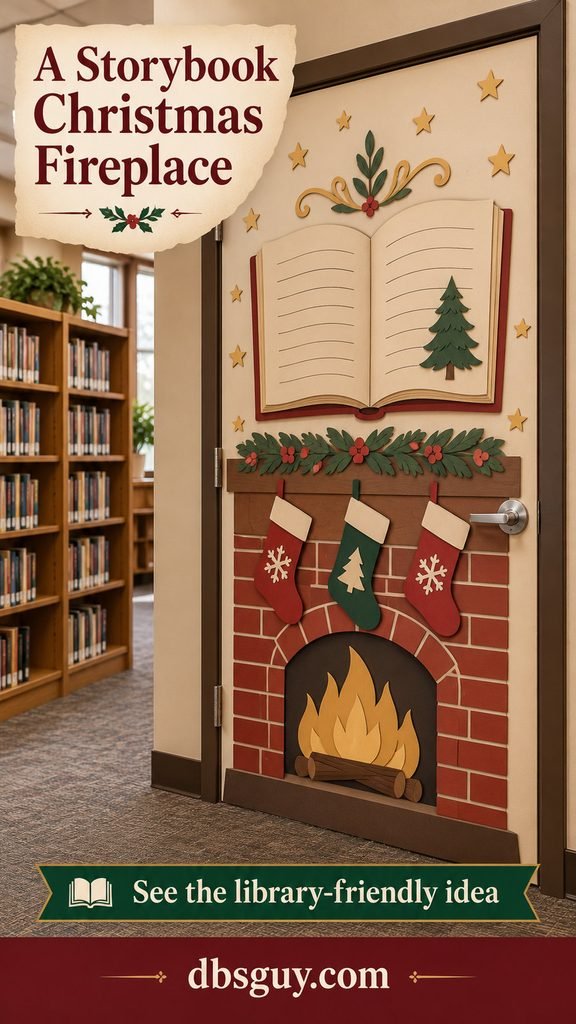
For a library, reading classroom, or book-loving office, combine a Christmas fireplace with one oversized open book. The book makes the design feel connected to the room behind the door.
Use ivory backing, a low brick-paper fireplace, a brown mantel strip, three stocking shapes, and an open book cut from cardstock. The fire is simply a flat illustration made from gold and orange paper. There are no candles, heaters, or decorative lights in this design.
Place the book above the mantel and keep its pages mostly quiet. A small tree illustration and a short phrase such as “A Cozy Christmas Chapter” will read more clearly than paragraphs of miniature writing. Use fresh craft paper rather than tearing up library books.
Participants can recommend favorite books on small matching cards placed in an approved nearby display. Keep the door itself focused on the book, stockings, and fireplace. Use paper shading for the mantel’s depth instead of building a shelf that projects into the hall.
9. Let One Giant Reindeer Fill the Door
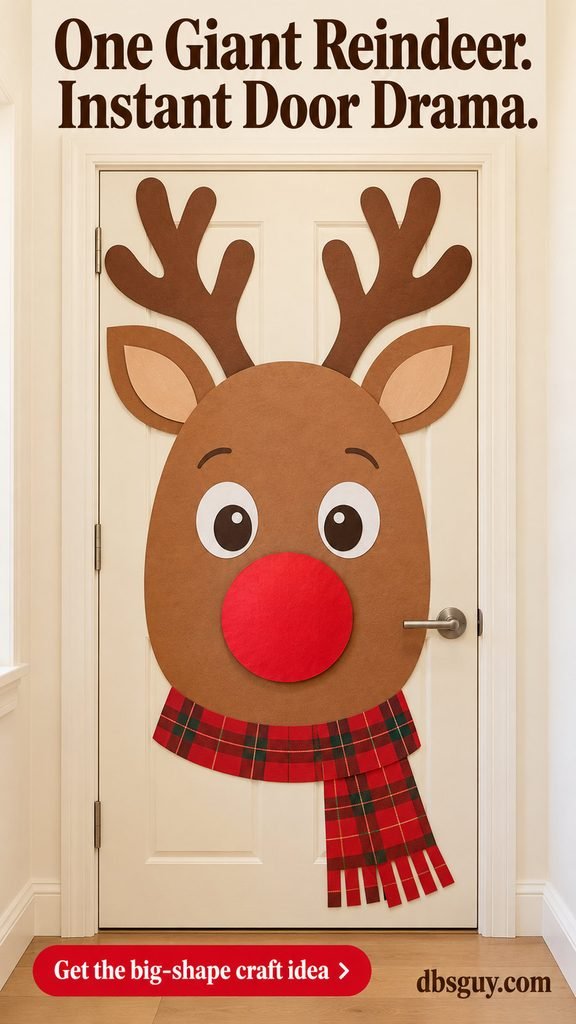
If you are short on cutting time, one oversized character is easier to organize than a detailed village. A reindeer gives you a strong face, a few large pieces, and an obvious holiday connection.
Start with a large brown oval, two ears, two branching antlers, two eyes, and one red circle for the nose. Cut a scarf from tartan-patterned paper, or build a check pattern from red and green strips. A cream backing keeps the antlers visible.
Lay out the face before attaching it. Move the eyes and nose around until the expression feels friendly, then photograph the arrangement from above so you can rebuild it on the door. Keep both antlers completely inside the permitted area.
For a group touch, add small paper ornaments to the antlers without hiding their outline. First names or initials should be optional and follow your school or workplace privacy rules. The reindeer remains the star even if you leave the ornaments off.
10. Send a Christmas Train Across the Door
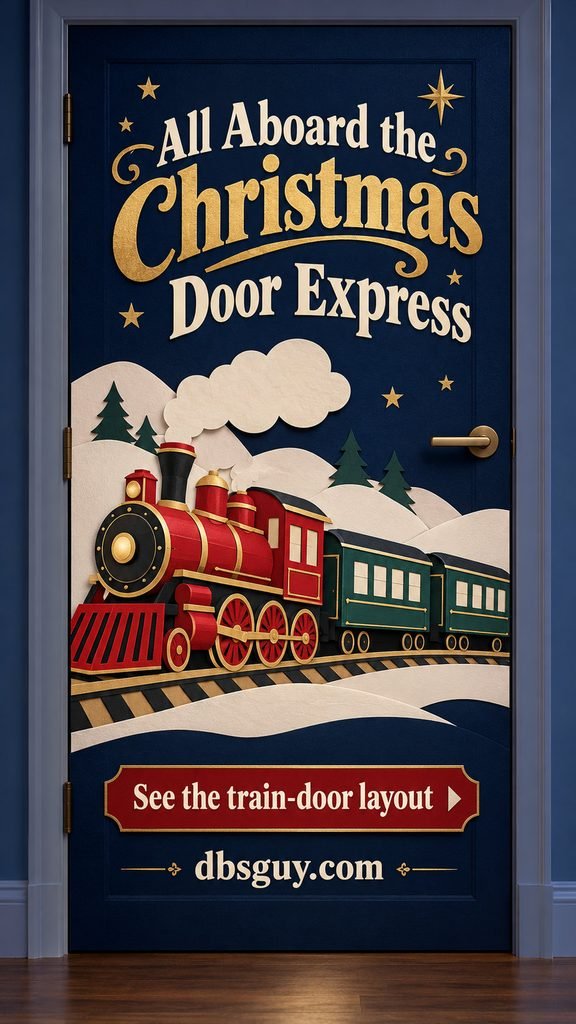
A Christmas train is a useful choice when your class or team wants to contribute to one shared scene. Each person can help with a window, a snowbank, or a piece of the landscape.
Build an original red locomotive and two green passenger cars against a navy sky. Keep the train in side view so the wheels and car connections are easy to recognize. Add white hills behind it and a curved paper track below.
On a narrow door, make a paper mockup of the entire train first. Shorten the passenger cars or use fewer windows before reducing every detail to a tiny size. The engine should still be the main shape. Passenger windows can hold simple drawings or approved photos, but obtain permission before displaying recognizable people.
Use your own train design and a short heading such as “All Aboard for Christmas.” You do not need movie logos or characters. Keep the track on the door face rather than continuing it onto the floor or across the frame.
11. Throw a Paper Penguin Party
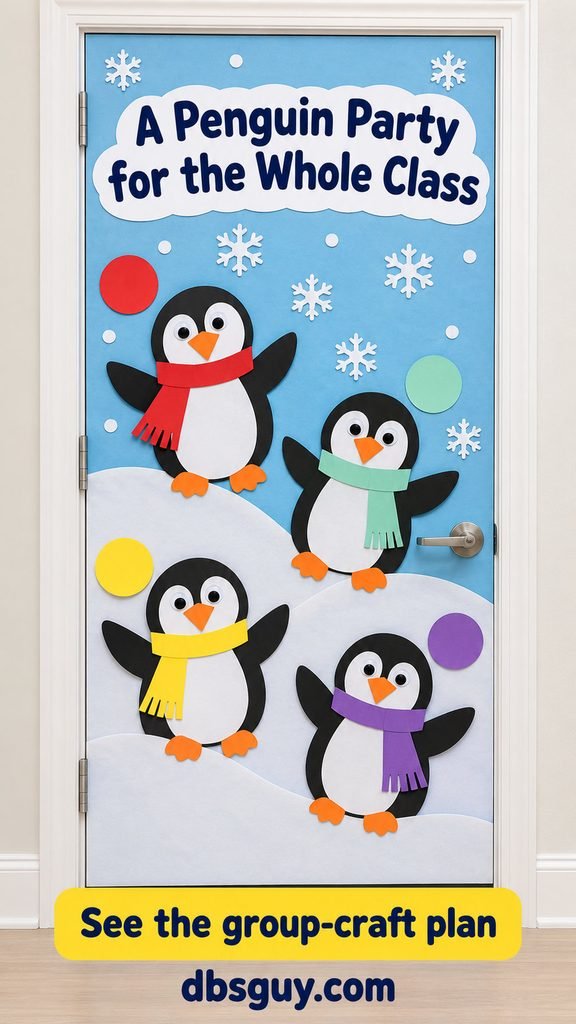
A penguin party gives younger contributors an approachable task: decorate one character. It also works for a winter door contest that does not require explicitly Christmas imagery.
The concept image uses four penguins across curved snowbanks. For a larger group, give several people parts of each penguin, or use smaller shared designs after checking the available space. Keep the finished characters large enough to read from the hallway.
Make one body template and one white belly template. Contributors can choose a scarf color, expression, or small paper accessory. Assemble each penguin on the table before mounting it, checking that the orange beak and feet remain easy to see.
Use icy-blue backing and a few white snowflakes to tie the characters together. Keep one or two penguins slightly higher on a higher snowbank so the arrangement feels lively. If names are included, put them on matching circles beside the figures; long labels can overwhelm a small character.
12. Turn the Door Into One Giant Gift
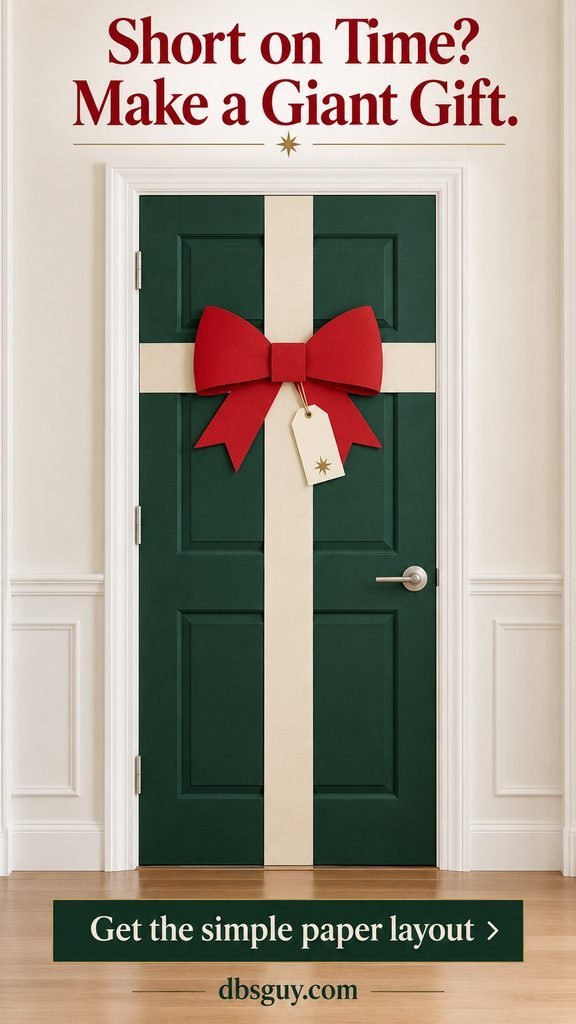
This is the strongest starting point when judging is close and your supply list needs to stay short. One backing color, two contrasting strips, and a big bow shape can make a complete design.
Cover only the approved area with deep green paper. Cross an ivory vertical strip with a horizontal strip, placing their intersection above the handle. Add a red paper bow with two loops and short tails, plus a small cream tag.
Keep every strip on the door face; do not wrap ribbon around the door edges or through the hinge side. A flat bow is easier to accommodate than a thick fabric bow, especially where clearance is limited. Neat, straight strips matter more here because the design has so few elements.
Try a short tag message such as “Wrapped in Team Spirit.” For a separate home-entrance project with room for a fabric bow, this oversized Christmas front door bow guide explains that different approach.
13. Make a Door-Height Nutcracker
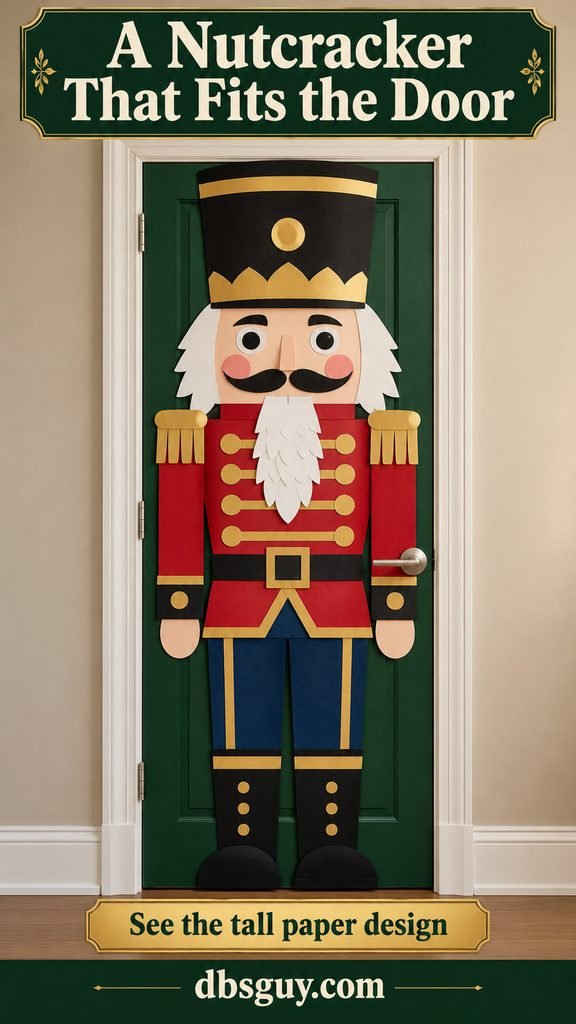
A nutcracker takes advantage of the door’s vertical proportions. Its hat, face, jacket, trousers, and boots form a clear sequence, so you can build it from simple shapes rather than one complicated drawing.
Choose black paper for the hat and boots, peach or another chosen skin tone for the face, white for the beard, red for the jacket, and navy for the trousers. Thin gold strips create the jacket braid. A dark green background frames the figure.
Mark a center line on the backing and arrange the major shapes before gluing. Reserve more space for the face and jacket than for tiny hat details. Keep the eyes level and the jacket braid evenly spaced; these repeated lines make a visible difference.
Adjust the figure’s width so a full hand can reach the real handle without brushing the craft. All pieces stay flat and inside the permitted display area. An oversized hat can be dramatic without extending above the door or covering its identification sign.
14. Make an Oversized Hot Cocoa Mug
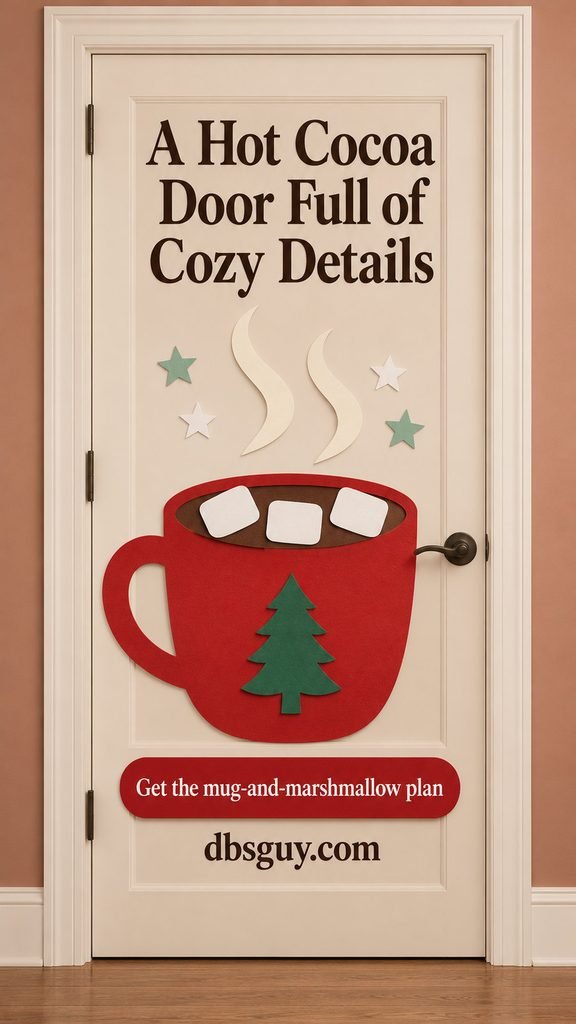
A cocoa door brings a softer, café-like mood to the contest. The design is friendly enough for a classroom and simple enough for a staff room.
Cut one oversized red mug with a loop handle on the side that leaves your real door hardware clear. Add a dark brown oval for the cocoa, three white marshmallow shapes, and two pale steam curls. Warm cream backing, blush accents, and a few mint stars keep the palette cozy without making everything brown.
Draw the mug on scrap paper first, including its handle. The handle needs enough open space to read as a loop. Make the steam curls broad rather than string-thin so they are easier to cut and secure.
Use flat white paper for the marshmallows; loose cotton and actual sweets are unnecessary. A short heading such as “Warm Wishes” can sit above the steam. If your team wants a real cocoa gathering as well, arrange it separately from the door display so supplies and spills stay out of the entrance.
15. Create a 24-Day Kindness Countdown
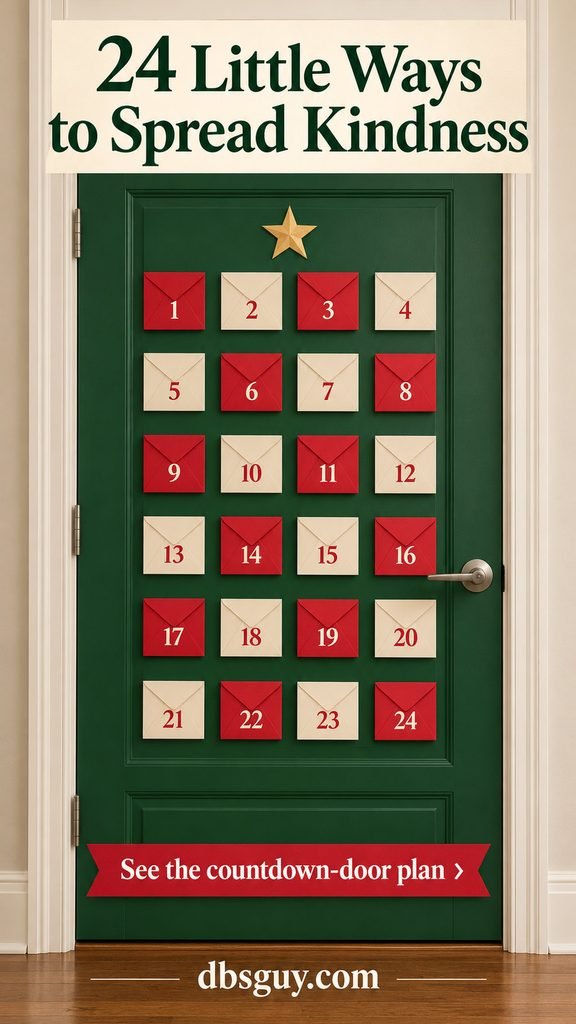
A kindness countdown gives the door something to offer after judging day. Each numbered envelope can reveal one small action: thank a helper, invite someone into a game, or write an encouraging note.
The concept uses 24 lightweight envelopes in four columns and six rows. Measure the available rectangle first. To size each envelope, subtract the three planned column gaps from the usable width and divide by four. Do the same with the height, allowing five row gaps, then divide by six. Leave additional clearance wherever the handle requires it.
Use alternating red and cream envelopes on green backing, with bold numbers and one gold star above. Keep the contents to one small paper slip per envelope, and check that the envelopes and attachments remain secure.
For a school or office closing before December 24, choose 12 or the number of remaining attendance days instead. Keep participation optional and open the day’s envelope when the doorway is quiet. Do not store gifts, food, or heavy objects in the display.
24 simple kindness prompts for the envelopes:
- Thank someone who helps your group.
- Compliment someone’s effort.
- Invite someone to join an activity.
- Write a short encouraging note.
- Return a borrowed item.
- Tidy a shared supply area.
- Listen without interrupting.
- Give credit for a good idea.
- Offer help with a small task.
- Welcome someone new.
- Leave a shared space neater.
- Ask someone about their interests.
- Celebrate another person’s progress.
- Share a useful tip.
- Let someone else choose the activity.
- Thank the person who cleans your space.
- Include a quieter voice in a discussion.
- Make a cheerful bookmark to give away.
- Replace a critical comment with encouragement.
- Be patient when someone needs more time.
- Make a thank-you card for a support worker.
- Help put away shared materials.
- Notice and mention a kind act.
- Choose one kind habit to continue.
Give Your Entry a Stronger Finish
Once the main scene is in place, pause before adding more. A few careful adjustments usually help more than another bag of decorations.
- Check the actual rubric. If participation is scored, show how the group contributed. If the theme is specified, make the connection obvious.
- Look from the judges’ approach. Stand where they will first see the door. Can you recognize the main shape and read the short heading?
- Clean up the edges. Trim ragged backing, straighten repeated shapes, and secure curling corners with the approved method.
- Test the finished door. Confirm it opens, closes, and latches normally, with the handle, glazing, signs, and required labels clear. Recheck after daily use.
- Plan removal. Save reusable cutouts, follow the attachment maker’s removal instructions, and meet the organizer’s cleanup deadline.
For a group build, divide the work into backing, main shapes, lettering, and final assembly. One person should compare the finished pieces with the sketch before mounting them. That keeps a collaborative door from looking like several unrelated projects.
Christmas Door Decorating Contest FAQs
What makes a Christmas door decoration more competitive?
A clear theme, readable focal point, neat construction, and a good fit with the published rubric give judges something specific to assess. Group involvement matters when the contest rewards it. No particular theme or amount of spending guarantees a win.
Which idea is easiest on a small budget?
The giant gift and reindeer use relatively few large shapes. Check your shared supply cupboard before shopping, and compare the full materials list rather than the price of one item. You can omit a backing sheet if the existing door color works and the building permits individual cutouts.
What if the door has a window?
Keep required glazing clear. Sketch its exact position before choosing a design, then arrange separate shapes around it. Do not treat a real vision panel as a place for a decorative paper window. If the approved space is too small, put the full scene on a permitted display board instead.
How do I attach decorations without damaging the door?
There is no tape that is guaranteed safe on every finish. Ask which attachment methods the owner permits, check the product’s surface restrictions, and test only where the owner allows. Avoid staples, nails, and hot glue directly on the door. Follow the product’s application and removal instructions.
Can these designs work without lights or expensive props?
Yes. All 15 concepts can be built with unlit paper graphics. Strong contrast, generous shapes, and tidy lettering provide the effect. Ask about material restrictions even when the pieces are lightweight; paper is not automatically permitted on every door.
Can I use the same paper designs outdoors?
Ordinary craft paper and indoor attachments are poor starting points for exposed weather. Re-create the visual idea with materials and fixings intended for that location, and check wind, moisture, and door-clearance requirements. For an indoor contest, keep the paper version indoors.