
For easy January nails, choose a base color you already like and give it one small detail: a navy dot, a flat star, a little glitter, or a change of finish. You can keep the nail art on one finger instead of designing an entire set.
These 13 ideas show exactly where the detail belongs and how to approach it with regular nail polish. Dots, flat stickers, glitter, and brush-on finishes are the less fiddly starting points. Fine tips and curved edges ask for a steadier hand.

The visuals are AI-generated nail-design concepts for dbsguy.com. Use them as placement and color references; they do not document completed manicures or product tests.
Choose the Detail You Want to Make
- Prefer the bottle brush? Start with the glitter corner, matte cocoa accent, or pearl-blue finish.
- Have a dotting tool? Try the navy dot or the three-dot snow accent.
- Want to skip drawing? Choose a small flat star or gold-fleck nail sticker.
- Enjoy careful edges? Try the silver stripe, micro French, half moon, or cobalt corner.
Have your base color, the one accent product, a suitable base coat and finishing coat, and the relevant small tool ready. These are design suggestions, not a reason to buy thirteen different kits. Remove old polish, tidy snags with a nail file, and follow your products’ preparation instructions.
Apply thin coats as directed and allow the recommended drying time before adding art. There is no single waiting time that fits every formula, layer thickness, or room. The small detail reduces the drawing; it does not remove the drying time.
1. Milky Pink With a Tiny Navy Dot
A single navy dot gives milky pink a little definition without filling the nail. Repeat it near the base of each nail, with a visible gap from the cuticle. On short nails, the contrast does more work than the size of the dot.
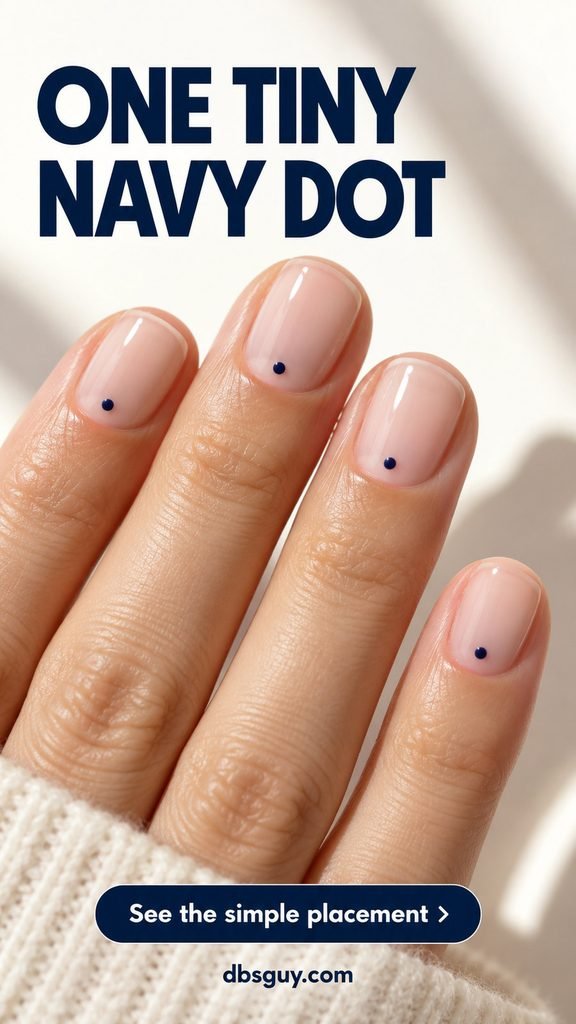
Put a drop of navy nail polish on a disposable palette. Dip a small dotting tool into it, then touch it straight down onto the dry pink base and lift. Make a practice dot on a nail swatch first so you can judge the pressure. A blunt toothpick can make a small dot, too; keep its point away from your skin.
If repeating the placement feels fiddly, decorate only the ring nail on each hand. Keep the dots small rather than adding more to balance a large one.
2. Slate Blue With One Silver Side Stripe
This is a good choice when you want something graphic beside a gray sweater or a silver watch. Keep the set slate blue and put a narrow silver stripe just inside one side of the ring nail. Blue should remain visible on both sides of the line.
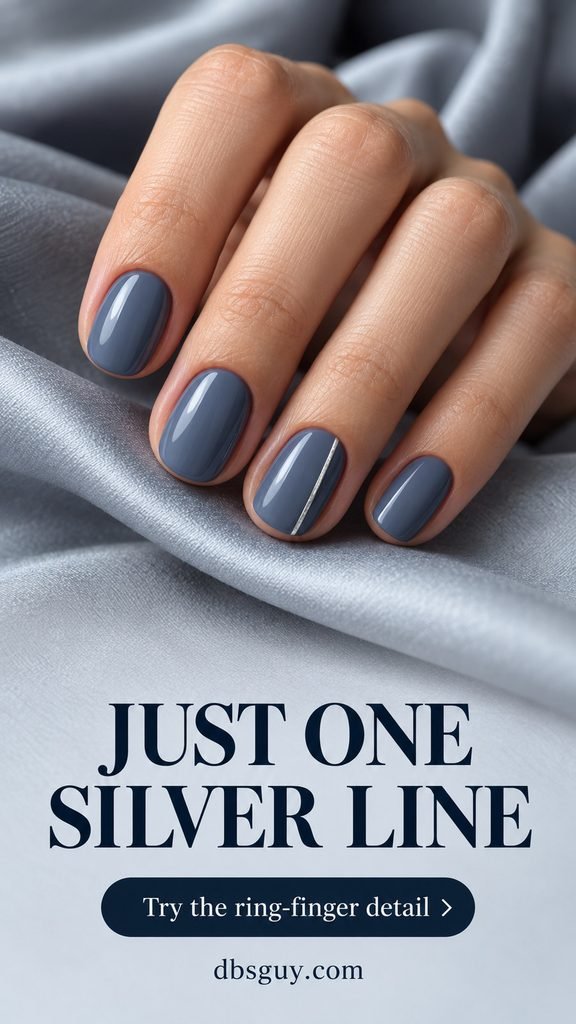
Rest your painting hand on the table and use a fine nail-art liner brush with a small amount of metallic nail polish. Start just above the cuticle and draw one vertical stroke toward the free edge. Keep it inside the side border rather than tracing the whole nail.
A pre-cut flat silver nail strip is another option if you prefer placement to painting. Follow its application and sealing directions, and trim it so neither end hangs over the nail. Fine linework takes more control than the dot in idea 1.
3. Sheer Blush With the Narrowest White Tips
A thin white edge gives sheer blush a crisp finish that works after the holiday decorations come down. Keep the pink translucent and the white band narrow, especially on a short rounded-square shape. A broad tip changes the proportions.
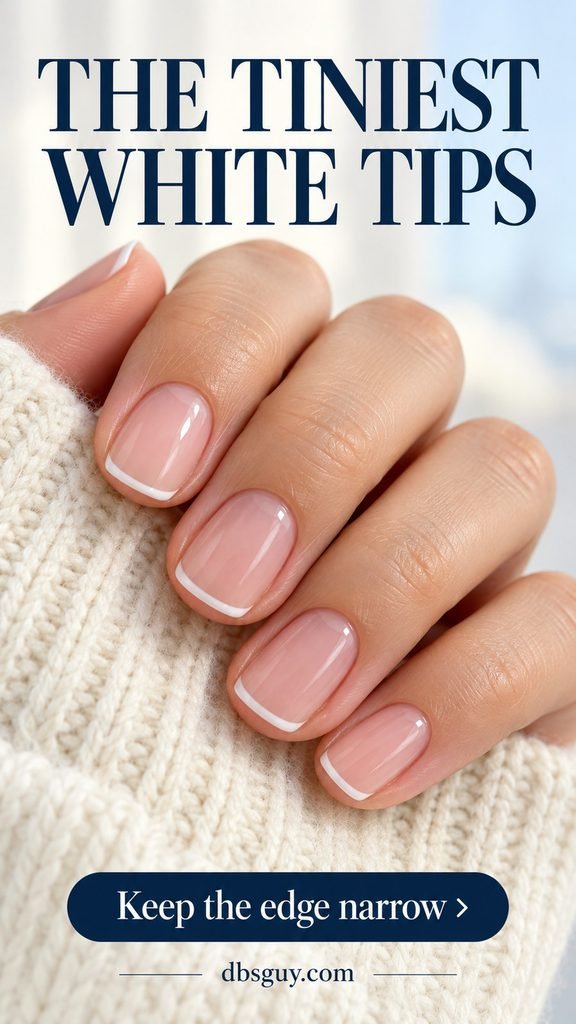
With a lightly loaded detail brush, paint a small white curve along the free edge. Start with the amount of white you want to see rather than automatically covering the entire natural tip. Work on one accent nail first if matching ten curves feels ambitious.
French guides can help, but they need a base that is dry enough for adhesive contact. Follow the guide and polish directions; touch-dry polish may still mark when a sticker is pressed onto it. If you want the least precision work, choose the pearl accent in idea 13 instead.
Also Read: 21 Short December Nail Ideas That Make Tiny Details Stand Out.
4. Midnight Navy With One Flat Silver Star
One star is enough to give navy nails a winter-night feeling. Choose a small silver nail sticker that fits comfortably in the center of the ring nail, with dark blue showing around every point. Leave the remaining nails plain.

Use a flat nail-art sticker rather than a raised charm for this version. Apply it when the base is ready according to the sticker directions, press the points down gently, and seal as instructed with a compatible finish. An edge that extends onto skin or beyond the tip needs a smaller sticker.
This option lets you skip drawing tiny points with your nondominant hand. Check the sticker against your actual nail before painting; a star that looks small on the sheet can still crowd a narrow pinky nail.
5. Mushroom Taupe With a Champagne Glitter Corner
Use a small glitter patch when a perfectly straight metallic line feels like too much work. The reference keeps mushroom taupe as the main color and gathers fine champagne sparkle at one base corner of the ring nail, with a clean gap from the skin.
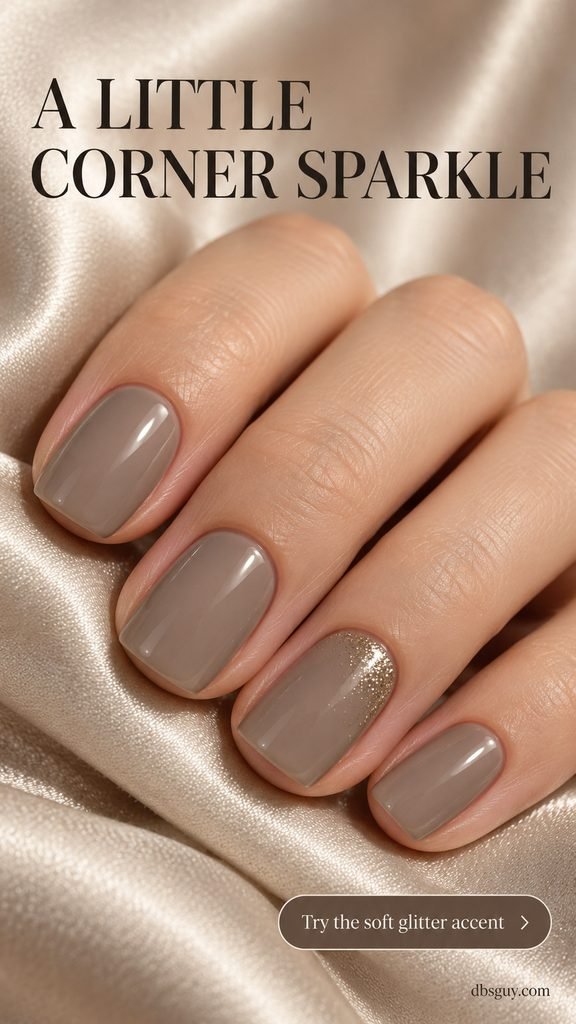
Wipe most of the glitter polish from the brush, then dab a little onto the corner. Leave gaps between the sparkling pieces and stop while the patch still looks small. A loose border suits this design, so there is no need to make a complete glitter crescent around the base.
Choose a glitter polish made for nails and finish according to its directions. Fine sparkle gives a softer effect than large sequins. Let the product do the decorating; adding a star or a stripe would hide the simplicity of the corner placement.
6. Glossy Cocoa With One Matte Nail
You can change the finish without buying a second color. Paint the whole set cocoa brown, then make only the ring nail matte. The glossy nails catch a clear reflection while the matte accent looks softer.
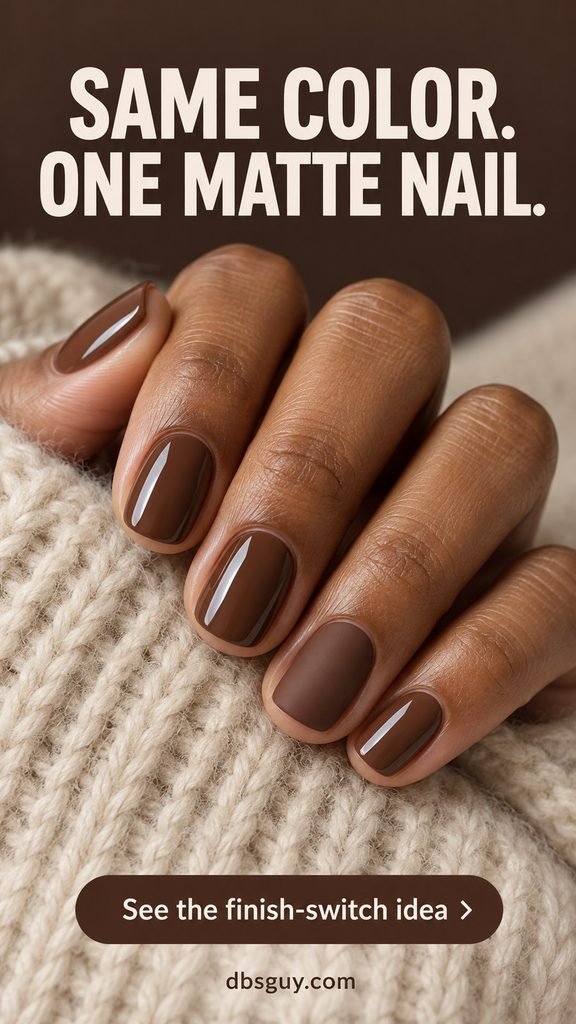
Use compatible regular-polish products and apply each finishing coat according to its label. Put glossy top coat on the plain nails and the appropriate matte finishing coat on the accent. Some matte products have their own layering requirements, so check those before starting.
Keep the final finishes separate. Brushing a glossy coat over every nail afterward would cover the matte effect you chose. This is one of the more manageable options if you like a small change but do not want to draw, place a sticker, or attach an embellishment.
Also Read: 15 Simple December Nails That Look Polished With Minimal Effort.
7. Creamy Ivory With a Small Icy-Blue Half Moon
A small blue semicircle at the base of one ivory nail brings in a wintry color without making the entire manicure blue. Keep the curved edge low on the ring nail, leaving most of the ivory uncovered.
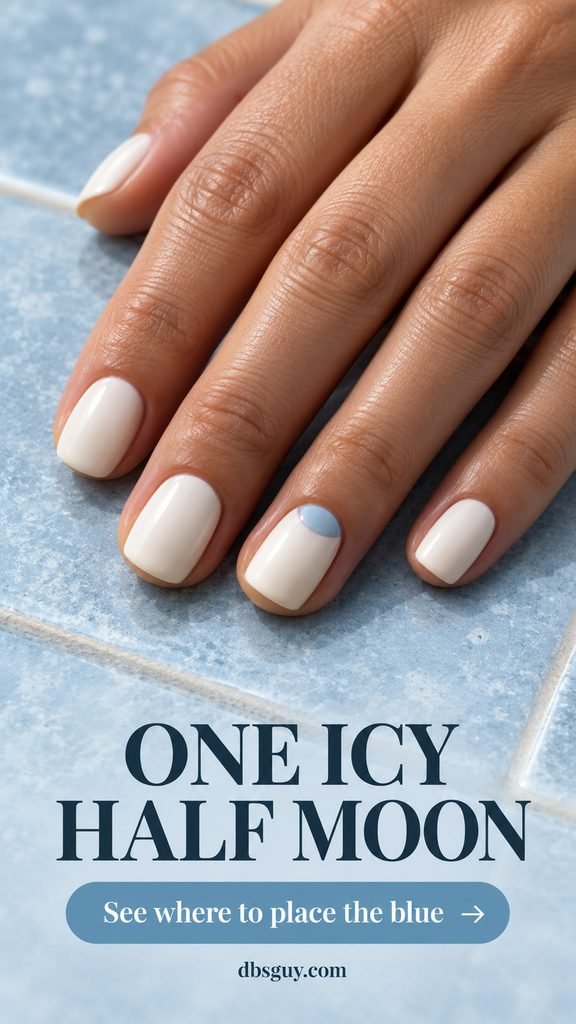
On a dry ivory base, use a small rounded nail-art brush to paint a shallow filled half circle near the cuticle. Leave a narrow gap from the skin. Start smaller than you think you need; enlarging the curve is easier than removing blue from the ivory.
A curved manicure guide can help if it is designed for this placement, but only apply it over a suitably dry base. This design needs more edge control than glitter or a finish change. Try one practice nail before committing to both hands.
8. Muted Sage With One Gold Fleck
Sage feels quiet beside cream knitwear, and one irregular gold fleck adds a warm point of light. Put the fleck slightly off center on the ring nail. It should occupy only a small part of the green surface.
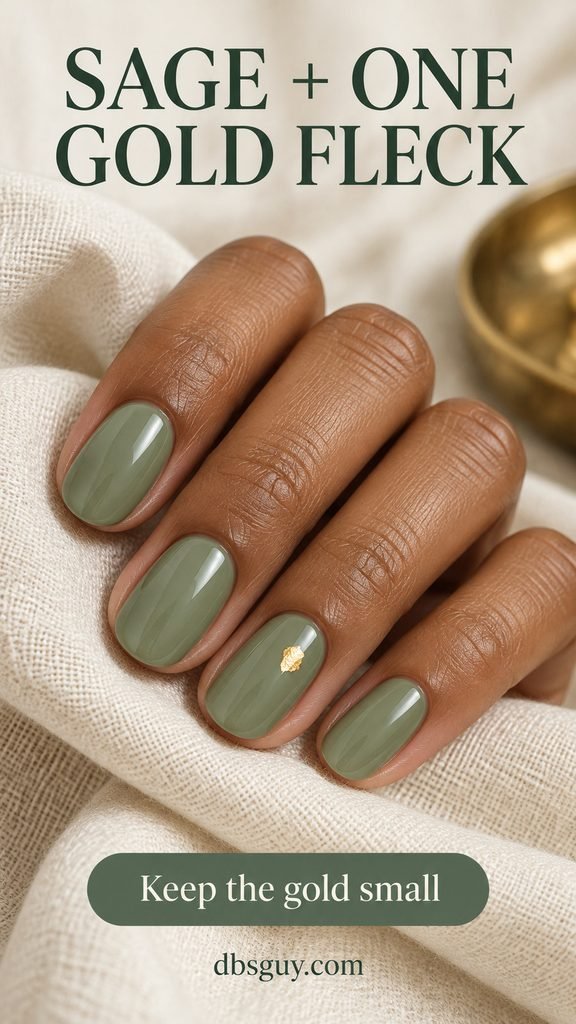
For the simplest home version, choose a tiny flat gold nail-art sticker with an irregular shape. Apply and seal it according to its directions. If you use loose nail foil instead, follow that product’s attachment system; transfer foil and loose flakes are not necessarily applied the same way.
Keep the other nails solid sage. At a salon, ask for one small, flat gold fragment without marble veins or an extra metallic border. The open green space is what makes this version feel restrained.
Also Read: 15 Elegant January Nail Art Ideas to Pair With Your Winter Jewelry.
9. Lilac With a Three-Dot Snow Accent
Three white dots can suggest snow without requiring a miniature snowflake. Cluster them loosely near one side of a lilac ring nail, leaving small lilac spaces between them. The surrounding nails stay plain.
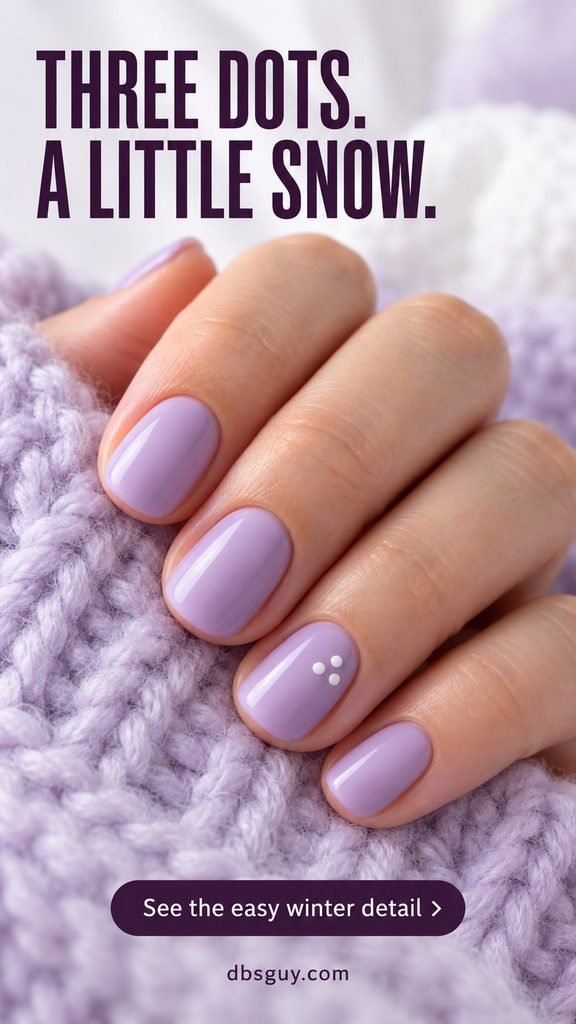
Use white nail polish and a small dotting tool on the dry base. Place the three dots as a relaxed triangle rather than a straight row. You can vary their size slightly, but avoid letting them touch; joined dots will read as one white blob.
This differs from the navy-dot manicure in idea 1: the decoration is a little grouped motif on one nail, rather than a repeated mark across the hand. It is a useful choice when you want a recognizable winter reference on very little nail space.
Also Read: 23 Winter Nail Designs: Snowflakes, Chrome and Cozy Knits.
10. Dusty Rose With a Tiny Burgundy Heart
A burgundy heart on dusty rose brings warmth to January without a full Valentine manicure. Center one small heart on the ring nail and leave the other nails glossy rose. The deep red gives the motif definition without a black outline.
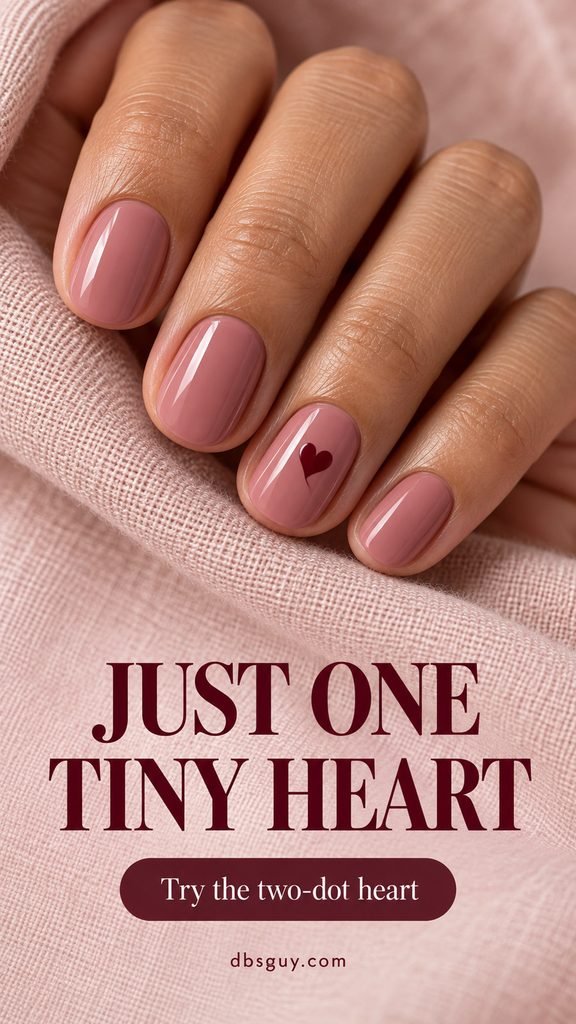
To paint it, place two small burgundy dots close together on the dry base. While those dots are still workable, use a fine nail-art brush to draw their lower edges toward a shared point. Practice the shape on a swatch first; too much polish makes it harder to keep the point clear.
If drawing the second hand is frustrating, use a small flat heart nail sticker in the same color. Pick one method for the accent and skip extra hearts around it.
11. Oatmeal With a Tiny Black Plus Sign
For a clean geometric detail, put one small black plus sign on an oatmeal ring nail. The warm pale base gives the black mark enough contrast to stay small. This works especially well if you prefer graphic shapes to winter motifs.
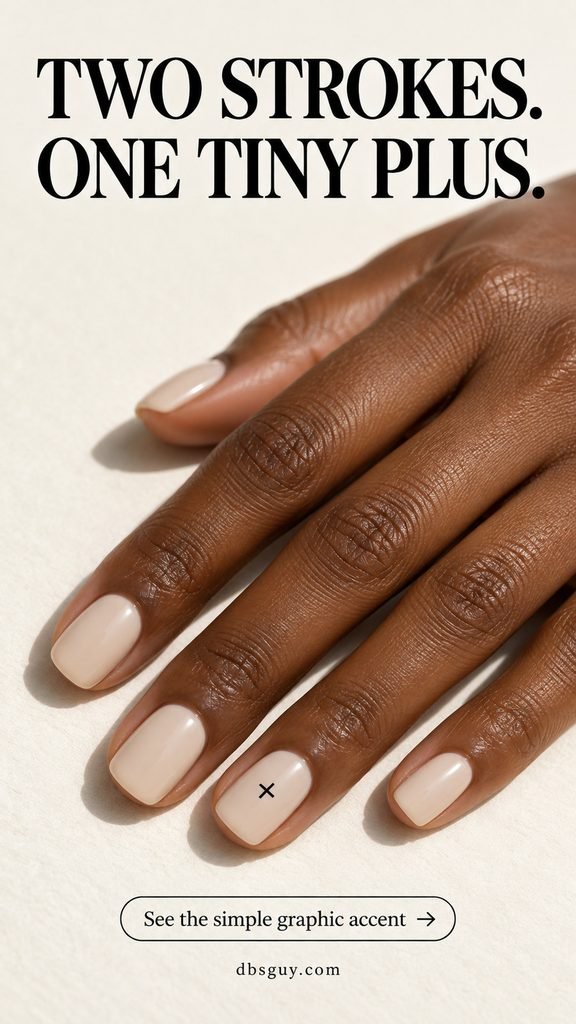
Use a fine liner brush to make one short vertical stroke, followed by a matching horizontal stroke through its center. Keep the brush lightly loaded so the intersection does not become a thick spot. Practice the two strokes before painting the accent.
Leave space around all four arms of the plus. If you keep widening it to correct the edges, stop and redo that accent rather than turning a tiny mark into a large cross. A flat geometric nail decal offers a placement-based alternative.
12. Pale Gray With a Cobalt Corner
A little cobalt wedge gives a pale-gray manicure a stronger flash of color. Place it at one base-side corner of the ring nail, keeping the blue to less than a quarter of that nail. The reference leaves the center and tip gray, with blue tucked against the curved side near the cuticle.
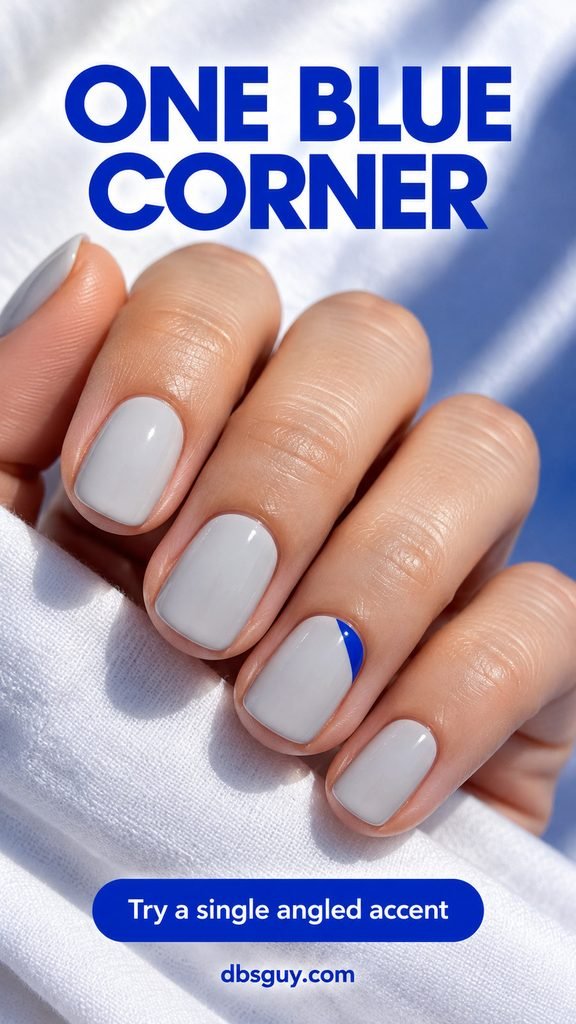
Use a small flat nail-art brush to paint one short angled boundary, then fill the little corner beyond it without touching the surrounding skin. Rest both hands on the table for support. A guide can make the boundary straighter, but use one only when the base is ready for adhesive contact.
You do not need matching blue tips on the other fingers. Keeping the accent to one nail makes the color easier to try and gives you just one angled edge to manage per hand.
13. Icy Blue With One Pearly Accent Nail
If your favorite tool is the polish bottle’s own brush, try this finish change. Keep the set icy blue and add a fine pearlescent lacquer or compatible sheer pearl topper to the ring nail only. The accent should glow softly while the blue remains visible.
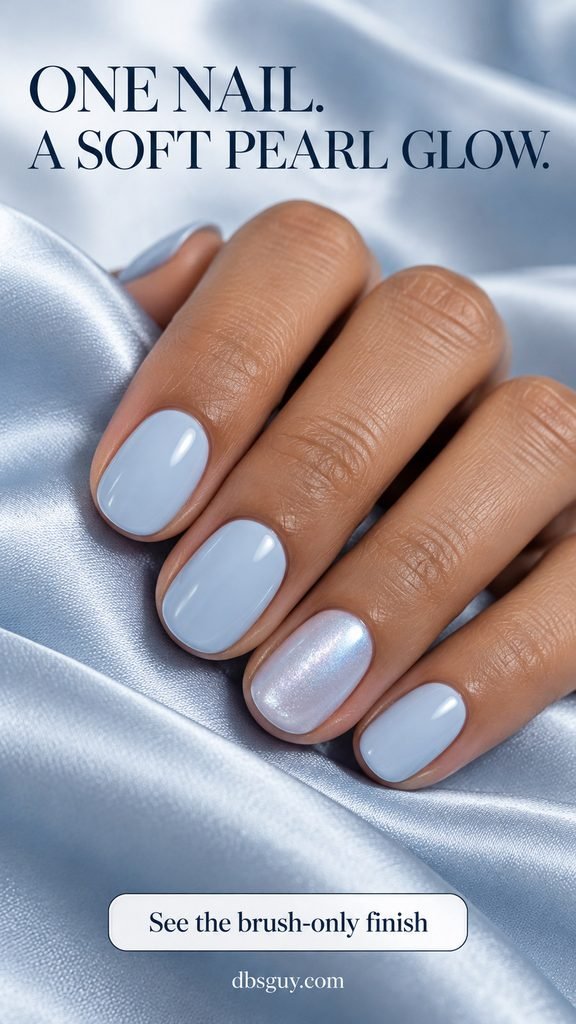
Check the pearl product over your chosen blue on a swatch first. An opaque white pearl can cover the base entirely, while a sheer topper lets more of the color show through. Follow the products’ layering and drying instructions.
There is no need for chrome powder, a magnet, or raised decorations in this version. Ask for a regular-polish pearl interpretation if that is the system you use; a mirror glaze reference may involve different materials and give a different reflection.
Also Read: 21 Blue December Nails From Icy Pastel to Midnight Navy.
Finish the Detail Before Adding Anything Else
Look at the accent at a normal viewing distance. Can you see the dot, corner, or little shape clearly? If so, leave the surrounding nails plain. Extra decoration is not necessary to make the manicure feel complete.
Let painted art dry as directed before sealing it, and use a compatible finishing coat with a light hand so you do not drag the design. Stickers and foils may have different sealing instructions. Keep a matte accent separate from a glossy final coat.
For everyday nail care, the American Academy of Dermatology’s manicure guidance recommends moisturizing nails after polish removal and avoiding cutting or forcefully pushing back cuticles. You do not need to remove the cuticle to make room for these accents; keep the decoration on the nail with a visible skin margin.
Questions About Easy January Nail Art
Which idea is easiest if I have never painted nail art?
Start with a brush-on finish: the matte cocoa ring nail or the pearl-blue accent. A loosely dabbed glitter corner is another option because it does not need a crisp border. If you want a small drawn mark, practice the single dot before trying a curve or French tip.
Can I do these on very short natural nails?
Yes, adapt the detail to the available space. A tiny dot, small sticker, or finish change needs little room. Keep a French edge narrow, and check that a star or heart fits fully inside the nail. If a motif looks crowded, decorate only one nail rather than shrinking several shapes into it.
Do I need gel polish or a UV lamp?
The home versions here are planned around regular nail polish and compatible nail-art products. Follow each product’s label; a product labeled as gel may require a specific curing system. Do not substitute gel into a regular-polish routine without checking what it needs.
How do I keep the second hand manageable?
Use the same base color on both hands and limit the art to a ring-finger accent. Rest your hands on a stable surface. A flat sticker or a brush-on finish can replace a painted motif if working with your nondominant hand feels awkward.
What should I ask for at a salon?
Show one reference and name the base, detail, placement, and finish: for example, “Short slate-blue nails, one thin silver side stripe on each ring nail, and a glossy finish.” Say which nails should stay plain. That is more specific than asking for a general January manicure.