
Choose milky white for a sheer, soft finish, ivory for a warmer cream, or bright snow white for crisp coverage. Once you have that base, decide whether you want a plain manicure, a French edge, a little winter artwork, or a reflective party detail. That choice makes a white December manicure much easier to plan.
These 19 ideas move from milky shades to bright white, with specific ways to request each look and adapt the details to your nail length. For a simple home manicure, start with a solid shade or snowfall dots. For a seamless ombré, a powder glaze, or raised knit texture, discuss the reference with your nail artist.
The visuals are AI-generated design concepts, not photographs of completed salon work or product wear tests. Use them to discuss color, placement, and finish; actual results will vary.

Choose Your White Before the Nail Art
Coverage and undertone are separate choices. A milky polish lets some natural nail show through. An opaque cream covers it. Either can look warmer or cooler, so compare swatches instead of relying only on a shade name.
Look at a swatch beside your hand in daylight and ordinary indoor light. Then choose the surface: gloss gives clear reflections, pearl adds a luminous sheen, glitter shows separate reflective particles, and matte reduces shine. Keep your usual comfortable length and simplify artwork to fit it.
1. Sheer Milky White on Short Squoval Nails
A translucent milky white is the softest starting point in this collection. The natural pink of the nail still shows through, so the result looks lighter than an opaque white cream. Short squoval edges keep the shape tidy without needing a pointed tip.
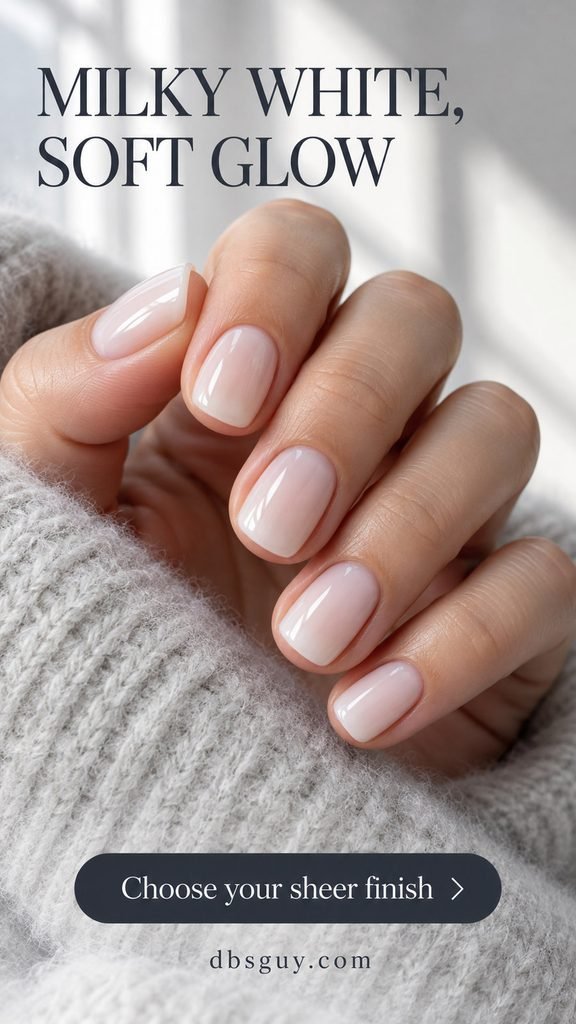
Ask for a sheer white with a glossy finish and show how much natural nail you want visible. If you dislike seeing the free edge, compare a more opaque swatch before painting begins. Adding more layers of a sheer formula is not always the best route to solid white; choosing the right coverage first makes the request clearer.
2. Warm Ivory for a Creamy Winter White
Ivory has a warmer, creamier appearance than optical white. Choose it if you want a pale manicure beside camel wool, oatmeal knits, or gold jewelry without the sharp contrast of a bright-white polish. The short oval shape in the reference keeps the color as the main feature.

Hold an ivory swatch and a pure-white swatch beside your hand in the same light. You are choosing the warmth you enjoy, rather than following a rule about which skin tone can wear white. If the ivory looks too yellow to you, try a more neutral off-white. Keep it glossy and undecorated to preserve that simple cream finish.
3. Bright Snow White With Soft-Square Edges
For the crispest version of white December nails, choose an opaque snowy white. It makes a clear statement against charcoal, navy, or a dark coat sleeve. A short soft-square shape gives the look a defined edge while keeping the corners gently rounded.
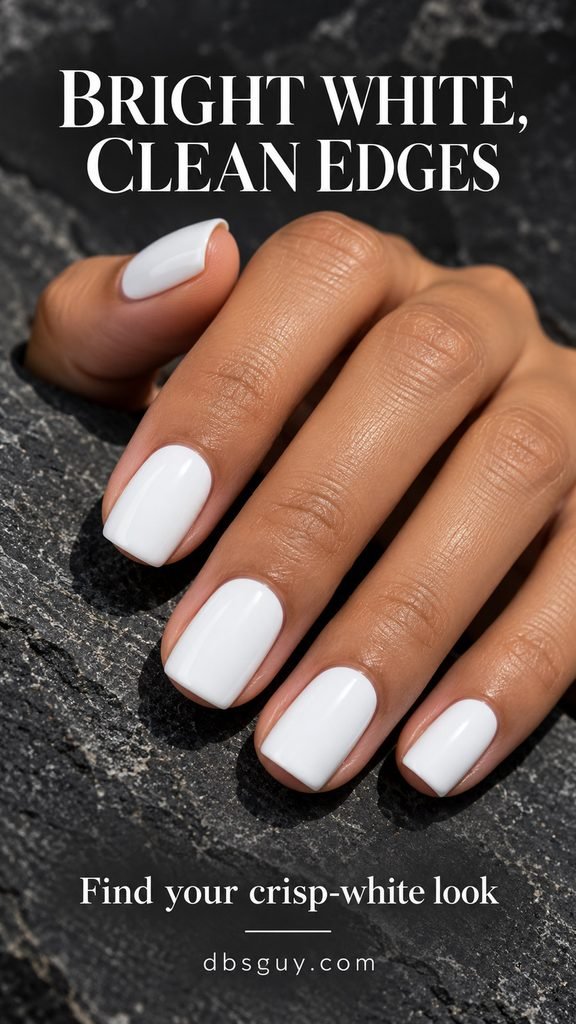
This is the option to choose when you want white itself to stand out, rather than shimmer or artwork. Request full coverage and neat sidewalls. For regular polish at home, use thin, even coats according to the bottle directions and let the layers dry as directed. Avoid repeatedly brushing over color that has begun setting, which can disturb the surface.
4. Micro White French Tips
A micro French keeps almost the whole nail sheer, with just a narrow white curve at the free edge. Compared with a full-white manicure, it gives you a much smaller amount of bright color. It is a useful choice for an everyday December look that can accompany either a sweater or a party outfit.
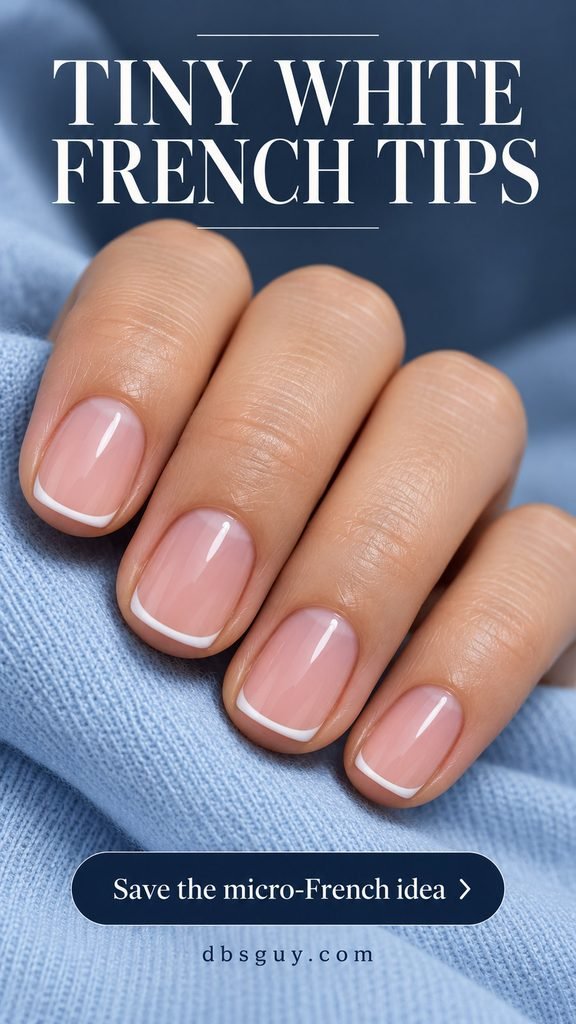
Choose the base separately: sheer pink, beige, or a deeper nude can all sit beneath a white tip. On short nails, ask for a slender line that follows your actual edge. Check one painted tip before the full set is finished so the width stays close to the delicate effect you pictured.
Also Read: 21 Short December Nail Ideas That Make Tiny Details Stand Out.
5. Diagonal White Side Tips
A diagonal French changes the direction of the white instead of adding another decoration. The color sweeps across one side of the tip, leaving an angled area of sheer pink visible. On an almond shape, that sweep echoes the taper without becoming a full-white nail.
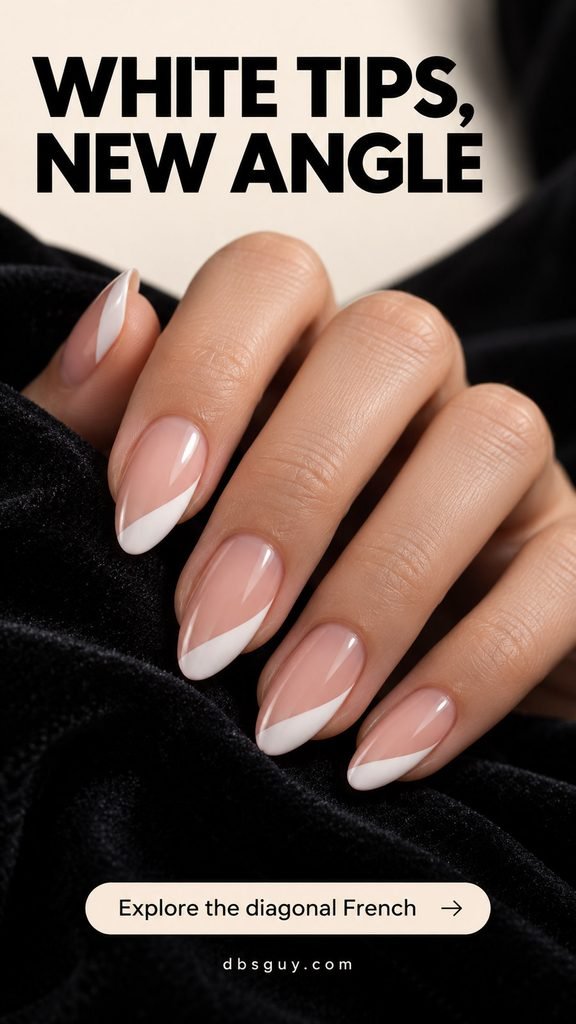
Show which side you want the white to begin on, and decide whether both hands should mirror each other. Keep the broadest white area near the tip so the center remains open. For shorter nails, use a shallower diagonal rather than copying the depth of a longer almond reference. The slant should still be easy to recognize when your fingers rest together.
6. Pink-to-White Snow Ombré
A snow ombré moves gradually from a pale pink base into white tips. There is no crisp smile line, which makes it a softer alternative to either French design above. The white should be strongest at the free edge, with a blended transition through the middle.
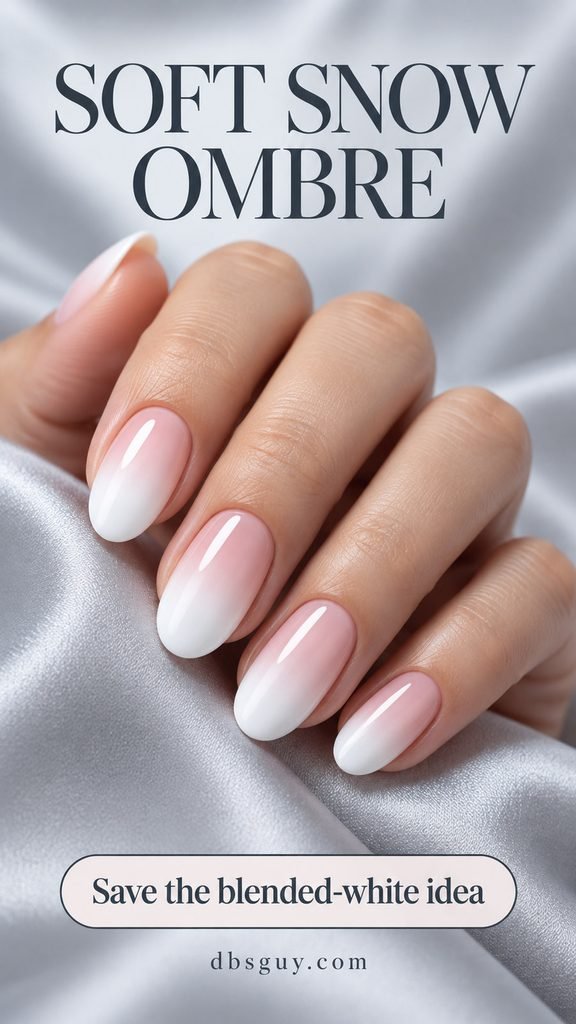
Tell your artist where you want the fade to start and how opaque you want the tips. A shorter nail needs a more compact transition; it does not need an extension simply to use this palette. If you are comparing references, look at the blend rather than the length. A visible white stripe across the center creates a different result from the diffused finish shown here.
7. Pearly White Glaze
Pearly white adds an all-over luminous reflection rather than separate pieces of sparkle. In this concept, the white base catches a faint pink-lilac sheen. That makes it a dressier option for a December dinner while keeping the palette pale.
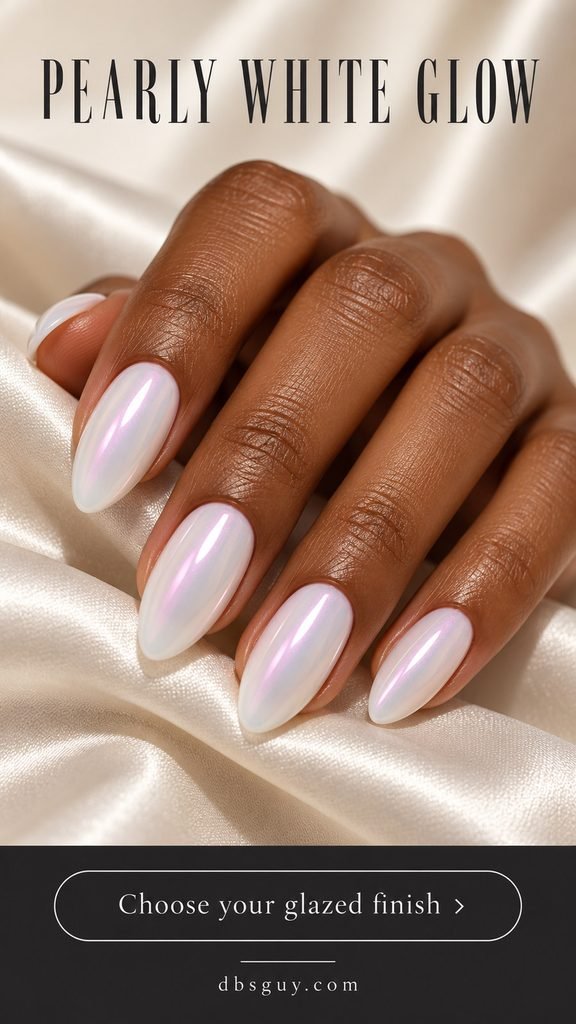
Ask to see the finish over the proposed base color. A pearl glaze, an iridescent shimmer, and mirror chrome can reflect light quite differently, even when the reference looks white. A pearlescent regular polish offers a simpler interpretation; a powder effect depends on a compatible product system. Choose the reflection you want rather than assuming every finish described as “glazed” will look identical.
8. Soft-Matte White
White with a low-sheen satin or matte surface looks quite different from a glossy cream. The color remains visible, but the broad glassy reflections are reduced. It is an appealing direction beside wool or a sparkling outfit when you want the nails to contribute a quieter texture.
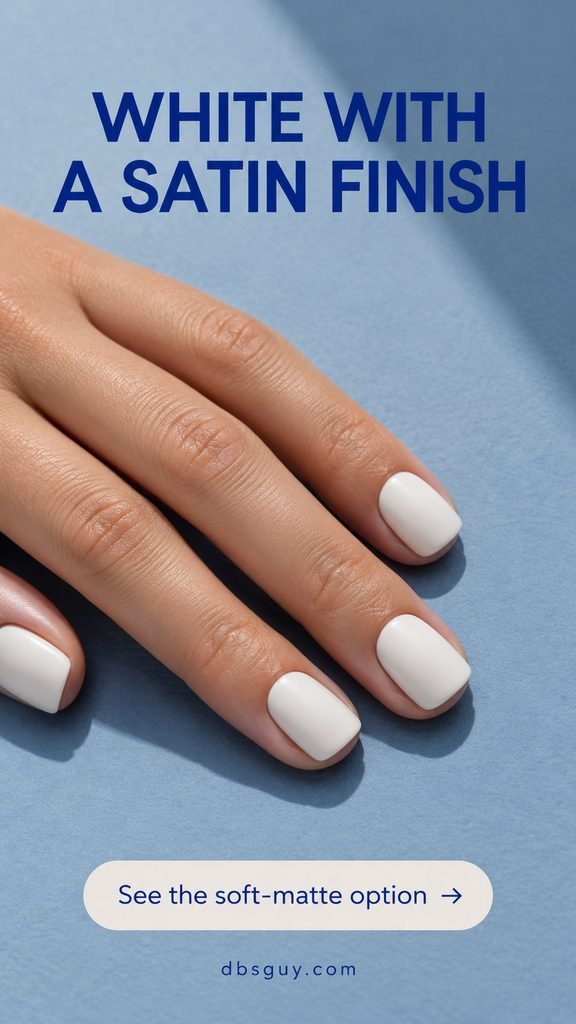
Bring a finish reference as well as a color reference, because “satin” can mean different levels of sheen. For a home version, use a compatible matte top coat as directed. Applying a glossy top coat afterward will change the finish. Leave this set plain so the contrast between the smooth white nails and your winter fabrics stays easy to see.
Also Read: 19 Neutral December Nail Ideas That Go With Every Holiday Outfit.
9. Silver Glitter Fading From the Tips
Silver sparkle concentrated at the tips gives opaque white a party finish. The reference mixes small reflective pieces with finer specks, then lets them thin out toward the center. The white remains visible beneath the decoration instead of disappearing under a solid silver layer.
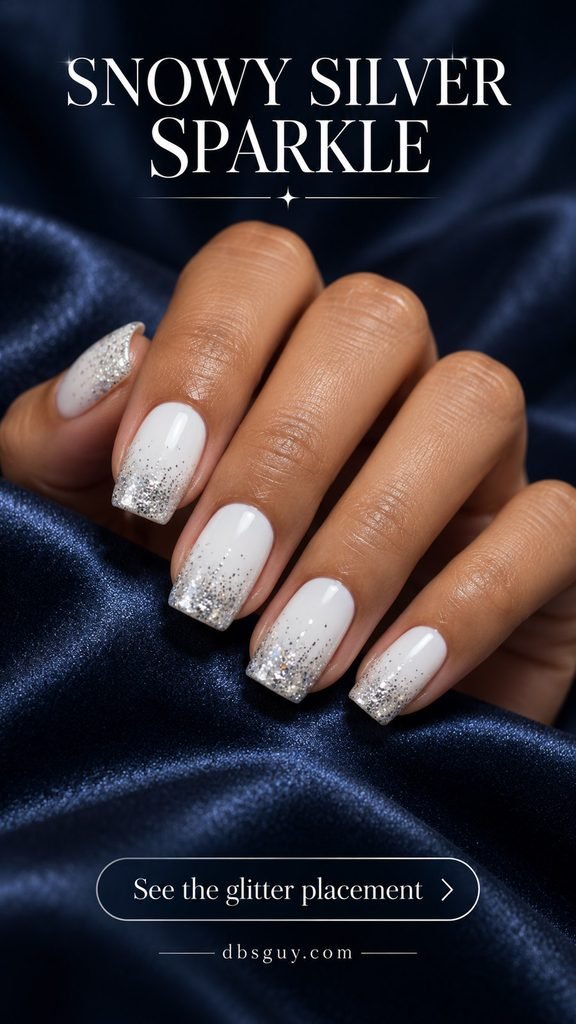
Ask for a tip-heavy scatter rather than glitter covering the entire nail. If your outfit already has sequins, keep the glitter to two accent nails or choose finer particles. At home, a nail glitter polish is an approachable shortcut: place a little near the edge, then use what remains on the brush farther inward. Follow its directions and avoid building a thick ridge at the tip.
10. Falling-Snow Dots on a Sheer Base
Small white dots suggest snowfall without requiring a detailed drawing. A sheer pink-white base gives the opaque dots enough contrast to remain visible. This is one of the more approachable designs to simplify with regular nail polish.
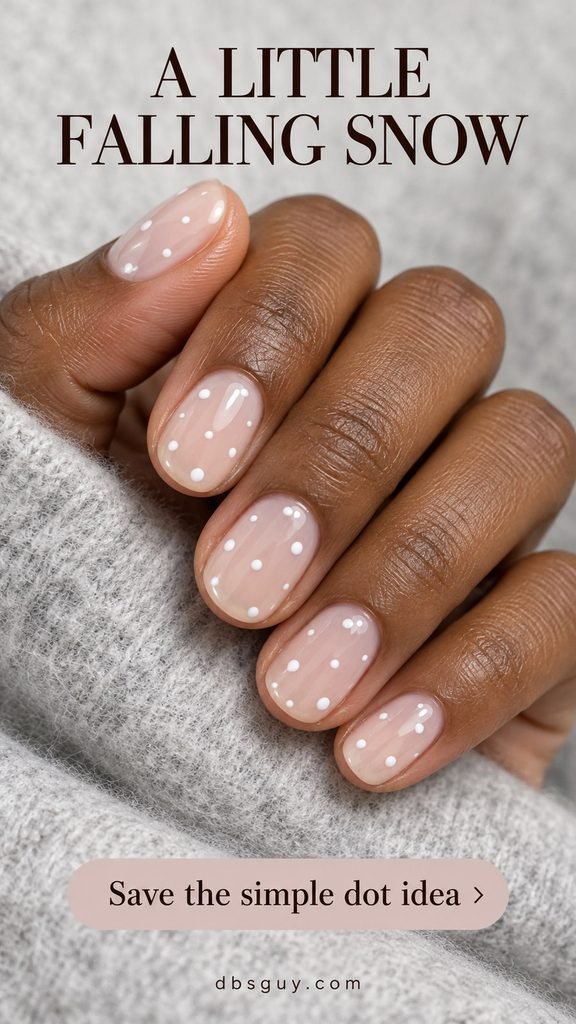
Use a small dotting tool and practice on a spare tip or practice surface first. Change the size and spacing slightly, leaving open areas rather than arranging a tight grid. Let the base dry as directed before adding dots, and allow the artwork to set before the finishing coat. On a tiny nail, three or four separated dots can communicate snowfall more clearly than a crowded scatter.
11. One White Snowflake Accent
One snowflake gives a milky manicure an unmistakable winter detail. Keep the surrounding nails plain so the branching shape has room to stand out. A slightly pinker or more translucent base beneath the snowflake makes the white artwork easier to distinguish.
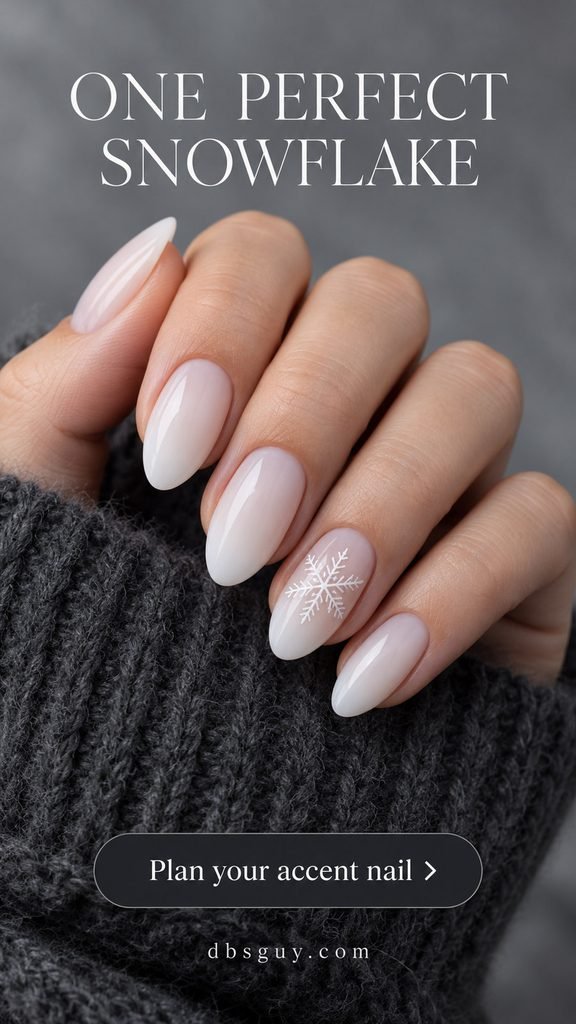
Ask for a fine six-branched snowflake centered on one accent nail, with space between its outer branches and the nail edges. If the nail is too small for detailed branches, use a simpler snowflake decal sized to fit. Avoid placing opaque-white art over an equally opaque-white base unless you deliberately want a very subtle texture effect.
12. An Ivory Cable-Knit Accent
A same-color cable pattern makes white nails feel like winter knitwear. The raised braid is the feature here; the rest of the short squoval set stays plain and matte. Limiting the texture to one nail gives the pattern space without putting relief on every fingertip.
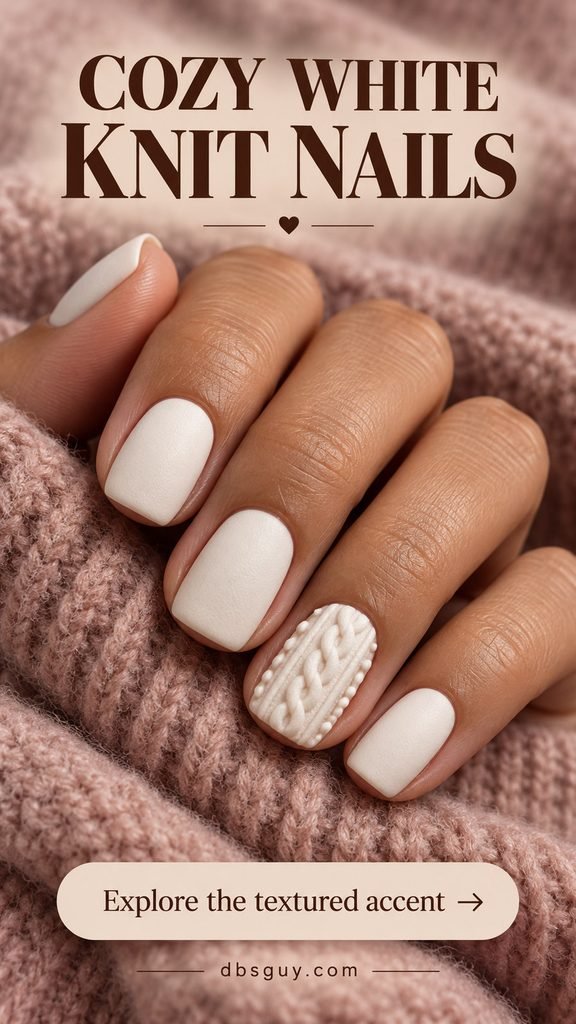
Specify raised texture when booking, since a sculpted cable is a different request from painted sweater lines. Let the artist choose the appropriate products and curing method. If you prefer a smooth surface or often wear close-fitting gloves, ask for a flat ivory-and-beige interpretation instead. It will suggest the knit pattern through color rather than reproduce the raised finish.
Also Read: 17 Sweater Nail Designs for December That Bring Cozy Knit Texture to Your Manicure.
13. A Fine White Ribbon Bow
A little white bow brings a gift-ribbon detail into a pale manicure without introducing red or green. Two loops and two tapered tails are enough. A sheer blush base gives the bow a clearer outline than a fully opaque white background would.
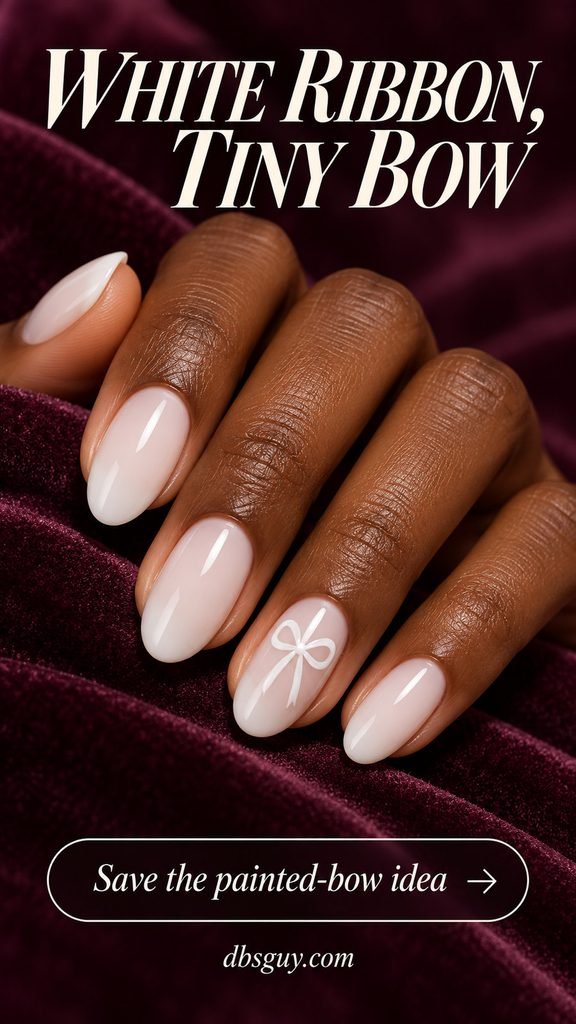
Keep the bow on one ring fingernail and let the other nails remain milky. Decide whether you want smooth painted artwork or a dimensional bow before choosing materials; the reference has a slightly sculpted appearance. A small flat decal can simplify a home interpretation. On a short nail, shorten the tails first so the loops still have room to read as a bow.
14. A Three-Pearl Accent Near the Base
Three pearl-like beads arranged near the base of one nail turn milky white into a jewelry-inspired design. The small arc is the decorative element, while the center of the nail remains clear. It is an option for someone who enjoys a little raised detail.
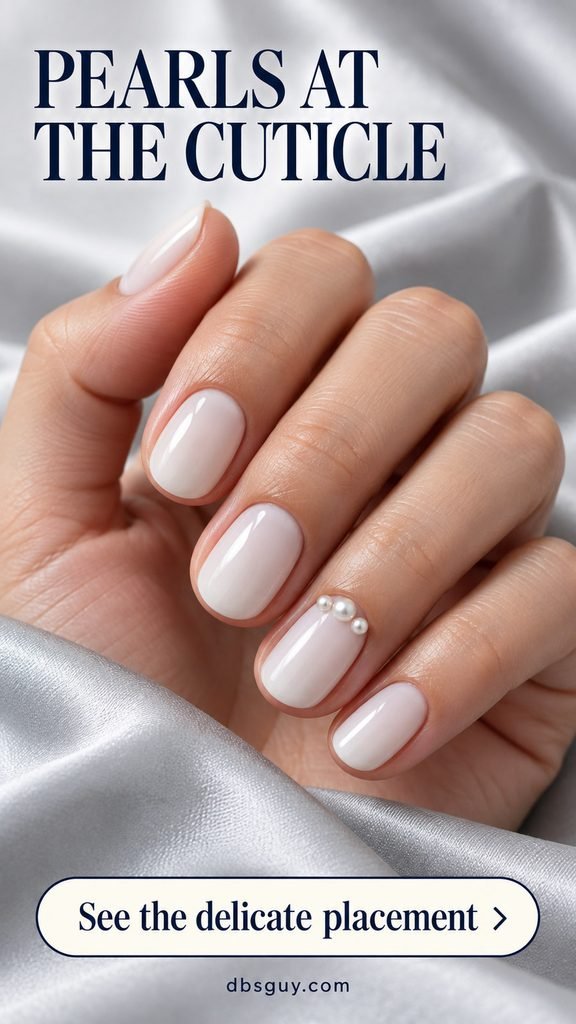
Check the bead sizes against your own nail before application and leave a visible gap from the surrounding skin. Ask the artist to secure them with a suitable nail embellishment system. If you want a flat surface, replace the beads with three pearlescent painted dots in the same arrangement. You keep the placement while changing how the manicure feels.
15. White With Silver Reverse-French Crescents
A reverse French places the metallic detail near the base rather than along the free edge. A slender silver crescent frames bright white and gives the manicure a graphic finish. Most of the nail stays white, so the silver works as an outline.
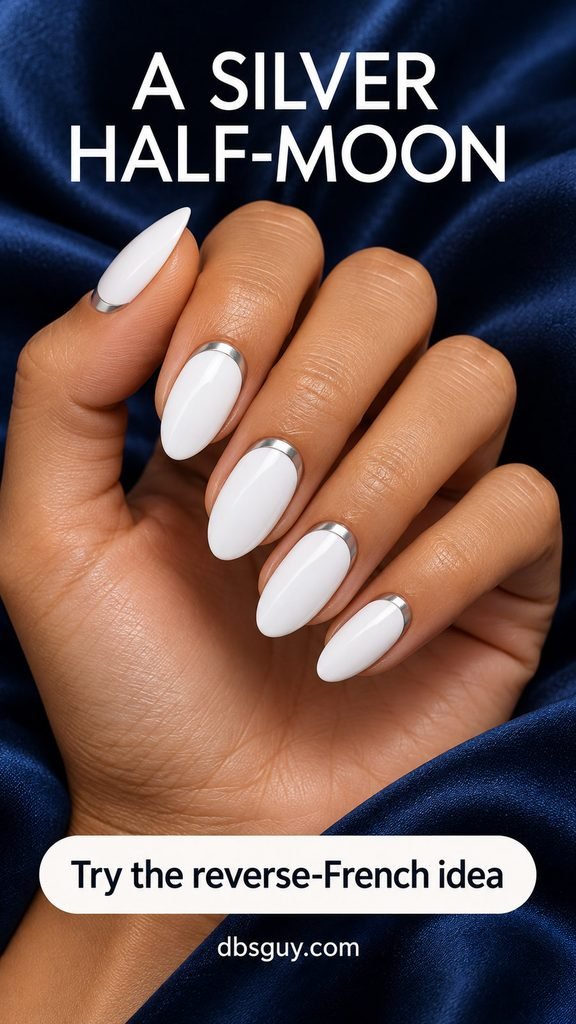
Ask for the curve to sit entirely on the nail plate, with a small gap from the skin. Check the width on one nail: a thick metallic band will feel much bolder than the narrow crescent shown here. For a simpler interpretation, put the silver curve on only the ring fingers. A fine painted metallic line can give you a smoother version of the effect.
16. Ivory With Gold Foil Along One Side
Small irregular gold fragments give creamy white a warmer metallic accent. Unlike the silver glitter gradient, this design uses a few visible flakes grouped along the sides of two nails. The open ivory areas keep the foil from becoming an all-over finish.
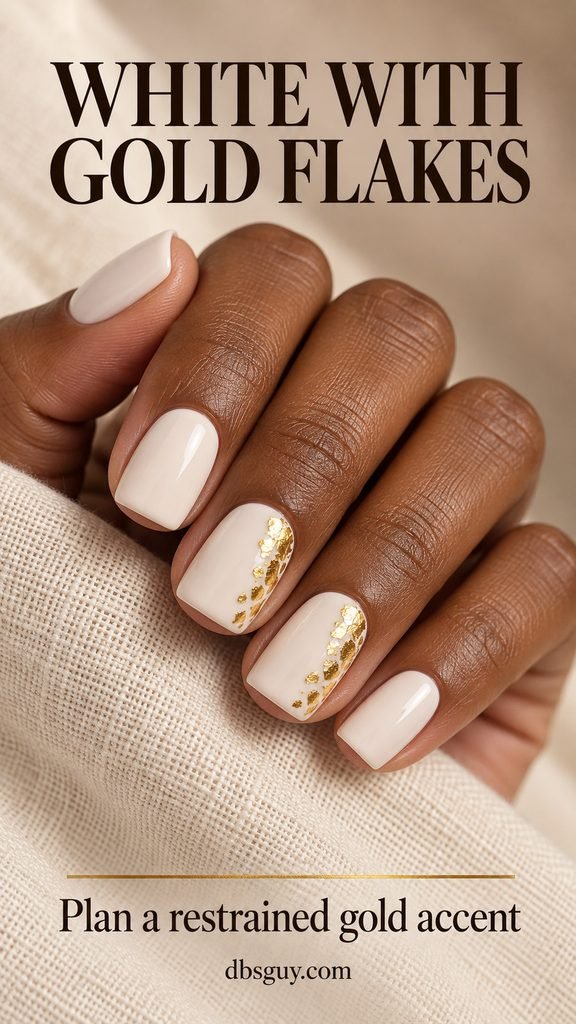
Choose nail-art foil and keep the fragments comfortably inside the nail edges. Ask for them to be sealed so exposed corners do not remain. On short nails, use fewer pieces rather than shrinking a dense cluster. If gold jewelry is already part of your December wardrobe, the warm foil can echo it while the ivory stays the main color.
17. White Marble With Pale Gray Veins
Fine gray veining gives white nails a stone-inspired pattern without bringing in another strong color. The reference uses two marbled accent nails and plain white around them. That balance helps the wispy lines remain visible.
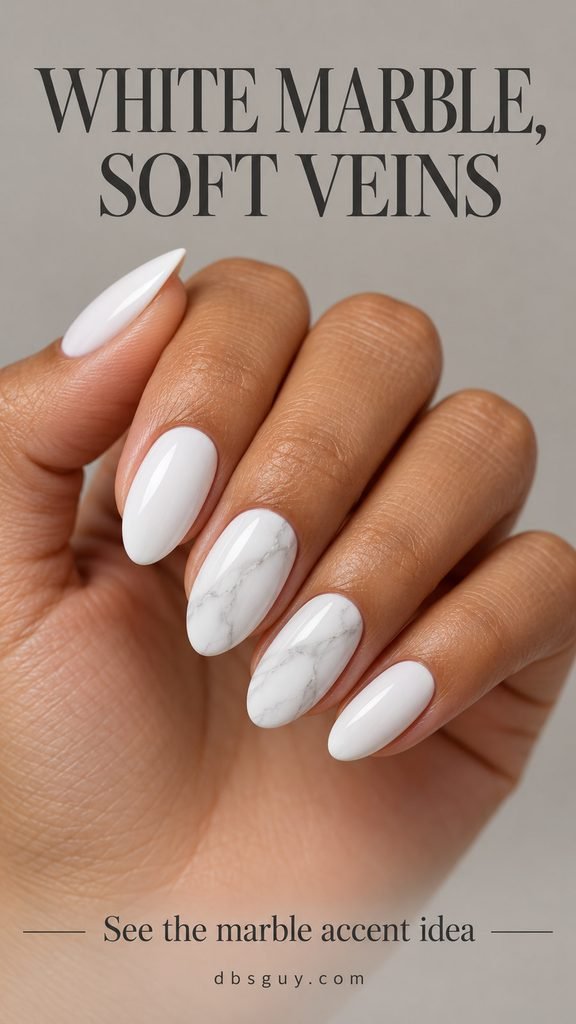
Ask for a mostly white field with faint, irregular gray veins, rather than a dark web covering the whole surface. Leave some sections almost blank. A detail artist or a well-sized nail wrap can interpret the pattern; neither needs to reproduce the reference line for line. For shorter nails, one vein with a small branching line is enough to suggest marble.
18. White French Tips With an Icy Blue Outline
A pale blue line along the inner edge of a white French tip adds a frosty color detail. The sheer pink base and white tip still dominate, while the blue makes the boundary visible. Choose this if you want a hint of winter color without switching to a blue manicure.
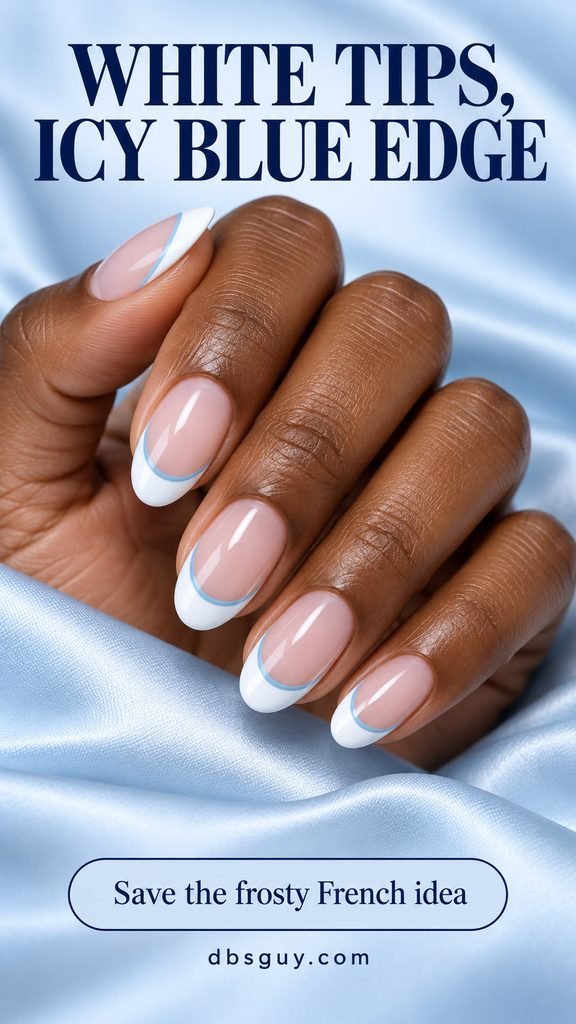
Show your artist exactly where the line belongs: it follows the curved meeting point between the pink base and the white tip. Keep it narrow so it does not replace the white. On very short nails, use the blue outline on two accents and leave the other tips plain. The result preserves the color combination with less fine brushwork.
19. Silver Starbursts on Bright White
Silver four-point stars take white nails toward an evening-party look. Their long, tapered points create a different motif from the branching snowflake. Two decorated nails and a few tiny metallic dots are enough to establish the pattern.
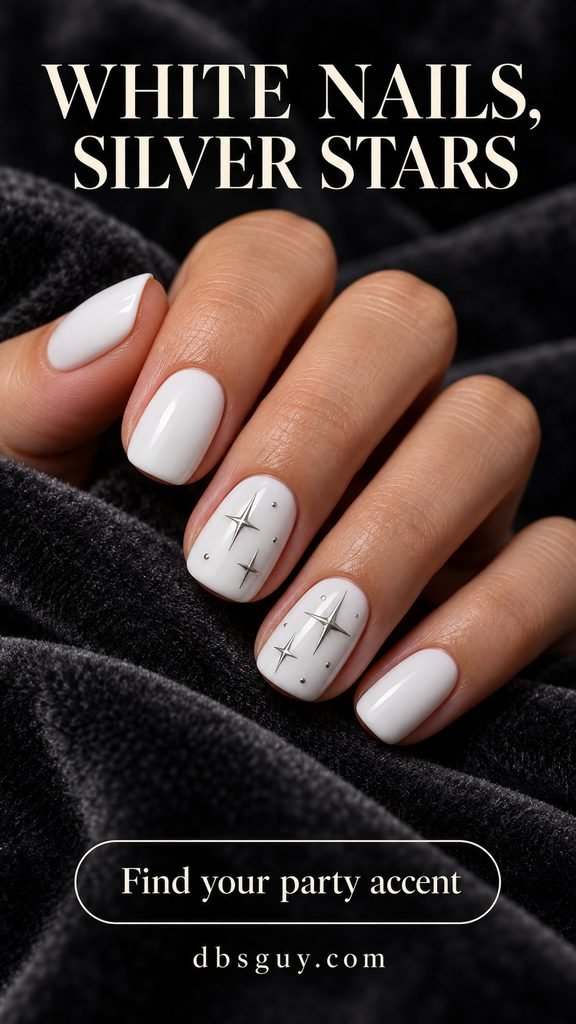
The concept has a slightly dimensional metallic appearance. Choose small embellishments for that effect, or request painted metallic stars or flat nail decals if you prefer smooth artwork. Keep the points inside the nail edges and leave white visible between motifs. This is a useful late-December choice when you want sparkle that can also suit New Year’s Eve.
Also Read: 27 Christmas Nail Ideas From Classic Red to Unexpected Twists.
Turn the Reference Into a Clear Salon Request
Save one main image and name the parts you want to keep. For example: “Short squoval, sheer milky white, glossy finish, and one flat snowflake on each ring finger.” That is more specific than asking for winter-white nails and hoping the artist imagines the same thing.
Confirm the shape, coverage, accent nails, and surface texture before work begins. Mention ombré, glaze, fine linework, or raised details when booking so the salon can explain the service and price. If a motif feels crowded at your chosen length, reduce the number of elements before making them smaller.
A Simple Regular-Polish Approach
- Choose a sheer or opaque white formula for the coverage you want, plus a compatible base and finishing coat.
- Follow the product’s preparation directions and keep polish on the nail rather than the surrounding skin.
- Apply thin, even color coats and allow the drying time directed by the product. A sheer first coat does not need to look fully opaque.
- Add optional dots or a properly sized decal only when the base is ready for artwork. Let the detail set as directed before finishing.
- Use a glossy or matte finishing coat to match your chosen look. Do not add gloss over a matte finish unless you want to change its appearance.
These are styling and application starting points, not instructions for sculpting gel texture or using every polish system. For nail care, the American Academy of Dermatology’s manicure guidance recommends moisturizing nails, avoiding cutting or forcefully pushing back cuticles, and checking salon cleanliness and tool disinfection.
White December Nails: Common Questions
What is the difference between milky white and bright white?
Milky describes a softly translucent appearance; bright white in this collection means an opaque snowy color. If you want to see some natural pink through the polish, choose milky. If you want a clearly solid-white nail, choose an opaque cream formula.
Which looks are easiest to adapt to very short nails?
Solid milky, ivory, bright white, soft matte, and sparse snowfall dots need little space for detail. Keep French tips narrow. For a snowflake, bow, marble vein, or star, use one accent nail and leave room around the motif.
Do white winter nails need gel or extensions?
No. Plain colors, dots, and many flat painted details can be interpreted with regular nail polish on natural nails. A specific glazed or raised finish may need a different product system and technique. Ask what is required for the finish you want rather than assuming the reference requires extra length.
Why does my white polish look streaky?
Some sheer and pale formulas look uneven on the first layer. Start with the recommended base, apply even coats as directed, and avoid repeatedly working the same area as it begins to set. If you want opaque coverage, choose a formula intended for it instead of adding many thick layers of a sheer polish.
Can these designs work after Christmas?
Yes. Milky white, ivory, French tips, marble, pearl, and restrained metallic accents do not depend on Christmas imagery. Snowflakes and snowfall dots keep a winter theme. Choose the one you enjoy for your next occasion, and refresh it when needed rather than expecting one manicure to cover the whole month.
Pick the Shade, Then One Detail
If you are deciding between several references, narrow them to one plain finish and one decorated look. Choose the base you prefer on your hand first. Then decide whether a little snow, texture, or silver makes it more like the December manicure you want to wear.