
When your nails barely reach your fingertips, the detail needs somewhere to sit. A single blue dot, two little cocoa stitches, or a snowflake cropped at the side can give you a January manicure while leaving most of the nail color visible.
These eight extra-short January nail designs are built around that small working space. Choose one detail for the whole set, then decide which fingers actually have room for it. You can keep the others plain.
The images are AI-generated design concepts. Use them as references for color and placement; they do not document completed salon work.

Start With the Space Your Nails Actually Have
Here, “extra-short” means little or no free edge beyond the fingertip. Your nail beds may still be long, wide, narrow, or different from finger to finger. Copy the placement that fits your own nail, rather than trying to reproduce every proportion in a picture.
- Almost no visible tip: try the single dot, cocoa stitches, or silver cuff. None depends on a white free edge.
- A wider nail with room for a small shape: consider the cropped snowflake or four-square check.
- Very little space on most fingers: put the artwork on your roomiest nail and repeat only the base color elsewhere.
For these concepts, a useful starting point is one accent per hand. That is a styling choice, not a rule: the navy corners repeat across the set, and the silver cuffs use two accent nails. Look at your hand from normal viewing distance before adding anything else.
1. Milky Pink With One Slate-Blue Dot
A cool blue dot gives a familiar pink manicure a small winter detail. The contrast does the work, so you do not need a pattern around it. This is the simplest place to start if you are painting your own nails.

On the ring nail, place one small dot in the outer third of the nail, just above the tip, with pink visible all around it. Keep the rest of the hand plain milky pink. If your ring nail has less space than your index nail, move the accent rather than making the dot touch an edge.
With regular nail polish, test a small dotting tool on a practice surface first. Use the smallest amount that leaves a clean circle, then make one light touch on the dried base color. Repeated tapping can turn the dot into a larger patch. Let the detail dry as directed before adding top coat.
Ask for: “Extra-short milky-pink nails with one small slate-blue dot near the tip of one accent nail. No raised stone.”
2. A Navy French Detail on Just One Corner
Instead of wrapping a French tip all the way across a tiny nail, give navy one corner. The short curved stroke adds a defined edge without taking a broad band out of the pink base.
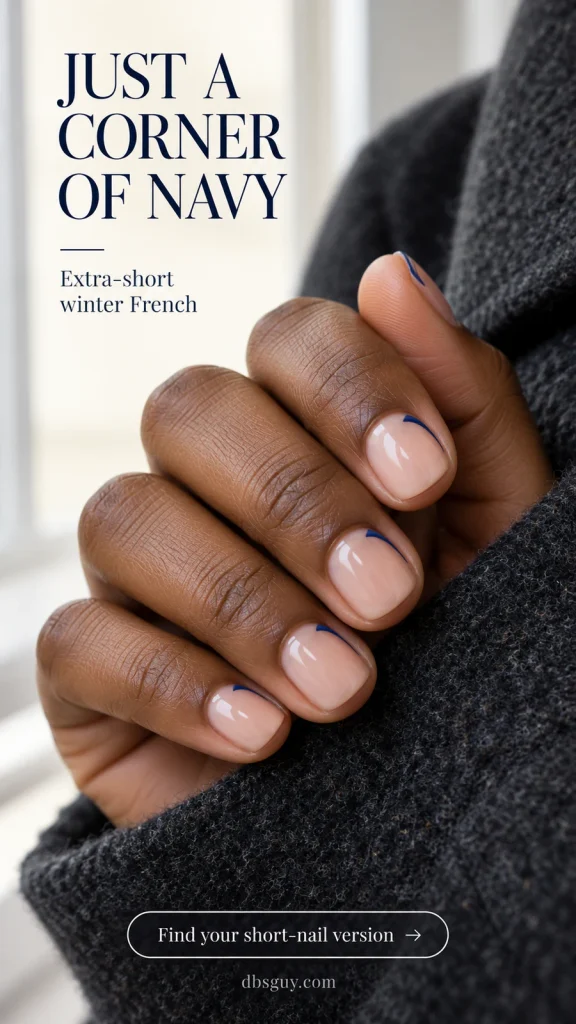
The reference repeats a fine navy sweep at the same tip corner of each nail. Ask the artist to taper the line as it ends, leaving the rest of the tip unoutlined. A thick wedge changes the balance; the feature here is the narrow, partial curve.
You can paint the detail on the visible nail plate even when there is no obvious white tip to follow. For a home version, rest your painting hand on the table and build the curve with short strokes from a fine detail brush. If one corner becomes much thicker than the others, redo that nail rather than widening every tip to match.
Choose this one if you want a little dark color while keeping most of the manicure sheer. For more short-length references, browse 21 Short December Nail Ideas That Make Tiny Details Stand Out and carry over the placements you like into a January palette.
3. Oatmeal Cream With Two Cocoa Stitches
Two short brown dashes suggest a little stitched detail against an oatmeal base. You get the sweater reference from the color and spacing, with a flat finish instead of raised cable-knit artwork.
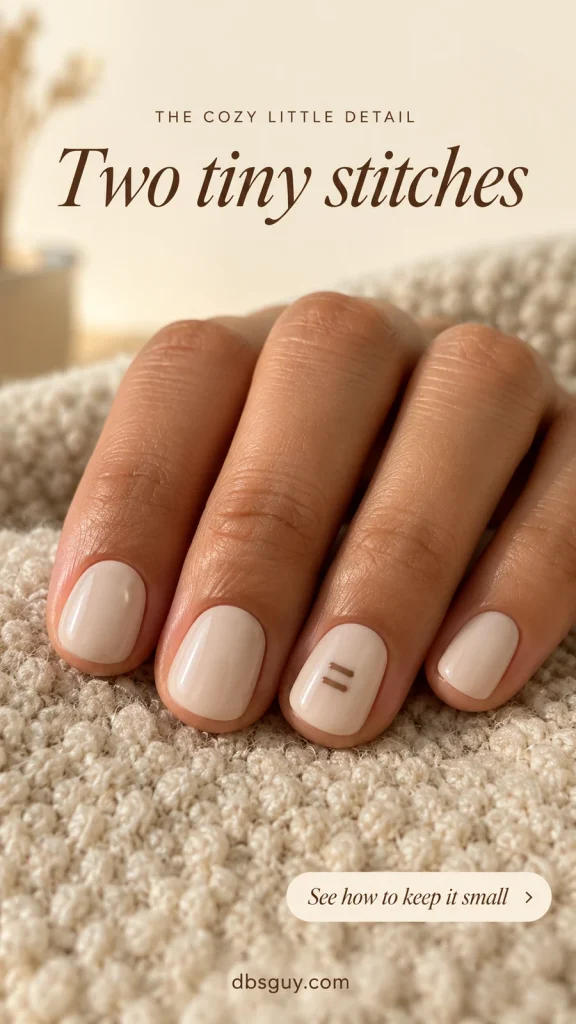
Stack two small horizontal dashes vertically on one ring nail, leaving a clear cream gap between them. Each dash should end well before either side of the nail. Keep them slightly off center if that leaves a more comfortable amount of open space.
The gap matters more than making each stroke extremely fine. If the marks merge, they read as one brown block. Paint the first dash, check how much room remains, and add the second only if you can keep the two separate.
This warm version is a good choice when icy blue does not suit the colors you usually wear. Take the reference to your appointment and specify two flat painted stitches; “sweater nails” alone could produce a much more textured design.
4. Dusty Blue With a Snowflake Cropped at the Side
A whole snowflake can demand more space than you want to give it. Let part of the motif disappear at one side of the ring nail instead. The remaining white branches still suggest winter, while a broad area of dusty blue stays visible.
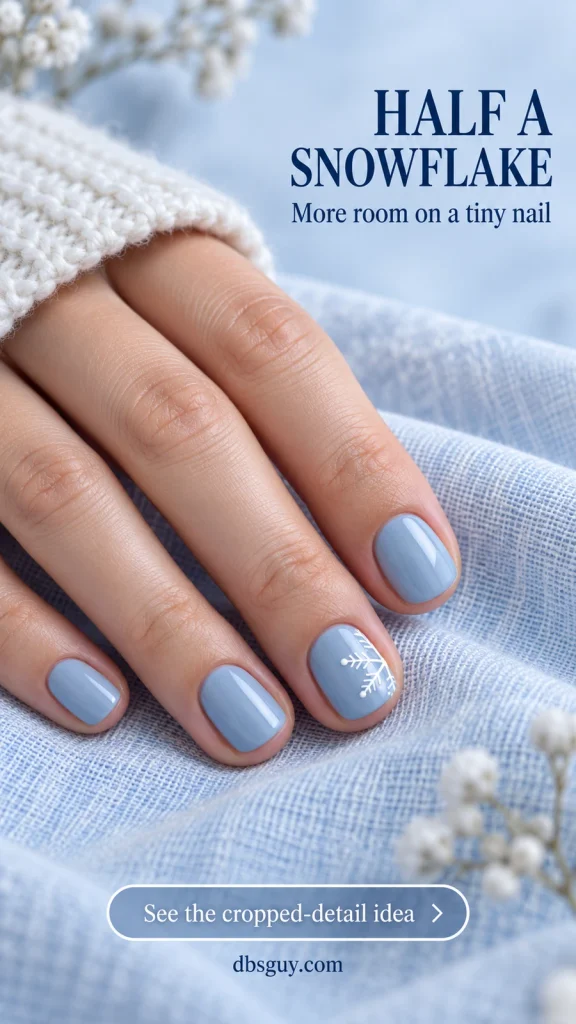
Ask for the snowflake to enter from a side edge, with only a few branches extending inward. Keep the other nails solid blue. The reference is about a cropped motif, so there is no need to squeeze a complete symmetrical snowflake into the middle.
This is the most detailed drawing in the group. A nail artist can simplify the branches to suit the available space. If using a nail decal at home, choose a partial motif small enough to lie entirely on the nail plate and follow its application directions. Do not leave a sticker overhanging onto skin.
Skip a surrounding scatter of dots if the branches already fill your accent nail. For a broader look at snowy motifs and reflective finishes, see 23 Winter Nail Designs: Snowflakes, Chrome and Cozy Knits.
5. Sheer Mauve With a Slim Silver Cuff
Move the metallic detail to the base of the nail. A narrow silver arc against sheer mauve looks like a little cuff, leaving the center and tip free of artwork.

The image uses silver on the middle and ring nails, with the other nails plain. Ask for a painted arc that follows the curve near the base, leaving a visible gap between silver and skin. It should sit on the nail, not on the cuticle.
On a very small nail, shorten the arc instead of making it thicker. You can also use one cuff per hand if two accents feel busy. A silver nail-art polish gives a softer metallic interpretation than a mirror-like salon finish; choose the reflection you want rather than relying on the word “chrome.”
Salon wording: “Sheer mauve with a fine, flat silver arc near the base of the middle and ring nails. Leave the tips plain and keep a small gap from the skin.”
6. Warm Greige With One Four-Square Check Patch
You can borrow a checked pattern without covering an entire nail in tiny squares. This version uses just four: two ivory and two cocoa, arranged in a two-by-two patch against warm greige.
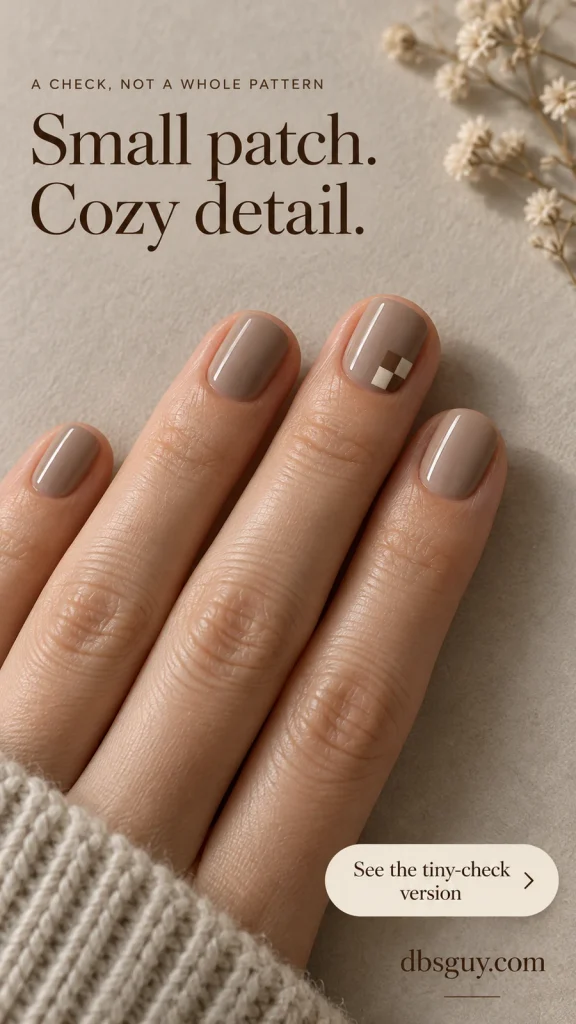
Place the patch toward one side of the ring nail, keeping the rest of that nail greige. The important detail is the alternating colors and the clear square edges. Do not add more rows just because a larger reference has them.
If the squares become too small to distinguish, move the patch to your thumb or another roomier nail. Trying to force four blurred squares onto the pinky loses the reason for choosing a check in the first place.
For an artist, describe it as a four-square patch rather than a checkerboard accent nail. At home, a suitably small nail-art decal may be more manageable than painting four straight-sided shapes with your less steady hand. Check its size against your nail before applying it.
7. Espresso Brown With Two Tiny Gold Flecks
Deep espresso gives a very small gold accent enough contrast to show. Keep the metallic pieces together on one side of the ring nail; the other nails stay glossy brown.

The reference uses two irregular flecks with brown visible between them. Ask for flat pieces made for nail art, fully contained within the nail surface. Large flakes can dominate a compact nail, so choose the pieces before committing to their placement.
For a regular-polish interpretation, two little irregular touches of gold metallic nail polish can suggest the arrangement without handling separate foil. The result will look painted rather than leaf-like. Follow the chosen polish or nail-art product’s directions for application and sealing; there is no single drying or curing time that applies to every system.
Keep this version to one accent if you want only a trace of the sparkle left over from the holidays. For more metallic options, 21 New Year’s Nails to Ring In the Year Sparkling offers finishes you can simplify for a smaller nail.
8. Smoky Lavender With One Little White Star
A four-point sparkle gives pale lavender a winter detail without another snowflake. Put one star off center on the ring nail and leave the remaining nails lavender.

Keep the star toward the tip, with a visible border of lavender around all four points. For a simple painted interpretation, cross one longer vertical stroke with a shorter horizontal stroke. A nail artist can taper the ends for the pointed sparkle in the reference.
If your accent nail is too small for the points to stay separate, use a smaller flat decal or move the star to a roomier finger. Leave out extra stars, trails, and surrounding dots. The single shape needs enough uninterrupted background to remain recognizable.
Choose a white that stands out against your lavender sample. If the two colors look almost identical indoors, the detail may disappear even though it shows in a brightly lit reference image.
How to Keep a Tiny Design From Taking Over
Pick your accent nail before you pick the motif size. Your ring finger does not have to carry the artwork if another nail gives it more room. Keep the color consistent on the plain nails so that moving the accent still feels deliberate.
For a salon appointment, bring one reference and identify the feature you want copied: the partial navy edge, the two separated stitches, or the silver arc. Then say, “Please keep my current length and simplify the artwork to fit.” That gives the artist a clearer brief than asking for an exact replica on a different nail shape.
At home, the single dot and two stitches are the most straightforward starting points here. Use nail polish and tools intended for nail art, let each layer dry as directed, and test the mark before touching the nail. If the first attempt is too large, remove and repaint that accent rather than adding more decoration to disguise it.
Keep the nail-care basics gentle. The American Academy of Dermatology’s healthy-nail guidance recommends trimming fingernails straight across with slightly rounded tips, leaving cuticles intact, and moisturizing after handwashing. There is no need to cut away skin or file the sides deeply to create more room for a design.
Questions About Extra-Short January Nails
Can I have nail art with no white tip showing?
Yes. The dot, stitches, star, check patch, and silver cuff sit on the visible nail plate. For the navy corner, the artist can paint a small curved detail near the tip rather than follow a natural white edge.
Which design should I choose for wide, very short nails?
Start with the side-cropped snowflake, a check patch in one corner, or a single dot. Each leaves a clear area of base color. Choose the placement you like on your own hand; you do not have to make a wide nail appear narrower to decorate it.
Do these looks need gel or extensions?
The painted ideas can be interpreted with regular nail polish, and none depends on added length. Fine linework, foil, or a highly reflective silver finish may be easier to discuss with a nail artist. The visual concept alone does not establish a particular product system or wear time.
Should the artwork be the same size on every finger?
It does not have to be. Keep the same general placement for repeated navy corners, but let the line scale to each nail. For the other designs, a plain pinky is often the clearest choice when the detail would have to be squeezed in.