Easy Short Nail Designs for January: Tiny Dots, Fine Tips and Soft Shimmer


For short January nails, start with one small detail: a navy dot on sheer pink, a narrow blue tip, or a pearly finish that needs no drawing. The useful question is how much room your nail has for that detail. A dot can sit on a nail with almost no free edge; a French tip needs enough visible space to keep the colored border from taking over.
These six easy short nail designs for January cover two dot layouts, two fine-tip options, and two soft-shimmer finishes. Each includes a specific placement and a regular-polish method, so you can choose something that suits both your nails and your patience for detail work.
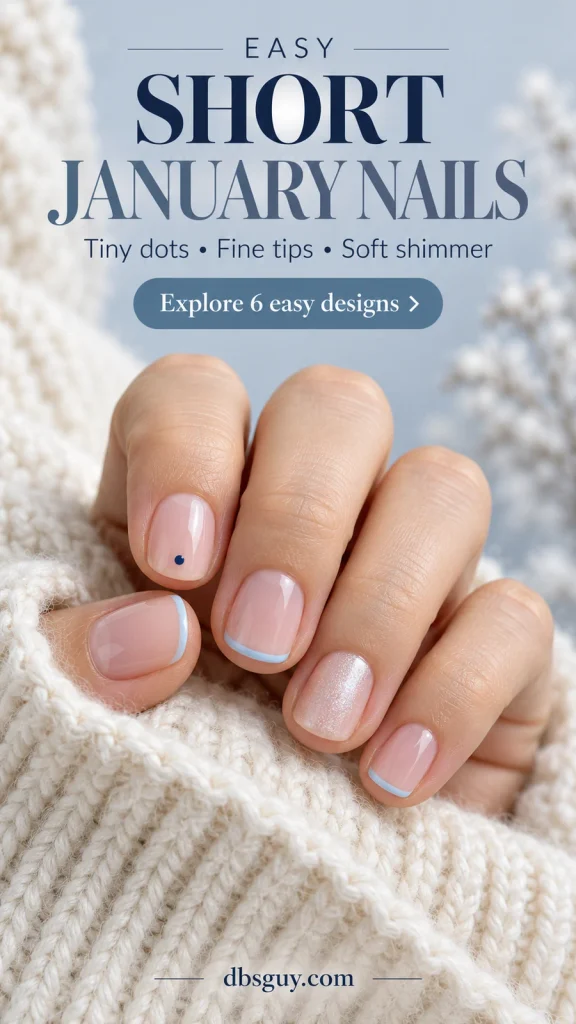
The images are AI-generated design concepts for dbsguy.com, not photographs of completed or tested manicures. Use them as color and placement references; actual polish finishes will vary.
Choose a Design That Fits Your Short Nails
- Almost no nail beyond the fingertip: choose the single navy dot in design 1 or the pearl veil in design 5. Neither depends on a visible white tip.
- A short, softly squared edge: try the icy micro French in design 3. Keep the blue border shallow enough that the pink center remains the focus.
- A short rounded edge: compare the three-dot tip in design 2 with the small corner accents in design 4.
- You want sparkle on just one finger: the taupe side shimmer in design 6 leaves the rest of the manicure plain.
A rounded tip curves across the end; a squoval keeps a flatter end with softened corners. You do not need to reshape your nails dramatically for these looks. Work with the outline you already have and reduce the amount of artwork when space is tight.
Set Up for Small Details
Use regular air-dry nail polish for the home methods below. Gather a base coat, your chosen colors, a compatible top coat, a small dotting tool, and a fine nail-art brush if you are painting tips. A clean, smooth, rounded bobby-pin end can substitute for a dotting tool, but try it on scrap paper first: some ends make a much larger mark than expected.
Begin with clean, dry nails and gently smooth any snagged edges. Leave the cuticles alone; do not cut them or force them back to make more room for polish. The American Academy of Dermatology’s manicure safety guidance explains why protecting this area matters and recommends moisturizing nails, especially after polish removal.
Apply base coat and thin color layers according to the labels. Let the base color dry before adding dots or lines; a tacky surface can drag when the tool touches it. Drying time varies by formula and layer thickness, so a fixed countdown is less useful than following your product’s directions. Keep polish on the nail, away from the surrounding skin.
1. One Navy Dot on Sheer Blush
A single dark dot gives a nearly bare-looking manicure a clear focal point. The reference repeats it on every nail, centered across the lower part of the blush base. Navy brings in a winter color without covering the whole nail in blue.
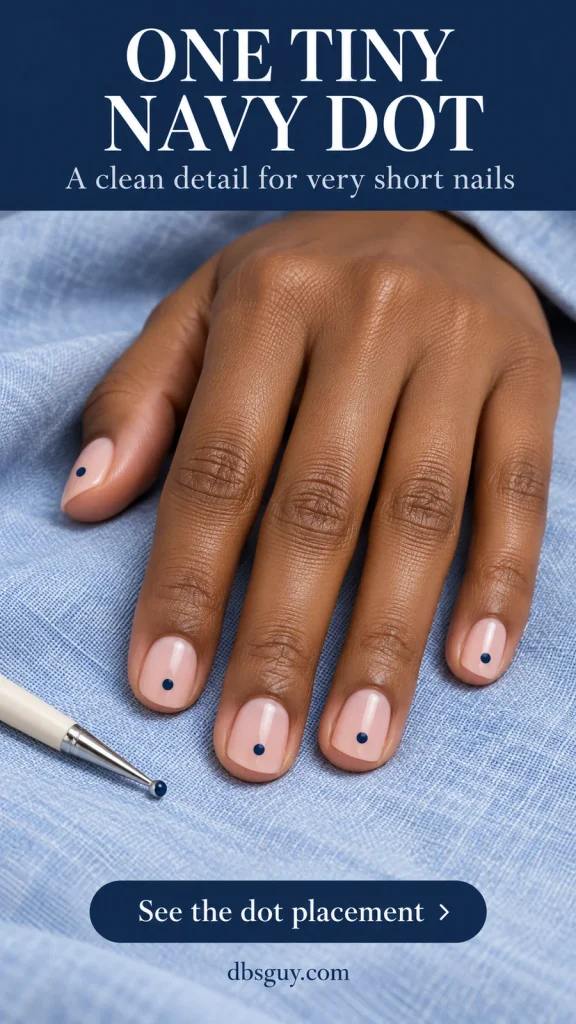
- Apply a sheer blush polish over your base coat, keeping the amount of coverage you like.
- Put a small drop of navy polish on a disposable palette. Pick up a little with the smallest rounded end of your tool.
- Touch the tool straight down in the lower third of the nail, leaving a visible gap above the cuticle. Lift straight up instead of dragging.
- Let the dot dry before applying a compatible top coat with light strokes.
Practice one dot on the palette before each nail if the polish starts spreading. A heavy bead creates a raised blob; pressing harder makes the mark broader. On a narrow pinky, use less polish rather than trying to match the thumb’s dot size exactly.
If doing all ten feels fiddly, repeat the placement on the two ring fingers and leave the other nails sheer. The important part is the open blush space around the dot, not the number of decorated nails.
2. A Three-Dot Tip on Slate Blue
This is a French-inspired edge made from separate marks. The smoky blue set stays plain except for three white dots near the ring nail’s tip. It gives you a small winter detail without asking you to paint a continuous curved line.
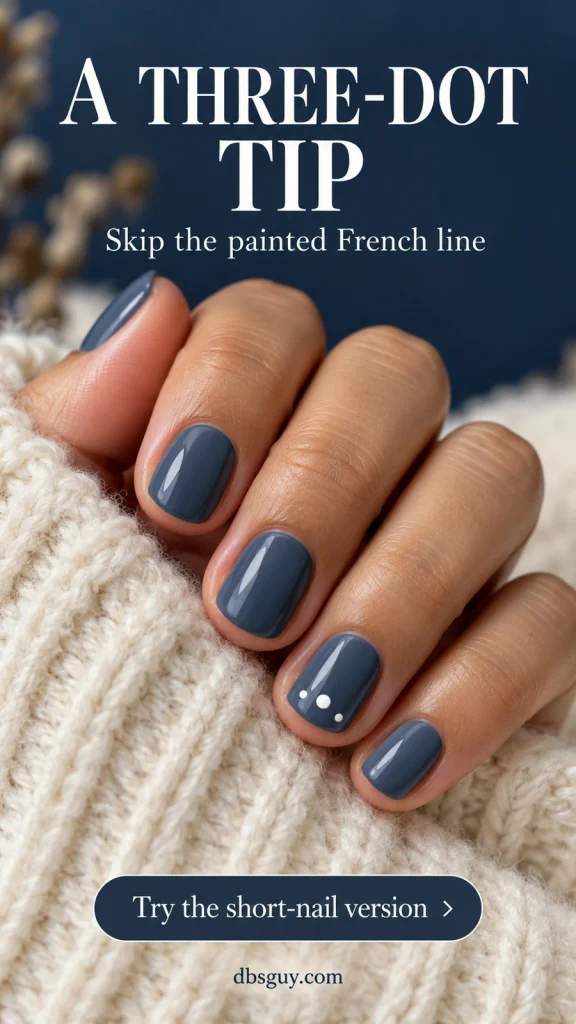
Once the slate-blue base is dry, place the center white dot first, near the tip but fully on the nail plate. Add one smaller dot on each side, sitting a little farther back. In the reference, the slightly larger middle dot anchors the shallow arc. Keep blue showing between all three marks.
Use a light touch and a small amount of white polish. You can check the spacing with the tool hovering above the nail before you touch down. If three dots will not fit with clear gaps, put the accent on your wider thumbnail instead; squeezing them together turns the design into a broken white band.
Let the dots dry before top coat. For a simpler second hand, keep the same single accent finger rather than adding the pattern to every nail.
Also Read: 21 Short December Nail Ideas That Make Tiny Details Stand Out for more compact layouts to adapt beyond the holidays.
3. Icy-Blue Micro French Tips
A pale blue edge on sheer pink is the most precise design in this group. The contrast is soft, but an uneven border still shows. Choose it when you enjoy careful brushwork or want a clear reference to take to a nail artist.
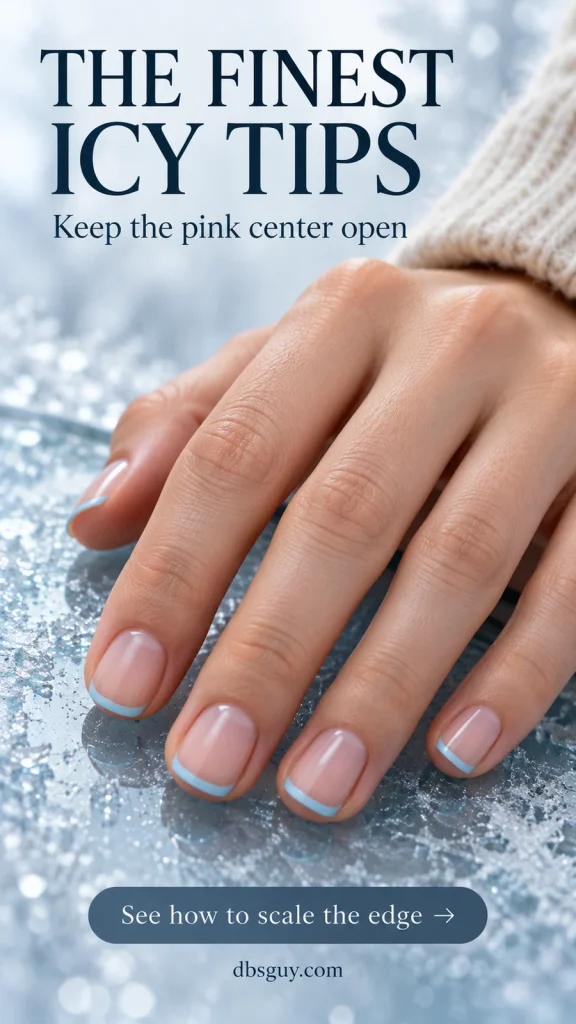
After the sheer base has dried, load a fine brush with a small amount of icy-blue polish. Rest both hands on a table. Build the border with short strokes along the visible tip, turning the finger slightly so you can reach the corners without flattening the brush against the whole nail.
Start narrower than you think you need. Check the first nail from above before continuing: most of the visible surface should still be pink. Follow the outline of each nail rather than copying an identical deep curve onto every finger.
When your nails are flush with the fingertips: you can paint a narrow border on the nail surface, but skip trying to wrap polish underneath an edge that is not there. If the line keeps touching skin or dominating the nail, the single-dot design gives you a cleaner home project. At the salon, ask for “a very shallow pastel-blue micro French on my current short length” and agree on one sample tip first.
4. Fine Ivory Corners on Soft Lilac
Two little ivory strokes change a lilac manicure without outlining every tip. Here, the middle and ring nails carry a slim diagonal curve across one upper corner; the thumb, index, and pinky remain plain. The longer stretch of lilac below each stroke is part of the design.
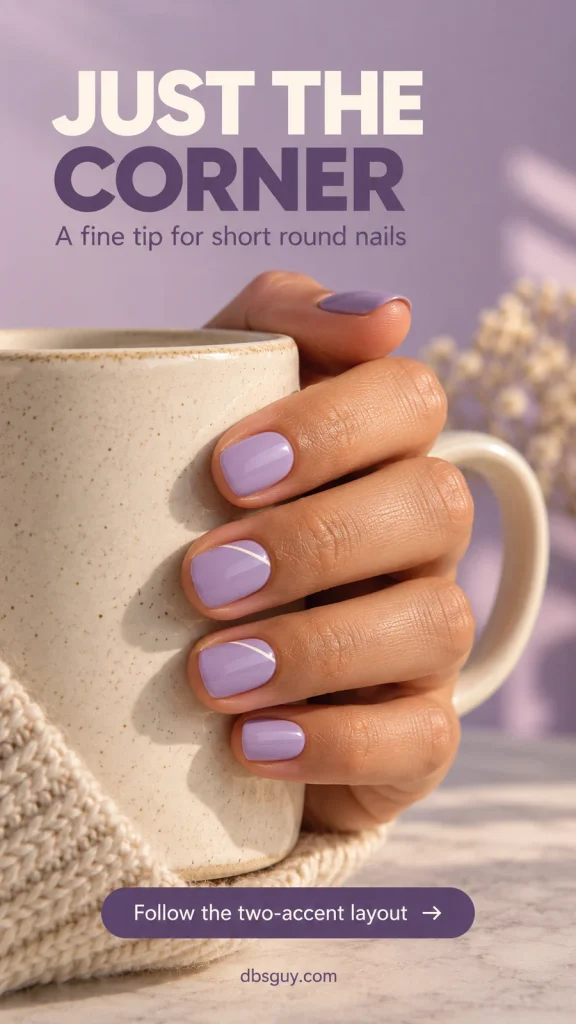
Paint the lilac base and let it dry. With a fine brush, make one short ivory stroke across the chosen upper corner of each accent nail, ending at the side edge. Keep the stroke near the tip and avoid filling underneath it into a large white wedge.
Try the direction on paper first, then orient your finger so you can pull the brush in the direction that feels most controlled. You can mirror the accents on the other hand. Consistent placement within each hand matters more than forcing an awkward brush angle.
This uses less line work than a full French manicure, although it still takes a steady touch. If you are painting with your less coordinated hand, decorate just the ring nail on each side. Do not keep widening a slightly imperfect line until half the nail becomes ivory.
5. A Sheer Pearl Veil With No Line Work
If tiny brushstrokes are the part you would rather skip, let the finish do the work. A translucent rosy base with a fine pearl shimmer gives short nails a soft glow. The nail should still read as pink, with little points of reflection as it catches the light.
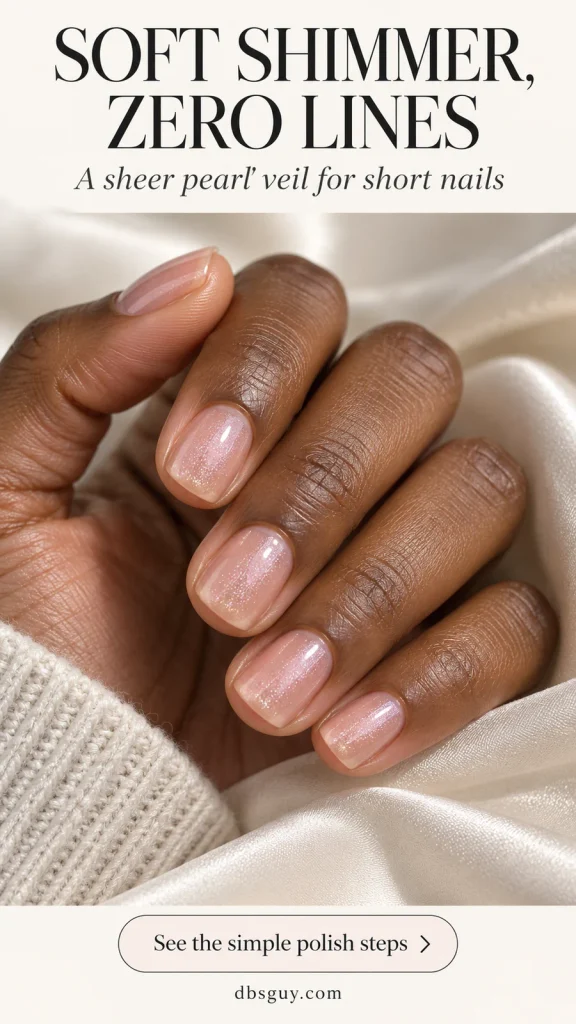
Choose a regular lacquer with fine shimmer in a sheer base, or pair your sheer pink with a compatible translucent shimmer topper. Test the combination on one nail before painting the whole set. Some toppers look delicate in the bottle but become quite opaque over a pale color.
After base coat, apply the sheer color as directed. Add one thin shimmer layer, then check it in ordinary room light as well as near a window. Stop while the effect still looks translucent if you want the reference’s softness. Finish with the recommended top coat.
A fine pearl or shimmer lacquer is a home interpretation of this look; it is not the same application as salon chrome powder. There is no need to buy powder or a lamp for the regular-polish version described here.
Also Read: 19 Neutral December Nail Ideas That Go With Every Holiday Outfit if you want to compare sheer pink with warmer beige and taupe bases.
6. Taupe With One Champagne-Shimmer Side
Keep four nails glossy mushroom taupe and give the ring nail a narrow champagne-shimmer strip along one side. The shimmer has a softly irregular edge, so you are placing a little sparkle rather than drawing a ruler-straight metallic outline.
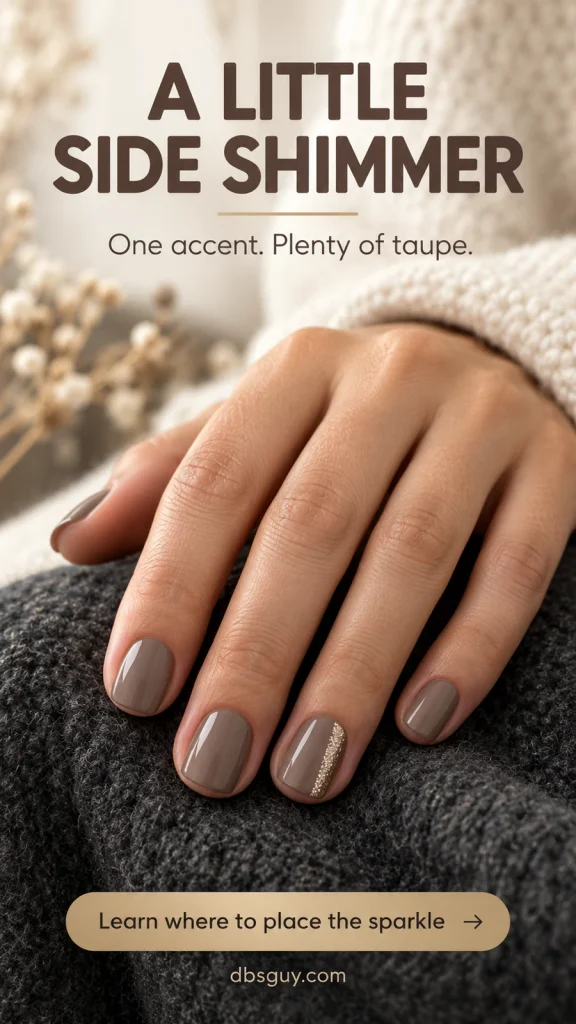
Once the taupe has dried, use a small brush to tap fine champagne shimmer along one side of the ring nail. Begin with a sparse strip, keeping most of the taupe visible. Add a little more only where needed; the accent should stay well under a quarter of the nail’s width.
Keep the shimmer inside the nail boundary with a small gap from the skin at the base and side. A fine shimmer polish is easier to keep visually delicate than a formula full of large glitter pieces. Let the accent dry and finish with a compatible top coat.
Choose the same side of the accent nail on each hand if you want a repeated layout, or mirror it for balance. Before adding more fingers, look at the whole hand: one strip may already give you all the shine you wanted.
Also Read: 15 Elegant January Nail Art Ideas to Pair With Your Winter Jewelry for ways to connect a small metallic accent with your rings or watch.
Keep the Detail Small Without Making It Disappear
Check the first decorated nail before repeating it. Hold your hand at a normal viewing distance: can you see the navy dot, the blue border, or the champagne strip? If a pale detail disappears, try slightly more contrast on a practice swatch before making the artwork wider.
When a design feels crowded, remove one element. Keep the dot and skip the French edge, or keep the shimmer and leave off the dots. The cover combines a few options to show the range, but each individual design works as a complete manicure.
If top coat pulls color into a streak, let the remaining artwork dry longer and use a light touch with enough top coat for the brush to glide. Follow the formula’s directions; repeated brushing over a partly dry dot usually makes the smudge harder to fix.
Questions About Easy January Designs for Short Nails
Which design should I try first if I have never done nail art?
Start with the sheer pearl veil if you want no detail-tool work. For a first painted accent, try one navy dot on each ring nail. Both let you practice the basic polish layers without matching ten curved French tips.
Can these designs work without gel, acrylics, or extensions?
Yes. The home methods here use regular air-dry polish on your existing short nails. Gel requires its own compatible products, curing instructions, and removal process; do not treat an air-dry lacquer tutorial as a gel tutorial.
How do I keep the look wintry after the holidays?
Use a cool accent such as slate or icy blue, or a quiet pearl finish, and leave out holiday symbols. If you prefer warmth, mushroom taupe with a little champagne shimmer still fits cozy winter outfits. Choose the palette you enjoy wearing rather than adding a motif simply because the month is January.
For your first set, pick the finish or placement you most want to try and repeat that one idea. Short nails give you enough room for a deliberate detail; you can leave the rest of the surface simple.