Start with the part of a manicure you are usually tempted to skip: a bold pattern, a strange-but-good color pairing, or one little face. Cobalt checks, lime squiggles, and a red dice accent give January nails some personality without asking you to wear leftover Christmas art.
These ten fun January nail designs range from a single playful accent to a full graphic set. You will find the exact placement to request, details worth keeping, and ways to simplify the look for shorter nails.
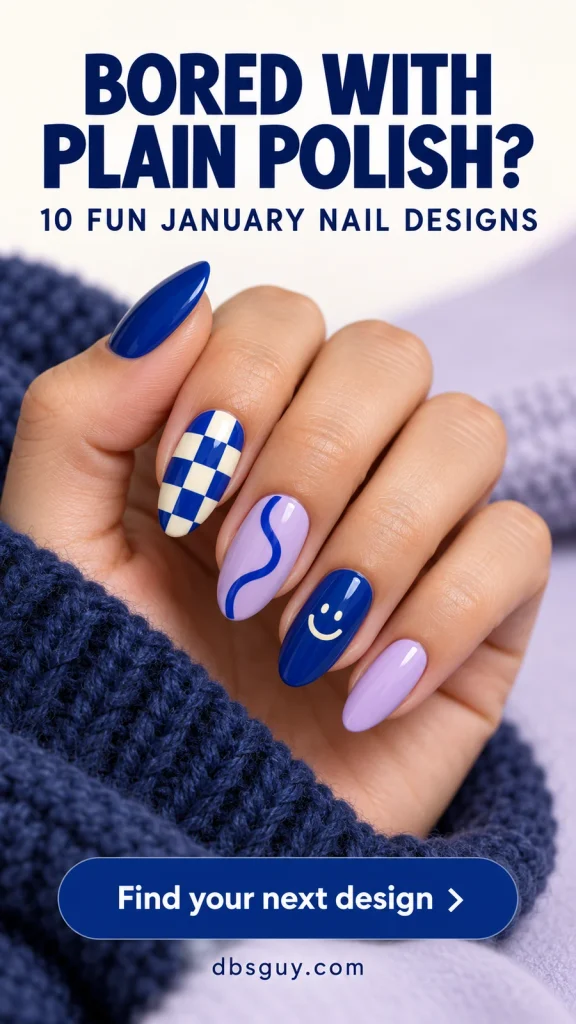
The images are AI-generated design concepts for dbsguy.com. Use them to discuss color, shape, and placement with your nail artist; they do not document completed salon work.
Pick the Kind of Fun You Want
- One small change: Try the yellow smiley in design 3 or the dice accent in design 6.
- Pattern you can spot at a glance: Compare the checks in design 1 with the cow-print patches in design 5.
- Color without tiny illustrations: Choose the broad squiggles in design 2 or the two-color split in design 4.
- A bigger statement: Look at the flame tips, comic outlines, and aura lightning in designs 8–10.
For this edit, navy, lilac, teal, and cool blue connect the brighter details to a winter palette. That is a styling choice, not a rule about which colors belong in January. Choose your comfortable nail length before deciding how much artwork to fit on it.
1. Cobalt-and-Ivory Checkerboard Accents
Keep your favorite blue, then give two nails a little board-game energy. Cobalt-and-ivory checks on the middle and ring fingers make the pattern obvious; solid cobalt on the thumb, index, and pinky keeps it from taking over the hand. The cream squares soften the contrast beside winter-white knitwear.
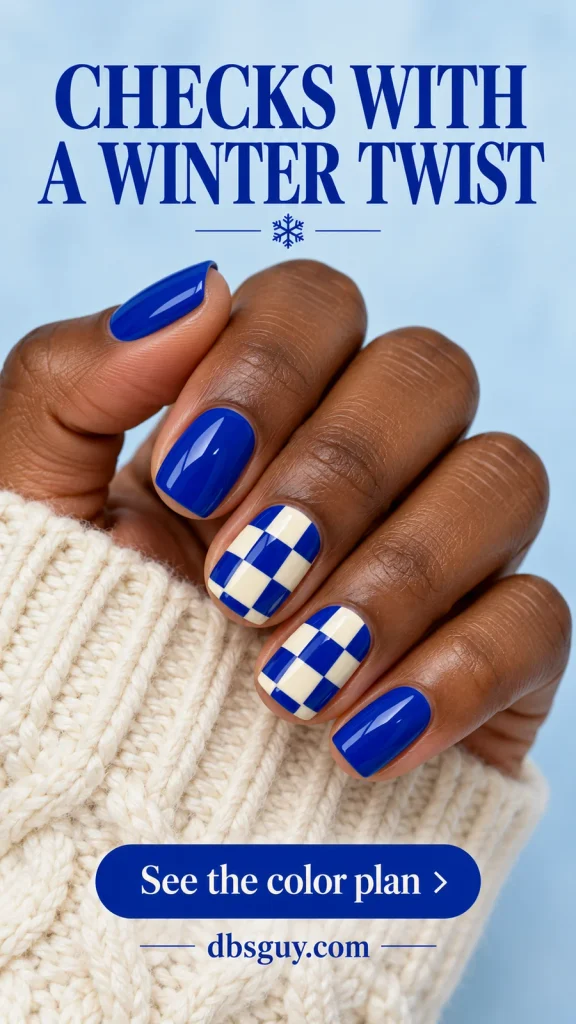
Ask for broad squares with clear corners rather than a tiny, densely packed grid. On a very short nail, fewer rows make more sense than shrinking every square. A squoval shape works well because the checks have a fairly straight edge to follow.
This is a precision-art choice. For a home interpretation, look for a flat checkerboard wrap or decal that fits inside the nail edges, and follow its application directions. A pattern that is too wide can lose its shape when trimmed.
2. Lilac Nails With Lime-Green Squiggles
A lime ribbon running over lilac gives you a bright manicure without needing a different illustration on every finger. The curve can change slightly from nail to nail. Repeating the same two colors is what makes the loose lines feel like a coordinated set.
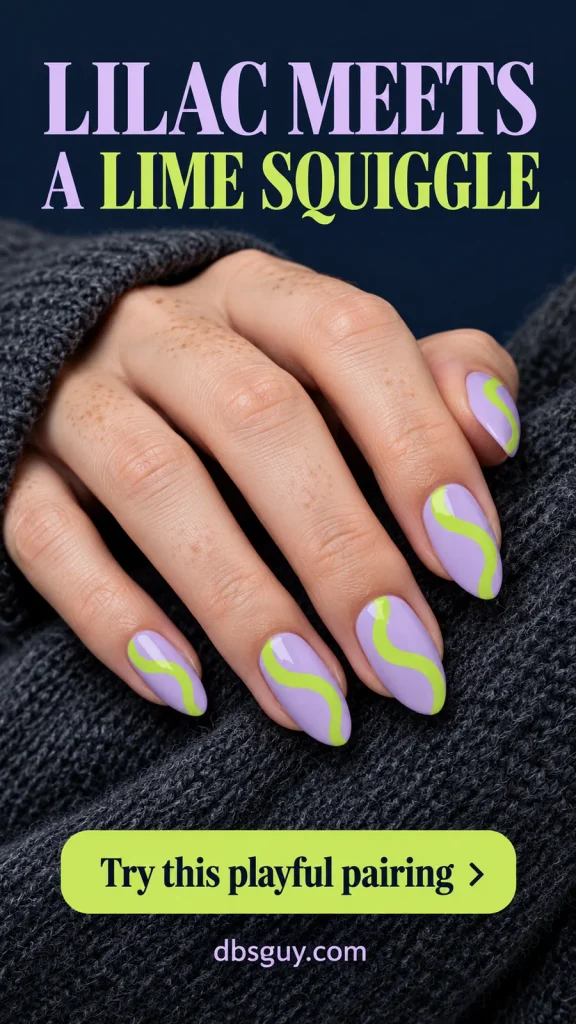
Show your artist the width you like: a fine line feels delicate, while the wider ribbon shown here makes the green a much bigger part of the look. Ask for one continuous S-like curve with open lilac space around it. Extra crossing lines would turn this into a different, busier pattern.
On shorter nails, use a gentler bend rather than trying to fit a full looping shape. If you are painting with regular polish, practice the curve on a spare tip first and let the base dry as directed before adding the green. The lime already supplies the surprise; you can skip glitter.
3. Navy Nails With One Butter-Yellow Smiley
For the days when you want something playful but still like a dark manicure, keep four nails navy and make the ring nail butter yellow. Two small navy eyes and a curved mouth turn that one lighter nail into the whole story. The yellow is easy to spot when you wrap your hand around a coffee mug.

Check the face orientation before painting or applying a decal: decide whether you want it upright when you look at your own fingertips or when you show your hand to someone else. Either choice works, but make it deliberate. Leave yellow space between the eyes and smile so they remain separate marks.
A small flat smiley decal is a useful shortcut if the curved mouth is harder to paint than the dots. Keep the remaining nails plain. On especially small nail beds, placing the face on a thumb gives it more room without changing your preferred length.
Also Read: 21 Short December Nail Ideas That Make Tiny Details Stand Out.
4. Teal-and-Plum Diagonal Color Blocks
If tiny drawings are not your thing, let two substantial blocks of color do the work. Teal sits near the base and plum fills the tip side, meeting along a single diagonal. Both colors have enough depth to sit comfortably beside gray coats and dark denim, while the dividing line makes the manicure graphic.
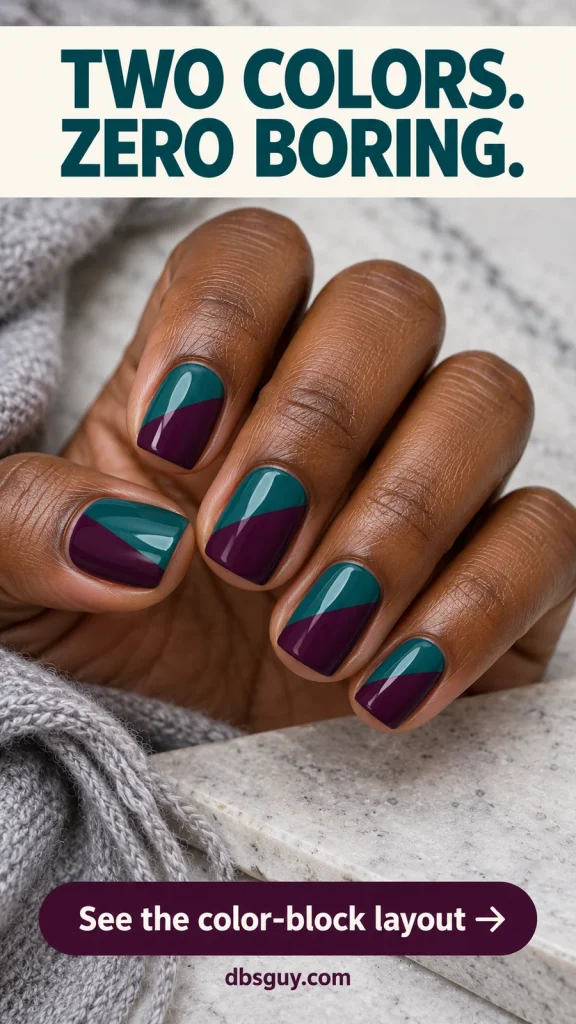
Request two opaque colors and a crisp meeting point, with no stripe between them. Ask to see both swatches together first; if the shades are almost identical in depth, the boundary may be less noticeable than you expect. You can make teal the larger area if that is the color you want to see most.
For a regular-polish version, nail-art guides can help with the diagonal, but use them only when the underlying layer is ready according to the product directions. Tape over a soft base can lift it. On very short nails, keep the same broad split instead of adding smaller shapes.
5. Icy Lilac With Navy Cow-Print Patches
Cow print takes a cooler turn when navy replaces black and the surrounding nails are lilac. Put the patches on ivory middle and ring nails, then leave the other three fingers solid lilac. That little break in the palette makes the animal pattern feel intentional beside soft winter layers.
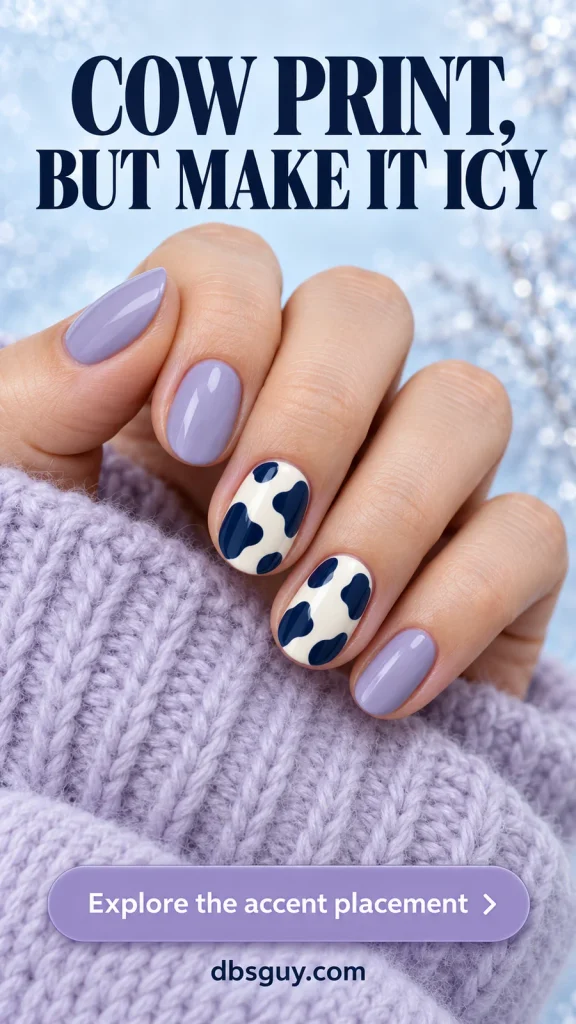
The patches should look irregular, with rounded edges and unequal sizes. Ask for visible ivory channels between them; evenly spaced circles would read as polka dots. A few marks can enter from the sides, but keep the polish on the nail plate.
This is forgiving about symmetry, though it still needs control around the edges. With regular polish, build each patch from a few connected brush marks after the ivory is ready. For a smaller nail, use fewer broad patches rather than a miniature all-over print. Keep the lilac nails undecorated so the two accents remain clear.
6. Cherry-Red Nails With a Dice Accent
A winter game night is a good excuse for a manicure with a wink. Keep the set cherry red, except for an ivory ring nail painted with the five face of a die: four red dots around a central one. It uses familiar colors, but the arrangement gives them a different meaning.
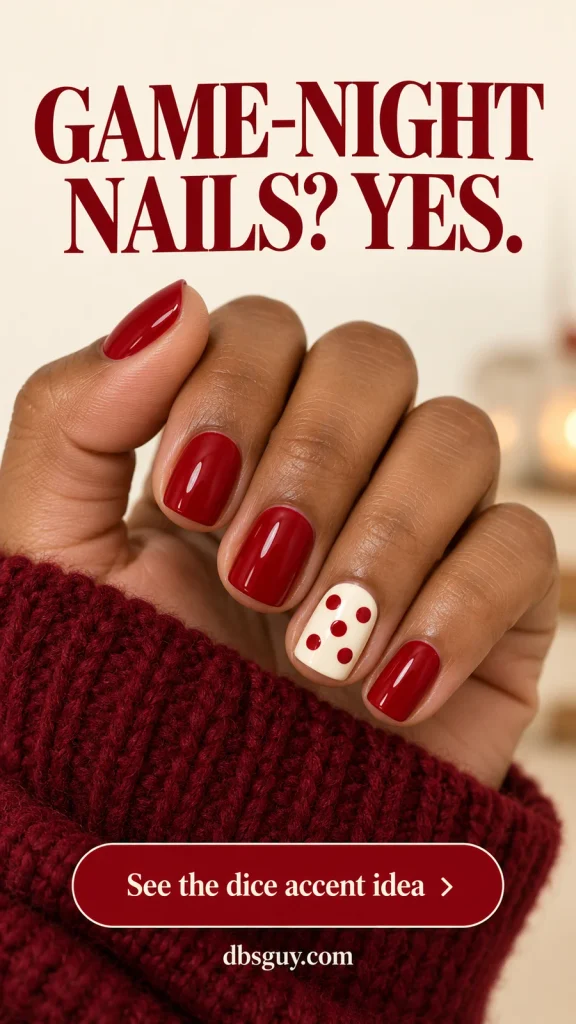
Lay out the five positions on a practice tip before painting the accent. Keep enough ivory between the dots for each one to stay distinct, and choose the dot size for the nail you actually have. A small dotting tool makes the spacing easier to control than a loaded polish brush.
If five marks feel cramped, ask for the three face instead: a diagonal row of three dots. The game-night idea stays readable with less detail. Keep the rest of the manicure plain red; adding dice faces to every nail would make a much busier set.
7. Midnight Navy With Lilac-and-Coral Confetti
You can keep a bit of party sparkle after New Year’s Eve. Scatter small lilac, coral, and silver flecks over midnight navy, with plenty of dark space between them. The short dashes and irregular pieces give this design a confetti feel rather than the even texture of an all-over glitter polish.
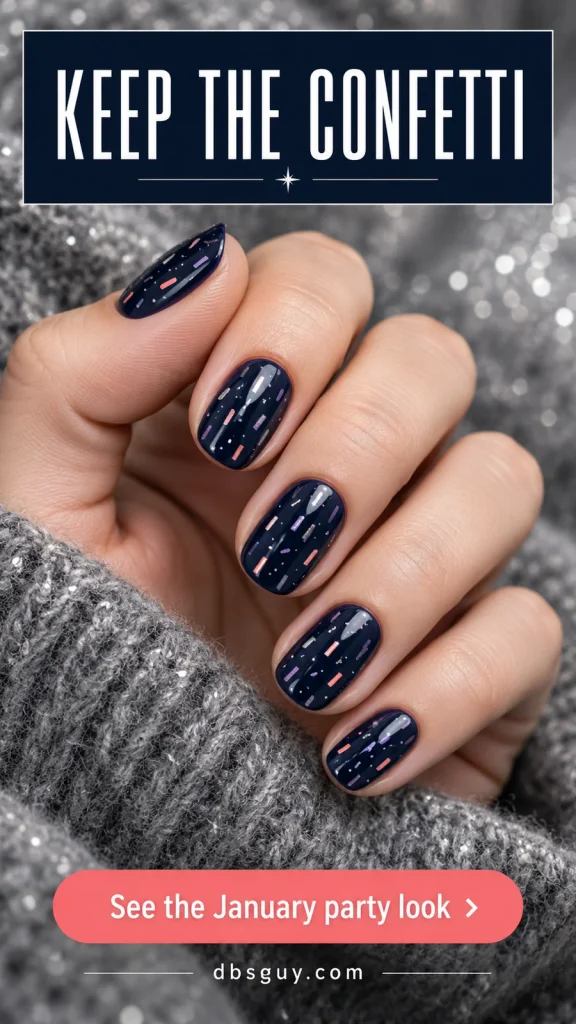
Ask for a smooth finish and sparse placement. If your artist uses a confetti topper, compare the size of its pieces with your nails before choosing it; a mix that looks delicate in the bottle may contain pieces too large for the effect you want.
For a home version with more control, paint short lilac and coral dashes over a dry navy base, then add a few silver marks. Vary their angles and avoid filling every gap. Follow your polish system’s directions for the finishing layer. There is no need to build a thick surface to get the scattered look.
Also Read: 23 Winter Nail Designs: Snowflakes, Chrome and Cozy Knits.
8. Hot-Pink Flame Tips Over a Sheer Base
Hot-pink flames bring a sharp burst of color to a sheer pink-beige manicure. The shapes enter from the free edge and reach toward the center, leaving the lower part of each nail open. Against an icy-blue sweater or cuff, the pink has all the contrast it needs.
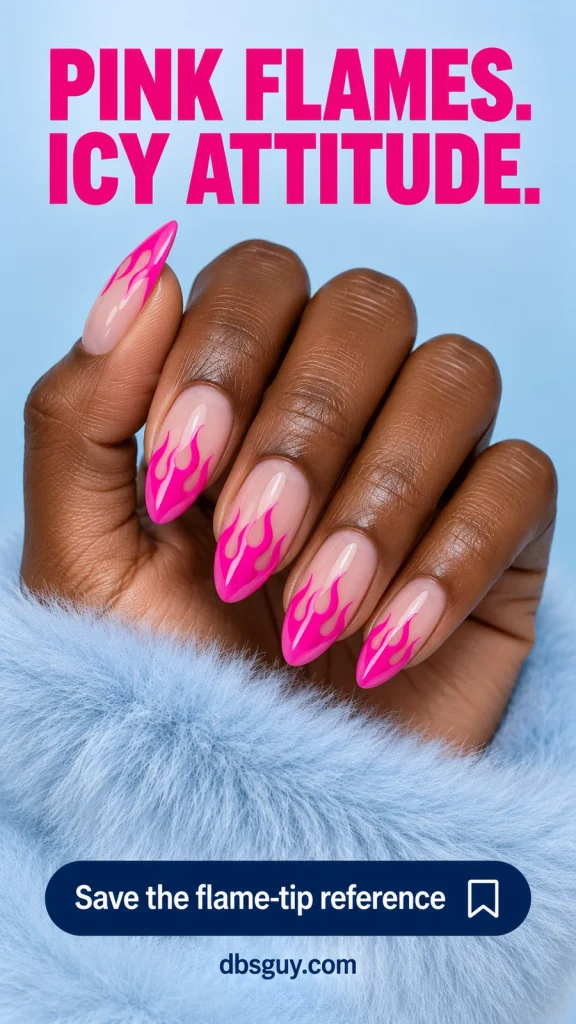
Tell your artist you want pointed flame shapes with clear gaps between the tongues, rather than a wavy pink French band. Medium almond nails give the curves more room, but extensions are optional. On shorter nails, use one or two larger flame points on an accent finger and keep the surrounding nails sheer.
This is a good salon reference if detailed liner work is new to you. For a decal version, compare the motif’s width and length with the nail before committing. Choose a sheer base that gives the transparency you want on your own nails, rather than assuming the reference shade will look identical.
9. Bubblegum-Pink Comic-Book Nails
Turn a bright pink manicure into a pop-art drawing with a narrow navy outline and a white painted highlight. The outline follows the nail’s perimeter, while the white curved dash suggests a cartoon reflection. Unlike an ordinary glossy pink set, the graphic details are part of the artwork.
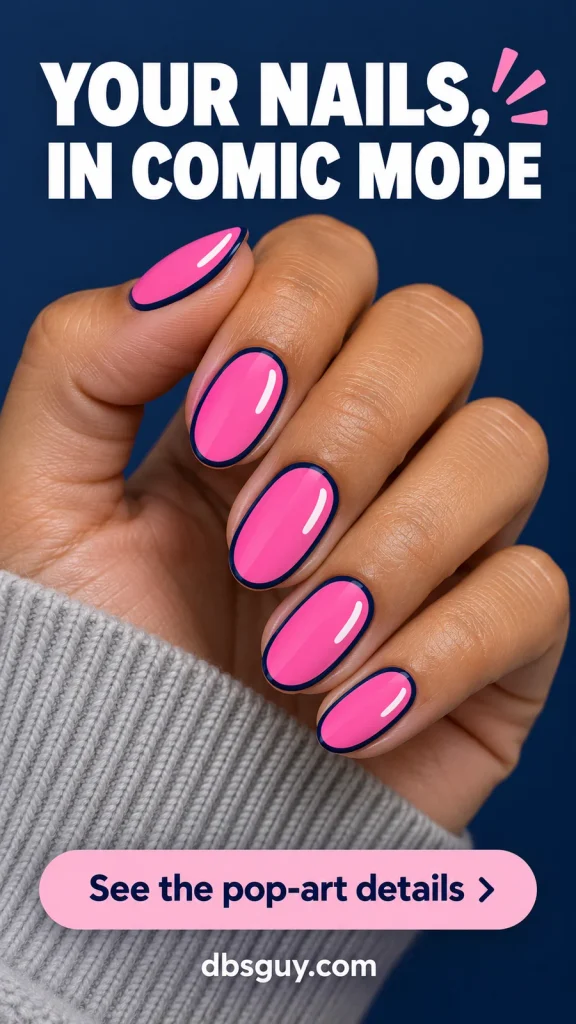
Ask for the navy to sit entirely on the nail, with a neat margin from the surrounding skin. Keep the border narrow enough to leave a generous pink center. The white mark should be a deliberate opaque dash, so do not rely on the natural shine of top coat to supply that detail.
A rounded or oval shape gives the border a continuous path. This is demanding perimeter work, so show the reference when booking and ask whether the artist can adapt it to your length. For a quieter version, keep the comic treatment on two nails and leave the rest plain pink.
10. Lilac Aura Nails With White Lightning Bolts
A diffused lilac glow inside dark navy edges gives this set its depth. Small white lightning bolts on the middle and ring nails add the graphic surprise; the surrounding nails keep only the glow. The sharp marks and soft background do different jobs, which is what makes the combination interesting.
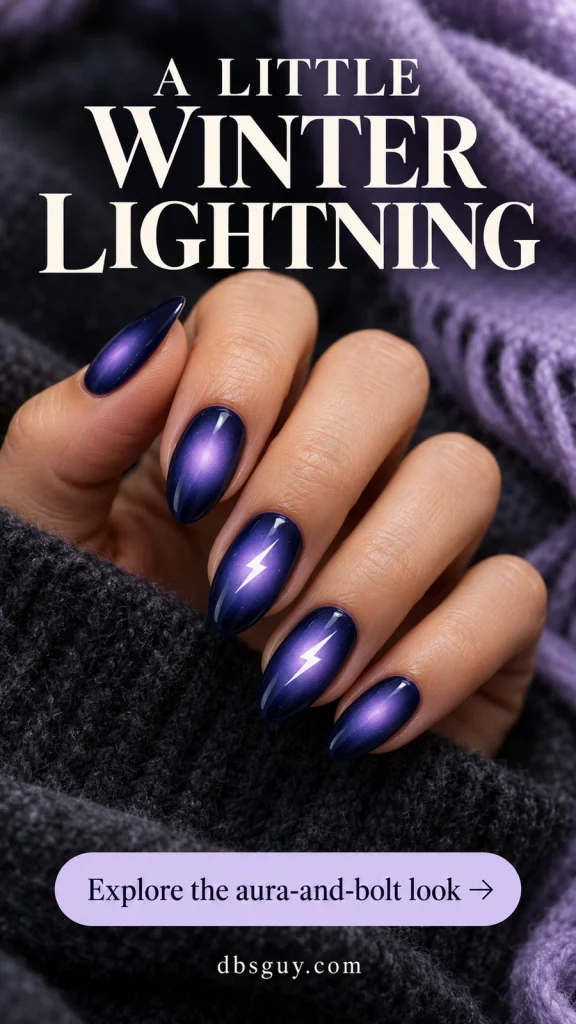
Describe the finish as a soft-edged lilac center fading into navy. A hard lilac oval or a narrow reflective stripe would change the effect. Ask your artist which method they use to create a blended aura, and send the reference ahead so they can plan for the gradient and artwork.
The bolt should stay small enough to leave lilac visible around it. On short nails, keep just one bolt on the roomiest accent nail. If you want a simpler home adaptation, a soft lilac center made with a small sponge and regular polish can suggest the palette, but do not expect it to reproduce a salon blend exactly.
Also Read: 15 Elegant January Nail Art Ideas to Pair With Your Winter Jewelry.
Make the Reference Work for Your Own Nails
Save one design and name the feature you most want to keep. “Short rounded nails, navy everywhere except one yellow smiley, with all artwork flat” is a clearer request than “something fun.” For checks, outlines, or aura work, send the image when booking so the salon can confirm the service, time, and price.
Before the full set is painted, check one sample nail for color contrast and the size of the artwork. If the detail looks cramped, remove a repeat or move it to a wider nail. Adding length is one option, but it is not the only way to make a design readable.
If you choose gel, the American Academy of Dermatology recommends broad-spectrum, water-resistant SPF 30 or higher on the hands before a gel manicure, or dark opaque gloves with the fingertips cut off. Do not pick off gel, and follow the removal directions for the actual service or product used. Traditional polish is also an option for many of these flat designs.
Fun January Nail Design FAQs
Which design is the most manageable to try with regular polish?
The dice accent has a small number of separate marks, making it a useful starting point if you can make dots with a dotting tool. Cow patches allow more irregularity than checks or comic outlines. Start on a practice tip, decorate one accent nail, and follow the polish manufacturer’s drying and application directions.
Can I wear these designs on very short natural nails?
Yes, with the artwork sized to the space available. Keep the dice to three dots if five do not fit, use fewer checkerboard rows, or put one smiley on a thumb. A reference with longer almond nails can supply the palette without obliging you to copy its length.
How do I choose bright colors that still feel right with winter clothes?
Start with a color already in a coat, sweater, or scarf, then add one brighter partner. Navy and butter yellow keep most of the manicure dark; lilac and lime make the entire set lighter. Look at the swatches beside something you wear often to decide how much contrast you enjoy.
Do I need gel, acrylics, or extensions for fun nail art?
Not necessarily. The flat checks, dots, patches, squiggles, and outlines describe patterns rather than a particular enhancement system. Many can be interpreted with regular polish on natural nails. A blended aura takes a different technique from painted dots, so ask about the result and method before choosing the service.
How can I make a bold reference feel less busy?
Reduce the number of decorated nails before removing the main feature. Keep two checked nails, one flame accent, or one comic outline, and repeat a color from the artwork on the remaining nails. That way the detail you liked is still recognizable.
If you keep coming back to one image, use it as the starting point. Decide which fingers get the art, keep the colors that caught your eye, and let the design fit the nails you enjoy wearing.
Also Read: 15 Simple December Nails That Look Polished With Minimal Effort.