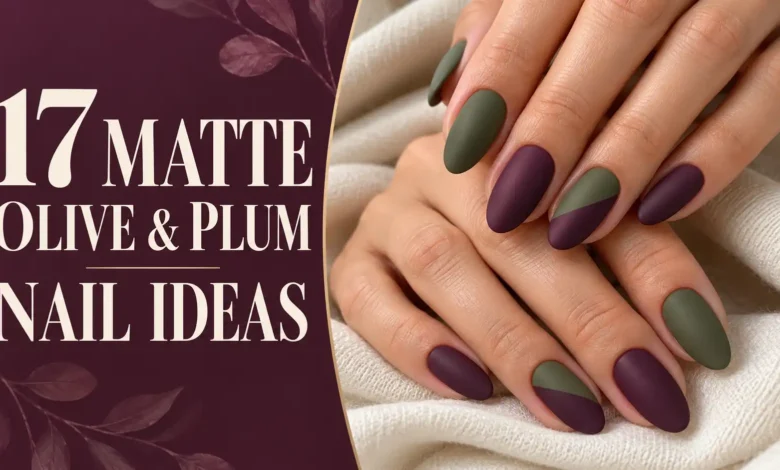
For matte olive and plum nails, start with a muted green and a plum that still looks purple in daylight. Wear them on alternating short nails for the simplest version, or use the pair for clean blocks, fine patterns, and one carefully placed accent. The shared matte finish ties the colors together without needing sparkle.
These 17 ideas range from an easy two-bottle manicure to artwork worth taking to a nail appointment. Each comes with a practical detail to keep, simplify, or scale to your nail length.
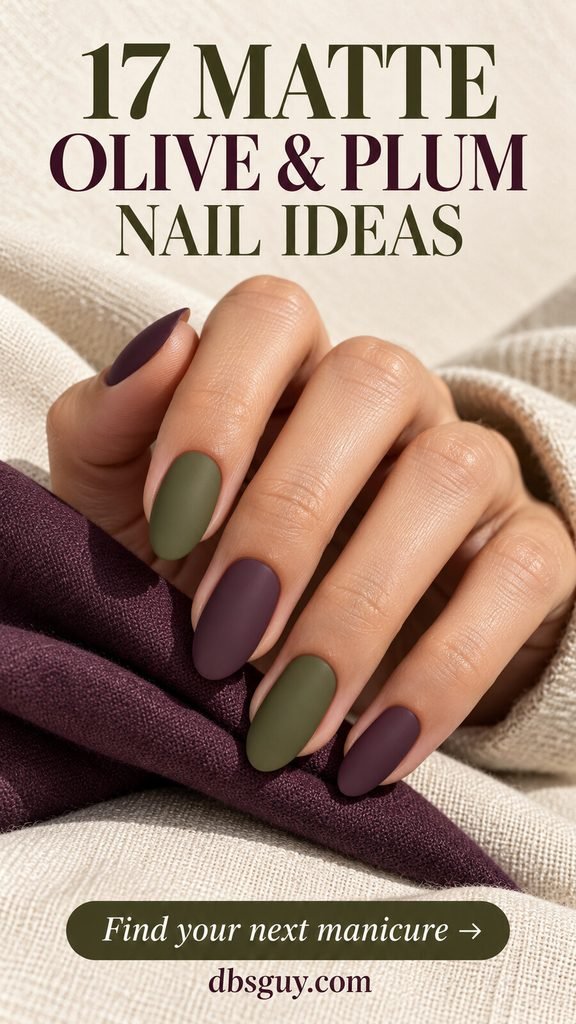
The images in this guide are AI-generated design concepts, not photographs of completed salon work. Use them to discuss color, placement, and finish with your nail artist; exact polish results will vary.
Choose Your Olive, Plum, and Level of Detail
Put the two actual color swatches side by side before choosing the art. An olive with a little brown or yellow gives the combination an earthy feel; a gray-green makes it quieter. Pair either with a visibly purple plum if you want both colors to read clearly. Very dark green and nearly black aubergine can lose their contrast, especially in a small pattern.
If you saved burgundy and green nails, notice the difference in the purple shade here: burgundy usually looks redder, while these plum concepts lean toward purple. Either direction can work, but tell your artist which one you mean.
- For a simple home manicure: start with alternating solids, a tonal mix, or sparse speckles.
- For short nails: choose one clear division, a narrow French edge, or a single accent instead of shrinking a dense pattern.
- For detailed salon art: save the checkerboard, plaid, botanical, or nested-arch reference and identify the part you want to preserve.
When saving fall nail ideas, group your favorites by everyday color, open-space art, or patterned accents. That makes it easier to find the right reference before an appointment.
1. Short Alternating Olive and Plum Nails
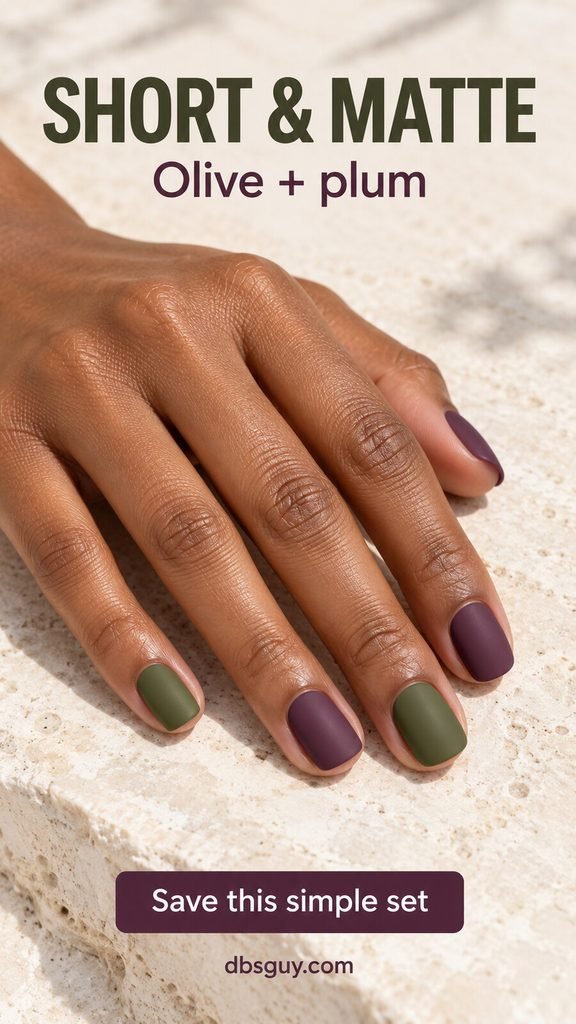
A short squoval shape makes this the most straightforward place to begin. Alternate an opaque olive with a muted plum, keeping the corners softly rounded and the length consistent. There is no accent nail to plan; the repeat of the two colors supplies the design.
This is also an easy reference to adapt if you prefer more green. Use olive on three nails and plum on two, then keep the same arrangement on the other hand. Ask for both colors to have the same matte finish so one does not look accidentally shinier.
Also read: 19 Olive Green November Nail Ideas That Pair Beautifully With Cozy Neutrals.
2. A Tonal Mix From Moss to Deep Plum
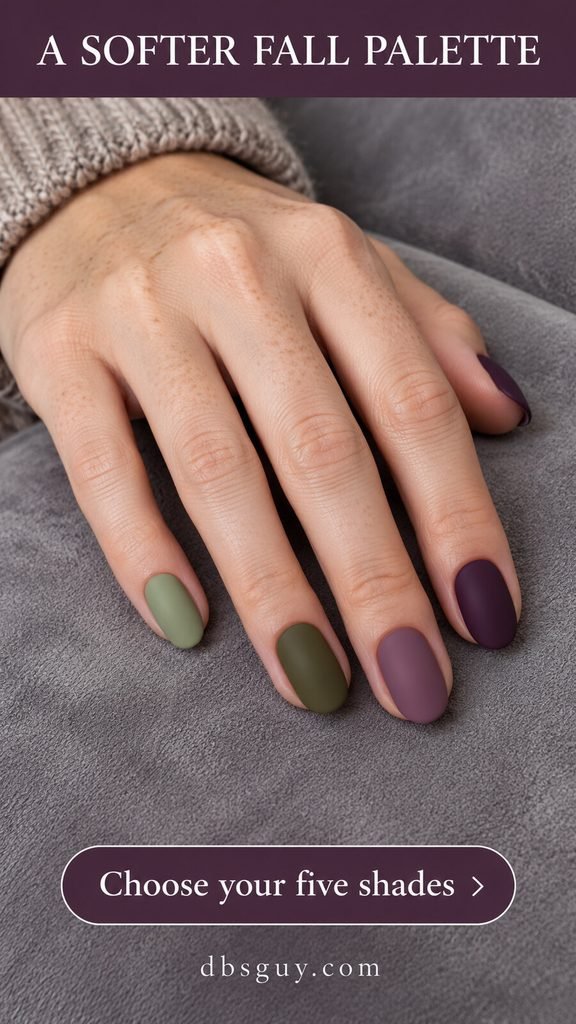
Instead of repeating two bottles, give each nail its own solid shade. Pale moss, earthy olive, dusty mauve-plum, and deeper purple create a softer transition across the hand. Each nail stays one color; there is no blended ombré to recreate.
Choose this when you like the palette but want less of a sharp green-purple switch. Lay out the swatches first, including the thumb, and replace any shade that looks much brighter than the others. Muted colors keep the set connected even when their depths differ. An oval shape echoes the gentle color changes.
3. A Clean Olive-and-Plum Center Split
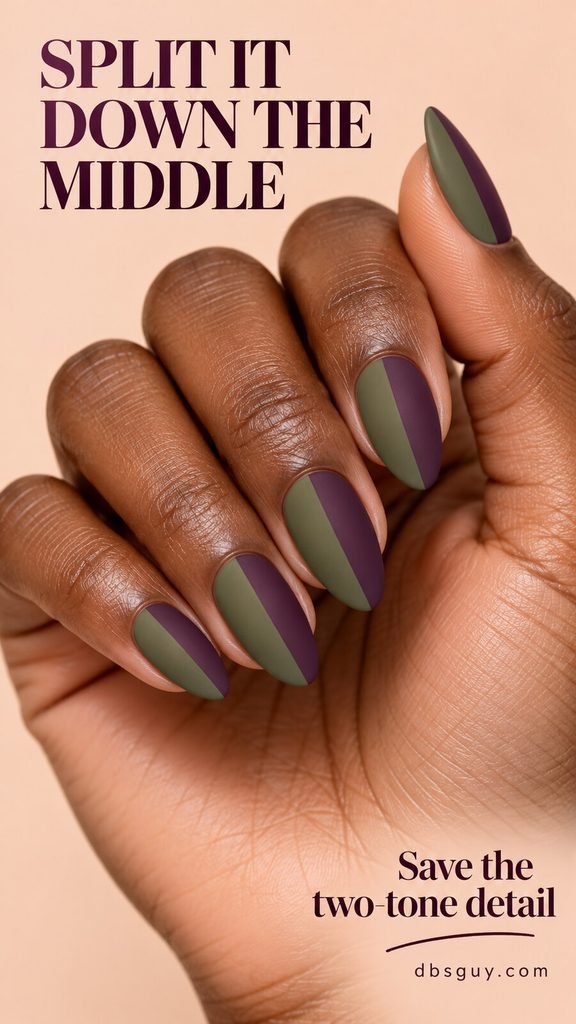
A straight division down the middle gives each nail equal amounts of olive and plum. On an almond shape, the line travels from the base toward the point, making the two-color construction easy to see.
The important detail is the meeting edge. Ask for a crisp seam without a metallic outline, and check that the division looks centered when you view the nail head-on. If painting ten split nails feels too involved, keep the split on two accents and use the same two colors as solids elsewhere. The reference still gives your artist the exact color balance to follow.
4. Diagonal Matte Color Blocks
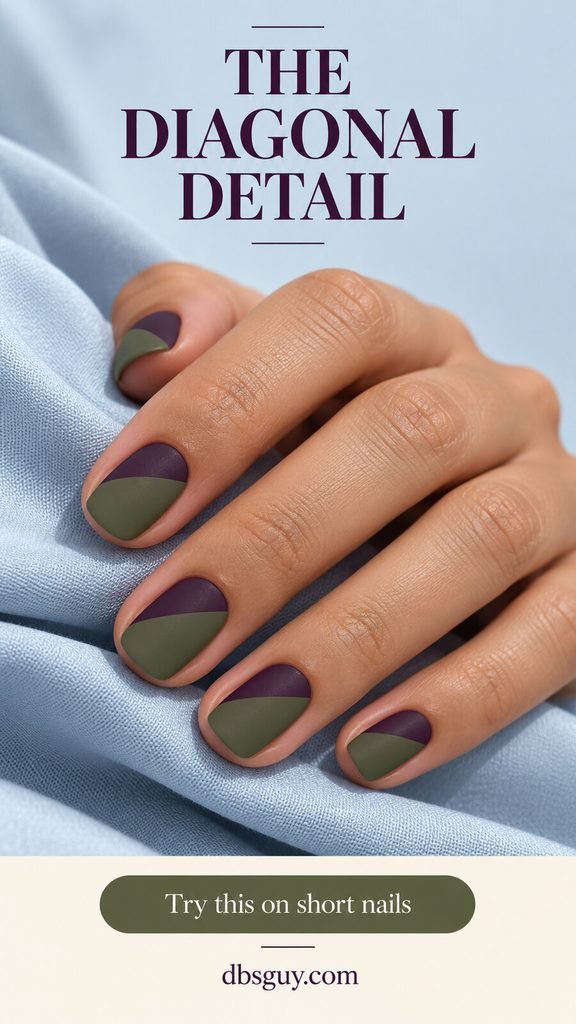
Move the dividing line to an angle for a broader, bolder color-block look. Unlike the center split, this design crosses the nail diagonally, leaving two substantial fields of color. Rounded-square nails give the angled edge a clean frame.
For a short version, keep one diagonal break per nail rather than adding several small triangles. Decide whether you want every line traveling the same direction or a mirrored arrangement between hands. Consistent angles will make the set look considered, while the olive and plum can trade places without changing the design.
5. Open-Space Olive and Plum Corners
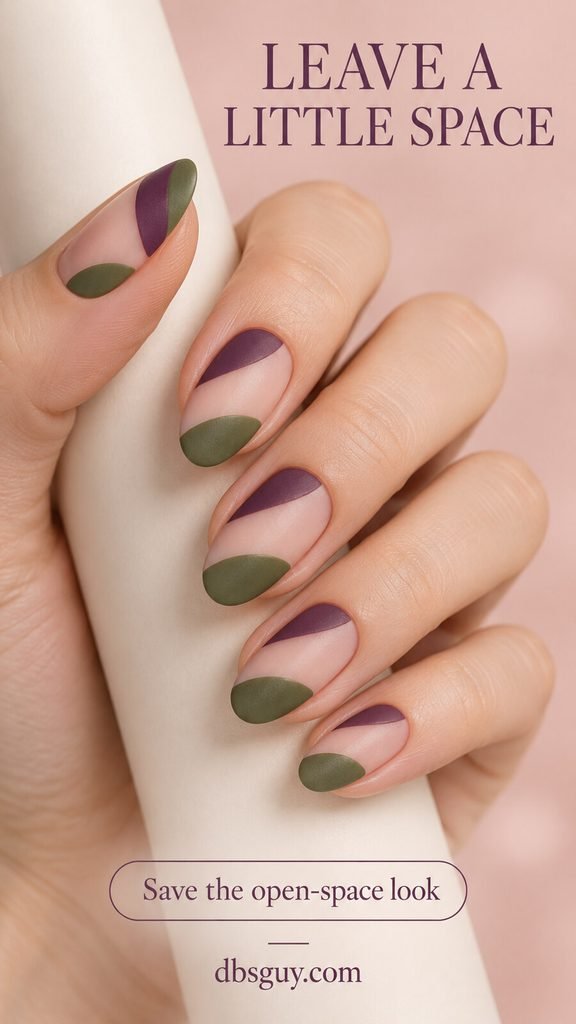
Wide areas of nude base separate plum near one side of the cuticle from olive toward the opposite tip. The exposed-looking center is the feature to preserve: it keeps two dark colors from covering the whole nail.
Ask for a nude polish that suits the look you want, rather than assuming every sheer pink will disappear against your skin. On a shorter nail, reduce the colored patches so the diagonal gap remains visible. These are broad rounded corners, not narrow French edges. Keep the nude base matte too for a consistent surface across all three areas.
6. Olive Nails With Plum Half-Moons
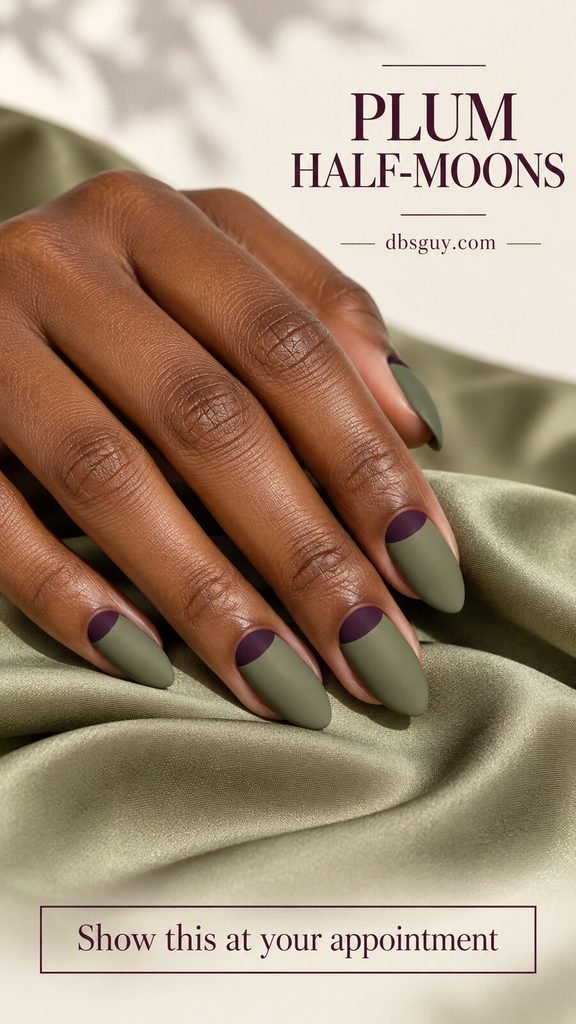
Here, plum sits in a small semicircle at the base of an olive nail. The curved detail follows the cuticle area, leaving most of the nail green. It is a useful choice when you want plum present on every finger without making it the dominant color.
Keep the moon shallow on short nails. A deep semicircle can take over the design and leave too little olive above it. At your appointment, point to the base of the reference and specify a filled plum half-moon; that is a different placement from a French tip or a thin outline around the cuticle.
7. A Matte Micro-French in Two Colors
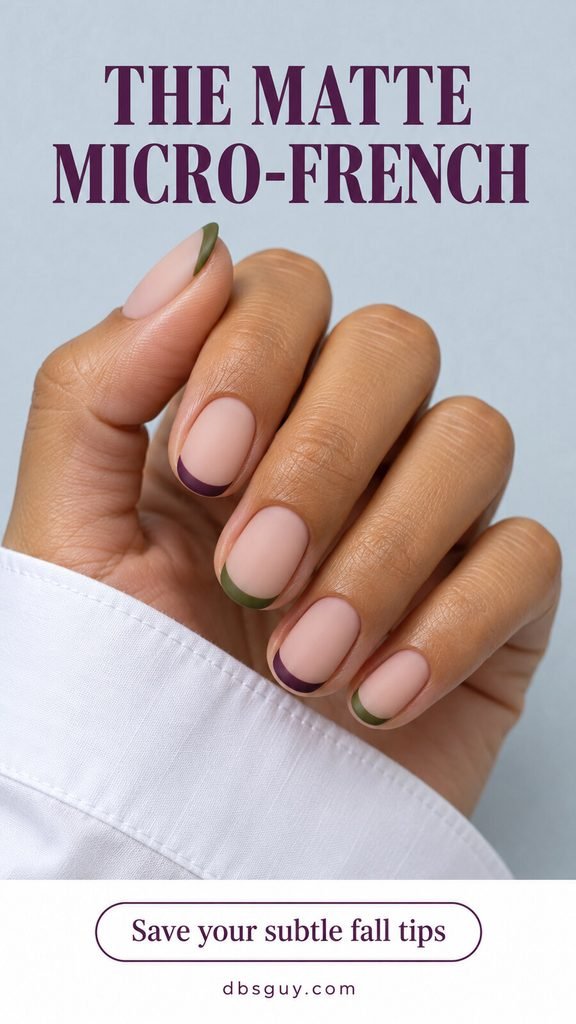
A narrow olive or plum edge over a nude base gives you a much lighter version of the palette. Alternate the tip colors across the hand, with a fine curved border following each nail’s shape.
The tip width matters more than the length. Ask your artist to keep the colored edge slim enough that the nude remains the main area you see. Short oval nails work well with this compact placement; there is no need to add length just to fit a French design. Specify matte across the entire nail, including the base, if you want to match the reference.
8. Olive and Plum Ribbon Swirls
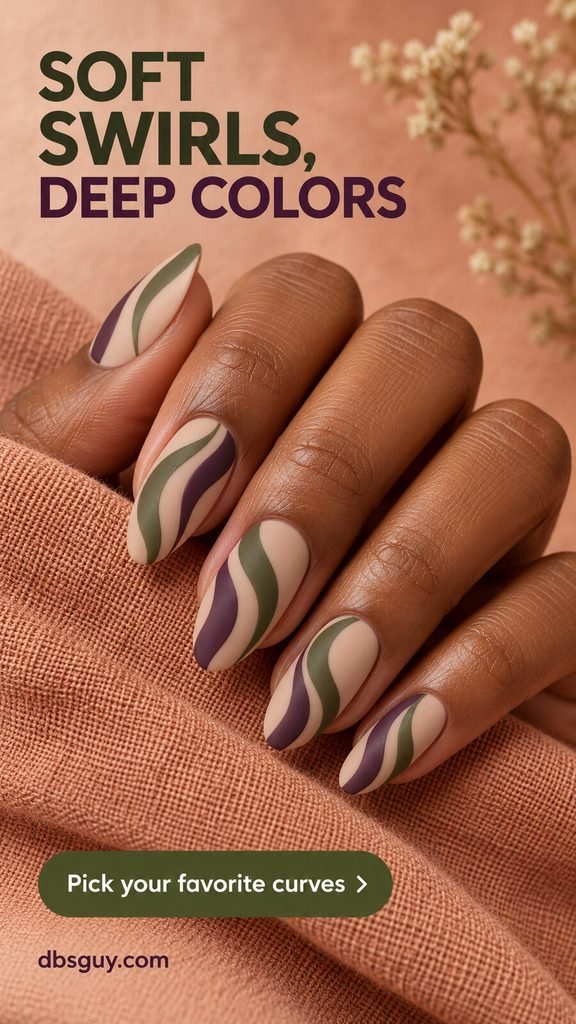
Two flowing ribbons turn the same colors into a softer design. Olive and plum curve along a nude base, with a visible channel of nude between them. Almond nails give the curves room to taper as they approach the tip.
Save this one if you prefer movement to straight edges. The ribbons do not need identical paths on every nail, but they should share a similar width. For a shorter adaptation, use one pair of curves on an accent nail and solid matte colors on the rest. Keeping the artwork flat avoids turning a painted swirl into a raised texture.
9. One Olive-and-Plum Checkerboard Accent
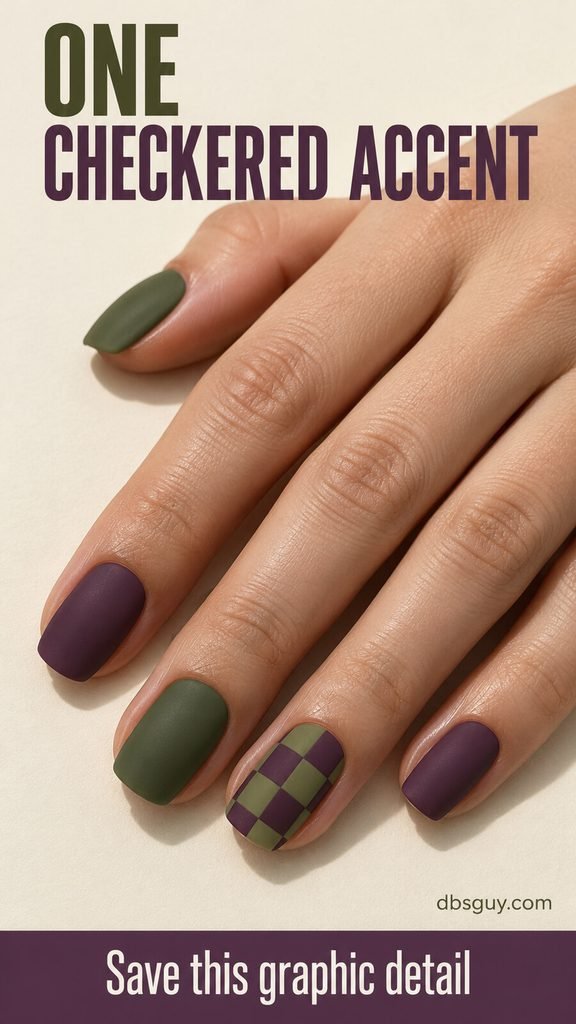
A single checkerboard nail brings a graphic focal point to an otherwise solid manicure. Use olive and plum squares, then repeat those colors on the neighboring nails. The reference keeps the checks large enough to recognize without zooming in.
For narrow nails, ask for fewer columns rather than a miniature grid. The two shades also need enough difference in lightness for the squares to remain separate. If the swatches look almost identical under the salon lights, choose a lighter olive. A rounded-square shape suits the grid, though your artist can crop the pattern to fit an oval.
10. A Plum Leaf Sprig on Matte Olive
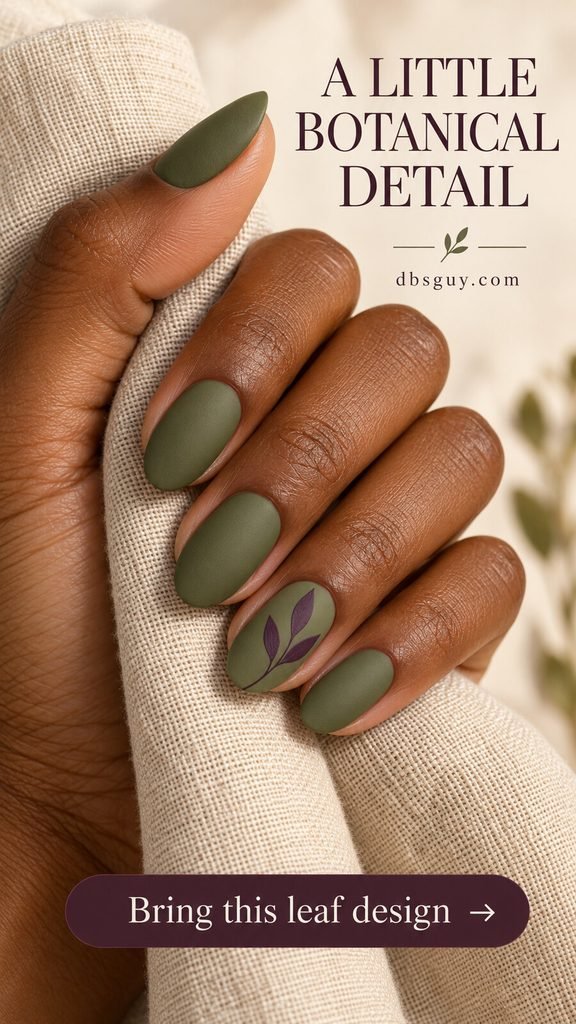
One plum stem with a few pointed leaves gives a mostly olive set a small botanical detail. The leaf silhouettes are filled in, so they stay readable against the green without an extra outline or metallic accent.
Keep the sprig on one nail if you want the manicure to feel quiet. On a short nail, one stem and two leaves can carry the same idea; crowded foliage would hide the olive base. Ask for a curved stem that follows the length of the nail and leaves a little clear space around the edges.
11. Fine Plum-and-Cream Plaid
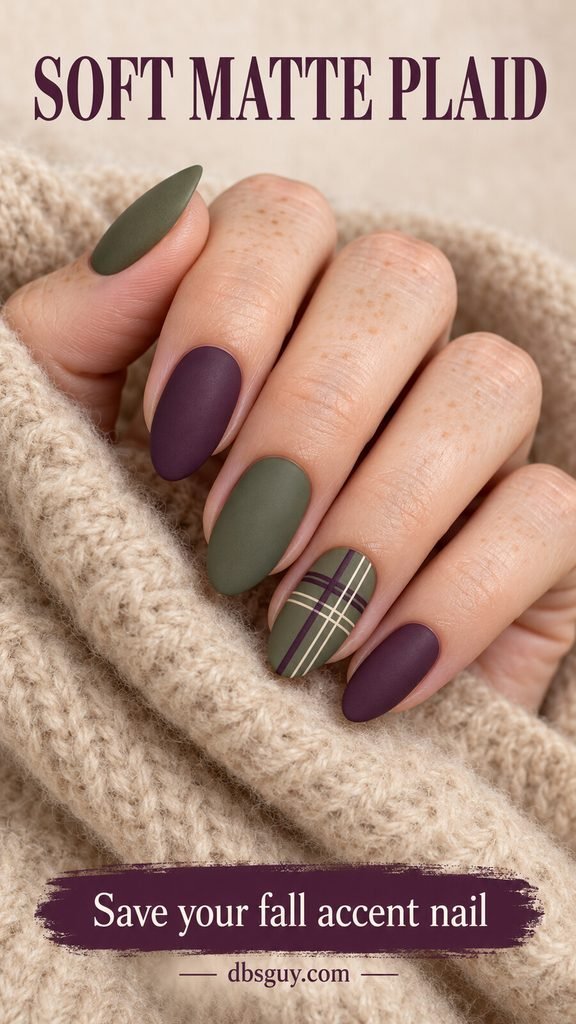
Use an olive accent nail as the backdrop for crossing plum stripes and finer cream lines. Solid olive and plum nails around it stop the plaid from taking over the whole manicure. The cream threads are the detail that makes the crossing lines easier to read.
Bring a close-up so your artist can see the difference between the main bands and the hairline accents. For short nails, simplify to one small intersection rather than trying to fit a full fabric repeat. Leave space between stripes; several thick lines can turn a delicate plaid into a dark block.
Also read: 31 October Nail Ideas You’ll Want to Screenshot Before Your Next Appointment.
12. Pottery-Inspired Speckles
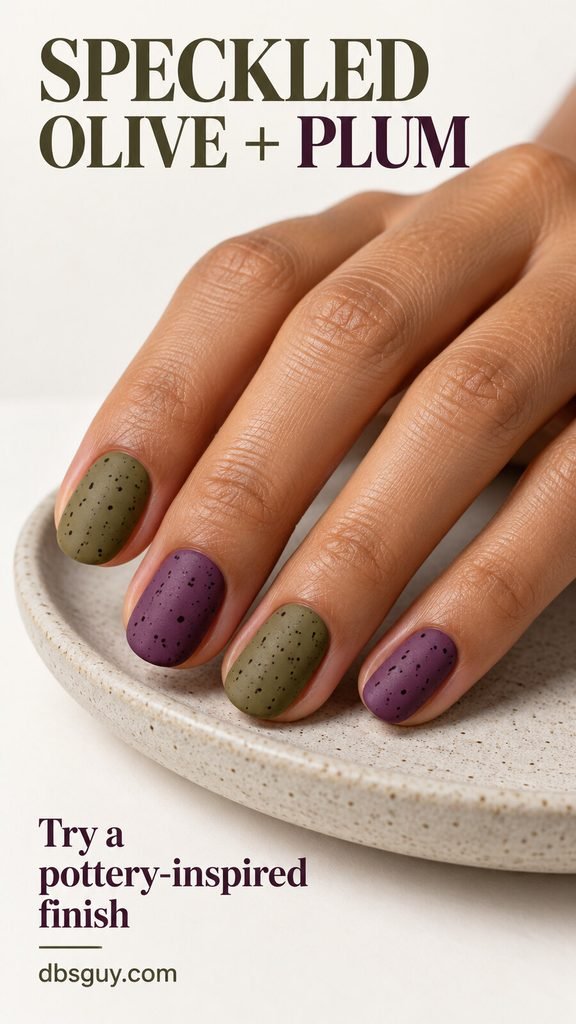
Tiny dark flecks give alternating olive and plum nails the look of speckled ceramics. The finish stays matte, and the marks sit flat on the color instead of adding glitter or a raised embellishment.
This design suits short oval nails because the scattered detail does not depend on a large canvas. Use an irregular mix of very small dots and a few slightly larger flecks, leaving plenty of the base visible. If you are trying a compatible speckled lacquer topper at home, test it over both colors first: flecks that show clearly on olive may nearly disappear on a very dark plum.
13. An Ivory Terrazzo Accent Nail
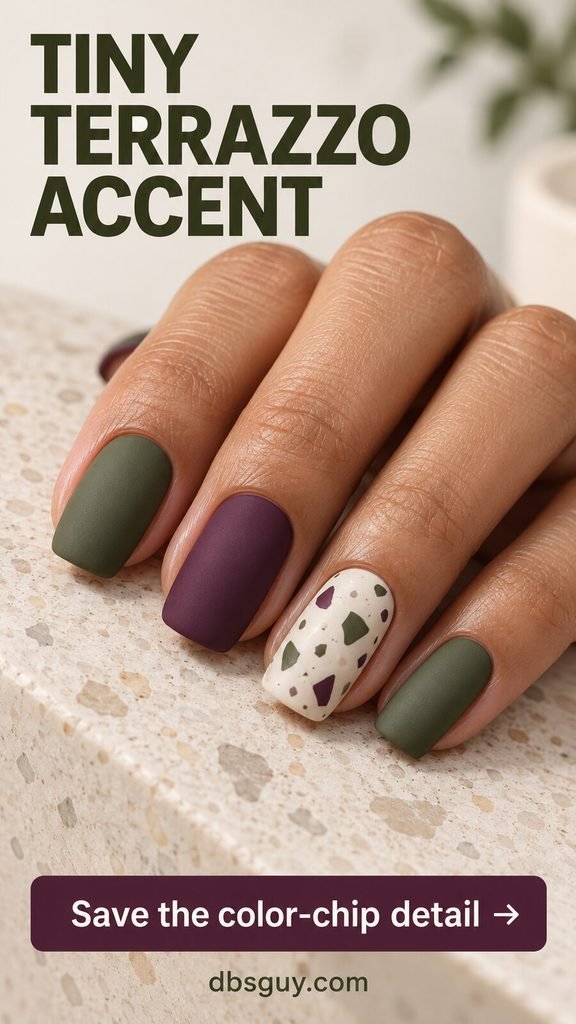
Terrazzo changes the scale and shape of the detail. Instead of tiny dark speckles across every nail, one ivory nail holds larger, irregular olive and plum color chips. Solid nails repeat the chip colors around the accent.
Ask for flat painted fragments with uneven edges, not round dots or pieces of glitter. An off-white base keeps the two colors visible and adds a light break in the set. On a small nail, a handful of separated fragments will communicate the idea more clearly than dense coverage. Keep a little ivory showing between every chip.
14. One Small Plum Flower
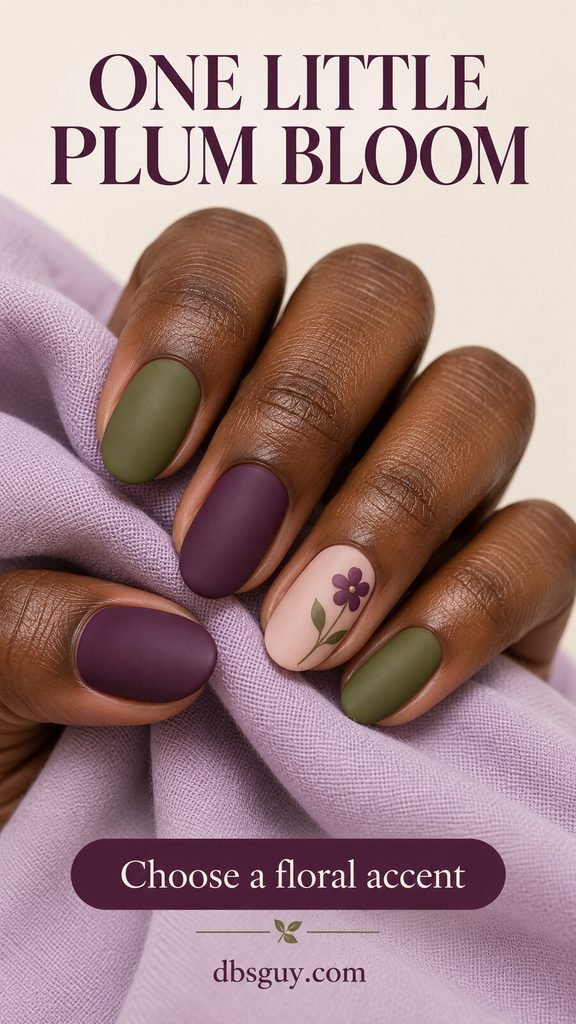
A nude accent nail with a single plum flower softens the solid olive and purple around it. An olive stem and two leaves bring the green onto the floral nail, while a tiny pale center makes the petals easier to distinguish.
Choose this if you want something decorative without a full floral print. Place the bloom slightly to one side and leave open nude space above or below it. For very short nails, keep the flower and shorten the stem instead of squeezing in more leaves. Request flat painted petals and a matte finish to preserve the simple illustrated look.
15. Plum Nails With an Olive Pinstripe
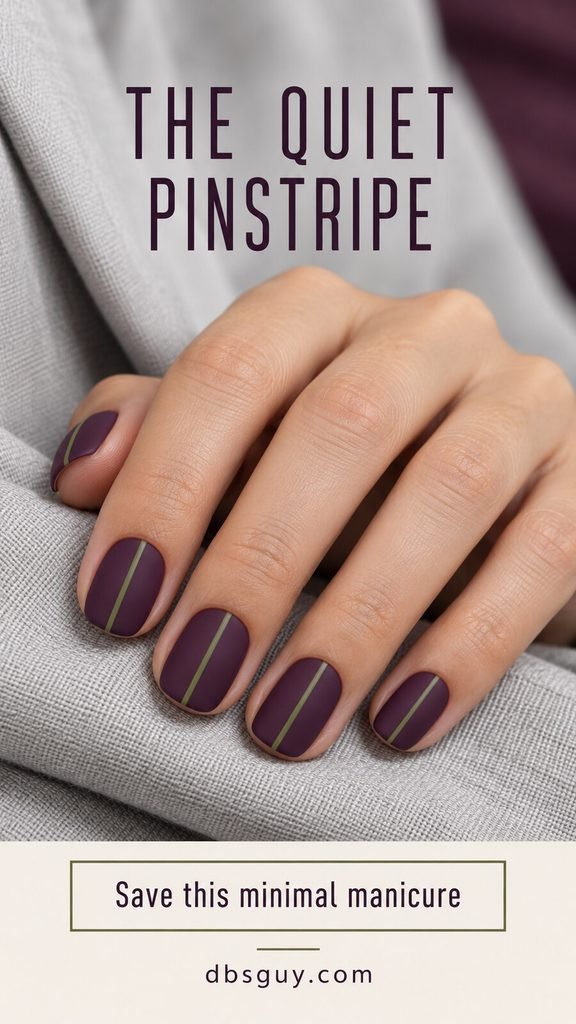
A single fine olive stripe gives a mostly plum manicure a tailored detail. Run it lengthwise, slightly off-center, and let the deep purple remain the dominant color. The narrow stripe creates a different balance from the equal halves of the center-split design.
Ask for a consistent line on every nail rather than a broad green panel. If your nail beds vary in width, the artist can adjust the stripe slightly while keeping its visual weight similar. A short squoval shape fits this restrained look. Choose an olive light enough to remain visible over the plum, especially if you want the detail to show in photos.
16. Matte Bases With Clear Gloss Dots
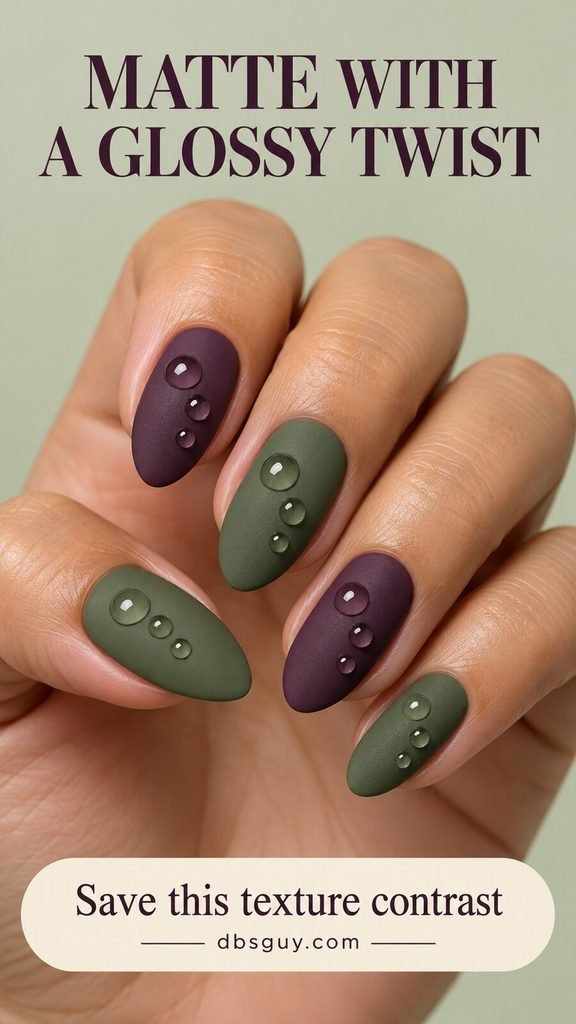
This is the mixed-finish option: alternating matte olive and plum bases carry small clear glossy dots. Most of the surface stays shine-free, while the dots catch light like tiny droplets. The effect comes from finish contrast rather than another color.
Ask for clear gloss details over the completed matte base, using products your artist knows work together. Keep the dots separated so the matte area remains obvious. These are polished spots, not rhinestones or loose decorations. If you want a completely matte manicure, choose the speckled design instead; adding matte top coat over the dots would remove this particular contrast.
17. Nested Olive and Plum Arches
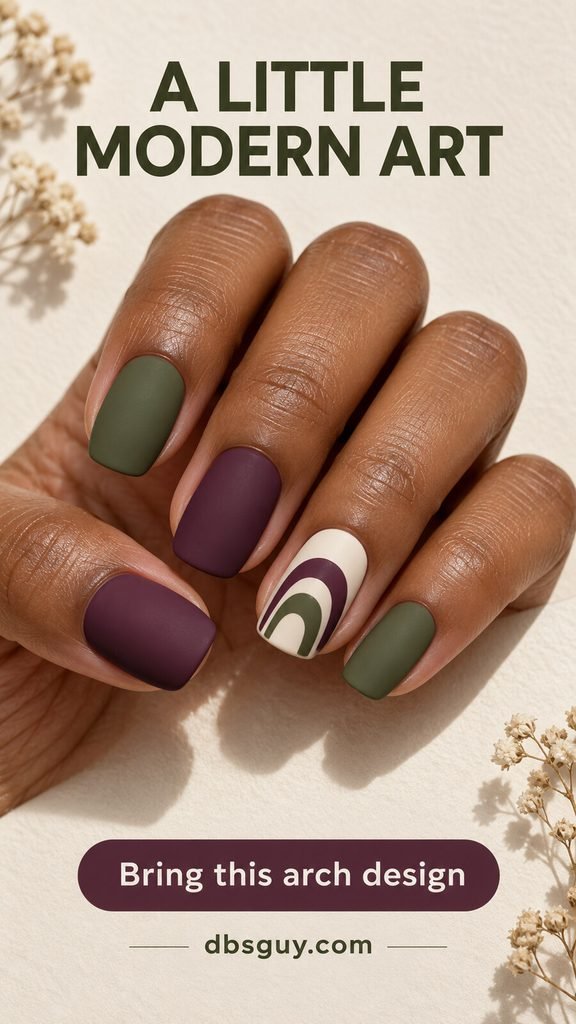
One cream accent nail holds a plum outer arch and an olive inner arch, with cream space separating the two. The neighboring solid nails repeat both colors, making the small modern-art detail feel connected to the set.
The gap between arches is worth pointing out at your appointment. Without it, the curves can merge into one heavy shape. A rounded-square nail gives the motif a clear frame; for a short adaptation, use two clean arcs and leave the lower part of the cream base visible. Keep every area matte so the color and geometry remain the focus.
How to Get the Matte Finish You Mean
Tell your artist whether you want a fully matte surface or the small gloss accents in idea 16. A photo alone can be ambiguous because lighting changes how much shine you see.
For regular nail lacquer, use a matte top coat intended for that system and follow its directions for preparation, drying, and application. OPI’s lacquer instructions place its matte top coat after the color coats. Its matte top coat guide also describes applying thin, even coats and adding glossy artwork over a matte base. Those are product-specific examples, not a universal gel curing schedule.
For gel, have your artist follow the chosen system’s top coat, lamp, curing, and wiping requirements. A regular air-drying lacquer top coat and a gel top coat have different instructions. Before committing to a full set, ask to see one finished matte swatch of your two colors, especially if you are matching a concept image.
Questions to Settle Before Your Appointment
Can I keep these designs on short natural nails?
Yes. Alternating solids, diagonal blocks, micro-French tips, speckles, and the pinstripe all have straightforward short versions. For detailed art, keep one accent and reduce the number of elements. You do not need to preserve every tiny mark to preserve the design.
Do I need special matte olive and plum polishes?
You can use compatible cream colors with a suitable matte top coat. Check the actual product instructions, and compare a finished swatch before choosing: the look in the bottle does not show the final matte surface.
Which option is easiest to try at home?
Start with the alternating solids in idea 1. It lets you decide whether you like the color pair and finish before adding fine artwork. Choose the tonal mix if you already own several related shades; choose a salon reference for the crisp checkerboard or plaid.
What should I send my nail artist?
Send the full image with your preferred length, the shade balance, and the detail you want to keep. For example: “Short squoval, mostly olive, one plum-and-olive checkerboard accent, fully matte.” Mention if you want a simpler version so the artist can plan the pattern around your nails.
For a first set, the alternating short manicure is a clear starting point. If you want more detail, save one patterned option alongside it and decide which would fit your ordinary week.