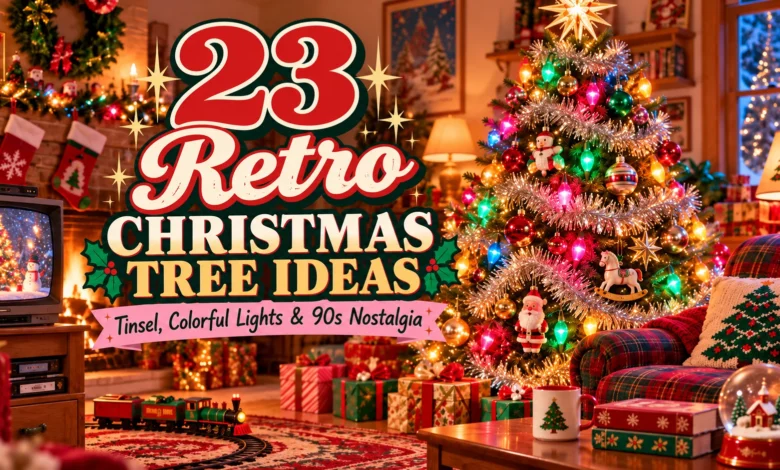
A retro Christmas tree starts with a few familiar ingredients: colored lights, ornaments collected over time, and a little sparkle that catches your eye across the room. For a distinctly 90s look, start with the classic family tree below. For more shimmer, try silver icicle tinsel; for an easy afternoon project, choose paper chains or felt ornaments.
These 23 retro Christmas tree ideas cover full-size living-room trees, small apartment setups, and tabletop displays. Some lean into 90s nostalgia; others bring in older decorations that fit a collected, nostalgic Christmas. Each includes the details that make the look work and practical ways to adapt it to your home.
The images are AI-generated decorating concepts, created to illustrate each idea.

Before choosing a tinsel-heavy look, consider who shares your home. The FDA recommends keeping tinsel off trees around pets because swallowed strands can cause serious harm. Soft ornaments without loose garlands offer another way to get the nostalgic feel.
1. The Classic 90s Family Tree

This is the familiar mix: a green tree, multicolored mini lights, red and gold balls, and a handful of ornaments that look as if they came from different years. A snowman, a rocking horse, a little wooden house, and a handmade heart can all belong on the same tree.
Start with the lights, then distribute your largest ornaments across the upper, middle, and lower branches. Fill the spaces with smaller keepsakes instead of sorting everything into strict color zones. Repeat a few red balls throughout so the assortment feels connected.
A simple star and red fabric skirt finish the scene. If your ornament box is already full, shop it first: this look works especially well when the decorations have different textures and shapes. Give the pieces you love the most a visible spot at eye level.
2. A Silver Icicle-Tinsel Tree

Fine silver strands create a different effect from fluffy tinsel garland. They hang downward like narrow icicles, catching the lights while leaving glimpses of green branches underneath. Warm white lights and a few ruby or silver ornaments let that shimmer become the main feature.
Decorate with lights and ornaments first. Add new, clearly labeled nonleaded tinsel last, draping small amounts over individual branch tips rather than throwing handfuls into the tree. Step back after each section; you should still be able to read the tree’s outline.
Concentrate the strands where the light reaches them and leave a few quieter pockets around special ornaments. Skip unidentified vintage metal tinsel. At takedown, remove the strands before storing the tree or checking your local real-tree recycling requirements.
3. A Big-Bulb Multicolor Tree
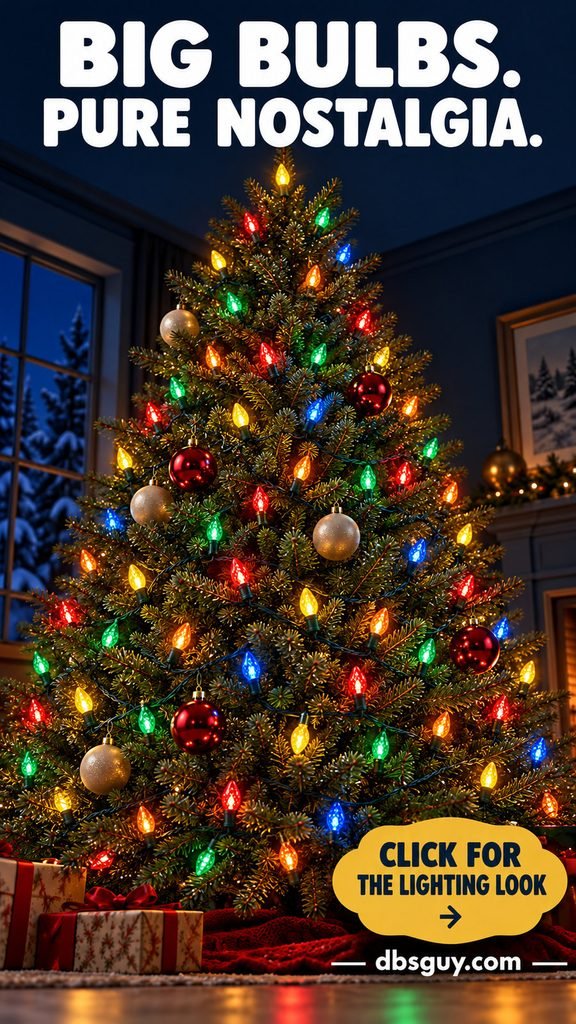
If the glow is what you remember most, give colorful bulbs the starring role. Vintage-shaped LED tree lights in red, blue, green, amber, and yellow create visible dots of color rather than the delicate twinkle of tiny fairy lights.
Choose a modern indoor-rated set approved for the tree you have. C7-style bulbs are an option for a classic shape; check the actual dimensions, since listings also include much larger novelty versions. Position the bulbs where their color can be seen, with the cable tucked into the greenery as the manufacturer allows.
Keep the ornaments simple: red balls and a few cream accents are enough. Before decorating the entire tree, test a section after dark. If the colors look too harsh in your room, adjust the placement or choose a softer, diffused bulb finish.
4. A Reflector-Ornament Collector’s Tree

Indented reflector ornaments, striped drops, and long finials bring detail you cannot get from plain round baubles alone. Their shaped surfaces catch the light, and a mix of turquoise, magenta, emerald, and red gives the tree an unmistakably collected character.
Place reflector ornaments toward the outside of the tree, facing the room, so their centers remain visible. Hang long drops where they have clearance beneath them. Warm white lights make the colors easier to appreciate; keep garland restrained so it does not cover the ornament details.
You can build this look with reproduction ornaments, treasured older pieces, or both. Inspect fragile glass before hanging it and use sturdy inner branches for heavier ornaments. In a busy household, shatter-resistant versions are a practical substitute for the same playful shapes.
5. Red Satin Bows and Gold Bead Swags

Small red bows and looping gold beads give a green tree a gentle, traditional rhythm. The bows mark the branch tips; the beads draw soft curves between them. A larger bow at the top echoes the little ones without introducing another competing shape.
Hang the bead garland before tying on the bows. Let each section dip naturally, securing it to branches that can support its weight. Avoid pulling one taut line all the way around the tree, which can flatten the silhouette.
Use red balls in a mixture of glossy and ribbed finishes, then add bows where the tree needs a little color. Narrow satin ribbon makes a softer-looking bow than a thick, stiff ribbon. If the tree starts to feel crowded, remove a few balls and let the bows and bead swags remain the focus.
6. A Construction-Paper Chain Tree

Bright paper loops bring the school-craft feeling straight into your living room. Red, green, blue, and yellow chains pair well with paper snowflakes and colored mini lights. The slightly uneven links are part of the charm.
For a small trial chain, cut strips about 1 inch wide and 6 inches long. Glue or tape the first strip into a loop, pass the next strip through it, and repeat. Those dimensions are a starting point: make a short sample before cutting a whole stack.
Build several manageable lengths instead of one enormous chain, then rest them loosely on the branches. Keep paper clear of bulbs, sockets, and electrical connections, and follow your light-set instructions. If suitable separation is difficult, use an unlit tree. Add only a few other ornaments so the linked shapes stay easy to see.
7. A Handmade Felt-Ornament Tree

Felt mittens, stockings, hearts, and snowmen make a tree feel personal without needing shiny glass or tinsel. Red, cream, and deep green felt keeps the collection connected, even when every ornament is a little different.
Cut two matching shapes for each ornament, stitch around most of the edge, add a small amount of stuffing if you want dimension, and close the opening. Embroidered details give a simple star or mitten plenty of character. Adults should handle needles, cutting tools, and any hot glue.
The concept includes a pom-pom garland for extra texture. Leave it off if pets chew strings, and avoid detachable beads or tiny accessories around young children. Hang each ornament with a short, secure loop. A basket-style stand cover adds warmth, provided it fits around a stable tree base.
8. Popcorn and Cranberry Garlands

White popcorn and cranberry-red garlands have a homespun texture that glossy ribbon cannot quite duplicate. On an airy green tree, pair them with plain wooden stars and red balls so the garlands can wind visibly between the branches.
For a handmade version, use plain, unbuttered popcorn that has cooled and gone slightly stale; it is easier to handle than fresh, fragile pieces. An adult can thread it with a needle, alternating with cranberries if desired. Make short lengths and support them on several branches rather than stretching them under tension.
A reusable faux popcorn-and-cranberry garland gives a similar look with simpler cleanup. Real food garlands are temporary decorations: discard them when they deteriorate and do not pack them away with ornaments. Choose another look if pets or small children may chew the food, thread, or imitation pieces.
9. A Plaid Country-Christmas Tree

Red-and-green tartan, tiny wooden sleds, pinecones, and cream stars create a cozy country version of a nostalgic tree. It suits a room with wood furniture or warm brown tones, but you do not need a cabin to make it work.
Choose one plaid pattern and repeat it in the tree and skirt. Cut wired ribbon into manageable pieces and tuck the ends into the greenery, leaving soft loops visible. Working in sections is easier than wrestling a long roll around the whole tree.
Hang the sleds between the ribbon loops and place pinecones farther inside for texture. Warm white lights keep the earthy materials clear. Avoid covering every opening with ribbon; a few visible green branches help the plaid feel woven into the tree instead of wrapped around it.
10. A Jewel-Tone Maximalist Tree

Fuchsia, royal blue, emerald, purple, and gold turn the tree into a bright focal point. A fluffy gold tinsel garland ties those colors together and gives this look a different texture from the silver icicle tree.
Build your color mix around three main ornament colors, then add the others in smaller amounts. For example, use blue, emerald, and fuchsia as the base, with occasional purple and amber pieces. Repeat each main color at several heights so one section does not dominate.
Place the largest balls slightly inside the tree, then hang smaller drops toward the tips. The garland should connect the arrangement without burying it. A simple finial topper works well because it continues the shine while leaving the mixed ornaments as the main attraction. Keep nearby room decorations quieter if you want the tree to stand out.
11. A Santa-and-Snowman Novelty Tree

Give your cheerful little figures a tree of their own. Santas with different coats, snowmen in tiny scarves, mitten ornaments, and a few candy-striped balls create a playful collection that rewards a closer look.
Choose two main characters to keep the theme readable. Spread the larger figures around the tree first, then fill gaps with smaller ones and plain red ornaments. Red-and-green lights reinforce the palette, while a thin bead garland adds a little shine.
The figures do not need to match perfectly. Different materials make the tree more interesting, but similar colors help the assortment belong together. Reserve the front branches for the clearest faces and distinctive shapes. If a figure tilts forward, move it to a stronger branch and shorten its hanger instead of trying to hide the problem with more decorations.
12. A Toy-Train Christmas Tree

Here, the tree base becomes part of the display. A red locomotive and colorful cars circling beneath the branches bring movement and a miniature scene to a tree that could otherwise be decorated quite simply.
Measure the assembled track before deciding where the tree will stand. Leave enough space between the track, stand, and furniture for the train to run without catching a skirt or gift ribbon. A flat, firm surface is easier to work with than a thick, uneven rug.
Keep the tree’s lower decorations above the moving cars. Multicolored lights and red-and-gold ornaments give the upper half plenty of interest without distracting from the train. Follow the train’s age rating and operating instructions, and supervise young children. Leave the doorway and normal walking route clear rather than squeezing the track into a busy passage.
13. A Light-Up Ceramic Tabletop Tree

A ceramic tree is an easy way to add nostalgia when you have no room for another evergreen. Its glossy green surface and colored pegs provide the entire decorating effect; it does not need added garland, baubles, or a separate topper.
Place one on a sturdy sideboard, entry console, or bedside table where its glow can be seen. A single Santa mug or small wrapped box nearby is enough. Leaving space around it makes the colorful pegs more noticeable.
For a newly purchased reproduction, follow the instructions for its internal lamp or LED base. If you have an older wired tree, check its condition and have questionable wiring assessed before plugging it in. Keep the cord out of traffic and the removable pegs away from children who might put them in their mouths.
14. An Aluminum Tree with Color-Wheel Light

A silver aluminum tree takes the article’s retro theme in a different direction. Metallic branches reflect the room and pick up colored light beautifully. Red and turquoise balls keep the decorating simple enough for that unusual branch texture to show.
Do not attach electric string lights to a metallic tree. The U.S. Consumer Product Safety Commission recommends a separate colored spotlight above or beside it. The concept shows an external color-wheel-style light washing the branches with color.
Use a suitable modern external light according to its instructions, with space around it and a protected cord route. You can also leave the tree unlit and enjoy the reflections in daylight. A modern silver-colored plastic tree is a different product; check its construction and manufacturer guidance rather than assuming every silver tree is aluminum.
15. A White Tree with Candy-Colored Baubles
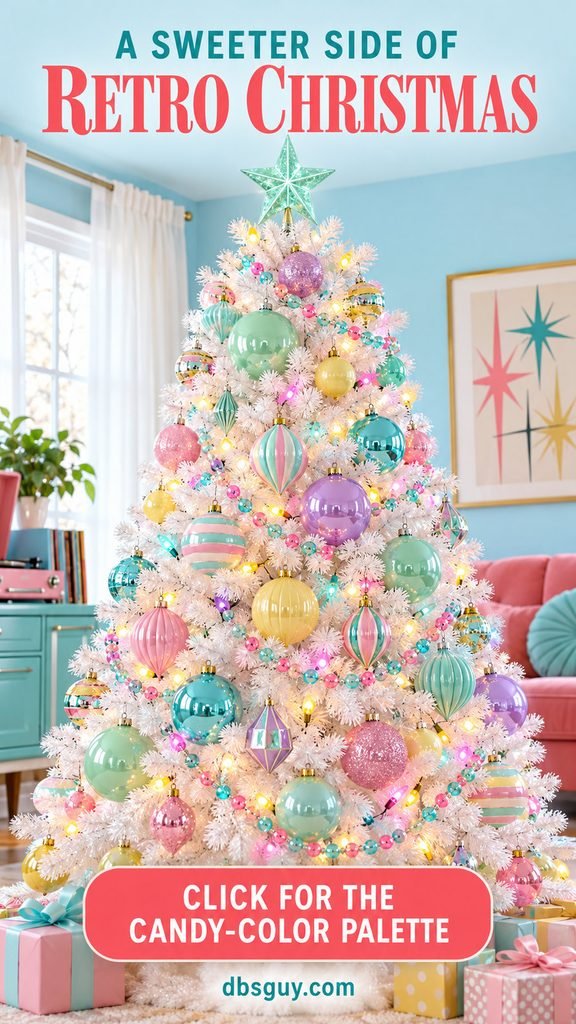
White branches make mint, aqua, lavender, pink, and yellow ornaments look especially bright. This is a lighter, more playful interpretation of retro Christmas, ideal for a room where a dark green tree would feel visually heavy.
Keep most ornaments round and vary their size. Add a few elongated drops or small stars for contrast, then use a delicate bead garland to connect the colors. A mint topper repeats one of the ornament shades without introducing a new focal color.
Test colored lights against the white branches before committing: the light can tint the whole tree, which may change how the ornaments look. If you prefer the candy colors to stay clear, use softer multicolor lights or warm white ones. Choose pale wrapping paper beneath the tree so the display does not become crowded with competing patterns.
16. A Candy-Cane Stripe Tree

Red-and-white stripes give a nostalgic tree a bold pattern without a complicated palette. Lightweight cane-shaped ornaments, plain red balls, and short silver garland swags create enough variation to keep the tree from looking flat.
Hang the canes at different heights, with their curved tops facing into open space. Avoid placing several in a perfectly straight row. Add red balls farther inside the greenery and let the silver garland dip between the striped shapes.
Warm white lights and a red bow topper keep the finish simple. Decorative canes are easier to store than edible ones, but food-shaped ornaments can tempt young children; choose a different motif if that is a concern. If you already have a lot of striped wrapping paper, use mostly plain packages below so the tree’s pattern remains the highlight.
17. A Family-Photo Memory Tree

Small framed snapshots turn the tree into a display of people, places, and Christmases you want to remember. Use copies of photos rather than irreplaceable originals, and mix them with a few bells or simple balls so the branches do not feel like a wall of rectangles.
Lightweight cardboard frames are easier to hang than miniature glass frames. Keep them roughly palm-size and repeat two frame colors, such as red and green. Place the photos facing the room where someone can see them without moving the branches.
A written date on the back makes each ornament easier to identify later. If you photograph the tree for public social media, check what personal information and faces are visible first. For a subtle version, display a handful of photos among your existing keepsakes instead of filling every branch.
18. A 90s Music-Memory Tree

Miniature cassette tapes, record shapes, and bright stars give a small tree a playful music-room identity. It is a good choice for a bedroom, office, or corner beside a record collection, where the theme can connect with things you already enjoy.
Use lightweight ornament versions of cassettes and records. You can also make simple cassette shapes from card, adding two spool circles and a colored label. A limited mix of black, silver, and bright accents helps the recognizable shapes stay visible.
Put a real cassette player or a favorite record sleeve beside the tree as a separate display piece. Avoid hanging heavy equipment or sharp broken discs on the branches. Colored mini lights provide the glow, while a few plain stars give the eye a break between the more detailed music ornaments.
19. A Sports-and-Hobbies Keepsake Tree

A personal tree can celebrate baseball, fishing, painting, or whatever your household loves. The retro feeling comes from the keepsake collection and familiar lights, while the ornament subjects make it your own.
Start with a small group of hobby ornaments and repeat a neutral shape between them. Wooden stars work well with baseballs, little palettes, and miniature sporting equipment. Warm white lights keep the different subjects easy to see; red balls add a shared holiday color.
Use ornaments made for hanging rather than actual tackle, heavy tools, or equipment with sharp edges. Place the most detailed pieces on the front and simpler shapes on the sides. This can also be a growing tradition: add one meaningful ornament each year instead of buying a complete themed set all at once.
20. A Gold-Angel and Silver-Bell Tree

An angel topper, silver bells, ivory bows, and gold balls create a quieter traditional look. The mix of metallic finishes feels collected, while the pale fabric details soften the shine.
Fit the topper first so you know how much clear space it needs. Follow its attachment instructions and check that the top branch can support it. Hang the bells at varied heights, then repeat small ivory bows through the tree rather than concentrating them near the top.
A little gold bead garland connects the gold ornaments with the angel. Choose warm white lights if you want the ivory fabric to keep its soft color. For a small tree, scale down the topper before removing ornaments: an oversized angel can make a compact tree feel top-heavy even when the rest of the arrangement is restrained.
21. A Slim Apartment Tree with Chunky Garland

A narrow green tree can still deliver bold retro color. Red fluffy tinsel garland, turquoise and red balls, and multicolored mini lights create a strong look without needing a wide floor footprint.
Measure both the tree’s advertised diameter and the space available after furniture and walking clearance are accounted for. Choose a stable stand, then fluff the branches before decorating. On a slim tree, loosely spaced garland turns are easier to read than tightly stacked rings.
Use smaller ornaments near the top and a few larger ones toward the middle and bottom. Keep the back simpler if it faces a wall, but distribute weight so the tree remains balanced. If loose tinsel is unsuitable for your household, use a red fabric ribbon in the same loose spiral for a similar color effect.
22. A Gingerbread-and-Cookie-Cutter Kitchen Tree

A tabletop kitchen tree makes baking-season decorations feel like a complete little scene. Faux gingerbread figures, star and heart cookie cutters, tiny rolling-pin ornaments, and red gingham bows provide enough detail for a small tree.
Use lightweight cutters with smooth edges and secure short hangers. Keep the tree on a stable cabinet or console away from the stove, toaster, sink splashes, and food-preparation space. An artificial tree is simpler to manage here than a cut tree that needs a water-holding stand.
Warm white mini lights suit the tan ornaments and yellow kitchen tones. Choose clearly decorative faux cookies for repeat use, while remembering that food-like shapes are unsuitable for children likely to taste them. Leave room around the display so everyday kitchen tasks do not require moving the tree each time.
23. A Holiday-Movie-Night Tree

Popcorn-carton ornaments, paper ticket shapes, little VHS-inspired decorations, and colored lights bring movie-night memories into the tree. This theme works well near a sofa or media corner, especially with a plaid blanket and a few favorite holiday films nearby.
Keep the decorations lightweight: card works for tickets and mini popcorn boxes, while felt or thin craft foam can suggest a tape shape. Repeat red-and-white stripes and black accents so the theme stays readable rather than turning into a jumble of unrelated props.
Display real tape cases beside the tree instead of hanging them on the branches. The concept uses an old television as an unlit decorative prop; a modern media setup works just as well. Keep ventilation openings, power cables, and the route to the seating area clear so the tree fits comfortably into an actual movie night.
How to Pull a Retro Tree Together
Choose one feature to lead the design: colorful lights, a special ornament collection, handmade garland, or a distinctive tree base. Then borrow one supporting detail from another idea. A family keepsake tree with red bows is easy to combine; an aluminum tree and ordinary string lights are not.
Lay your ornaments out before buying more. Group them by size and material, identify anything broken, and set aside the pieces that deserve the best positions. One pack of repeated plain balls can connect a mismatched collection without replacing its character.
For most green artificial or real trees, work in this order:
- Position and stabilize the tree, then shape artificial branches or prepare a suitable water-holding stand for a fresh tree.
- Inspect and add lights, following the tree and light-set instructions.
- Arrange garlands or short ribbon sections without covering the electrical connections.
- Hang larger ornaments, then fill with smaller keepsakes.
- Add a suitable topper and, only where appropriate, fine tinsel last.
Check the result from the doorway and from your usual seat. Move a few ornaments if the front is crowded or an important piece disappears behind garland. For an affordable first attempt, keep your existing tree and change just the lights or one decorating layer.
Keep the Nostalgia, Update the Safety
The National Fire Protection Association’s Christmas tree guidance calls for at least 3 feet between a tree and heat sources, a clear exit, daily watering for cut trees, and lights switched off before bed or leaving home. Replace worn light strings and follow the manufacturer’s limit for connected strands.
Use clearly labeled nonleaded tinsel, avoid sharp or breakable ornaments within children’s reach, and keep paper decorations away from flames and electrical connections. The CPSC’s decorating guidance also cautions against food-like decorations for young children. Reproductions can capture the look without relying on unidentified old materials or damaged electrical pieces.
Retro Christmas Tree FAQs
What makes a Christmas tree look like the 90s?
For this decorating approach, the strongest combination is a green tree, multicolored mini lights, mixed keepsake ornaments, and familiar finishing touches such as a star, angel, red bows, or garland. It is an interpretation of a nostalgic family look; there was never one tree style shared by every household.
Can I get the retro look without tinsel?
Yes. Colored lights, reflector-style baubles, felt ornaments, and a memorable topper can carry the whole design. In homes with pets that chew decorations, leave loose tinsel, string, and ribbons out of reach and choose securely attached ornaments appropriate for your household.
How do I mix vintage ornaments with new ones?
Use new plain balls as the connecting layer, then spread the older pieces throughout the visible branches. Repeat two or three colors while allowing different shapes and finishes. Inspect each older piece for damage and give heavier ornaments stronger branches.
Are warm white or multicolored lights better?
Multicolored lights suit a playful family, novelty, or movie-night tree. Warm white lights make detailed glass ornaments, plaid, and handmade textures easier to see. Test your choice in the room after dark; the surrounding wall colors and other lighting can change the effect.
What is the easiest retro Christmas tree idea for a small space?
A ceramic tabletop tree needs very little decorating, while a slim artificial tree gives you room for a full ornament collection. If you already own a small green tree, try colored lights and a few keepsakes before buying a new setup. Measure the stand and branch spread as well as the height.
Can I use old Christmas lights from storage?
Inspect the set before use and discard damaged strings. If its condition or suitability is uncertain, choose a new set with the bulb shape and colors you want. Check indoor-use labeling, a qualified testing-laboratory mark, and the manufacturer’s connection limits. Do not put electric string lights on a metallic tree.