
Choose a garland by where it needs to hang. A mantel can show off dried orange slices or a cascade of pine and cedar. A staircase is easier to use when its garland hugs the outside of the balusters. On a tree, paper chains and ribbon work well on lighter branches, while beads and clay need more support.
These 25 DIY Christmas garlands include the materials and steps for each design. If you want to use what you already have, start with the paper chain, the Christmas card garland, or gingham ties made from fabric scraps.

The images are AI-generated illustrations of the designs. The fireplaces shown are inactive.
Measure Before You Make a Garland
Hold a piece of string along the exact path you want the garland to follow, including dips and end drops. Mark where it meets each support, then lay it flat and measure it. Leave extra length at both ends for ties or knots. When a design takes a lot of individual pieces, make a 12-inch sample first. Count the pieces it takes, then multiply by the length of your garland in feet.
- Mantel. Check the shelf depth and decide where the weight will sit, especially if one end hangs down. Follow your fireplace manual’s clearance and vent requirements. Take the garland down before using the fireplace. For general precautions around candles and lights, see the U.S. Fire Administration’s holiday fire safety guidance.
- Staircase. Measure along the slope. Use soft ties on the outer faces of the vertical balusters and keep the handrail grip, treads, and landing clear.
- Tree. Use a separate string to measure each tier. The lower branches usually need a longer strand. Check whether you want to wrap the whole tree or decorate only the side you see.
DIY Christmas Garlands for Mantels
Use the ledge to support full greenery, or hang a slim strand under the shelf if you want room above for the pieces you already display.
1. Asymmetrical Pine and Cedar Mantel Garland

What you need — Fresh pine and cedar sprigs, sturdy cord, green floral wire, pruning shears.
Cut the greenery into roughly 6-inch sprigs and make small bundles with both textures. Wire the first bundle to the cord, then overlap its cut ends with the next bundle. Make the drop first, adding a few longer cedar sprigs where it rounds the shelf edge. Work across the top with smaller bundles so the ledge stays visible at the short end. Tuck the wire ends into the greenery and support the heavy corner separately so it can’t pull the whole garland sideways.
2. Dried Orange Slice Garland

What you need — Fully dried orange wheels or fresh oranges, cotton twine, a large blunt needle, scissors.
Pierce each wheel near the rind and tie it to a long strand with its own short loop. Lay the line flat and space the slices about 3 inches apart before making the final knots. Tie the slices at two points if you want more of them to face forward. A narrow mantel only needs a single row. To dry your own, cut even ⅛-inch rounds, blot them, and bake in one layer at 200°F. Turn and check every 30 minutes, then let the rounds cool. Put any with damp centers back in the oven before stringing.
Also read — How to Make Dried Orange Christmas Garland Without Burning the Slices
3. Eucalyptus and Brass Bell Garland

What you need — Faux eucalyptus stems, cotton cord, green floral wire, small metal craft bells, narrow ribbon.
Wire overlapping eucalyptus stems onto the cord with the round leaves tilted forward. Tie pairs of small bells with ribbon at a few intervals, then hang the garland and look for leaves that cover the bells. Turn those stems outward. If a bell cluster makes the cord bow more than you want, tie it near a supported point and leave the middle sections to the leaves.
4. Dried Hydrangea and Faux Pine Garland

What you need — Slim faux pine garland, dried hydrangea heads, floral wire, optional faux fern.
Set the pine base on your work surface. Arrange three hydrangea heads near one end, then stagger smaller clusters across the shelf. Loop soft floral wire around each stem below the flower head and twist it around the garland’s center. Rotate each head before tightening to show its best side. Dried petals crush easily, so lift the finished garland by the base and store the flowers separately if you plan to reuse the pine.
5. Clothespin Christmas Card Garland
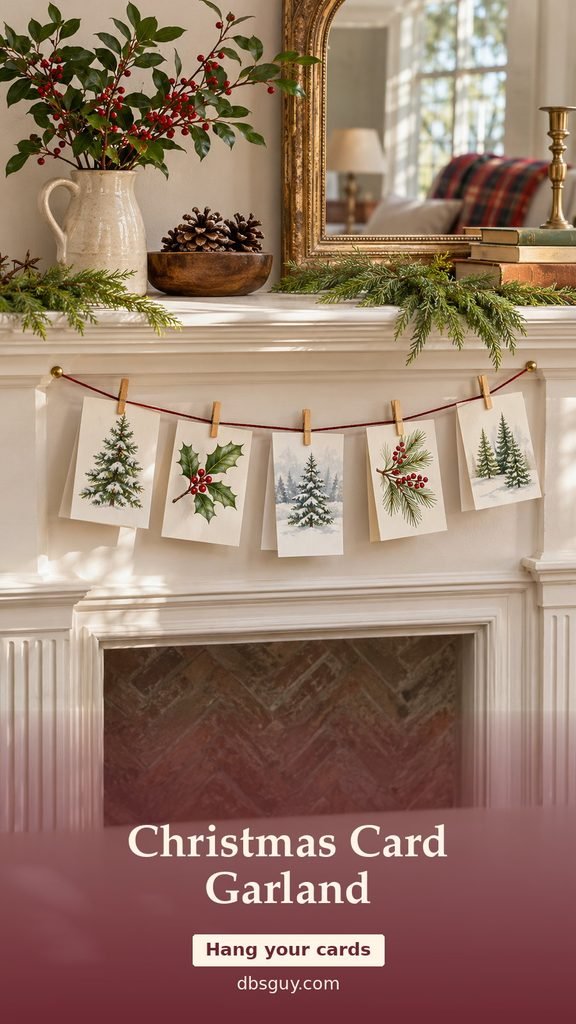
What you need — Cotton cord, miniature clothespins, holiday cards.
Hang the cord in a shallow curve and clip the cards along their top edges. Use two clips on a heavy folded card so it stays upright. Leave room between cards so you can add new ones through December. If a card keeps flipping open, clip the fold or slip a tiny removable paper clip over its open edge. This works with a plain cord and gives the designs on the cards room to show.
6. Snow-Tipped Pinecone Garland

What you need — Clean dry pinecones, white acrylic craft paint, stiff brush, cotton cord, floral wire.
Wipe most of the paint off the brush, then drag it over just the tips of the scales. Once the paint dries, nest a short piece of wire under the scales near the wide end of each cone. Twist the wire into a loop and tie the loop to the cord. Check how a cone hangs before you wire the rest. If your cones are heavy, shorten the span between supports and use a few small cones to fill the gaps.
7. Felt Gingerbread and Star Garland
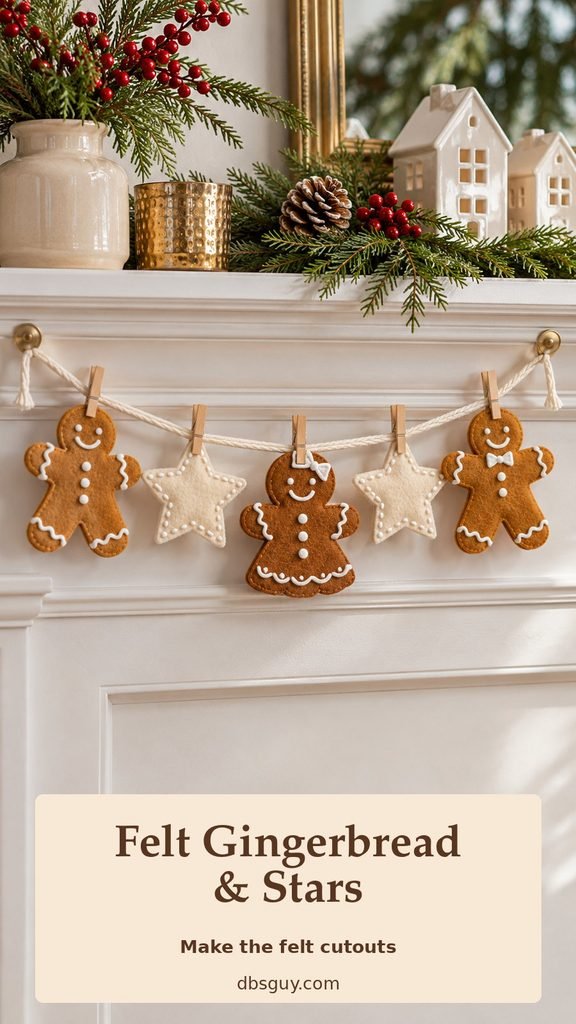
What you need — Tan and ivory craft felt, paper templates, scissors, white fabric paint, cord, mini clips.
Trace cookie shapes and stars onto felt and cut them out. Test the paint on a scrap, then add icing-style dots and cuffs to the gingerbread shapes. Let the paint dry as directed before attaching the pieces. Clip each shape to the cord at its top center so it hangs straight. Swap the stars for felt hearts if you want the garland to match a gingerbread village.
8. Folded Paper Rosette Garland

What you need — Light cardstock, glue, scissors, cotton cord, optional gold paper circles.
Accordion-fold two matching strips of light cardstock. Fold each strip in half and glue the facing edges to make two fans. Join the remaining edges to form a round rosette, then add a gold paper circle if you want to cover the join. Glue a paper tab across the back to trap the cord. Hang one rosette first to check the tab is high enough to keep the folds facing forward.
Also read — 25 Christmas Mantel Decor Ideas · 13 DIY Paper Christmas Decorations That Look Surprisingly Expensive
DIY Christmas Garlands for Staircases
Fasten a short test section at the bottom and walk the stairs before finishing the rest. Keep soft ties snug and tuck the ends so they can’t catch clothing.
9. Cedar Swag With Velvet Bows

What you need — Slim faux cedar garland, velvet ribbon, soft reusable ties.
Attach the cedar to the outer face of the balusters at the top and bottom, then add ties at intermediate posts. Let the cedar dip slightly between ties. Knot velvet bows separately and tie one over each attachment. Cut the tails after hanging so they stay on the outside of the staircase. Walk the full flight while holding the handrail to check that the greenery stays out of the way.
Also read — Red Bow Christmas Decor: 25 Ideas for Trees, Garlands & Gifts
10. Shatterproof Ornament Cluster Garland

What you need — Faux evergreen garland, small shatterproof ornaments, soft ties, thin floral wire.
Choose ornaments with snug hanging caps. Feed thin wire through two or three hanger loops and bind the group to the stem of the garland. Repeat the same colors in different orders so the clusters feel related. Hang the garland on the outside of the stairs and put the fuller clusters near the support ties, where their weight is less likely to twist the strand.
11. Gingham Rag-Tie Garland
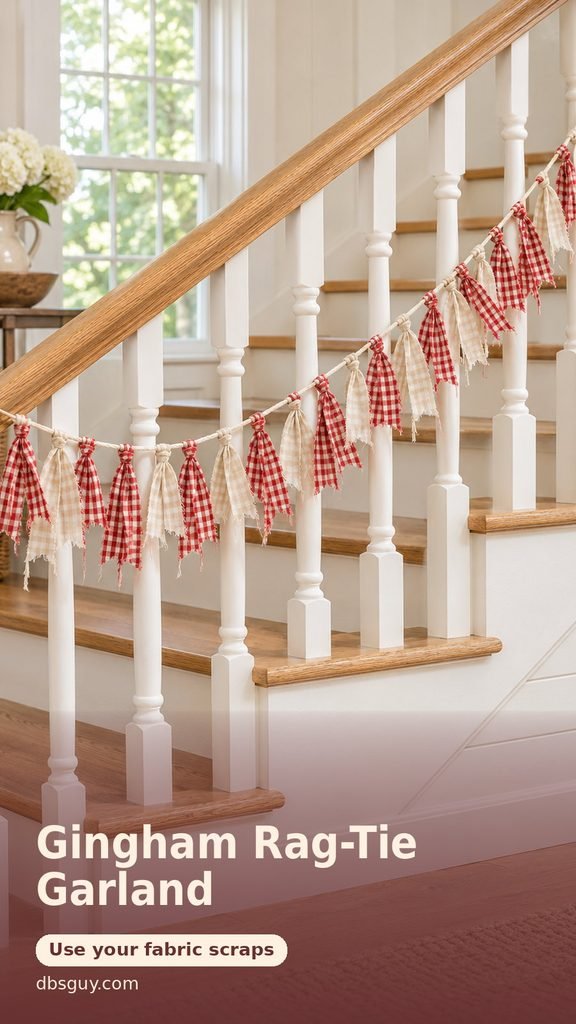
What you need — Red gingham and cream cotton scraps, scissors, cotton cord, soft ties.
Cut fabric strips about 1 inch wide and 7 inches long. Fold a strip in half, slide the folded end behind the cord, and pull the two ends through the loop. Repeat in loose groups, leaving some cord visible. Tie the garland to the outside of the balusters and trim any pieces that catch on the rail. Mix scraps from old napkins or cotton shirts to make the same idea in another palette.
12. Wood Bead and Tassel Garland

What you need — Lightweight wood craft beads in two sizes, sturdy cotton cord, yarn tassels, soft ties.
Thread a short sample in a repeating pattern, such as three small beads and one larger bead. Add a small tassel every few repeats and knot the cord at both ends to hold everything in place. Make separate lengths for each stretch of stairs. Support each length at several balusters, since a fully strung garland is heavier than a handful of beads feels on the worktable.
13. Faux Spruce With Warm LED Lights

What you need — Slim faux spruce garland, indoor-rated battery LED string lights, soft ties, secure battery-pack holder.
Attach the spruce to the outside of the balusters first. Loosely weave the lights through the branches and step back with the lights on to check for dark gaps. Secure the battery pack to a sturdy outside support where you can reach the switch. Route the wire along the garland and leave enough slack that it won’t be pinched. Follow the light manufacturer’s directions and keep cords off the steps.
14. Red Berry Sprig Garland

What you need — Faux cedar garland, faux red berry stems, wire cutters, floral wire, soft ties.
Cut the berry picks into short sprays, leaving enough stem to fasten each one. Hang the cedar, then wire in the sprays in groups with their tips angled up the stairs. Tuck cut wire and stem ends into the greenery. Hold one spray up from the bottom of the stairs before adding the rest. If the red disappears against the dark green, choose fewer, bigger clusters.
15. Paper Christmas Village Garland

What you need — White cardstock, pencil, scissors, craft knife and cutting mat for windows, cotton cord, paper tape.
Draw a few simple houses about 3 inches tall, using different rooflines. Cut the outlines with scissors. An adult can cut small windows on a mat, or you can draw the windows and skip the knife. Tape the houses to the cord at the back near the roofline and hang it in short, shallow spans on the outside of the balusters. Use a second paper layer on any house that keeps curling.
16. Knotted Cotton Rope Garland

What you need — Soft ivory cotton rope, scissors suitable for rope, cotton thread, fabric ties.
Test an overhand knot in a short piece of the same rope and measure how much length it uses. Allow that extra length for every knot when you cut the full strand. Space the knots along the rope, bind the cut ends with cotton thread, then attach the rope on the outer face of the balusters. A soft tie next to a knot helps carry its weight and keeps the rope from sliding down the slope.
Also read — How to Make Christmas Garland Look Fuller: 9 Easy Styling Tricks
DIY Christmas Garlands for Trees
Drape the garland before you hang the ornaments. Step back after the first wrap to see whether you want closer swags or more space for ornaments.
17. Three-Color Paper Chain

What you need — Lightweight cardstock, scissors or paper trimmer, glue dots or double-sided tape.
Cut the paper into strips about 1 by 6 inches. Close the first strip into a loop with a glue dot, then thread each new strip through the previous link before closing it. Repeat cranberry, forest green, and ivory, or use two colors with an ivory link every few loops. Make several manageable lengths and nest them into the branches. A small tree can take thinner strips for a more open look.
18. Popcorn and Faux Cranberry Garland

What you need — Plain air-popped popcorn, red craft beads, cotton thread, blunt or fine needle suited to the materials.
Sort out the largest intact kernels and thread through the firm center of each. Slip in a red bead every few kernels. If a piece breaks, move on to another so you don’t have to pull thread through a crumbling edge. Make short lengths and drape them with light support on several branches. Use this strand where children and pets can’t reach the food, small beads, or loose cord. For a reusable version, string irregular cream felt beads in place of popcorn.
19. Colorful Felt Ball Garland

What you need — Wool felt balls, strong thread, large needle, scissors.
Pick three accent colors and add ivory for breathing room. Push the needle through the center of each ball and slide the balls onto the thread. Try spacing them about 2 inches apart, then hang a short sample on the tree. Add a small knot beside any ball that slides out of place. Spread the strand over several branches and use the colored balls to fill gaps between larger ornaments.
20. Vertical Tucked Ribbon Garland

What you need — Wired ribbon about 2 inches wide, scissors, optional soft twist ties.
Cut one short test section and tuck its top end into a sturdy branch. Pull the ribbon forward into a soft puff, then tuck it a little lower into the tree. Repeat with short pieces that overlap visually. Pinch the ribbon at each tuck to control its width, and use a soft tie where a branch won’t hold it. Work around the tree in staggered columns so the ribbon looks relaxed between ornaments.
21. Linked Woven-Ring Garland

What you need — Small lightweight woven straw or rattan craft rings, narrow cotton cord, scissors.
Arrange the rings in a line and join each pair with a small cotton loop threaded through both centers. Knot on the back and clip the tails. Keep the loops loose enough for the rings to pivot as the strand curves around the tree. Use a small loose tie on an occasional branch if the rings keep turning edge-on. Keep these strands on sturdier branches where their open shapes are easy to see.
22. Vintage Red Rickrack Garland

What you need — Wide red rickrack trim, scissors, optional fabric glue for the cut ends.
Lay the trim along the branches in shallow swags. On a wide tree, use a bolder trim so the zigzag still reads from across the room. Fold the end under and secure it with a small loop of thread around a branch. Test fabric glue on a scrap before sealing any fraying ends. Space the swags far enough apart for ornaments to hang between them.
23. Mini Air-Dry Clay Star Garland

What you need — Air-dry clay, rolling pin, small star cutter, skewer, fine cotton cord.
Roll the clay to an even thickness using the clay maker’s directions. Cut small stars and use a skewer to make a hole near the top of each, leaving a sturdy margin around it. Let them dry completely as directed. Thread short loops through the holes and tie them along a longer cord. If the stars pull the branch tips down, use fewer per strand and rest the cord farther in on stronger branches.
24. Folded Paper Diamond Garland

What you need — Ivory paper, scissors, glue stick, cotton thread, pencil.
Cut three identical diamond shapes for each ornament. Fold each shape lengthwise, glue one folded half to the next, and trap a short thread loop between the last two halves before pressing them together. Open the fins after the glue sets. Knot the loops onto a long thread at regular intervals. Keep the diamonds small enough to turn freely between nearby branches.
25. Candy Cane Stripe Bead Garland

What you need — Red and white acrylic craft beads, sturdy cord, scissors.
Thread three or four red beads, then the same number of white ones. Repeat the groups to make the stripe. Check the pattern against a branch before making a long strand. If you want more obvious stripes, use larger beads on the lower half of the tree and smaller ones near the top. Finish each length with a stopper knot too large to pass through the bead, and use several interior branches to support the strand.
Also read — 23 Vintage Christmas Tree Decorating Ideas That Bring Back Childhood Christmas
Christmas Garland FAQs
How do I hang a garland without putting holes in the wall?
Use padded mantel clips designed for your shelf edge or removable hooks rated for both the surface and the garland’s weight. Follow the hook maker’s instructions for cleaning the surface and waiting before you hang anything. Soft reusable ties work around staircase balusters. If the finish is delicate or you’re unsure about adhesives, rest the garland on the mantel or use a separate shelf display.
How can I make a sparse garland look fuller?
Hang the base, then fluff and turn the branches that face the room. Add extra stems where the garland bends or shows a gap, with each cut end tucked under the next spray. If there’s a long bare stretch, wire another short section to the back of the base and add a support tie close to the join.
What’s a good garland to make early and keep for next year?
Felt balls, rickrack, and woven rings pack easily. Wrap them around a wide piece of cardboard and label the lengths before you store them. Keep paper rosettes in a shallow box so they retain their folds. If you want real pine or cedar, assemble it closer to when you’ll display it and remove it as it becomes dry and brittle.