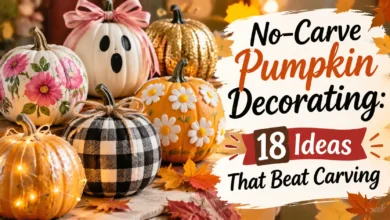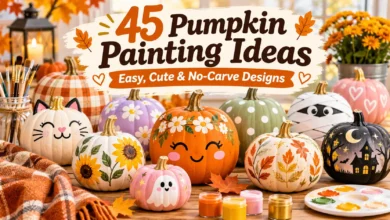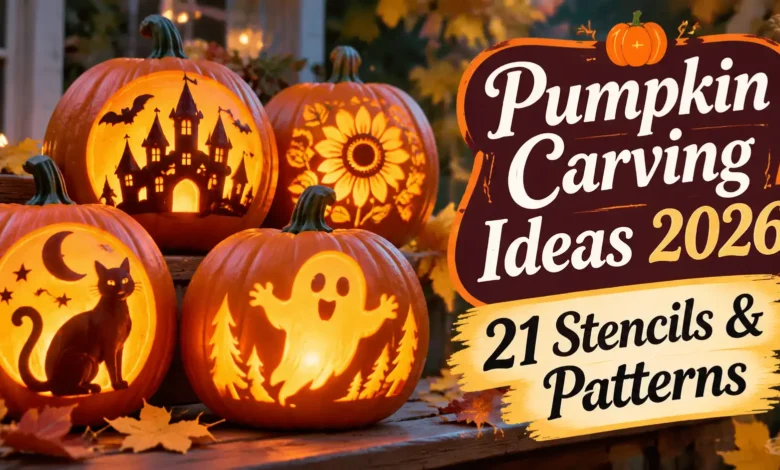
A good pumpkin pattern has a clear silhouette and enough solid rind to hold together. Start with the classic grin, one-eyed monster, paw print, or keyhole if you want fewer fiddly cuts. Choose the ghost, leaf, spiderweb, or BOO lettering if you would rather scrape a design into the surface.
Below are 21 pumpkin carving ideas, each with a finished-look concept, a matching simplified stencil, and instructions for what to cut, scrape, or keep. The flat stencil is your cutting guide; the styled image shows the overall effect rather than an exact cutting diagram.
The styled pumpkin images are AI-generated concepts, not photographs of tested carvings. The original stencil sheets are simplified drawing guides; adapt their size and spacing to your pumpkin.

Choose your pattern before you choose your pumpkin
Look for a firm pumpkin with a stable base, an intact stem, and no soft spots, mold, or open cuts. Carry it from underneath rather than by its stem. Match the face to the design: wide for a bat or BOO, tall for a hat or house, and round for a grin or sunflower.
Use the smoothest broad area for your pattern. Deep ribs make small details harder to transfer. If the design wraps out of sight around the sides, reduce its size or choose a wider pumpkin.
What to gather
- A pumpkin, bowl for seeds and pulp, and sturdy scoop.
- A purpose-made pumpkin carving saw, a poking tool, and a hand scraper for gray areas.
- Plain printer paper, scissors, tape, and a washable marker.
- A stable, dry work surface with good lighting.
- A battery-operated LED light suitable for the display location.
The American Society for Surgery of the Hand recommends leaving carving to adults, working with dry hands and tools, and using small, controlled strokes. Children can choose the design, draw, and help scoop before cutting begins. Keep your free hand outside the tool’s path, including behind the pumpkin wall. Do not force a stuck tool.
How to use these stencil sheets
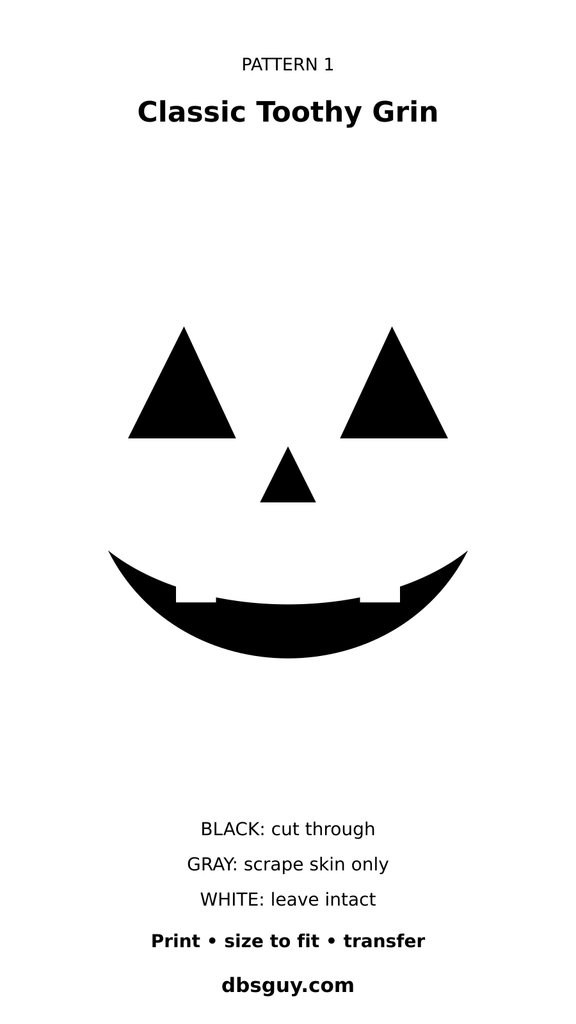
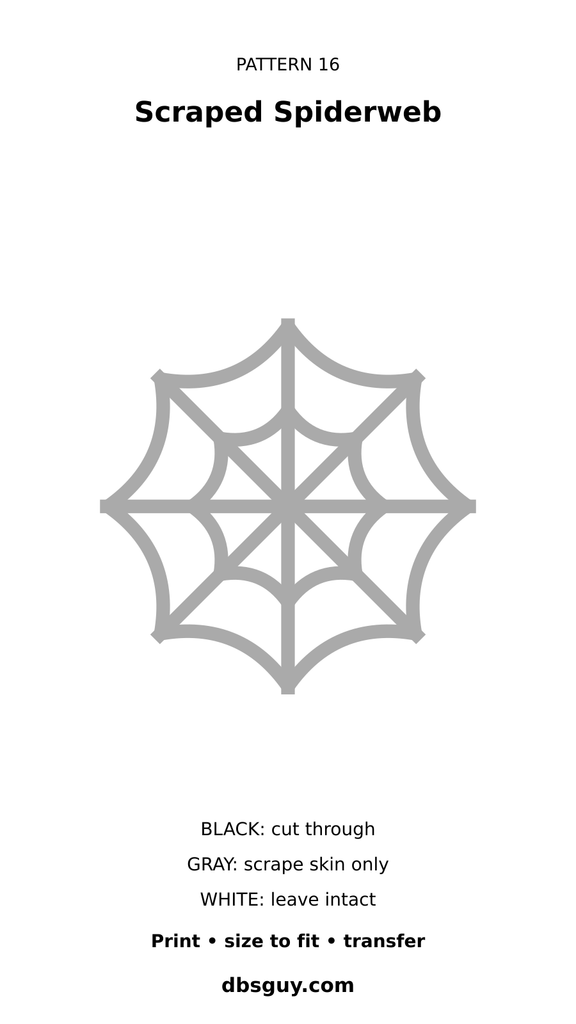
Black means cut through. Gray means scrape away the skin while leaving flesh underneath. White means leave intact. On scrape-only patterns, the remaining flesh supports details such as ghost eyes and letter centers. Do not saw around the outer edge of a gray shape.
- Save and size the sheet. Right-click or long-press the black-and-gray pattern image and save it. Print that image by itself, starting with “fit to page.” Check the paper design against your pumpkin before carving. If it is too small, crop away the title and legend in your print app and enlarge the motif; keep the legend nearby. There is no universal correct print percentage.
- Prepare the pumpkin. Wash and dry the outside. An adult should make an access opening large enough for scooping and the LED light, away from the design. If making a top lid, angle the cut so the lid has a ledge to sit on. Remove seeds and stringy pulp, then scrape the inside of the carving face evenly. Keep the shell firm rather than thinning it until it flexes.
- Transfer the lines. Trim excess paper and make small relief snips in its blank margins so it lies against the curve. Tape it in place. Prick along each design boundary with a poking tool, then remove the paper and connect the dots with a washable marker. Mark gray areas and white areas clearly before starting.
- Work from small details to larger openings. Scrape gray areas gradually. Saw black shapes with short strokes, taking the tool out to change direction at corners. Keep the pieces in place until their outlines are fully cut; ease them out without levering against thin rind.
- Check with an LED. Place the light inside after putting the tools down. If a scraped area barely glows, inspect its thickness before removing a little more flesh. Some shallow designs are mainly daytime decorations; do not chase brightness until the wall breaks.
As an editorial starting point, leave roughly ½ inch of solid rind between nearby openings on a medium pumpkin, and more around large cuts. This is not a structural guarantee: flesh thickness, freshness, and the design all matter. If a gap looks fragile on paper, simplify the pattern before you cut.
Find a design that fits your evening
- Few simple openings: classic grin, one-eyed monster, paw print, keyhole.
- Soft or woodland: sleepy face, cat, leaf, mushroom, owl, sunflower.
- Halloween silhouettes: vampire, bat, ghost, witch hat, spooky house, skull.
- Graphic patterns: moon and stars, spiderweb, BOO, chevrons, star trail.
1. Classic Toothy Grin
Beginner · cut-through
Start here if you want a pumpkin that reads as Halloween from the sidewalk. Two triangle eyes, a smaller triangle nose, and one broad smile do the work; the teeth stay attached to the top lip. A round pumpkin with a fairly smooth face gives you room to keep the features apart.

Transfer the three triangles first, then the mouth. Saw each straight side separately rather than dragging the tool around a tight corner. Cut the mouth last and leave both tooth bases broad. If the grin feels crowded, shorten it instead of squeezing it closer to the nose.
2. Sleepy Crescent Eyes
Beginner with curves · cut-through
This sleepy face suits a softer porch display or a pumpkin a child has helped choose and draw. Its expression comes from two downward-curving eyelids and a little smile, without a nose or extra decorations competing for space.

Trace the two thick crescent shapes at the same height. Give each crescent enough width to admit your carving saw, and round off its tips if they feel too delicate. Make the mouth smaller than either eye so the face stays calm rather than turning into a giant grin.

3. Vampire Smile
Intermediate · cut-through
Two fangs change a familiar jack-o’-lantern into a vampire without requiring an intricate portrait. The trick is to make the mouth wide enough for the fangs while keeping plenty of solid rind below the eyes.

Transfer the slanted eyes and the mouth as separate shapes. Leave two triangular fangs hanging from the upper edge; their bases should be much wider than their points. Work up to each fang from either side with short strokes rather than trying to swing the saw around the tip.

4. One-Eyed Monster
Beginner · cut-through
One oversized eye makes an expressive monster with very few cuts. Three little mouth openings keep the face playful, and the uncut strips between them avoid the fragile teeth of a complicated grin.

Center one circular eye in the upper half of the pattern. Below it, arrange three rounded rectangles with clear gaps. Cut each rectangle independently. Leave the eye open rather than trying to suspend a pupil in the middle; a disconnected rind circle would fall out.

5. Cat Face with Scraped Whiskers
Intermediate · cut-through and scrape
Almond eyes and a small triangular nose are enough to suggest a cat. Shallow whisker marks add the recognizable detail without turning the cheeks into a row of weak slits.

Cut the two eye shapes and nose. Use a hand scraping tool to remove only the skin along three short whiskers on each side, leaving flesh underneath. Do not connect the whiskers to the eye openings or cut a large contour around the entire face.

6. Flying Bat
Intermediate · cut-through
A single bat silhouette has a strong outline even without eyes or fur. It fits a wide carving area, with the body at the center and the wings spreading toward the sides.
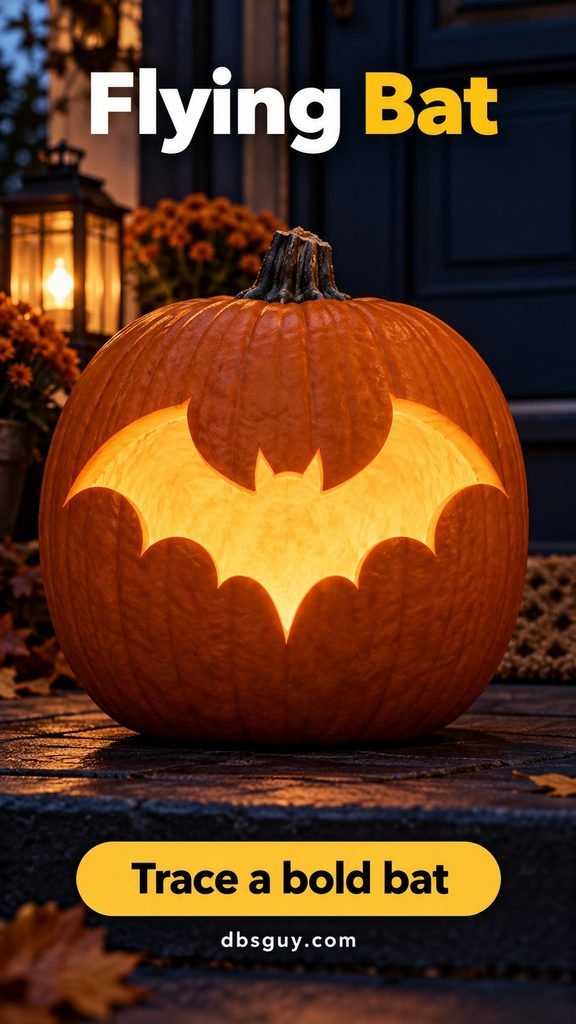
Trace the whole outer silhouette, including the short ears and shallow scallops underneath the wings. Remove the bat-shaped area, not the surrounding pumpkin. Widen the wing tips on your paper pattern if they narrow to a sliver, and stop each cut before changing direction.

7. Scraped Ghost
Intermediate · scrape-only
A ghost with dark eyes looks charming, but those eyes need somewhere to stay attached. This version solves the problem by scraping the body instead of cutting out its entire outline. The ghost becomes pale against the orange skin while its face stays dark.
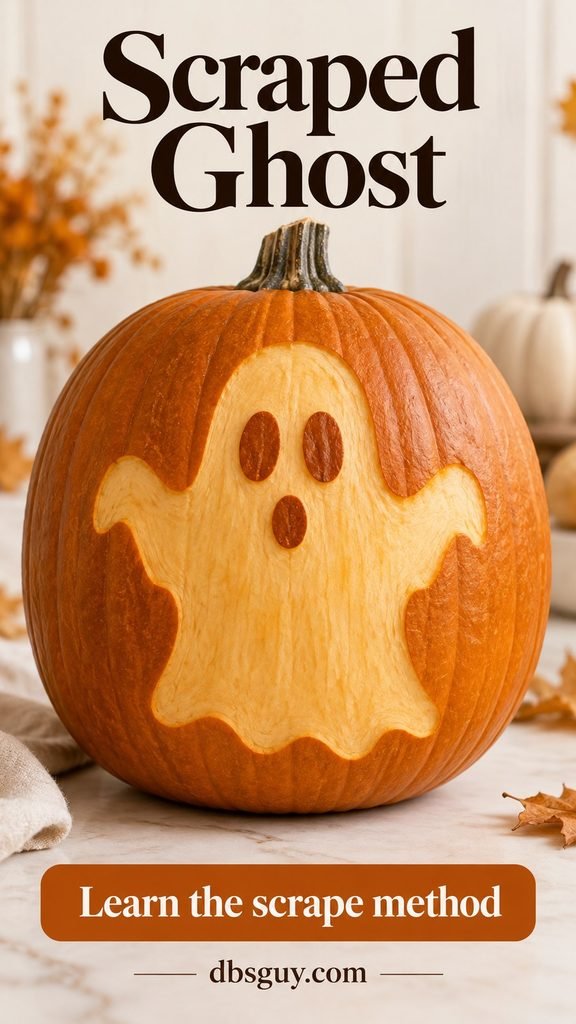
Transfer the rounded head, loose sides, and wavy hem. Mark the eyes and mouth as areas to keep. Scrape the gray body gradually, leaving a continuous layer of flesh under the design and facial features. Stop before you break through. The flat sheet simplifies the arms for easier tracing.

8. Bent Witch Hat
Beginner with corners · cut-through
A hat is a useful alternative to a detailed witch profile: one bent point and a wide brim tell the whole story. A taller pumpkin gives the peak room without forcing the brim around the sides.

Draw the sloping crown above a broad, slightly uneven brim and treat them as one connected opening. Start at the brim’s outer corners and work in short sections. Leave out a buckle or band inside the cutout; those details would need bridges or a different scraping plan.

9. Crescent Moon and Stars
Intermediate · cut-through
This night-sky pattern works beyond a traditional face and pairs well with a simple dark porch. One broad moon provides the main glow, with three separate stars filling the remaining space.

Place the crescent first and position the stars around it without touching. The moon is a single crescent-shaped hole; the dark space inside its curve remains connected to the pumpkin outside that opening. Cut star points one edge at a time and leave generous rind between motifs.

10. Scraped Autumn Leaf
Intermediate · scrape-only
An oak-style leaf gives you a fall design that does not depend on a Halloween face. Rounded lobes are forgiving to redraw, and the remaining dark center vein adds detail without creating separate loose pieces.

Trace one broad leaf with a short stem and rounded lobes. Scrape the gray areas on either side of the white center vein, leaving flesh underneath. Keep the vein and its base intact. The concept has extra branching veins; the stencil keeps only the center vein to simplify the work.

11. Sunflower Glow
Intermediate · repeated cut-through shapes
A round center surrounded by eight petals makes a floral pumpkin with clear rhythm. It suits a broad pumpkin and an autumn display you want to keep cheerful.
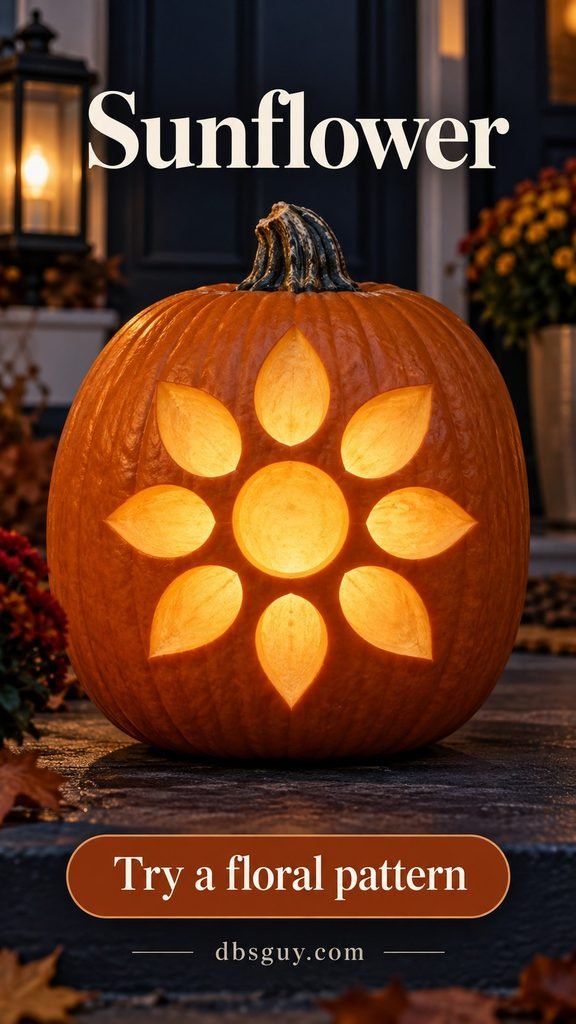
Mark the circular center and eight separate petals before making any cuts. Check that the spaces between petals stay wide, especially at their inner tips. Carve the small petal openings first and the center last. Do not join the petals to the center hole.

12. Mushroom Cottage
Intermediate · scrape and cut-through
A mushroom cottage combines a pale cap with little windows and a dark doorway. The mixed technique keeps the cap spots in place and gives the design more depth than one large opening.

Scrape the mushroom silhouette while keeping the three round cap spots and arched doorway untouched. Leave a continuous layer of flesh beneath the scraped area. Cut the window panes through while retaining their crossbars. The doorway stays orange in this version; it is not a hole. Enlarge the pattern if the window bars look too narrow.

13. Simple Owl Face
Beginner with curves · mixed technique
Two round eyes and a triangular beak make a recognizable owl without an elaborate feather pattern. A pair of shallow curved feather marks beneath the eyes gives it a softer woodland look.
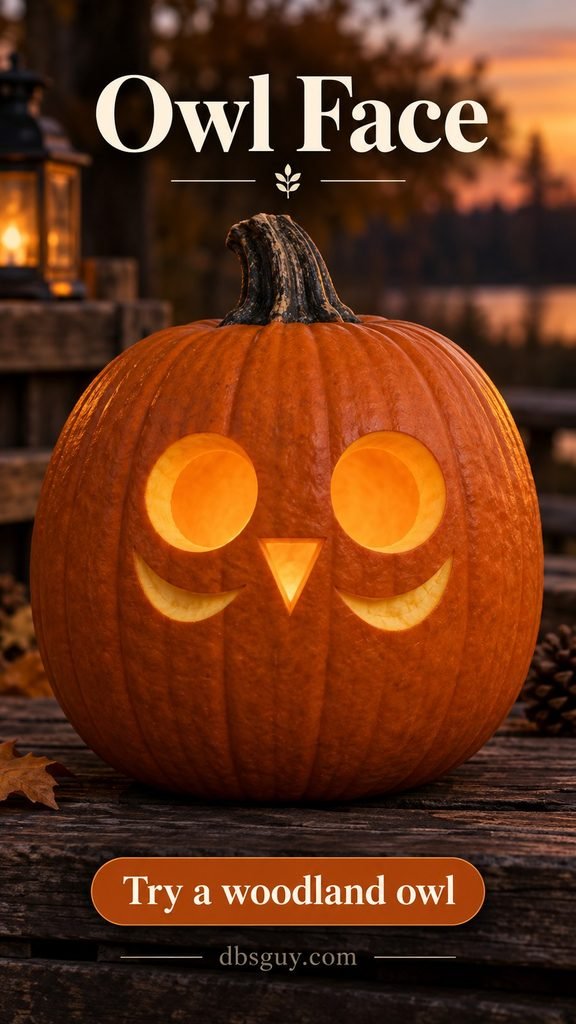
Keep the two eye circles separate and add the small beak below their inner edges. Cut these three black shapes through. Scrape the two gray feather curves lightly, keeping flesh underneath. Leave the eyes as open circles; no floating pupils are needed.

14. Glowing Spooky House
Intermediate · scrape and cut-through
The outline of a small house becomes visible when you scrape its roof and walls, while open windows supply brighter details. A dark, uncut door anchors the scene without making another large opening.

Transfer a simple peaked roof, short chimney, and rectangular body. Scrape the gray silhouette first, keeping the doorway untouched. Cut the separate window panes through afterward, preserving the crossbars and wall around each. Enlarge the design until the bars look sturdy on paper.

15. Friendly Skull
Beginner with repeated cuts · cut-through
The pumpkin itself supplies the skull’s outer shape. You only cut its features: two oval eyes, a small heart-shaped nose, and five short tooth openings. That keeps the design readable without a complicated jaw outline.

Draw the eye sockets fairly large and leave the nose much smaller. Arrange the five tooth holes in a shallow row, keeping rind between each pair. Round their corners slightly and cut them individually rather than making one long mouth opening.

16. Scraped Spiderweb
Intermediate · scrape-only
A spiderweb can quickly become fragile if every gap is cut away. Here, eight spokes and two connecting rings are scraped into the skin, so the pumpkin stays whole behind the web.

Mark the center, draw eight evenly spaced spokes, and connect them with two curved rings. Scrape those gray lines into broad channels. Work outward from the center and stop once the pale flesh shows; the white spaces between the strands remain untouched.
17. Scraped BOO Lettering
Intermediate · scrape-only
Lettering is where many homemade stencils go wrong: the centers of B and O fall out when the whole letter is cut through. Scraping solves that problem and keeps this short greeting readable.

Use thick block letters, with a little space between B, O, and O. Scrape only the gray letter strokes, leaving their white centers and the background untouched. Keep flesh beneath every stroke so the centers remain supported from underneath.

18. Bold Chevron Bands
Intermediate · cut-through
Three stacked V shapes give a pumpkin a graphic look with no face at all. The repeated angles work best on a tall pumpkin with enough space for substantial rind bands between the openings.

Trace the three chevrons before cutting. Make their arms wide rather than needle-thin, and keep the points away from the bottom of the pumpkin. Carve each V as a separate opening. Support the pumpkin outside the tool’s path; do not press on the narrow bands.

19. Paw Print
Beginner with curves · cut-through
A large pad and four oval toes make a sweet pet-inspired pumpkin without a detailed animal portrait. The separate openings are easy to scale up and leave plenty of room for solid rind.
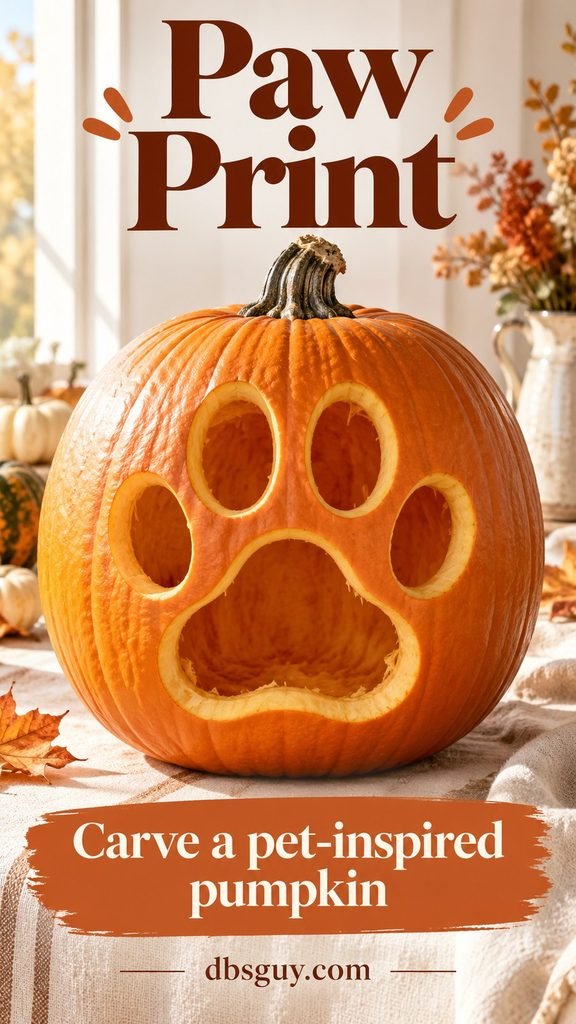
Center the broad paw pad low in the design and arrange four smaller toes in an arc above it. Keep every toe separate from the pad and its neighbors. Cut the toes first, then remove the larger pad in manageable sections if needed.

20. Glowing Keyhole
Beginner with a curve · cut-through
One keyhole makes an unusually clean pumpkin: a circular top flows into a flared base, forming a single bright opening. It is a useful choice when you want fewer details to transfer.
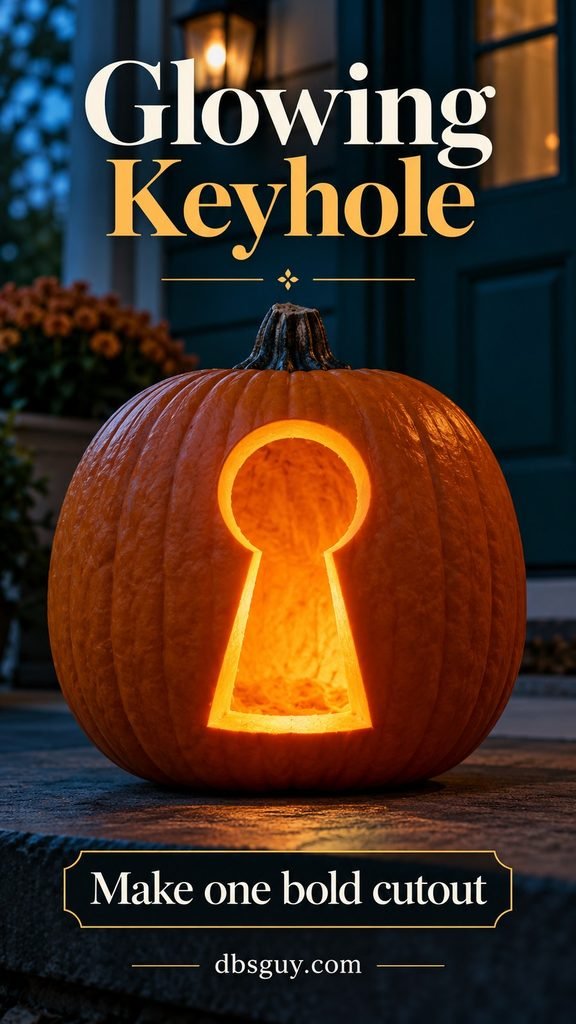
Draw the circle and tapered base so they overlap, then erase their internal join. Transfer only the outside contour. Cut the curved top in short strokes and the base in straight sections. Keep a generous margin of rind below the opening.

21. Diagonal Star Trail
Intermediate · repeated cut-through shapes
Five stars stepping diagonally across the pumpkin create movement without a central face. Vary their sizes enough to make the trail obvious, but keep even the smallest one comfortable to carve.

Place the largest star first, then arrange four more along an upward diagonal. Keep a wide patch of rind between every pair. Cut each point from two directions instead of twisting the saw at the tip. Simplify unusually sharp points before transferring the pattern.

Keep the carving looking good for Halloween
Keep your pumpkin cool before carving, and save the cuts for the few days before you want to display it. Once the shell is cut, moisture loss and decay start to change the edges. Warm weather and delicate cuts can shorten the display window, so do not count on the same number of days for every pumpkin.
Use a battery-operated light rather than a flame, and keep the pumpkin away from heat and out of walkways. Check it daily; remove it from display if it becomes moldy, leaks, or starts to collapse. A simple pattern in a fresh pumpkin is a better choice for a busy week than an elaborate one made too early.
Planning a carving night? Add it to your October bucket list and leave time for cleanup before you take the pumpkins outside.
Questions that come up while carving
Which pattern is easiest for a first pumpkin?
The keyhole has one connected opening, while the classic grin uses familiar straight-sided shapes. Choose the one that fits your pumpkin’s face. A smaller number of cuts helps, but making the design too tiny can make any pattern harder.
Why would a letter center or ghost eye fall out?
A piece of rind cannot float inside a hole. A cut-through pattern needs an uncut bridge connecting an interior detail to the surrounding shell. The ghost and BOO sheets here use scraping instead: the flesh beneath their white details remains in place. Follow the gray legend rather than treating every outline as a saw line.
Can I use the sheets without a printer?
Yes. Redraw the main shapes on paper, check their fit, and transfer them with a washable marker. Use the flat stencil rather than tracing the styled pumpkin image, which curves the design around a three-dimensional surface. Do not hold a device against the pumpkin while using a sharp tool.
How do I make a detailed pattern more manageable?
Enlarge it, remove the smallest detail, widen narrow spaces, or change a cut-through area to a shallow scrape. Decide on those changes before cutting. With a sunflower, for example, spacing the petals farther apart is more useful than trying to carve hairline gaps.
Will a scraped design glow as brightly as an open cut?
Usually it looks softer because light must pass through the remaining flesh. Thickness and the LED’s brightness affect the result. Scrape gradually and stop while the wall still supports the design; a pale daytime pattern is preferable to an accidental hole.
Pick one pattern and make it fit
Choose the design you can comfortably transfer and carve, then give it enough room. Keep the stencil beside you, preserve the white areas, and check the gray areas before making a through-cut. A clean silhouette with sturdy gaps will do more for the finished pumpkin than a pile of tiny details.