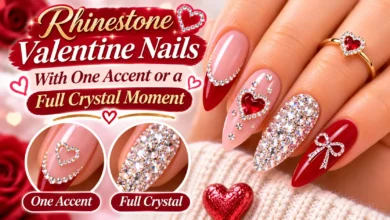
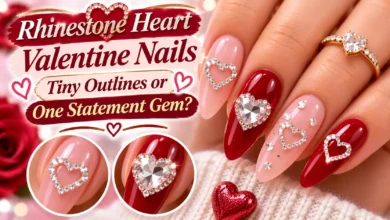
Milky White Valentine Nails With Tiny Hearts and Sheer Romantic Details

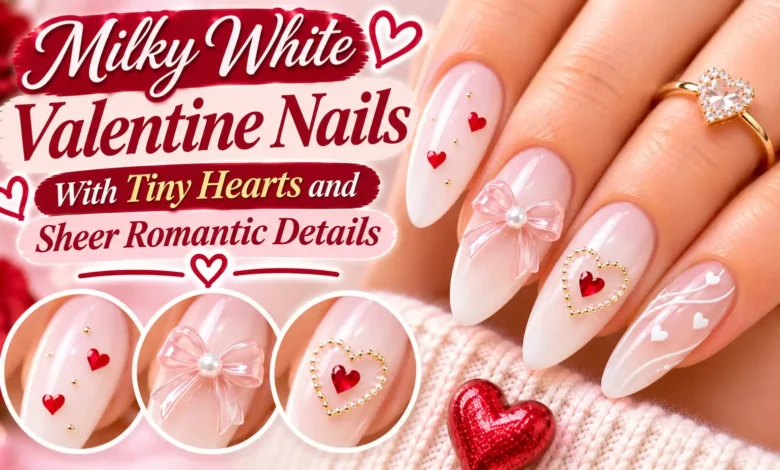
For milky white Valentine nails, choose a cloudy white base that still lets a little of your natural nail show, then give the tiny hearts room to stand out. A single red heart is the clearest accent. Opaque white hearts feel quieter, while a wine-colored outline keeps the milky base visible inside the shape.
These six designs keep white as the main color and change the placement, contrast, or sheer detail. Start with the look that fits your current nail length; you can borrow a heart color without copying a longer shape.

The images are AI-generated design concepts for dbsguy.com. Use them to discuss color, placement, and shape; they do not document completed salon work or wear tests.
Get the Milky White Base Right First
Milky describes the softly cloudy color; sheer describes how much nail you can see through it. For this look, you want both. The natural pink of the nail bed and the pale free edge can remain softly visible beneath the white.
Ask to see a sheer white swatch over your own nail before choosing the artwork. A warm ivory can look creamy, while a neutral white gives a cooler finish. Neither needs to match your skin exactly. Pick the white you like in daylight, rather than relying on the bottle or a brightly lit reference image.
For regular polish at home, use a shade formulated to be sheer and apply thin coats as its directions specify. Check the coverage before adding more: another coat can soften streaks, but it also hides more of the natural nail. If the finish has already become solid white, choose a sheerer formula for the next attempt instead of adding more layers to chase transparency.
- On very short nails: begin with one filled heart on an accent nail. Keep a visible border around its lobes and point.
- For the quietest detail: use opaque white art over a noticeably translucent base.
- For a heart you can see at a glance: choose cherry or raspberry rather than a pale pink that blends into the base.
1. One Cherry Heart on Short Squoval Nails
A tiny cherry-red heart toward one tip corner gives a short milk-white manicure a clear Valentine detail. Keep the ring nail as the only accent on each hand, with the other nails plain. The rounded corners of a squoval shape leave a small, tidy area for the heart without needing a long free edge.

Leave milky white between the heart and the tip so the point stays inside the nail. If your nails end at your fingertips, move the heart toward the middle rather than squeezing it into a corner you do not have.
This is a manageable home version with a small, flat heart decal compatible with your polish. Check its size against the actual nail before applying it. At a salon, specify one flat, filled heart so the reference does not become a raised charm or a full scatter of hearts.
Also Read: Valentine Nails on Natural Nails: Simple Ideas Without Extensions
2. Tiny White Hearts on a Sheer White Base
White-on-white works through a difference in coverage. The base is translucent and softly cloudy; the hearts are crisp, opaque white. On short oval nails, put one small heart on the index and ring fingers and leave the remaining nails undecorated.

Check the contrast before repeating the artwork. If the heart disappears, making the whole nail whiter will hide it further. Keep the base sheer and use a more opaque white for the motif. A heart can sit a little closer to the center if the naturally white free edge makes it hard to see near the tip.
Choose this version when you want the design to reveal itself up close. A glossy reflection can briefly cover a little white heart, so look at the sample with your hand tilted as well as flat. You do not need to outline it in another color unless you want a more noticeable result.
Also Read: Minimalist Valentine Nails With Tiny Details and Plenty of Bare Space
3. An Airy Diagonal of Raspberry Hearts
Three separated raspberry hearts give a medium almond nail more movement than a single centered motif. Keep the diagonal on the ring nail, running from one side of the lower nail toward the opposite side near the tip. The other fingers stay glossy milk-white.
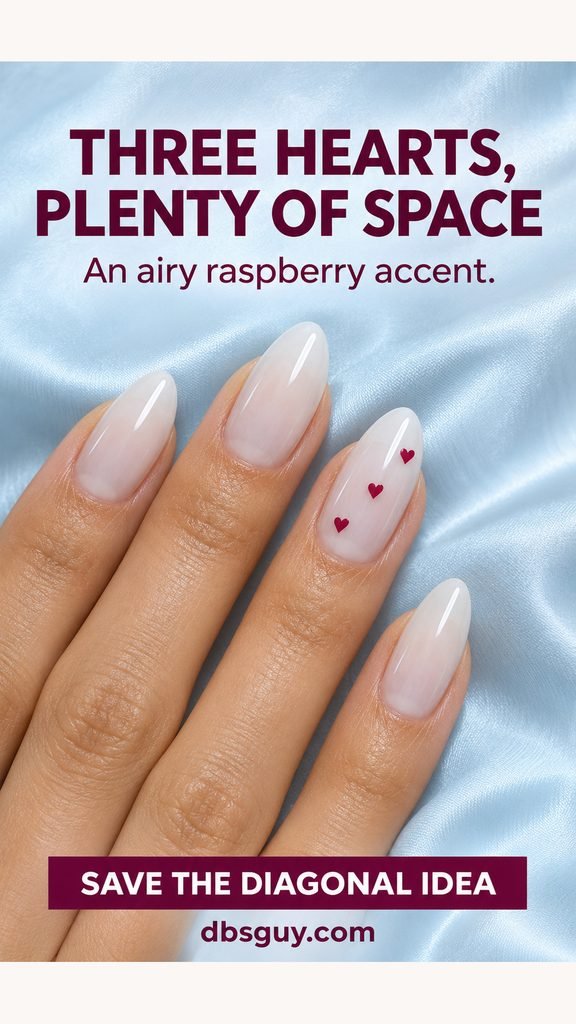
The gaps matter more than fitting in a third heart. Ask your artist to leave enough room that you can recognize each shape separately. On a shorter nail, use two hearts or choose a wider accent nail; shrinking all three until they look like dots loses the point of the design.
Keep the hearts in the same raspberry shade if you want the diagonal itself to be the feature. Adding several pinks, glitter, and a French edge would give you more details to balance. Here, the plain neighboring nails make the small trail easy to follow.
Also Read: 15 Almond Valentine Nail Ideas With Heart Tips and Soft Curved Lines
4. A Milky Micro French With Pink Hearts
A fine white French edge gives a sheer milky base a more defined outline. Add a dusty rose heart just above that edge on the index and ring nails, leaving a slim strip of base color between the heart and the tip. Short rounded-square nails keep the line compact.

The natural pink showing through a warm milky base can make the center look blush, as in the reference. If you prefer a whiter result, check a neutral sheer white on your own nail rather than covering the pink with an opaque cream.
Ask to see one French edge before the whole set is painted. A wide white band takes up much more of a short nail and leaves less room for the heart. If you have almost no free edge, keep the line extremely fine and bring the motif inward. The design needs that little gap more than it needs a perfectly matched position on every finger.
Also Read: 11 Simple Valentine Nail Designs Built Around One Little Detail
5. A Small Wine-Red Outline Heart
A wine-red outline puts a darker accent on milky white without filling the whole heart with color. Give one ring nail a small open heart and keep the rest of the oval set plain. The same milk-white base should show inside the outline and around it.

This looks minimal, but the linework needs more control than a filled heart. Give the outline enough width for two curved lobes and a visible opening. If a thick line closes the center, a slightly larger heart with a finer border will serve the design better than an even smaller symbol.
For a home manicure, a suitably small outline decal is an alternative to freehand painting. Check that it has an open center rather than a pale printed fill. At an appointment, ask for a flat painted outline and show the artist how much white you want left inside it.
Also Read: Intricate Valentine Nail Designs to Discuss With Your Nail Artist
6. A Sheer Blush Side Swoosh With One White Heart
Keep milk-white as the main color and add a translucent blush curve along one side of the index and ring nails. Place one opaque white heart over the pink curve on the ring nail. The neighboring nails stay plain, so you notice the soft sweep rather than a full pink manicure.

Ask for a sheer pink wash with a curved boundary, not a solid pink stripe. Most of the nail should remain milk-white. A ready-made sheer pink shade is a clearer starting point than improvising a mix; the exact product combination and application should follow the polish system being used.
On a shorter oval, shorten the swoosh and keep it close to one side. If the white heart blends into the surrounding milk-white, shift it farther onto the blush patch. This is a good salon reference when the translucent color matters more to you than perfectly identical curves.
Also Read: BIAB Valentine Nails With Sheer Bases and Tiny Heart Details
Turn Your Favorite Reference Into a Clear Salon Request
Describe the coverage, shape, and accent together: “Short squoval nails, a translucent milk-white base, one tiny cherry heart near a tip corner on each ring nail, and gloss throughout.” Point to the part you want kept sheer. An image alone can leave the artist guessing whether you like the color, the length, or the amount of artwork.
Milky white is a color effect, not a requirement to book extensions or builder gel. Ask which service fits your nails and the design, and mention any existing product when you book. Request a quote for the chosen number of accent nails before the work starts.
For an at-home version, the single-heart looks are the simplest place to start with regular polish and compatible flat decals. Let the base and artwork become ready for the next layer according to their instructions, and use a compatible clear top coat. A universal drying time would be misleading because formulas and coat thickness vary.
Keep nail preparation gentle and leave cuticles uncut. If you choose gel, do not pick it off when it lifts. The American Academy of Dermatology’s gel manicure guidance also recommends hand sun protection for UV curing and explains care and removal precautions.
Questions About Milky White Valentine Nails
How do I keep milky white from looking chalky?
Start with a sheer white formula and decide how much natural nail you want visible. Repeated coats of an opaque white will not create the same translucent effect. For the heart designs here, some visible nail bed helps the base stay soft and gives opaque white artwork something to contrast with.
Can these designs work on very short nails?
Yes. The single cherry heart and the white-on-white accents are the easiest layouts to reduce to fingertip length. Move the motif onto the visible nail plate and keep a margin around it. The three-heart diagonal and French-plus-heart layouts need more space, so simplify those first.
Do I need gel polish for the sheer look?
No. Sheer describes the coverage, and you can choose regular polish formulated for that finish. Gel is a separate service choice. The precise application, drying or curing, and removal depend on the products selected.
Which heart color should I choose?
Choose cherry for a clear red accent, raspberry for a softer berry note, or opaque white for a detail you notice up close. A wine-colored outline is useful when you want dark contrast with less filled-in color. Compare the accent over the chosen base, because pale pink can blend into a warm milky finish.