Handmade Valentine Gifts for Teachers Featuring Student Artwork and Personal Notes

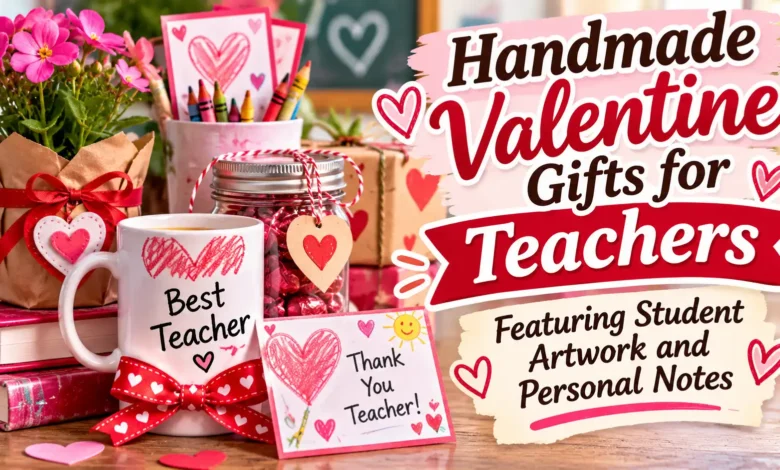
A watercolor bookmark is a good starting point when one child wants to make a small teacher Valentine. For a gift from the class, collect a drawing and a sentence from each student in an accordion book. Both give the teacher something personal without requiring a large display or an expensive purchase.
These five handmade Valentine gifts for teachers pair student artwork with a place for the student’s own words. Choose the one that fits your supplies, your child’s interest, and the time you have for assembly.

The images are AI-generated craft concepts that illustrate the projects, rather than photographs of gifts made or tested with students.
Choose the project before collecting supplies
- A small, flat gift: Make the watercolor bookmark. Crayons work if you need to skip drying time.
- A gift from several students: Build the accordion book with one equal-size panel per child.
- A drawing the child wants to keep whole: Put it in a small desk frame with a caption.
- A child who likes cutting and arranging: Make a paper-flower posy with handwritten leaf notes.
- A teacher who could use a desk organizer: Add an artwork sleeve to a pencil cup you already have.
Check the school’s gift and Valentine celebration rules first. For a group project, invite everyone to contribute without requiring a purchase. A drawing, a dictated sentence, or a signature can all be part of the gift.
Set out paper, crayons or washable markers, a ruler, child-appropriate scissors, and glue or paper tape. Use art supplies intended for children and follow the labels. The U.S. Consumer Product Safety Commission’s Art and Craft Safety Guide recommends close supervision and avoiding solvent-based supplies for young children. The projects below use paper and ordinary school supplies; an adult should handle any craft knife or hot laminator.
1. Turn a little painting into a thank-you bookmark
A narrow bookmark gives a child a manageable space to decorate. The front can hold watercolor hearts, a favorite animal, or a tiny picture of a classroom book. Save the back for one sentence about something the teacher actually did.

You’ll need: Sturdy white cardstock or watercolor paper, child-appropriate watercolors or crayons, scissors, and a pen. A suggested finished size is 2 × 6 inches.
- Cut the strip and lightly round the corners. If you are using an existing painting, ask the child which part they want to turn into the bookmark before cutting it.
- Let the child decorate the front. For paint, use a light wash and let it dry completely before writing on the reverse.
- Add a short message on the back, followed by the student’s first name and the school year. Leave the surface flat so it can sit between pages.
A note to adapt: “Thank you for reading with me. I liked doing the funny voices.” Use that detail only if it reflects the child’s own memory; otherwise, ask which book or reading activity they remember.
Skip beads, foam stickers, and thick layers of glued paper. If the paint buckles, let it dry fully, then place it between clean sheets of paper under a book. Optional lamination protects the surface, but it also makes the bookmark thicker. Follow the pouch instructions and keep any cutting outside the sealed edge.
Slip the finished bookmark into a plain envelope with the teacher’s name on it. You do not need to buy a book to make it feel complete.
2. Collect the class’s drawings in an accordion book
This option suits a room parent or another adult coordinating several contributions. Equal-size pages make assembly easier, while each student can choose a different memory: a science activity, a read-aloud, or help learning something difficult.

You’ll need: One 4 × 4-inch cardstock square per student, two extra squares for covers, crayons or markers, and flexible paper tape. The image shows a short four-panel example so the hinges are visible.
- Give each student one square. Leave about ½ inch clear along the left and right edges for joining. Put a drawing above a short sentence and a first-name signature.
- Collect the squares before assembly. Keep a roster so you can include a child who was absent or needs help dictating a message.
- Place two panels side by side, facing up, with a tiny gap between their edges. Join the seam with paper tape, turn them over, and tape the back of the seam too.
- Add the remaining panels the same way. Gently fold successive hinges in opposite directions to make the zigzag. Close and reopen each new join before adding more pages.
- Add a cover panel at each end. Letter the front with the teacher’s name and the school year, keeping decoration clear of the hinges.
Try joining two blank scraps first; the gap needs to let the cardstock fold without pulling the tape loose. For a large class, divide the pages into two or three labeled volumes so the finished gift is easier to hold. Keep pages single-layer and avoid bulky attachments.
Use a prompt such as “Draw one thing you learned with our teacher.” A child who is not writing yet can tell an adult what to put underneath. Read the sentence back and let the child decide whether it says what they mean.
If the book is part of a group celebration, the activity choices in DBSGuy’s Valentine classroom ideas can help you plan something alongside it without turning the gift into the whole party.
3. Frame a drawing with the story behind it
Choose this when a child has drawn a recognizable classroom moment. A caption such as “This is us reading the dragon book” tells the teacher why the picture matters. The drawing does not need to look like a formal portrait.

You’ll need: A small frame with an easel back, white backing paper, the drawing, a pen, and photo corners or paper tape. A frame with a 5 × 7-inch opening is a useful starting size; measure its actual visible opening before arranging the art.
Cut the backing to fit the frame. Place the drawing toward the top and leave a clear strip below it for the child’s caption and signature. Move everything into position before attaching it, and check that the frame edge will not hide the words. Use photo corners, or tape the drawing lightly from behind.
If you prefer a paper mat like the one pictured, an adult can cut an opening slightly smaller than the drawing and attach the art behind it. Leave enough of the lower mat visible for the caption. A ready-cut mat is another option if you do not want to use a craft knife.
For a large original, make a reduced copy with the child’s agreement and keep the original intact. Check the copied colors and handwriting before framing it. Add a longer personal note on a separate slip inside the envelope, so the teacher can keep it private.
A small frame still takes desk space. If you do not know whether the teacher has room, give the mounted artwork in a protective folder and let them choose how to display it.
4. Make a paper-flower posy with notes on the leaves
Use a page of colorful scribbles or a fresh sheet of crayon patterns for the petals. This gives a child who enjoys making marks a clear role, even if an adult helps cut the flower outlines. The leaves provide space for the thank-you messages.

You’ll need: Decorated paper, cardstock for backing if needed, green paper straws, green paper leaves, small paper circles for centers, glue, paper tape, and a sheet of kraft paper. Three flowers make a manageable small posy.
- Draw three simple flower shapes, roughly 2½–3 inches across, on the reverse of the artwork. Cut them out. Back thin artwork with cardstock before attaching the stems.
- Glue a paper circle in the middle of each flower. Let the glue dry, then turn the flowers face down.
- Lay the top of a paper straw against the back of each flower, stopping below the top edge. Secure it with a short strip of paper tape across the straw. Lift it gently to check the attachment.
- Write a brief thank-you on each leaf while it is flat. Tape the leaves to the straws below the flower heads, with the writing facing forward.
- Gather the stems at slightly different heights. Fold kraft paper around the lower stems into a cone and tape it closed. Add a loose ribbon if you like, without covering the leaf notes.
The image includes an extra face-down flower to show the stem attachment. For the gift itself, three finished stems are enough. If a flower droops, reduce the head size or use lighter paper rather than adding more layers.
Let the child name three things they appreciate, such as “You explain the hard words,” “I like our drawing time,” and “You help me try again.” A short phrase per leaf is easier to read than a paragraph squeezed around the stem.
5. Wrap a pencil cup in student artwork
A paper sleeve can turn a plain desk cup into a handmade gift while keeping the artwork removable. Choose this project when you already have a smooth, stable pencil cup and a reason to think the teacher could use it.

You’ll need: A clean, dry, straight-sided pencil cup with a smooth rim, drawing paper, crayons or markers, a ruler, scissors, and tape. A plastic cup like the one pictured avoids using a cut metal can.
- Wrap scrap paper around the cup to measure its circumference. Mark where the ends meet, then add about ½ inch for overlap. Measure the height of the straight section between the rim and base.
- Cut the artwork paper to those measurements, keeping it slightly shorter than the usable height. Try it around the cup before decorating; the paper should not extend beneath the base.
- Mark the overlap lightly on the back. Have the child decorate the visible area and write a brief message near the center, clear of the seam.
- Wrap the dry paper around the cup with a little room to slide it off. Tape the overlapping paper ends to each other at the back, rather than gluing the artwork to the cup.
“Thank you for helping me draw” fits an art teacher if that is what the child wants to say. For another teacher, use a detail from their class. Add a first-name signature on the sleeve or a separate note.
Keep the inside and rim bare. This is a paper-covered desk organizer, so remove the sleeve before cleaning the cup and keep it away from spills. A few pencils are optional; the artwork can be the whole gift.
Help the student write a note that sounds like them
Start with a question they can answer from memory: “What did your teacher help you do?” or “Which part of class would you tell someone about?” Ask one question at a time and give them room to answer.
A useful starting sentence is: “Thank you for ____. I remember ____.” They can shorten it, draw the answer, or dictate while an adult writes. Read it back without replacing their language with a formal thank-you letter.
For example, “Thank you for helping me read the long words” says more about a particular classroom than “You’re the best.” Both are welcome messages, but a specific detail gives the teacher a memory to connect with the artwork. Keep sensitive learning or family details in a separate, private note.
If the child wants an accompanying card, these Valentine card ideas offer simple ways to give a short message its own space.
Pack it so the artwork arrives intact
Allow paint and glue to dry fully before wrapping; follow the materials’ directions rather than assuming a fixed drying time. Use an envelope for the bookmark, a shallow box for the accordion book or frame, and a small box that keeps the paper flowers from being crushed. Carry the pencil cup upright so its sleeve does not catch on a bag zipper.
Write the teacher’s name clearly on the outside. For a class gift, add the class and school year to the cover or backing. Check the teacher’s preferred delivery day, especially if February 14 falls outside the school week.
Questions about handmade teacher Valentines
Is a handmade note enough on its own?
Yes. A drawing with a short thank-you fulfills the purpose of showing appreciation. There is no need to add a purchased gift, and the school may have its own rules about what families can give.
What can a preschooler contribute?
Let them choose colors, scribble on the paper, or draw something from class. An adult can prepare the shapes and write down the child’s exact words. Leave the child’s marks visible instead of redrawing the picture for them.
Can we use artwork the child already made?
Ask first, especially before cutting it into petals or a bookmark. A copy works when they want to keep the original. Give the child a chance to choose the section you use and add a new note for the teacher.
How do we include everyone in a class gift?
Offer the same-size page to each student, with drawing, writing, and dictation as equal options. Have the coordinating adult track contributions and arrange another chance for absent children. Follow the school’s usual naming practices, and get appropriate permission before sharing images of student work or names publicly.