21 Cute Christmas Nails for Anyone Who Can’t Resist Tiny Bows and Holiday Details

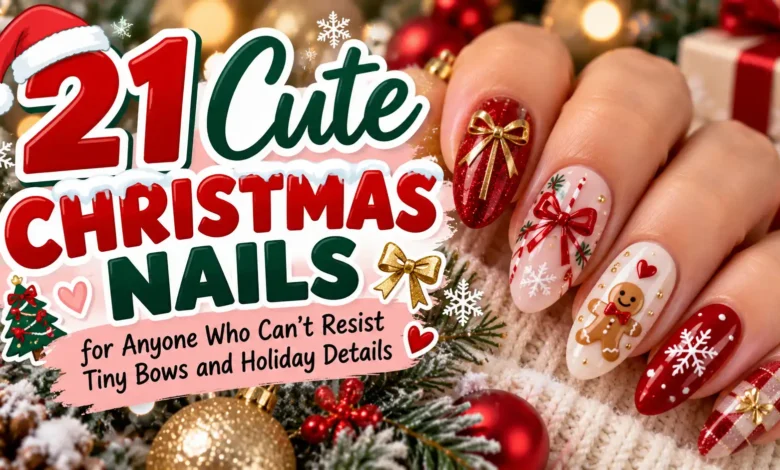
Start with a tiny red bow on a sheer pink nail if you want the sweetest, simplest version of cute Christmas nails. Want more personality? A dotted wreath, a little gingerbread figure, or one scarf-wearing penguin gives you a recognizable holiday detail without decorating every inch of every nail.
These 21 looks focus on the little things: ribbon loops, miniature ornaments, painted stockings, and small winter characters. Each option includes a way to make the design fit your nail length and a useful detail to discuss with your nail artist.
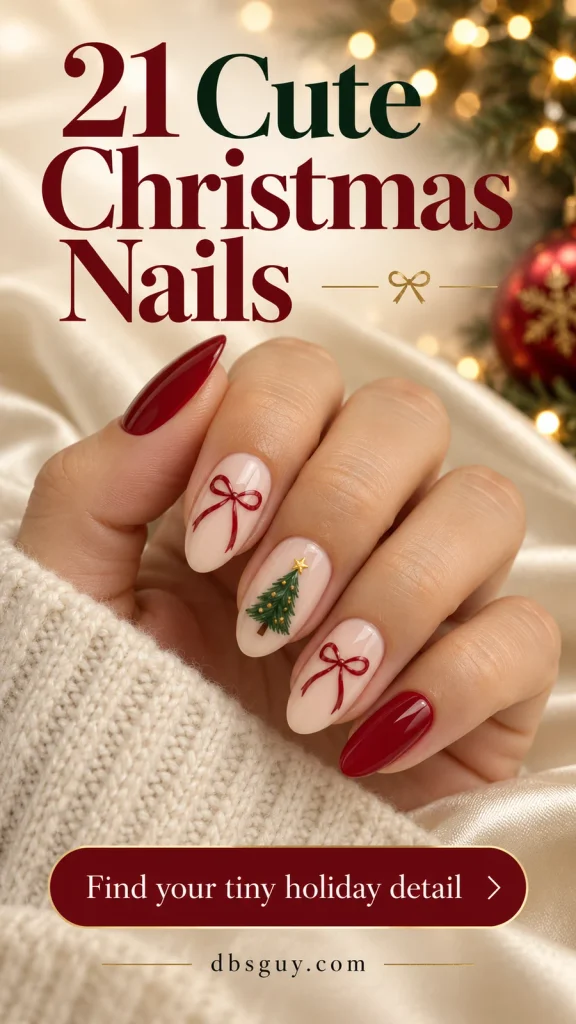
The visuals are AI-generated design concepts, not photos of completed or tested manicures. Use them as references for color and placement; a technician can help adapt the scale and finish to your nails.
Choose Your Level of Detail
For the least painting, start with the single red bow or dotted wreath. For a polished dinner look, try gold bows on burgundy or the ribbon French tips. If you want character art, choose one gingerbread, reindeer, snowman, or penguin accent and keep the other nails in a coordinating solid color.
Choose your actual nail length first, then scale the artwork to fit it. A design that looks tiny in a close-up image may need fewer details on your own nail. If you would rather have quiet winter color than little illustrations, our December nail ideas by mood offer more directions.
1. One Tiny Red Bow on Sheer Pink
A little red bow has enough personality to carry an entire manicure. Keep the base translucent rose-beige and put the bow on one ring fingernail, with a clear border of pink around both loops. Short round nails suit this version because the bow stays compact and the rest of the set feels easy to wear.
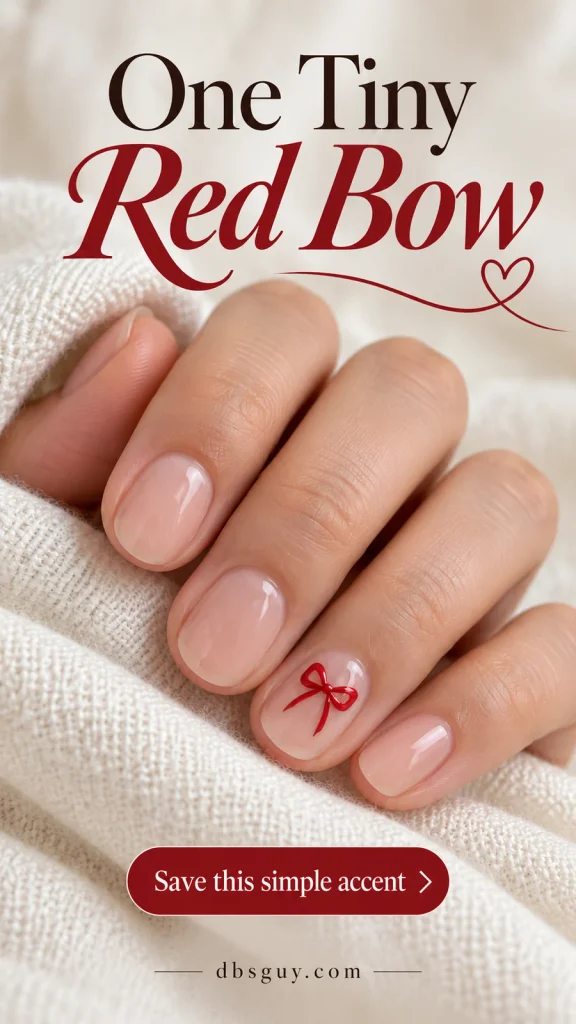
Ask for a flat painted bow with two small loops and two fine tails. For a home version, a small bow decal is a useful alternative to freehand painting; choose one that fits inside your nail rather than reaching the sidewalls. You can leave every other nail plain.
2. Gift-Wrapped White French Tips
This version turns one French-tip nail into a tiny present. A narrow red ribbon runs along the accent nail, with a crossing ribbon and bow near the white tip. Keeping the other nails as plain French tips makes the gift detail stand out.
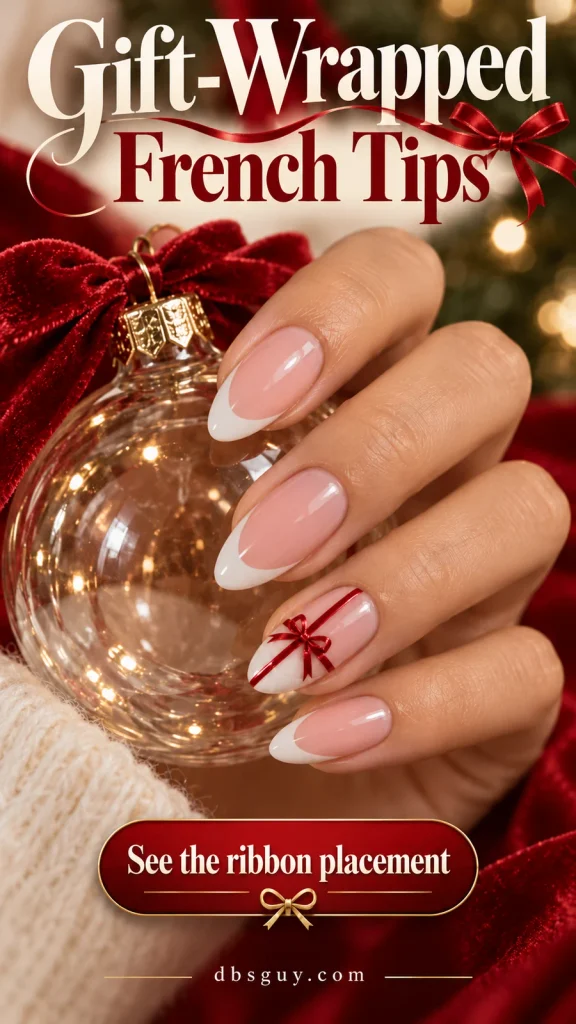
The important salon request is thin ribbon lines. Wide red bands can cover the pink base and make the accent feel heavy. If your nails are very short, keep the bow and one ribbon line, and skip the second crossing band. You still get the wrapped-present effect with less crowded artwork.
3. Pale Pink Bows on Forest Green
Pale pink against forest green gives bow nails a different mood from the usual red-and-white combination. Choose a green dark enough for the pink loops to remain visible, then keep the bow on one accent nail. A short squoval shape gives the color a neat frame.
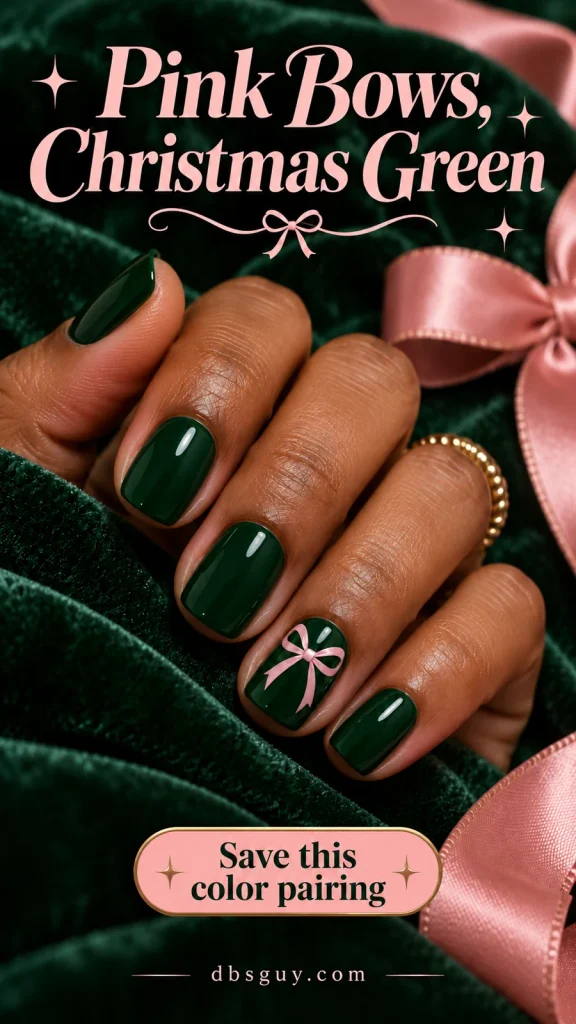
Bring both color references to your appointment: a soft pink that looks delicate in the bottle may need more opacity over dark green. Ask to see the pairing on a sample tip. If you are using decals, check that the pink motif is opaque rather than translucent so it does not disappear into the base.
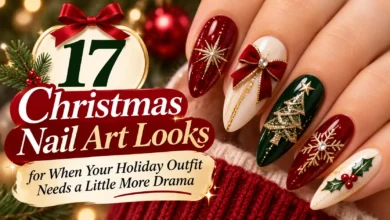
4. Gold Ribbon Loops on Burgundy
If you want the bow idea to feel dressier, pair deep burgundy with a small gold ribbon motif. The warm metallic detail works like a little piece of jewelry, so the remaining nails can stay solid and glossy. Oval nails give the fine loops room without requiring a very long set.
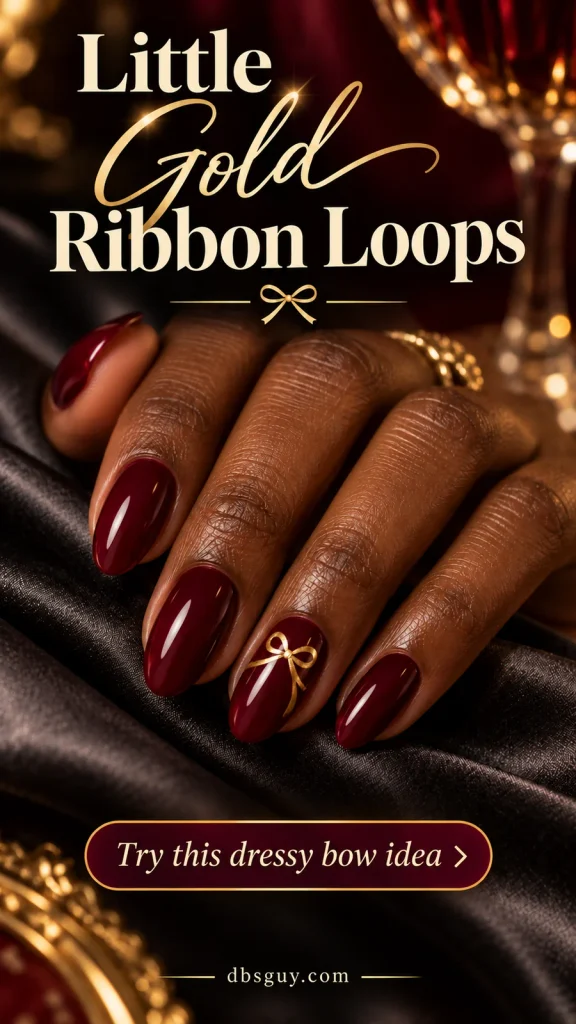
Ask for a painted metallic bow or a flat decal, with open space inside the loops. Keep the gold lines distinct rather than filling the entire bow in. A gold polish pen or decal can suggest the look at home; it does not need a chrome-powder service.
5. White Bows With Pearl-Look Centers
Two white bows over a softly shimmering rose base make this set feel like a winter ribbon box. The small pearl-look center is the detail to notice: it can be suggested with a rounded white painted dot, so you can ask for the appearance of a pearl without choosing a raised bead.
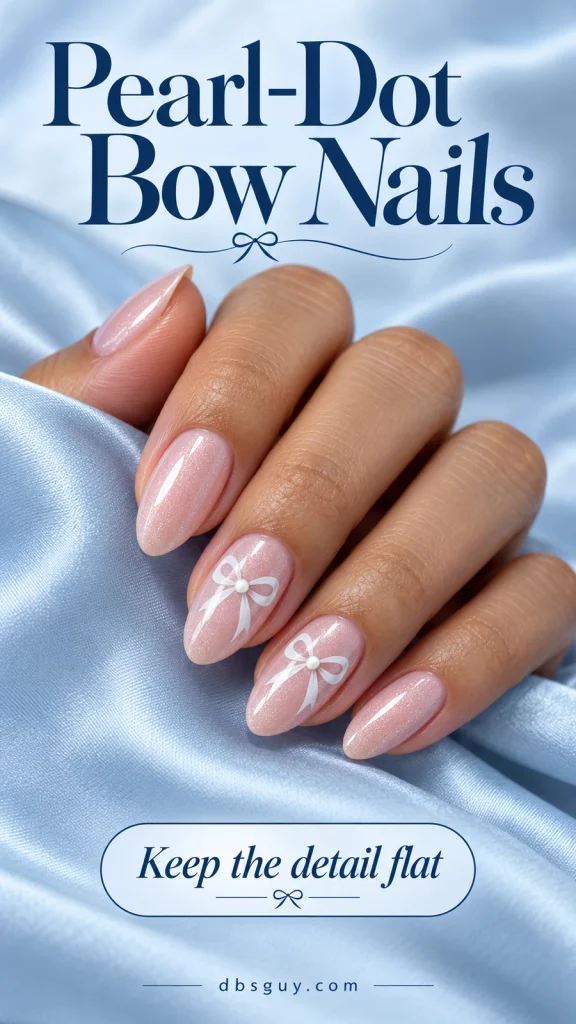
For a smooth version, tell your nail artist that the loops, tails, and center should all be flat artwork. Keep the shimmer fine enough that the white bows still have a clear outline. On shorter nails, use one bow and shorten its tails instead of shrinking every part until it is hard to see.
6. Peppermint-Striped Mini Bows
Instead of striping the whole nail, put the candy-cane detail inside two little red bows. Fine white stripes across the ribbon loops and tails give them a peppermint look, while a milky cream base keeps the illustration easy to read.
This is a precision-art option rather than the first freehand design to attempt with your non-dominant hand. Ask your technician to keep the bow silhouette recognizable before adding stripes. A red bow decal with white detailing is the simpler route; on short nails, one striped bow makes a better focal point than several squeezed together.
7. One Small 3D Bow With Red Tips
A pearly raised bow makes a different statement from the flat designs above. Here, it sits on one sheer pink accent nail beside red French tips. Keeping the charm smaller than the nail surface lets the red tip remain visible underneath.
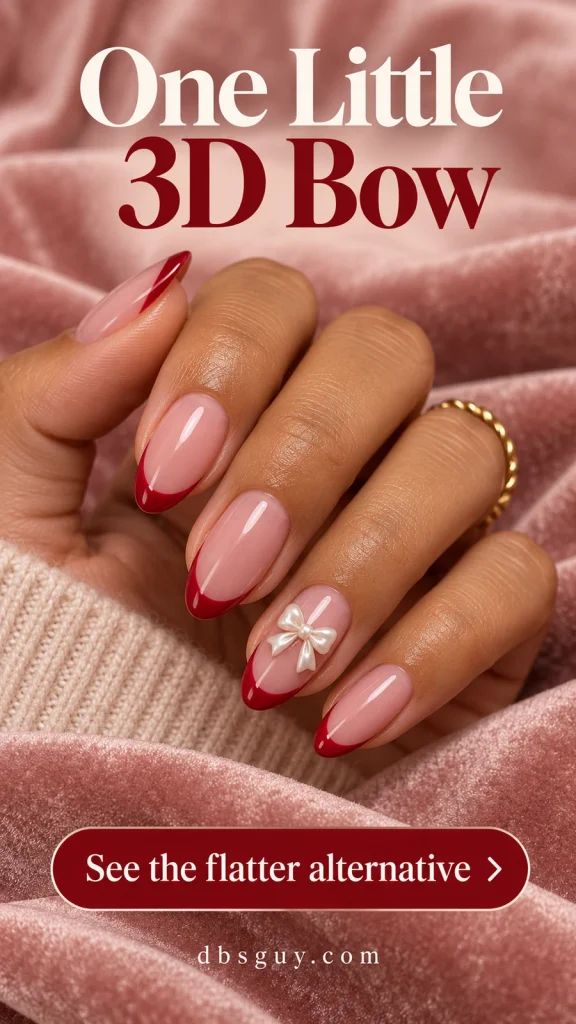
Discuss the height as well as the width before your appointment. Raised decorations can catch on hair or fabric, so consider whether a dimensional bow fits your daily routine. Ask the technician to select and secure a nail-specific decoration using its intended system. The flatter alternative is a painted white bow with a small gray shadow to suggest folded ribbon.
8. Mini Green Trees With Golden Toppers
A tiny tree does not need individually painted branches. Three tapered green strokes, stacked from widest to narrowest, give you a recognizable silhouette. The illustrated set places trees on two sheer beige nails and finishes them with a gold star or dot.
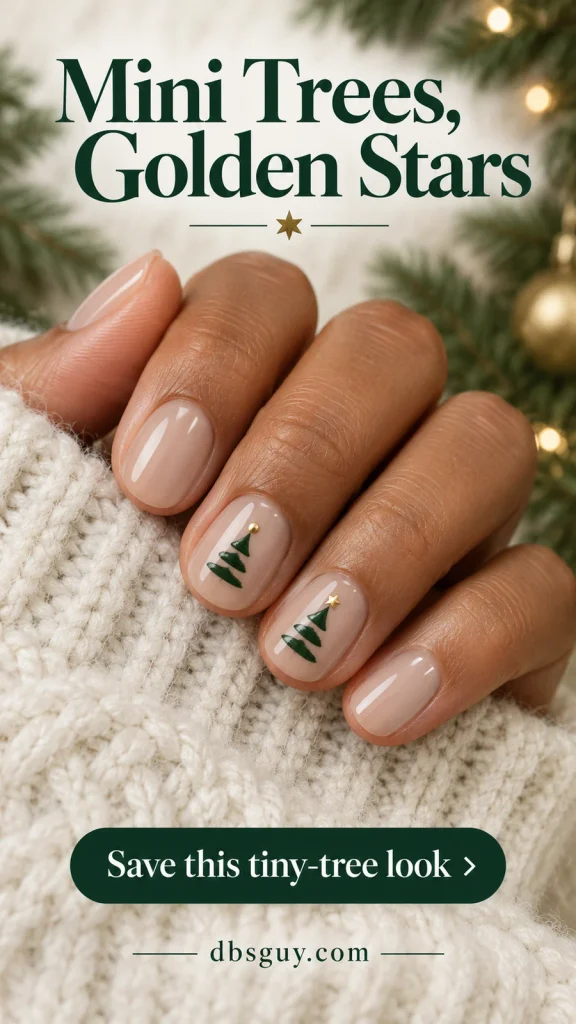
This is a useful option when you want holiday art on short round nails. Leave space between the green strokes so the shape does not become a solid blob. If painting a star feels fiddly, a small gold dot still gives the tree a clear topper. Keep the neighboring nails plain to repeat the airy look.
9. Holly Sprigs at the Corners
Move the holiday detail away from the center with small corner sprigs. Two pointed green leaves and a cluster of three red berries give milky pink nails a festive edge while leaving most of the surface open.
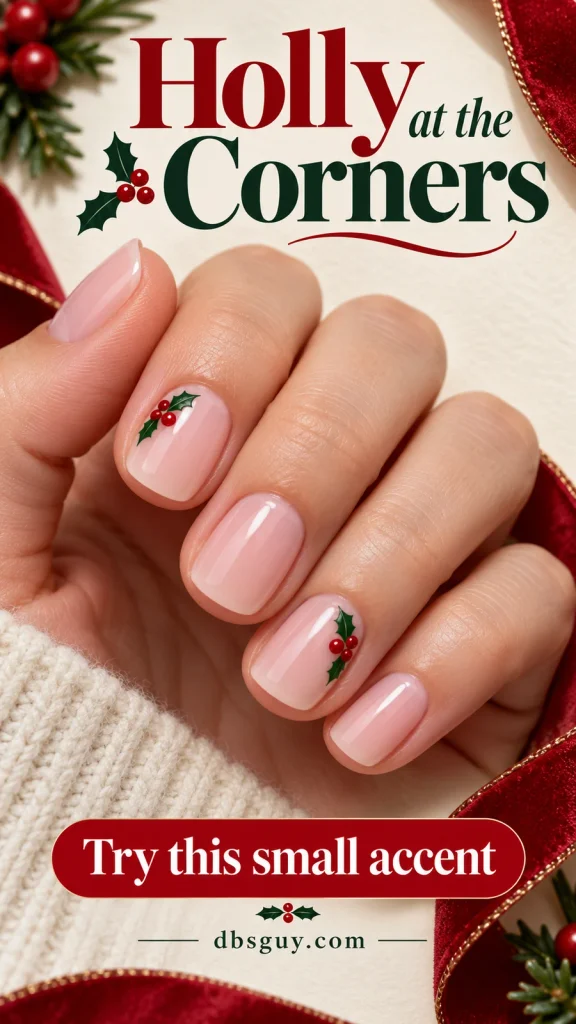
Ask for the leaves to follow the corner of the nail instead of stretching across the whole tip. That placement is helpful if you like a quiet manicure with one close-up detail. For a simpler home adaptation, use short green leaf-shaped marks and red dots. Keep each berry separate; adding more polish to enlarge them can turn the cluster into one red patch.
10. A Dotted Wreath With a Red Bow
A small open ring of green dots turns a cream accent nail into a little Christmas wreath. The empty center matters: it is what distinguishes this design from a green circle or a scattered polka-dot pattern. Add a red bow at the bottom to finish it.
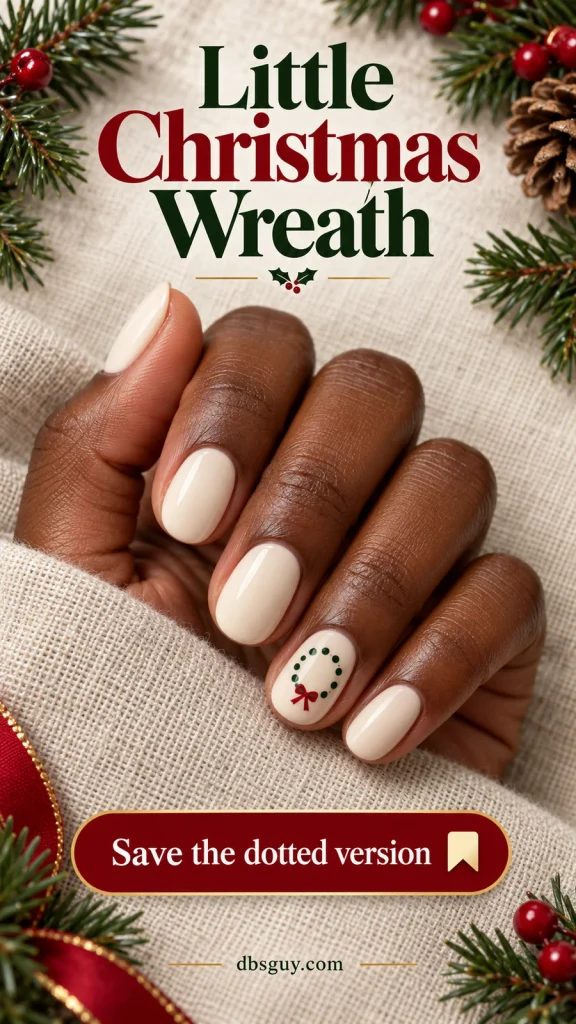
For a DIY version, place four guide dots at the top, bottom, and sides, then fill the gaps while preserving the opening. Let the size of your nail determine the number of dots. On a narrow nail, a smaller ring with fewer dots is easier to read than a dense wreath that touches both edges.
11. A Gingerbread Figure With a Bow Tie
A cream accent nail gives a gingerbread figure enough contrast to show its little arms, icing details, and red bow tie. Pair it with cocoa-brown nails for a set that feels closer to a cookie tin than a traditional red manicure.
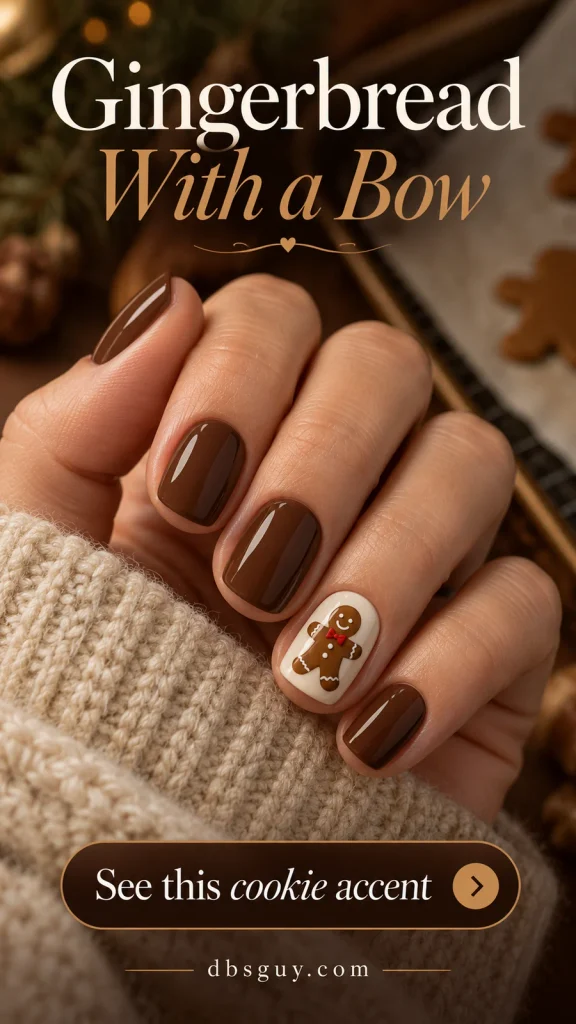
Ask for the outline and bow tie to take priority over tiny facial details. A figure that fills the nail from edge to edge leaves little room for the icing to remain clear. On a very short nail, use a gingerbread face with a small bow underneath, or choose a decal sized for the full figure. You can skip extra glitter around it.
12. A Santa Hat Hidden in the French Tips
A red-tip manicure becomes playful when one tip turns into a little Santa hat. The accent needs a red pointed shape, a white brim, and one white pom-pom. Keep the other nails as simple red French tips so the hat feels like a small discovery.
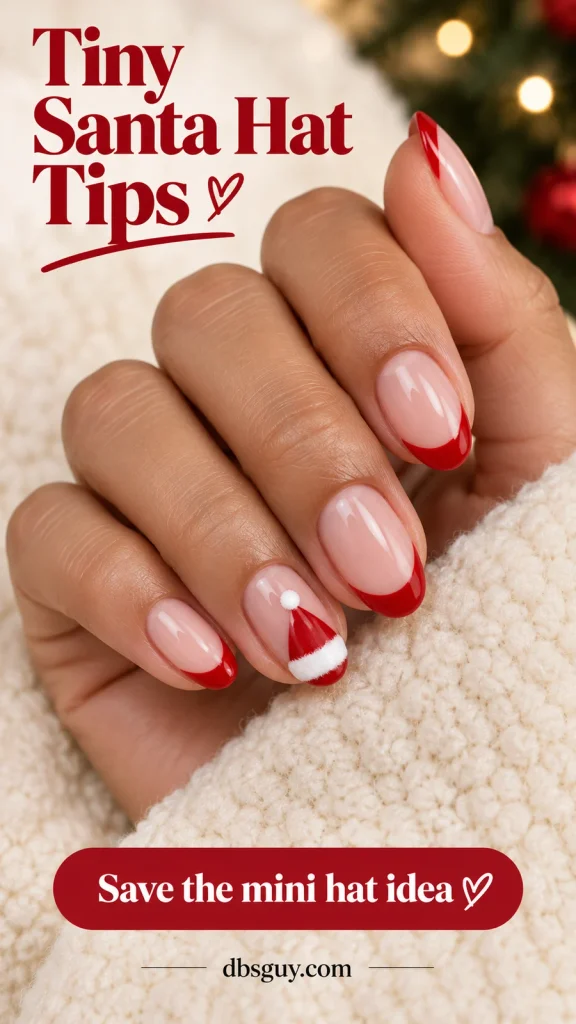
Show your artist which direction you want the hat to lean. The brim should sit near the tip, with enough pink space beneath it to preserve the French-manicure feel. If your free edge is short, put a tiny whole hat in the center of one nail rather than forcing a large brim across it.
13. A Reindeer Face With One Red Nose
Soft taupe nails make a gentle background for a little reindeer accent. Put the face on a pale blush nail and keep the features spare: two dark eyes, fine antlers, and a small red nose. The nose supplies the Christmas color without changing the rest of the palette.
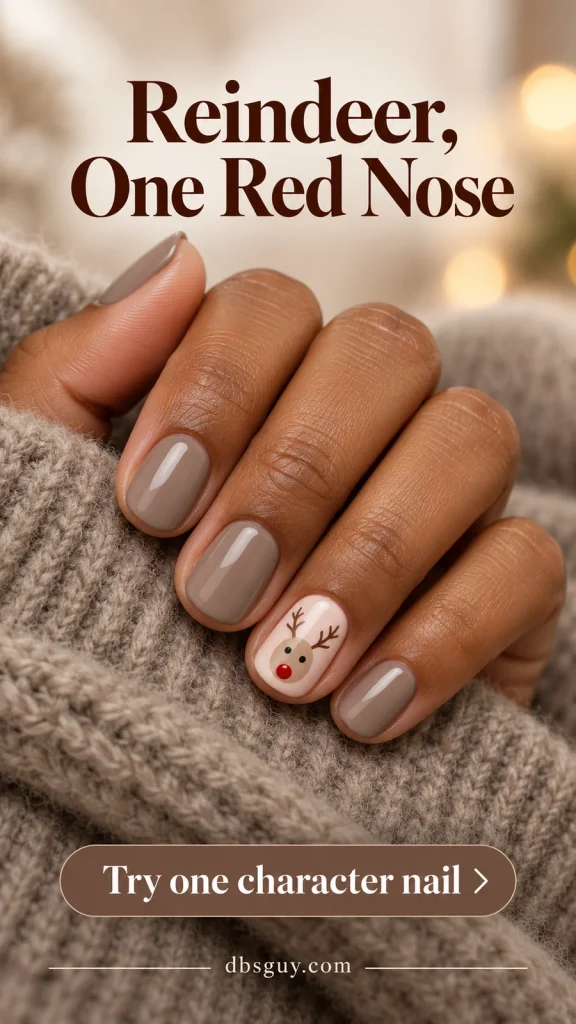
The antlers need room above the face, so ask for the head to sit slightly toward the tip. On short nails, a partial face peeking up from the edge gives the antlers more space. Skip eyelashes and extra dots if they make the expression crowded; the antlers and nose already explain the character.
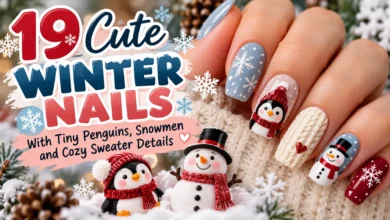
14. A Little Snowman With a Red Scarf
Dusty blue and a small white snowman make a cheerful winter pairing. Two stacked white circles establish the figure, while the red scarf adds a bright detail. A tiny orange dash is enough for the carrot nose.
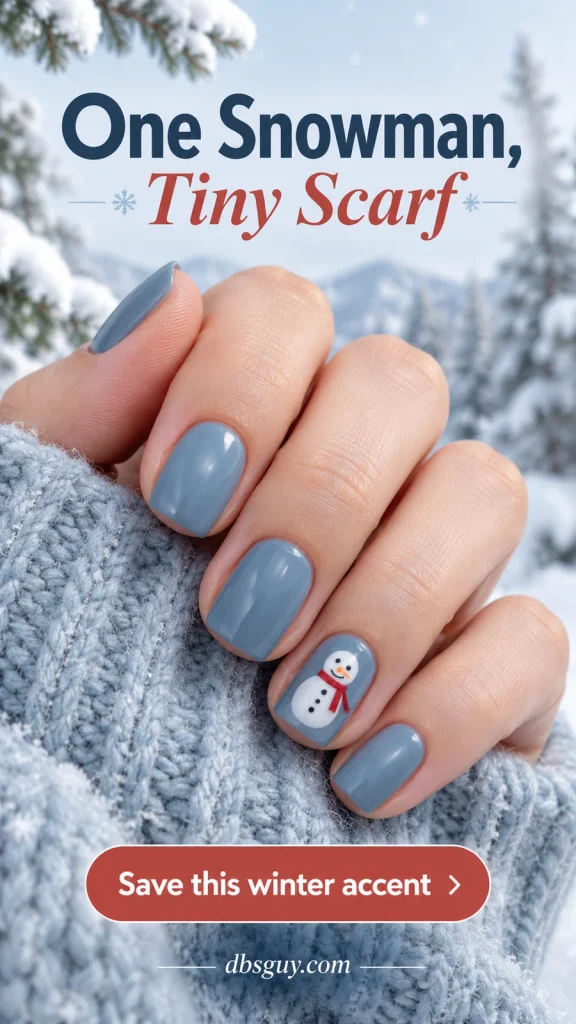
Ask for one character nail and solid blue on the rest. For a home adaptation, leave off the arms and use a simple scarf line across the join between the circles. If the nail is narrow, make the snowman taller rather than wider, keeping a blue border visible on both sides. This look can stay in your winter rotation after Christmas.
15. Tiny Hanging Baubles on a Sheer Base
Fine gold hanging lines make these ornaments feel different from ordinary dots. Run each line down from near the cuticle toward the middle of an accent nail, then finish it with a red or green circle. Leaving the tips empty gives the miniature ornaments breathing room.
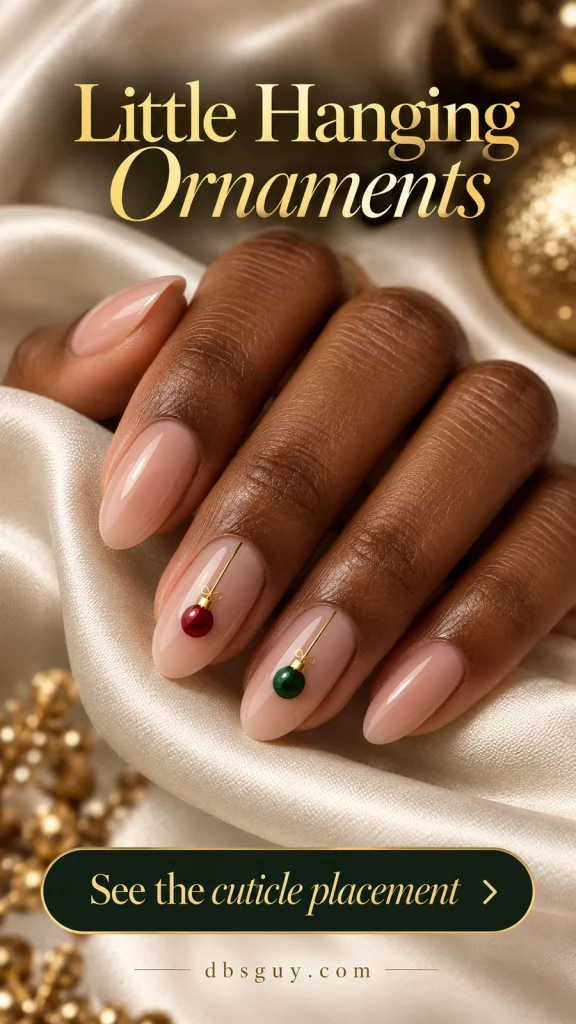
Specify that the artwork stays on the nail plate, with a gap from the skin. The illustrated baubles have a rounded, jewel-like appearance; painted highlights can suggest that depth without a raised gem. On short nails, shorten the hanging line and use one ornament per accent. On longer nails, keep the bauble small rather than enlarging it to fill the available space.
16. A Delicate String of Christmas Lights
A curved dark line with tiny colored bulbs is a cheerful choice when you want several Christmas colors in a small area. Put the light string across the upper half of two nude nails and keep the neighboring nails plain.
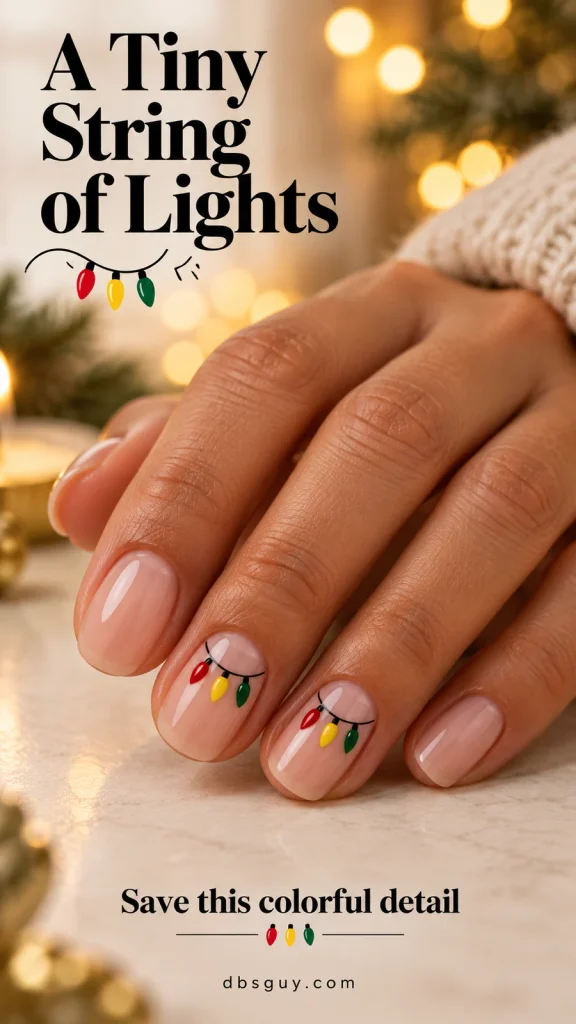
The curve should look intentional before you add the bulbs. Use three small colors on each accent rather than trying to fit a whole strand onto one nail. At the salon, ask for little teardrop bulbs; at home, round dots are a simpler substitute. Leave gaps between them so red, green, and yellow do not merge into a single stripe.
17. One White Snowflake on Baby Blue
Baby blue gives white snowflake art a soft winter setting. Choose one clear six-armed flake on an accent nail, with a few snow dots nearby. Keeping the other nails solid blue makes the flake feel like a deliberate focal point.
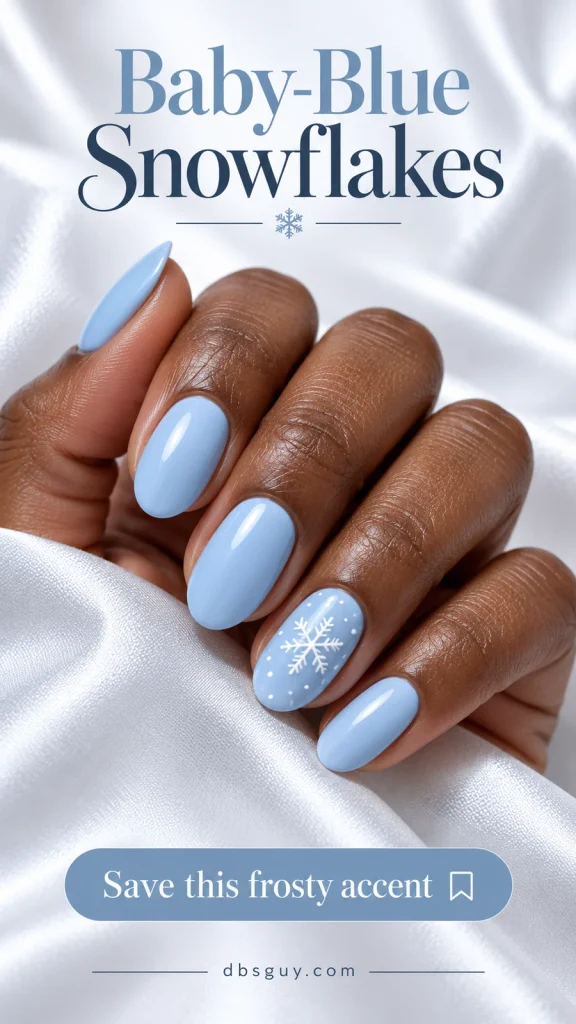
Ask to see the line thickness your artist plans to use: very thick branches can close up the spaces that make a snowflake delicate. On short nails, use an off-center partial flake or a small decal instead of compressing a large design. If you want more variations on this motif, explore our 19 delicate snowflake nail ideas.
18. A Mini Red Stocking on Ivory
A tiny red stocking makes an ivory manicure feel immediately festive. The white cuff and bent toe do most of the work, so you can keep the body of the stocking a simple red shape. A few gold dots on a neighboring nail add a little sparkle without introducing another illustration. The illustrated cuff has a textured appearance; request a painted white cuff if you prefer a smooth surface.
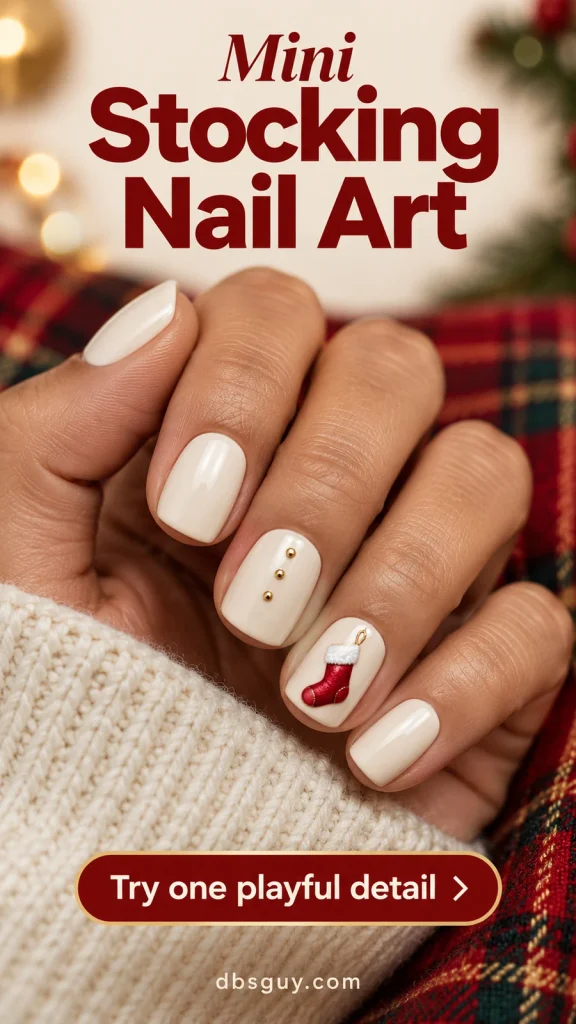
Ask for a clearly angled foot; a straight red rectangle with a white top can look more like a candle. On short squoval nails, keep the stocking upright in the center with a margin around it. A miniature decal is a sensible choice if the toe shape is hard to paint neatly.
19. A Penguin With a Little Red Scarf
Glossy navy nails frame one icy accent carrying a small penguin. The black outline and white belly establish its shape; a tiny orange beak and red scarf provide the cheerful details. It is a good alternative if you prefer winter characters to trees or Santa art.
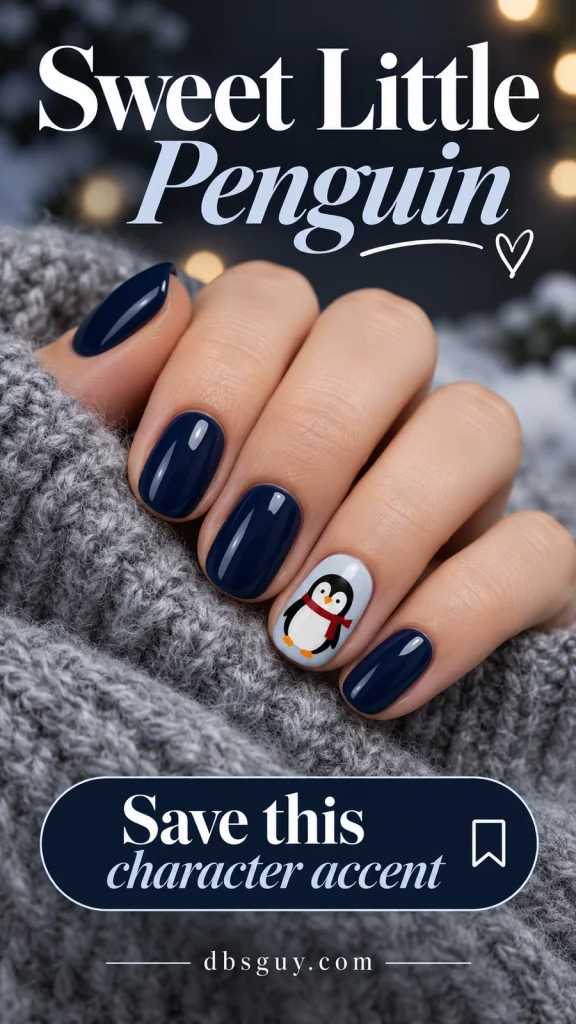
Give the character the widest accent nail available, rather than insisting that it go on a particular finger. On a small nail, reduce the illustration to a rounded head and white chest. Request flat painted details or a decal if you want a smooth finish. Avoid surrounding the penguin with extra snowflakes when space is tight.
20. A Snowy Little Red Cottage
A red cottage on a cream accent nail adds a storybook detail to muted sage nails. Keep the scene small: one red house, a white snow-covered roof, a dark doorway, and two warm yellow windows. A little snowy ground and a few dots above the roof finish the picture without adding a full landscape.
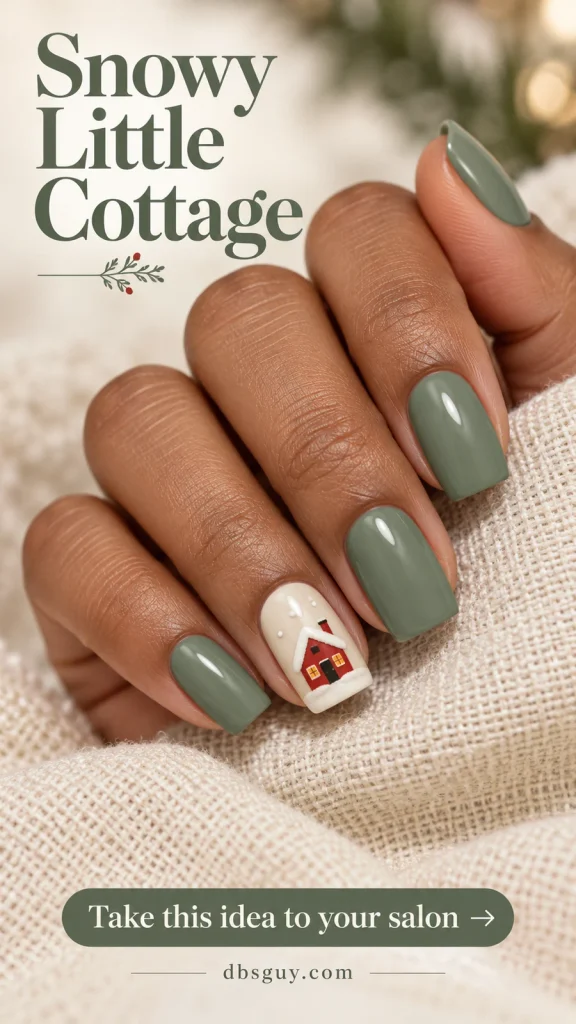
This is a salon-level miniature if you want the windows and roofline clearly separated. Ask your artist to simplify the house to fit your actual nail, especially at the corners. For a short-nail adaptation, leave off the windows and keep the red house silhouette, white roof, and door.
21. Five Little Icons Like a Christmas Postcard
If choosing one motif is the difficult part, give each nail a different tiny icon while keeping the same milky pink base. This set uses a red bow, green tree, candy cane, gold star, and red heart. The repeated base color holds the small illustrations together.
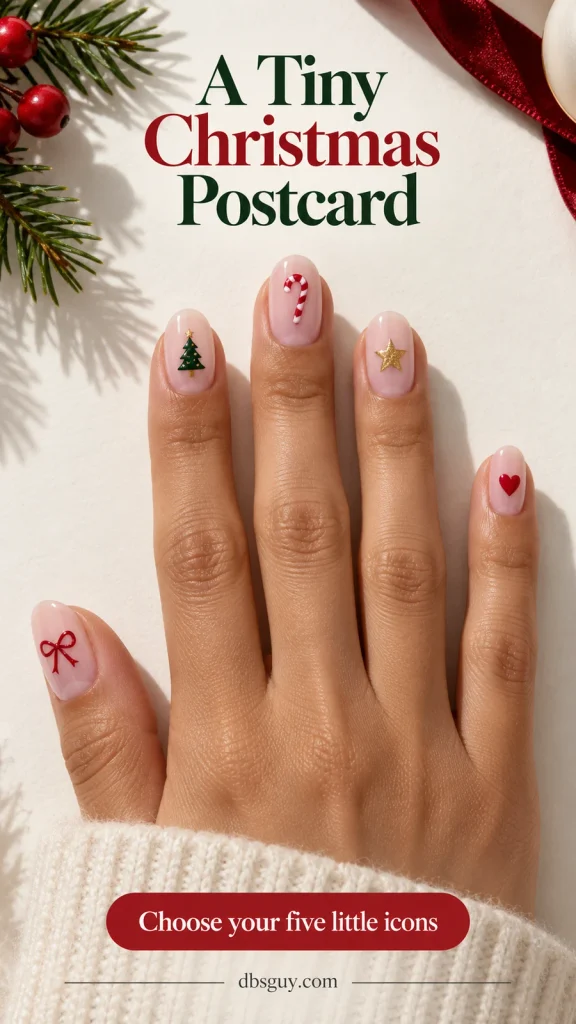
Plan the whole hand with your artist before painting, and assign the most detailed icon to the roomiest nail. Keep each picture around the same visual size even though the shapes differ. On very short nails, simplify the tree to three strokes and the star to a small decal. The point is a coordinated collection, with one clear image per nail.
How to Get the Tiny Details Right
For an appointment, save one full-set reference and tell your artist the nail length, base color, accent placement, and whether the surface should be smooth or raised. Ask for an art quote before the service; a miniature cottage involves different work from one bow decal. If you want fewer decorated nails, decide which detail matters most before simplifying the rest.
For a home manicure, pick one accent you can repeat on your other hand. Gather a base coat, your background color, the detail colors or appropriately sized decals, a fine nail-art brush or dotting tool, and a compatible top coat. With regular polish, let the base dry enough to work over it without dragging, and follow the product’s directions for layers and drying. Gel products require their own compatible curing system and instructions; do not substitute regular-polish drying steps.
Practice the small motif on a spare nail tip before putting it on your hand. If the loops of a bow merge together, reduce the paint on the brush or choose a decal. For the dotted wreath, check the empty center before adding more dots. You can make either design simpler without adding more colors.
Keep ordinary nail care part of the plan. The American Academy of Dermatology’s manicure guidance recommends moisturizing nails, avoiding cuticle cutting or forceful pushing, and checking salon cleanliness and tool hygiene. Cute artwork does not require aggressive cuticle preparation.
Questions About Cute Christmas Nails
Which design is easiest for very short nails?
Start with one small red bow decal, a dotted wreath, or a single tree made from three green strokes. Choose a motif that fits within the nail with a visible margin, and leave the other nails plain. A detailed face or cottage needs more room for its separate parts.
Can I get this look with regular nail polish?
Many flat versions can be adapted to regular polish, including painted bows, dots, simple trees, and nail decals. Use products intended to work together and follow their application directions. A sculpted bow or specialty finish may require a different service; tell your technician if you want a regular-polish version.
Are 3D bows necessary for bow nails?
No. Painted loops, a flat decal, or a white bow with subtle shadowing can create the ribbon effect. Choose a raised decoration because you want dimension, and discuss its size and how it will fit your routine. You can keep the red French tips and replace the raised bow with flat artwork.
What should I save for my nail appointment?
Save the full-hand image that shows the overall balance, then note your preferred base, motif, nail shape, and number of accents. Mention any changes, such as a shorter length, fewer stripes, or a painted center instead of a bead. Use the concept as a starting point rather than expecting every miniature line to be identical.
Which ideas can I wear after Christmas?
The baby-blue snowflake, dusty-blue snowman, navy penguin, and pale pearl-look bows have a winter feel that is less tied to December 25. You can also remove the red and green accents from the postcard idea and keep a small star or heart.
Also Read
- 21 December Nails From Early Sparkle to New Year’s Eve — choose a look for a particular part of your holiday calendar.
- 19 Snowflake Nails So Delicate They Look Freshly Fallen — explore more small winter details.
- 21 New Year’s Nails to Ring In the Year Sparkling — find a party look for the next celebration.