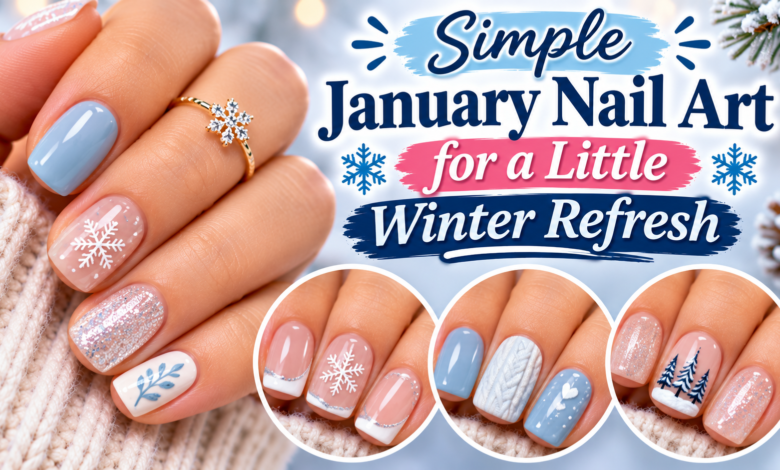
For a little winter refresh, start with a milky pink manicure and give just one nail a pearl finish. If you want a sharper detail, try a tiny silver square over mauve. Both let you change the look without drawing a pattern across every finger.
These five simple January nail art ideas move from soft shine to small color blocks and a two-finish French tip. Each has a specific placement, a way to recreate it with regular air-drying polish, and an adjustment for the part that can get fiddly. Choose one look for your whole manicure; the designs are separate options.

The images are AI-generated design concepts, including the practice-tip illustrations. They show intended colors, placement, and finishes rather than tested manicures.
Choose the Kind of Refresh You Want
- A little more color: the two-tone blue accent, with a straight split instead of a detailed pattern.
- A warm neutral: mushroom taupe with one small ivory half-moon.
- No painted linework: a flat silver square sticker on dusty mauve.
- The least drawing: milky pink with one pearl-finish nail.
- A deeper winter shade: matte espresso with a glossy tip. This one asks for the steadiest brushwork.
Short oval and squoval nails leave enough room for these accents. Keep your usual length and scale the detail to the space you have. For the taupe and mauve looks, hold a color swatch against your hand in daylight: choose whether you prefer a noticeable contrast or a shade closer to your skin.
Prepare Once, Then Add Your Chosen Detail
Set out your base color, its recommended base coat, and a compatible top coat. Add a small flat nail-art brush for the blue panel, a fine brush for the half-moon or glossy tip, or tweezers for the sticker. A spare practice tip is useful for checking the color combination before painting your nails.
Remove old polish, smooth any snags with a file, and prepare clean, dry nails according to your polish instructions. Leave cuticles intact. The American Academy of Dermatology’s manicure guidance advises against cutting or forcefully pushing them back and recommends moisturizing after polish removal.
Apply the base coat your system calls for, then build the color with thin coats. Allow the base to dry before adding artwork, following the product directions. A coat that is ready for another layer may still be too soft for a sticker or a brush pressing against it. All the instructions below use air-drying products; check the labels when selecting colors, toppers, and finishing coats.
1. Split One Accent Nail Between Two Winter Blues
Use dusty denim on most nails and divide the ring nail between denim and pale ice blue. The shared blue undertone connects the colors, while the straight boundary gives you a visible change without a French curve or tiny motif.
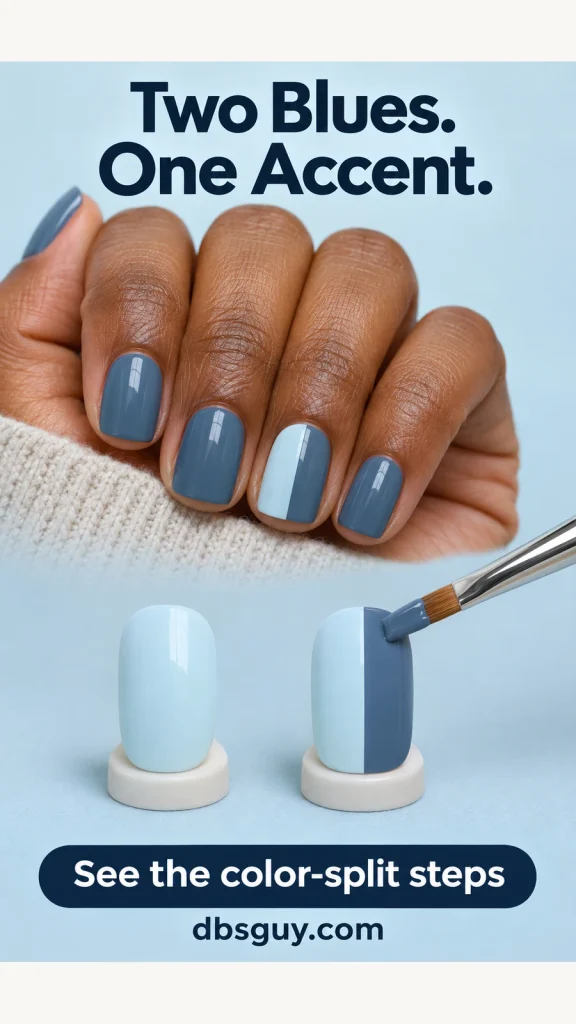
- Paint the other nails dusty denim. Paint the ring nail pale ice blue and let the base dry as directed.
- With a small flat nail-art brush, paint denim over one lengthwise half of the ring nail. Begin just above the cuticle and work toward the free edge, keeping the brush on the nail surface.
- Use the brush’s straight edge to define the center boundary, then fill the side panel in a thin layer. Add another thin layer only if needed, allowing the first to dry as directed.
- Once the detail is ready, seal with the compatible glossy top coat.
The practice tips show why the pale color goes down first: you only need to add one darker panel. On a narrow nail, aim for a simple half-and-half division rather than squeezing in a third stripe. A slightly off-center boundary still works.
If the split becomes uneven: resist chasing the wet edge back and forth with both colors. Let it settle and decide whether it needs repainting. Try the brush movement on a spare tip before tackling the second hand.
Also Read: January Nail Art for Beginners: Simple Designs to Practice at Home for more ways to practice small brush movements.
2. Add a Small Ivory Half-Moon to Mushroom Taupe
An ivory semicircle near the base of one taupe nail feels soft beside an oatmeal sweater or cream sleeve. The contrast sits at the cuticle end, leaving the tip and most of the nail plain. It is a good choice when you like neutral polish but want something more deliberate than an all-over color.
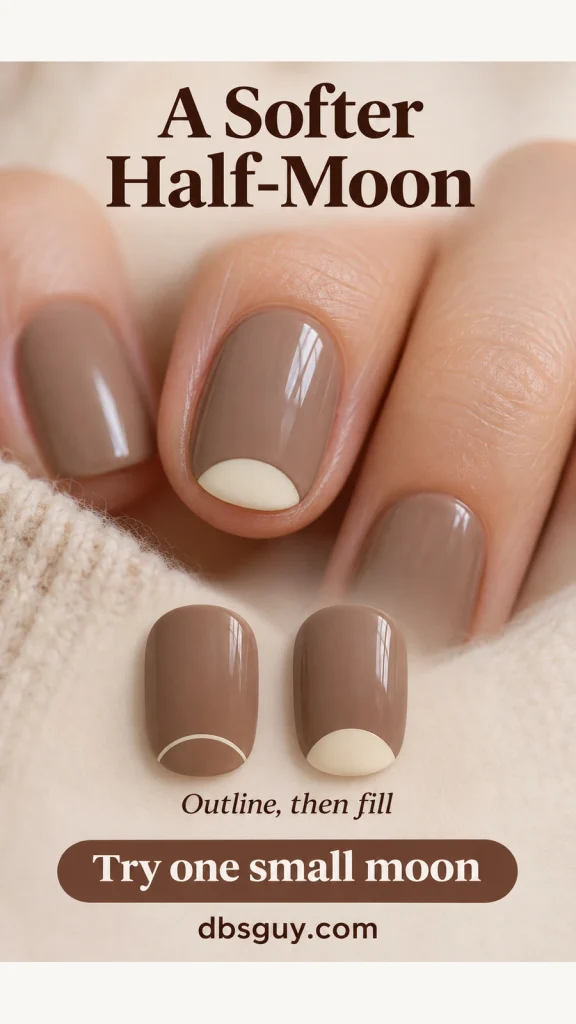
Start with dry mushroom-taupe polish. Using a fine brush and opaque ivory lacquer, sketch a shallow arch near the bottom of the ring nail. Fill the space below the arch, stopping before the skin. Keep a fine margin of taupe visible around the lower edge.
Aim for a half-moon occupying roughly the bottom fifth of the nail, as a visual guide rather than an exact measurement. Use two light passes if the ivory is sheer, letting each dry as directed. Finish with gloss once the painted detail is ready.
For a very short nail: make the moon shallower so taupe still dominates. The curved edge needs more control than the blue panel; try it on one practice tip first. If it grows too large as you correct it, repaint that accent nail instead of adding a thick taupe border around it.
Also Read: Extra Short January Nail Designs With Tiny Details That Fit for ideas scaled to a smaller nail surface.
3. Place One Flat Silver Square on Dusty Mauve
This is the graphic option for someone who would rather place a shape than paint one. Choose a tiny, flat, self-adhesive nail-art sticker designed for use with regular polish. A solid silver square against muted mauve gives you a clear focal point without a raised gem.
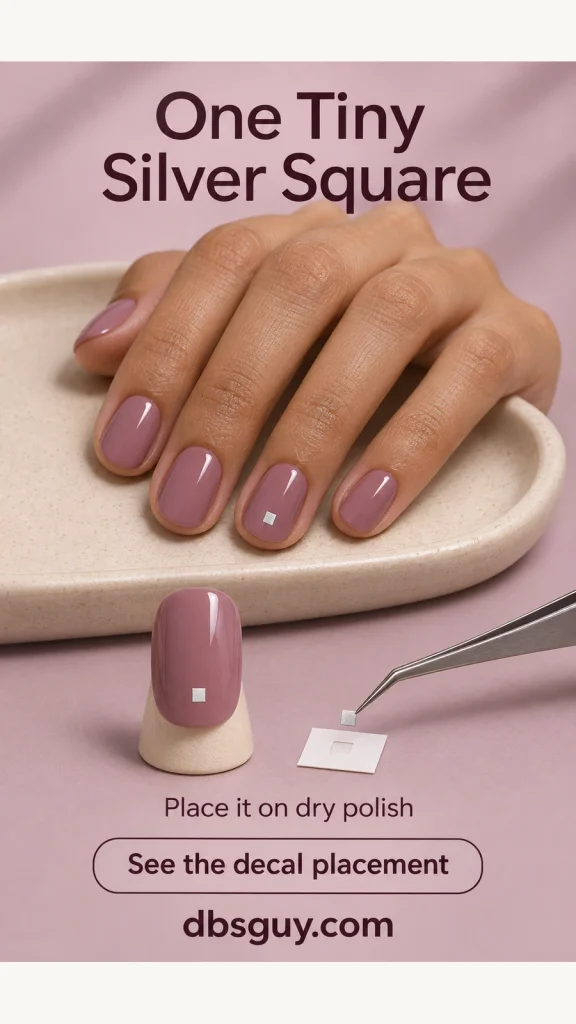
- Paint the nails dusty mauve and allow the polish to dry thoroughly before pressing anything onto it.
- Use tweezers to lift one square from its backing, following the sticker maker’s directions. Handle metallic stickers gently.
- Center it across the lower third of the ring nail, leaving space between the square and the cuticle. Keep its sides upright rather than turning it into a diamond.
- Gently settle the edges onto the nail and seal as the sticker manufacturer directs, using a compatible air-drying top coat.
In the concept image, the square is about one-fifth of the nail’s width. That leaves mauve visible on every side. Choose a smaller sticker if yours approaches the sidewalls, where the nail curves more sharply.
Check the finishing instructions: some sticker makers advise against particular quick-dry top coats. Test your chosen combination on a spare tip. If an edge stays raised, replace the sticker rather than building a thick mound of clear polish over it.
Also Read: 15 Elegant January Nail Art Ideas to Pair With Your Winter Jewelry for more ways to work a small metallic detail into your manicure.
4. Give Milky Pink Just One Pearl-Finish Nail
Choose this if painting the base color is already enough of a project. Keep every nail milky blush pink, then put a sheer pearl-effect lacquer over the ring nail. The change comes from how that nail reflects light, so there is no outline to keep even.
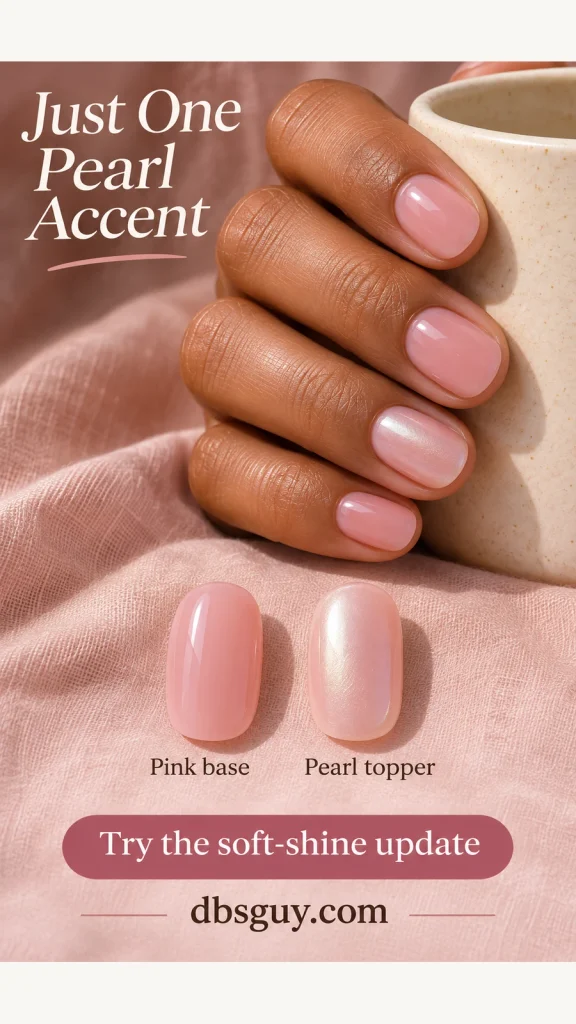
Look for a brush-on, air-drying pearl topper that is intended for layering over color. A translucent formula keeps the pink visible; an opaque white pearl polish will produce a much stronger accent. The reference shows a fine, luminous sheen rather than large glitter pieces.
Apply the pink base and let it dry as directed. Brush a thin coat of the pearl topper from the base toward the tip of the ring nail, keeping the strokes in the same direction. Assess the effect after the coat dries before adding more. Finish with the top coat recommended for your products.
If the pearl looks streaky: use a lighter brush load on the next attempt and avoid repeatedly brushing over a layer that has begun to set. A faint directional reflection belongs to many pearl finishes; piling on more coats can hide the pink you wanted to keep.
This is also the easiest look here to carry toward February: the blush base already provides a gentle color, and the pearl accent needs no seasonal symbol.
Also Read: End-of-January Nail Designs for the Weeks Between Snowflakes and Hearts.
5. Keep Espresso Matte and Add a Glossy Tip
If you prefer dark nails in winter, change the finish instead of adding another color. A narrow glossy edge over matte espresso is subtle head-on and more noticeable when the light catches it. The reference repeats the band across the visible nails; you can begin with a single ring-finger accent.
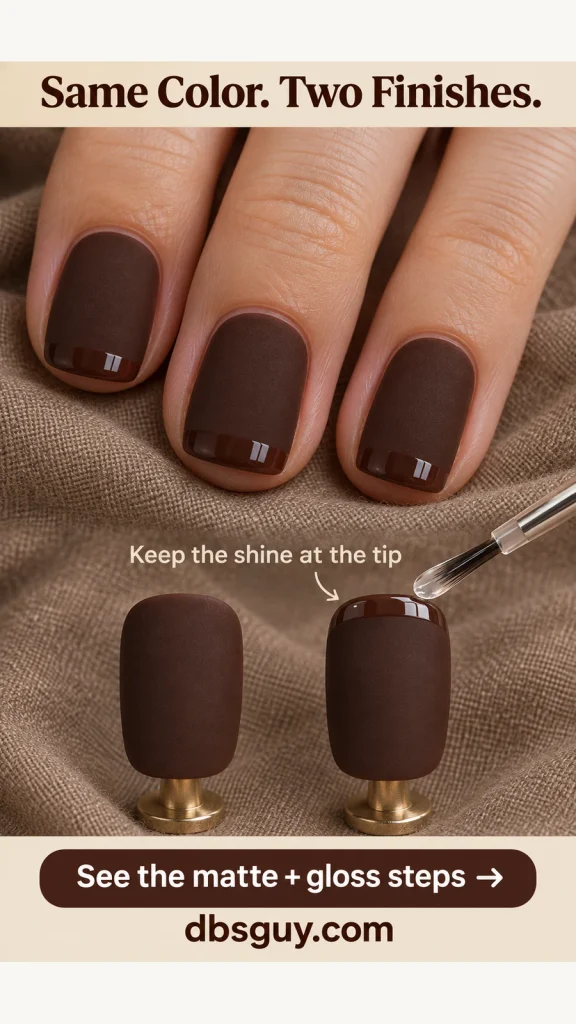
- Apply your espresso lacquer over its recommended base coat and allow the color to dry as directed.
- Apply a compatible, air-drying matte top coat. Let that layer dry according to its instructions.
- With a fine nail-art brush and compatible clear glossy top coat, paint a narrow band along the free edge—the outer tip, away from the cuticle.
- Keep the gloss within that band and allow it to dry. The matte coat has already finished the rest of the nail.
Try a band about one-eighth of the nail’s length, making it shallower on a shorter nail. The close-up shows the useful distinction: the body scatters light softly, while the tip has a sharper reflection. Both areas remain the same espresso shade.
The easy mistake: brushing a final glossy coat over the whole nail will remove the finish contrast. Test the matte-and-gloss combination on a spare tip first. If a neat curved band feels frustrating, keep this as a salon reference and choose the pearl accent for your at-home refresh.
Also Read: 17 January French Tip Nail Ideas Beyond the Classic White Edge for more ways to change the edge of a manicure.
Questions Before You Paint
Which design needs the fewest extra tools?
The pearl accent only adds a suitable brush-on topper to your usual manicure supplies. The silver square avoids linework but needs a small sticker and tweezers. Choose based on the action you find easier: brushing a whole nail or placing one tiny detail.
Can I add a detail to polish I am already wearing?
You can consider it if the existing lacquer is smooth, dry, and intact, and your chosen products are compatible. A pearl topper or sticker may suit that situation. If the surface is chipped, peeling, or uneven, remove and repaint the affected nail first; a decorative layer will not restore a missing base.
Do these looks need gel polish or a UV lamp?
No. The instructions use regular air-drying polish, including the pearl topper and finishing coats. Select those versions deliberately: a product that requires lamp curing needs a different application system. For the silver square, choose a small nail-art sticker intended for regular lacquer.
How long should I leave the manicure to dry?
Follow the directions for your particular products and leave time after the final coat before using your hands normally. Drying depends on the formula, layer thickness, and conditions. A surface that feels dry can still dent underneath, especially when you press on a sticker or reach into a pocket.
How do I keep the second hand manageable?
Rest both forearms on the table and decorate only one accent nail per hand. Rotate the finger you are painting to bring the working edge toward the brush. Matching the colors and keeping the accents small matters more than reproducing every curve exactly.