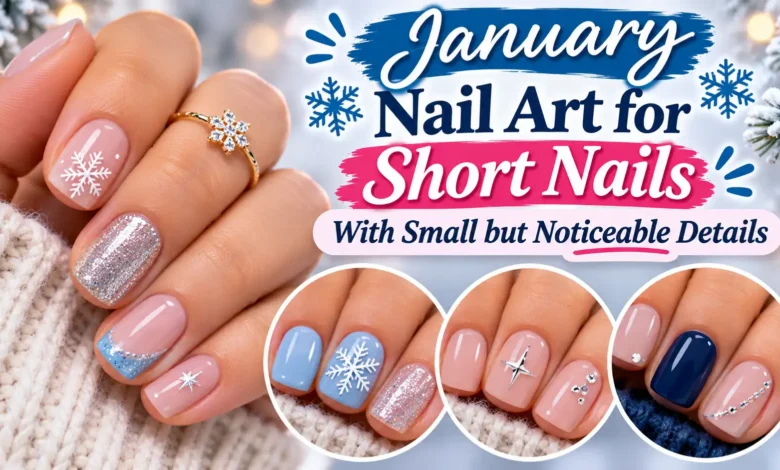
For January nail art on short nails, choose one detail with a clear outline: a navy dot, a fine blue tip, or a small ivory half-moon. Leave enough plain polish around it that you can recognize the shape without bringing your hand right up to your face.
The seven looks below use small marks in different places, from the nail base to the outer edge. Start with the dot if you want the simplest shape to paint. Choose the snowflake for a winter motif, or the espresso wave if you prefer a warm neutral manicure.

The images are AI-generated manicure concepts. They illustrate suggested colors and placement, rather than completed salon work or tested polish results.
Make the Detail Visible Before Making It Bigger
A tiny pale mark can disappear against a pale base. First try a clearer color difference: navy on oat beige, white on dusty blue, or ivory on ink blue. If the outline still looks muddled, simplify the shape before giving it more space.
Use your actual nail as the guide. Round nails offer a soft edge for a dot or low half-moon; squoval nails—short nails with a softly squared tip—give a French line an easy-to-see boundary. You do not need extra length to use these designs.
When choosing a sheer base, compare rose, peach, beige, or caramel against your own hand. The base does not have to match the model’s shade. What matters for this look is that your chosen detail remains visible beside it.
1. One Navy Dot on an Oat-Beige Base
This is the quietest graphic option: creamy beige nails, each with a single navy dot near the base. Repeating the same small mark gives the manicure a pattern without filling the nail with decoration. The dark dot supplies the contrast, so you can keep it genuinely small.
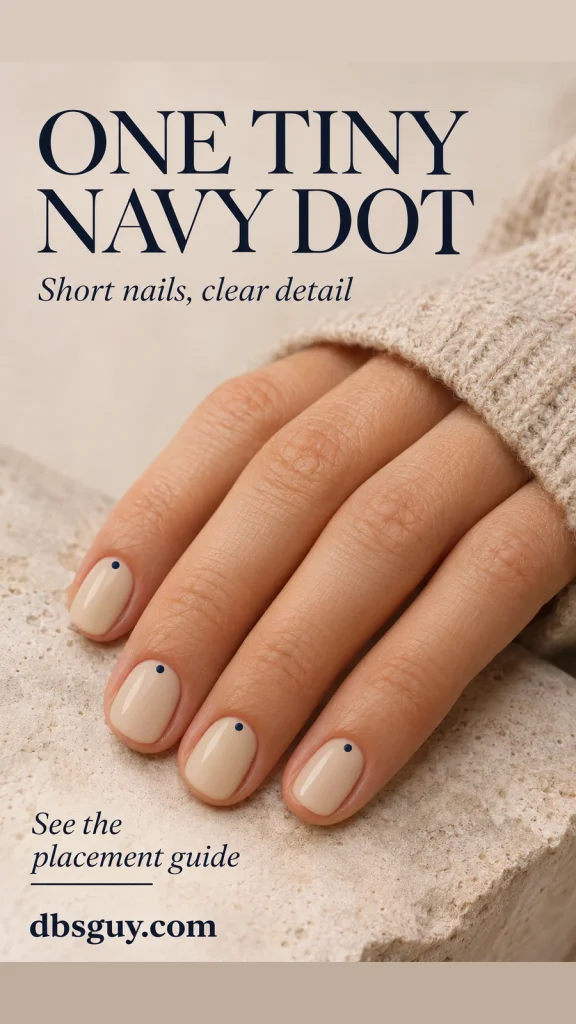
Use a small ball-ended nail-art dotting tool and opaque navy lacquer. After the beige base has dried as its label directs, test one dot on a practice tip. Touch the tool straight down and lift it straight up. Aim for the center across the nail’s width, leaving beige between the dot and the skin.
The reference dot is roughly a tenth of the nail’s width; treat that as a visual starting point, not a measurement to reproduce exactly. If yours becomes a large circle, use less polish or a smaller tool. For the smallest pinky nail, leaving it plain is better than squeezing the dot against the cuticle.
Also Read: January Nail Art for Beginners: Simple Designs to Practice at Home for practice with small painted marks.
2. An Icy-Blue Micro French
A fine powder-blue edge gives a familiar French manicure a January color change. Keep the middle of the nail sheer and the blue close to the free edge—the outer tip. On a short squoval nail, that narrow border is the entire design.

At the salon, ask to see one finished tip before committing to the width across both hands. A broad blue band will cover much more of a short nail than the same band on a long extension. Ask for a light outline of the edge rather than a deep smile line.
For an at-home version, steady both hands on the table and use a fine nail-art brush with a small amount of blue lacquer. Work in short strokes along the visible edge. If you have almost no free edge, the blue can sit on the outermost surface of the nail; there is no need to paint underneath it or onto the fingertip.
Also Read: 17 January French Tip Nail Ideas Beyond the Classic White Edge if the fine-tip look is your favorite.
3. A Corner Snowflake on Dusty Blue
One white snowflake gives this set a recognizable winter theme. Keep the surrounding nails solid dusty blue, and position the motif near an outer corner of the accent nail, with a visible blue border around it. The reference places it toward the nail base rather than across the tip.

Plan the snowflake’s center first. With a fine brush, cross three short white lines through that point to form six arms. Add tiny branch strokes only if the arms still have open blue space between them. A practice tip helps you judge whether the full shape will fit before painting your nail.
This is the most intricate option here. If the branches merge into a white patch, keep the six-arm outline or choose a small nail-art decal that fits inside the nail. Do not enlarge the motif until it touches the skin. One clear snowflake is more readable than several crowded ones.
4. A Silver Pinstripe on Mushroom Taupe
A single lengthwise stripe gives a neutral manicure a sharper detail. Mushroom taupe keeps the overall color muted, while metallic silver makes the line catch the light. Put the stripe on one middle nail and leave the neighboring nails undecorated.
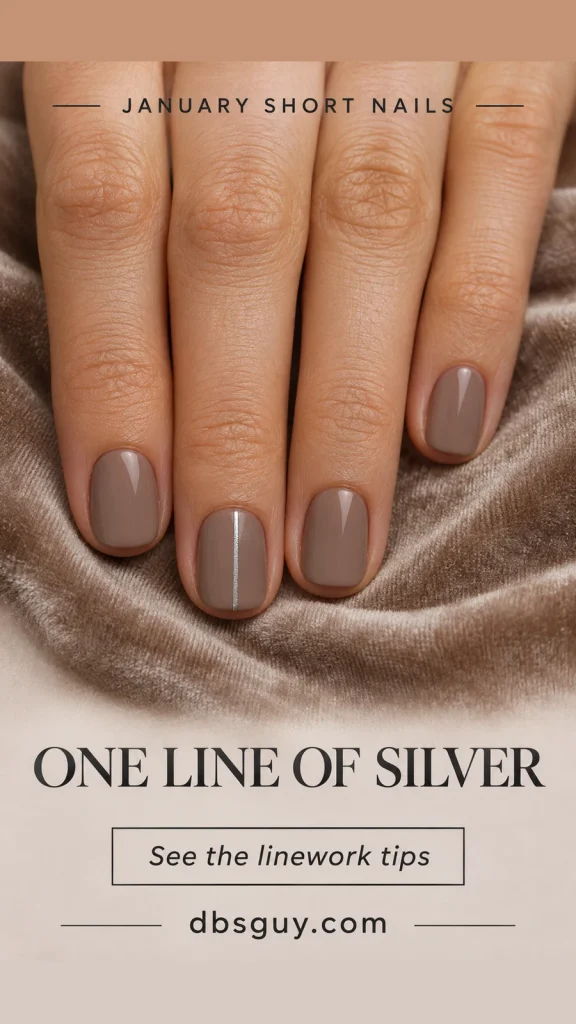
Place the stripe slightly to one side of center, leaving a broad taupe area beside it. Use a fine brush and metallic nail lacquer; stop the line just inside the nail’s base and tip. This is painted linework, so you do not need raised striping tape or an attached ornament.
Practice the stroke with your painting hand supported. If one long pull wobbles, join two shorter strokes with very little polish on the brush. Avoid repeatedly tracing the whole line to fix it: the stripe can grow thicker with each pass. Check it under ordinary indoor light as well as beside a window; a very sheer silver may need a more opaque formula to show clearly.
5. Small Ivory Half-Moons on Ink Blue
For a darker January manicure, use glossy ink blue with a low ivory half-moon at the base of each nail. The pale area is a small curved shape next to the cuticle end, not a French tip. Its placement keeps the outer edge dark.

Show your nail artist how little ivory you want visible. In this concept, each moon is shallow and leaves most of the nail blue. Match the visual balance across the hand rather than making every curved patch an identical size.
With regular lacquer, one approach is to apply the ivory base first, then paint blue over most of it once that layer is ready, preserving a small ivory semicircle. Rehearse the blue boundary on a practice tip. Keep a narrow, clean margin at the skin; creating the crescent does not require cutting or moving the cuticle.
On especially short nails, try the moon on one accent nail first. If the pale shape takes up more space than you like, reduce its height instead of filing your nails into a different shape.
6. One Painted Gold Spark on Dusty Mauve
A small four-point gold spark adds a reflective detail without a full glitter manicure. Dusty mauve gives the metallic paint a warm background. Keep the spark on one ring nail so it remains the one thing your eye goes to.

Use a fine brush to paint a short vertical gold stroke, then a shorter horizontal stroke through its middle. Taper the ends with a lightly loaded brush. The reference has longer top and bottom points, with a little mauve visible around every side.
A flat four-point nail decal is an alternative if drawing tapered points feels fiddly. Check its footprint against the nail before applying it, and follow its application directions. Choose painted polish or a flat decal for this look: the concept does not call for a raised metal charm.
If the gold looks faint, try a more opaque metallic shade on a practice tip before adding extra points. Keeping one clean silhouette preserves the small-detail effect.
7. A Fine Espresso Wave on Cream
This is the warmest option in the collection. A fine chocolate-brown S-curve travels along one creamy beige accent nail, while the rest stay plain. The curve introduces movement without a full swirled pattern or an extra color on every finger.

Draw the curve lengthwise, keeping plenty of cream visible on both sides. Let it bend gently instead of forming tight loops. On a broad short nail, an off-center path leaves a larger uninterrupted patch of cream and makes the line easier to distinguish.
For a narrow nail, reduce how far the wave moves from side to side. You can keep the same idea with a shorter, shallower bend. Ask your artist for “one fine espresso curve on one cream nail” and point to its position in the reference so the request does not turn into an all-over marble design.
A Simple Application Plan for Regular Polish
Choose one look before setting out supplies. You will need its base and detail colors, the relevant fine brush or dotting tool, a file, remover, a cleanup brush, and a practice tip. Use base coat and top coat that suit your polish system.
- Remove old polish and gently smooth snagged nail edges. Leave the cuticles alone.
- Prepare the nail surface and apply the base coat and color as the product directs, keeping polish off the surrounding skin.
- Let the base dry as directed. Test your detail on a practice tip before adding it to the nail.
- Allow the artwork to dry before applying a compatible top coat. Use enough product on the brush to avoid repeatedly dragging it over the tiny mark.
These are lacquer-based design suggestions, not instructions for curing gel. There is no single drying time or wear time to promise across different products. Follow the application and removal directions for the products you choose.
For basic care, the American Academy of Dermatology’s healthy-nail guidance recommends keeping nails clean and dry, filing snags, leaving cuticles intact, and moisturizing after hand washing. Wear gloves for wet cleaning tasks. Seek a dermatologist’s advice for nails that become painful, swollen, or noticeably changed.
Questions About January Nail Art on Short Nails
What is the easiest design to try first?
The navy dot asks for the fewest strokes and no linework. Practice the dot’s size, then decide whether to repeat it on every nail or keep it on one accent. The snowflake needs more control because several tiny lines must remain separate.
Can I use these ideas when my nails have no visible white tip?
Yes. Dots, a corner motif, a shallow half-moon, and one small painted accent sit on the nail surface. For the French option, use a fine painted boundary at the outer edge. Choose the design that fits the nail you have rather than growing it to fit the image.
How do I keep a tiny design from disappearing?
Look at the base and detail together in ordinary light. If they blend, change the detail to a clearer contrasting color before increasing its size. Keep nearby nails plain, and leave visible base color around the shape so its outline is easy to read.
Do all ten nails need the same artwork?
No. The French tips, dots, and half-moons show repeated details; the other concepts use one accent. You can repeat that accent on the opposite hand or leave the second hand in the matching base color. Decide how much repetition you enjoy before the first detail is painted.
Also Read: More January Nail Inspiration
- Extra-Short January Nail Designs With Tiny Details That Fit for artwork scaled to very little nail space.
- Easy Nail Art for January Using Dots, Lines and a Little Shimmer for more practice-friendly winter marks.