19 December Nail Art Looks That Prove Tiny Lines, Dots and Foil Can Do Plenty

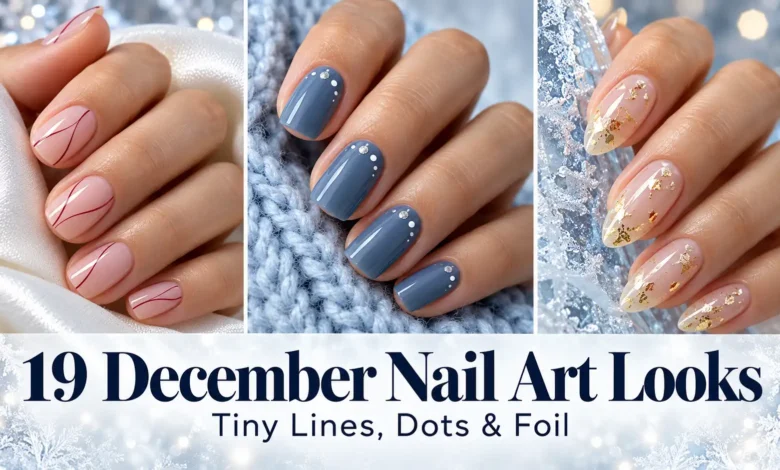
A cranberry dot near the cuticle, a narrow silver curve, or a broken seam of gold foil can give December nail art a clear point of view. The trick is deciding where the detail belongs and leaving enough plain color around it to see the shape.
These 19 looks keep the artwork small, with specific placement notes you can bring to an appointment or adapt for a home manicure. Start with the single red dot for the simplest painted option, the corner tartan for a graphic holiday detail, or mixed-metal cuticle arcs for an evening set.
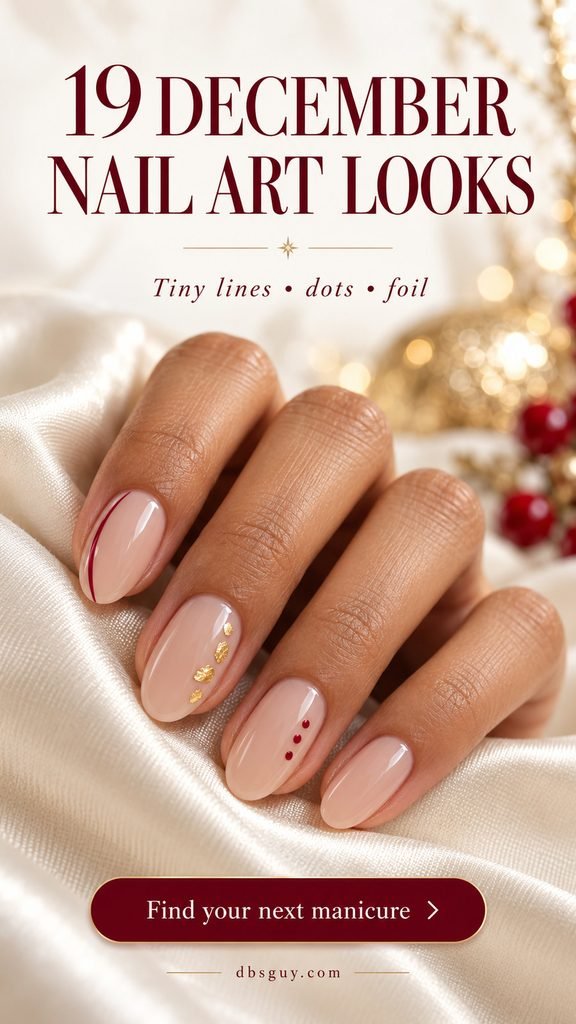
The visuals are AI-generated design concepts for dbsguy.com. They illustrate color and placement, rather than documenting completed or tested salon manicures. Metallic reflections and tiny details will vary with your nails, products, and lighting.
Choose the Detail Before You Choose the Color
- For a first dotting attempt: try the single cranberry dot in look 1. You only need one clean mark per nail.
- For fine brushwork: compare the straight stripe in look 2 with the curved green ribbon in look 5. Straight lines show small wobbles more clearly; a loose curve gives you a different finish.
- For a foil accent: decide between a side seam, a diagonal, a tip, or a cuticle arc. Placement changes the design even when the metal stays the same.
- For very short nails: choose one accent nail or fewer marks. Keep the base color visible instead of shrinking a busy design into the space.
For regular-polish versions, have your base and top coats, chosen colors, a fine liner brush, and a small dotting tool ready. Essie’s at-home manicure guide also suggests a toothpick for tiny dots or the rounded end of a bobby pin for larger ones. Practice the size on a spare nail tip first. Follow your polish’s drying directions before adding artwork and before sealing it.
The foil looks below use small, irregular nail-art fragments. Choose a product compatible with your manicure system and follow its placement and sealing instructions; loose flakes and transfer-foil films are not interchangeable materials. If you book gel, leave product selection and curing to your nail professional.
1. One Cranberry Dot on Sheer Pink
Short rounded nails, a translucent pink base, and one little red dot on each nail make a quiet December set. Place the dot near the cuticle end, centered across the nail, with a clear margin between the paint and skin. That repeated position makes the tiny marks read as a deliberate pattern.

For a home version, touch the dotting tip straight down and lift it straight up rather than dragging it. A large bead of polish will make a larger mark, so check the tool on your practice tip before each nail. Ask for cranberry rather than bright orange-red if you want this softer color pairing.
2. An Off-Center Cranberry Pinstripe
A fine red line gives sheer beige nails a little structure. Here, the stripe runs lengthwise toward one side, leaving noticeably more beige on the other. Repeat that relationship across the hand; it matters more than placing every line at an identical measured distance.
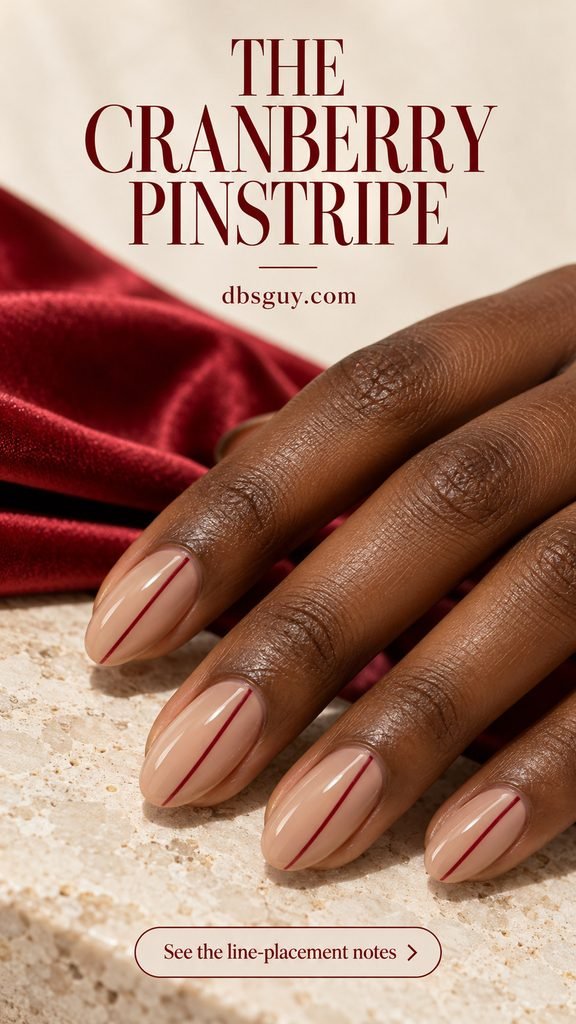
Bring the reference and ask for a narrow cranberry pinstripe with a slim margin at both ends. A broad stripe would take over the design. If painting your other hand is awkward, put the line on one accent nail per hand and leave the others sheer. You keep the graphic idea with less precision work.
3. Snow-Dot Tips on Slate Blue
White dots over dusty blue suggest snowfall without drawing a snowflake. The scatter is fullest at the free edge and becomes lighter toward the center. The lower half stays mostly plain, so the blue remains the dominant color.
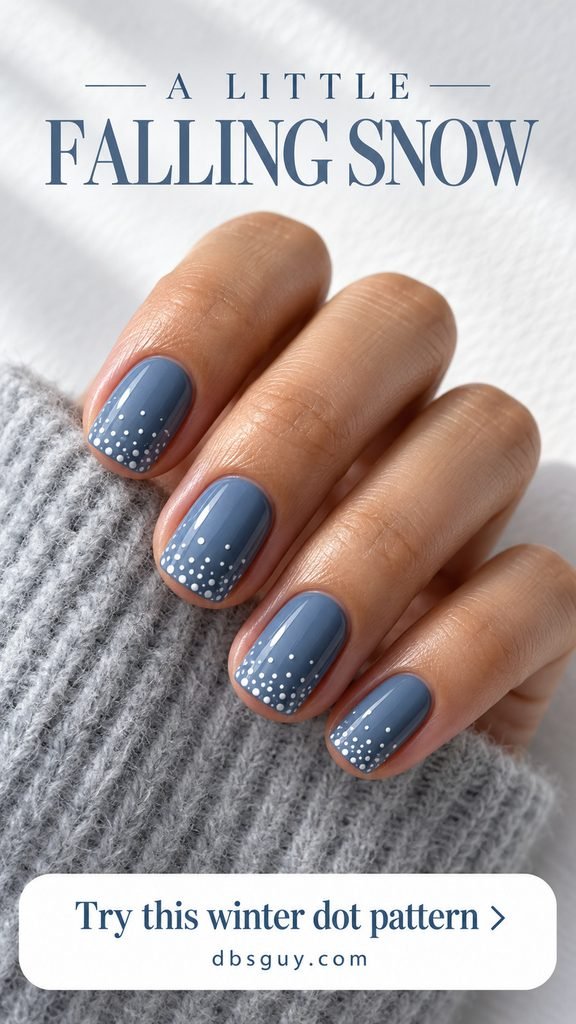
Use a few different dot sizes and uneven spacing to avoid a row of polka dots. On very short nails, make the snowy area shallow rather than bringing it all the way to the cuticle. This is a winter option you can keep wearing after Christmas because the design does not depend on a holiday symbol.
Also Read: 19 Snowflake Nails So Delicate They Look Freshly Fallen if you want a more defined winter motif.
4. A Gold-Foil Side Seam
On the middle and ring nails, small gold fragments form a broken seam near one side of a blush-beige base. The remaining nails stay plain. Unlike a painted metallic stripe, the irregular edges make this accent feel a little less exact.
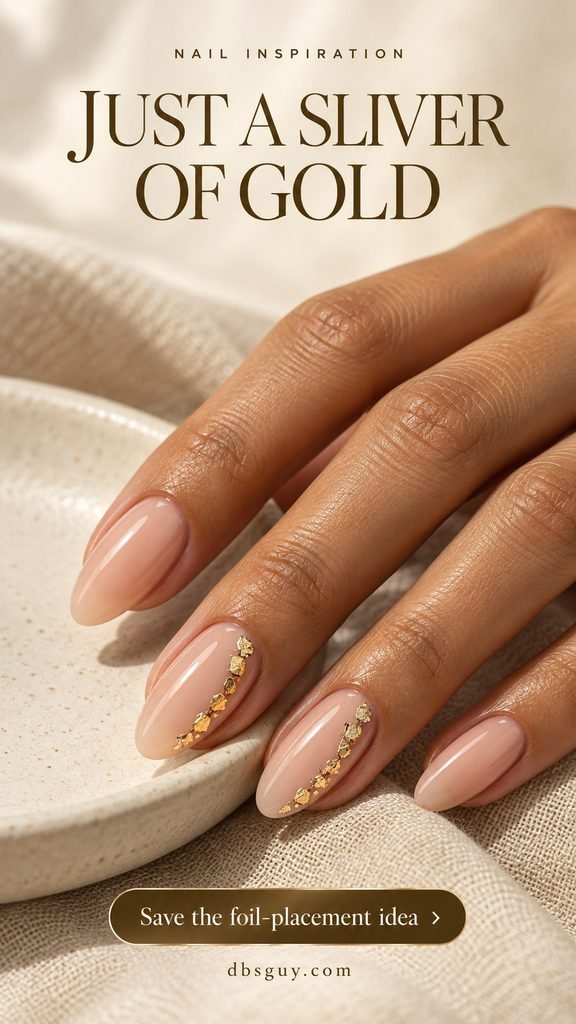
Tell your artist that you want a narrow trail, with pink visible between the pieces and alongside them. Keep the foil within the nail boundary. For a shorter version, use fewer fragments along the side rather than a wider patch. Ask for a smooth finished surface so the effect comes from reflected light rather than raised decoration.
5. An Evergreen Ribbon Across the Tips
One slim green swoosh passes across the upper part of each sheer peach-pink nail. It sits at an angle rather than following a conventional French smile line. The green stays narrow enough that the base is visible above and below much of the curve.
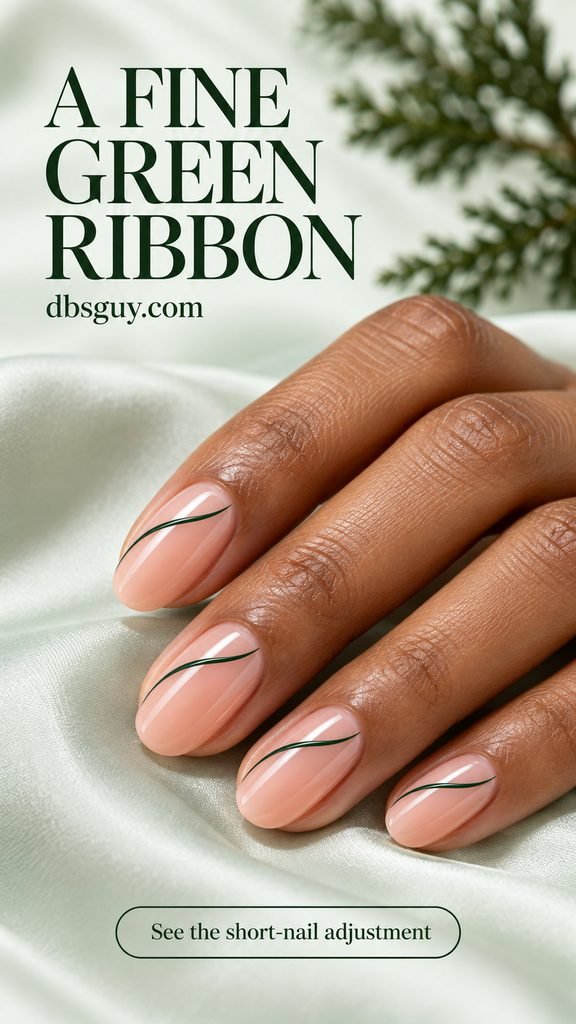
On short nails, lift the sweep closer to the free edge and keep it fine. If the line lands halfway down a tiny nail, it can divide the space more strongly than intended. A deep evergreen gives this look its seasonal color; skip extra dots or foil so the curved stroke remains the main detail.
6. A Dotted Half-Wreath Accent
A small open wreath on one ivory ring nail brings in Christmas color without decorating the whole hand. Tiny green dot-and-leaf shapes curve upward on each side, while a small red berry cluster finishes the lower part. The open top keeps the motif airy.
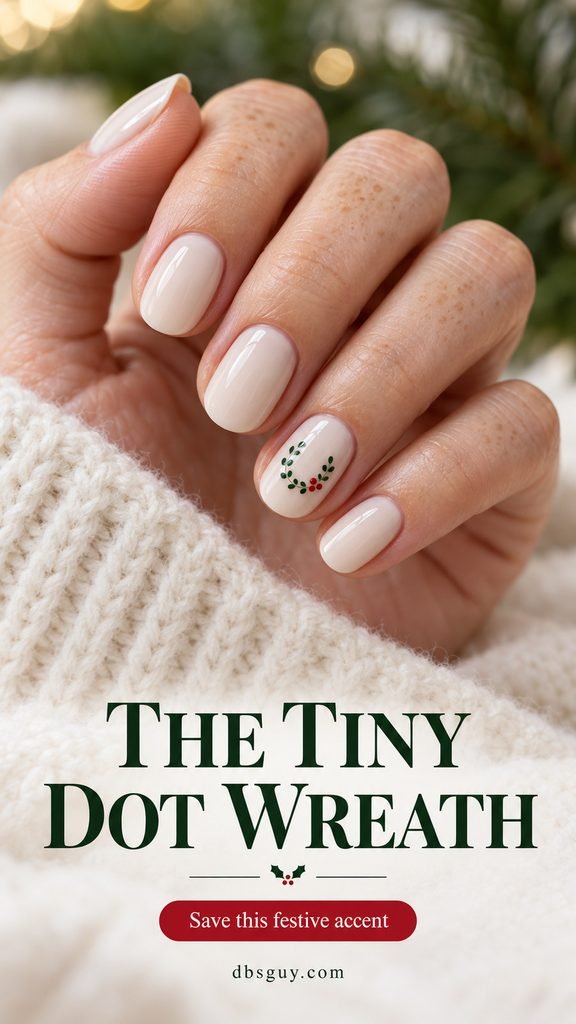
The reference has a little connecting branch detail. For a simpler interpretation, ask for separated green dots in the same U-shaped arrangement. Start with fewer marks if your nail is narrow; once the dots merge into a thick green band, the little wreath loses its definition. Leave the other nails plain ivory.
7. Fine Silver Curves on Midnight Blue
Deep blue carries the color in this set, and two fine silver curves add the movement. Each curved line crosses an accent nail at an angle. There is no need for stars, glitter, or a silver outline around the whole nail.

Use the middle and ring nails for the accents, or reduce the design to one if you prefer a quieter evening manicure. Ask to compare a blue swatch in daylight before choosing: a very dark navy may look nearly black in a dim room. Painted metallic silver can interpret the line without requiring a full chrome service.
8. A Tiny Tartan Corner
Two fine burgundy lines crossed by a pair of green lines create a little check on an oatmeal ring nail. The pattern sits toward one upper corner, with the burgundy strokes extending down that side. Most of the nail remains beige.
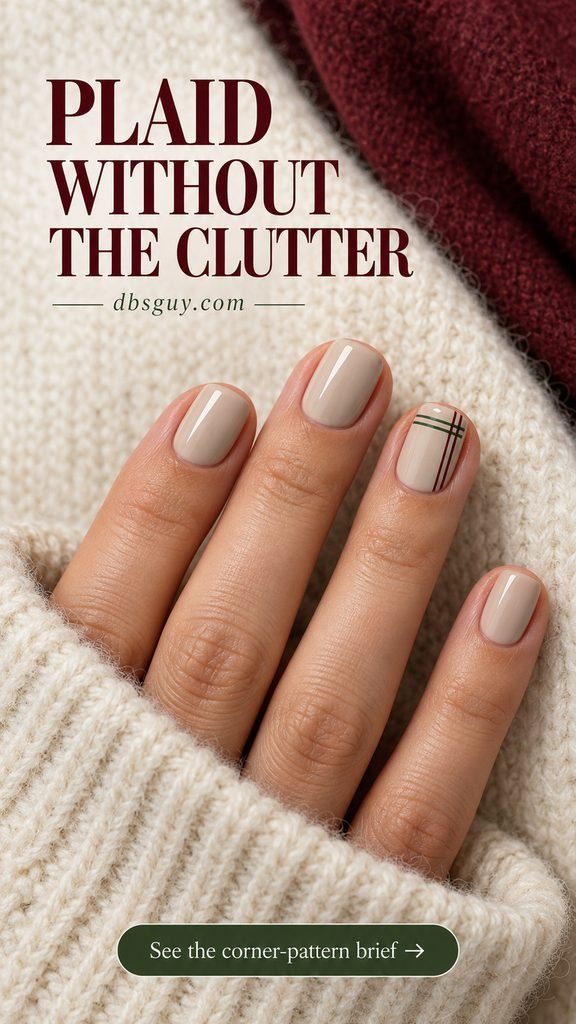
This is a useful salon reference if you like plaid but do not want a full patterned set. Specify the corner and the amount of empty space, since “Christmas plaid” alone can lead to much denser artwork. On a very short nail, shorten the burgundy strokes or use one crossing pair rather than squeezing the whole fragment in.
9. A Copper-Foil Diagonal on Taupe
Mushroom taupe and copper give holiday shine a warmer, earthier palette. A broken diagonal crosses the middle and ring nails, while the surrounding nails stay solid taupe. The angle separates this look from the long side seam in look 4.
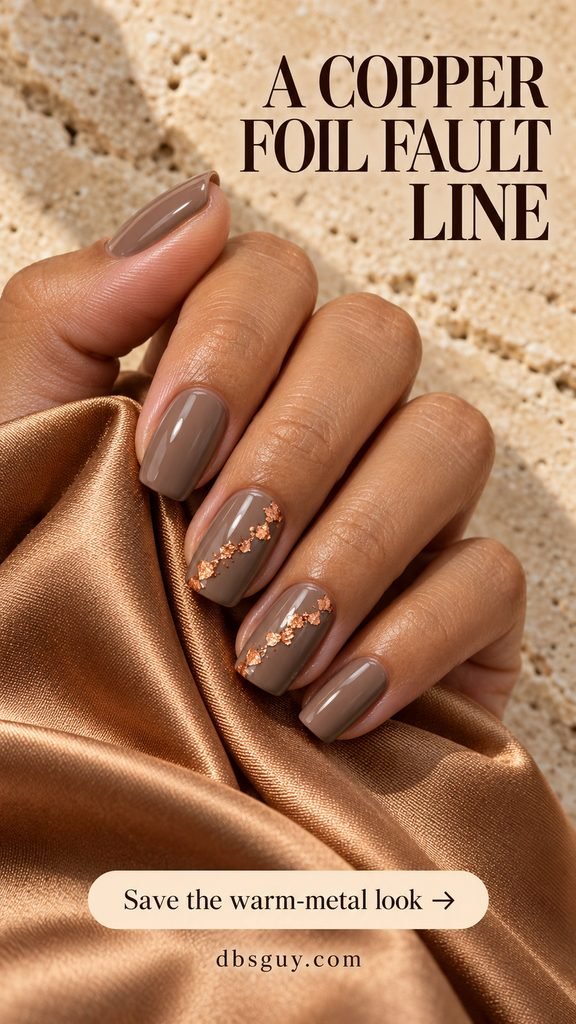
Choose distinctly copper-colored foil if you want that rosy-orange contrast; yellow gold will create a different pairing. Ask for a narrow, irregular trail with gaps between fragments. A diagonal can be shortened to a small corner accent on compact nails. Keep the rest of the set free of shimmer so the copper remains easy to see.
10. Holly Made From Dots and Two Strokes
Three red berry dots and two tapered green leaf strokes are enough to suggest holly. Put the tiny sprig toward one side of a rosy ring nail and leave the other nails plain. The sheer base gives the red and green a soft background.

Make the berries small enough to remain separate. If they touch into one red patch, there is less reason to keep adding detail around them. For a salon appointment, show the placement as well as the motif. A small matching decal is another interpretation if you want the holly shape without painting miniature leaves yourself.
11. A Champagne Dotted Tip Halo
A row of tiny champagne-colored dots follows the free edge of each nude-pink nail. The result has the outline of a French tip without a solid band of color. This version works especially well when you want a small metallic detail beside an otherwise simple outfit.
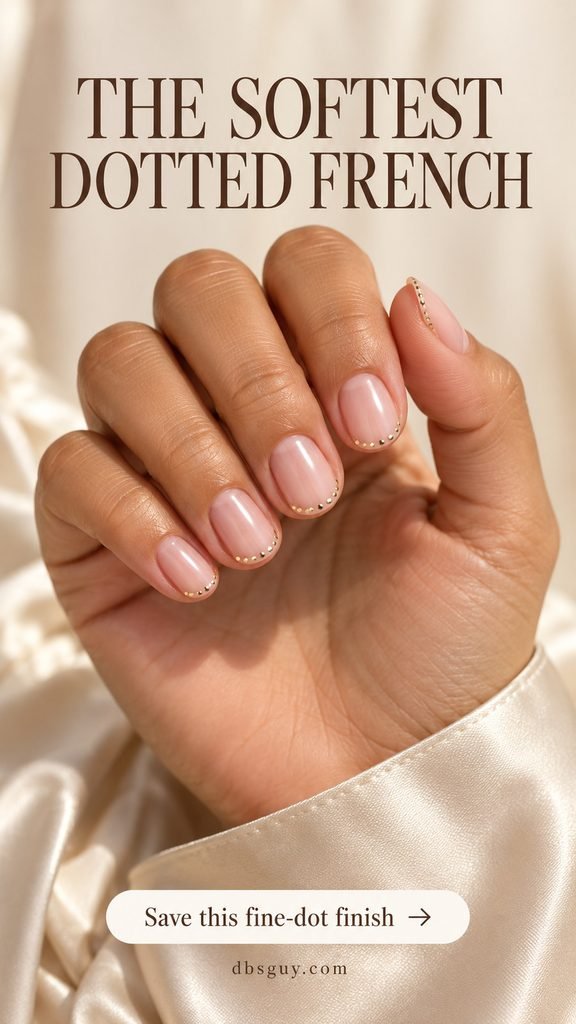
For a painted interpretation, ask for small, separated metallic dots rather than a row of raised beads. Keep their size fairly consistent and leave room between them. On a very short nail, use fewer dots around the tip; a crowded chain would hide the spaces that make this design different from an ordinary French.
Also Read: 15 Simple December Nails That Look Polished With Minimal Effort for options with less detailed placement.
12. A Three-Tier Line Tree
A small geometric evergreen on a creamy ring nail uses a slim central stem and three pairs of angled branch strokes. The tiers widen toward the bottom. It reads as a tree while leaving the light base visible between the lines.
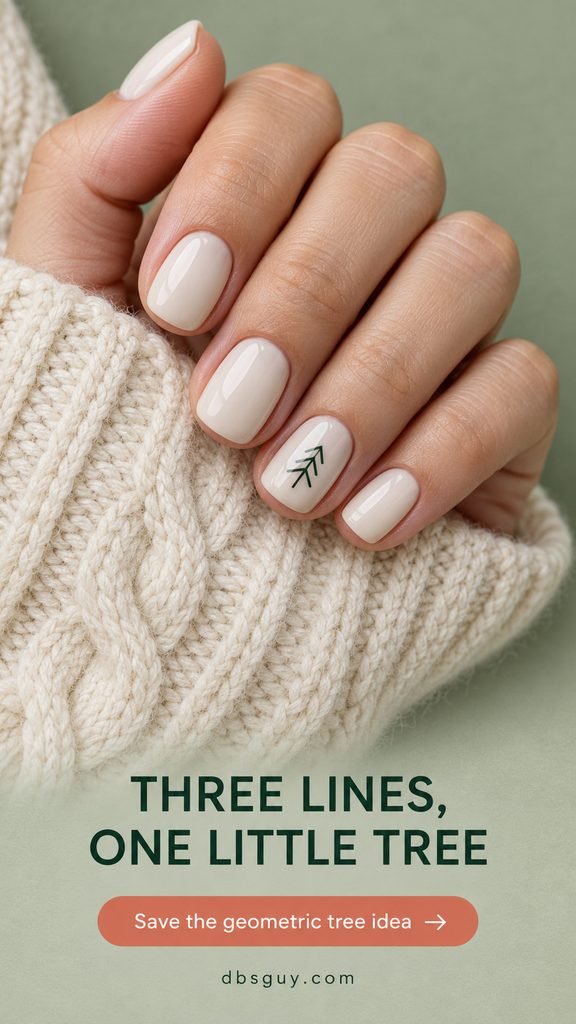
Keep the tree on one accent nail and skip ornaments if you want the spare version shown here. The most useful salon instruction is “a little open line tree, not a filled triangle.” On a narrow nail, shorten the branches before making them thicker. A fine green tree decal can also give you the open shape.
13. Icy Silver-Foil Tip Shards
Broken silver pieces gathered at smoky pale-blue tips create a more irregular edge than a metallic French. The foil stays close to the end of the nail, with most of the blue left uncovered. There is no need to add snowflakes to make this feel wintry.
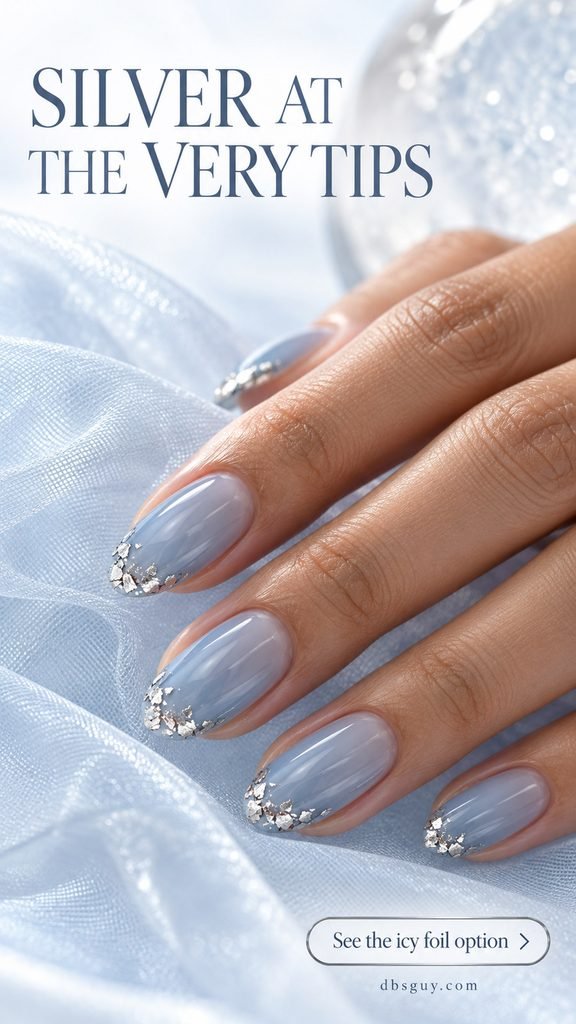
Ask for a shallow silver scatter, rather than a wide solid cap. Bring the image if your artist usually interprets “silver tips” as an opaque band. For a subtle version, keep the larger pieces on two nails and use only a few little flecks on the rest. The placement should still look concentrated at the free edge.
14. A Diagonal Trail of Burgundy Dots
On a pale mauve base, a short diagonal trail moves from tiny burgundy dots toward larger ones near the free edge. The middle and ring nails carry the pattern, giving the hand a repeated detail without covering every finger.
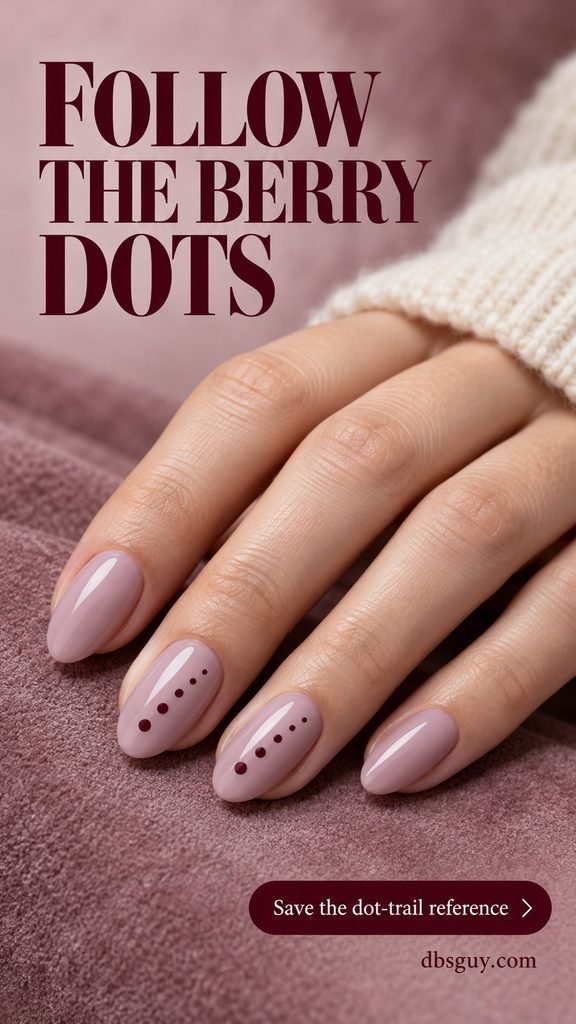
The reference uses roughly five dots per accent. Reduce that to three on short nails and preserve the change in size. For a home version, practice both the spacing and the direction before moving to your nails. This feels less Christmas-specific than holly or a tree, making it a useful choice for the later part of December.
15. Black Winter Twigs With Gold Berries
A fine black branch and a few gold berry points give creamy nails a winter botanical detail. The branch sits diagonally on one ring nail, with the other nails left plain. Keeping the twig bare makes the little metal-colored points easier to notice.
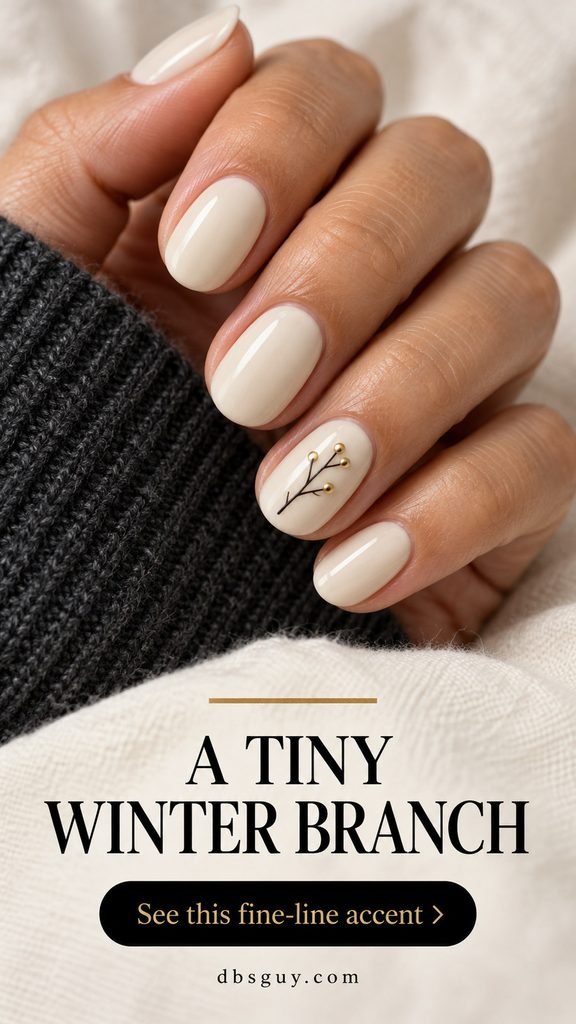
The concept gives the berries a bead-like highlight. If you prefer a smooth painted manicure, ask for tiny metallic-polish dots in those positions rather than studs. Let the stem remain finer than the berries, and reduce the number of offshoots on a small nail. A large branching drawing would change the scale of this quiet accent.
16. One Fine Red Gift-Ribbon Bow
A small scarlet outline bow stands out on a milky-white ring nail. Two open loops and two fine tails provide the whole motif; the rest of the set stays white. The empty space inside the loops matters as much as the red lines.
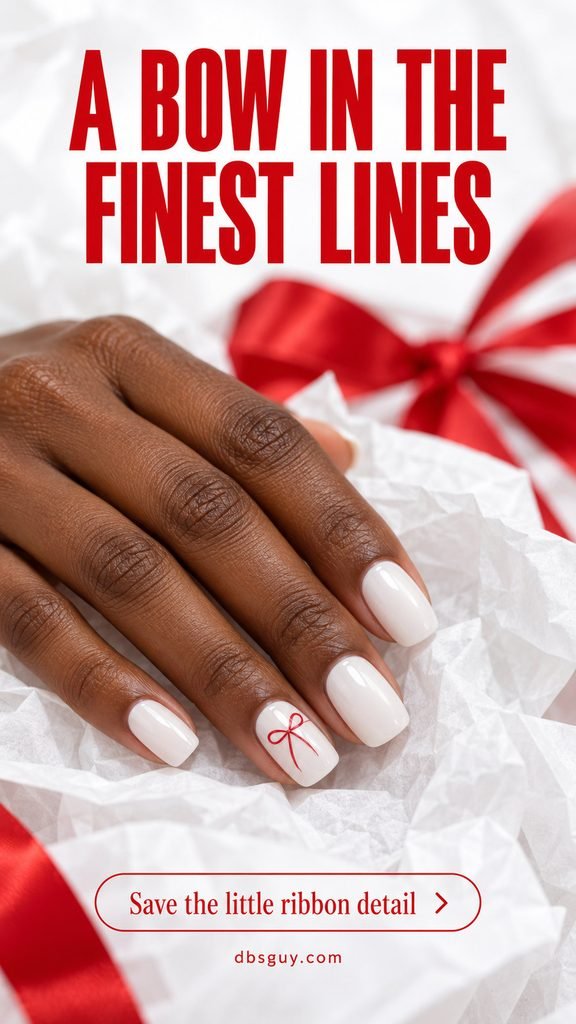
Ask for a painted bow with fine tails if you want this light finish. A molded charm or a solid red bow will have a different weight. This is one of the more precise brushwork options in the collection, so a small decal is a reasonable home alternative. Keep the bow compact rather than stretching it across the nail.
17. Rose-Gold Fragments on Dusty Mauve
A few rose-gold fragments sit near the outer, cuticle-side corners of two dusty-mauve nails. The foil forms little loose groups rather than a continuous seam. An opaque base also gives this look a different feel from the sheer blush-and-gold option.
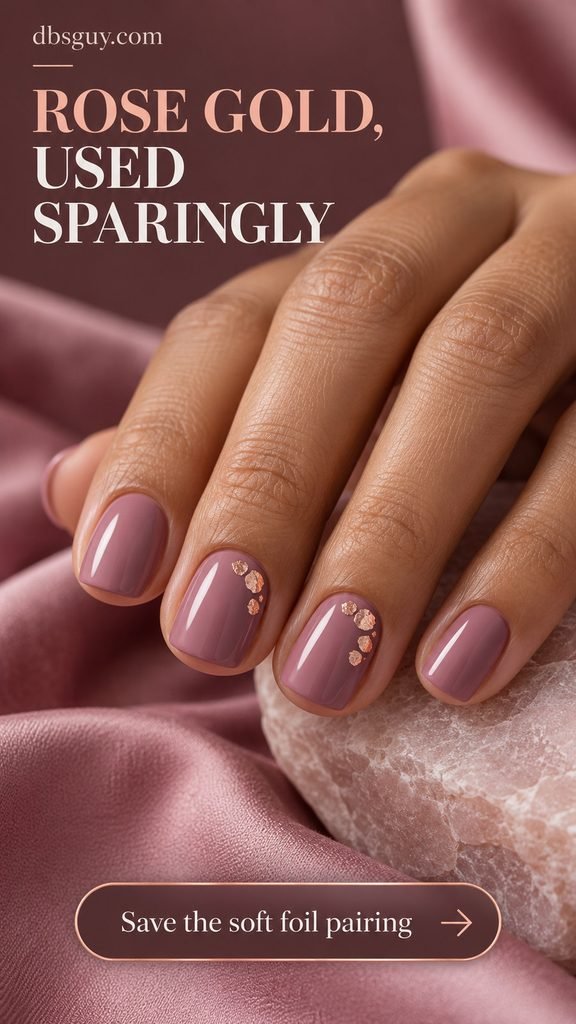
Compare a foil sample with your chosen mauve before committing. Copper will read warmer and more orange, while a pinker rose gold stays closer to this palette. Keep each group small enough that the mauve remains the main color. If you want only one accent, use the ring nail and leave the middle nail plain.
18. Broken Mixed-Metal Cuticle Arcs
Tiny gold and silver fragments make broken crescents near the bases of glossy black nails. The tips stay plain black. This reverses the placement of a metallic French and gives you both jewelry colors in one small detail.
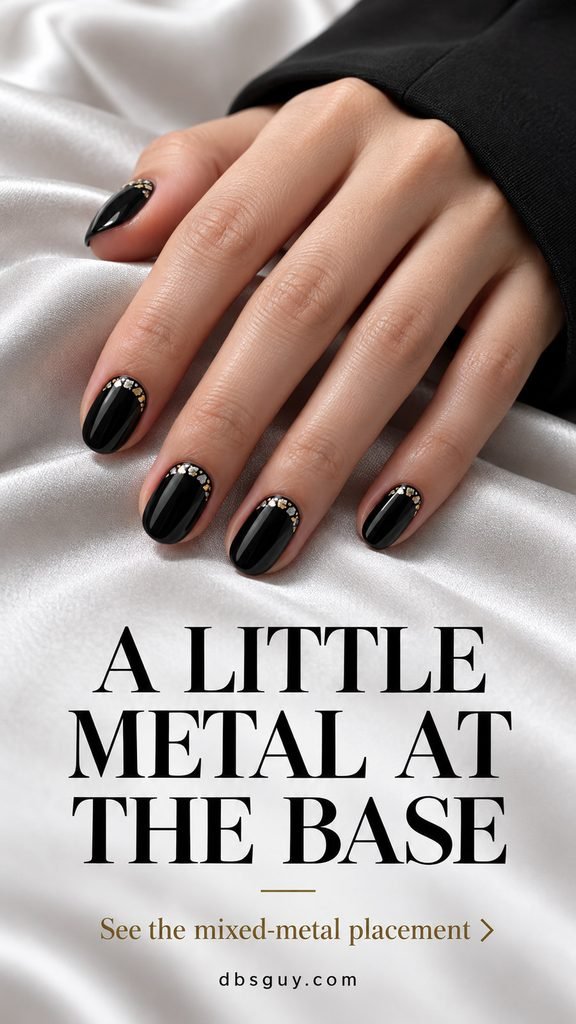
Point out the black gaps between pieces when discussing the design. A continuous gold stripe would lose the mixed, fragmented effect. Keep a clean margin from the skin, and make the arc shallow on short nails. If you are wearing a heavily embellished outfit, try the same placement on two accent nails rather than repeating it across the whole hand.
19. A Navy Pinstripe With One Silver Dot
One navy stripe and a small silver point bring a cool, graphic finish to sheer pink-beige nails. In this reference, the middle and ring nails carry the detail, with the silver beside the stripe toward the free edge. The other nails stay plain.
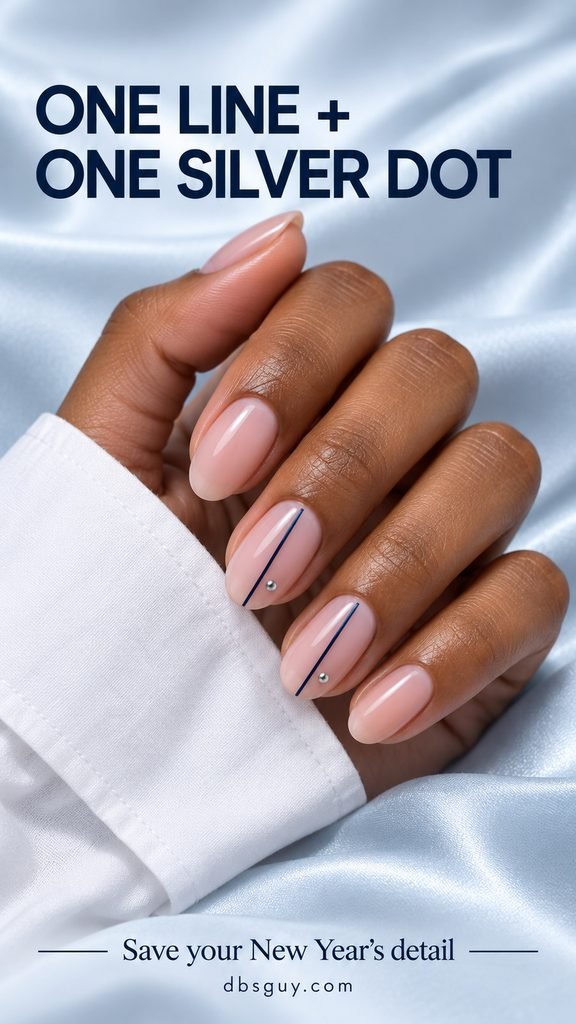
The silver point has a stud-like reflection in the concept. Choose a painted metallic dot if you want the flat version, and keep a little visible base between it and the navy line. This is an understated New Year’s option when you want a detail that can carry into January without a recognizable Christmas motif.
Also Read: 21 New Year’s Nails to Ring In the Year Sparkling for more evening finishes.
Make Your Appointment Brief Specific
Save one main reference and tell your artist which details you want to keep: the shape, base coverage, accent placement, and amount of decoration. For example, “short oval, sheer pink, one cranberry dot near each cuticle” is a clear starting point. For foil, mention whether you want a broken trail or a solid metallic area.
Ask whether the design is available in the service you prefer and how much artwork the appointment includes. Tiny details still require controlled placement; a miniature plaid or bow can involve more work than a plain color. If you need to simplify, reduce the accent nails before giving up the feature you liked.
December Nail Art Questions
Which look is the simplest place to start at home?
The single cranberry dot in look 1 has the fewest marks to place. Practice one small dot on a spare tip, then use the same tool and amount of polish on your nails. A finished base and the recommended drying time still matter; “simple art” does not mean you can skip the polish instructions.
Can these designs work on very short natural nails?
Yes, with the artwork scaled to the available space. One dot, a small side accent, or a single tree can fit a compact nail. Reduce the number of dots, foil fragments, or crossing lines rather than crowding in every feature from a longer reference.
Do I need gel for lines, dots, or foil?
Painted lines and dots can be interpreted with regular nail polish and suitable tools. Foil compatibility depends on the specific flakes, adhesive, and finishing products. Use materials intended for your manicure system and follow their directions rather than assuming a gel tutorial will work with regular lacquer.
How can I keep a tiny design from looking busy?
Decide on one main feature: a line, a dot pattern, or a foil placement. Keep some nails plain when the motif has several parts. Before adding another color or mark, check whether it helps you see the original shape more clearly. The corner tartan and open wreath both rely on the empty space around them.