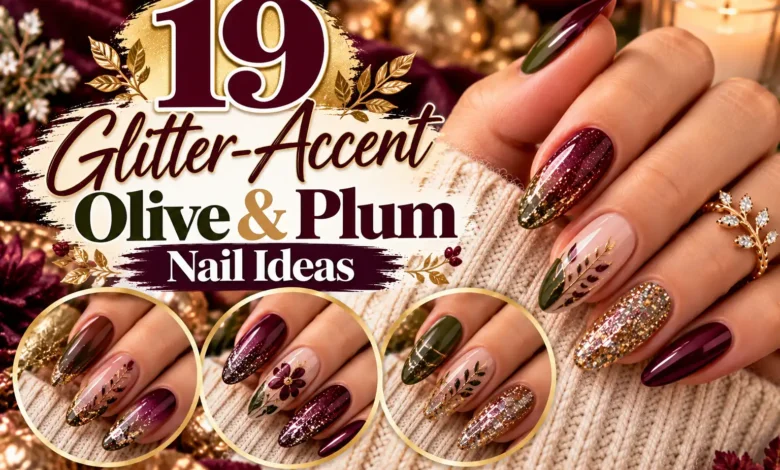
For olive and plum nails with a little sparkle, decide where the glitter belongs before adding more decoration. One champagne accent nail gives you an easy starting point; a fine glitter seam or a patterned accent makes the same colors feel more graphic. Keep enough olive and plum visible that the glitter stays an accent.
These 19 designs range from short, simple manicures to detailed salon references. Each includes a placement to copy and a way to adjust the look. Start with idea 1 for a straightforward home version, idea 9 for very short nails, or idea 19 if you want a patterned statement.
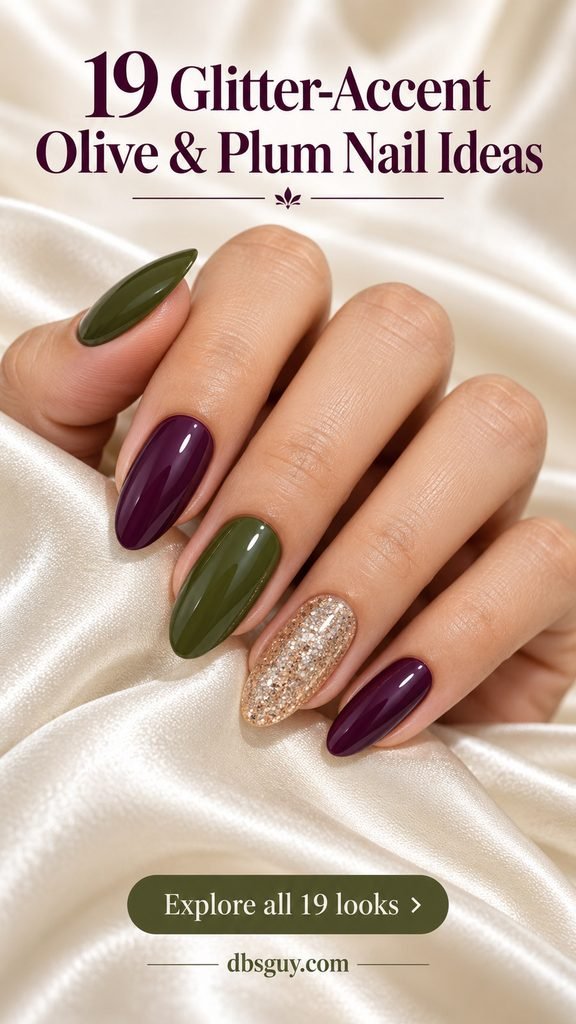
The images are AI-generated manicure concepts, not photographs of completed or tested salon services. Use them to discuss color, shape, and placement with your nail artist; real finishes and results will vary.
Choose Your Colors and Amount of Sparkle
- Choose an olive that still looks green beside your plum. A muted khaki and a clearly purple plum give more separation than two nearly black shades.
- Champagne or gold is a warm starting point; silver makes the pairing feel cooler, while copper introduces a rusty autumn note. Compare a glitter sample beside both colors before choosing.
- For a quiet result, put glitter on one nail or one narrow detail. For a dressier version, repeat the same small accent across the hand instead of adding several unrelated patterns.
Also read: October Nail Colors Ideas to Refresh Your Fall Nails if you want to compare olive and plum with other autumn shades.
1. One Champagne-Glitter Accent Nail
Start with short squoval nails in olive and plum, then give the ring finger a full champagne-glitter finish. The single sparkling nail breaks up the dark colors without turning the whole manicure metallic. Keep the olive and plum in opaque cream finishes so the three textures are easy to read.
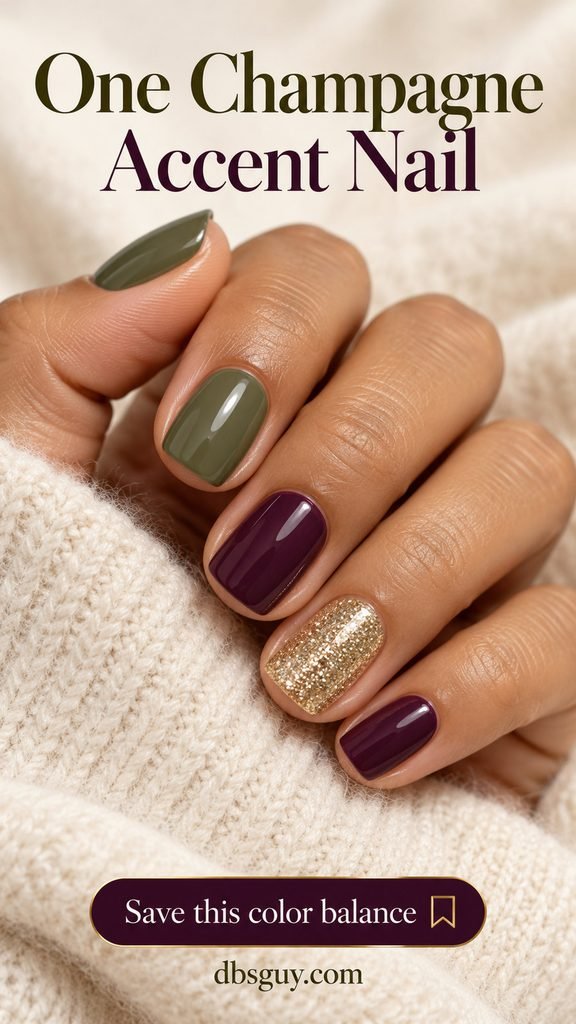
This is a manageable home option because the glitter covers a whole nail; there is no tiny border to draw. Pick fine glitter for a closely packed effect, or a sparse topper if you want the base to show. Test coverage on a spare nail tip before deciding how many layers your particular polish needs.
2. Gold Micro-Tips Over Solid Color
Instead of a nude French base, alternate solid olive and plum and trace the very edge with fine gold glitter. The colored surface should occupy almost the entire nail. This gives you a defined little flash when your fingers move, especially on a short, softly squared shape.
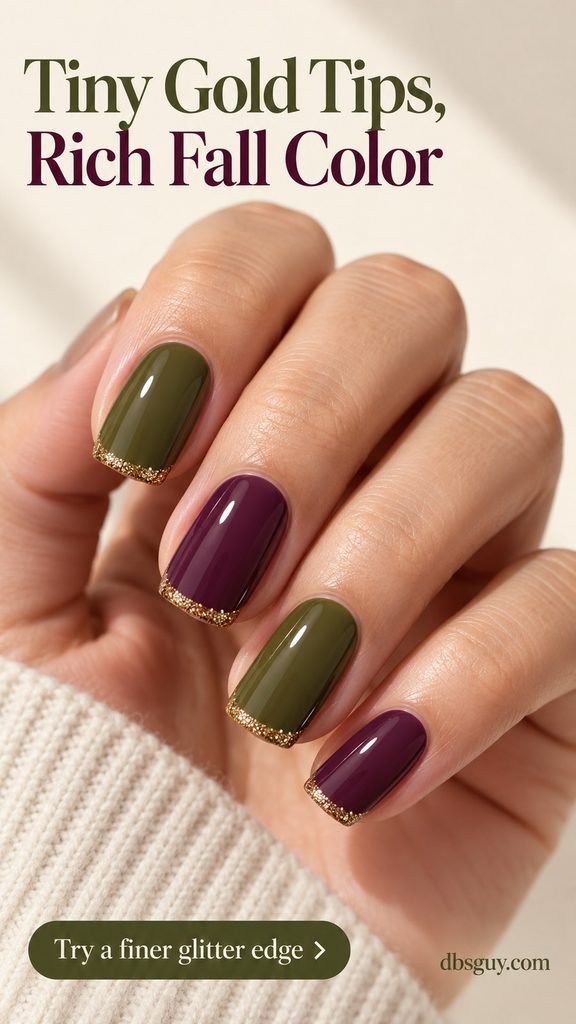
Show your artist the width you want: a fine edge, not a broad glitter cap. On very short nails, try the detail on two fingers first. Dense fine glitter is easier to read as a continuous line than widely spaced large pieces; scattered chunks can make the edge appear uneven.
3. Fine Glitter Crescents at the Base
Move the sparkle to the base of the nail. A slender champagne crescent follows the lower curve of a mix of olive and plum ovals, leaving the tips plain. It is a useful choice when you like a curved accent but want something different from another French manicure.
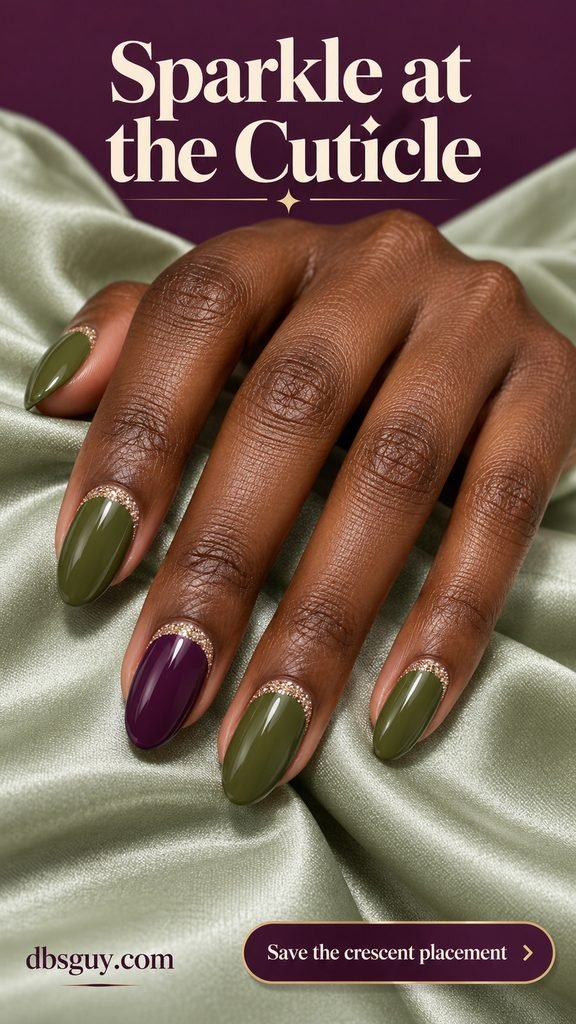
The glitter belongs on the nail plate, just inside the skin boundary. Ask for a slim, tidy arc with the same visual weight on each finger. If your nails are small, use the crescent on one olive and one plum nail rather than enlarging it until it becomes a solid half-moon.
4. A Silver Ribbon Along One Side
A narrow silver-glitter ribbon running along one side gives an olive-and-plum set a cooler finish. Keep the line off-center and let it follow the side curve. Unlike a full outline, this leaves most of each nail uninterrupted and gives the manicure a directional detail.
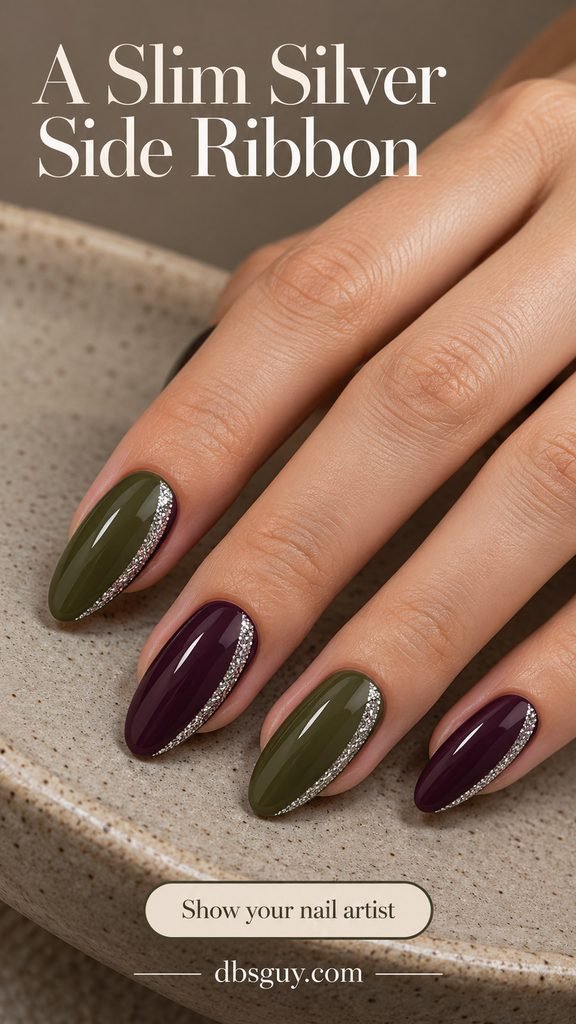
A medium almond shape has room for the ribbon to bend gently. For a short oval, shorten the line instead of making it thicker. Ask for fine silver glitter rather than a mirror-chrome strip if you want the speckled sparkle shown here; those finishes create quite different effects.
5. Champagne Glitter Fading From the Tips
Collect champagne glitter at the tips and let it thin out toward the middle of olive and plum nails. The soft boundary is the point: there should be visible space between the last few flecks, with the lower part of the nail mostly plain.
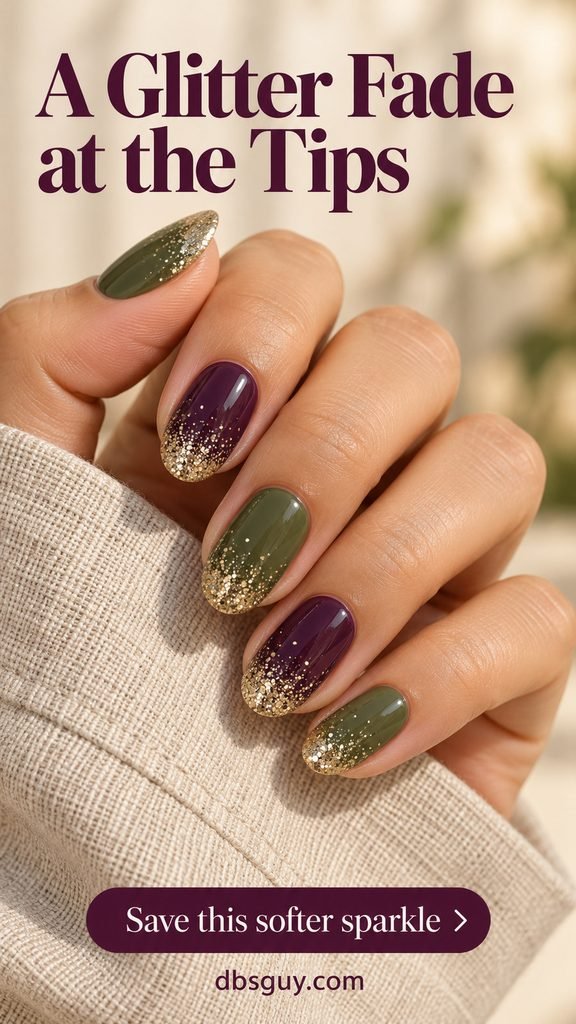
For a regular-polish version, practice with a sheer glitter topper over a dry color base. Place a little sparkle near the edge first, then add density at the very tip after the earlier layer dries as directed. Stop before the glitter reaches every cuticle; otherwise the fade becomes an all-over topper.
6. Two-Tone Nails With a Golden Center Seam
Put olive on one lengthwise half of each nail and plum on the other, then place a fine gold-glitter seam where they meet. Both colors appear on every finger, so this version feels more coordinated than alternating whole nails. A medium almond keeps the long division easy to see.
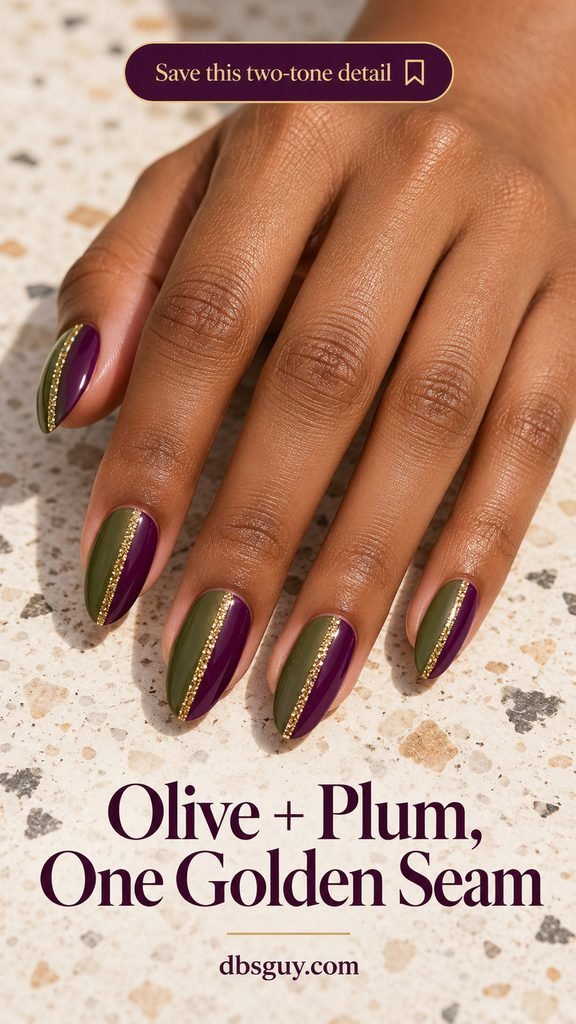
This is a precise salon request: two opaque halves, a narrow central glitter line, and no blended transition. If you prefer a less detailed set, use the split design only on the middle and ring fingers and paint the surrounding nails solid. The glitter seam should emphasize the division rather than cover a wide section of both colors.
7. Sheer Space With Olive, Plum, and Glitter Curves
Leave a sheer blush center and curve olive and plum around the edges. One fine glitter curve beside the color adds sparkle while the open space keeps the result light. Choose this when you like the palette but do not want every nail covered in a deep shade.

Point out the clear area in your reference before the appointment: it should remain a visible part of the design. On shorter nails, use one colored swoop and its glitter companion on each accent nail, alternating olive and plum across the set. Trying to squeeze in extra curves can remove the breathing room that makes this work.
8. Diagonal Color Blocks With Copper Glitter
Use a diagonal copper-glitter band to separate olive and plum color blocks. The warm metal gives the green-and-purple pairing a rusty fall note, while the straight division makes the set feel graphic. A short square shape provides a neat frame for the angle.
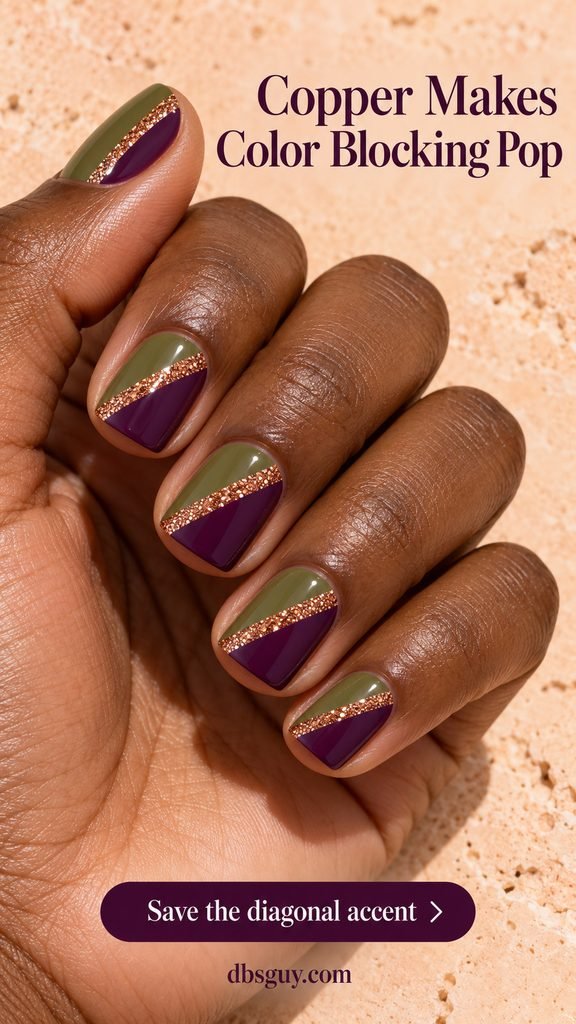
Keep the band narrow enough that both colors remain recognizable. Ask your artist to maintain a similar diagonal direction across the hand; random angles create a busier variation. If copper looks too orange beside your chosen plum, compare a softer bronze sample rather than changing the whole color palette.
9. Tiny Glitter-Dot Clusters on Short Nails
Very short nails can carry this combination without extra length or elaborate art. Alternate olive and plum, then place a few tiny gold-glitter dots near one lower side of each nail. The little cluster supplies a deliberate accent while leaving the center clear.

Keep the dots separate. If they merge into a patch, reduce their number or size instead of adding more glitter to balance it. A dotting tool with glitter polish can give a home interpretation, although the particle size affects how crisp the dots look. Flat sparkling dots suit this reference better than raised stones.
Also read: 19 Snowflake Nails So Delicate They Look Freshly Fallen for more examples of leaving space around small seasonal details.
10. A Glitter Star on One Plum Nail
Give one plum nail a small gold-glitter star and keep the other olive and plum nails plain. The dark purple background makes the motif easy to see, and the single star adds a playful detail without requiring a whole celestial manicure.
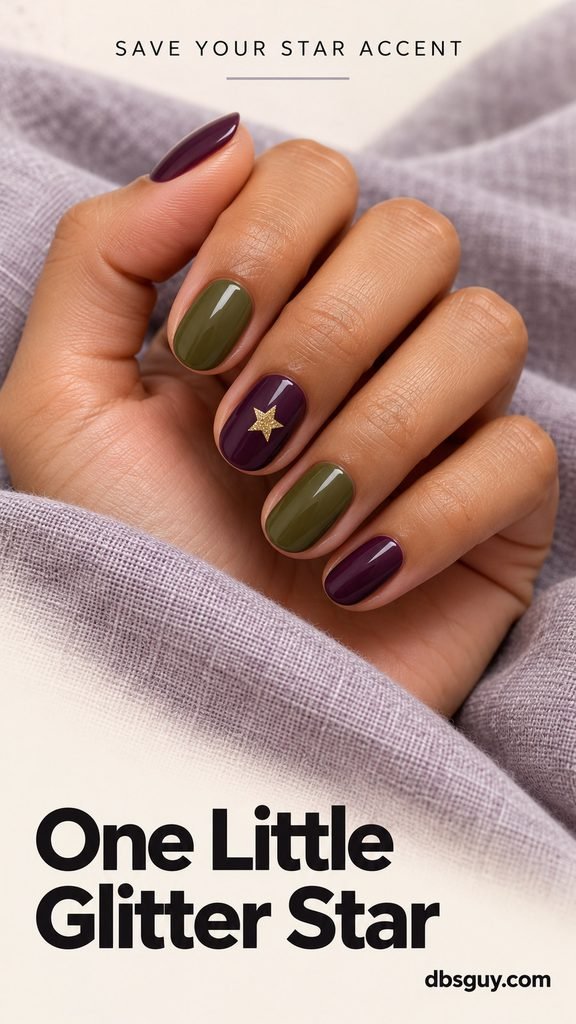
Ask for a flat painted star or a nail-art decal with a sparkling finish, leaving visible plum around its points. On a short nail, one small star is clearer than several miniature ones. Skip extra moons, gems, and scattered artwork if you want the simple version shown here.
11. One Plaid Accent With a Glitter Stripe
Paint one accent nail pale cream and build a loose plaid with olive and plum lines. Add a fine gold-glitter stripe through the pattern, then keep the surrounding nails solid. The cream background separates the crossing colors so the plaid does not disappear into a dark patch.
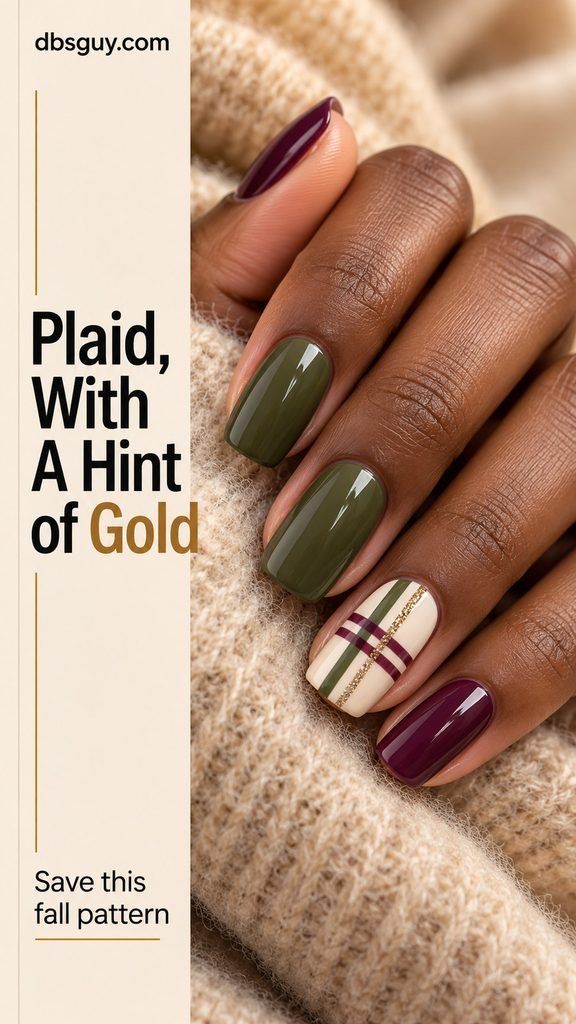
This is a good reference for a detailed salon appointment. Tell your artist you want a few readable crossings, not a dense woven print. For a shorter version, use one vertical olive line, one horizontal plum line, and a slim gold companion; reduce the pattern rather than shrinking every stripe.
12. Olive-and-Plum Marble With Glitter Veins
Reserve one nail for olive-and-plum marble, with irregular fine gold-glitter veins tracing parts of the pattern. The neighboring solid nails repeat both colors. Keeping the marble to one accent lets you see the swirling detail without turning the whole hand into competing movement.
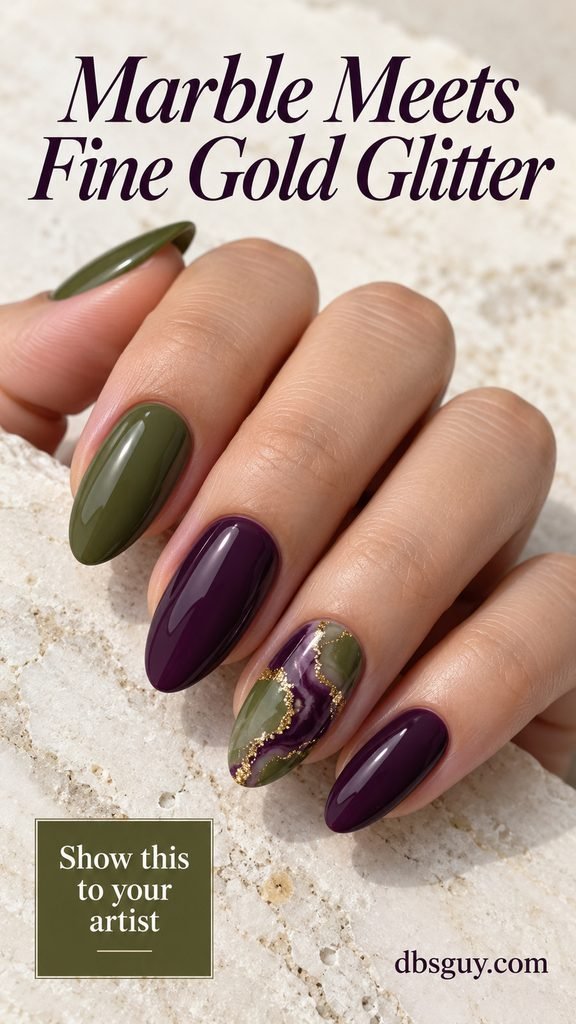
Ask your artist to preserve separate olive and plum areas rather than blending them into one brownish shade. The glitter should follow selected veins, not outline every swirl. If your nail is narrow, request one larger curve and fewer veins so the pattern stays readable.
13. A Small Flower With a Glitter Center
Use a sheer nude accent nail for a small olive-petal flower with a plum center and a tiny gold-glitter highlight. Solid olive and plum on the remaining nails connect the botanical detail to the rest of the set. This offers a softer piece of earthy nail inspo than a geometric stripe.
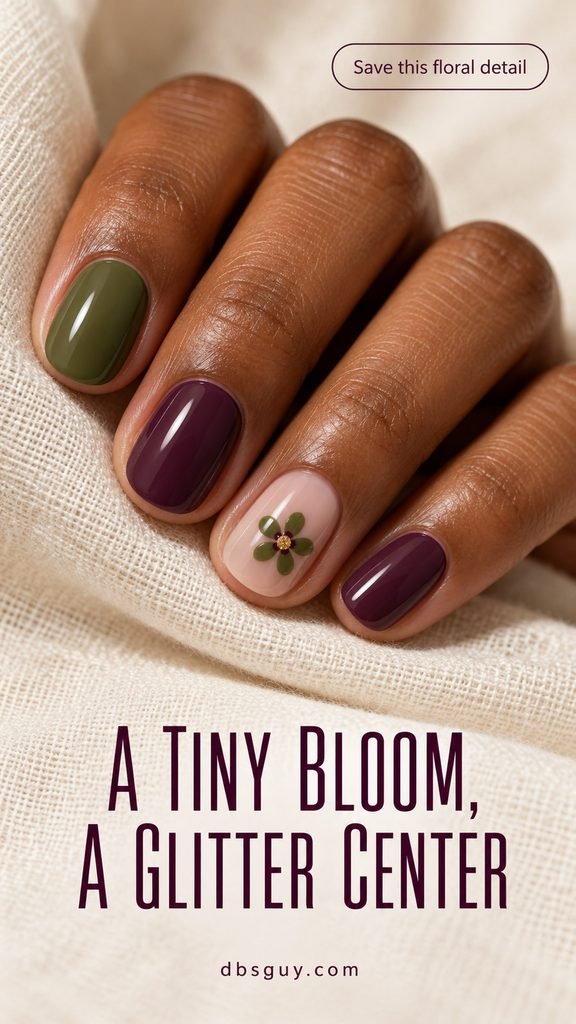
Place the flower slightly off-center and leave enough nude around it to show the petal shape. On a short nail, choose one bloom rather than a miniature bouquet. A flat floral decal is a practical alternative to hand-painted petals; check that its colors match your two polishes before applying it.
14. An Amber Tortoiseshell Accent With Gold Specks
Add one translucent amber tortoiseshell nail between olive and plum solids. A few fine gold-glitter specks bring the accent into the sparkling theme without covering its mottled brown pattern. The amber introduces a third color, so keep the rest of the manicure especially simple.
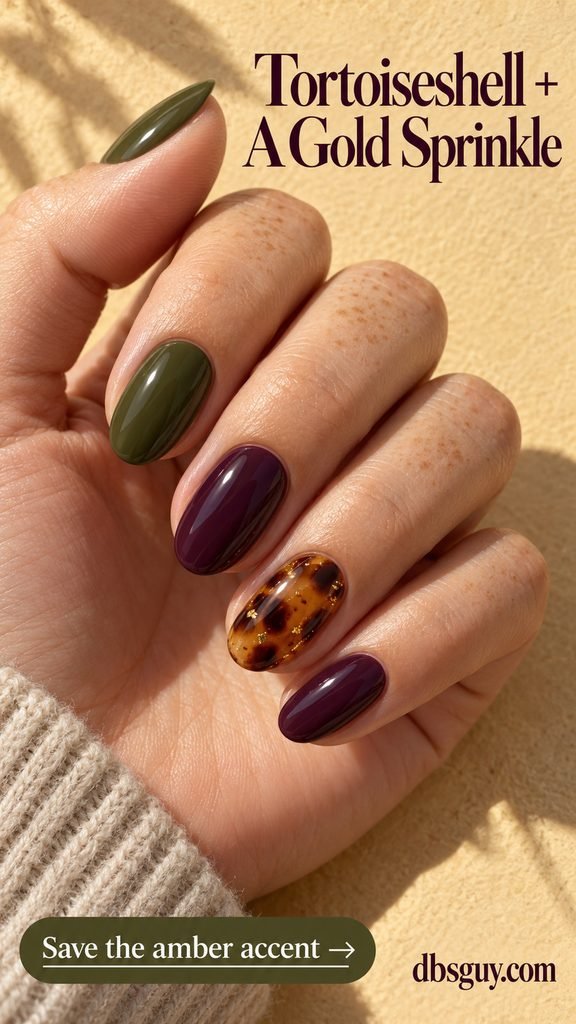
Show your artist that you want visible translucent amber pockets rather than an opaque dark-brown nail. Short ovals can carry a simplified version with fewer, larger markings. Avoid a dense glitter topper here: the tortoiseshell needs clear areas to remain recognizable.
15. V-Shaped Tips With Glitter Edges
Keep a sheer nude base and build a V-shaped tip with olive on one side and plum on the other. A slim gold-glitter line follows the angled border. The point gives a familiar tip design a more angular finish, especially on medium almond nails.
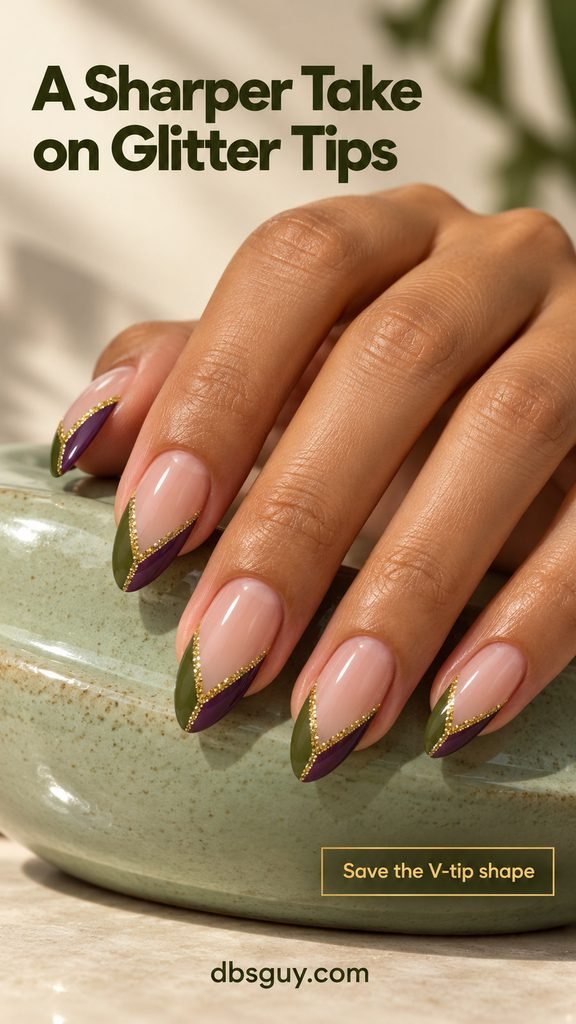
Ask for the two colored sides to meet cleanly at the center. On shorter nails, make a shallower V so the color does not climb too far toward the cuticle. A glitter line can emphasize a tidy shape, but it cannot preserve the design if it becomes so wide that it fills the nude space.
16. An Open Glitter Frame on Two Accent Nails
Trace a fine champagne-glitter frame around an olive accent and a plum accent, leaving a small break near the tip. The neighboring nails stay solid. This puts sparkle around the color rather than through its center, with the open gap keeping the border from looking heavy.
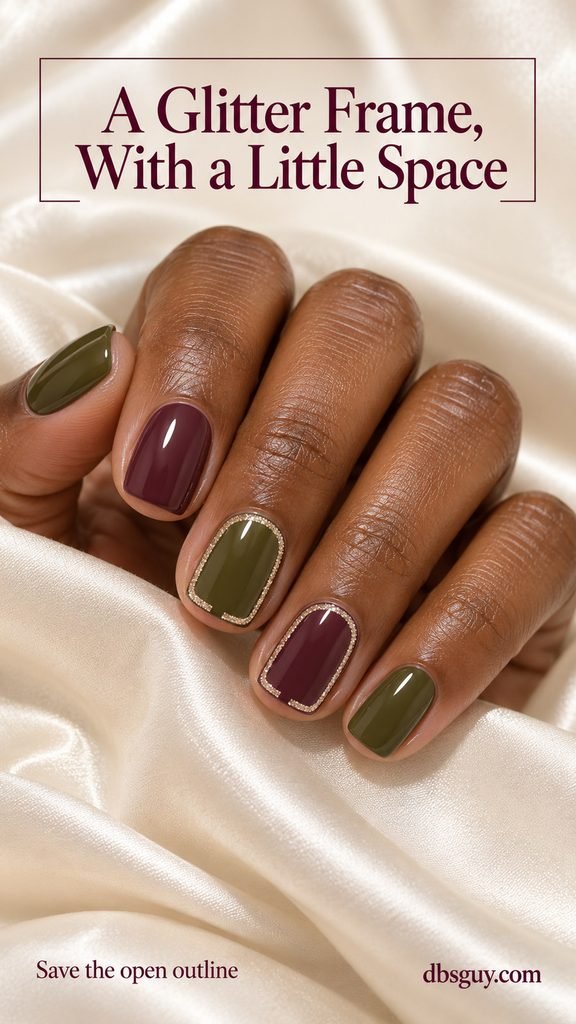
A short squoval shape makes the frame especially graphic. Request a little breathing room between the line and the skin, and show where the break should be. If the outline feels too busy at your nail length, use it on one finger per hand instead of thickening the line to make it easier to notice.
17. A Glitter Corner on Matte Olive and Plum
Choose matte olive and plum, then place a small glossy gold-glitter triangle in one tip corner of each nail. The contrast comes from both placement and finish: a quiet matte field beside a concentrated sparkling corner. Short square nails give the little triangle a clear edge.
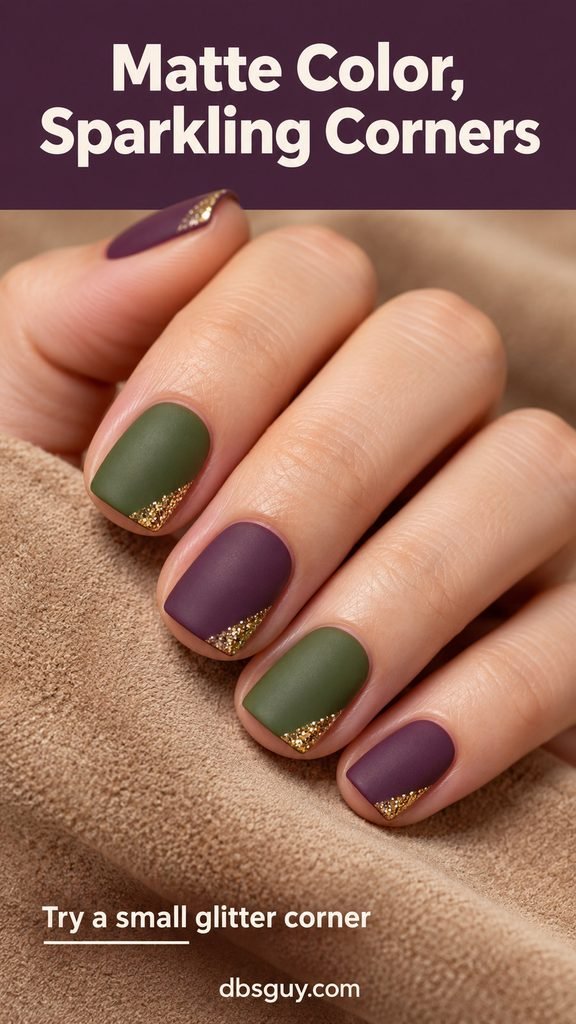
Ask your artist to keep the glitter area glossy and the colored area matte. A matte coat over everything changes the sparkle, so the finishing plan matters. Use the same corner direction across the set for a coordinated look, and keep the triangle small enough that it reads as a corner accent rather than a diagonal French tip.
18. A Glitter-Touched Leopard Accent
Give one olive nail a few irregular plum leopard spots with tiny gold-glitter centers. The remaining nails alternate the two solid shades. Because the animal print uses colors already in the set, it feels connected even with the extra texture.
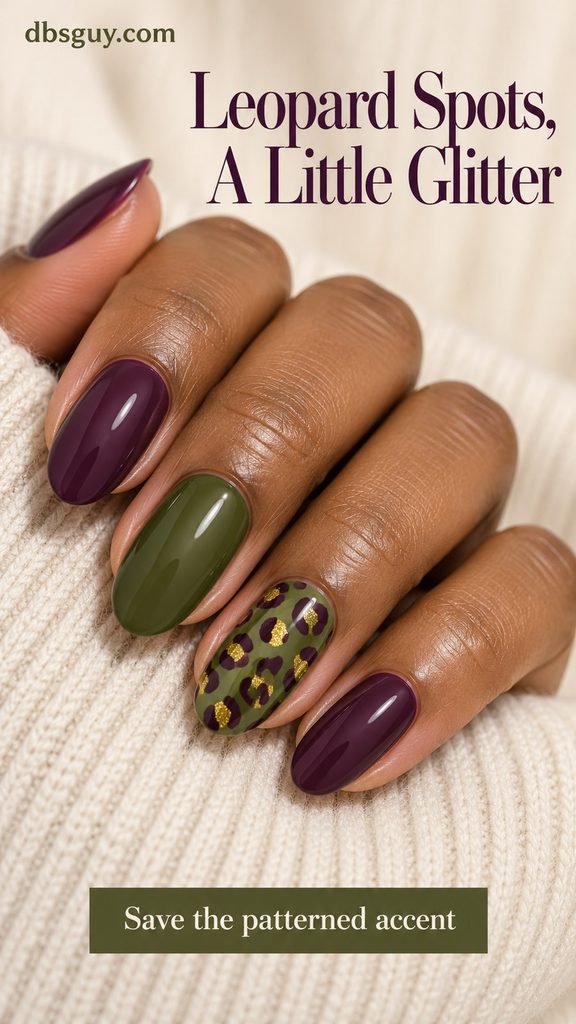
Ask for open, uneven spot outlines rather than matching circles. Leave olive visible between the markings and put glitter in only a few centers. For a small nail, two or three larger partial spots are easier to read than a dense miniature print. This is the bolder patterned option if plain accents feel too restrained.
19. An Olive-and-Plum Checkerboard With One Glitter Square
Keep the surrounding nails solid and use one accent for an olive-and-plum checkerboard. Replace just one square with champagne glitter. The tiny change draws the eye into the pattern while preserving the alternating colors that make it a checkerboard.
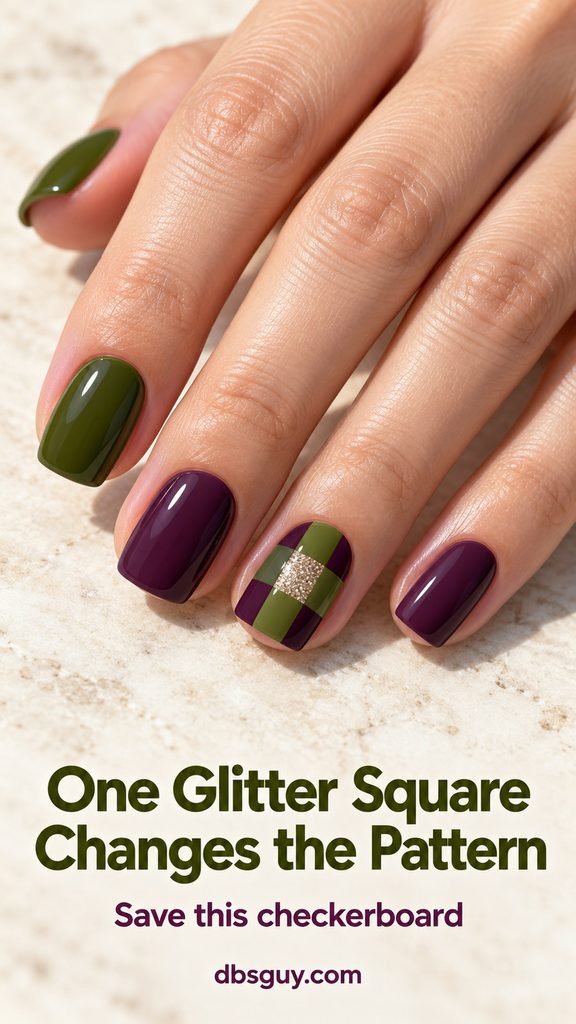
Choose a medium square or squoval nail so the blocks have room. On a shorter nail, ask for a coarse grid with fewer, larger squares rather than many cramped ones. Show your artist which single square should sparkle; covering the full checkerboard with glitter would blur the clean graphic contrast.
Also read: 21 New Year’s Nails to Ring In the Year Sparkling when you want to carry a favorite glitter placement into party season.
How to Keep a Glitter Accent Clear
For a home manicure, start with regular nail lacquer and a glitter polish made for nails. A full accent nail, sparse tip fade, or a few dots is a more forgiving starting point than a tiny checkerboard or a full perimeter outline.
- Apply the base coat and color according to your polish instructions. Use thin layers and let each layer dry as directed.
- Decide on the glitter placement before opening the bottle. For chunky glitter, OPI recommends a dabbing motion to help position the pieces; its nail-polish application guide also covers thin layers and finishing.
- Build only the area you chose. For a line or pattern, use a suitable fine nail-art brush rather than the wide bottle brush.
- Finish with a compatible top coat as directed. For the matte-corner look, plan separate matte and glossy areas instead of brushing a matte finish over the entire design.
These are design references, not a universal gel procedure. If your salon uses gel, ask the technician which compatible products and application method will reproduce the look.
Questions About Olive and Plum Glitter Nails
Can I use burgundy instead of plum?
Yes, if you prefer a redder palette. Plum usually reads more purple, while burgundy leans toward wine red; polish names vary, so compare swatches. For burgundy and green nails, keep the same glitter placement and choose an olive that stays visibly green beside the darker red.
Which design is a good starting point for short nails?
Try the full accent nail in idea 1 or the tiny dot clusters in idea 9. Neither depends on having room for a detailed pattern. Keep your preferred short shape and simplify the decoration rather than adding length just to match a reference.
How much glitter should I request?
Name both the placement and the coverage: “one fully glittered ring nail,” “a fine edge only,” or “a sparse fade confined to the tips.” A reference image helps, but those words clarify what should stay plain. Choose one main glitter treatment for the set before adding extra art.
How do I remove regular glitter polish?
Use a remover intended for your nail-polish system and follow its directions. OPI’s lacquer guidance describes remover-soaked wraps to loosen glitter before gentle removal. That is guidance for regular lacquer, not a universal removal method for gel, dip, or extensions; ask your salon about the system you are wearing.
For your appointment, save one design and specify the olive, the plum, the glitter color, and the amount of plain nail you want left visible. That gives your artist a clearer starting point than combining several different references.