17 December Nails Design Ideas for When One Tiny Detail Makes the Whole Manicure


The smallest detail can give a December manicure its direction: a gold dash on oxblood, a white bow on cocoa, or a little blue dot beneath a French tip. Start with a color you already like, then choose one accent and leave enough plain nail around it for the detail to show.
These 17 December nails design ideas focus on placement as much as color. Each look has a different small feature, with a way to adapt it to your nails or explain it at your appointment.
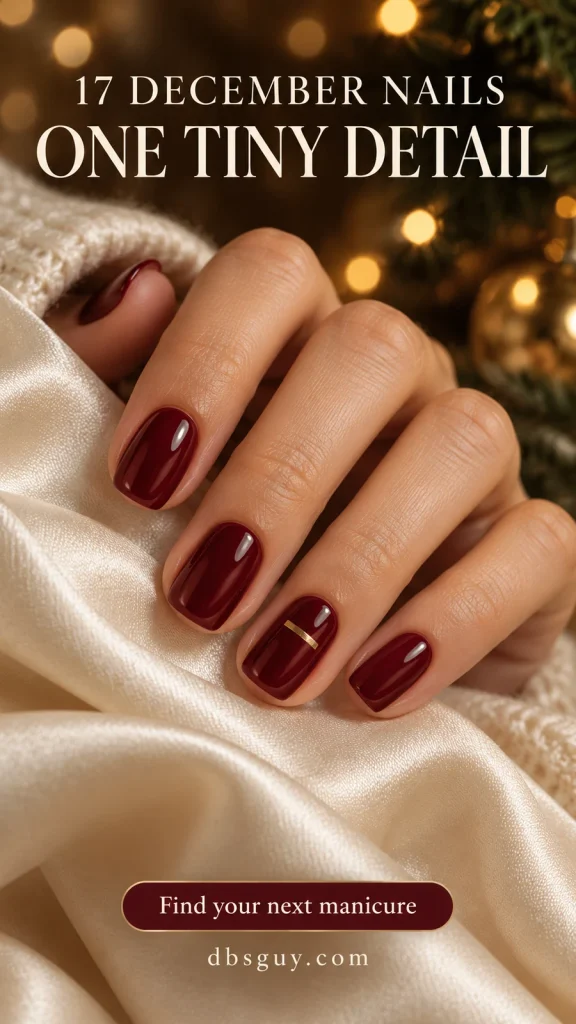
The images are AI-generated manicure concepts. They illustrate color, scale, and placement rather than document completed salon work.
Choose the Detail You Want to Notice
For a first home attempt, consider the gold dash in idea 1 or the ribbon cross in idea 16. If you want something seasonal without a Christmas symbol, try the green comma, cobalt corner, or open silver circle. The bow, pine sprig, and snowflake make the holiday reference clearer. Keep any of these accents on one nail per hand if you want the surrounding color to remain the main impression.
1. Oxblood With an Off-Center Gold Dash
A short gold dash gives a deep red manicure a precise little focal point. Put it across the upper half of one ring nail, slightly away from the center, and keep the other nails glossy oxblood. The offset position makes it feel less like a band painted across every finger.
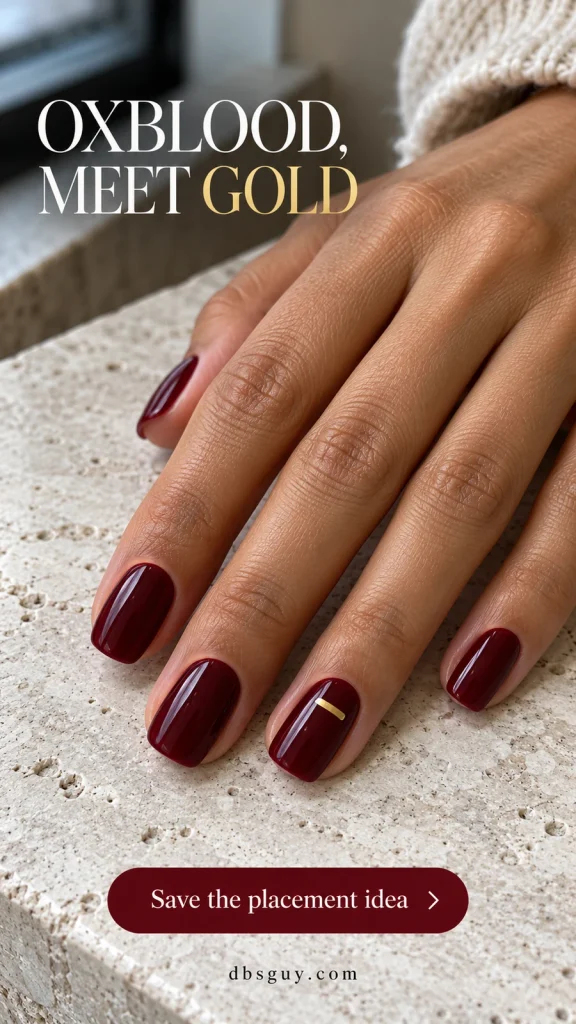
A flat metallic nail-art polish works for a home interpretation. Practice one short stroke before painting your nail; the aim is a small mark with red visible at both ends. If the dash starts spanning the entire width, shorten it rather than adding more decoration to balance it.
2. Sheer Cocoa With One Ivory Bow
Warm brown gives a tiny ivory bow more contrast than a pale pink base would. A translucent cocoa finish also keeps the look lighter than a fully opaque chocolate manicure. Place the bow above the middle of one oval nail, leaving room for its two loops and short tails.
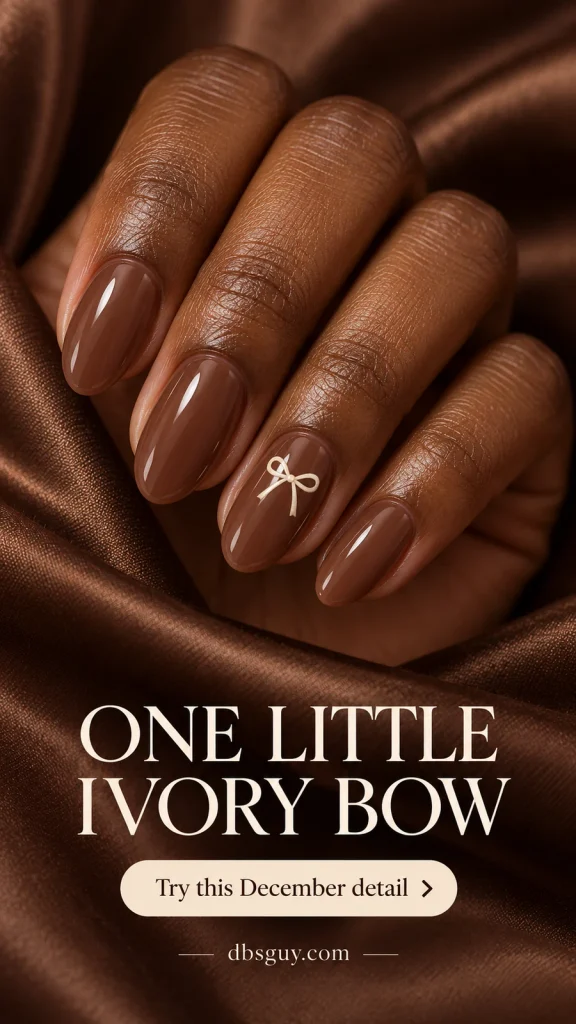
For a salon request, specify flat painted ribbon rather than a raised charm. At home, use a small nail-art decal that fits comfortably inside your nail edges. A wide bow can lose its delicate character on a narrow nail; choose a simpler outline before choosing a larger size.
3. Milky Blush With an Evergreen Comma
This little green curve suggests a brushstroke rather than a holiday illustration. Against milky blush, one tapered comma on an accent nail supplies just enough evergreen for December. The rest of the manicure can stay exactly as you would wear it any other month.
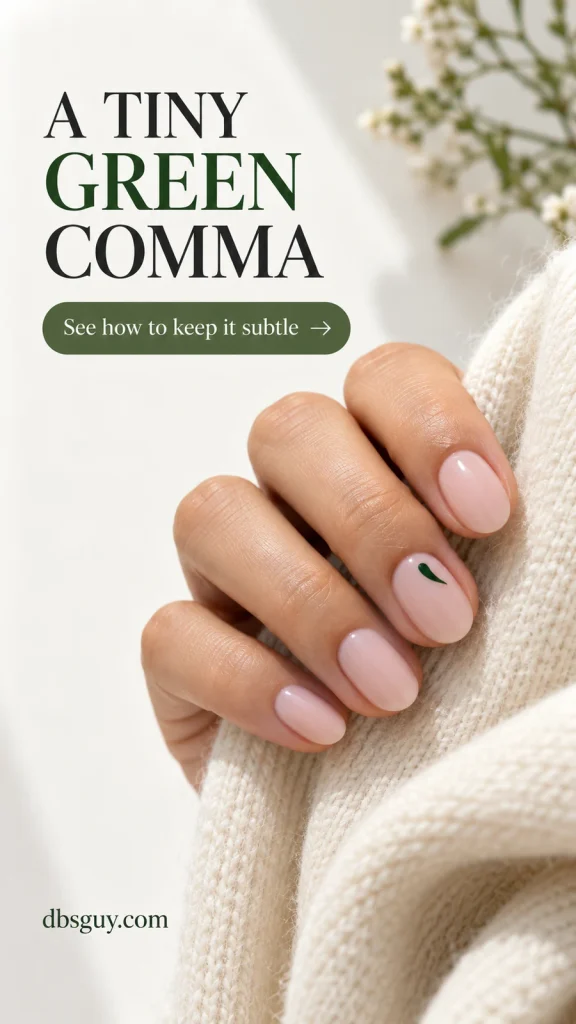
Ask for a rounded beginning and a fine tapered end, with the mark sitting to one side instead of in the center. A nail artist can adjust its direction to suit the nail. Avoid stretching it into a long swirl: keeping the stroke compact is what gives this version its quiet character.
4. A White French With One Ice-Blue Dot
Keep the familiar sheer pink base and narrow white tips, then add one ice-blue dot near the base of a ring nail, with a visible pink margin between the dot and the skin. The dot sits apart from the white tip, letting the two details read separately. It is a winter update that does not require changing the whole set.
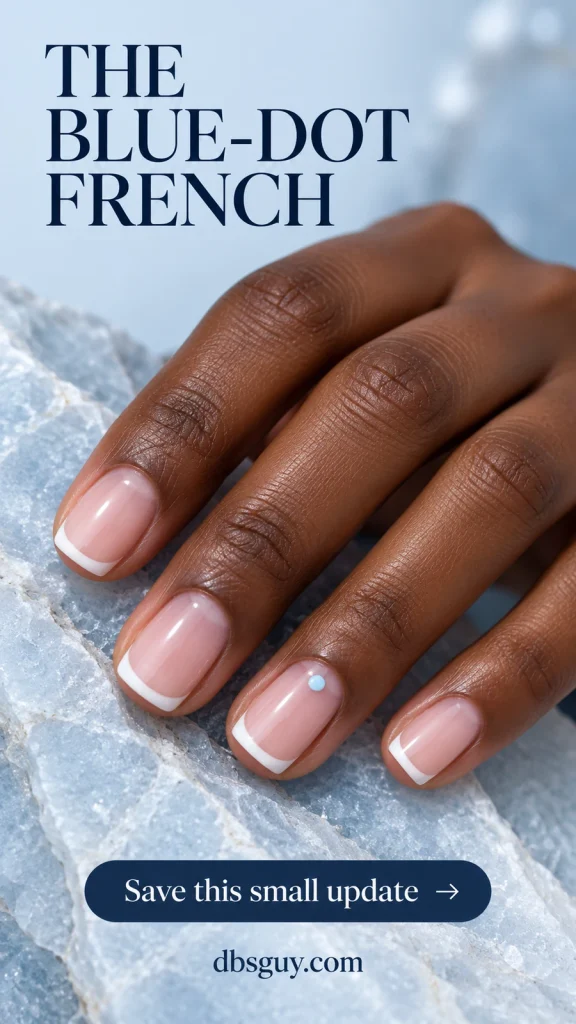
Check the blue beside the white before committing. An extremely pale shade may disappear; a slightly more opaque pastel gives the dot a clear edge. On a short nail, keep the white band slim and use your smallest dotting-tool tip, testing the amount of polish on a practice surface first.
Also read: 21 Short December Nail Ideas That Make Tiny Details Stand Out for more ways to scale an accent to a compact nail.
5. Black Cherry With a Single Silver Star
A four-point silver star gives black-cherry polish a little evening sparkle without turning the whole manicure glittery. Keep it above the middle of one nail, with enough wine-colored space around the points to show the shape clearly.
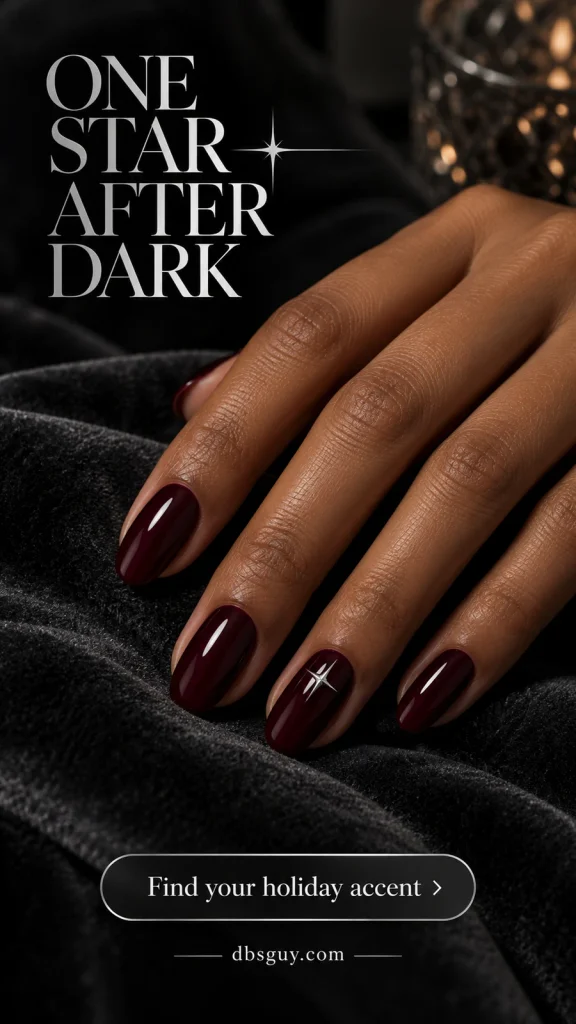
Choose a flat metallic star decal if painting four fine points feels too fiddly. Measure the decal against the nail before applying it; none of the points should crowd the side edges. For a softer result, choose a base that still shows its red-purple color indoors rather than one that looks completely black.
6. Matte Evergreen With One Glossy Drop
Here the tiny detail is a change of finish. Matte evergreen covers the set, while a small glossy teardrop on one nail catches the light. The concept shows a raised-looking drop; ask for a flat painted gloss shape if you prefer a smooth surface.
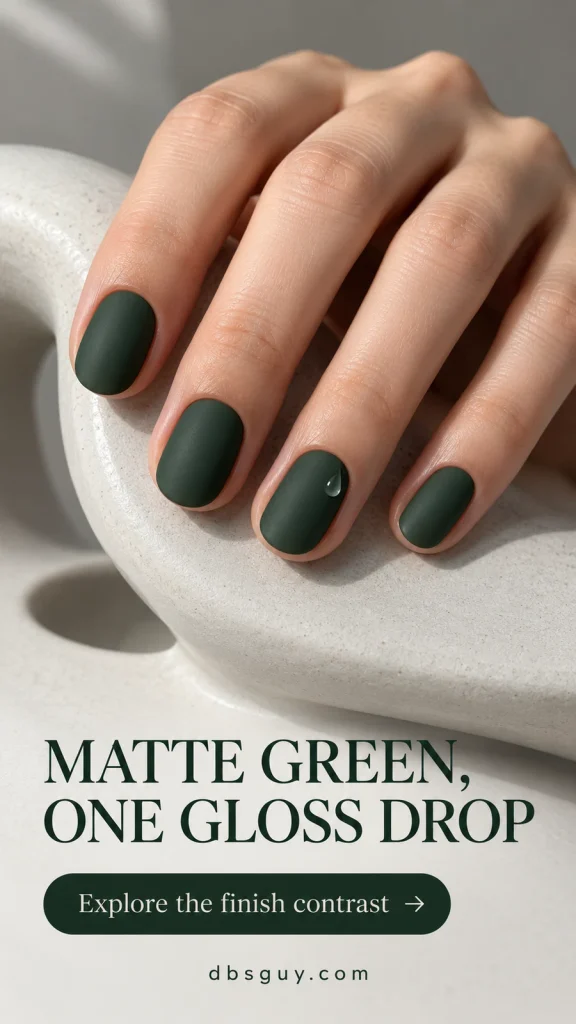
For that flat regular-polish adaptation, use compatible matte and glossy products according to their instructions. The final glossy coat belongs only on the small accent; brushing it over the entire nail would remove the contrast you chose this design for. Discuss the height of any dimensional version before application if you regularly wear knit gloves.
7. Taupe With Three Ivory Knit Stitches
Three tiny V shapes stacked down one taupe nail borrow the look of sweater stitches without covering the surface in a cable-knit pattern. Leave a little space between each V so the column reads as separate stitches rather than one thick zigzag.
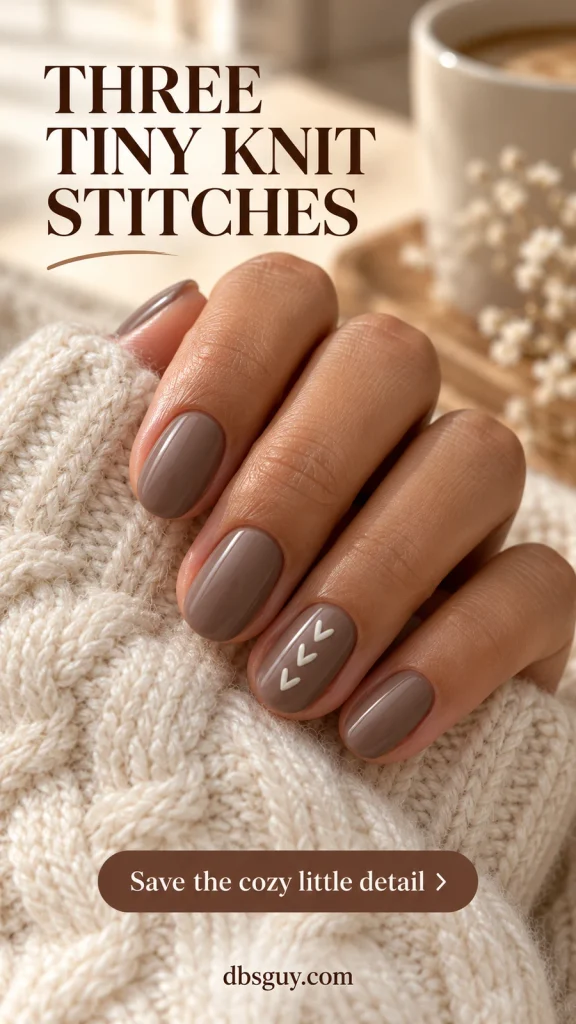
The ivory marks in the concept have a slightly raised appearance. Ask for thin painted stitches if you want a smoother interpretation. On a very short nail, reduce the column to two stitches instead of squeezing three against the tip and base; the spacing is more useful than keeping an exact stitch count.
8. Creamy Ivory With a Cobalt Corner
A little cobalt crescent near one side of the base changes the outline of an ivory nail. The blue follows a short curve, while the center and tip stay cream. It brings a strong color into the manicure without filling a whole accent nail.

Show your artist the exact side you want to accent and ask for a clean margin between the blue and your skin. On an almond nail, the color can follow the side curve; on a squoval, shorten it to a neat curved corner. Keep the other nails plain so the asymmetry is easy to see.
9. Rosy Nude With Small Gold Foil Corners
Small irregular gold flakes give sheer rosy nails a flash that does not need a perfectly drawn shape. The reference repeats the foil on two neighboring nails, leaving their centers mostly clear. Keep just one accent if you prefer less sparkle; the irregular edge is part of the appeal either way.
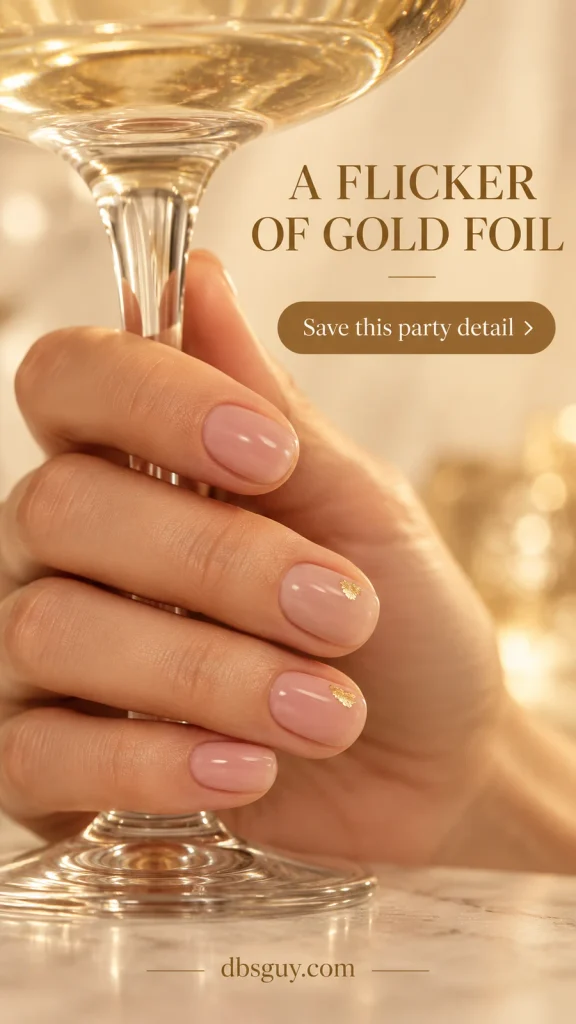
Choose foil intended for nail art and follow its application system, including the recommended base and seal. Check that the flake lies flat rather than curling at an edge. If you want an easier regular-polish interpretation, make a tiny uneven dab with metallic gold; it will suggest the placement without reproducing foil’s reflective texture.
10. Pearl Gray With a Fine Black Chevron
A tiny black chevron brings a crisp graphic mark to pearlescent gray. Keep the two joined lines short and point the chevron toward the free edge. The gray supplies the soft sheen; the black supplies the shape.
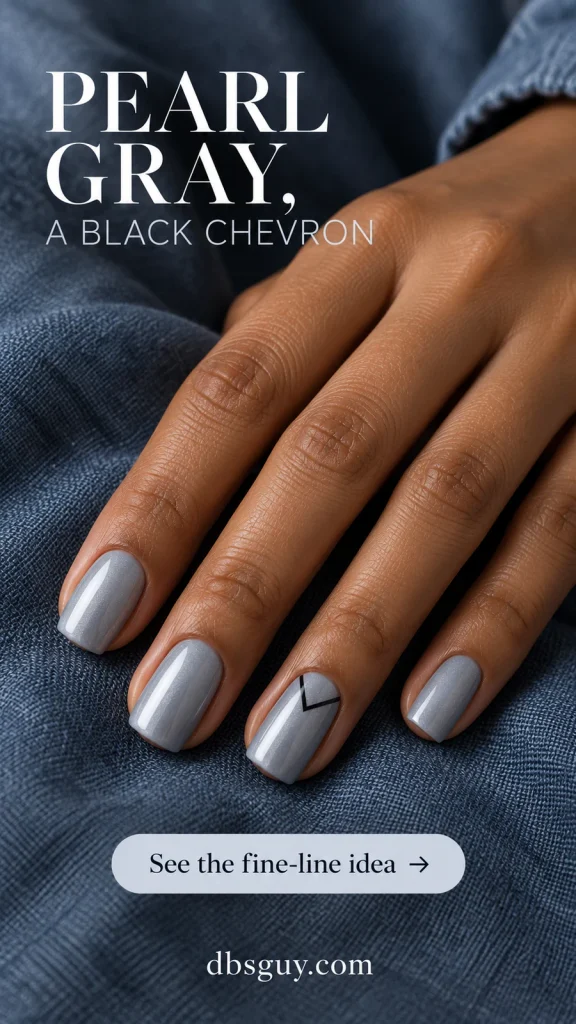
Ask for a fine open V, with gray visible inside it. On a small nail, shortening the arms will preserve that opening better than thickening the lines. This suits a reader who likes a winter palette but wants something more geometric than snowflakes or bows. A sheer silver shimmer can replace the pearl base if you prefer less opacity.
11. Champagne Shimmer With a Burgundy Mini Moon
Instead of putting the accent at the tip, move it to the base. A small burgundy half-moon on one champagne nail gives the pale shimmer a deeper point of contrast. Keep the curved patch small enough that champagne still dominates.
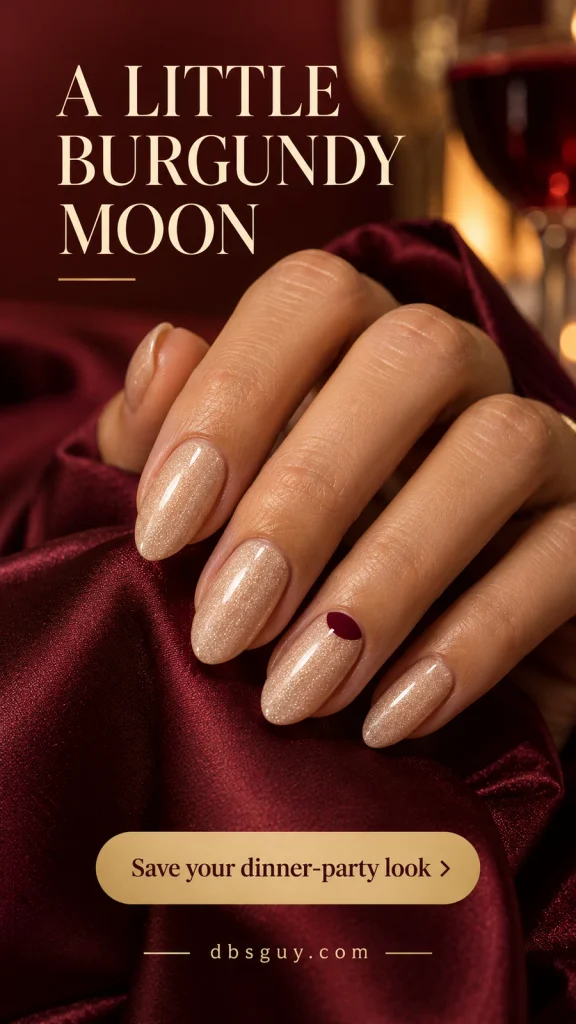
Clarify that the moon is painted entirely on the nail, with a visible gap from the skin. It does not require cutting or pushing back the cuticle to make space. If your nail bed is narrow, use a shallow burgundy arc rather than a wide semicircle; the color relationship stays the same.
12. Warm Cream With a Copper Diamond Outline
A hollow copper diamond gives cream nails a small, jewelry-like detail without adding a gem. Four fine metallic lines make the shape, while the cream remains visible inside. Place it slightly above center on one accent nail.
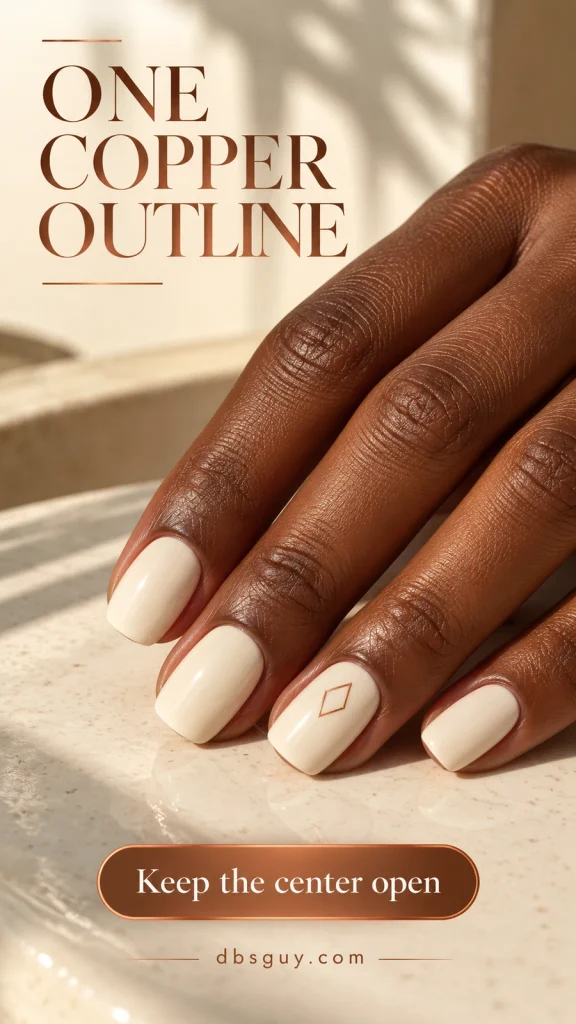
Use a flat nail-art decal or take the reference to a technician for fine linework. Check that the opening is still visible at normal viewing distance; a thick outline can turn into a solid copper patch on a short nail. Skip surrounding dots here so the geometry remains the only feature.
13. Midnight Navy With One Tiny Snowflake
A white snowflake stands out clearly against midnight navy, so it does not need to be large. Keep one small six-armed flake in the upper part of a ring nail and leave the neighboring nails plain blue. It gives the set a winter theme that still fits after Christmas.
For short nails, choose a simplified decal or ask for fewer little branch details on the six main arms. Crowding every branch into a miniature shape can make the lines merge. Preserve a navy border on every side instead of enlarging the snowflake until it fills the nail.
Also read: 19 Snowflake Nails So Delicate They Look Freshly Fallen if the winter motif is your favorite part.
14. Rose Pink With an Open Silver Circle
An almost-closed silver circle looks like a tiny piece of line jewelry over muted rose pink. Leave a visible break in the outline so the opening feels intentional. One small circle on a ring nail gives the eye a place to settle without a recognizable holiday symbol.
Ask for flat painted metallic linework, not a metal ring attachment. The circle can sit above center, with plenty of pink around it. If your nails are narrow, choose a smaller open oval rather than forcing a wide circle close to both side edges.
15. Warm Ivory With a Miniature Pine Sprig
A little diagonal green sprig supplies a botanical December detail. The warm ivory base keeps the fine needles visible, and the empty space around the stem matters more than adding berries or extra branches.
For a clear salon request, ask for one slender stem with fine needles, placed diagonally along one side of a nail. The reference uses a longer sprig; ask for a shorter stem with fewer needles if you want a smaller accent. A pine decal offers an alternative at home. Check its fit before application rather than trimming random sections from a busy illustration.
16. Sheer Peach With a Cranberry Ribbon Cross
Two tiny intersecting cranberry lines hint at gift ribbon without turning the entire nail into a present. Place the compact cross slightly off-center on a sheer peach base and leave the other nails undecorated. The red is the seasonal reference; a bow is optional and unnecessary for this version.

At home, paint one short line, let it set as directed, then add the crossing stroke. Keep both ends well inside the nail edges. If the lines run from side to side and base to tip, the result becomes a full gift-wrap design rather than the small detail shown here.
17. Deep Plum With a Three-Fleck Gold Trail
Three little gold flecks make a short diagonal trail across one plum nail. Let one piece be slightly larger and the other two smaller, with visible purple between them. That spacing keeps the accent from reading as a single glitter patch.
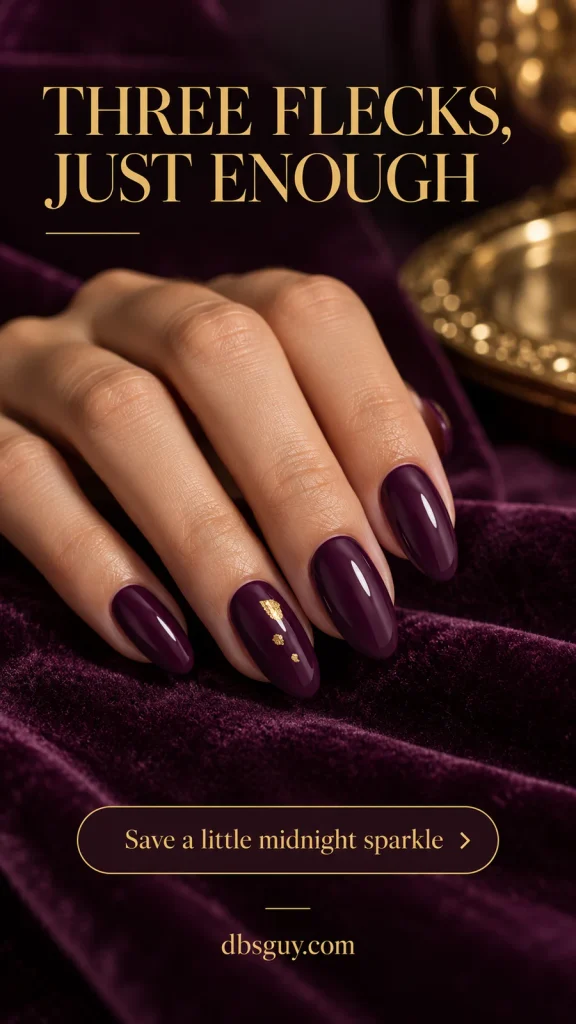
Ask your artist to keep the trail narrow, rather than filling the whole surface. On a shorter nail, two well-spaced flecks are a better adaptation than three crowded ones. Pairing the detail with plain plum on the remaining fingers gives it enough contrast for a December dinner or New Year’s plans.
Also read: 21 New Year’s Nails to Ring In the Year Sparkling for more evening finishes.
How to Ask for a Small Detail at Your Appointment
Save the whole-hand reference so your artist can see how much of the set stays plain. Then point out the accent nail, its position, and whether the detail should be flat or raised. Ask to check the size of the first motif before it is repeated on the other hand. A tiny detail in a close-up can look much larger on your own nail.
Choose your preferred length before adjusting the artwork. If the motif feels cramped, simplify it or use fewer marks. You do not need to add length just to fit the reference.
For home nail art, use products intended for nails and follow the specific drying, curing, application, and removal directions. Keep polish and other nail products off the surrounding skin. The American Academy of Dermatology’s manicure guidance recommends moisturizing nails and avoiding cutting or forcefully pushing back the cuticles. A clean outline should come from controlled product placement.
Questions About Tiny December Nail Details
Which detail is the easiest place to start at home?
A small dot or short dash is a sensible first attempt because it involves a single mark. Try the gold dash or the blue dot on one nail before decorating both hands. A flat decal can simplify a bow or snowflake, but it still needs to fit your nail and be applied according to its directions.
Can these designs work on short natural nails?
Yes; adapt the artwork to the available space. Dashes, corner accents, and small dots need less room than a branched snowflake or bow. Keep the base visible around the mark, and reduce the number of stitches or flecks if necessary. The image’s nail shape is a styling suggestion, not a requirement.
Do I need gel polish for these looks?
Many of the color-and-line ideas can be interpreted with regular nail polish and suitable nail-art products. Metallic foil and matte/gloss combinations depend on the products used, so follow their instructions. A regular metallic polish may give a softer shine than a salon chrome treatment; choose the finish you actually want rather than assuming they are interchangeable.
Should the accent match on both hands?
Repeating the same detail on the same finger gives the set a coordinated look. You can also mirror its position, such as placing each corner accent toward the outside of the hand. Decide before painting so a deliberate asymmetry does not look like an accidental change.