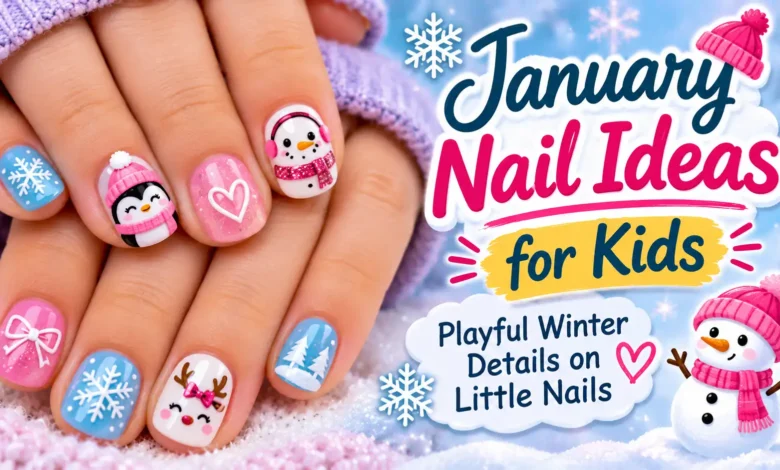
A little polar bear, a cocoa mug, or two scarf-colored stripes can give a short nail a winter story. These January nail ideas for kids use one clear accent at a time, with plain neighboring nails so the detail has room to show.
Start with the scarf stripes if you want the fewest shapes to paint. Try the snow cloud for simple brush-and-dot practice, or save a character for a child who enjoys choosing the tiny features. Every look below stays at the child’s natural nail length.
The visuals are AI-generated design concepts. They show suggested colors and placement, not real children’s manicures, tested products, or guaranteed results.
Before You Choose the Polish
The American Academy of Pediatrics’ family product guidance says young children who put their hands in their mouths should not use nail polish. It notes that water-based polish may be a safer option; that is not a guarantee that every formula suits every child.
For a child who is ready for a supervised polish activity, check the product’s age guidance and application and removal directions. An adult should manage the bottles and tools in a ventilated space. Keep polish and remover out of reach afterward. Leave sore nails or irritated skin unpainted, and stop using a product if a reaction appears.
Keep nails short, smooth any rough edges, and leave cuticles alone. The American Academy of Dermatology’s children’s nail-care guidance advises against cutting or pushing back cuticles. None of these designs needs extensions, a curing lamp, or attached decorations; interpret the artwork with suitable air-dry nail products.
Set Up for One Small Accent
Let your child choose the design before opening anything. Gather its base color and detail colors, a fine nail-art brush, a small ball-ended dotting tool, a washable table covering, and a steady support for the painting hand. Use nail products for the artwork rather than craft paint, craft glitter, or markers.
Apply and dry the base according to its label before adding details. Follow the chosen system’s directions for base coat and top coat rather than adding extra layers automatically. An adult can rehearse the shapes on a spare practice tip; the child can decide the colors and which nail gets the picture.
For very little nails, compare the actual nail widths before choosing placement. The thumbnail often offers useful space, but a wide middle or ring nail may suit the design better. Keep a visible border of base color around the accent. If you cannot fit that border, simplify the drawing.
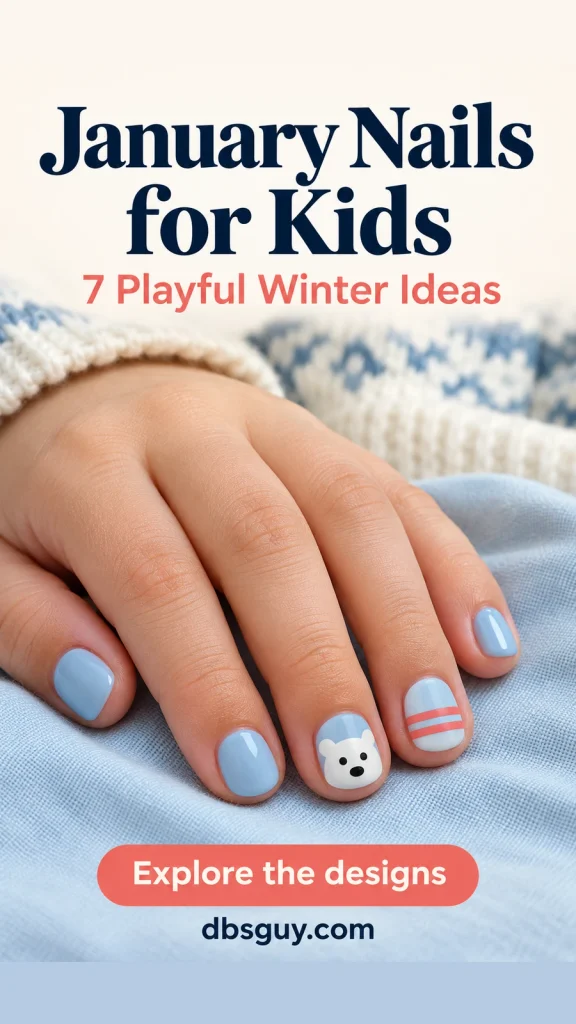
1. A Tiny Polar Bear on Powder Blue
This bear uses a face rather than a whole animal, giving the eyes and nose room on a small thumbnail. Keep the other nails powder blue so the little white head stays the main detail.

Have an adult paint a rounded white head, then add two smaller white circles at its upper corners for ears. Once the white has dried as directed, place two black eyes and a small oval nose beneath them. A mouth is unnecessary: the ear shape and nose already suggest a bear.
The concept includes a fine blue outline and pale inner-ear shading. Treat those as optional finishing details. On an especially small nail, keep the white silhouette, eyes, and nose, and let the plain blue border do the separating.
2. A Little Cocoa Mug on Dusty Mauve
A pink cup with two marshmallows gives this design its cozy January feel. The pictured mug sits on a middle nail, but choose the widest comfortable nail on your child’s hand so the handle has space.

Begin with a small coral shape with a rounded bottom. Add a C-shaped handle on one side, leaving a mauve opening inside it. A brown oval across the cup’s top suggests cocoa; two tiny white marks on that oval become the marshmallows.
This is one of the more detailed options because it needs separate color layers. Keep the other nails plain, and skip steam, a saucer, and lettering. If the handle keeps merging into the cup, make the cup body narrower on a practice tip before trying again. One white marshmallow is enough when two would crowd the top.
3. Two Coral Scarf Stripes on Mint
Choose this for a child who likes a colorful winter accessory more than a character. Two coral bands across one mint nail suggest scarf stripes without drawing a miniature scarf or adding fringe.

With a lightly loaded fine brush, an adult can paint the first band across the middle of the ring nail, then add a second parallel band. Leave mint showing between them and above and below the pair. Follow the nail’s surface without extending polish onto the skin.
Work on one accent before deciding whether to repeat it on the second hand. If the two bands become one broad patch, use less polish and a thinner brush for the next attempt. You can also stop at one band when the nail has very little space.
Also Read: January Nail Art for Beginners: Simple Designs to Practice at Home for adult practice with small marks and controlled brushwork.
4. A Pink Pom-Pom Hat on Lilac
A small pink dome, a white cuff, and a white dot make a winter hat with just three main shapes. Lilac keeps the pink visible, while the plain surrounding nails leave attention on the beanie.
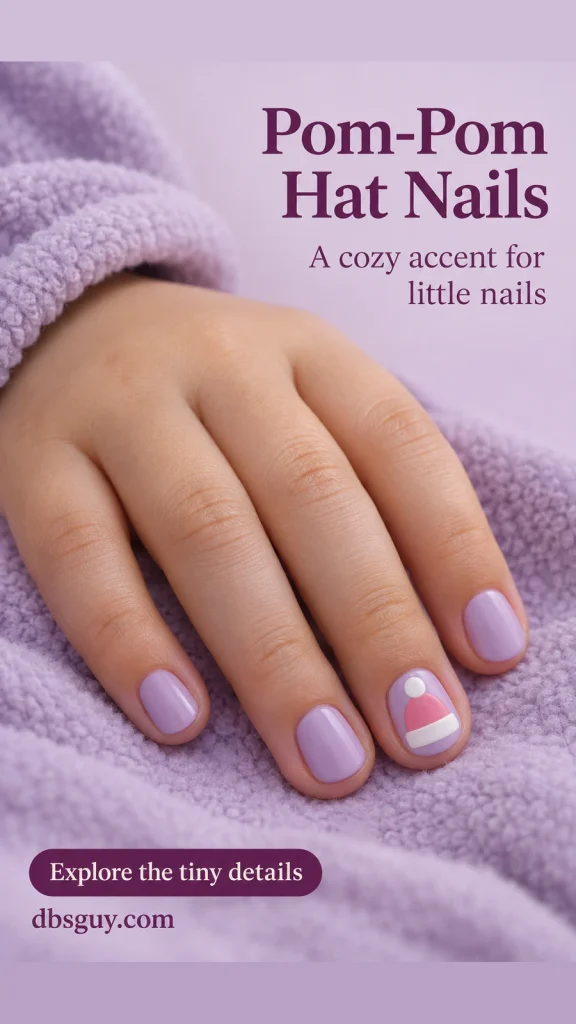
Place the pink dome near the center of the accent nail, with its curved top facing the free edge—the outer tip of the nail. After it dries as directed, add a narrow white band across the dome’s bottom and one small white dot above it. Keep all three parts painted flat.
Plan the whole silhouette before painting the dome: an oversized hat body leaves no room for the pom-pom. Ribbing and knit stitches are optional extras this little design does not need. On a narrow nail, make the cuff slightly shorter than the dome’s widest point.
5. Mini Snowy Mountains on Sky Blue
Two uneven peaks turn a thumbnail into a tiny winter landscape. This option suits a child who wants a picture without a face. Keep the mountains near the free edge and leave open blue above them.

An adult can outline two small triangles in slate blue, fill them, and let the color dry as directed. Add a white cap to the top of each triangle, leaving most of the darker mountain showing below it. The caps can have slightly uneven lower edges.
Start with the taller peak off-center so there is room for its smaller neighbor. If both shapes merge into a dark wall, lower the shorter peak on the next attempt. A single snow-capped triangle is the sensible version for a very narrow thumbnail; trees and tiny cabins would take away the open sky.
6. A Snow Cloud With Three Falling Dots
This little weather picture uses a scalloped white cloud and three separate snow dots over periwinkle. The cloud provides a clear top to the scene, making it different from an all-over dotted manicure.
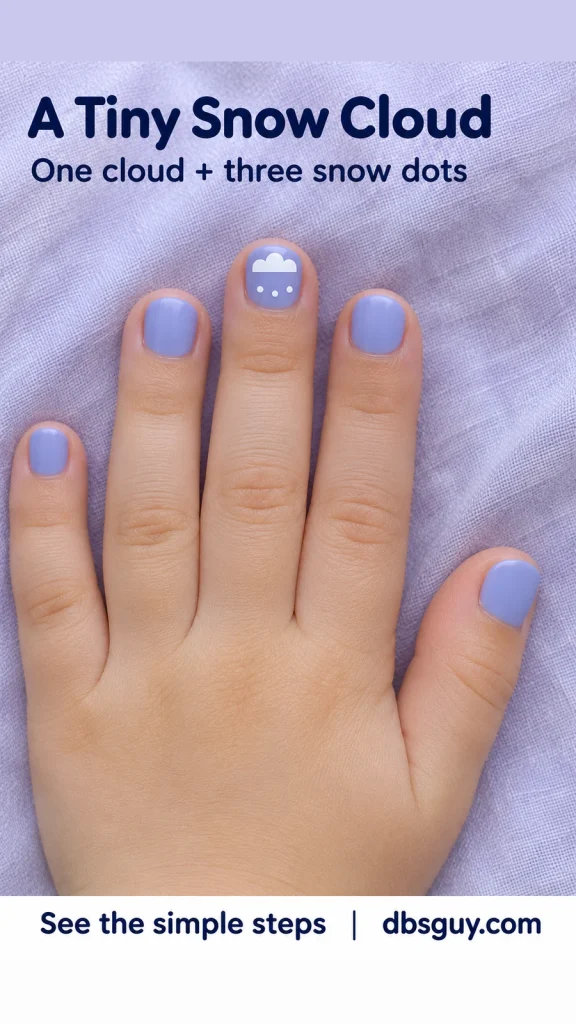
Place three touching white dots in the upper half of the middle nail, toward the free edge. With a fine brush, join their lower edges into a short, flat-bottomed cloud. Leave periwinkle showing around it rather than stretching the cloud from sidewall to sidewall.
Below the cloud, place three smaller dots with uneven spacing. Stop before the cuticle area. If the cloud and snow touch, they lose their separate shapes; use a smaller cloud or fewer snow dots on a practice tip. Two detail sizes—a larger cloud and smaller snowfall—make the picture easier to read.
7. An Earmuff Smile on Peach
A peach background becomes the face, so there is no separate head shape to squeeze onto the nail. The pictured accent is on the index nail, with dusty-rose earmuffs framing two eyes and a small smile.
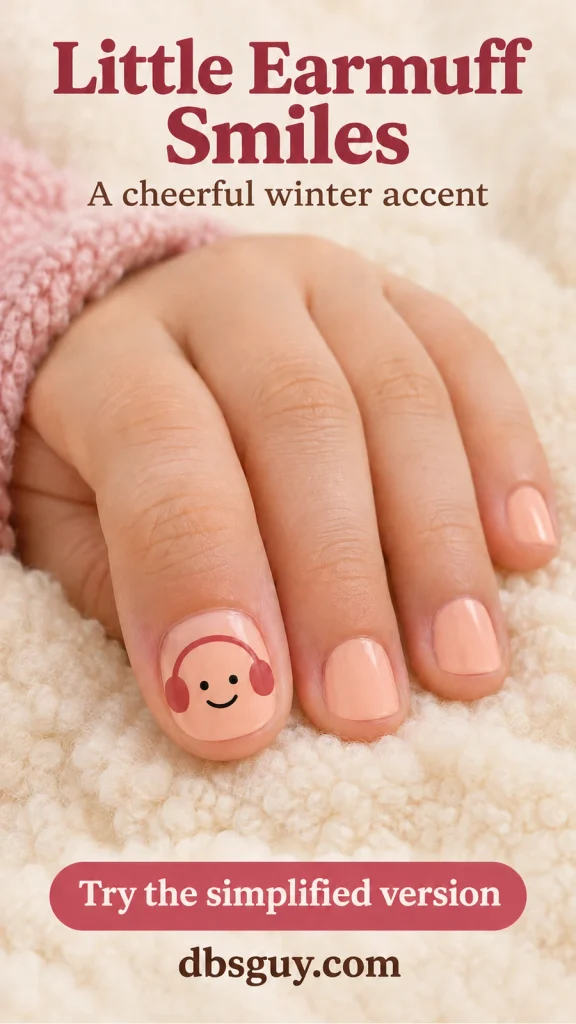
Place two small rose pads toward the sides of the nail while keeping them inside its edges. Join them with a thin rose arch above the future eyes. Once that layer is ready, add two black dots between the pads and a small curved smile below.
Decide where the arch will sit before placing the eyes; a low band can run through them. For a smaller version, keep the earmuffs and eyes and omit the smile. You can move the accent to a wider thumbnail, but do not enlarge or extend the child’s nails to fit the reference.
Keep the Painting Session Flexible
Choose a stopping point your child likes: one decorated nail and a few plain nails can be enough. A second hand can repeat the base color without repeating every tiny feature. Check school or activity rules before planning a painted look.
Let each layer dry as its product directs, and use a compatible finish only when called for. Follow the specific removal instructions afterward; water-based does not automatically mean peel-off. Do not scrape at a design to save its outline. Once the polish is removed, moisturize the nails and surrounding skin.
Questions Parents Ask
Which idea is easiest to start with?
The scarf stripes need only two colors and two bands. The snow cloud is a useful next choice if an adult is comfortable placing dots. The cocoa mug asks for more small shapes and color layers, so save it for a more patient session.
What if my child still sucks their thumb or puts fingers in their mouth?
Skip the nail polish. Let them choose a favorite design and turn it into a drawing on a paper hand outline instead. A tiny winter picture can be an art activity without being worn on the nails.
Is water-based polish suitable for every child?
No. The formula, label directions, age guidance, and your child’s habits still matter. If your child has a known product allergy or a skin or nail condition, ask their clinician before introducing a nail product.
How long will these designs last?
There is no single wear time to promise. It depends on the formula, application, and daily activities. Use the product’s directions for wear and removal, and choose the design for the small creative activity rather than an expected number of chip-free days.
Also Read: More Winter Nail Ideas
For additional children’s designs, explore 13 Cute January Nails for Kids Who Love Snowmen and Sparkle. That guide focuses on snowmen, mittens, and other accents, giving you a different set of pictures to choose from.
For an adult-and-child painting afternoon, browse Easy Nail Art for January Using Dots, Lines and a Little Shimmer for the adult’s own manicure. Choose the child’s products separately using the guidance above.