
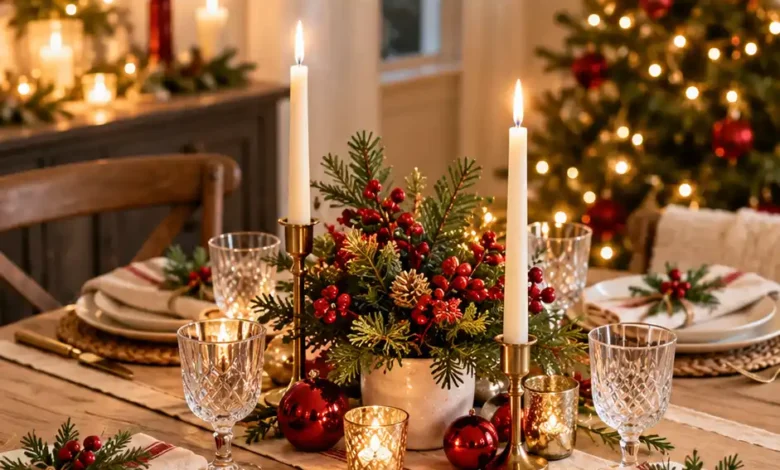
Your Christmas table can look lovely right up until you try to put down the potatoes. Suddenly, the centerpiece needs moving, the glasses are crowded, and there is nowhere sensible for the gravy.
The easiest way to decorate a small Christmas table is to plan around the meal. Put festive color on things you already need, keep any centerpiece contained, and let the chairs or the room carry some of the decoration.
These 15 small Christmas table decor ideas give you different ways to do that, whether you are setting an apartment dining table, a round kitchen table, or a breakfast nook for two. Each comes with a simple setup and a detail that makes it easier to use during dinner.
Choose one main idea for the tabletop, then add a supporting detail if the space allows. A ribbon napkin and a window wreath can feel wonderfully festive together. A runner, two vases, an ornament bowl, a tray, and a tree all at once will quickly undo the point.
Set Out the Dinner Dishes Before the Decorations
Start with the actual plates, glasses, and serving dishes you plan to use. Put the serving bowls on the table empty, including their spoons and any trivets. This shows you the space the meal really needs before you buy or arrange anything.
Keep the place setting suited to the menu. Emily Post’s table-setting guidance recommends setting out only the utensils you will use. If you are not serving soup, that soup spoon can stay in the drawer. Bring dessert dishes out when it is time for dessert.
Now sit in each chair. Can you pull your plate toward you, lift your glass comfortably, see the person opposite, and pass a bowl without reaching through decorations? Make those movements part of the setup check.
On a round table, try one low, contained centerpiece. On a narrow rectangular table, try a flat runner or a very small decoration in the remaining center strip. If the dishes already fill the surface, decorate the napkins, chairs, or nearby window instead.
Use the styled examples below for inspiration, then size the arrangement to your own dishes and seating. There is no single centerpiece width that fits every small table.
1. Tie a Simple Ribbon Bow Around Each Napkin
A ribbon bow can do a surprising amount of decorating. Repeating the same little detail at each place gives the table a coordinated Christmas look, while the center stays available for the meal. This is a particularly easy starting point if your everyday plates are white or another solid color.
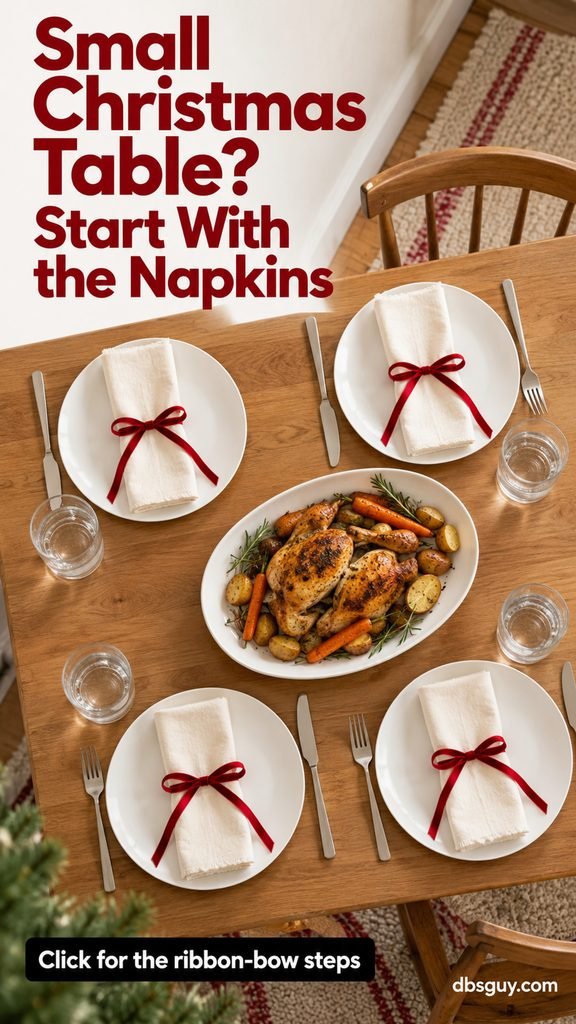
What you need: Clean cloth napkins, soft narrow ribbon, scissors, and your dinner plates.
How to set it up:
- Fold each napkin into a neat rectangle that fits entirely on the dinner plate. A simple fold makes the ribbon easier to tie and lets the fabric stay usable.
- Wrap the ribbon around the middle and tie a small bow on the front. Leave enough slack for a guest to undo it easily; use a bow rather than a tight knot.
- Trim the tails so they rest on the napkin, then repeat the same ribbon color at every seat. Set the napkins on the plates before adding the glasses.
Finishing tip: Cherry-red ribbon with ivory napkins gives a classic Christmas feel. Forest green works just as well with cream dishes, while a striped ribbon can add interest to a completely plain table.
Keep the bow as the whole plate decoration. Adding a bauble, greenery sprig, gift box, and name-card stand at every seat creates several things guests have to find homes for before eating.
Good fit: Tables where every inch of the center is needed for food.
2. Use a Narrow, Flat Runner That Can Stay Under the Serving Dishes
A runner can give a small table a finished look without taking away a place to put food. The useful version here is a flat strip of fabric through the middle, sized around your place settings. It becomes the background for dinner rather than a platform for a long line of decorations.
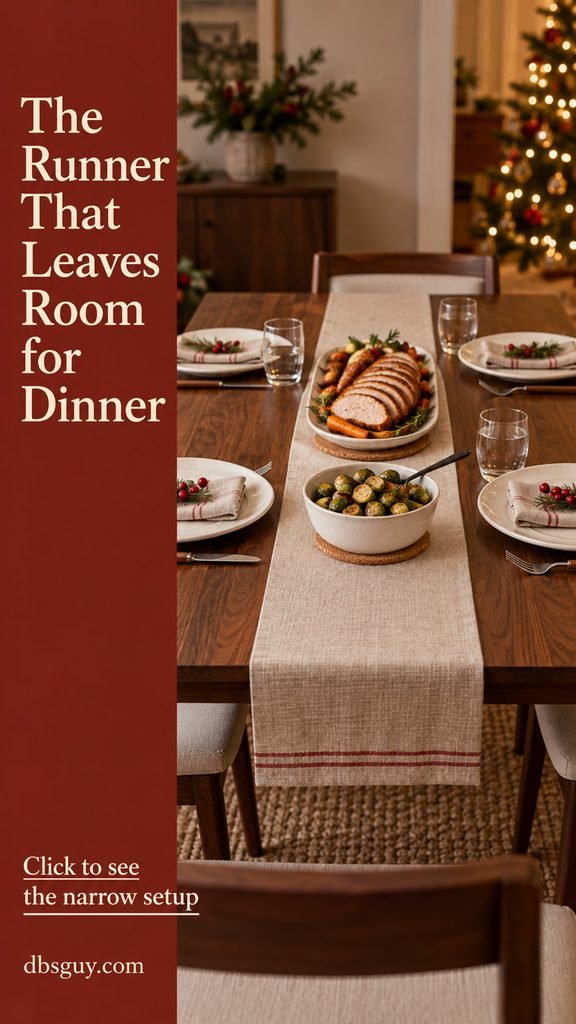
What you need: A slim fabric runner, serving dishes, and appropriate trivets for hot items.
How to set it up:
- Set the plates first, then lay the runner through the open middle strip. Check that glasses and cutlery sit steadily and that fabric edges do not bunch beneath them.
- Place the empty serving dishes where they will go during dinner. Make sure the serving-spoon handles have room too; those can extend beyond the bowls.
- Smooth the runner and add only a color detail you already need, such as red napkins. Let the serving dishes occupy the middle when the meal arrives.
Finishing tip: For a runner you already own that is too wide, try a lengthwise fold with the crease underneath. Check the thickness and stability with your own dishes before using it.
Fabric is decoration, not heat protection. Put hot dishes on trivets suited to your tabletop, and keep the runner’s ends clear of chair seats and guests’ laps.
Good fit: Narrow rectangular tables and simple meals served at the table.
3. Contain the Christmas Color in One Low Ornament Bowl
Loose ornaments look pretty until they start rolling toward a glass or into the path of a serving dish. One low bowl gives you the same holiday color in a much more manageable footprint. It is an easy small Christmas table centerpiece to assemble from decorations you may already have.
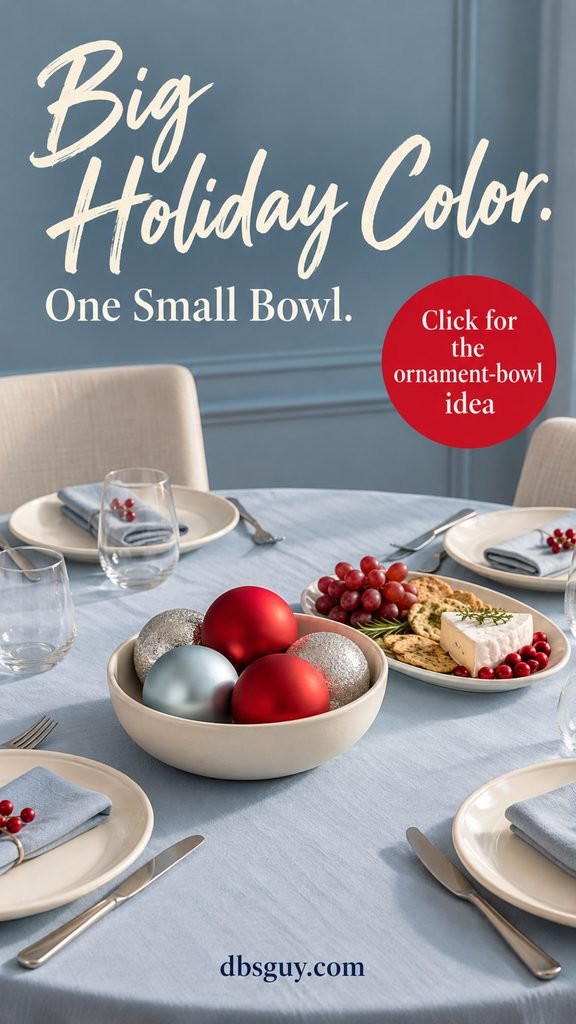
What you need: One shallow, stable bowl and a small selection of shatterproof Christmas ornaments.
How to set it up:
- Choose a bowl that fits in the space left after the place settings and food dishes are down. Start smaller than a dinner plate, then check it on the actual table.
- Arrange the ornaments in a shallow layer, with the hanging caps tucked inward. Mix a couple of sizes, but keep everything below a height that interrupts conversation.
- Place the bowl where guests can pass dishes around it. If dinner needs that spot, move the whole bowl to a shelf before bringing out the food.
Finishing tip: Repeat a color from the napkins in the bowl. Red ornaments with pale blue or silver accents create a different Christmas look without adding more objects to the surface.
Skip the trail of baubles around the bowl. The useful part of this idea is containment. Choose ornaments with finishes that will not shed loose glitter onto linens or near food.
Good fit: Small round tables with a little space left in the center.
4. Build a Centerpiece You Can Lift Away on One Tray
Sometimes the table has room for a centerpiece while guests arrive, but needs the entire middle once dinner begins. A small tray lets you enjoy both stages. The important detail is choosing its destination before the meal, so you are not standing there with a full tray and nowhere to put it.
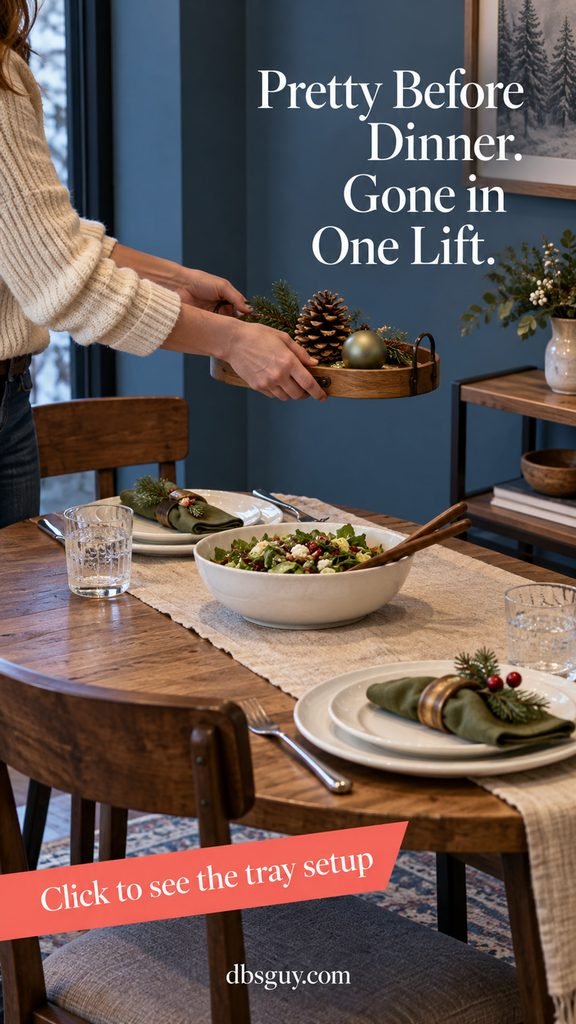
What you need: One small stable tray, a few lightweight decorations, and a clear nearby shelf or counter.
How to set it up:
- Arrange a few short evergreen pieces, one pinecone, and a couple of ornaments inside the tray’s edge. Keep the display low and leave the handles easy to grasp.
- Lift the finished tray with both hands to check that it carries comfortably and that nothing rolls or slides. Reduce the arrangement if the tray feels awkward.
- Set it on the table for the welcome drinks, then move it to the planned landing spot before the first serving dishes come out.
Finishing tip: A plain tray you use elsewhere in the house is enough. The arrangement gets its Christmas character from a few coordinated pieces; it does not need a special holiday base.
Keep decorative branches and ornaments out of direct contact with food, and leave that landing spot clear. A tray is only convenient when moving it does not start another round of rearranging.
Good fit: Family-style dinners with several bowls or large serving platters.
5. Choose One Tiny Potted Tree for a Breakfast Nook
A small potted rosemary tree or miniature evergreen can give a table for two a complete Christmas focal point. The key is choosing the plant for the table you have. A compact pot and a restrained crown are easier to fit around dinner than a miniature tree with branches spreading across both place settings.
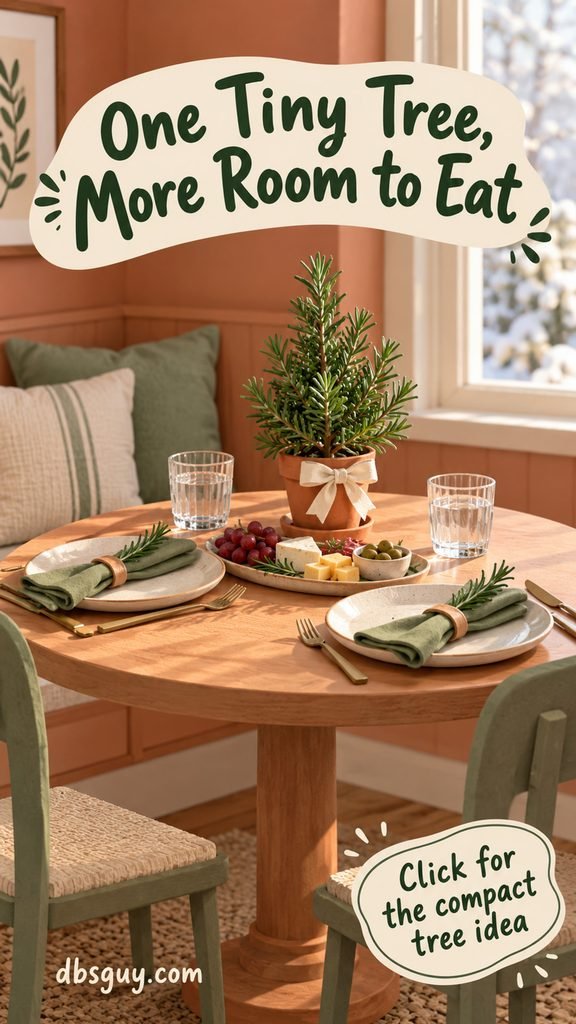
What you need: One small potted plant, a watertight saucer or protective container, and a short ribbon.
How to set it up:
- Put the plant on the table with the plates and serving dish in place. Sit down to check that its branches stay out of faces, glasses, and the path of passing food.
- Protect the tabletop from moisture with a suitable saucer or container. Wipe away loose soil or water before the pot comes to the dining area.
- Tie one little bow around the pot, then position it in the open area that remains. Keep the center available if that is where the food dish needs to sit.
Finishing tip: Let the plant be the main decoration. A terracotta pot, cream bow, and green napkins already create a warm Christmas palette without extra ornaments around the base.
Return a living plant to the light and care conditions it needs after the meal. If it blocks conversation or crowds the dishes, use it on the windowsill and keep only its color on the table.
Good fit: Two-person round tables and cozy breakfast nooks.
6. Put Two Short Bud Vases Around the Serving Bowl
A full bouquet can occupy the exact place your serving bowl needs. Two petite bud vases give you flowers while leaving a useful gap between them. This works best when the vases have small, stable bases and the blooms are low enough for people to see one another.
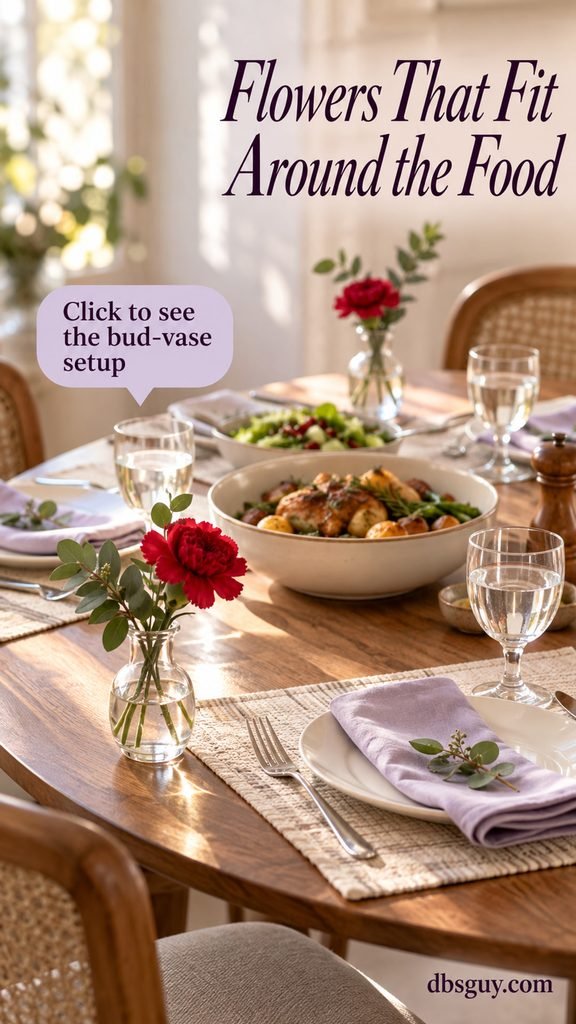
What you need: Two slim bud vases, a few short flower stems, water, clean clippers, and flower food if supplied.
How to set it up:
- Place the empty serving bowl in the middle first. Set one vase to either side in the remaining spaces, where hands and serving spoons will not knock them.
- Trim the stems so each vase holds just one or two small blooms. Keep the flowers within the vase’s general footprint instead of letting them spread across the table.
- Fill the vases carefully, dry their outsides, and check the finished arrangement from the chairs. Move one vase to a shelf if the pair feels crowded.
Finishing tip: For fresh flowers, UF/IFAS cut-flower guidance recommends removing leaves that would sit below the water line, making clean stem cuts, and using commercial flower preservative. Follow the packet directions when adding it.
Two wide bottles can take more room than one small centerpiece. Choose the containers by their footprint, and keep a vase away from the route guests use to pass a heavy dish.
Good fit: Small oval or rectangular tables with a little space beside a serving bowl.
7. Keep the Christmas Glow in One Small LED Cluster
Warm light is especially lovely for Christmas dinner, but a parade of candle holders can use the whole center of a narrow table. A few compact LED tea lights grouped on one little base create a glow you can place in the space that is actually available.
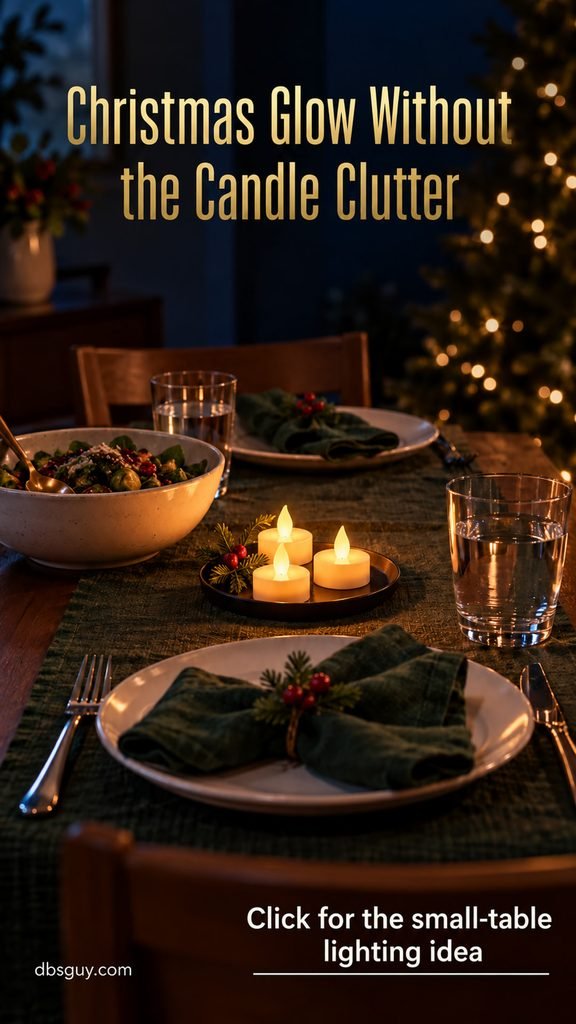
What you need: A few unscented battery-operated tea lights and one small stable base.
How to set it up:
- Try a small group of LED tea lights on a shallow dish or saucer. Pick a base with enough room for the lights to stand flat without overhanging its edge.
- Place it beside the serving dishes and test the lights after dusk. Keep it out of the area where guests set down their glasses or reach across the table.
- Switch the lights on before everyone sits down, then leave the rest of the centerpiece area clear. Move the little base away if more dishes arrive.
Finishing tip: Choose flameless lights for a table with fabric and decorative touches. NFPA’s candle-safety guidance recommends battery-operated flameless candles as an alternative to open flames.
Check the size of the holders as well as the lights. Tiny tea lights inside several large lanterns still make a large centerpiece. A modest glow is enough when the room lighting is warm too.
Good fit: Evening dinners on narrow tables where a full candle arrangement will not fit.
8. Let a Patterned Tablecloth Supply the Christmas Color
A Christmas tablecloth can decorate the whole surface while leaving it usable. Red gingham, a restrained plaid, or a small evergreen print gives plain dishes a festive setting without a separate centerpiece. This is a good option when a round table has just enough room for the plates and one serving dish.
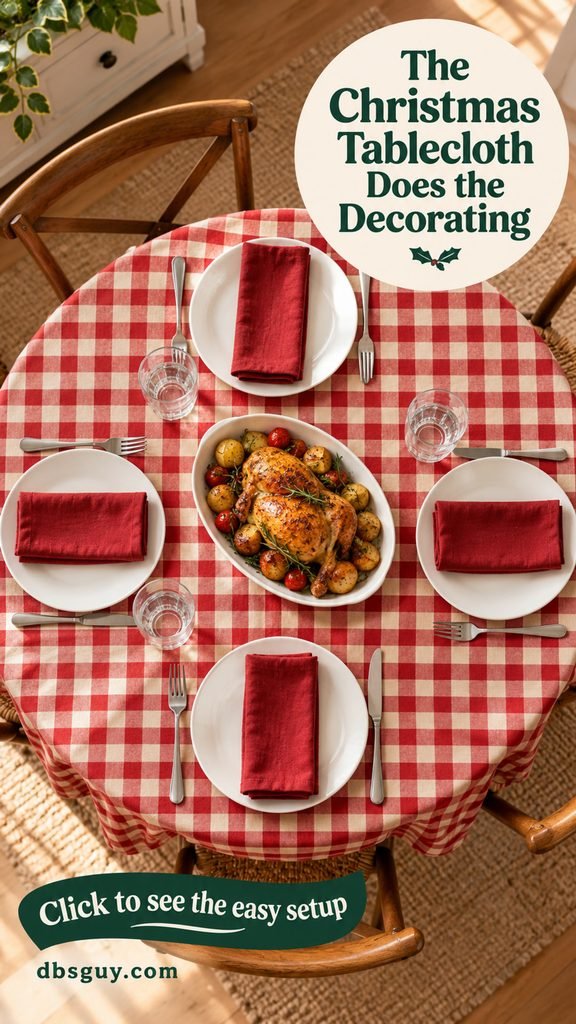
What you need: A clean patterned tablecloth, plain dinnerware, and simple napkins.
How to set it up:
- Choose a cloth sized for your table and the way the chairs fit beneath it. Lay it evenly, then sit down to check that the hanging fabric stays clear of laps and feet.
- Use plates that stand out against the pattern. White dishes and solid-color napkins help each place setting remain easy to see.
- Set the food platter or serving bowl in the middle. Leave that center free of decorative objects so the pattern can keep doing its job during dinner.
Finishing tip: Before buying a new cloth, look at fabric and linens you already have. A washable plaid or gingham cloth in good condition may be all the holiday layer this table needs.
Let one pattern lead. Adding patterned placemats, a second patterned runner, and busy dishes makes the table feel fuller even when those layers are flat. Keep the other pieces simple.
Good fit: Small round tables and dining areas where a centerpiece would crowd the meal.
9. Tie Tiny Bows Around the Stems of Glasses You Already Need
A little bow on a stemmed water glass is a cheerful detail that does not require another object on the table. It works especially well when the dinnerware is plain and you want a small repeated touch of red. Use the glasses you were already planning to set out.
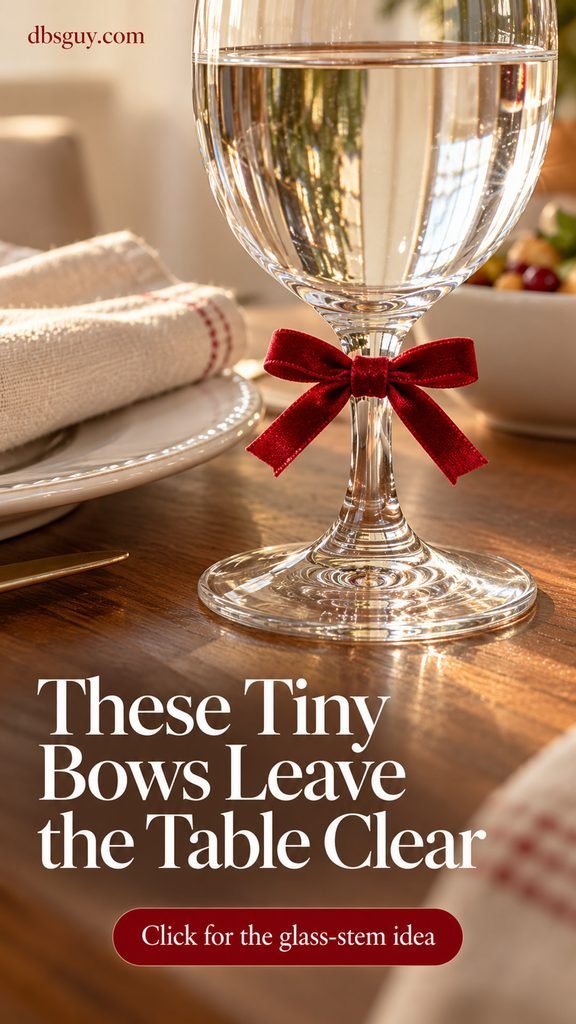
What you need: Stable stemmed glasses and short lengths of soft, narrow ribbon.
How to set it up:
- Start with clean, dry glasses. Tie a small bow around the stem below the bowl, keeping it clear of the rim and the part guests drink from.
- Trim the ribbon ends so they do not reach beneath the glass base or trail across the table. The base should rest completely flat.
- Fill the glasses and put them back in the place settings. Pick one up as a guest would to check that the ribbon does not make the stem awkward to hold.
Finishing tip: A small velvet bow gives a richer Christmas accent; a simple satin ribbon feels lighter. Match the ribbon to a napkin color for an intentional look with very little material.
This idea depends on the glass having a suitable stem. If you use tumblers, put the ribbon on the napkin instead. Adding extra stemware solely to display bows defeats the space-saving benefit.
Good fit: Tables already set with stemmed glasses and simple dinnerware.
10. Lay the Name Cards Flat on the Plates
Place cards are helpful when you want to guide where guests sit, but the holders can become another row of little objects to navigate. A flat card on the napkin makes the same welcome feel personal. It stays within the plate’s footprint and can be moved easily before the food arrives.
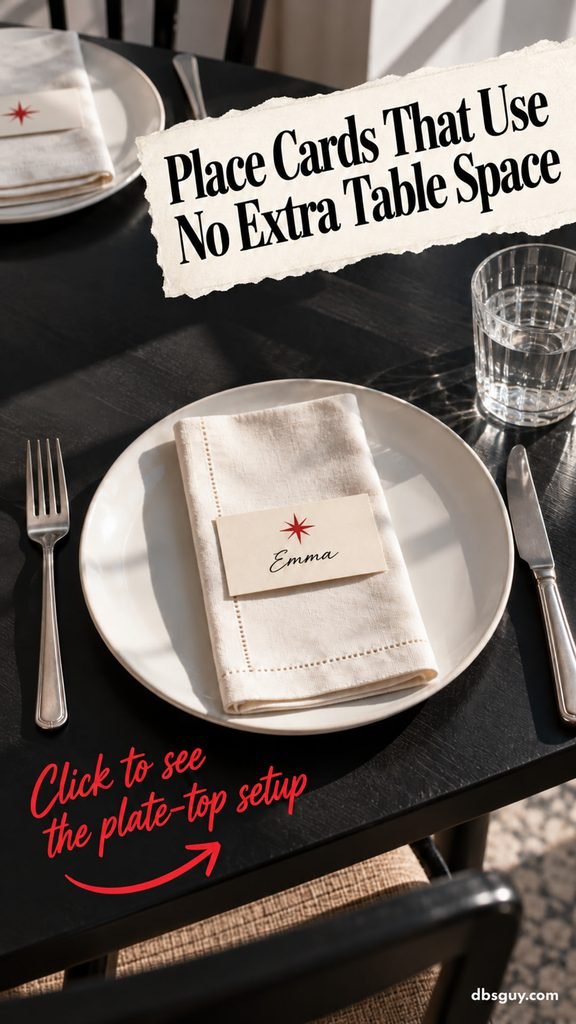
What you need: Small pieces of cardstock, a pen, and an optional simple printed or drawn motif.
How to set it up:
- Write each name on a small card that fits fully on the folded napkin. A business-card-sized rectangle is a useful starting point, rather than a rule.
- Add one modest Christmas detail, such as a red star or a tiny printed evergreen. Let any ink dry fully before putting the cards on the napkins.
- Set a card flat at each place. Decide where guests can put it once they sit down, such as a nearby shelf or a small envelope collected before dinner.
Finishing tip: Use the card to add a little warmth: a short ‘Glad you’re here’ on the back is enough. Keep names large and clear so guests do not have to lift every card to read it.
If you are also using ribbon napkins, place the card where it does not hide the bow or make the fold bulky. For a very small setting, choose one of those details as the main feature.
Good fit: Holiday dinners with assigned seats and tables that cannot spare room for card stands.
11. Give the Bread Basket a Festive Liner
When bread is part of the meal, the basket already needs a place on the table. A red gingham or holiday-colored liner turns that useful item into part of the decoration. The basket looks welcoming, and you have one fewer purely decorative piece to make room for.
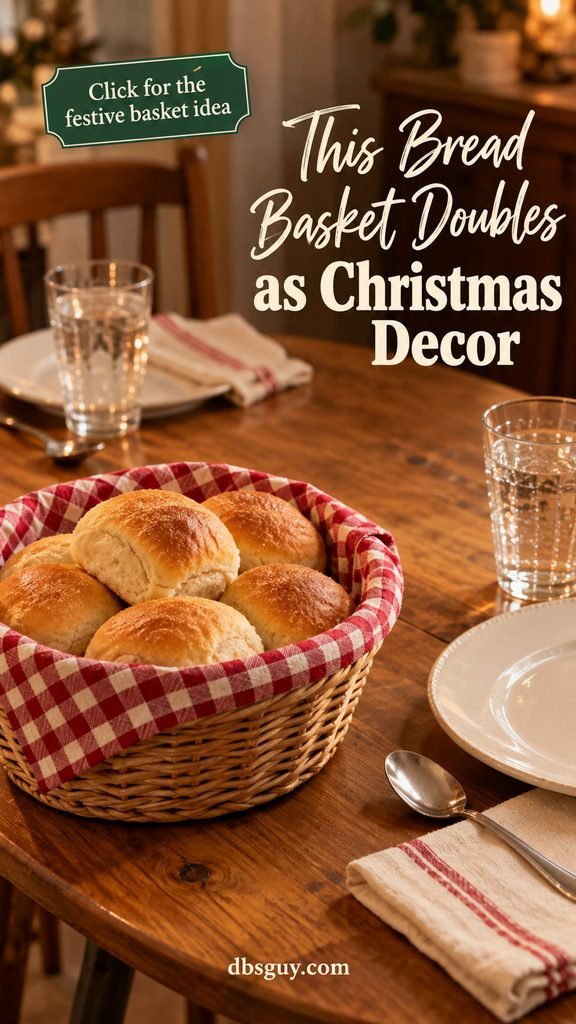
What you need: A clean basket intended for food, a freshly laundered suitable cloth liner, and the bread you are serving.
How to set it up:
- Choose a basket that holds the amount of bread you actually need at the table. Keep extra rolls in the kitchen and refill the basket if necessary.
- Line it neatly, with the cloth tucked inside and only a short edge showing. Keep the handles clear if the basket has them.
- Add the bread shortly before dinner and place the basket where it can be passed comfortably. Check that it does not cover another guest’s cutlery or glass.
Finishing tip: Let the liner echo one existing Christmas color. Red-and-white checks with cream napkins feel cozy; a solid green cloth works with a patterned tablecloth.
Keep the bread area for bread and its clean liner. Pinecones, ornaments, and craft greenery belong elsewhere. If you are not serving bread, pick another idea rather than adding a basket just for decoration.
Good fit: Casual Christmas dinners where a bread basket is already part of the meal.
12. Let One Beautiful Serving Bowl Be the Centerpiece
The most useful centerpiece on a small dinner table may be the dish holding dinner. An evergreen serving bowl, a red platter, or a simple white bowl with an attractive shape can provide the focal point. You can enjoy a table that looks ready for a celebration and ready to eat at the same time.
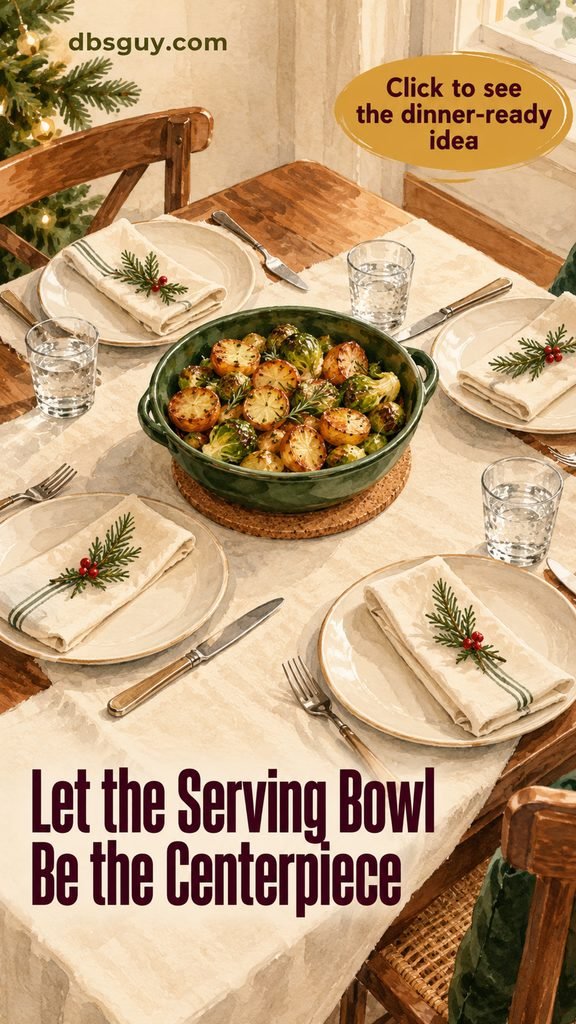
What you need: One food-safe serving dish, the food it will hold, and a suitable trivet if needed.
How to set it up:
- Choose the dish according to the portion and how you plan to serve it. A pretty oversized bowl is still oversized if it leaves no room for the plates.
- Try it empty on the table first, including the serving utensil. Arrange the place settings so guests can reach the bowl or pass it without squeezing between glasses.
- Use its color as the decoration cue. Repeat that color in one small existing item, such as the napkins, then bring out the filled bowl when dinner is ready.
Finishing tip: If your serving pieces are all white, their shape and the color of the food can still create a lovely focal point. You do not need to buy green ceramics to make this idea work.
Use a dish intended for food and follow its temperature and care instructions. Keep decorative objects out of the food, and use proper tabletop protection beneath a hot serving vessel.
Good fit: Very small tables where the meal uses almost the entire middle.
13. Move the Wreaths to the Chair Backs
Chair wreaths bring Christmas greenery into the dining area while freeing the tabletop. They can be especially effective when the chairs are visible from the room’s entrance. Start with one or two chairs so the decoration feels considered, then check how it works when people actually sit down.
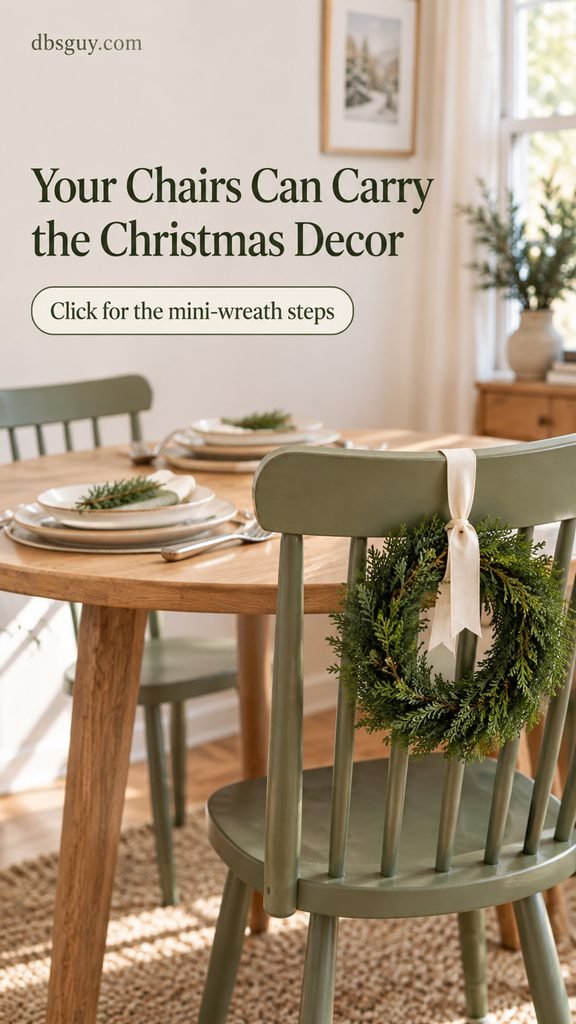
What you need: Small lightweight wreaths, soft ribbon, and chairs with a suitable open back rail.
How to set it up:
- Hold a wreath against the outside of the chair back. Choose one that sits comfortably within that area, rather than hanging past the sides or down toward the seat.
- Loop ribbon over a suitable upper rail and through the wreath, then secure it neatly. Keep the attachment easy to remove and check that it does not scratch the chair.
- Pull the chair out, sit in it, and slide it back toward the table. Adjust the wreath if it catches on clothing, blocks the seat, or gets in the way of movement.
Finishing tip: Angela Marie Made’s chair-wreath tutorial shows a ribbon attachment on open-backed chairs. Use that approach as inspiration, then choose the wreath and ribbon for your own chair shape.
For an upholstered or solid-backed chair, use an attachment method approved for that material or choose a window wreath instead. You should not need pins or adhesive on a chair’s finish to make this work.
Good fit: Open-backed dining chairs and tables that need the whole surface for serving.
14. Decorate the Window Behind the Table
The view from a dining chair can carry the Christmas mood just as well as the tabletop. A single wreath in the window behind a breakfast nook gives the area a focal point, especially when the table itself needs to stay clear. It also makes a small space feel thoughtfully decorated from across the room.
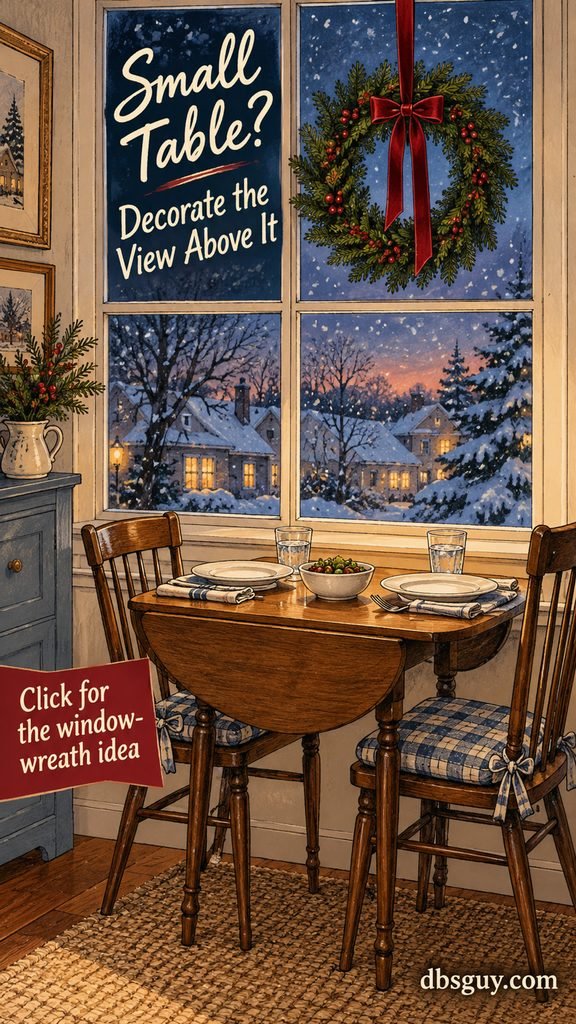
What you need: One lightweight wreath, a simple bow, and a mounting method suitable for the window and wreath.
How to set it up:
- Stand back and choose a position that works with the table’s view. Keep the decoration clear of window controls, blinds, and any window you need to open.
- Mount the wreath using hardware or a removable product rated for its weight and the particular surface. Follow that product’s installation instructions.
- Set the table with plain plates and repeat one wreath color in the napkins. Sit down to check that the display adds to the view without getting in anyone’s way.
Finishing tip: One wreath and a small bow are enough for a compact nook. If there is no suitable window, use an existing, appropriate wall hook behind the table for the same off-table effect.
Keep hanging decorations away from the food and from guests’ paths. A display behind the table is easier to live with than loose decorations dangling over the middle of dinner.
Good fit: Breakfast nooks, drop-leaf tables, and dining spots beside a window.
15. Create the Main Christmas Display on a Nearby Sideboard
If you love a more detailed Christmas display, give it a place where it can stay throughout the meal. A nearby sideboard, shelf, or narrow console can hold the little houses, greenery, and lights you enjoy. The dining table then needs only one small color connection to feel part of the scene.
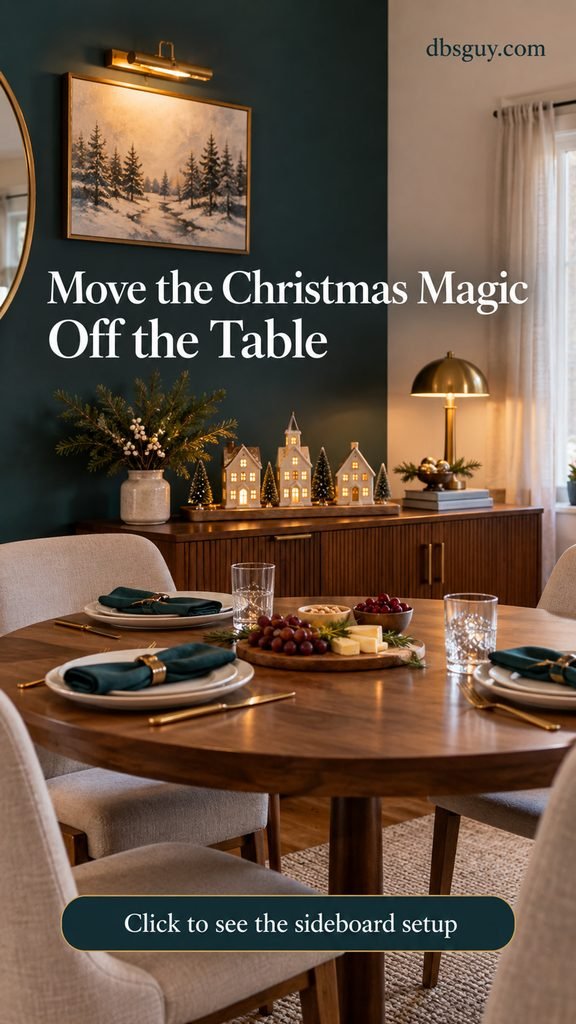
What you need: A nearby display surface, a few favorite decorations, and optional battery lights.
How to set it up:
- Choose the part of the sideboard that is not needed for food, drinks, or clearing dishes. Reserve a separate clear landing area if the surface has to serve both purposes.
- Arrange a compact group of decorations, keeping taller pieces at the back and smaller ones where they can be seen. Make sure the display is stable and clear of the serving route.
- Repeat one color from the display on the table, such as teal or green napkins. Set the dinner dishes out, then check the view from the chairs and the space for passing food.
Finishing tip: A few small ceramic houses with battery lights can make a lovely Christmas scene. Use the decorations you already enjoy; a sideboard gives them a home without making guests eat around them.
Do not fill the sideboard completely if you need it for buffet service. Keep the serving area distinct and easy to reach, with decorations behind or beside it rather than mixed among the food.
Good fit: Apartment dining rooms with a nearby shelf, sideboard, or console.
Choose the Setup That Fits the Meal
For a table for two, start with ribbon napkins and either one tiny plant or a wreath in the view behind you. For a small round table, a patterned cloth can provide all the decoration; add an ornament bowl only if the serving dishes still fit.
For a narrow rectangular table, begin with a flat runner and let the food occupy the middle. If you want more glow or greenery, try one compact LED cluster or chair-back wreaths rather than filling the center strip.
Just before guests arrive, set down every empty serving dish one last time. Leave the spaces you need for hot food and test whether a bowl can pass comfortably between people. Move any decoration that makes those movements awkward.
The best small Christmas table is one people can settle into. A little repeated color, a clear place for dinner, and a detail that feels welcoming will do more for the evening than a table that has to be dismantled halfway through the meal.




