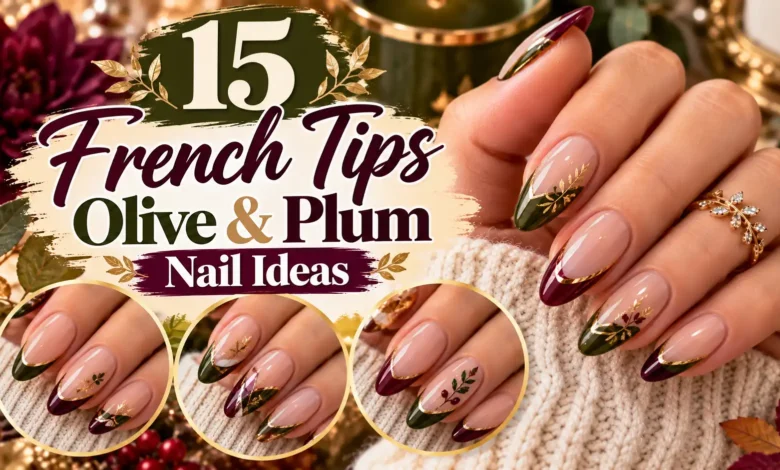
Olive and plum nails work beautifully as French tips when both shades have room to show. Alternate solid tips for the simplest version, choose a micro edge for short nails, or bring both colors onto the same tip with a split, border, or soft blend.
These 15 ideas change the shape, pattern, or finish of the French itself. Start with idea 2 for a subtle short set, 3 for a crisp two-color detail, or 13 for full-color coverage. Each reference includes the placement details worth discussing with your nail artist.
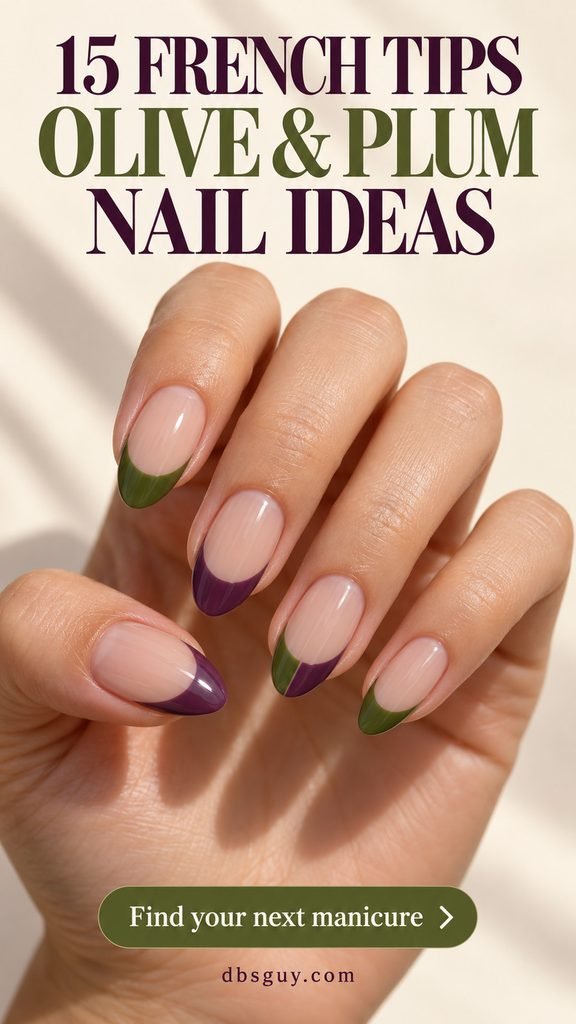
The images are AI-generated design concepts, not photographs of completed salon work. Use them to discuss color and placement; your nail length, polish, and finish will affect the result.
Choose the Two Shades Together
For this palette, start with an earthy olive and a plum that visibly leans purple. If your saved burgundy and green nails look redder than these references, ask for that wine-red version deliberately; it changes the color balance. Compare finished swatches beside your hand in daylight and ordinary room light.
A sheer beige, pink-beige, or caramel nude can leave the nail bed soft while the tips supply the color. Try the base with both shades before committing. You do not need to follow a strict warm-or-cool rule if a different combination looks better to you.
If you are saving fall nails 2026 inspiration, these designs offer a focused two-color direction. Choose the silhouette first: a tiny edge needs less room than plaid, marbling, or two separated curves.
1. Alternating Olive and Plum French Tips
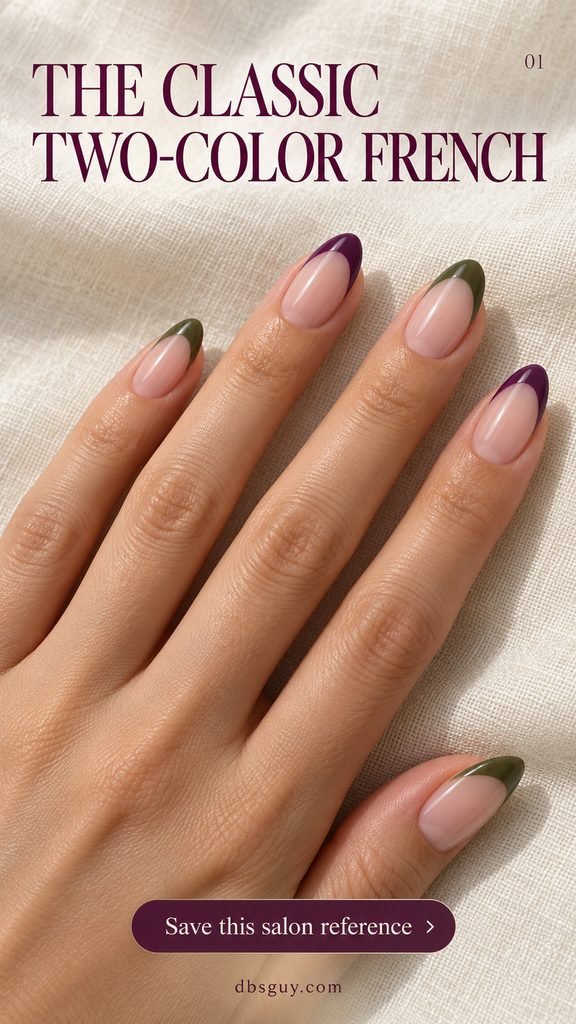
Start here if you want to see both colors clearly without adding miniature artwork. Each nail gets one solid French tip, alternating olive and plum across the hand. A sheer pink-beige base keeps the two dark shades from covering the whole nail.
Choose two polishes with a similar depth: a very pale khaki beside an almost-black purple will make the set feel uneven. Keep the colored band at a similar visual depth on each finger, adjusting for the smaller pinky. At your appointment, specify “alternating colors, the same curved French shape, and a glossy finish.”
2. Olive and Plum Micro French on Short Nails
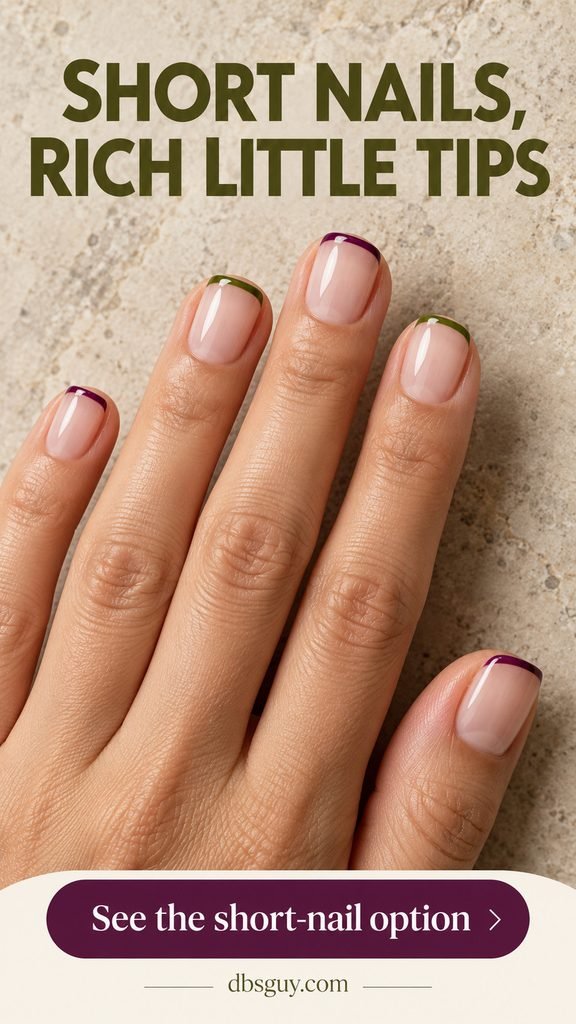
A micro French is the lightest way into olive and plum nails. The color sits in a fine line along the free edge, so even the purple feels like a small detail. The short squoval shape in the reference has softly rounded corners rather than a sharp square outline.
Ask to approve the width on one nail first. If the band becomes deep, you lose the barely-there effect that makes this version appealing. There is no need to squeeze both colors onto each tiny tip; alternating them preserves the palette and gives the artist a simpler edge to paint.
3. Half-Olive, Half-Plum Split Tips
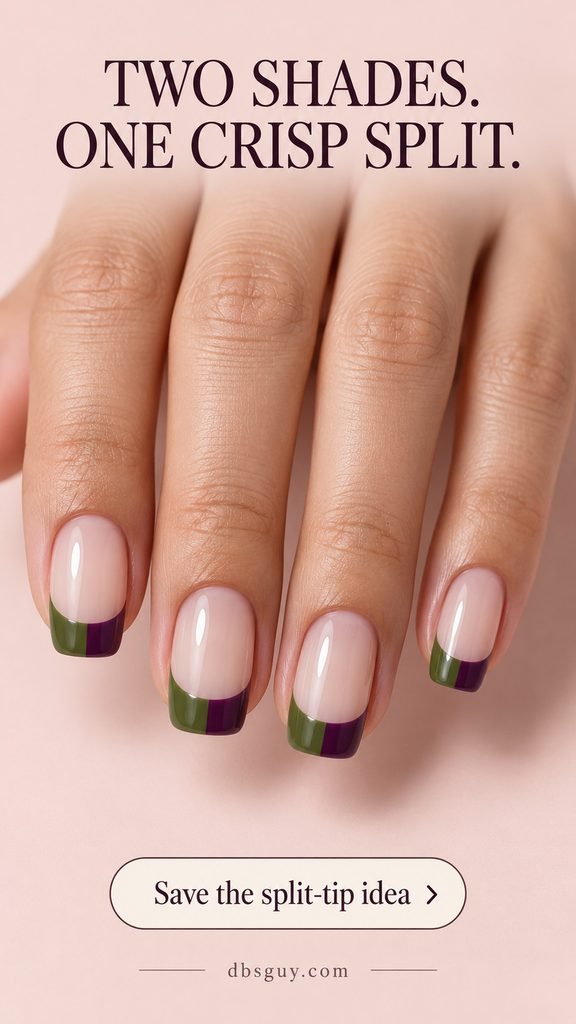
This version puts both colors on every nail. The French band follows the rounded smile line, while a straight seam divides the colored tip into olive and plum halves. The soft-square free edge gives that little division a tidy frame.
The seam should stop where the tip meets the nude base. Carrying it down the nail would turn the look into a different color-block design. For a more restrained adaptation, use the split on two accent nails and alternate plain olive and plum tips on the others. Keep the same left-to-right color order if you want a coordinated set.
4. Olive Tips With a Floating Plum Curve
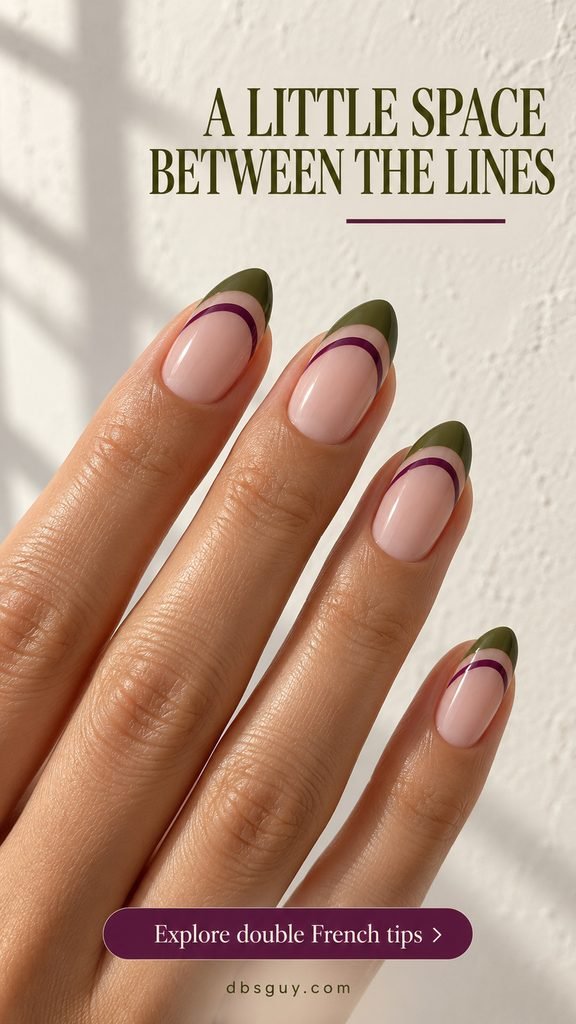
A fine plum curve floats just below the filled olive tip. The visible strip of nude between them makes this feel airy, even though there are two dark marks on each nail. Medium almond nails give the separate curves room to follow the same tapered outline.
Show the artist the gap, rather than asking only for “double French.” You want an olive band, a narrow open space, and then the plum line toward the cuticle. On shorter nails, reserve the extra arc for the ring fingers instead of making the lines so close that they merge.
5. Side-Swept Olive Tips With a Plum Corner
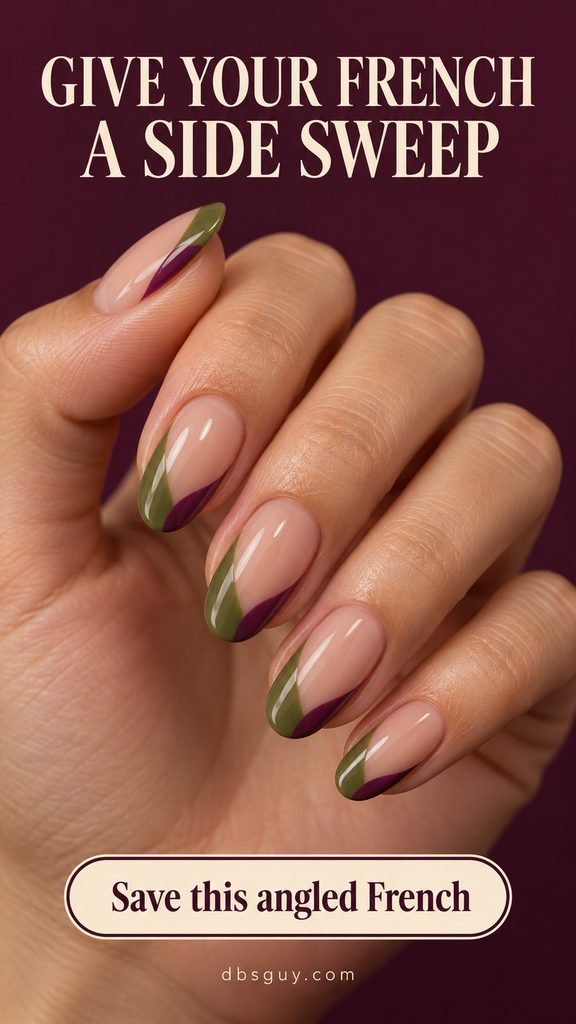
Let the olive travel farther down one side of the nail, then tuck a smaller plum swoosh into the opposite part of the edge. The open nude center makes the sweep easy to follow. This is a good option when a symmetrical French feels too formal for your taste.
Decide which color should lead before painting. In this reference, olive takes the larger area and plum stays a corner detail. Giving them equal space would make the tip look more like the chevron below. For a shorter oval nail, shorten the side sweep while keeping its direction.
6. Two-Color Chevron French Tips
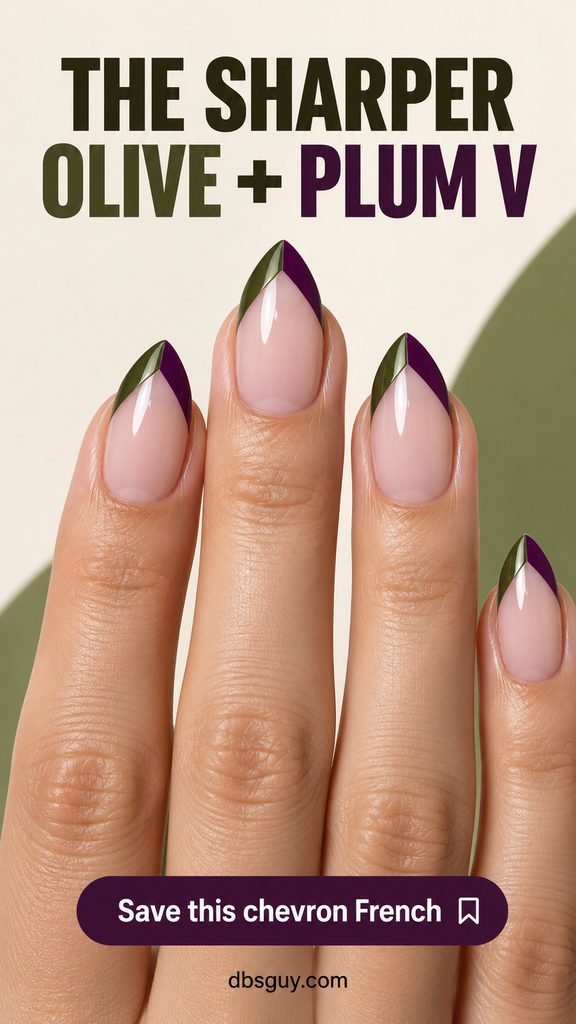
A chevron changes the geometry of the manicure. Olive forms one arm of the V, plum forms the other, and the nude base comes to a point between them. The two colors meet at the free edge, giving the almond silhouette a sharper emphasis.
The point needs to look centered on each individual nail, even when nail widths differ. Ask the artist to sketch the V before filling its arms. If you prefer a softer result, choose a shallower angle; you can keep the two-color construction without wearing a very long or pointed nail.
7. Plum French Tips With a Fine Olive Border
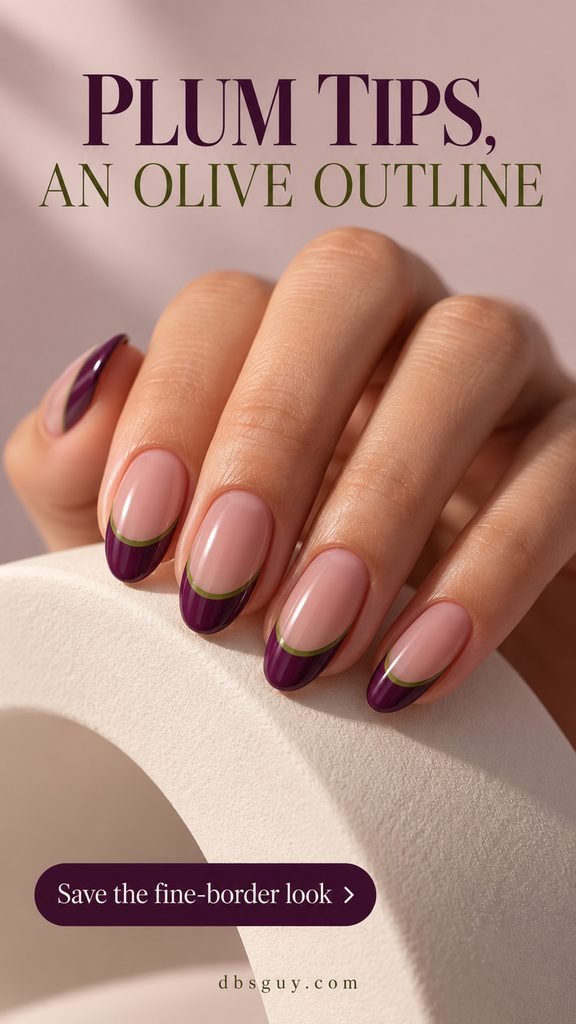
Plum takes the main role here, with olive acting as a delicate border along the smile line. Because the two colors touch, the tip reads as one outlined shape. It is a quieter way to put both shades on every nail than a half-and-half split.
Choose an olive light enough to remain visible against your plum. The border should stay much narrower than the filled purple area. If the swatches look nearly identical in room light, adjust one shade before adding more line width. For other ways to vary the purple itself, compare 19 Plum November Nail Ideas That Make Deep Purple Look So Wearable.
8. Scalloped Olive Tips With Plum Dots
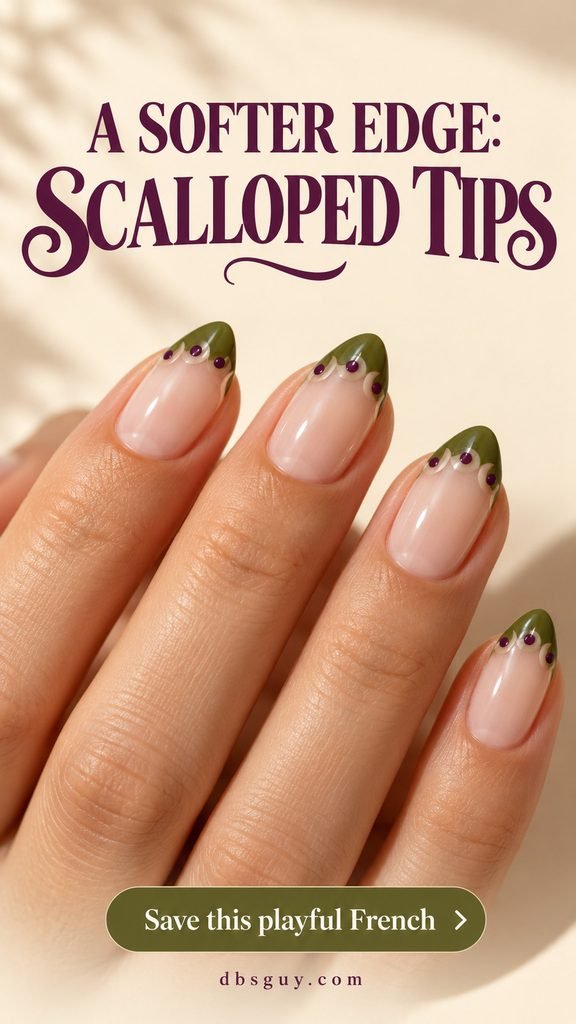
A cream scalloped trim gives the olive edge a rounded, decorative finish. Tiny plum dots sit along that border, bringing the second main color into the design without another solid band. The reference keeps the rest of the nail sheer.
Use a few broad scallops that you can recognize without zooming in. Lots of miniature bumps can become a wobbly-looking line. On a smaller nail, reduce the number of scallops and dots together. Tell your artist whether you want the dots painted flat; the glossy reference has a slightly dimensional appearance that does not have to be copied literally.
9. Plum French Tips With Olive Polka Dots
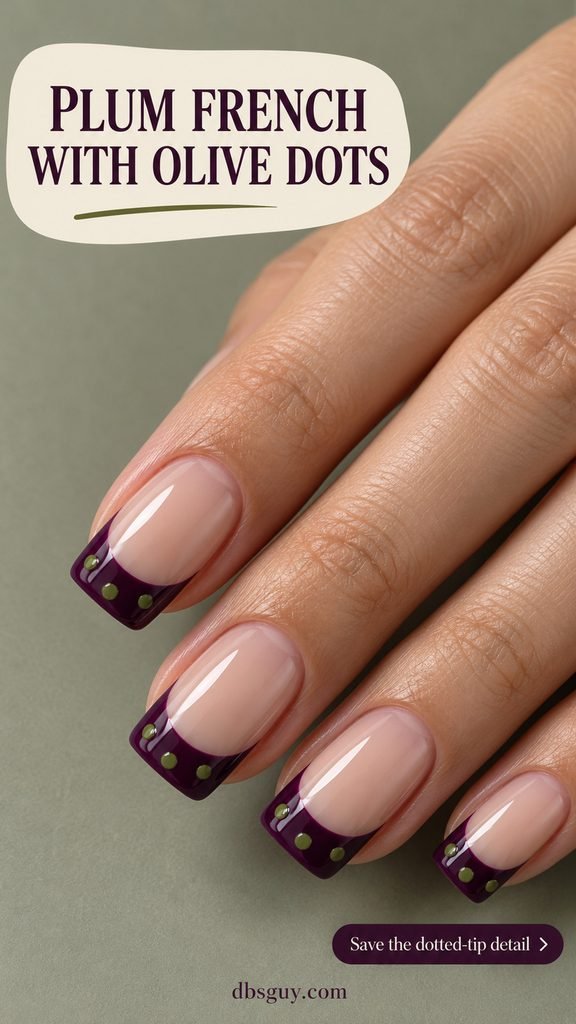
Small olive dots give a plum French a playful finish while leaving the nail beds plain. A moderately deep tip provides enough purple space around the dots. The squared edge in the reference makes the dotted band look almost like a little printed ribbon.
Keep the dot size in proportion to the tip: each needs room on all sides. If your nails are short, try two smaller dots on a tip or use the pattern on one accent. Ask for a lighter olive if the spots disappear against the purple. A painted, smooth version can suggest the same pattern as the more rounded dots shown.
10. Olive French With One Plum Plaid Accent
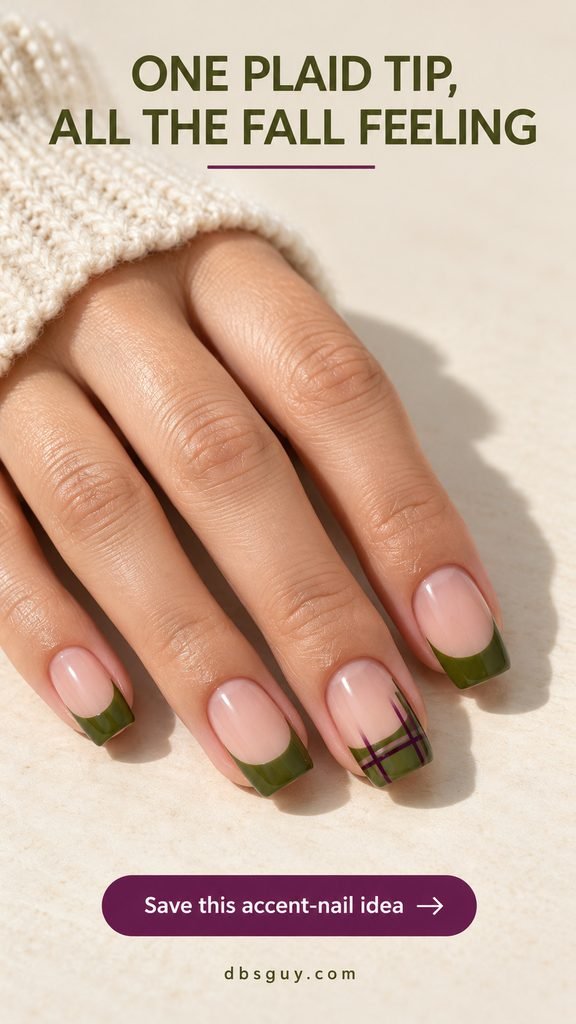
Keep most tips plain olive and give the ring finger a small plum plaid. In this reference, the crossing lines cover the tip and continue a little onto the nude base along one side. That offset placement makes the accent feel less like a rigid grid.
Before booking, send the picture and specify one patterned nail per hand. The line count can change with your nail width; preserving a few open olive spaces matters more than matching every stripe. If you want the artwork confined strictly to the French area, ask the artist to stop the lines at the smile line.
11. Olive French With a Plum Leaf Sprig
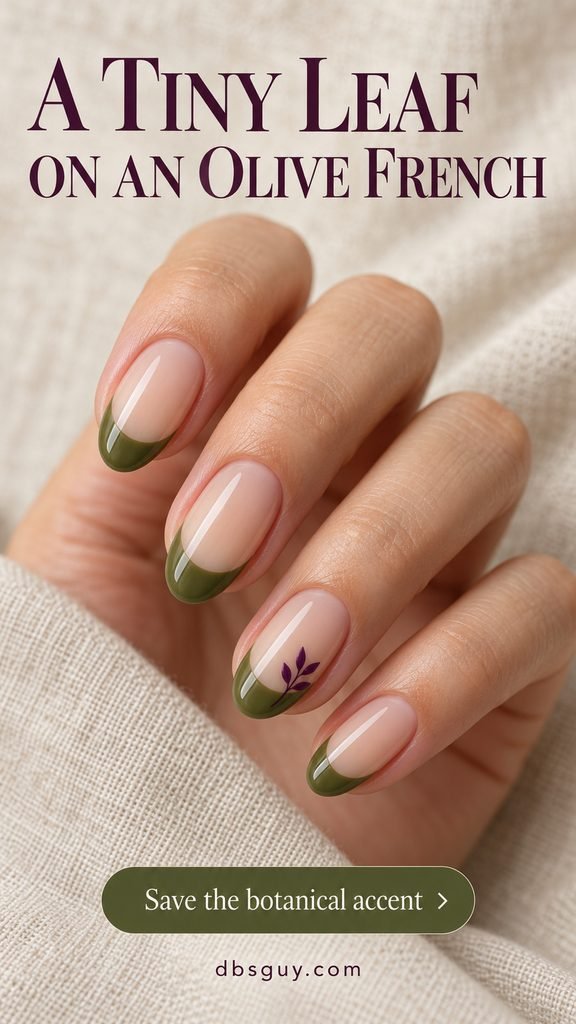
For botanical, earthy nail inspo, a single leaf sprig is enough. The fine plum stem begins near the olive tip and the little leaves rise into the sheer base on one accent nail. Leaving the neighboring nails plain makes that small drawing the focal point.
Ask for a simple sprig with a few separate leaves, rather than a detailed branch squeezed into the same space. A purple that is clearly different from the green will keep the motif readable. If olive is the part you love most, 19 Olive Green November Nail Ideas That Pair Beautifully With Cozy Neutrals offers more ways to build around it.
12. Olive-and-Plum Marble French Tips
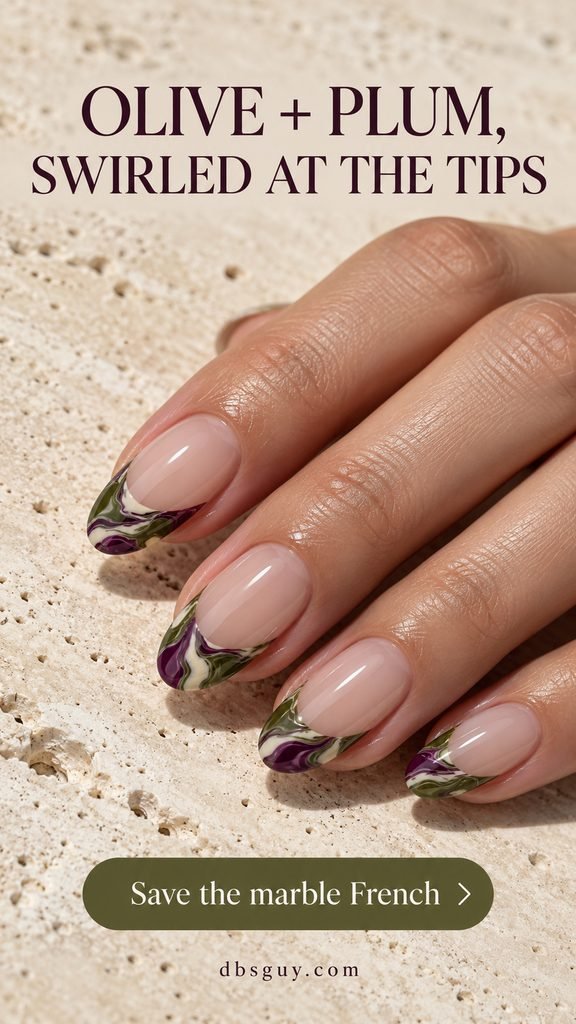
Marbling puts the movement inside the French band. Olive and plum wind around small cream ribbons, while the lower nail stays nude. The pattern can differ from finger to finger; a repeated striped arrangement would lose the irregular stone-like effect.
Choose the color balance on a sample tip. Too much mixing can blur olive and purple into a brownish center, while a few distinct trails preserve both shades. For short nails, consider one marbled accent with plain tips elsewhere. This is also a useful reference to send ahead so your artist can confirm they offer the layered artwork.
13. Matte Plum Nails With Glossy Olive Tips
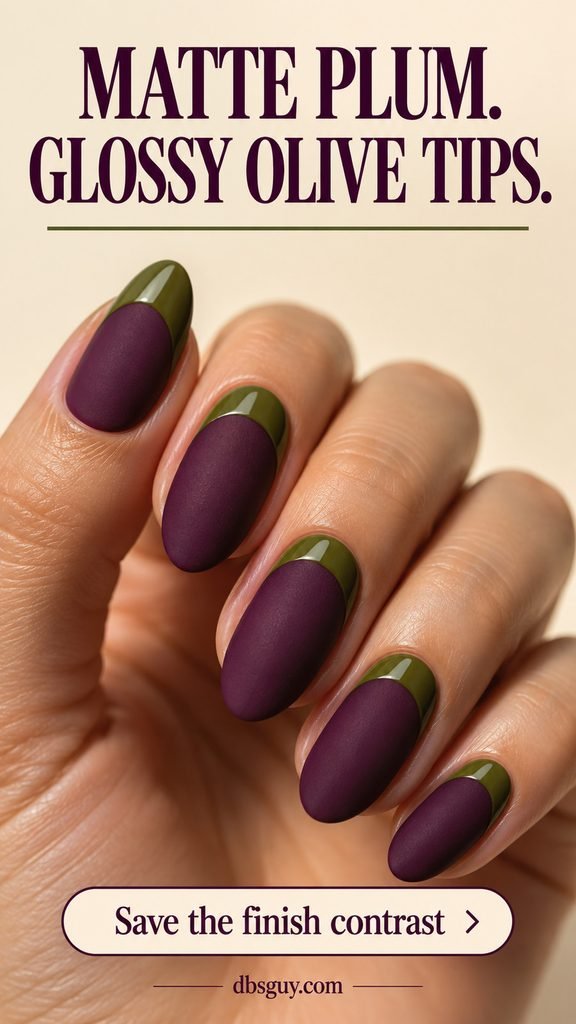
This is the fullest-coverage manicure in the collection. Matte plum fills the nail bed and glossy olive defines the French edge. There is no sheer base; the contrast comes from both the color change and the way the two surfaces reflect light.
Ask to see the plum finished matte before deciding on the shade, then check the olive beside it. The green should have a distinct glossy highlight while the purple remains softly flat. Mention the separate finishes when booking, since an all-over final gloss would remove the contrast you chose this design for.
14. Plum Cat-Eye Tips With an Olive Border
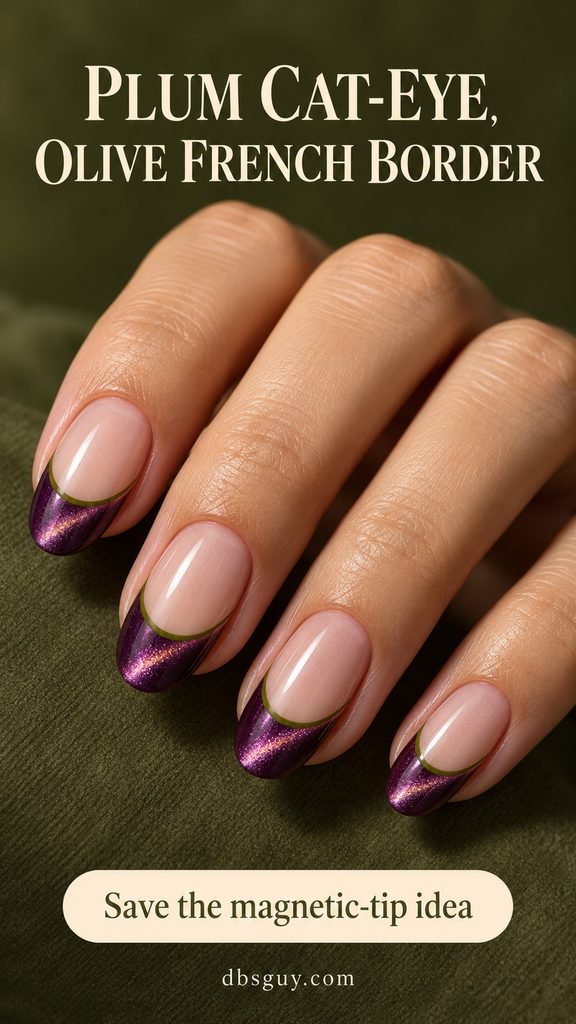
A plum cat-eye tip adds a shifting reflection to the outlined French. The sheer base keeps the shimmer concentrated at the edge, and the olive border gives it a precise stopping point. This is a more luminous alternative to the plain cream-color version in idea 7.
Choose an artist who offers magnetic polish and ask to view a sample from several angles. A still image captures only one light position. Specify “magnetic plum tips, nude nail beds, and a thin olive border,” since full-coverage cat-eye nails would give you a different balance. The exact reflection will depend on the product and how the artist arranges it.
15. Olive-to-Plum Gradient French Tips
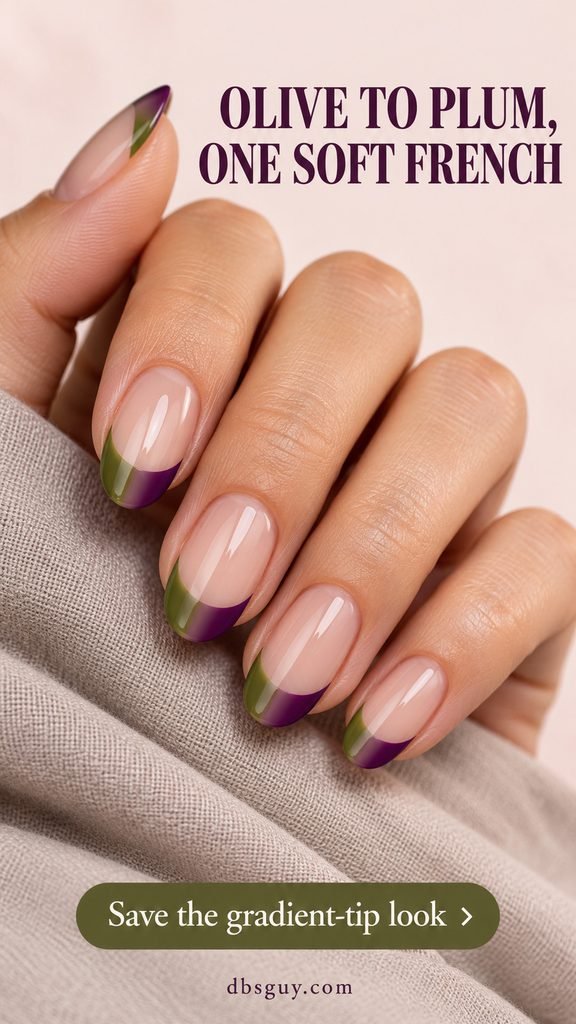
Instead of a hard split, let olive soften into plum across the width of each French tip. The reference has a narrow, muted transition in the middle, with recognizable green and purple at the sides. A crisp curved smile line keeps the blend looking like a French manicure.
Explain the direction clearly: the fade travels side to side, not from the free edge toward the cuticle. A wider tip gives both end colors room to show. If a sample looks mostly muddy through the center, reduce the blended area or choose the crisp split-tip version in idea 3.
Make Your Reference Easy to Explain at the Salon
Save one full-hand image and name the feature you want to preserve: the open gap in idea 4, the centered V in idea 6, or the matte plum base in idea 13. Then agree on your actual nail shape, how deep the tips should be, and how many accents you want.
For detailed art, send the reference when booking and request a quote for that exact version. A fine border, a hand-painted leaf, and a magnetic finish are different services; the picture alone does not establish appointment time or price. Ask to see the first completed accent before repeating it.
Questions Before You Choose Your French Tips
Which version suits very short nails?
Start with the micro French in idea 2. A simple alternating tip also works if there is enough room for a visible colored edge. For patterns, use fewer dots or one accent rather than trying to reproduce a long-nail design at miniature scale.
Can I try these with regular nail polish?
Yes—the plain alternating tips are a sensible first attempt. Essie’s French manicure guide uses a base coat, sheer color, a fine brush for the curved tip, and top coat after the color dries. Adapt the tip color to olive and plum, following your products’ directions. Practice the curve in short strokes and check its balance before filling the band. Magnetic and mixed-finish looks need the appropriate products and their instructions.
Do I need extensions for olive and plum French tips?
No. The short micro design can use your natural length. A deeper V, layered curve, or intricate pattern may need more space than your current nails provide. Ask your artist to show a shallower or accent-only version before deciding whether you want added length.
What if the colors look almost black together?
Compare a lighter olive and a more visibly purple plum. Check them with the intended top coat, since the finished surface is what you will see. Adding extra artwork will not solve a pairing whose two main colors already disappear into each other.
Also Read
For a wider autumn palette beyond olive and plum, explore 25 November Nail Ideas That Give Classic French Tips an Unexpected Fall Twist.