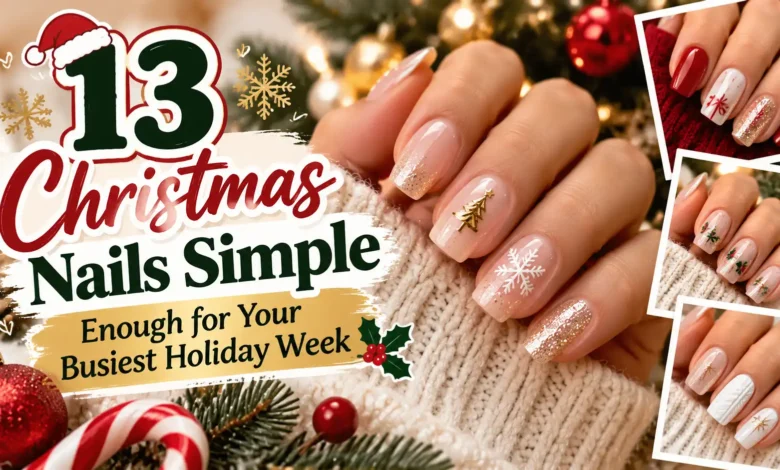
If your holiday week already includes work, gift wrapping, and a grocery run you keep putting off, choose a manicure with fewer decisions: one festive color, one accent nail, or one small sticker. You can get a Christmas look without painting ten miniature scenes.
These 13 simple Christmas nail ideas are arranged by what you feel comfortable doing. Start with the brush-only looks if nail art usually frustrates you. Move to dots, stickers, or a single line when you want a little more detail. Every design can stay short; none needs extensions.

The images are AI-generated nail-design concepts, not photographs of tested manicures. Colors and finishes will vary with your polish and lighting.
Pick Your Look Before You Open the Polish
- No nail-art tools: choose cherry red, pine shimmer, champagne shimmer, the color swap, or the silver accent (ideas 1–5).
- A little placement work: try the soft glitter edge or snow dots (ideas 6–7).
- A recognizable Christmas detail: choose holly, candy stripes, a tree, a star, or a bow. Stickers simplify the small motifs.
- Comfortable with a liner brush: try the candy stripes or single gold line (ideas 9 and 12).
A Small Setup That Keeps the Manicure Manageable
Set out only the polish and tools for your chosen design, plus remover, a small cleanup brush, and compatible base and top coats if your polish calls for them. Start with clean, dry nails, smooth any rough free edges with a file, and follow the product directions for preparation, coats, and drying. These ideas use ordinary air-dry nail polish; they do not require a curing lamp.
Do the tasks that need your hands first: open packaging, change clothes, and finish the dishes. Then give the manicure a clear drying window. A simple design reduces painting work, but it does not make the polish dry immediately. Follow your particular formula rather than treating any look here as a guaranteed five-minute manicure.
Keep cuticle prep gentle. The American Academy of Dermatology advises against cutting or forcefully pushing back cuticles and recommends moisturizing nails after polish removal. You do not need aggressive cuticle work to wear a festive color.
1. Classic Cherry Red on Short Rounded Nails
Choose this when you want the smallest supply list. A bright cherry-red cream, your usual compatible base and top coat, and a file are enough. The rounded shape keeps the silhouette simple, while the glossy finish supplies the detail.
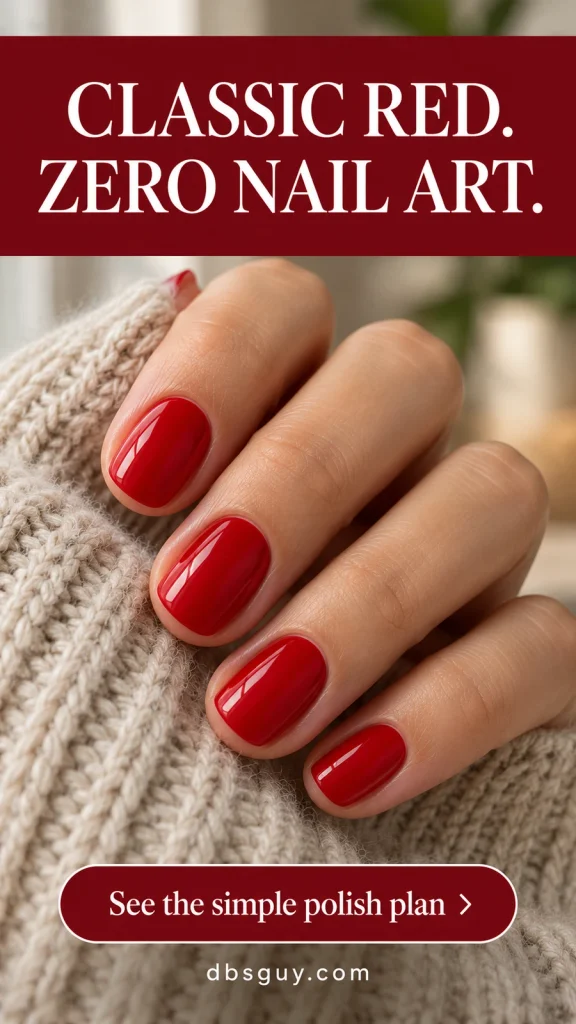
Apply the color in thin, controlled coats, following the bottle’s directions. Leave a small clean margin beside the skin instead of flooding the sides and trying to fix every edge afterward. If your nails are already short and comfortable, keep that length; reshaping them into almonds adds work this look does not need.
2. Pine Green With Shimmer Already in the Bottle
Look for a dark green polish containing fine gold shimmer, rather than buying green color and a separate glitter topper. The small particles give the finish movement without any placement work. This is a useful alternative if red competes with the outfits you plan to wear.
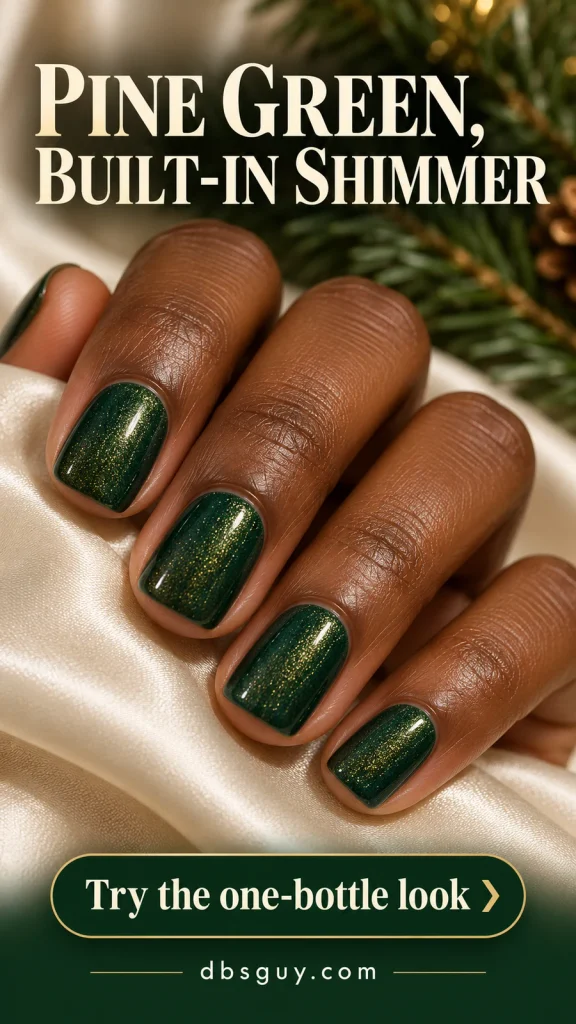
Check a painted swatch if one is available: some pine shades look nearly black indoors. Pick the depth you actually want, then use the recommended number of coats rather than building extra layers just to intensify the sparkle. A polish that requires a magnet is a different technique; choose ordinary shimmer for this version.
3. Sheer Pink With a Champagne Shimmer Wash
For a week that moves between office clothes and party clothes, a sheer pink base with a sparse champagne topper gives you a quieter option. The natural nail should remain visible. Choose tiny particles suspended in clear polish, not a dense glitter intended to cover the entire nail.
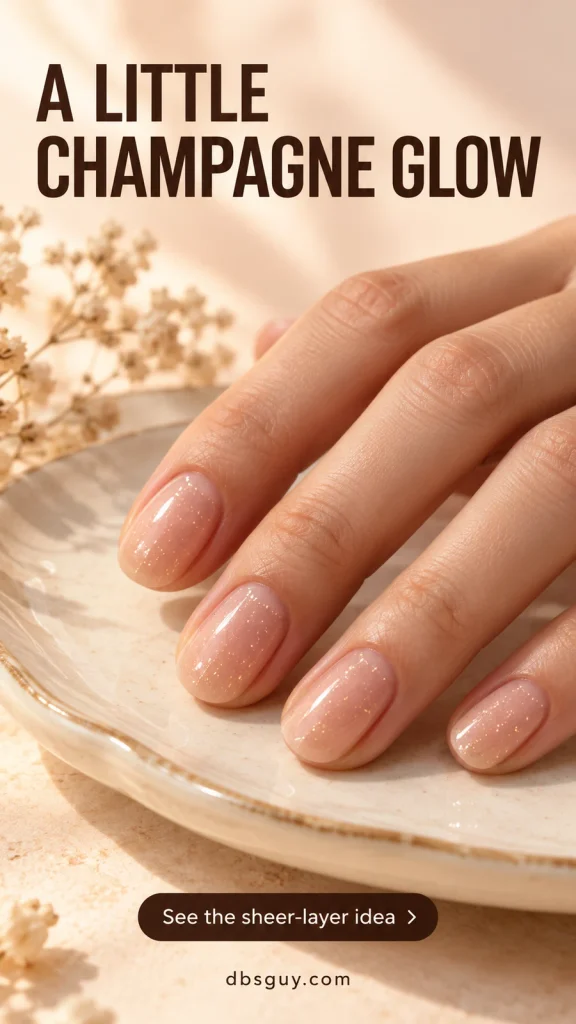
Brush a light layer over the prepared pink base and stop when you have the amount of sparkle you like. Avoid repeatedly brushing the same spot to chase an even distribution of individual particles. A few natural gaps are part of this scattered finish.
4. Red-and-Green Color Swap
Use two cream polishes and let the color order do the decorating. From thumb to pinky, try red, green, red, green, red, then repeat that sequence on the other hand. Keeping the finishes equally glossy makes the set feel connected.
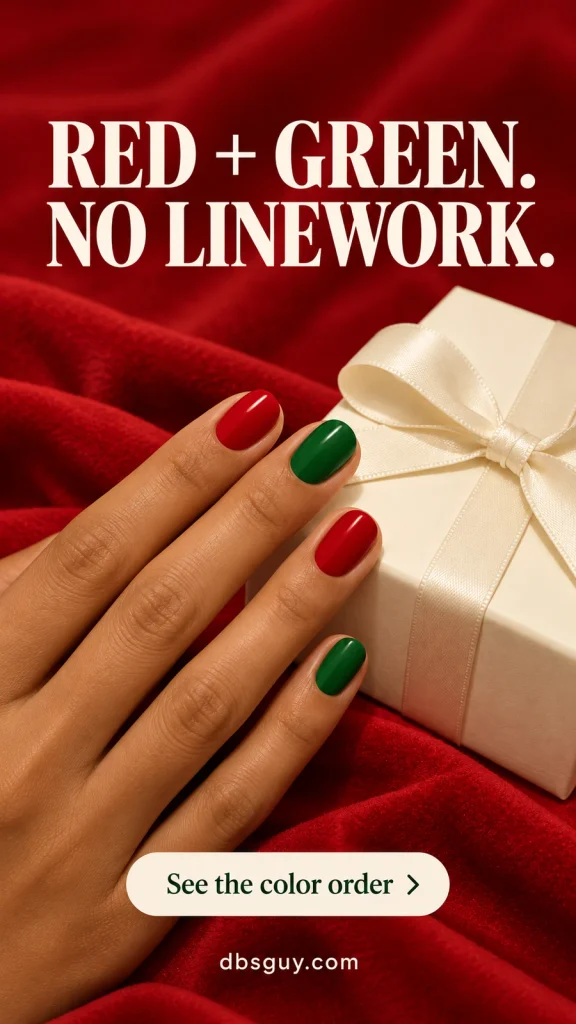
Decide the order before opening either bottle. Paint all the red nails first, then the green ones, so you are not switching bottles after every finger. This gives you both Christmas colors without the careful boundary a half-red, half-green nail would require.
5. Cranberry Nails With One Silver Accent
Paint most nails a rich cranberry cream and give the ring finger a silver-glitter finish. Unlike a glitter fade, the accent covers the entire nail, so you do not need to control where each particle lands. It is a good choice when you want one obvious sparkly detail.

Choose a silver glitter polish designed for coverage; a sparse topper may never look like the reference without too many layers. Use its application directions and leave the other nails plain. If you dislike glitter removal, choose a silver metallic polish instead and expect a smoother, less twinkly result.
6. Soft Gold Glitter Tips Without a French Line
Over a sheer pink base, lightly place gold glitter near the free edge, then draw the remaining sparkle a short distance toward the center. Leave most of the lower nail clear. A lightly loaded polish brush works for this; you do not need a makeup sponge.
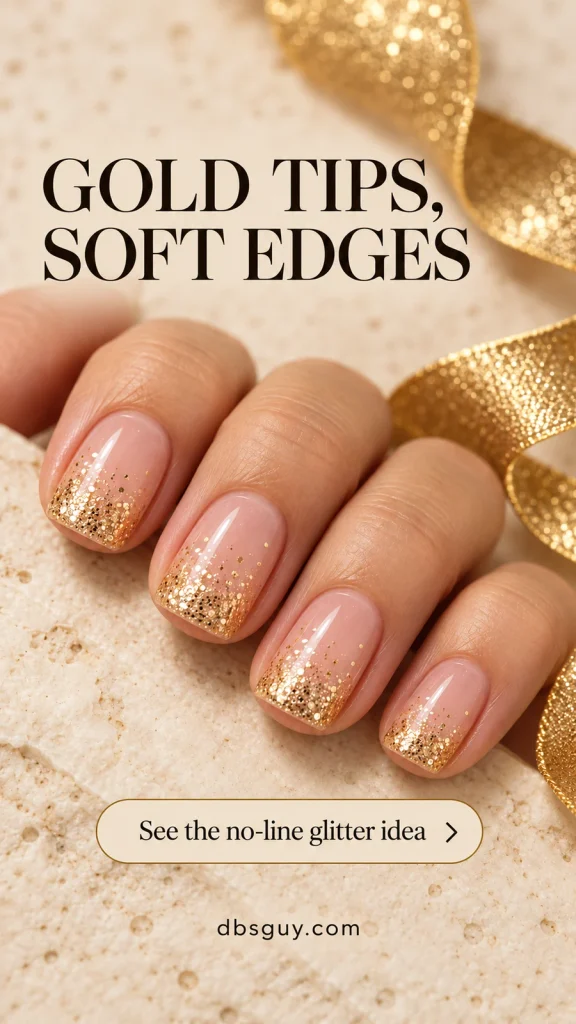
Start with less glitter than you think you need and assess the result before adding more. On very short nails, a narrow scattering at the edge is enough. If the glitter forms a thick ridge, reduce the amount rather than covering it with repeated layers of top coat.
Also read: 19 Neutral December Nail Ideas That Go With Every Holiday Outfit if you prefer a softer palette for your holiday plans.
7. Dusty Blue With Simple Snow Dots
A dusty-blue base gives white dots enough contrast to show clearly. Put a small drop of white nail polish on a disposable palette, lightly load a dotting tool, and practice a few dots before touching your nails. Use a fresh little drop if the polish becomes stringy.

Scatter a few dots over each dry blue nail, leaving open space between them. The dots can vary slightly in size; a strict grid takes more planning and looks less like snowfall. For an easier second hand, put the snow on the ring finger only and leave the remaining blue nails plain.
8. One Tiny Holly Corner
Keep a sheer pink manicure mostly bare and place one holly cluster near an outer tip corner of the ring nail. Make three small red dots close together, with a little room between them. Add two short green oval strokes beside the berries using a fine nail-art brush.

Skip veins, outlines, and pointed leaf edges. The red-and-green arrangement supplies the recognizable detail. This is a small painting task rather than a brush-only look; if those tiny strokes feel fiddly, use one flat holly nail sticker instead. Leave the other nails undecorated so the corner stays the focal point.
9. A Single Candy-Stripe Accent Nail
Paint the ring finger opaque white and the rest of the hand cherry red. Once the white base is dry enough for detail work, use a red nail-art liner to draw two slim parallel diagonal stripes across it. Keep the stripes separated by visible white space.

Rest both hands on a table while painting and move slowly through one stroke at a time. This takes more control than dots, so it is the option to choose when you enjoy a little linework. If you are already running late, use a flat candy-stripe decal; adding wet layers to repair uneven stripes will not simplify the manicure.
10. Ivory Nails With One Tree Sticker
Choose creamy ivory polish and one small, flat green tree sticker for each ring nail. Size the tree before painting: it should fit comfortably inside the nail with ivory visible around it. A tiny simple silhouette is easier to place than a large sticker reaching into the sidewalls.
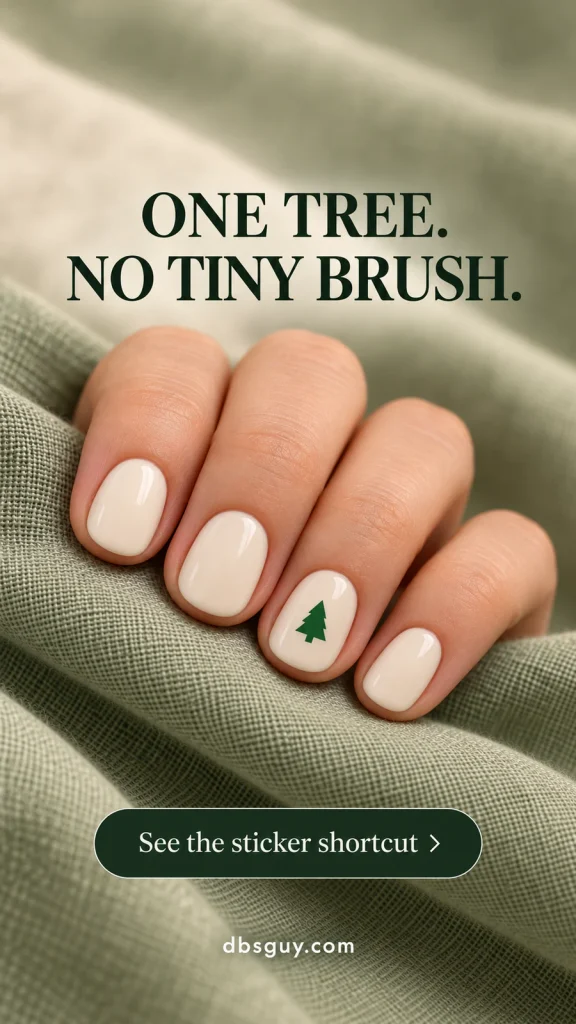
Use self-adhesive nail stickers intended for polish, and follow their directions for the base and compatible top coat. A water-slide decal needs a different application, so check the packaging. Leave off extra stars and ornaments; the single green tree already reads as Christmas.
11. Burgundy With a Flat Gold Star
One small five-point gold nail sticker stands out against a dark burgundy base. Place it in the center of the ring nail, leaving a clear border of color all around. This keeps the silhouette readable even on a short oval nail.

Choose a flat sticker rather than a raised metal charm if you want the illustrated finish. Follow the sticker’s sealing instructions and check that its points lie flat before finishing. The star can also carry the manicure into New Year’s plans, so there is no need to add a second Christmas motif.
Also read: 21 December Nails From Early Sparkle to New Year’s Eve for more ideas to carry into the end of the month.
12. Sheer Nude With One Gold Line
This is the quietest painted accent here: sheer nude-pink nails with a single fine gold line down the ring nail. Use a metallic nail-art liner over the prepared base, starting slightly inside the cuticle end and drawing toward the tip. Keep the surrounding skin clear.
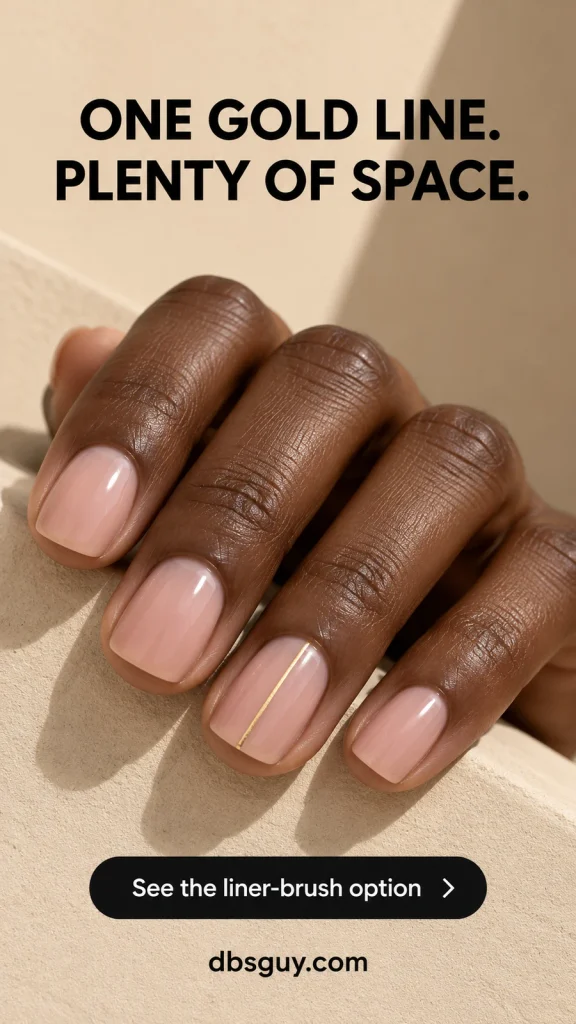
The line needs a steady hand, even though there is only one of it. Practice the brush pressure on a spare nail tip or palette first. If you would rather avoid freehand work, choose a thin pre-cut nail stripe compatible with your polish and follow its trimming and sealing directions.
13. A Tiny Red Bow on a Barely Pink Base
Choose a small red bow nail sticker with two clear loops and fine tails. Place it near an outer tip corner of the ring nail over a barely pink base. The off-center placement gives it a gift-ribbon feeling while leaving most of the nail open.
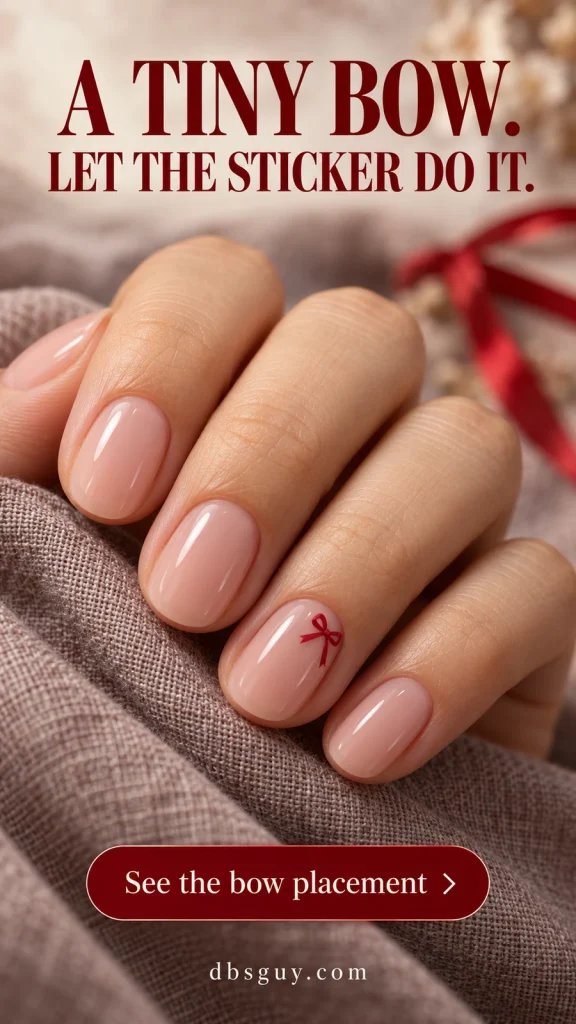
Check that the entire bow fits on the nail before pressing it down. A sticker that hangs over the edge is the wrong size for this placement; move it inward or choose a smaller one. Keep the other nails plain and follow the sticker manufacturer’s top-coat instructions. You get the bow detail without having to paint matching loops with your less steady hand.
Make the Second Hand Easier
Rest your painting hand and the hand being painted on a stable surface. For small accents, practice the tool or sticker placement before committing to the nail. If the second hand is becoming a project, keep its color the same and simplify the artwork: one dot cluster, one sticker, or no accent at all. Both hands can share a palette without matching every detail.
For stickers, distinguish self-adhesive designs from water-slide decals before you start. Follow the package instructions for when to apply them and which top coat to use. Keep every edge on the nail surface; an oversized sticker is harder to fit neatly than a small one.
Questions About Simple Christmas Nails
What is the easiest Christmas manicure for a beginner?
A solid cherry-red cream is the most straightforward choice here because it uses the normal polish brush and no artwork. Pine-green shimmer adds a more decorative finish without extra tools. If a neat base color is still challenging, practice that before adding tiny motifs.
Which designs work on very short nails?
Solid colors, fine shimmer, the red-and-green color swap, and one small accent all fit a short nail. For a tree, star, or bow, choose the sticker to fit the actual nail width. Shrink the motif or use fewer dots instead of squeezing a full-size design into a small space.
Can I make an existing manicure feel festive?
If the existing polish is intact and compatible with the added product, a small flat sticker or light shimmer topper may let you add a festive detail. Check the product instructions. If the color is peeling or lifting, remove it and start again rather than using decoration to cover the problem.
Can I skip gel for these looks?
Yes. The colors, dots, glitter, and liner accents here can be created with regular air-dry nail polish. Use stickers labeled for that type of manicure. Gel products have their own application and curing requirements; they are not interchangeable with regular polish.
How do I avoid smearing the little details?
Allow the base and artwork the drying time their products require. Apply a compatible top coat with a light hand rather than repeatedly brushing the same spot. If your first attempt drags the color, stop and allow more time before trying again; extra wet layers can make the repair harder.
For the busiest week, choose the look you can finish comfortably: plain red when you want fewer steps, shimmer when you want sparkle without placement, or one small sticker when you want a Christmas motif. Set the supplies out before you start, and leave room in the evening for the polish to dry.