21 Christmas Nails Ideas Cute: Tiny Trees, Bows and Dots You’ll Want to Show Off


Start with the detail you want to notice when you reach for your coffee: one little evergreen, a red ribbon bow, or a handful of Christmas-colored dots. A small motif gives you a clear theme while leaving room for the polish color you already like wearing.
These 21 cute Christmas nail ideas focus on three families of detail: trees, bows, and dots. Each look explains where the artwork belongs, what to keep plain, and how to simplify it for a smaller nail. You can bring a favorite reference to your nail artist or choose a flat decal or regular-polish interpretation at home.
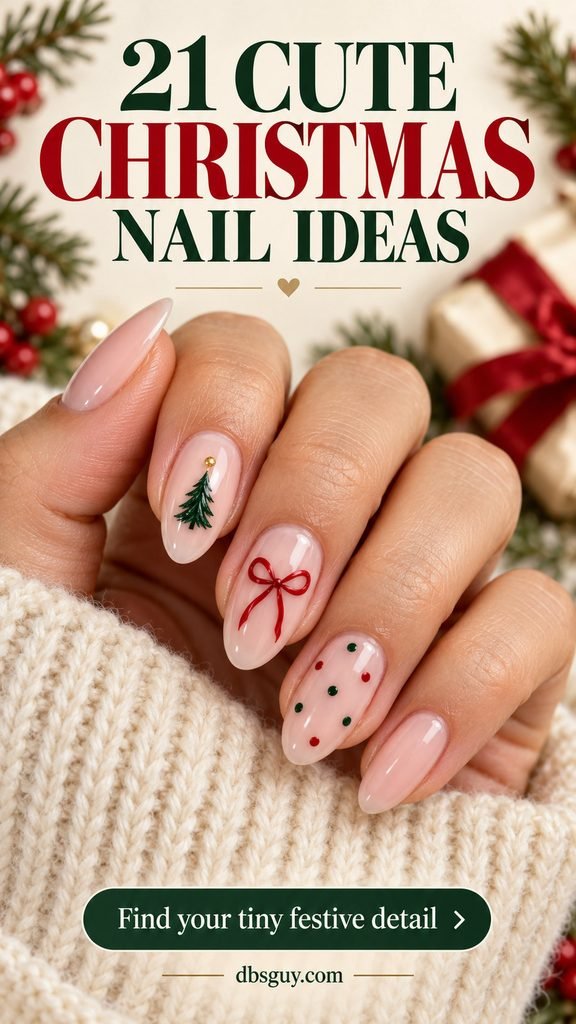
Image note: These visuals are AI-generated nail-design concepts, not photographs of completed or tested manicures. Use them to discuss color, scale, and placement; your artist can adapt the artwork to your actual nails.
Pick the Detail Before the Polish
- For one small accent: start with the single evergreen (1), side bow (8), or berry cluster (19).
- For a regular-polish project: try confetti dots (15) first. The dotted tree (2) or wreath (17) adds a placement exercise once you like your dot size.
- For a more detailed appointment: compare the miniature grove (4), striped bow (10), and scalloped-tip pairing (14). Ask whether the artwork fits the time booked.
Choose your usual comfortable length first. A motif can move to a wider nail, lose a few details, or appear on only one finger. You do not need to lengthen every nail to fit an inspiration image.
For a Regular-Polish Version at Home
Set out your base color, detail colors, a small dotting tool or fine nail-art brush, and the base and top coats recommended for your polish. A practice tip or disposable practice surface helps you check the motif before putting it on your hand. For general preparation, Essie’s at-home manicure guide covers the basic sequence from clean nails to color and finishing.
Follow your products’ directions for layers and drying. Let the base be ready before adding detail, and let the artwork dry as directed before applying top coat so you do not drag a fine red line across a pale background. Keep polish on the nail and off the surrounding skin. These are design suggestions for regular polish; they are not a gel curing guide.
1. One Little Evergreen on Milky Rose
A single green tree gives a soft manicure a Christmas focal point. Keep the surrounding nails milky rose and place the tree near the center of the ring nail, with a little gold dot above its tip. The open background makes the branch shape easy to see on a short oval.
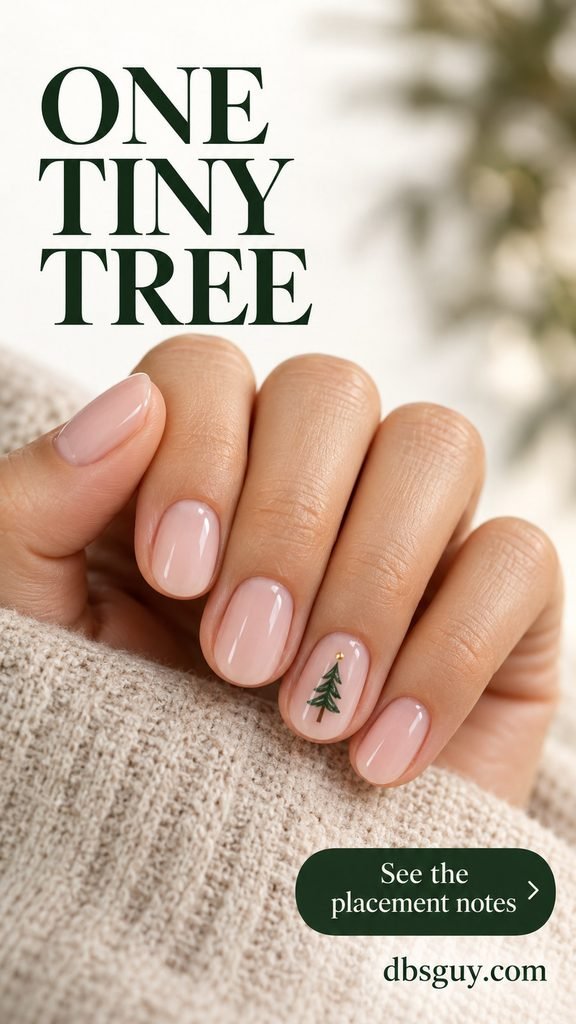
Ask for a pointed top, a few widening branch tiers, and a short trunk. The tree should sit fully inside the nail with space above and below it. For a smaller version, drop the gold dot before making the tree so tiny that its outline disappears. A compact tree decal is an alternative to painting the branches.
2. A Six-Dot Christmas Tree
This tree is built from separate green dots rather than branches. On an ivory accent nail, arrange one dot at the top, two below it, and three across the bottom, then add a short brown trunk. Keep the other nails ivory so the little triangle supplies the pattern.
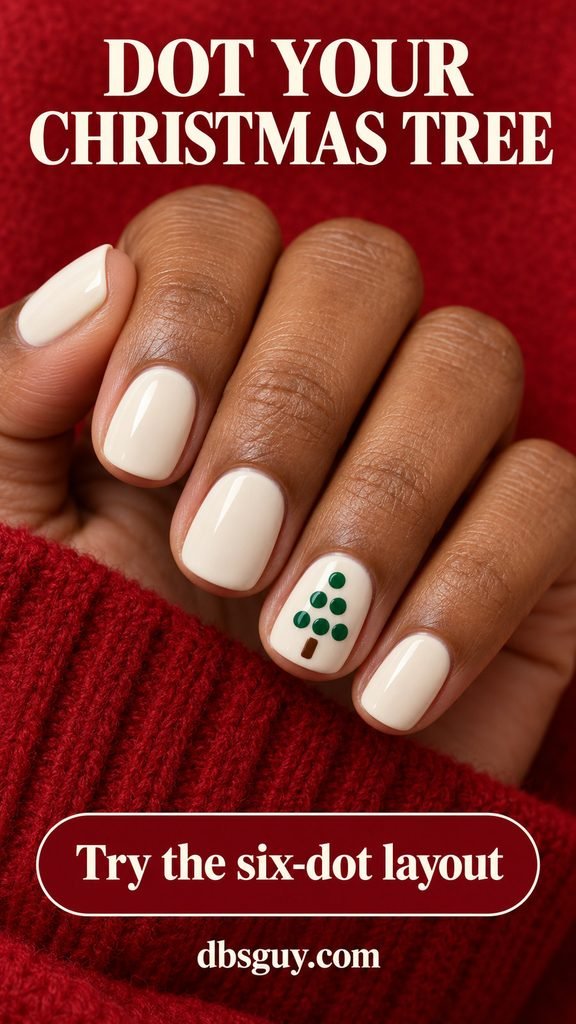
For a regular-polish attempt, map the six positions on a spare tip or practice surface first. Touch the dotting tool straight down and lift it rather than dragging. Leave ivory between the dots; if they merge, the design becomes a solid triangle. A wider accent nail gives the three-dot bottom row more breathing room.
3. A Gold Zigzag Tree on Burgundy
A fine gold zigzag suggests a tree without drawing individual branches. Burgundy gives the metallic line contrast, while a short squoval shape keeps the overall set compact. Reserve the artwork for one nail and let the remaining nails carry the rich color.
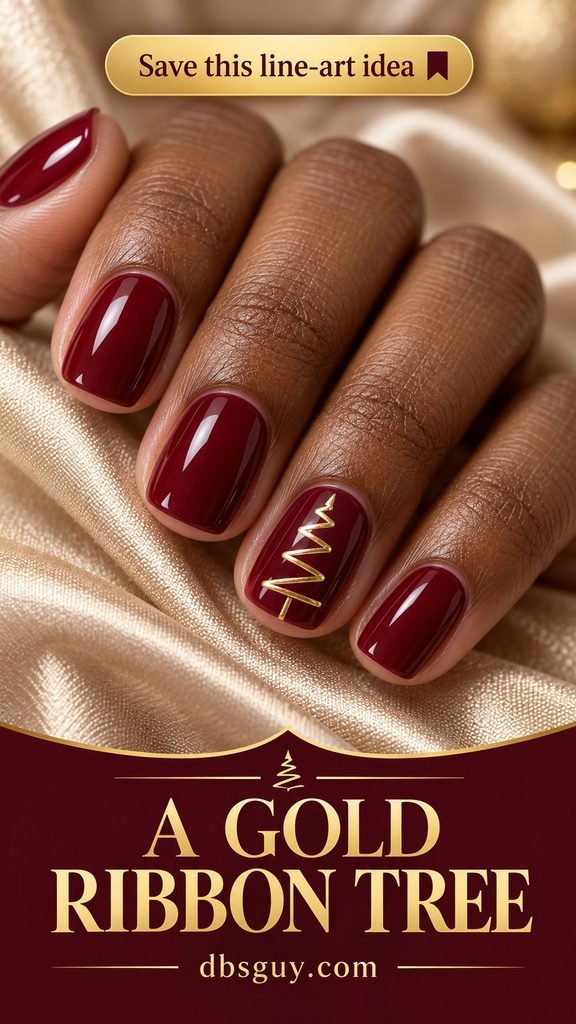
Show your artist the line shape: narrow at the top, progressively wider toward the bottom, with a tiny trunk beneath. A thick gold stripe would fill the spaces that make the zigzag readable. Keep the accent flat and skip extra ornaments; the uninterrupted line is the reason to choose this version.
4. A Miniature Tree Farm
Three little trees create a scene on one ivory nail. Use sage, evergreen, and muted teal, with the middle tree a little taller than its neighbors. The different heights make the group feel like a tiny grove rather than a repeated stamp.
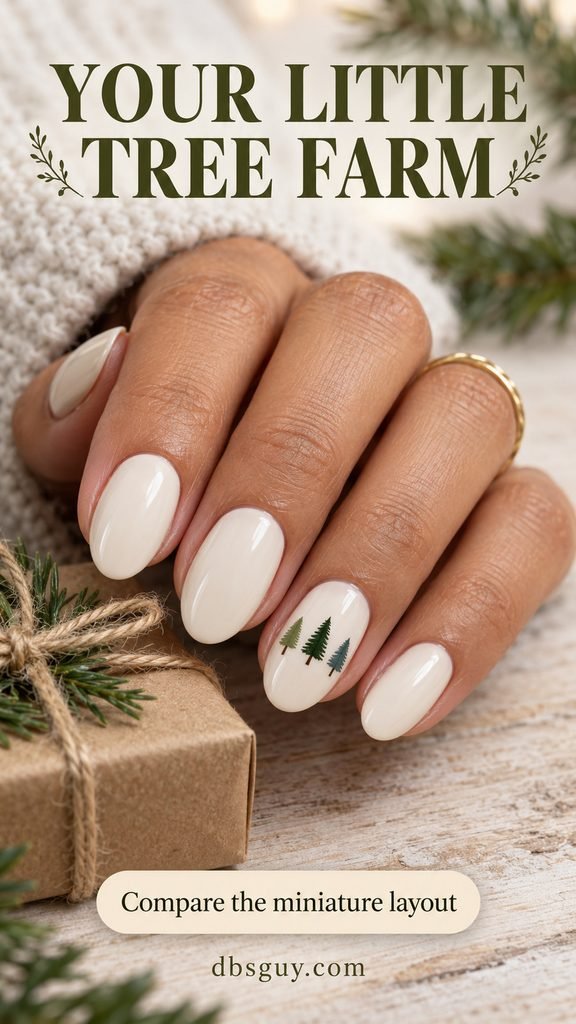
This layout needs width more than length. Ask your artist to check the three silhouettes against your actual nail before painting. If they crowd the sidewalls, move the group to a thumb or reduce it to two trees. Keep the remaining nails plain ivory; snow, stars, and a border would compete with the miniature landscape.
5. A White Tree on Forest Green
Reverse the usual pale-base tree design with a white evergreen over deep green. A few white snow dots around the accent make it feel like a winter scene. The other nails stay solid forest green, giving the white silhouette a clear place to stand out.
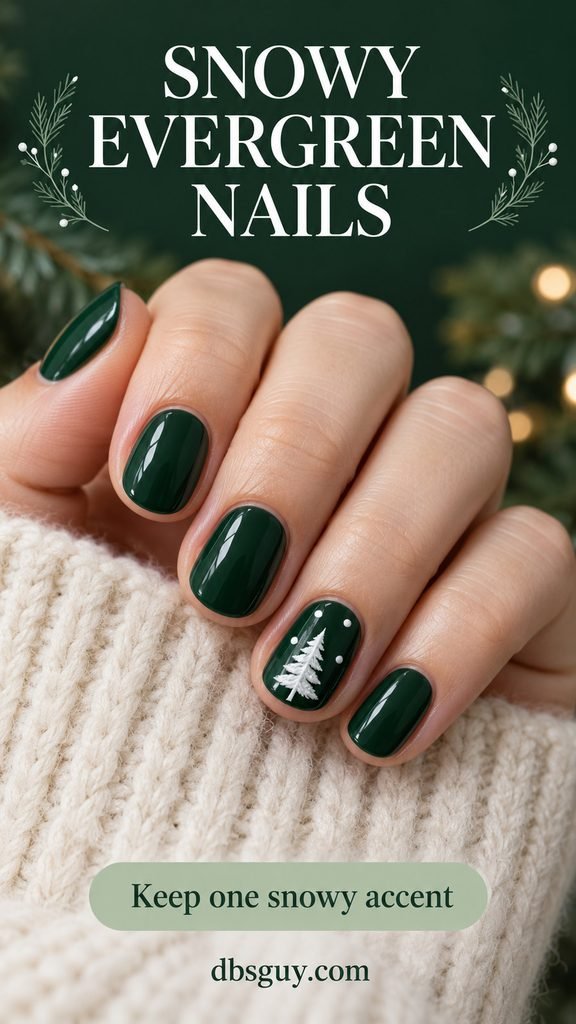
Choose this when you want the Christmas motif to be visible against a darker manicure. Ask for a recognizable pointed tree and separated snow dots, rather than a dense patch of white. If your nail is especially short, keep the tree and remove the surrounding snow. A white tree decal can supply the same contrast.
6. An Outline Tree Beneath Red French Tips
A slim red French edge frames this light manicure, while one green outline tree sits on the sheer nail body. Leaving the inside of the tree unfilled gives it a different character from the solid silhouettes. The tip and tree should read as two separate details.
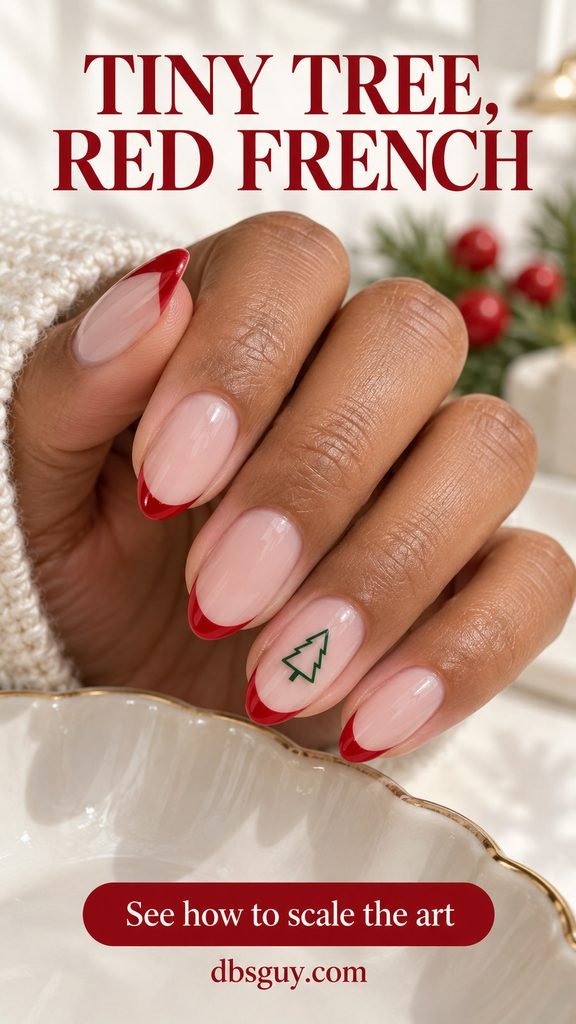
Ask for a narrow red edge and an empty triangular tree outline with a short trunk. Leave a visible gap between the top of the tree and the French tip. On a short nail, use the tree on one sheer accent without a red tip rather than forcing both details into the same small space.
Also read: 21 Short December Nail Ideas That Make Tiny Details Stand Out.
7. A Dusty-Pink Bottlebrush Tree
A pink tree on creamy vanilla offers a softer holiday palette. Fine horizontal strokes widen toward the bottom, suggesting the bristles of a miniature bottlebrush tree. One tiny gold dot above the point adds a finishing mark without turning the accent into a full ornament scene.
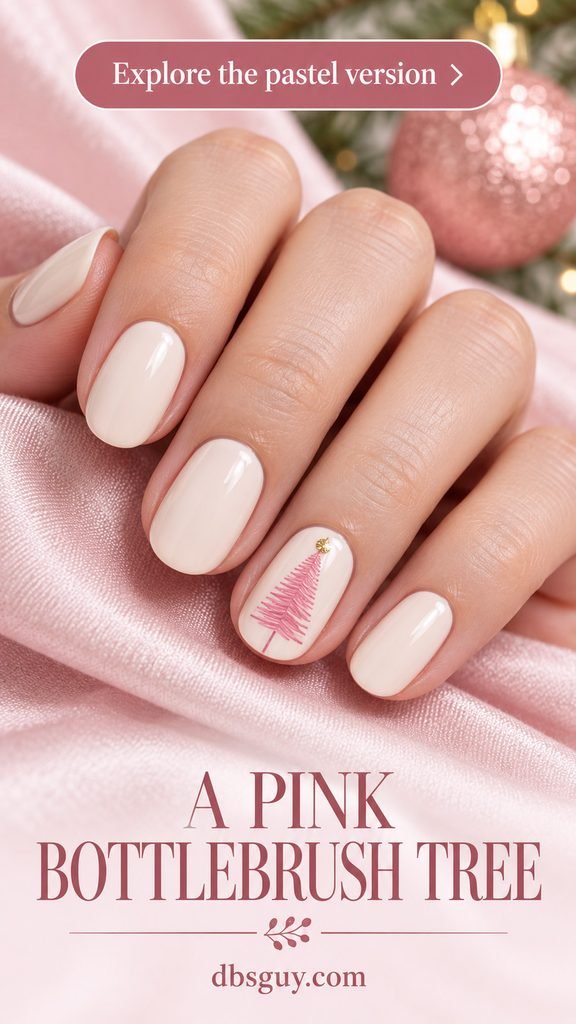
The brush-stroke texture is the detail to discuss with your artist. Ask for visible little strokes around a fine central stem, rather than an opaque pink triangle. Keep the other nails vanilla so the tree remains easy to recognize. If the strokes are too intricate for your nail size, a simple dusty-rose silhouette is a reasonable adaptation.
8. A Red Side Bow With Long Tails
Moving a bow toward one side changes the whole layout. Two airy red loops sit near the edge of a peach-nude accent, with fine tails curving downward. Most of the center stays open, so the manicure keeps the lightness of a sheer base.
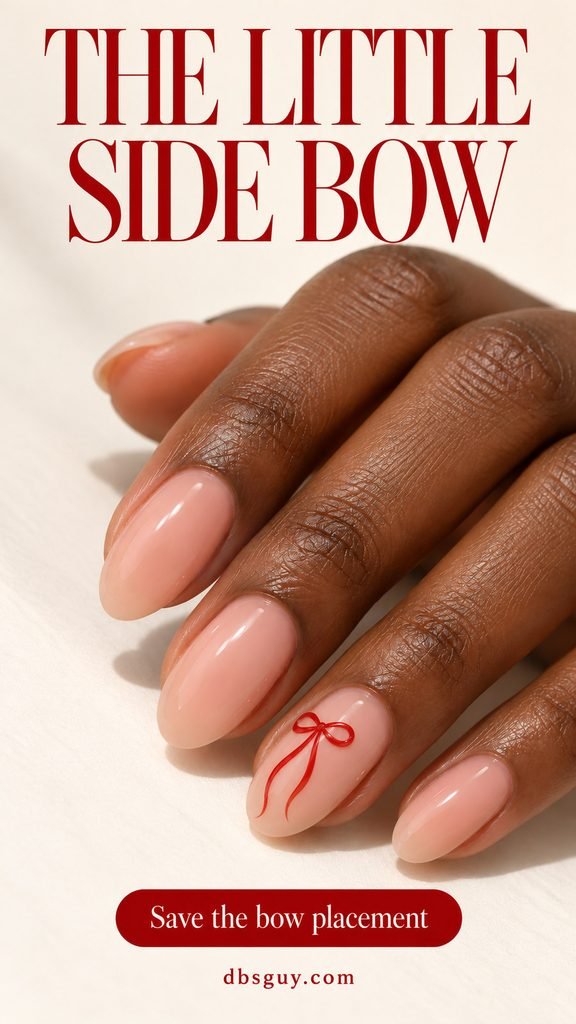
Ask for an off-center line bow, not a filled bow shape. The loops need small empty centers, and the tails should remain separate. On a narrow nail, shorten the tails before squeezing the loops together. Keep the artwork on the nail plate with a margin beside the skin; it does not need to touch the sidewall to look off-center.
9. A Gold Gift Ribbon on Green
A pair of crossed gold lines makes one green nail look gift-wrapped. Put a small bow at their meeting point near the upper part of the nail. The straight ribbon lines give this look a graphic structure that a floating bow does not have.
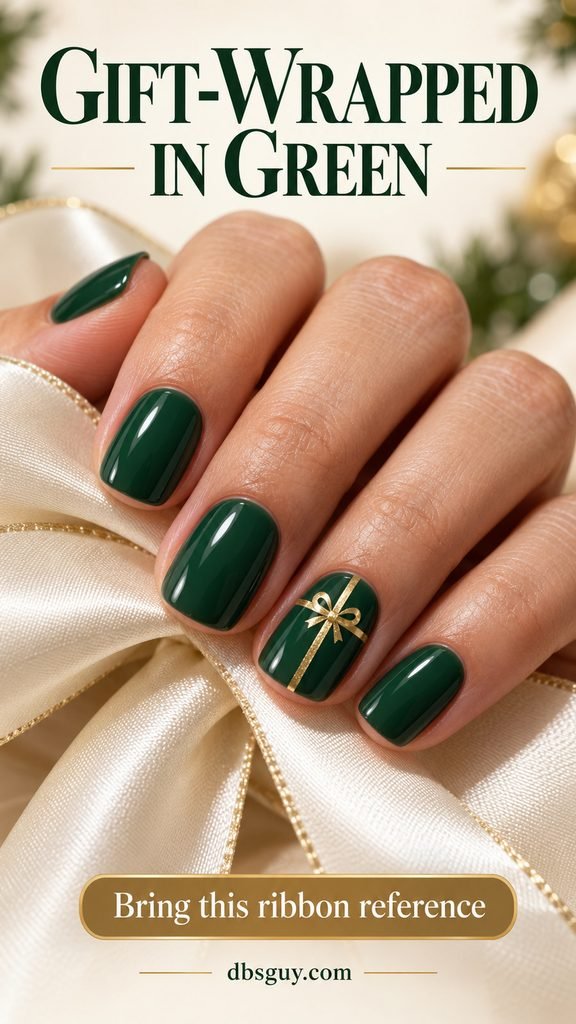
Specify flat painted gold details if you want the illustrated smooth surface. Keep both ribbon lines narrow enough that the green remains the main color. For a smaller nail, use just the vertical ribbon and its bow. Leave the rest of the set plain green rather than repeating the full gift pattern on every finger.
10. A Peppermint-Striped Bow
A red bow with fine white stripes borrows the colors of peppermint candy. Give it an ivory accent nail and surround it with glossy cherry red. The bow remains the main illustration; the stripes are a small detail inside it.
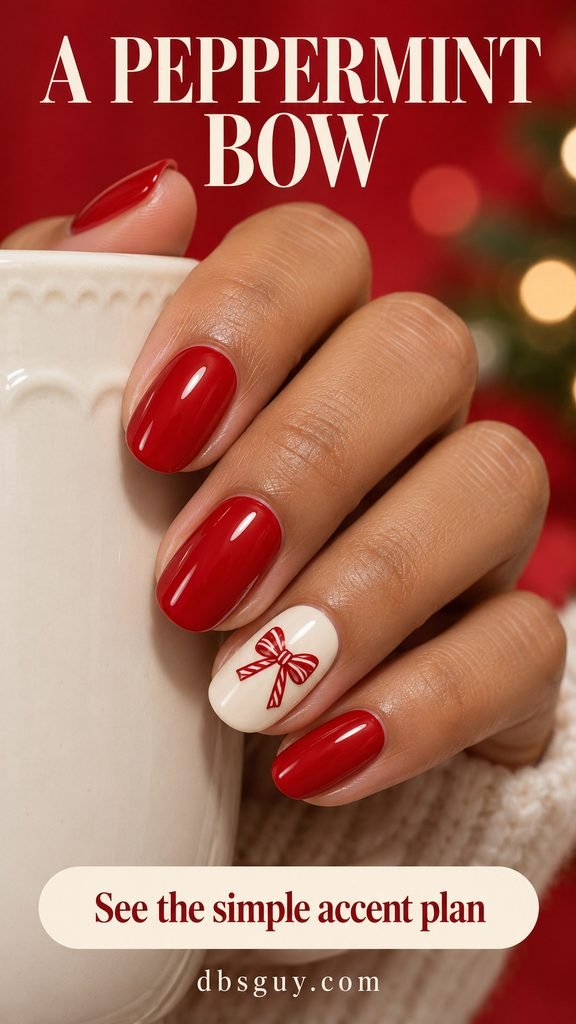
This is one to simplify thoughtfully. Start with a bow whose two loops and tails are recognizable, then add only as many white marks as the shape can hold. Too many stripes can break up the silhouette. A patterned bow decal is a practical option for home use, provided it fits with ivory space left around it.
Also read: 17 Candy Cane Nails That Are Almost Good Enough to Eat.
11. A Silver Bow at a Navy French Edge
A little silver bow sits where the navy tip meets the sheer pink base. That border placement makes the bow look tied around the French edge. The cool navy-and-silver palette suits someone who wants a winter manicure without a red-and-green color scheme.
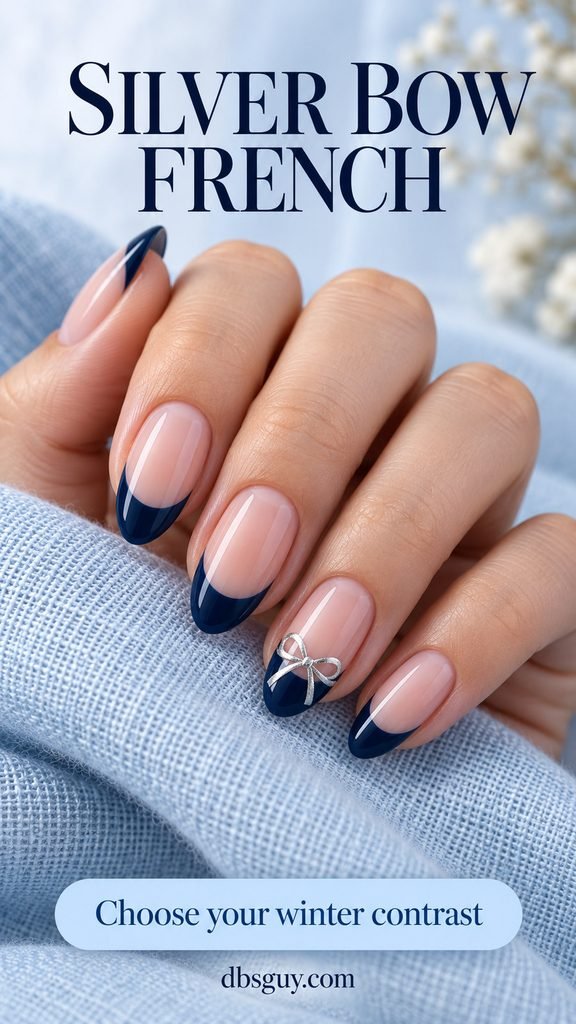
Ask for one flat silver bow straddling the French border on the ring nail. Keep the other navy tips undecorated. If the French band is deep, reduce it before adding the bow so there is still visible pink below. On very short nails, use a navy accent with a silver bow and skip the French layout.
12. A Diagonal Ivory Tie on Cocoa
A diagonal ivory ribbon gives warm cocoa nails a gift-box detail. Place the small bow near the upper end of the line rather than in the center. The slant gives the accent a sense of movement while the surrounding chocolate nails stay simple.
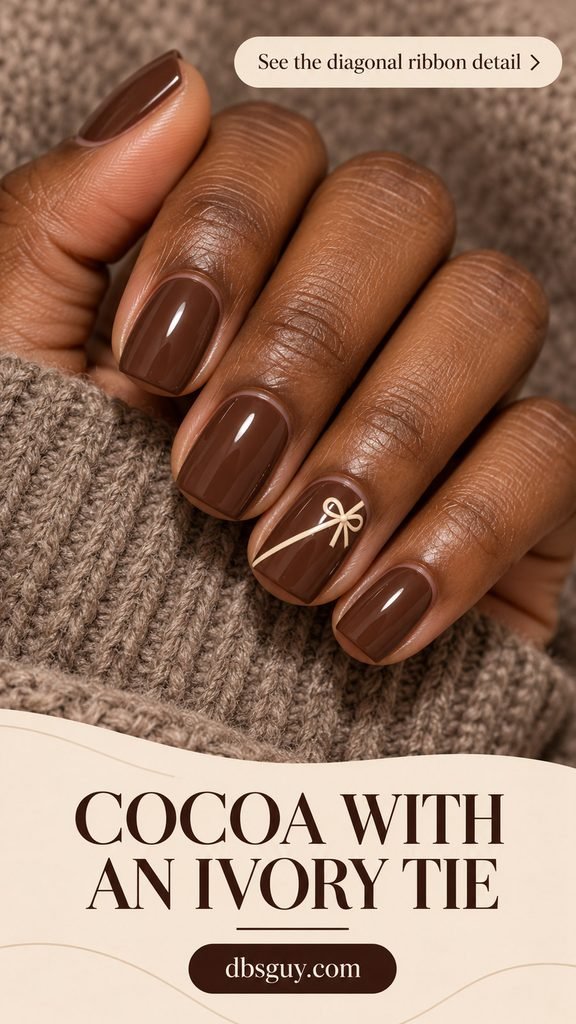
The useful salon instruction is one thin diagonal ribbon, one small outline bow, and no extra crossings. A broad cream band would make the design heavier. If you are adapting the idea with a decal, choose a diagonal ribbon-and-bow design that leaves the cocoa visible on both sides. Keep the same warm white for the ribbon and loops.
13. Two Tiny Burgundy Bows on Sheer Pink
For a paired-accent approach, put one miniature burgundy bow on each of two nails. The reference groups the two decorated fingers together while the remaining nails stay sheer pink. Repeating the same little motif gives the manicure a rhythm without covering every finger.
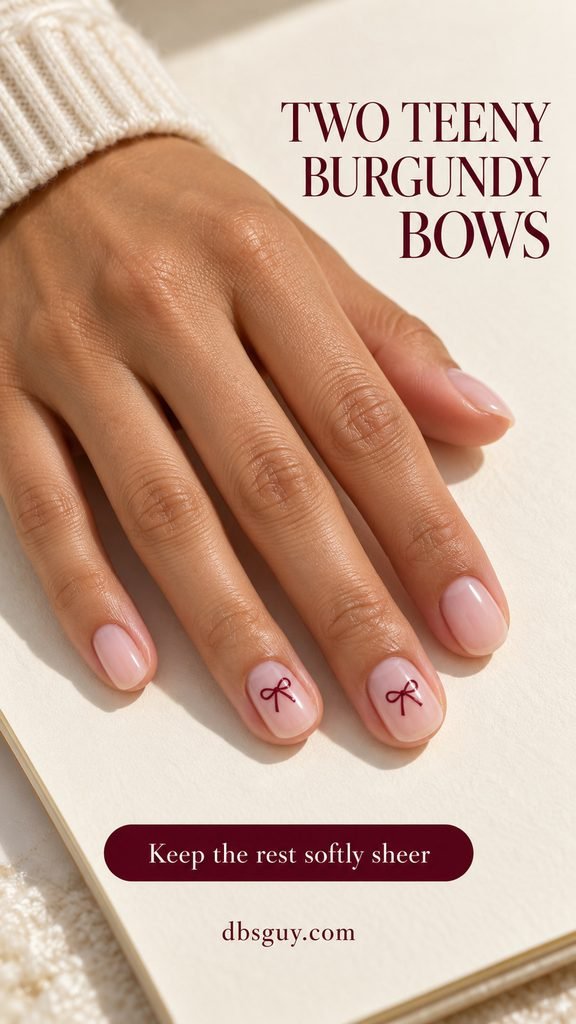
Keep both bows centered and similar in scale, with two open loops and short tails. Burgundy gives a deeper red accent than cherry without adding another color. If matching the pair by hand feels fiddly, use two small flat decals from the same sheet. Check their width first; these bows should have a visible margin on either side.
14. An Ivory Scalloped Tip With a Base Bow
A shallow scalloped ivory edge gives this manicure a soft outline. On one accent nail, a tiny red bow sits near the base, with an open blush area between the bow and tip. The separated placements keep two delicate details from becoming one crowded pattern.
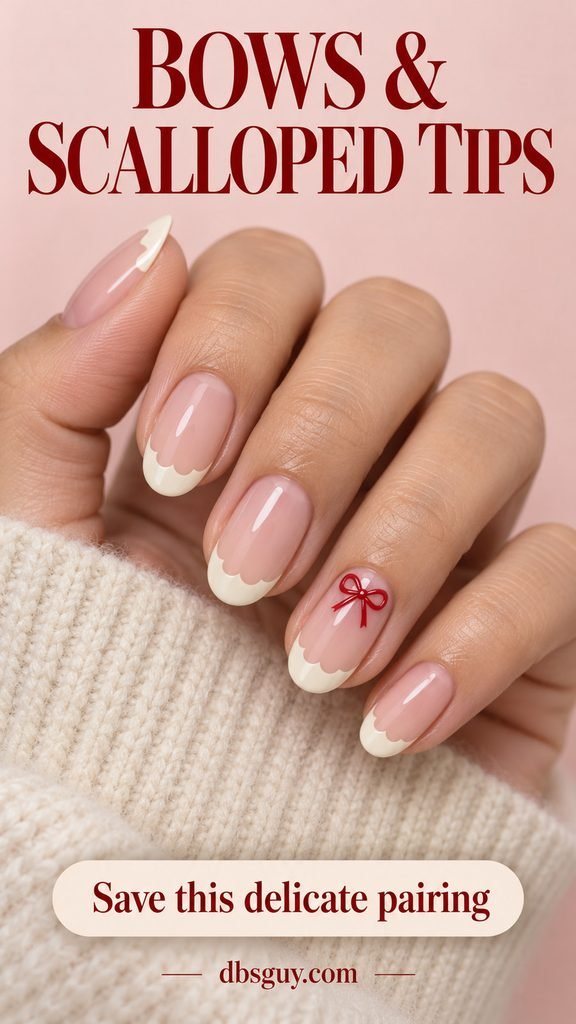
Ask for a few gentle scallops rather than a deep, densely ruffled border. Leave the bow above the cuticle with polish kept off the skin. On a smaller nail, use an ordinary narrow ivory tip and retain the bow. That keeps the pale-edge-and-red-accent idea while removing the more demanding part of the border.
Also read: 17 Early December Nails to Wear Before the Holiday Rush.
15. Red-and-Green Confetti Dots
A few red and green dots can supply the Christmas color without a tree or bow. Scatter them over a sheer warm nude base and keep plenty of space between each mark. The loose placement is the pattern; it does not need identical rows on every finger.
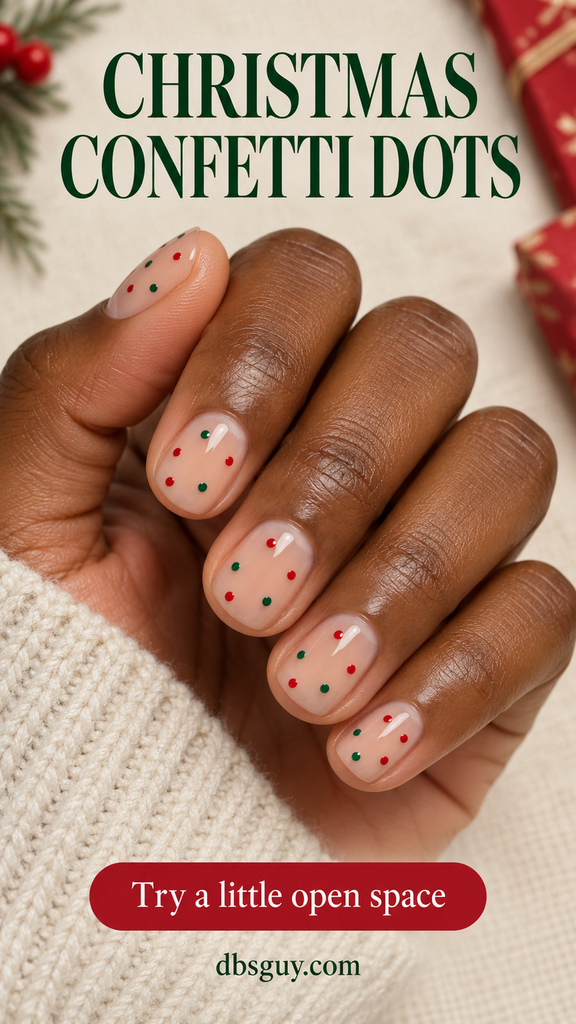
For a home version, practice making small dots before decorating the nails. Add a few, pause, and check the balance across the hand before filling more space. If one area looks empty, that may be what keeps the design light. Use fewer dots on the pinky rather than trying to match the count on a wider nail.
16. A Snow-Dot French on Midnight Navy
White dots gather along the free edge of navy nails, suggesting snow without a solid French band. Let a few marks trail slightly toward the middle, leaving the lower half mostly dark. That change in density gives the dotted edge its shape.
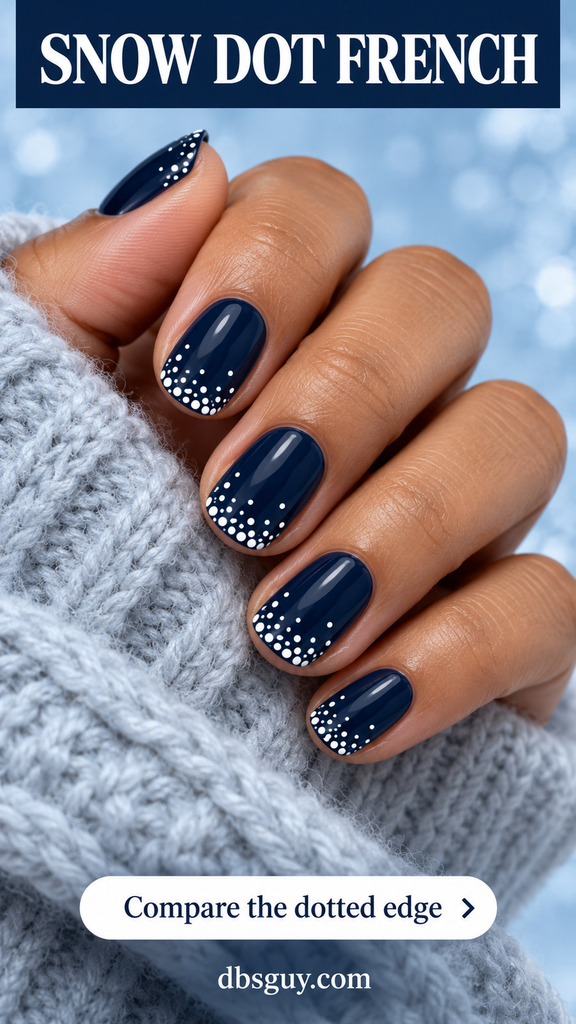
Ask for separate dots rather than a white strip with dots added underneath. On a short nail, a single curved row at the tip may be enough. Keep the dots small and distinct so the navy gaps remain visible. This is a useful winter option if you want to keep wearing the design after the Christmas decorations come down.
17. A Dotted Wreath on Ivory
Arrange tiny green dots in a small circle on an ivory accent, then add a little group of red berry dots at the bottom. The empty center is essential: it makes the shape read as a wreath. Glossy red on the other nails ties the berries into the set.
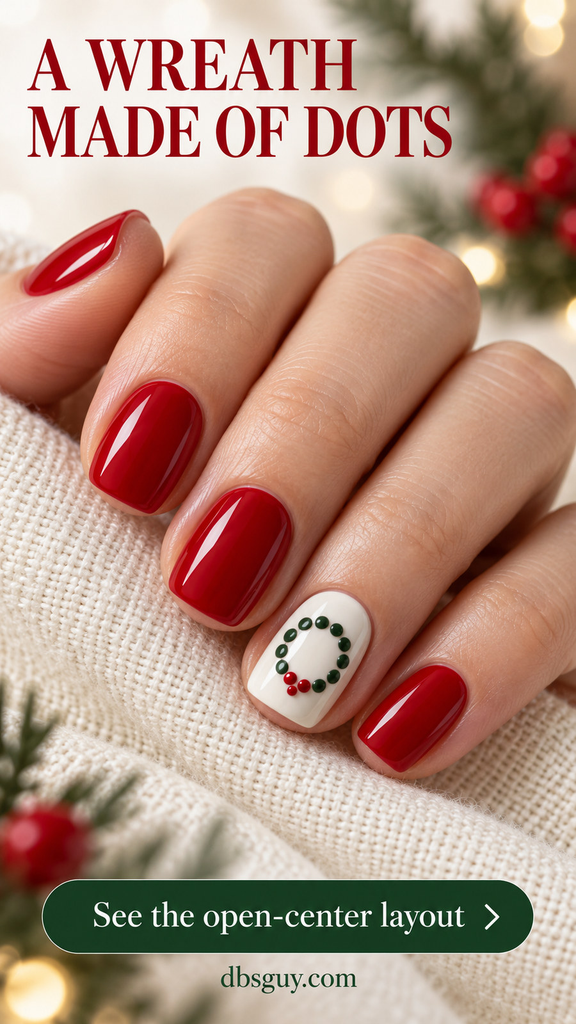
For a regular-polish version, place the top, bottom, left, and right green dots first, then add a few between them. Check the circle before adding berries. Keep the marks separate rather than joining them into a thick green ring. If the center closes up, make the wreath larger on a wider nail or use fewer dots.
18. Two Tiny Hanging Baubles
Two round ornaments turn simple dots into a small Christmas illustration. On a sheer beige accent, use one red circle and one gold circle at different heights. Fine gold lines run from near the nail base toward the baubles, while the surrounding nails stay deep evergreen.
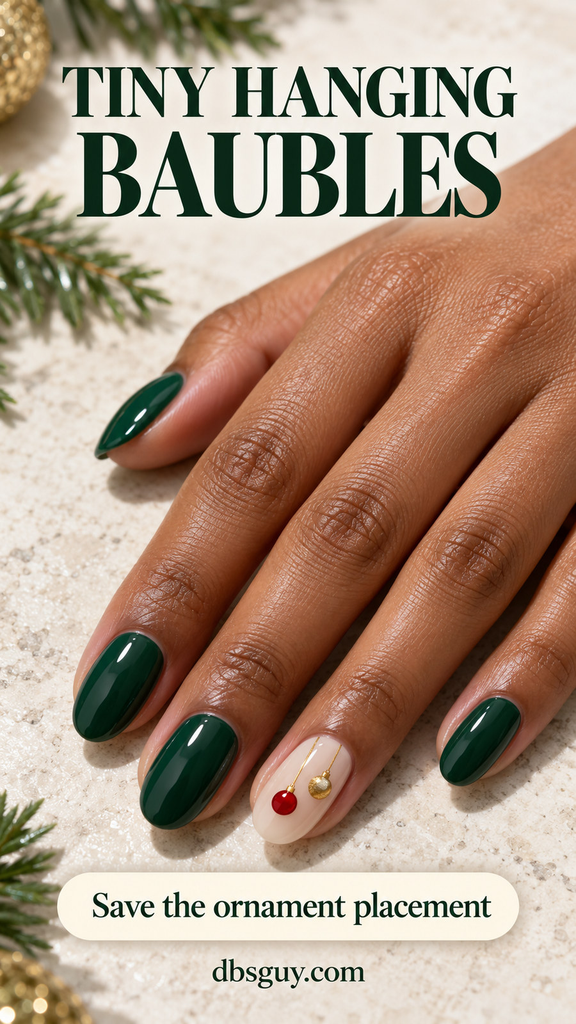
Show your artist which way you want the ornaments to hang. In this reference, the lines begin below the cuticle and lead toward the circles, with a gap between the polish and skin. A tiny cap where each line meets its ornament makes the detail easier to understand. Ask for painted baubles with space between them. On a short nail, one ornament gives a clearer layout than two squeezed together.
19. A Little Berry Cluster on Sage
Three red berry dots and two pointed green leaves add a small holiday accent to muted sage. Put the cluster near one corner of a single nail and leave the rest solid sage. The red is a deliberate bright point within an otherwise soft green manicure.
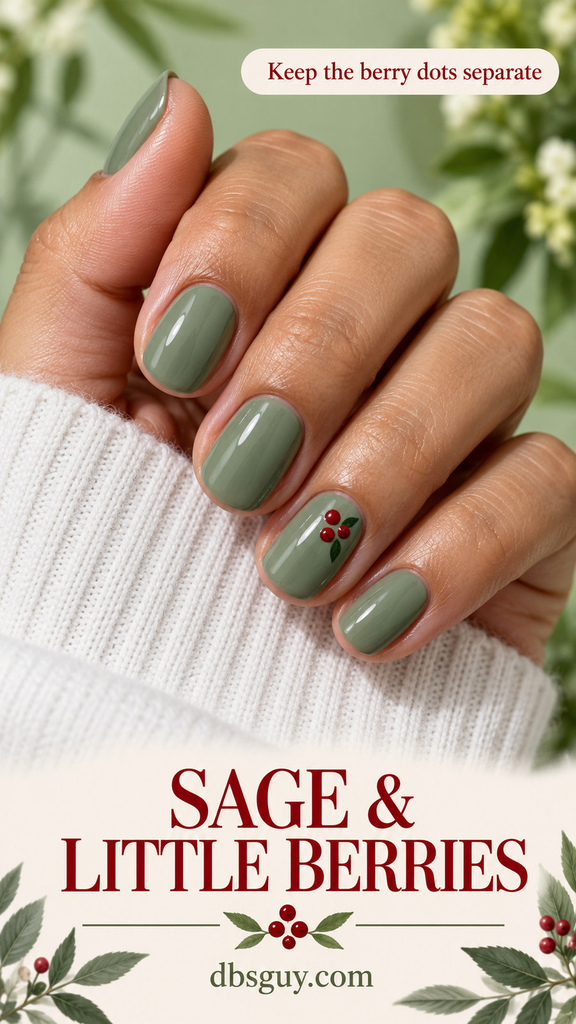
Keep the berry dots distinct; a single red blob loses the little-cluster effect. Ask for darker leaves so they remain visible against the sage base. If painting the leaves is the difficult part, a small holly decal can carry the entire motif. Do not enlarge the sprig to fill the nail—the open sage area is part of this look.
20. A Painted Pearl-Dot Border on Cranberry
Tiny pearly-white painted dots trace the base and sides of one cranberry nail. Leave the tip open, creating a U-shaped border around a plain red center. The contrast has a jewelry-like effect while keeping the illustrated surface flat.
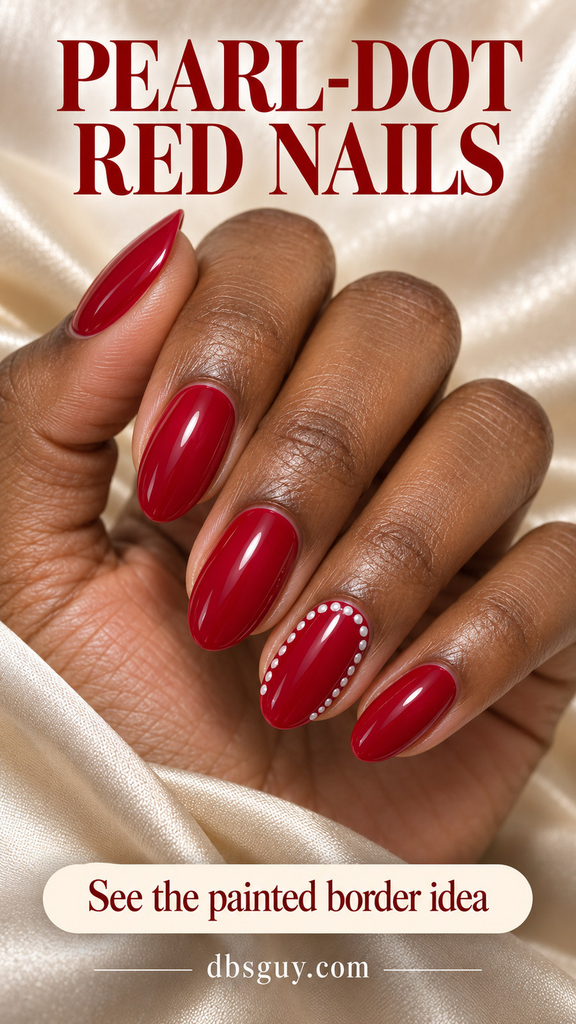
Specify painted dots if you want this reference rather than attached beads or gems. Keep a visible gap between the border and the surrounding skin, and space the dots so they remain separate. On a small nail, trace only the base curve. The other nails can stay cranberry with no border, allowing the accent to feel deliberate.
Also read: 21 December Nails From Early Sparkle to New Year’s Eve.
21. A Tree, a Bow, and a Few Festive Dots
If you want all three details, give each one its own nail. Use a tiny green tree on the index, a red bow on the middle, and a few red-and-green dots on the ring. An ivory base across the hand connects the different motifs; the thumb and pinky stay plain.
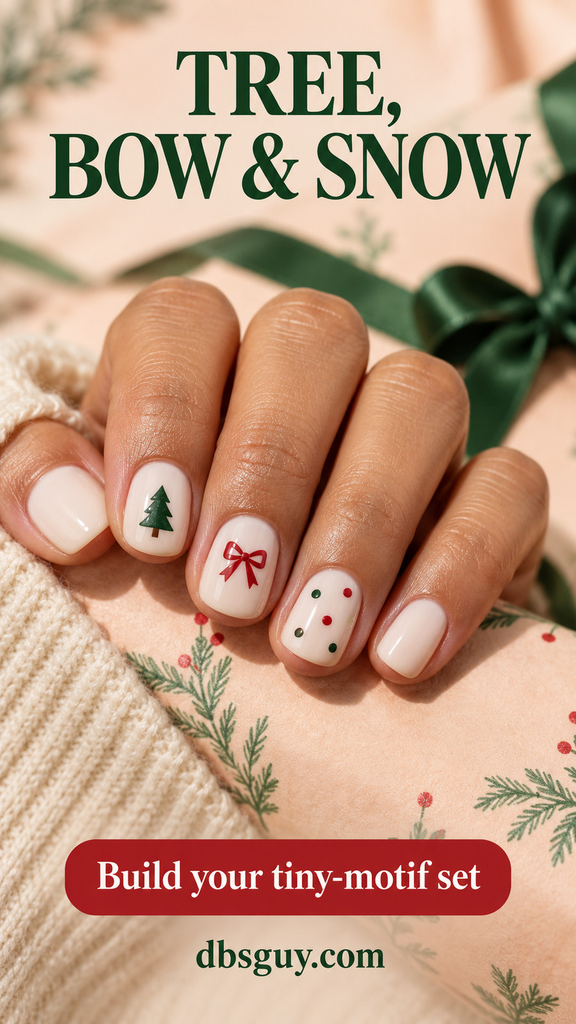
Choose the same red and green for every illustrated detail so the set feels intentional. Let each motif sit at a comfortable scale instead of trying to match their exact heights. For a simpler version, keep the tree and bow on one hand and use only dotted accents on the other. Bring the whole-hand reference so your artist can see how much plain space you want.
Before You Show the Reference to Your Nail Artist
Point out the part you want copied: the palette, the bow placement, the tree shape, or the amount of empty space. Then agree on the nail length and which fingers will carry artwork. “This tiny tree on one ring nail, with the others plain” is a more useful request than asking for the entire picture without discussing scale.
If you are combining references, keep one shared base color and choose which detail matters most. A simple red bow and a detailed tree farm ask for different amounts of space; reducing the number of motifs is often more effective than shrinking everything.
Questions About Tiny Christmas Nail Art
Which of these cute Christmas nails work on very short nails?
Start with one tree (1), a centered mini bow from the paired-bow idea (13), confetti dots (15), or the berry cluster (19). Keep the motif inside the available nail area. Move a detailed design to a wider thumb if necessary, and remove small secondary marks before reducing the whole motif.
Do I need gel or acrylics for these designs?
The color and placement ideas can be interpreted with regular nail polish. Tiny detailed brushwork still takes practice, regardless of the polish type. Flat decals can replace a painted tree or bow; use them according to their instructions and check their size before application.
How can I stop dots from turning into blobs?
Practice with a smaller amount of polish and leave more space between marks. Touch down and lift rather than dragging the tool. If dots spread together, reduce their size or count and follow the base polish’s drying directions before trying the detail again.
How do I make a tiny bow look like a bow?
Keep two visible loops, a central knot, and two tails. Preserve open space inside a line-art bow. If those pieces cannot stay separate at the chosen size, use a simpler filled silhouette or a larger accent nail instead of adding more lines.
Can I mix trees, bows, and dots without a busy result?
Use the same base on every nail, put each main motif on a separate finger, and leave a couple of nails plain, as in idea 21. Repeating the same red and green connects the accents. You can also choose just one motif and let dots be its only companion.
Also Read
For ways to adapt your manicure to the plans on your calendar, see 21 December Nails Ideas Sorted by Occasion: Work, Party, Family.