19 Olive Green November Nail Ideas That Pair Beautifully With Cozy Neutrals

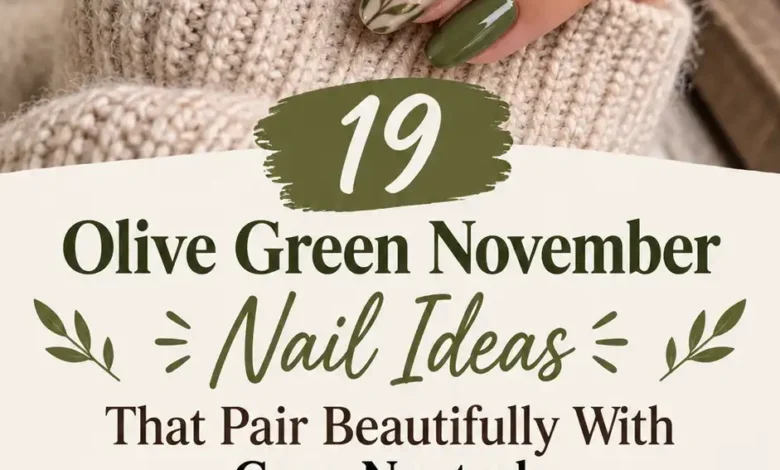
An ivory sweater, a camel coat, and olive green nails: that is a November outfit almost finished. The manicure adds color, but the earthy green still feels at home beside the neutrals you reach for all week.
These olive green November nail ideas range from short, glossy sets to detailed accent nails in cream, taupe, espresso, and bronze. You will find a different design in every image, plus notes on the shape, color balance, and small details to discuss with your nail artist. Start with the look that caught your eye, then save its salon note along with the picture.
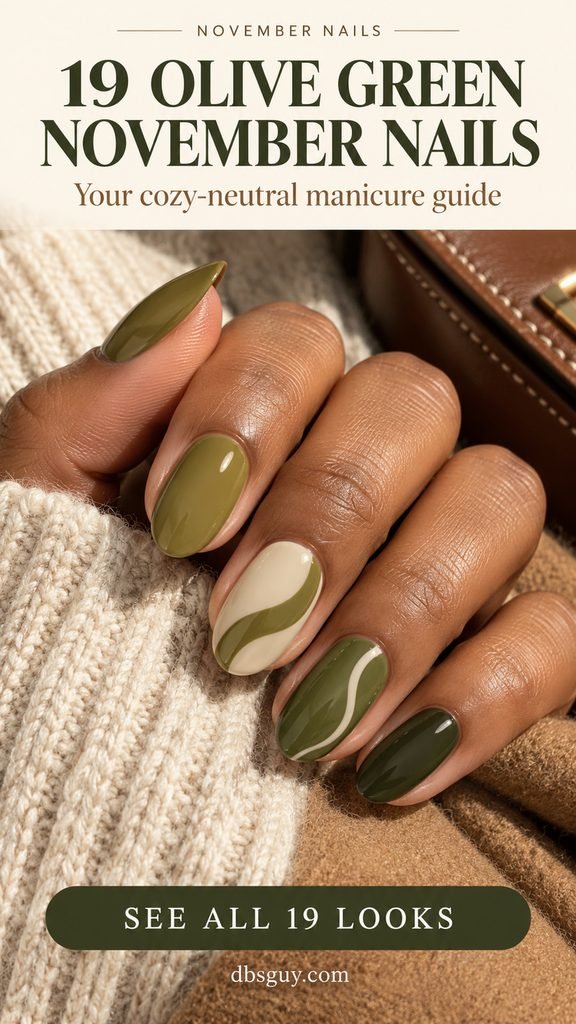
Choose Your Olive Before You Choose the Art
For a warm look beside camel and oatmeal, start with an olive that has noticeable yellow or brown in it. For charcoal sweaters and cooler taupe, compare a more muted, gray-leaning green. Shade names are only a starting point: hold the actual swatch beside your hand and the neutral color you want to pair with it.
Next, decide how much detail you want. The glossy short set is an easy starting point; checkerboard and herringbone put the pattern on an accent nail. For something softer, look at the sheer jelly or cream-to-olive ombré. You can keep the same color palette while choosing a nail length that feels comfortable for your day.
For real polish references, OPI’s Suzi – The First Lady of Nails is an olive green, while Olive & June’s WKF is described by the brand as a cool mossy green. Use their swatches to compare color direction; they are not exact product matches for the concept images below.
1. Short Glossy Olive Nails With an Ivory Knit
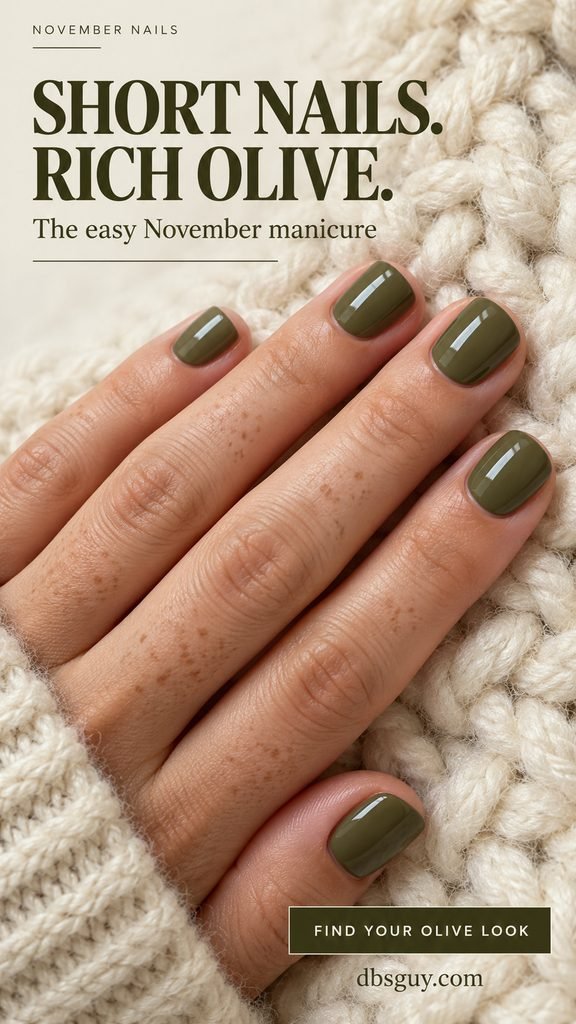
A short squoval shape lets the olive shade do all the work. The rounded corners soften the outline, while the glossy finish gives this simple set a little light-catching detail. Beside an ivory cuff, the green looks especially clear and rich.
Choose this if you want a manicure that fits a busy week without planning extra nail art. Compare the polish in daylight before committing: a brown-heavy olive will look different from a yellow-leaning khaki, even when the bottles seem close. Keep the length consistent so the finished set feels deliberate.
Salon note: Short squoval nails, one warm olive shade, full coverage, and a glossy finish. Keep the free edge narrow and the corners softly rounded.
2. Matte Olive Almond Nails With Camel Layers
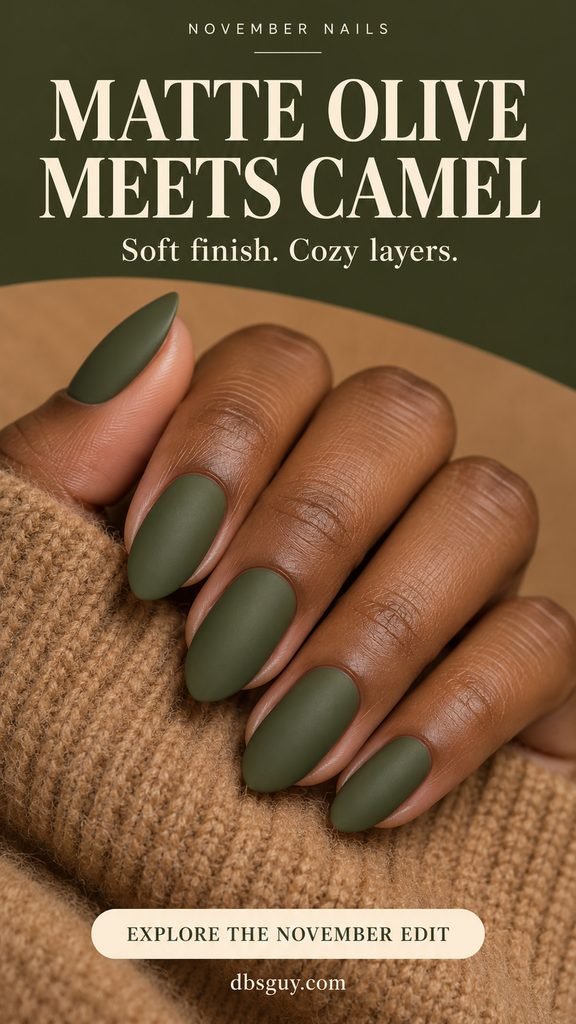
Matte olive has a soft, flat finish that looks lovely against the fuzzy surface of camel wool. On a medium almond shape, there is enough length to show the color without needing another pattern. The entire look rests on the contrast between a smooth nail and a textured sleeve.
Ask to see the olive with the intended matte top coat, since the finish changes how its depth appears. The shape should taper gently rather than end in a sharp point. If you prefer shorter nails, a rounded oval keeps the same quiet mood.
Salon note: Medium almond nails in opaque warm olive, finished evenly matte. Show me the color with the matte finish before completing the set.
3. Olive Nails With Cream Half-Moons
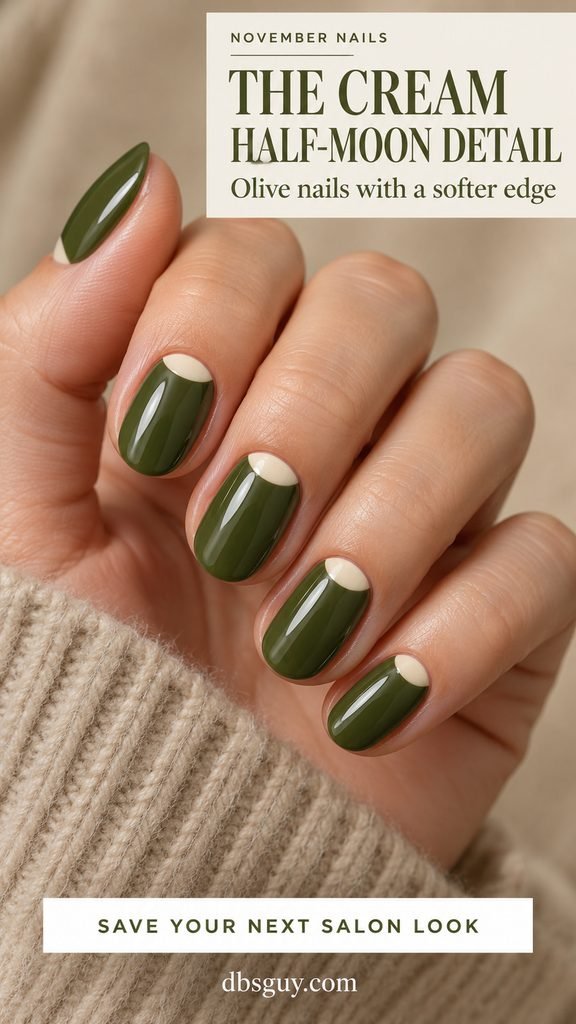
A little cream half-moon at the base of each nail makes olive feel lighter without giving up full coverage. The curved detail echoes the cuticle, so the placement looks intentional even on a short oval nail. Cream knitwear picks up that small pale accent beautifully.
Keep the half-moon shallow, especially if your nail beds are short. A tall cream section can take over the design. This version uses opaque cream rather than a bare gap, which gives the edge a crisp, graphic finish. Save a close-up so your artist can judge the proportions.
Salon note: Glossy olive with small opaque cream half-moons centered at the cuticles. Keep the cream sections shallow and consistent from nail to nail.
4. An Oat-to-Olive Five-Color Manicure
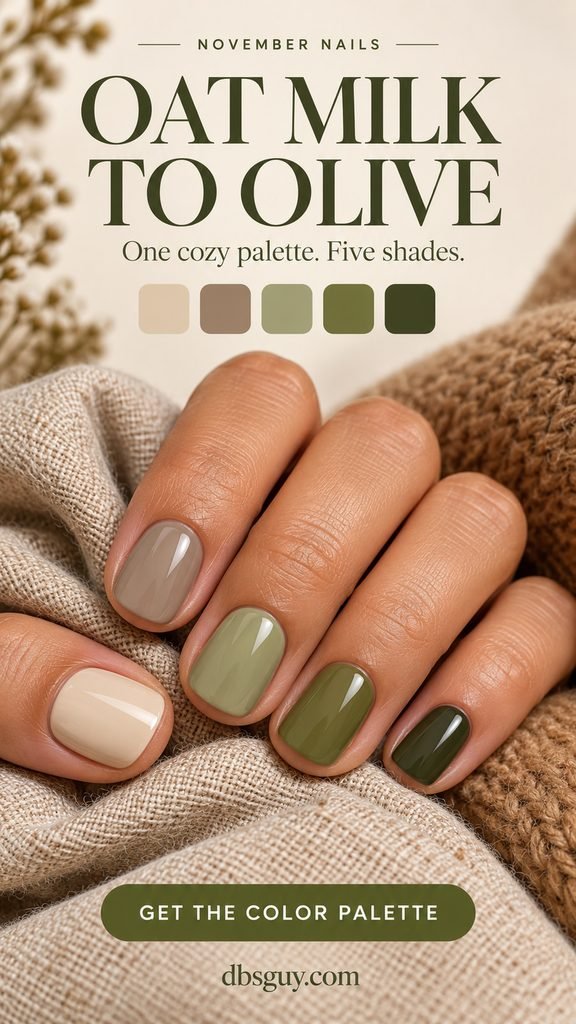
If you collect neutral polish shades, this is a satisfying way to wear several together. Oatmeal, mushroom taupe, light khaki, olive, and deep olive move from pale to dark across the hand. Each nail stays solid, so the interest comes from the palette itself.
Lay the five swatches next to one another before painting. The jump from taupe to khaki should feel related rather than abrupt; a muted green usually makes that transition easier to arrange. Keep every nail equally glossy and repeat the sequence on your other hand for a coordinated finish.
Salon note: One solid color per nail, progressing from oatmeal and taupe through khaki to deep olive. Use the same short rounded shape and gloss throughout.
5. Olive Nails With Fine Ivory Contour Lines
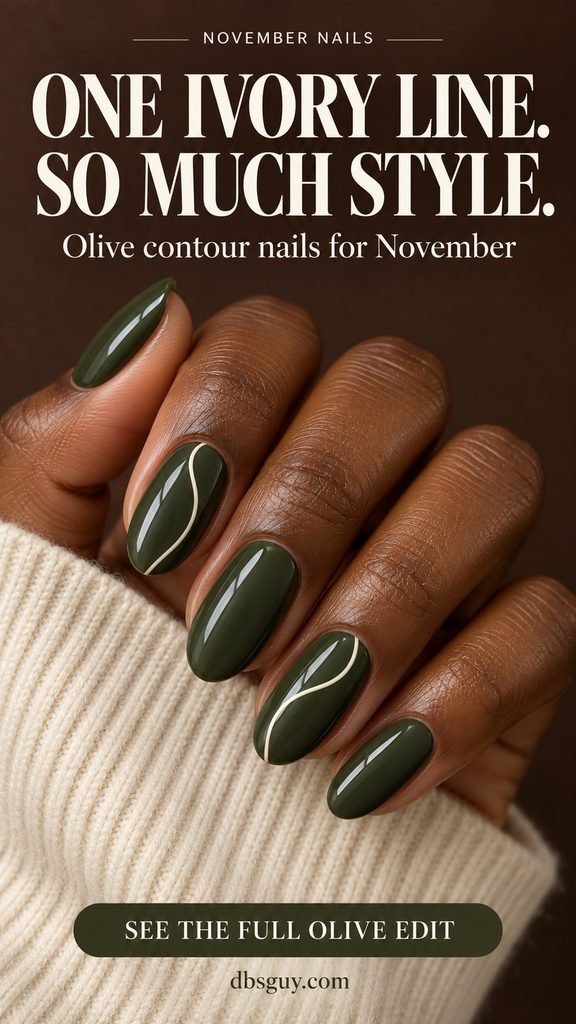
A single ivory line can bring movement to an otherwise solid manicure. Here, it travels down two olive nails in a loose curve, leaving most of the green visible. The narrow mark feels especially clean beside an ivory ribbed sleeve or a simple cream blouse.
The line does not need to match perfectly on both accent nails. Give each curve a little breathing room, and keep the stroke thin from end to end. On a shorter nail, one gentle bend will be easier to read than several tight loops.
Salon note: Glossy olive on every nail, with one fine ivory contour line on the index and ring fingers. Leave the remaining nails solid.
6. A Cream-and-Olive Checker Accent
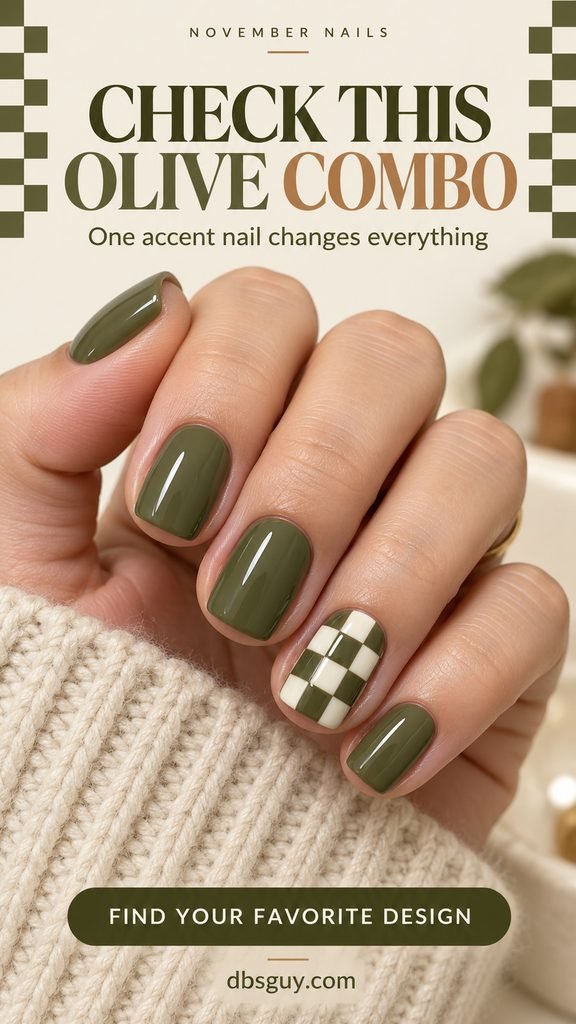
One checkerboard nail gives a plain olive set a playful focal point. The cream squares keep the pattern bright enough to see, while the solid green nails tie it back to the rest of the hand. A short square shape provides a useful canvas for those neat little rows.
Keep the checks large enough to recognize at a glance. Three columns may suit the reference, but a narrower nail could need fewer. This is an easy design to pair with an unpatterned sweater, where the single checked nail gets its own moment.
Salon note: Solid olive nails with one cream-and-olive checkerboard ring finger. Adjust the number of squares to my nail width and keep the edges crisp.
7. Olive and Espresso Diagonal Color Blocks
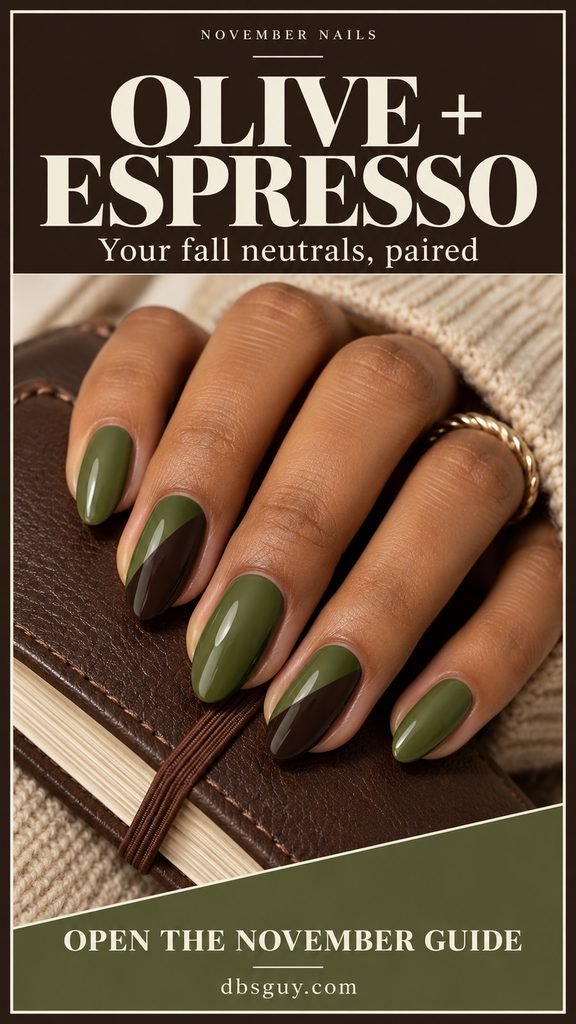
Olive and espresso share an earthy depth, which makes a diagonal split feel bold without introducing a bright color. Two accent nails are enough to establish the pattern. The remaining solid olive nails stop the dark brown from taking over the whole set.
This combination looks particularly good with a brown leather bag or belt. Ask for espresso that is visibly brown beside the olive; a nearly black shade will create a sharper effect. The dividing edge should cross the nail body rather than sit only at the tip.
Salon note: Olive almond nails with clean diagonal olive-and-espresso splits on the index and ring fingers. Both sections opaque, with no metallic divider.
8. Olive Agate Nails With Milky Stone Accents
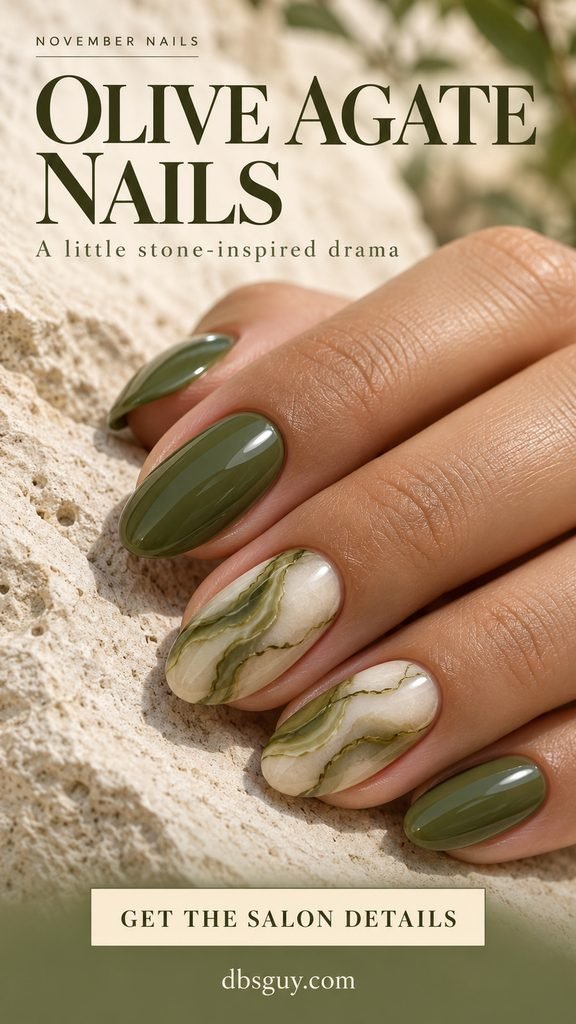
Milky cream, translucent olive ribbons, and fine dark veins give these accent nails a stone-inspired finish. The irregular pattern is the attraction: each accent should look related without looking stamped from the same template. Solid olive on the other nails makes the delicate veining easier to appreciate.
Bring this image when booking, since layered stone art needs a different approach from a simple painted stripe. Ask the artist to leave visible cream between the green ribbons. If the layers become too dense, the stone effect can disappear into a muddy patch.
Salon note: Two milky cream agate accents with translucent olive ribbons and fine dark veins; the other nails glossy olive. Keep the layers light and irregular.
9. Olive Nails With Slim Bronze Side Panels
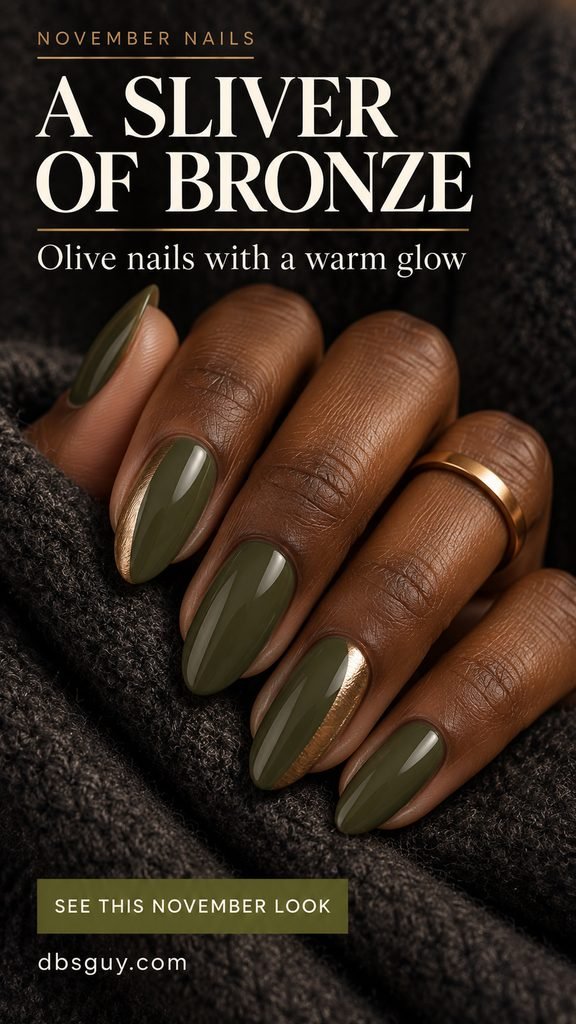
A narrow bronze panel adds a warm metallic flash along the side of an olive nail. Because the panel sits off-center, the manicure still reads green first. It is a lovely detail against charcoal wool, especially when a sleeve moves and catches the light.
Keep the bronze to about one-fifth of each accent nail rather than turning it into a half-and-half design. A brushed appearance makes the metal feel softer than a mirror finish. Discuss the technique with your artist so the panel looks intentional and stays distinct from scattered foil.
Salon note: Glossy olive with a slim brushed bronze panel down one outer side of the index and ring nails. Keep the center of each nail green.
10. Camel-and-Olive Retro Arches
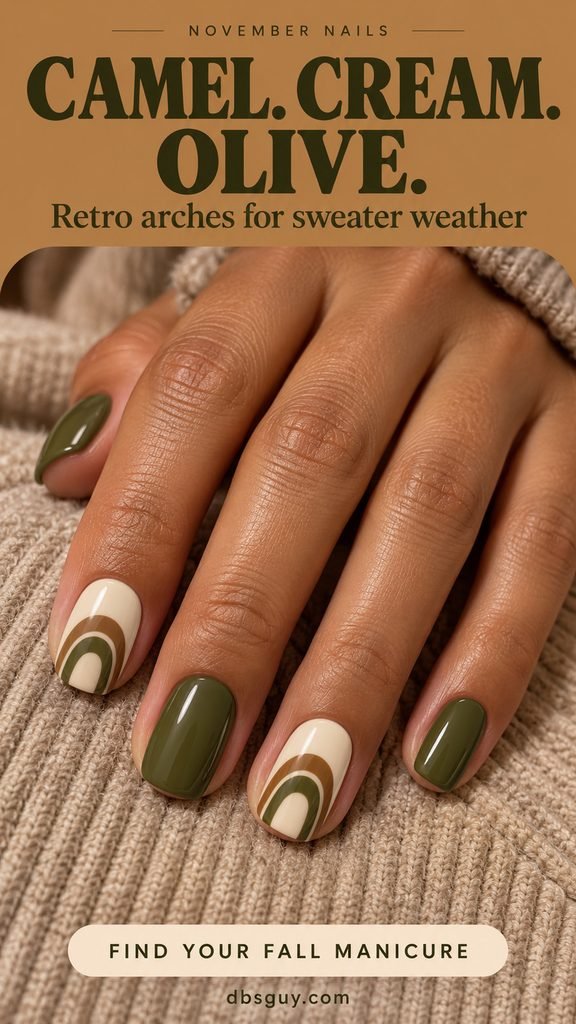
Wide camel and olive arches make a cheerful pattern on a cream base. Their rounded shape softens the straight sides of a squoval nail, and the three-color palette connects easily with an oatmeal sweater and camel coat. The solid olive nails give the arches room to stand out.
Choose broad, clean bands instead of squeezing in lots of thin rings. The cream center should remain visible, even where the arch narrows. Two accent nails are plenty; covering every finger with the motif would create a much busier version.
Salon note: Cream accent nails with two broad nested arches in camel and olive on the index and ring fingers. Keep the other three nails solid olive.
11. Glossy Ribbons Over Matte Olive
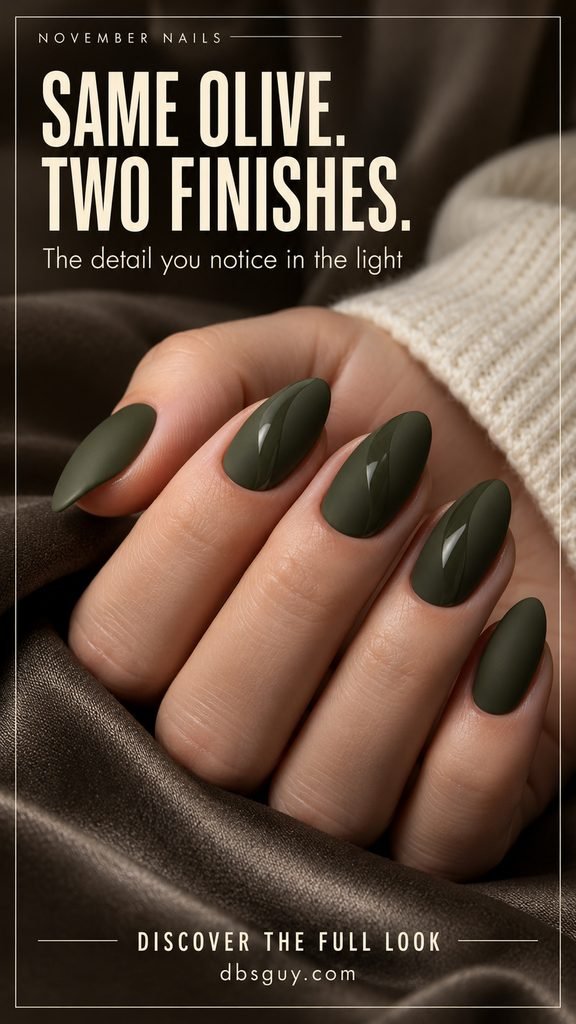
This design uses reflection as the pattern. A glossy ribbon crosses a matte olive base, so the detail becomes more visible as the hand turns. Keeping both finishes the same color makes the effect subtle enough to wear with a textured taupe or cream outfit.
Ask for a broad curve with a smooth edge rather than several narrow strokes. The reference needs angled light to show its contrast, so look at a sample from more than one direction. This is flat nail art; the ribbon does not need to be raised to catch the light.
Salon note: One dark olive shade throughout: matte base with flat glossy curved ribbons on three nails. Keep the finish contrast clear without changing the color.
12. Sheer Olive Jelly on Short Oval Nails
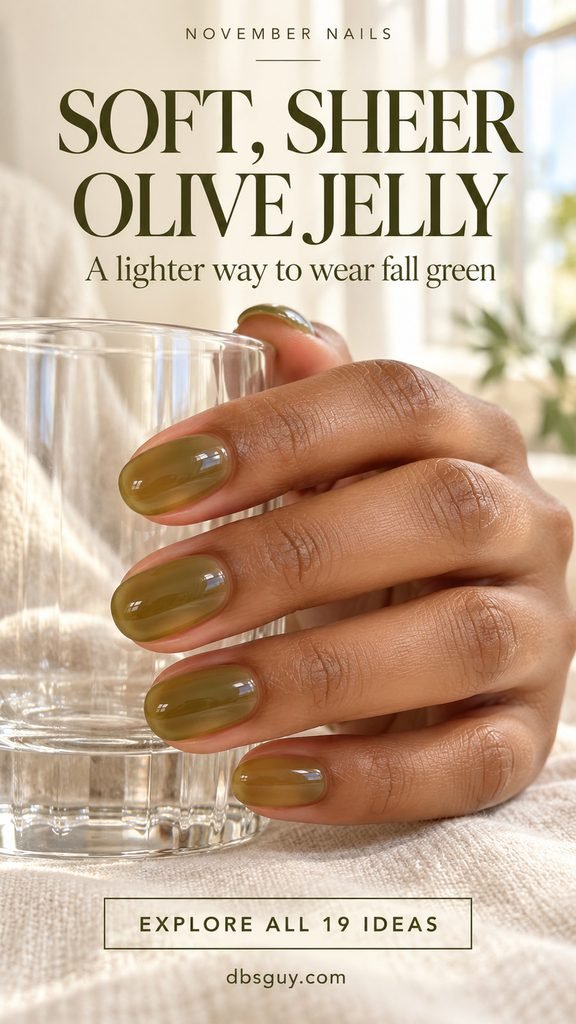
Olive jelly gives the color a lighter, translucent appearance. You can still see some of the natural nail through it, which is part of the look. A short oval shape and cream linen backdrop keep the whole manicure feeling soft and uncomplicated.
Choose a polish formulated to be sheer rather than expecting an opaque olive to behave like jelly. More coats generally deepen a translucent color, so decide how much nail you want visible. If you dislike seeing the free edge, the solid glossy design at the beginning is a better reference.
Salon note: Short oval nails in a glossy translucent olive, with natural nail detail still visible. Show me the intended opacity before building up the color.
13. An Olive Herringbone Accent on Taupe
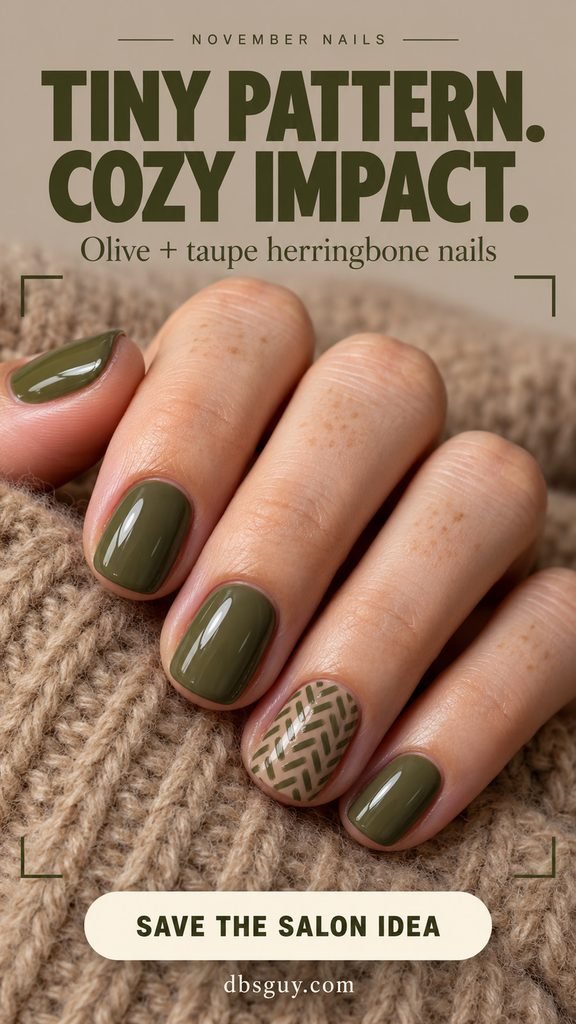
Herringbone brings the feeling of a favorite fall coat into a small painted detail. Short angled marks form the pattern over one taupe nail, while the other nails stay olive. It is a flat design, so the woven appearance comes entirely from the arrangement of the strokes.
Give this accent enough contrast to show up: olive on a very dark taupe can hide the pattern. A lighter mushroom base makes the zigzags easier to distinguish. Keep it to one nail if you want the detail to feel tailored rather than busy.
Salon note: Glossy olive nails with one light taupe herringbone accent. Use fine staggered olive strokes, keeping the pattern flat and the scale readable.
14. Painterly Olive Brushstrokes on Milky Beige
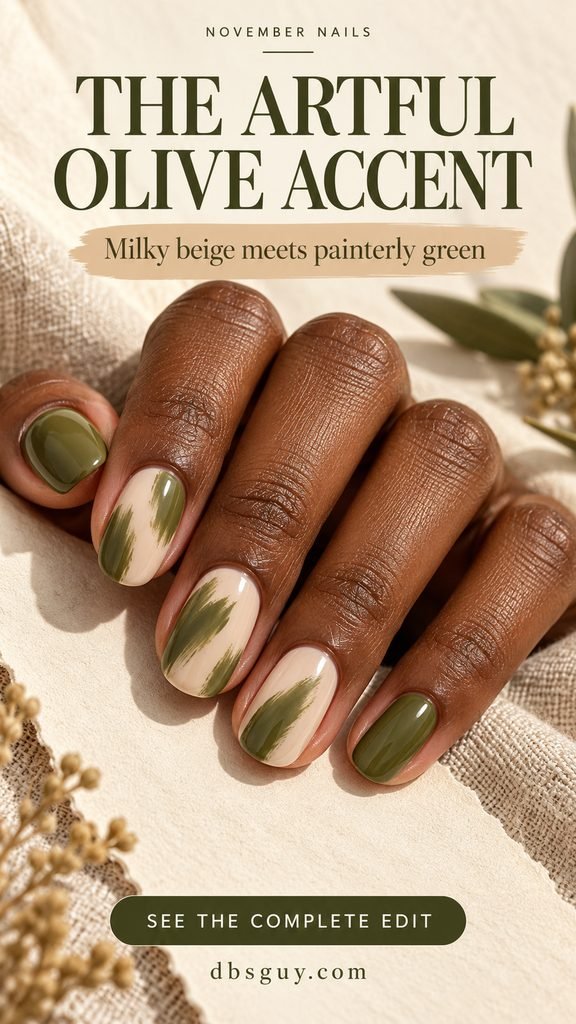
Loose olive brushstrokes give milky beige nails an artistic feel without requiring a recognizable picture. The uneven edges are intentional. Some strokes can sit near the side and others closer to the center, creating a set that feels connected without repeating the same mark five times.
Keep plenty of beige visible around each brushstroke. One or two broad marks per accent nail will usually communicate the idea more clearly than many tiny streaks. Solid olive on the thumb and pinky frames the softer middle nails and anchors the palette.
Salon note: Milky beige on three nails with broad, irregular olive brushstrokes and visible feathered edges. Paint the thumb and pinky solid olive.
15. Olive Nails With Fine Black Frames
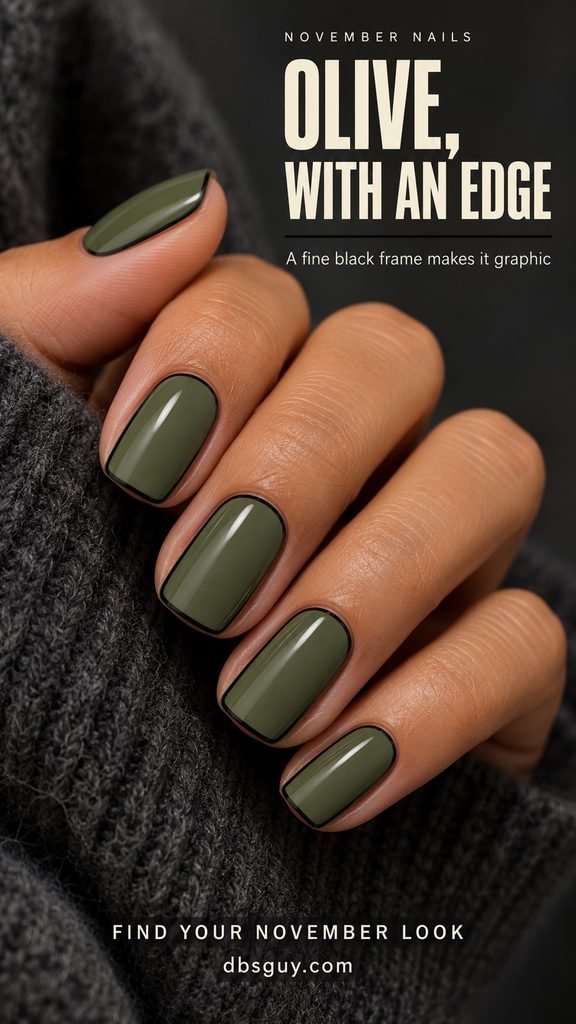
A fine black frame gives muted olive a graphic outline. The green remains the main color, but its edges look more defined against a charcoal sleeve. Soft square corners work well here because the outline follows a clear shape without becoming too severe.
The frame should be extremely narrow; a thick border will change the balance of the whole manicure. Ask the artist to keep the outline on the nail surface and follow the complete perimeter. This precise detail is worth showing in a close-up when you book.
Salon note: Opaque olive centers with a hairline black frame around the full perimeter of each nail. Keep the green area large and the corners softly square.
16. Olive Pinstripes on Mushroom Taupe
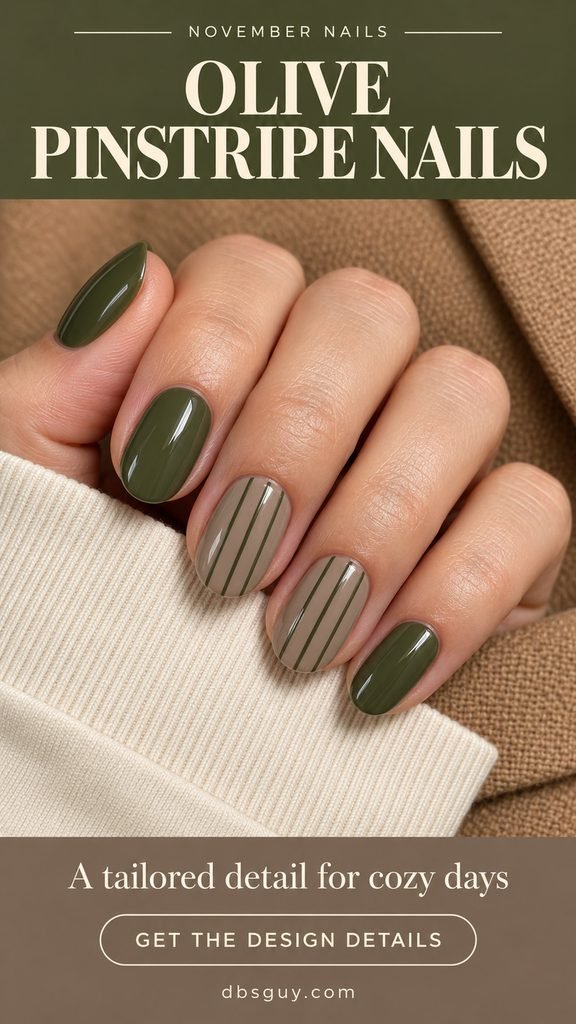
Fine vertical pinstripes bring a shirt-and-blazer detail into a cozy neutral manicure. Three olive lines over mushroom taupe give the accent nails structure, while solid green on the others keeps the set coordinated. The lines stay parallel, with no crosshatching or extra decoration.
Leave enough taupe between the stripes so they remain separate at a glance. If your nails are narrow, two lines can preserve the same effect. A cream cuff and camel jacket make a natural outfit pairing, especially if you prefer straight lines to curved nail art.
Salon note: Solid olive with two mushroom taupe accents, each carrying two or three very fine vertical olive lines. Keep spacing even and skip horizontal lines.
17. Olive Nails With a Tiny Pearl Accent
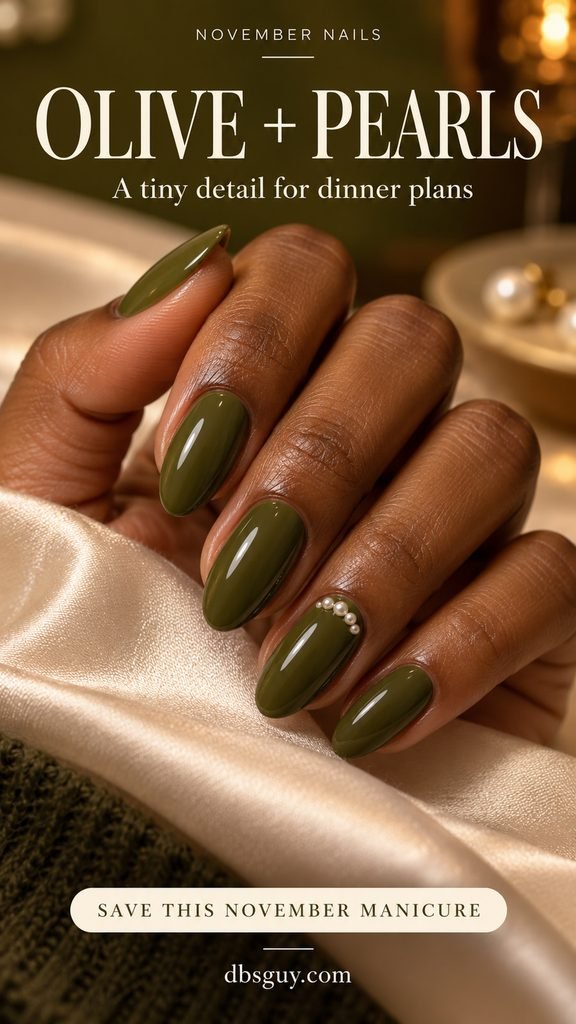
A small arc of ivory pearls turn a glossy olive set into a lovely dinner manicure. Grouping them near one cuticle creates a small focal point, leaving most of the nail smooth and green. Cream silk or a fine-knit ivory sweater picks up their pale color without needing more embellishment.
Choose small, low-profile pieces and discuss placement with your artist if you wear delicate knits often. Raised embellishments can catch on fabric. A single ring-finger cluster delivers the idea while keeping the remaining nails simple enough for everyday outfits.
Salon note: Glossy olive almond nails with a small arc of tiny ivory half-pearls near one ring-finger cuticle. Use a low-profile placement suited to my usual clothing.
18. Cream-to-Olive Ombré Nails
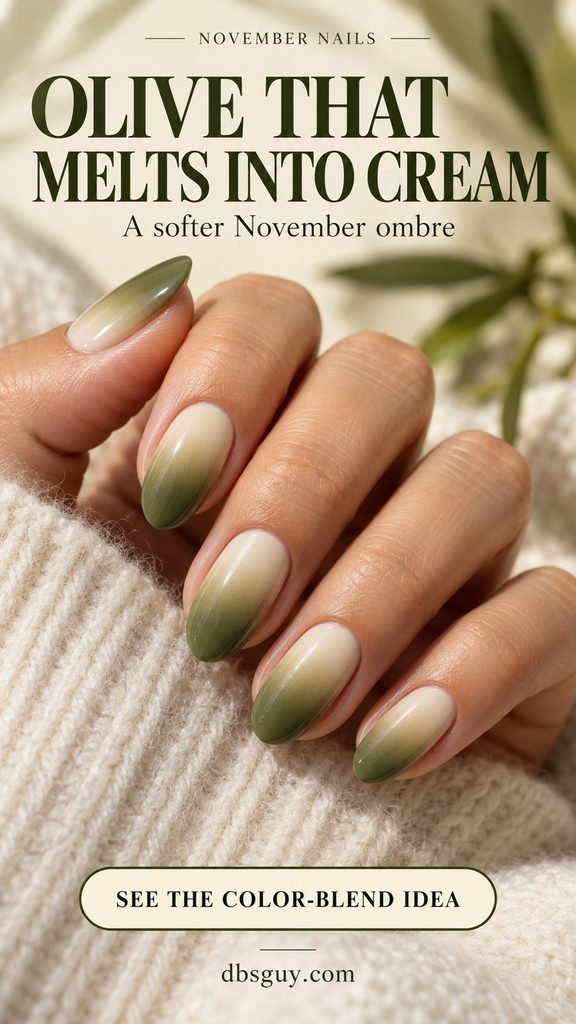
Warm cream gradually blending into olive gives this manicure a gentler transition than a crisp two-color edge. The pale base keeps the area near the cuticle light, while the darker tips bring in the November color. The middle of the gradient passes through a soft khaki tone.
Ask for a gradual blend across the nail’s length rather than a narrow band near the tip. On short nails, the artist may need to simplify the transition so both colors remain visible. Keeping every nail in the same direction gives the finished set a calm, consistent rhythm.
Salon note: A smooth opaque ombré on every nail: warm cream at the cuticle, blending gradually into olive at the tip, with no hard dividing line.
19. Olive Leaf Silhouettes on Almond-Milk Cream
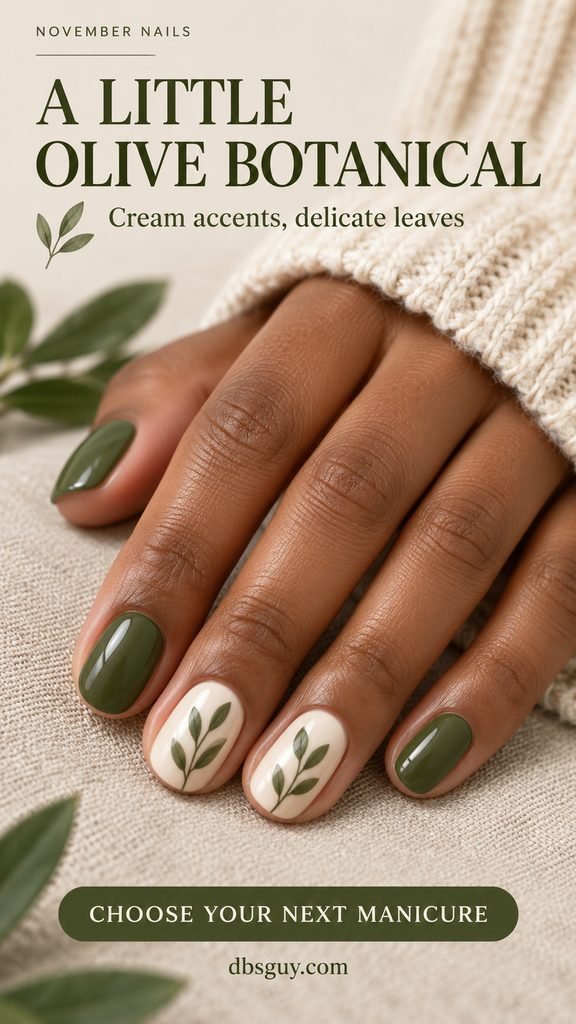
Tiny olive-colored leaf sprigs bring a botanical detail into this neutral palette. The cream accent nails make the stems and narrow leaves easy to see, while the solid green nails keep the design rooted in the same shade family. It is a gentle option for the end of the gallery.
Keep the sprigs small enough that cream remains visible on every side. A few clear leaves will read better than a dense cluster on short nails. Pair the set with oatmeal linen or an ivory cardigan when you want a November manicure with a lighter overall feel.
Salon note: Short olive nails with two almond-milk cream accents. Add one delicate olive leaf sprig to each accent, leaving open cream space around the stems.
What to Tell Your Nail Artist
Bring one main image and its salon note. Decide the nail length, the exact accent fingers, and the finish before the appointment starts. A picture of your favorite sweater or coat can also help when choosing between a warm olive, a grayer green, and several similar cream shades.
Mention detailed linework, layered agate art, or pearl embellishments when booking so the salon can allow the right time and quote the work. If you want a simpler version, keep the color combination and reduce the art to one accent nail.
An Easy Olive Manicure to Try at Home
For a first attempt with regular air-dry polish, choose the short glossy set or the five-color palette. Both let you focus on even coverage before adding detailed art. Select products designed to work together, and follow their directions for preparation, base coat, color, and top coat.
Use thin, even coats and give each layer the drying time its instructions call for. If you try an accent, practice the mark on a suitable palette first and let the colored base dry before painting over it. Finish with a compatible top coat once the design is ready, taking care not to drag wet detail across the nail.
Essie’s application guidance recommends thin layers and explains that base-coat requirements vary between its formulas. Follow the instructions for your own products; these air-dry polish steps do not replace a gel system’s application and curing directions.
Olive Green November Nails: FAQs
What colors go with olive green nails in November?
Cream, oatmeal, camel, mushroom taupe, espresso, and charcoal all appear in this gallery. For a softer contrast, start with cream or taupe. Espresso and black create stronger edges, while a small bronze or pearl accent adds an evening detail.
Can olive green nail art work on very short nails?
Yes. Start with solid glossy olive, the five-color palette, or a single checker accent with larger squares. Ask your artist to simplify small patterns to fit the actual nail width. A short nail does not need the same amount of detail as a longer reference.
Should I choose matte or glossy olive nails?
Choose glossy when you want visible shine and a crisp view of painted detail. Choose matte when you prefer a flat, softly lit surface. The ribbon design combines both, but ask to see the finish contrast on a sample because it becomes more visible at certain angles.
How do I choose an olive shade that I like on my skin?
Compare a yellow-brown olive and a grayer version beside your hand in natural light. Then hold each near the cream, camel, or taupe you plan to wear. Treat undertone advice as a starting point rather than a rule; the swatch you enjoy looking at is the useful answer.
Do these designs need gel or extensions?
The design itself does not require extensions. Solid color and a simple painted accent can be adapted to natural nails with regular polish. More involved finishes and embellishments depend on the technique your artist uses, so ask how the chosen reference can be recreated with your preferred service.
Save Your Favorite Olive-and-Neutral Pairing
Save the design you keep coming back to, whether that is the short glossy olive, the camel arches, or one tiny pearl accent. Bring the image and its salon note together, then adjust the shape and detail to your nails. That small bit of planning makes it much easier to leave with the November manicure you had in mind.
Manicure images are AI-generated concepts created for dbsguy.com. Your nail artist can adapt the colors, proportions, and placement to your nails.
Further inspiration: Who What Wear’s olive-green manicure guide and Real Simple’s olive-green nail ideas. Designs, styling notes, and images in this gallery were developed for dbsguy.com.