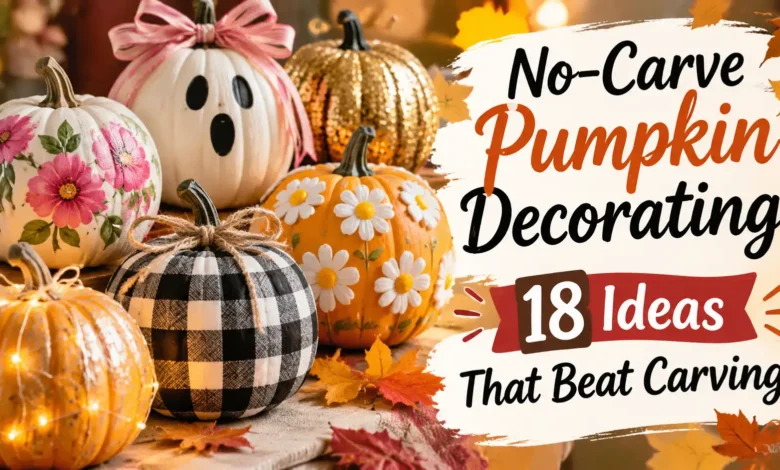
For the quickest no-carve pumpkin, tie on a velvet bow or add a peel-and-stick face. For a decoration you can bring back next fall, choose a faux pumpkin and try floral decoupage, yarn, or a removable flower crown. These 18 ideas leave the pumpkin intact—no scooping, drilling, or cutting slots for accessories.
“Beat carving” means less pumpkin mess and more ways to match your room. You still get a recognizable fall decoration, but you can choose a project that fits your supplies and patience. The tradeoff: an intact pumpkin will not give you a jack-o’-lantern’s glow.
The images are AI-generated decorating concepts, not photographs of tested projects. Use them as visual guides; your pumpkin’s shape and materials will affect the result.
Before you decorate: choose the right pumpkin
Use a real pumpkin for a simple removable finish such as a bow, lace band, or gauze wrap. Choose a firm pumpkin without soft spots, cracks, or damaged skin, and carry it from underneath. Illinois Extension’s pumpkin selection guidance explains why protecting the stem matters: a broken stem exposes an area where spoilage can start.
Use a faux pumpkin for a project you want to keep. It is the practical choice for glued fabric, buttons, pearls, gilding, and full paint finishes. Check what it is made of before choosing glue or paint; a product suitable for a hard plastic shell may not suit exposed foam.
Wipe away dirt or dust and let the surface dry completely. Protect your table, test your paint or adhesive on the back, and follow its label for preparation, drying, curing, and ventilation. Skip pins, tacks, skewers, and carved attachment slots. The ideas below use surface attachments.
For children, choose age-appropriate supplies and have an adult handle cutting. Buttons and loose pearls belong out of reach of young children and pets. Keep fabric, paper, and dried leaves away from candles; any lanterns beside the display should use battery-operated lights.
Choose a project that fits your evening
- Least setup: velvet bow, washi tape, or a sticker face.
- Soft texture: lace, ribbon, yarn, or fabric patchwork.
- A dining-table accent: floral decoupage, pressed leaves, pearls, or a flower crown.
- A Halloween character: the felt bat or gauze mummy.
- Time for paint to cure: copper leaf, scallops, a night sky, or a chalkboard message.
Buy supplies for one idea first. Most of these designs are intended for indoor display; craft glue and a decorative topcoat do not automatically make a pumpkin weatherproof.
1. Tie on a velvet bow

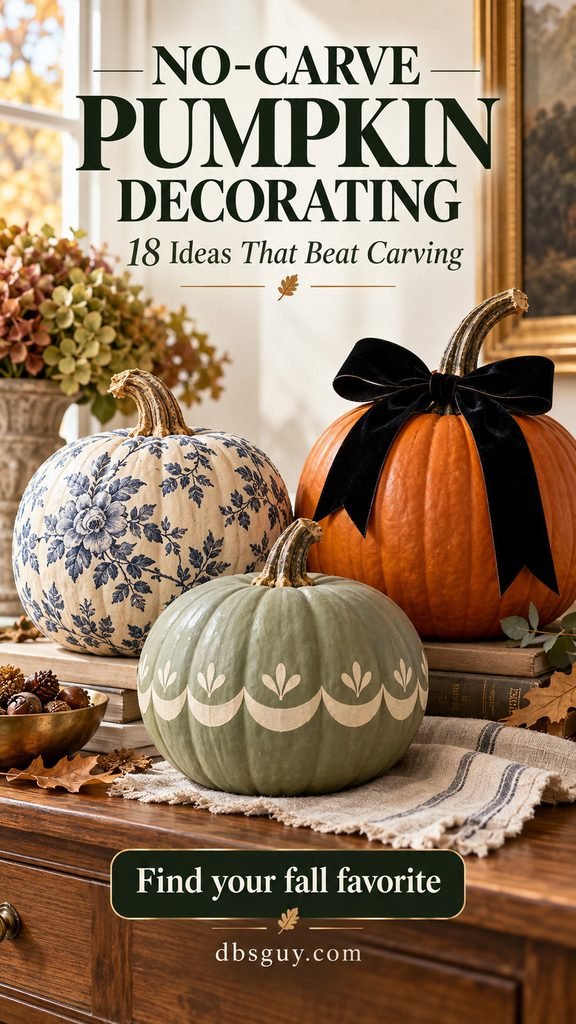
A wide velvet bow gives an ordinary orange pumpkin enough presence for an entry table. The contrast does the work: soft black ribbon against the bright, ridged skin. This is the first project to choose if you want a finished decoration without paint drying time.
Gather: a real or faux pumpkin with a sturdy stem, velvet ribbon, and scissors. Wrap the ribbon loosely around the base of the stem, tie a bow, then adjust the loops before trimming the tails. Let them end above the tabletop so they do not drag.
Keep the knot gentle; the stem is not a handle or an anchor to pull against. Choose an indoor spot where the velvet stays dry. When the season changes, untie the bow and reuse it.
2. Scatter washi-tape confetti
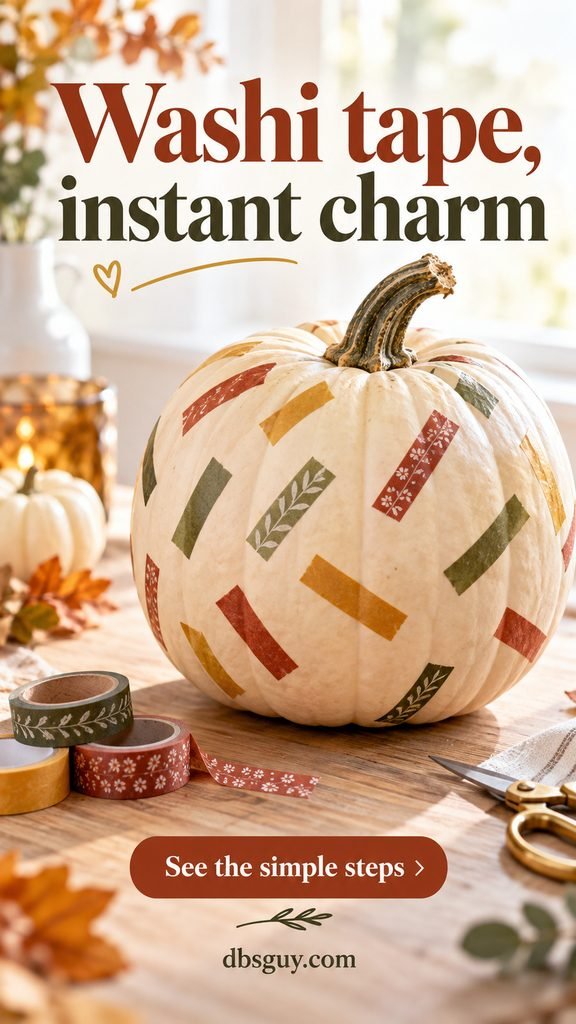
For a relaxed craft-night project, use short pieces of washi tape as confetti. Rust, mustard, and olive keep it autumnal, while a cream pumpkin makes each piece easy to see. Mix a couple of small prints with solid tape rather than using every roll in the drawer.
Start with a clean, completely dry real or faux pumpkin. Cut or tear short strips, place the first few far apart, then fill only the gaps that look empty. Press each strip from the center toward its ends. Keep pieces on the rounded ribs where possible; spanning a deep groove encourages lifting.
Test one strip on the back first. Some tape releases from waxy skin or pulls at a painted finish. If yours will not stay put, choose a smoother pumpkin rather than adding wet glue over a supposedly removable design. Display indoors.
3. Build a peel-and-stick pumpkin face

A friendly face is a good choice for a family craft table because the personality comes from placement. Move the eyes closer together for a little grin or farther apart for a wide, cheerful expression.
Use ready-made pumpkin-face stickers or cut two curved eyes and a crescent smile from adhesive craft vinyl. Sketch the shapes on paper first, then trace them onto the backing; you do not need a cutting machine. An adult can prepare the pieces before younger children start arranging them.
Choose a relatively smooth, broad pumpkin front. Position the mouth first, then place the eyes above it, pressing outward to release bubbles. Keep the pieces small enough to settle between deep grooves. Test the adhesive on the back, and keep the finished pumpkin dry. It will not glow from inside, so give it a visible spot near existing room lighting.
4. Decoupage blue floral napkins
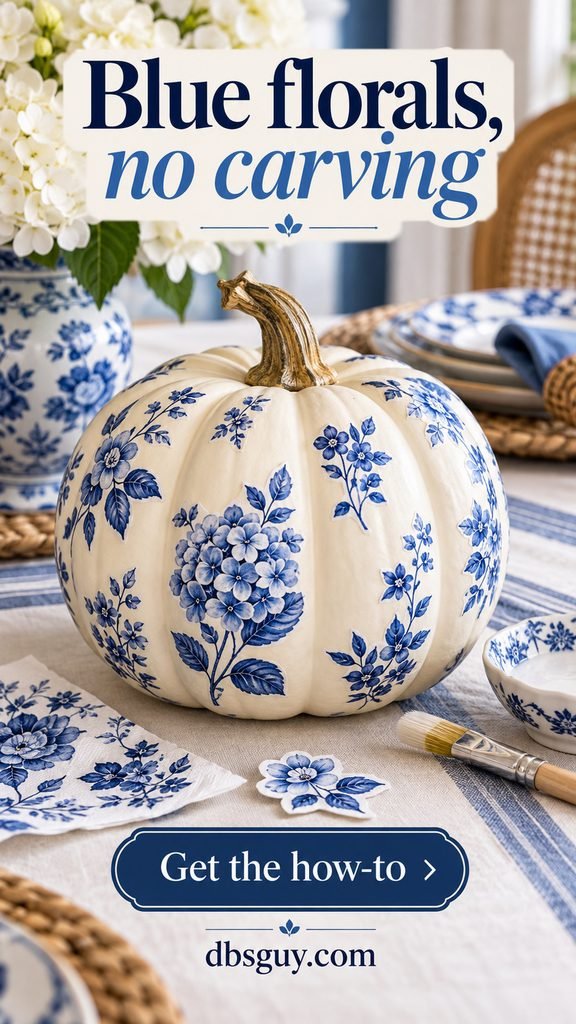
This blue-and-white design suits a dining room where orange would compete with the rest of the decor. Use an ivory faux pumpkin, blue floral paper napkins, decoupage medium, scissors, and a soft brush.
- Cut out individual floral motifs. Separate the napkin layers and keep only the thin, printed layer.
- Brush an even, thin coat of medium onto one small area of the pumpkin. Lay down a motif and gently press it into the curves with the brush.
- Add the remaining flowers, leaving ivory spaces between them. Use smaller cutouts near the stem.
- Let the paper dry before adding the topcoat specified for your medium. Avoid repeatedly brushing wet napkins; they tear easily.
A light base keeps the blue flowers crisp. Test a spare motif first if the napkin ink bleeds or the pumpkin’s finish resists the adhesive. Keep this paper-covered piece indoors.
For a table setting to use around your finished pumpkin, explore 23 Olive Green Simple Fall Tablescape Ideas.
5. Make a pressed-leaf border
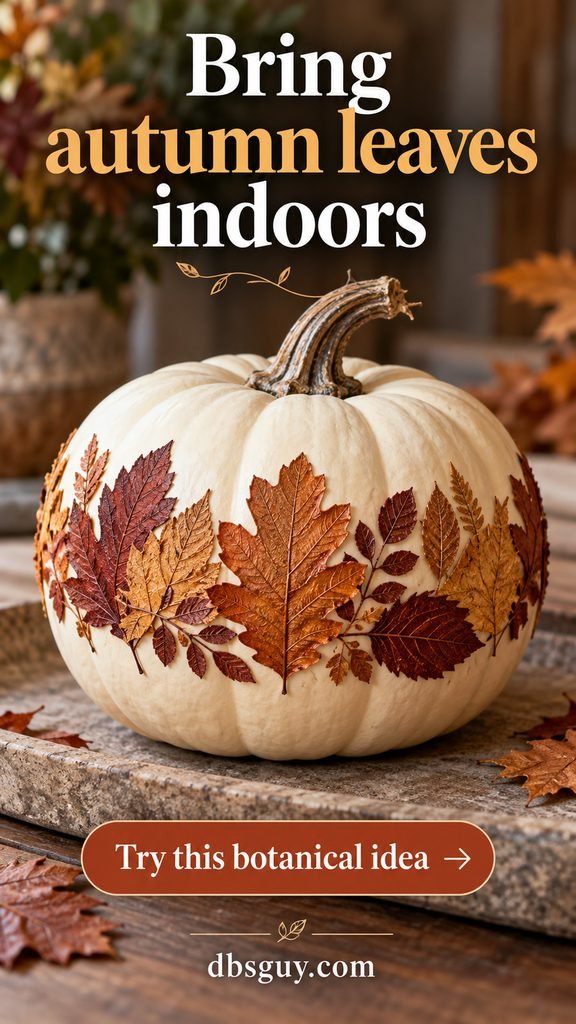
A leaf border brings actual texture to a neutral pumpkin. This is a botanical option for a bookshelf or Thanksgiving sideboard, especially if you prefer a restrained palette over Halloween characters.
Choose thin, fully dried and pressed leaves that still flex gently. Brittle leaves that crumble when bent are frustrating on a curved surface. Arrange them on the table first, alternating broad and narrow shapes, and trim off thick stems that prevent them from lying flat.
On an ivory faux pumpkin, test decoupage medium with one small leaf at the back. If it adheres, brush a thin coat beneath each leaf and smooth it carefully into place, working around the middle. Add a compatible topcoat only after the first layer dries. Stop if the leaves crack rather than forcing them into deep grooves. Display indoors and expect natural leaf colors to change over time.
6. Wrap the middle in black lace

Black lace gives you Halloween contrast without a face, glitter, or an elaborate paint job. Choose a wide stretch-lace trim with an open pattern so the orange pumpkin remains visible through it.
Wrap the trim around the pumpkin’s widest point and cut enough for a small overlap at the back. Fasten the overlapping fabric to itself with a suitable fabric adhesive, following its drying directions. Protect the pumpkin beneath the join while the glue sets, then remove that temporary barrier. The finished band should fit snugly without squeezing the pumpkin.
Try the fit before gluing: a very tapered pumpkin may let the band slip. A rounder shape or slightly stretchy trim is easier. Use inexpensive craft trim, not an heirloom textile, and keep this piece indoors.
If you like using lace elsewhere in the room, explore Lace Doilies in Modern Decor: 9 Ideas Beyond Grandma’s Table.
7. Follow the ribs with ribbon stripes
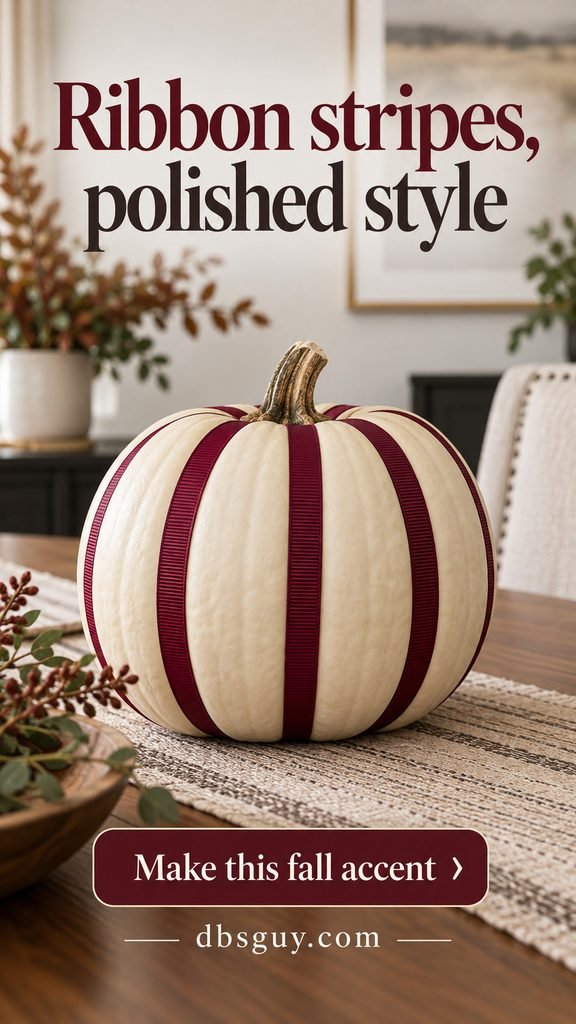
Vertical ribbon gives a cream pumpkin a tailored finish. Burgundy grosgrain has enough texture to stand apart from the surface without turning the whole pumpkin into a fabric-covered object.
Choose a faux pumpkin, narrow ribbon, scissors, and a craft adhesive approved for both the ribbon and the pumpkin material. Measure one route from the stem area down a rib to just beneath the base, then cut the other strips to fit their own routes; pumpkins are rarely perfectly symmetrical.
Attach the first strip, then one opposite it. Work around the pumpkin, leaving a bare rib or a similar gap between stripes. Keep the ribbon smooth rather than pulling it tight. Trim the ends so they do not pile up under the pumpkin and make it wobble. Let the adhesive set before moving it to an indoor table.
8. Cover a small pumpkin in chunky yarn
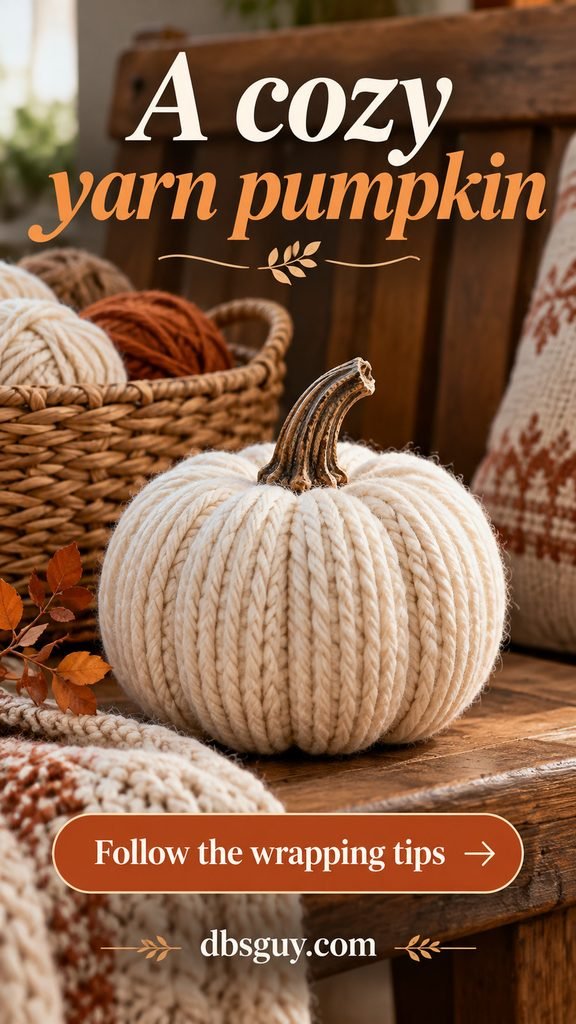
A yarn pumpkin fits naturally beside woven baskets and knit throws. Keep it small: covering a large pumpkin takes far more yarn and patience than the simple finished shape suggests.
Use a faux pumpkin, chunky cream yarn, scissors, and a foam-compatible craft glue if the pumpkin is foam. For the braided texture shown, make several loose three-strand braids first. Measure each finished braid from the stem area down one side to the base, leaving a little extra for trimming.
Glue the braids vertically, side by side, following the ribs and keeping the stem uncovered. Work in short sections so the glue does not dry before the yarn is positioned. Trim the lower ends neatly without building a thick pad underneath. Check the pumpkin still sits flat. This absorbent finish belongs indoors, and it is best stored where the yarn will not be crushed.
9. Use fabric scraps as patchwork panels
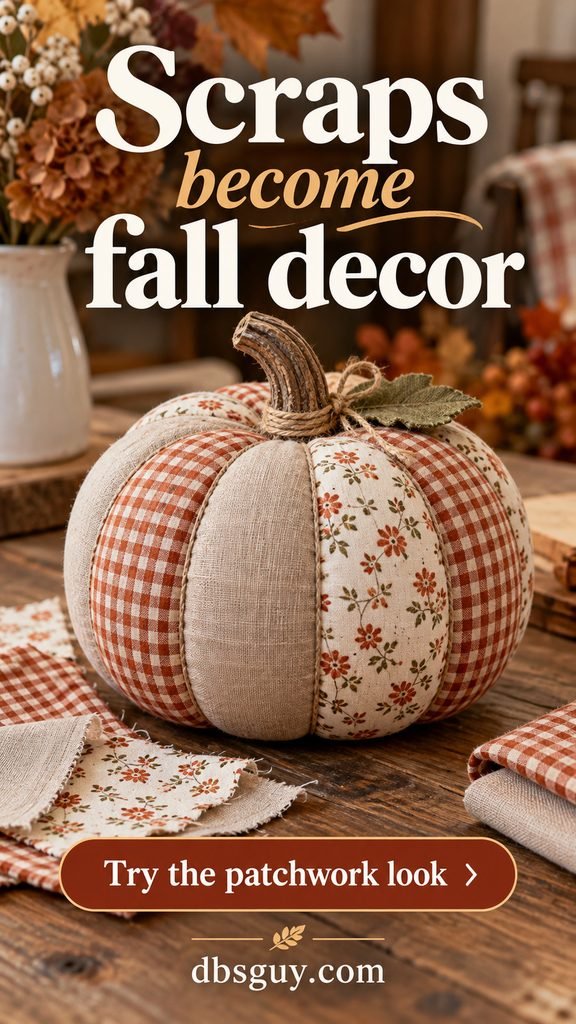
Combine rust gingham, a tiny floral, and plain tan fabric for a pumpkin that feels like part of a cozy room. Three coordinated fabrics are enough; the changing texture supplies the interest.
Make a paper template for one rib of a faux pumpkin: wide through the middle, tapered at both ends. Test it against the surface before cutting fabric, then allow a small overlap along each side. Adjust each panel as you go instead of assuming every rib has the same width.
Brush on a fabric-appropriate decoupage medium and smooth a panel from its center outward. Continue around the pumpkin, keeping overlaps in the grooves. Trim close to the stem and base without cutting the pumpkin. A narrow glued cord can cover uneven seams, as in the concept image. Let everything dry fully before displaying indoors; this is glued patchwork, so no sewing is required.
10. Spell an initial with buttons

A button monogram makes one pumpkin feel personal without needing tidy hand lettering. Choose an initial with a simple outline, then keep the button colors close together so the shape reads from across the room.
You need a faux pumpkin, flat sew-through buttons, a pencil, paper, and a compatible craft adhesive. Draw a large block initial on paper and arrange the buttons over it before touching the pumpkin. Move the biggest buttons into the wide strokes and save the smallest ones for corners.
Lightly sketch the same letter on the broadest pumpkin face. Glue the buttons one at a time, supporting the pumpkin on a folded towel while the front faces upward. Allow the adhesive to set before standing it upright. Skip buttons with raised shanks on the back, which are harder to attach flat. Keep this small-parts decoration away from young children and pets.
11. Add a crescent of pearls

A pearl crescent gives a dusty rose pumpkin a dressier finish while leaving most of the surface quiet. It works well on a shelf or sideboard where you can see it close up.
Start with a precolored faux pumpkin or paint one and let the finish cure according to its label. Use adhesive half pearls with flat backs in two or three sizes. Sketch a light crescent near one side of the front, place the largest pearls through its widest part, then fill around them with smaller pieces.
Keep both tips narrow so the arrangement reads as a crescent rather than a thick stripe. Test the adhesive on the back; if it releases, use a compatible glue sparingly beneath each pearl. Do not add pearls to damp paint. Display indoors, out of reach of children who might pull off the small pieces.
12. Sweep copper leaf across one shoulder

Charcoal paint and copper leaf create a strong focal point with very little ornament. Leave plenty of matte surface exposed so the metal’s wrinkles and highlights remain noticeable.
Choose a faux pumpkin, charcoal craft paint, copper-colored gilding leaf, the matching leaf adhesive, a soft dry brush, and any sealer recommended by the leaf manufacturer. Let the painted base cure first. Apply adhesive only where you want the diagonal accent, then wait for the tack stage specified on the package.
Lay small pieces of leaf onto the prepared patch and press gently with the dry brush. Brush away loose fragments over a tray, keeping the outer edge irregular. Seal only as directed for that leaf and finish. Kitchen foil will not behave like thin gilding leaf. This is an indoor decorative project; do not use a real pumpkin intended for eating.
13. Turn a pumpkin into a felt bat
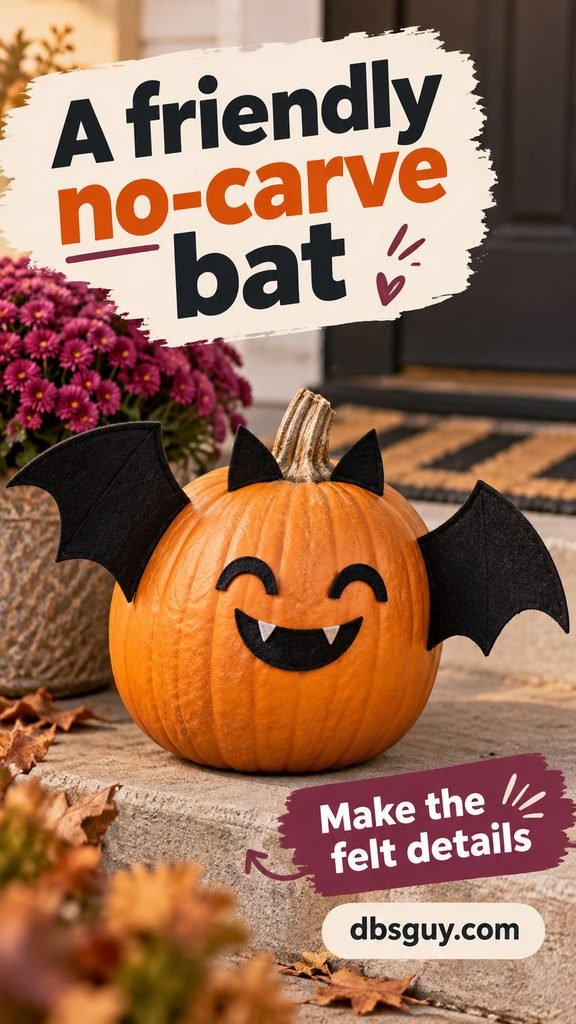
The wings make this little character recognizable, so start with those rather than adding lots of facial details. Stiff craft felt holds its shape better than a floppy scrap.
Fold a sheet of paper and draw half a bat-wing pair, including a wide attachment tab at the inner end. Cut it out and use it to make two matching felt wings. Add two triangular ears, curved eyes, a smile, and optional tiny white felt fangs.
On a faux pumpkin, fold the wing tabs back and glue the tabs against the sides with an adhesive suitable for both materials. Support the wings while the glue sets. Glue the ears beside the stem and the face to the front. Do not cut slots or push in skewers. Use it indoors, or bring it outside briefly for a dry, sheltered Halloween display and return it inside afterward.
14. Wrap a gauze mummy
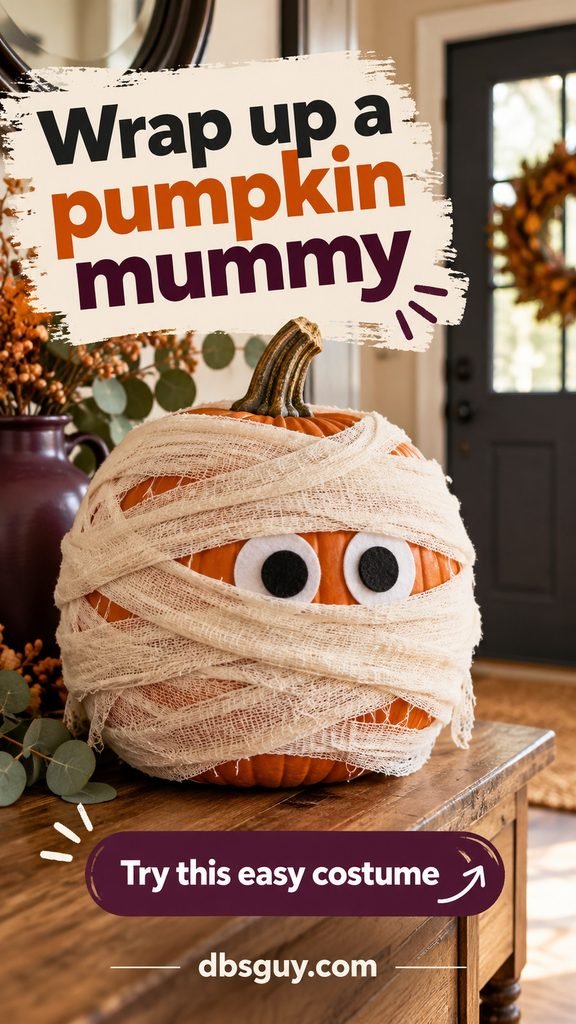
A mummy is forgiving because an uneven wrap adds character. Use a clean real or faux pumpkin, fresh craft gauze or cheesecloth strips, felt for the eyes, and an adhesive suitable for the fabric.
First make two eyes by gluing black felt circles onto larger white circles. Wrap the gauze around the pumpkin at changing angles, leaving a horizontal opening for the face. Tuck the starting end beneath another layer and secure the finishing end to the fabric at the back.
Attach the eyes to a strip of gauze spanning the opening, so you do not need to glue them directly to a real pumpkin. Keep the stem and the flat base clear. Display indoors, remove the wrap periodically to check a real pumpkin for soft spots, and keep the loose fabric away from flames and heaters.
15. Rest a removable flower crown around the stem
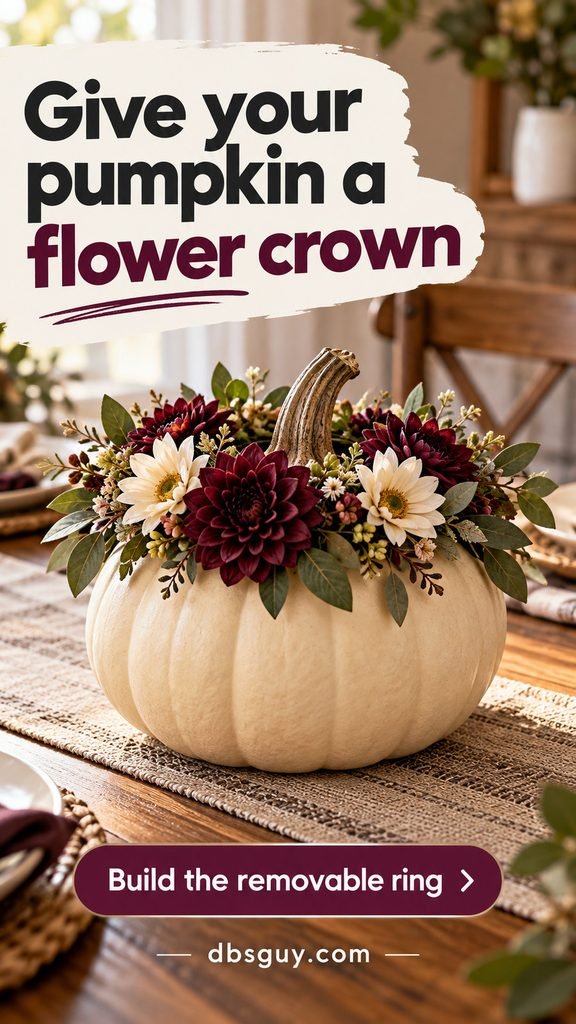
A flower crown is a useful centerpiece option when you want to reuse the flowers later. Burgundy and cream blooms create a fall palette without covering the pumpkin’s pale surface.
Choose a small ready-made grapevine ring that slips over the stem and rests on the shoulders. Check that fit before adding flowers. Arrange lightweight faux greenery around the ring, followed by faux dahlias and daisies. Keep the largest blooms toward the front and leave the stem visible.
Attach the greenery and flower heads to the ring with a compatible craft adhesive, following its curing instructions. Assemble and dry the crown off the pumpkin, then lower it into place. Never insert floral picks into the skin. Keep the ring loose enough to lift off easily, and choose an indoor location where the flowers will not catch on passing sleeves.
16. Paint a single scalloped band
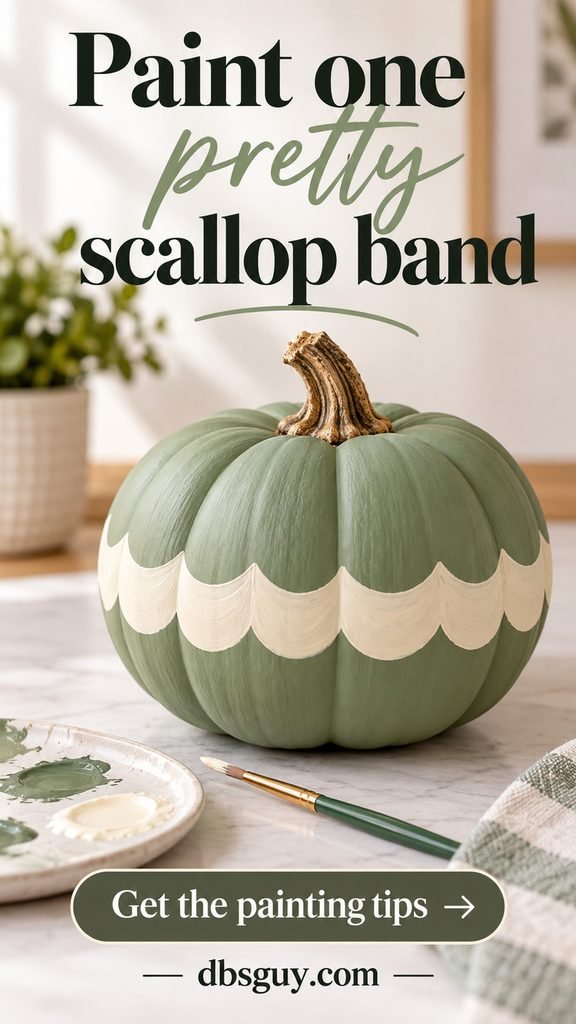
One cream band gives a sage pumpkin a clear pattern without the commitment of covering it in detailed artwork. The pumpkin’s own ribs provide a spacing guide.
Use a faux pumpkin, sage and cream acrylic craft paints suited to its surface, a pencil, and a small round brush. Paint the base if needed, then let it dry as directed. Lightly mark the middle of each rib at the height where the band will sit.
Draw a shallow U-shaped curve between neighboring high points. Repeat a second curve just below the first to form a narrow scalloped ribbon, then fill between the lines with cream paint. Continue around the pumpkin, adjusting the last few curves so the ends meet neatly. Let the first coat dry before touching up. On the cover concept, small cream leaf strokes add an optional flourish above the band; the simpler version here works on its own.
17. Paint a navy-and-gold night sky

A night-sky pumpkin gives you Halloween mood without a spooky face. The gold catches nearby light, while the dark base makes a small number of marks feel deliberate.
Start with a faux pumpkin and a cured navy acrylic base coat. Use a fine brush and metallic gold craft paint, or a compatible paint pen. Place a few larger stars first: draw a vertical stroke, a shorter crossing stroke, then two small diagonals. Add tiny dots around them.
Join only some of the stars with dotted lines, leaving open navy areas between groups. These are constellation-inspired decorations, not an accurate star chart. Practice the marks on scrap paper before working across a rib. If a dot becomes a blob, let it dry and cover it with the base color rather than smearing it away. Keep the finished pumpkin indoors.
For more brush-and-paint directions to take next, browse 30 Easy Pumpkin Painting Ideas You’ll Love to Try.
18. Create a chalkboard message pumpkin
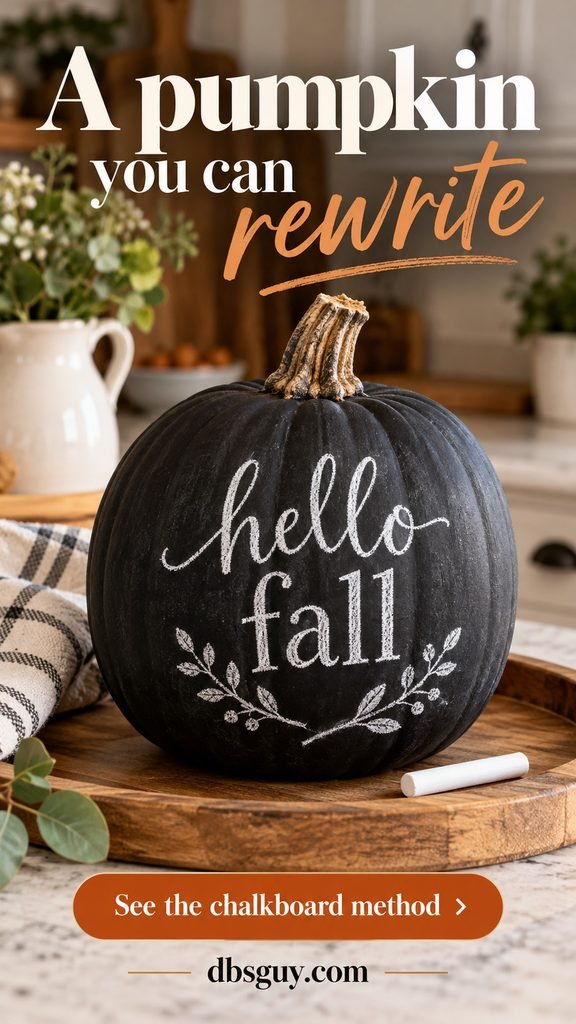
A message pumpkin can move from a simple fall greeting to a dinner-party welcome. Choose a smooth faux pumpkin with a broad front; deep grooves make handwriting much harder.
Use chalkboard paint approved for the pumpkin material, a brush, and ordinary chalk. Follow the product’s preparation and coat instructions, then allow its full stated cure time before writing. A surface that feels dry is not necessarily ready for chalk.
Condition the cured finish as directed, usually by lightly rubbing the side of a chalk stick over it and wiping away the excess. Write a short message such as “hello fall,” then add a small leafy line if you want the illustrated finish. Test erasing on the back first. Do not substitute ordinary matte black paint, and avoid liquid chalk markers unless the paint manufacturer confirms they erase from that finish. Keep it indoors.
Keep your finished pumpkin looking good
Set real pumpkins on a washable tray and check underneath regularly. Keep them away from heat and bring them in when outdoor conditions could damage the pumpkin or its decorations. A covered porch can still be damp, windy, or exposed to rain. If a pumpkin develops soft spots, leaks, or mold, retire it rather than covering the problem with more craft material.
Let faux pumpkins dry and cure completely before packing them away. Wrap delicate finishes loosely and give wings, crowns, and bows their own space so they are not crushed. Lift off removable decorations before storing them.
At the end of the season, remove ribbon, fabric, stickers, and other non-compostable attachments from real pumpkins. Check your local compost program’s rules for decorated pumpkins; do not assume painted or glued ones are accepted. Never leave decorated pumpkins out for wildlife or use painted and glued display pumpkins for food.
No-carve pumpkin decorating FAQs
Do no-carve pumpkins last longer than carved pumpkins?
Leaving the rind intact avoids the exposed cut surfaces of carving, but it does not stop a real pumpkin from spoiling. Starting condition, temperature, moisture, and handling all matter. There is no reliable display-life promise for every decorated pumpkin; use a faux one if keeping the finished project is the priority.
What paint should I use?
For the painted faux-pumpkin ideas here, choose an acrylic craft paint whose label includes the pumpkin’s material. Test adhesion, use thin coats, and allow the stated drying time between them. Glossy surfaces may need a compatible primer or preparation specified by the manufacturer. Use actual chalkboard paint for the erasable-message design.
Can I use hot glue?
Only if the glue and temperature are appropriate for the materials. Heat can damage some foam pumpkins, and hot glue can burn fingers. The projects here can use compatible room-temperature craft adhesives instead; support attachments while they set. No single glue works equally well on waxy skin, plastic, fabric, and foam.
Which idea is easiest to undo?
The velvet bow and removable flower crown lift off without peeling a finish. A lace band glued only to itself is another good choice. Tape and stickers may leave residue or lift paint, so test before treating them as fully reversible.
Can I put these pumpkins outside?
Most are better indoors. Paper, yarn, gauze, and ordinary adhesive decorations can deteriorate in damp weather. For a brief outdoor display, choose a dry sheltered location and bring the pumpkin back inside afterward. A permanent outdoor project needs a pumpkin and every coating and adhesive rated for that exposure.
Start with the finish you will enjoy making
If you are decorating tonight, start with the bow or sticker face. If you want a keepsake, use a faux pumpkin and give yourself time for the yarn, patchwork, or painted designs. Choose the display spot before you start: a small, stable pumpkin that fits your shelf is more useful than an elaborate one with nowhere to sit.