15 Christmas Nails Ideas Red: Gold and Glitter for When You’re Feeling Festive


Red Christmas nails can go from a little festive to full party sparkle with one decision: where you put the gold. A single glitter nail keeps the set simple. A fading gold tip adds more shine, while a ribbon, star, or tiny tree makes the Christmas theme clear.
These 15 ideas show different ways to use that pairing, with placement details you can take to an appointment and smaller versions for short nails. Start with the amount of sparkle you actually want to see on your hands, then choose the pattern.
Image note: All visuals are AI-generated design concepts, not photographs of completed or tested manicures. Use them to discuss color, placement, and finish; products, application, and lighting will affect the result.

Choose your red-and-gold combination
- For a small festive detail: try one gold accent nail (1), a fine cuticle crescent (4), or sparse dots (13).
- For visible party sparkle: compare the gold tip fade (3), ruby glitter (7), and matte nails with glitter corners (10).
- For unmistakable Christmas art: start with gift ribbons (6), red tartan (11), or a tiny gold tree (12).
Pick your red against your own hands: cherry feels brighter, ruby looks richer, and burgundy gives gold a darker backdrop. Champagne gold is a softer-looking pairing; yellow gold makes a clearer contrast. Compare swatches together rather than choosing from shade names alone.
1. Cherry Red With One Gold Glitter Nail
A full gold ring nail gives a short cherry-red manicure one obvious focal point. Keeping the thumb, index, middle, and pinky plain lets the glitter read clearly, even when the nails are only a little longer than the fingertips. The soft square shape in the reference keeps the outline neat.
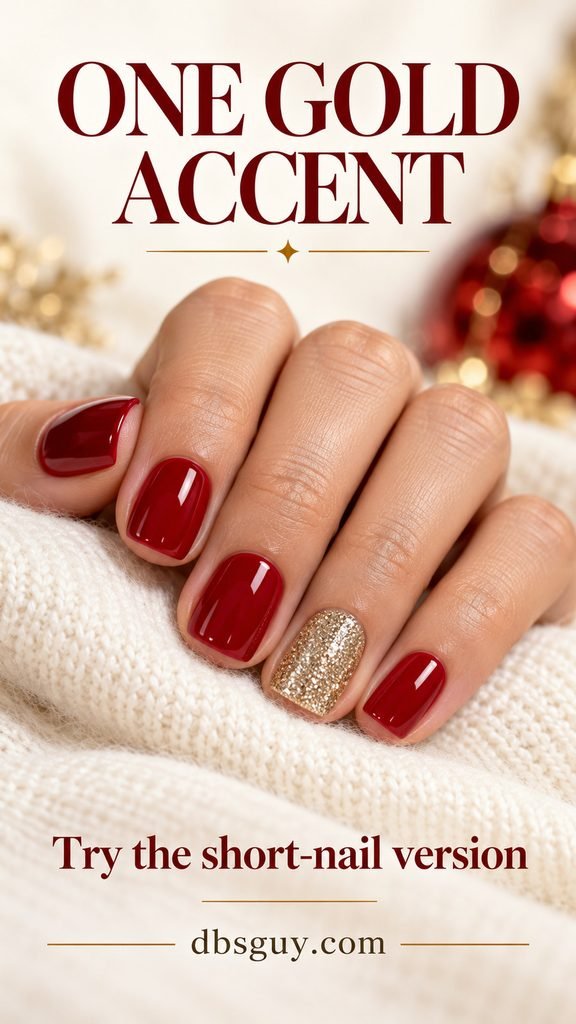
This is a straightforward home option if you already paint your nails. Choose a gold glitter polish intended for coverage, rather than expecting a sparse topper to look opaque. Ask for one champagne-gold accent per hand and glossy red everywhere else. If the ring nail is particularly narrow, move the gold to whichever nail gives you the space you prefer.
Also read: 21 Short December Nail Ideas That Make Tiny Details Stand Out.
2. Red French Tips With a Fine Gold Edge
Sheer pink centers give these red and gold Christmas nails a lighter feel than a fully painted set. The red tip supplies the color, and a fine gold line follows its inner curve. Keep that gold line narrow enough that the two colors remain separate.

At the salon, point to the boundary between the red and pink: that is where you want the gold. Ask to see one finished tip before repeating it. On short nails, reduce both the red band and the gold line; a deep French tip would cover much of the pink. The reference uses almond nails, but the same color placement can follow a rounded edge.
3. Crimson Nails With a Gold Glitter Tip Fade
Concentrate champagne glitter at the free edge and let it scatter toward the middle. That gradual change gives the nails a dipped-in-gold effect while keeping the cuticle area red. Tapered nails provide room for the fade, but a shorter oval can carry a shallower version.
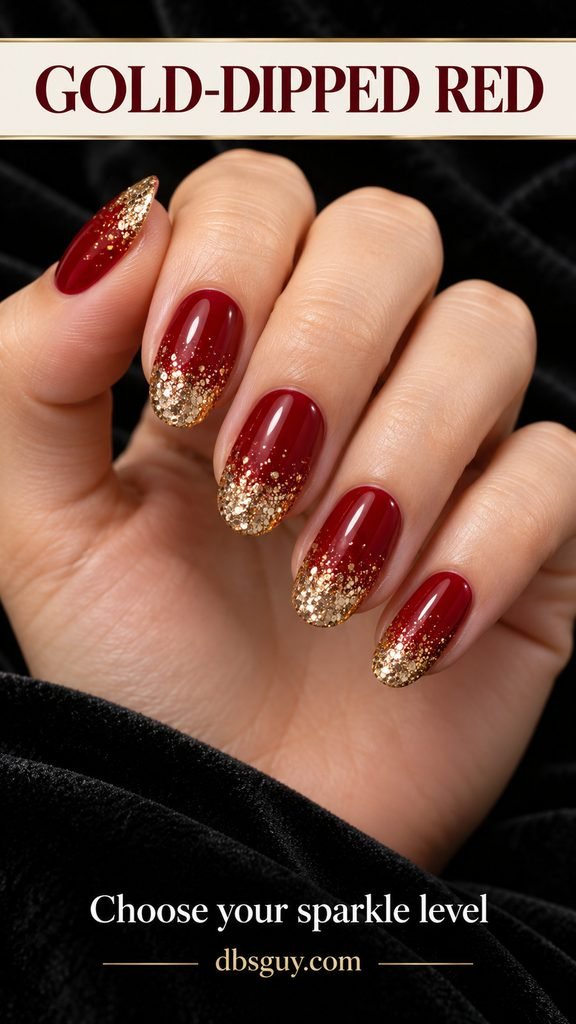
The useful salon request is “dense glitter at the tips, sparse through the middle, plain red at the base.” A hard horizontal glitter band creates a different look. For a home interpretation, build the tip first with a glitter lacquer, then use the small amount left on the brush to soften the boundary. Stop before the scattered particles reach the cuticle.
4. Burgundy With Slim Gold Cuticle Crescents
Move the sparkle to the base for a quieter effect. A narrow gold crescent follows the cuticle curve while most of each short nail stays burgundy. It gives a plain dark manicure a small decorative edge without needing a separate Christmas drawing.
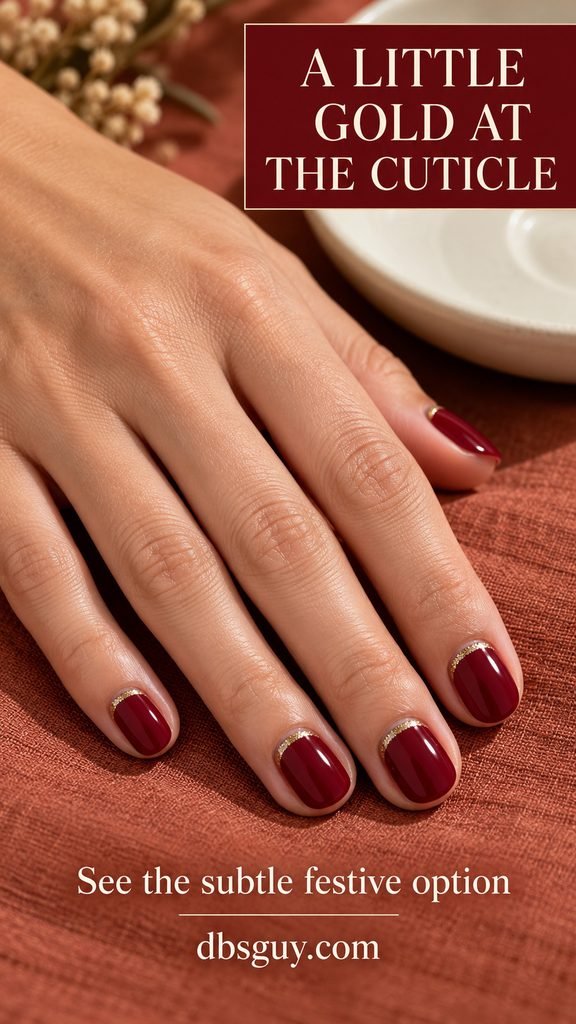
Keep the crescent on the nail plate with a clean gap from the skin. A fine glitter liner is easier to place precisely than large loose pieces. If ten matching arcs feel like too much detail, use them only on the middle and ring nails. Choose this version when you want rich red color to remain the main feature.
Also read: 25+ December Nail Ideas to Match Your Mood, From Cozy to Party-Ready.
5. Deep Red With Scattered Gold Foil
Gold foil gives larger, irregular flashes of metal than the glitter looks above. Here, torn-looking pieces sit on the index and ring nails, with red visible between them. The other nails stay glossy and plain, so you can see the foil shapes individually.
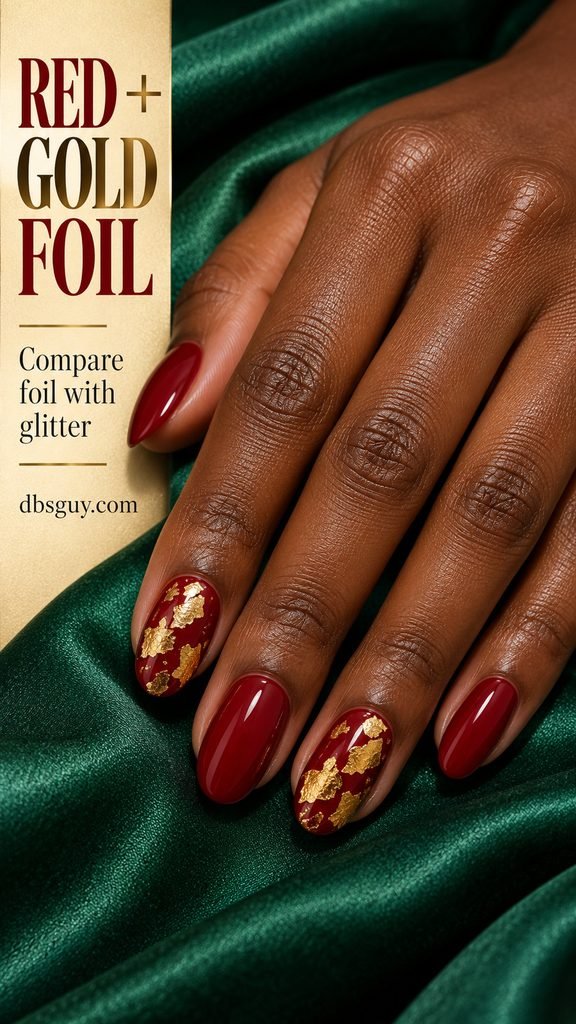
Bring a close-up when you book and specify sparse foil rather than a solid metallic nail. Ask for the pieces to lie flat within the nail edges and be finished with a compatible top coat. For a simpler home version, choose a nail-art foil product made for your polish system and follow its adhesion instructions. Random placement is part of the design; the two accent nails do not need to match.
6. Scarlet Gift-Wrap Nails With a Gold Bow
One ring nail becomes a wrapped present with crossing gold ribbon lines and a small bow. Plain scarlet companion nails repeat the gift color without adding more artwork. This is a clear Christmas choice for someone who would rather wear one recognizable motif than several different characters.
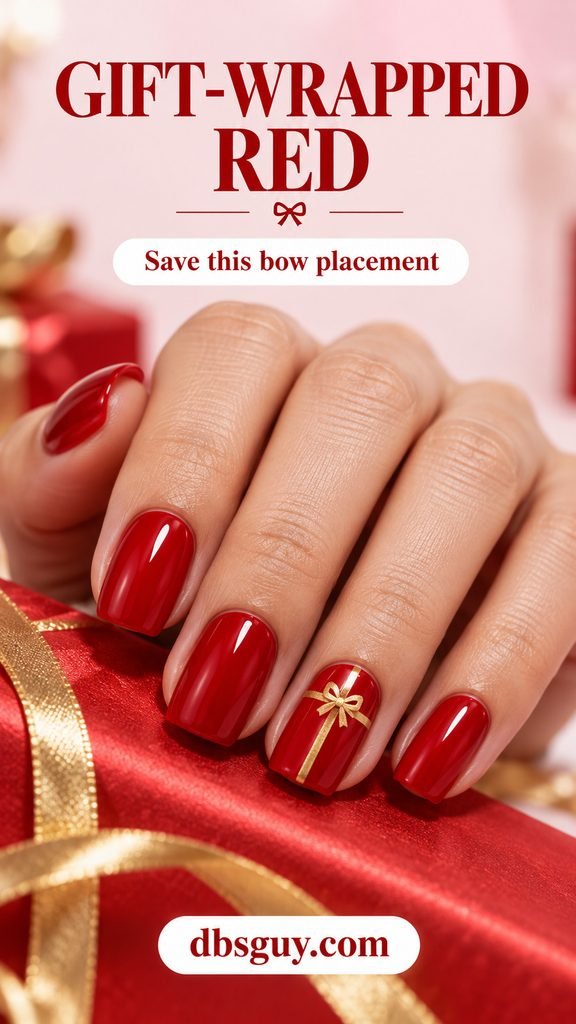
The illustrated bow has a slightly raised appearance. If you want a flatter finish, request painted gold lines with a small flat bow decal or a hand-painted bow. Put the crossing above the center of the nail so there is room for the ribbon tails. For a very short nail, keep the bow and vertical line, and omit the horizontal ribbon.
7. Ruby Glitter With One Gold Pinstripe
All-over ruby glitter carries the sparkle here; one slender gold stripe adds a clean line to the ring nail. This is a useful middle ground when you want more shine than a cream polish but do not want bows, trees, or other holiday illustrations.
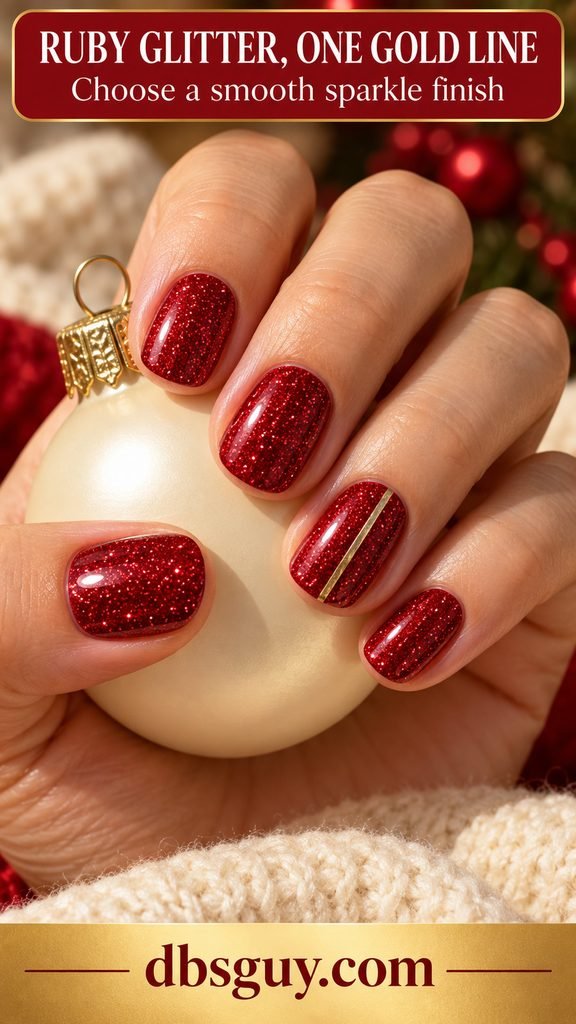
Choose fine red glitter for the evenly sparkling appearance in the reference. Ask for a smooth finished surface and one lengthwise metallic line, placed just off center. More stripes would compete with the glitter. If a shifting band of light is what you had in mind, compare a magnetic velvet reference before booking: scattered glitter and a magnetic highlight give different visual effects.
Also read: 21 Velvet Cat-Eye Nail Ideas for December That Catch the Light Beautifully.
8. Red Accent Nails With Diagonal Gold Stripes
Diagonal gold bands borrow the rhythm of candy-cane stripes in a red-and-gold palette. Keep the pattern on the middle and ring nails, with plain red on the others. Three separated bands are enough to make the direction clear on the almond reference.

Ask your artist to keep the angle consistent across the two accents and leave more red than gold showing. On a shorter shape, use two stripes rather than crowding in three. If you are doing this at home, a metallic nail-art liner gives more control than a full-size polish brush. Practice the diagonal on a spare tip before working on your less steady hand.
9. Ruby Red With Tiny Gold Stars
Small gold stars give ruby nails an ornament-like detail without filling the whole nail. Place them on the middle and ring fingers, with a few tiny gold dots in the gaps. The plain red nails around them give the little shapes a clear background.
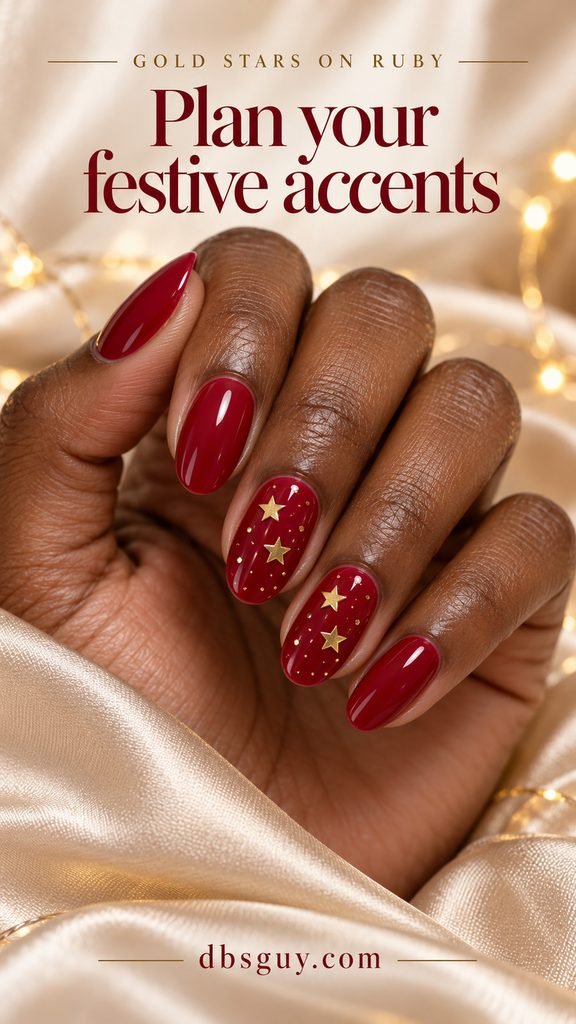
Size matters more than the number of stars. Each point should fit within the red nail, so choose smaller decals before adding more of them. The reference uses two stars on each accent; one star is a useful adaptation for short nails. Ask for flat nail-art decals or painted stars if you prefer the appearance of smooth artwork over raised charms.
10. Matte Oxblood With Gold Glitter Corners
A matte red base makes the reflective gold corners especially visible. Each glitter patch cuts diagonally across one free-tip corner, leaving the rest of the short square nail matte. The contrast comes from both the finish and the placement.

Show the reference before the finishing step and explain that you want the red matte and the gold reflective. A single finish across everything would change that contrast. Let your technician choose compatible products for the two areas. On tiny nails, keep the gold to a small corner wedge; extending it across the full tip turns it into a French design instead.
11. Red Tartan With Fine Gold Crossings
Red tartan suits the cozy side of Christmas: knitwear, a wool skirt, or a simple sweater dress. Two accent nails carry darker burgundy bands over a brighter red base, with fine gold lines crossing the pattern. The remaining nails stay wine-red.

The darker bands establish the plaid, while the gold lines should be noticeably thinner. Ask for a simplified grid rather than an entire fabric pattern shrunk onto each nail. A soft square gives the crossings a clear edge to work against. On short nails, one dark vertical band, two horizontal crossings, and a few fine gold lines can suggest the pattern without becoming a dense mesh.
12. Cherry Red With One Gold Glitter Tree
A tiny gold tree makes a short red manicure unmistakably festive. Use one compact glitter triangle on the ring nail, a small trunk, and a miniature star above it. The other nails need only glossy cherry-red polish.
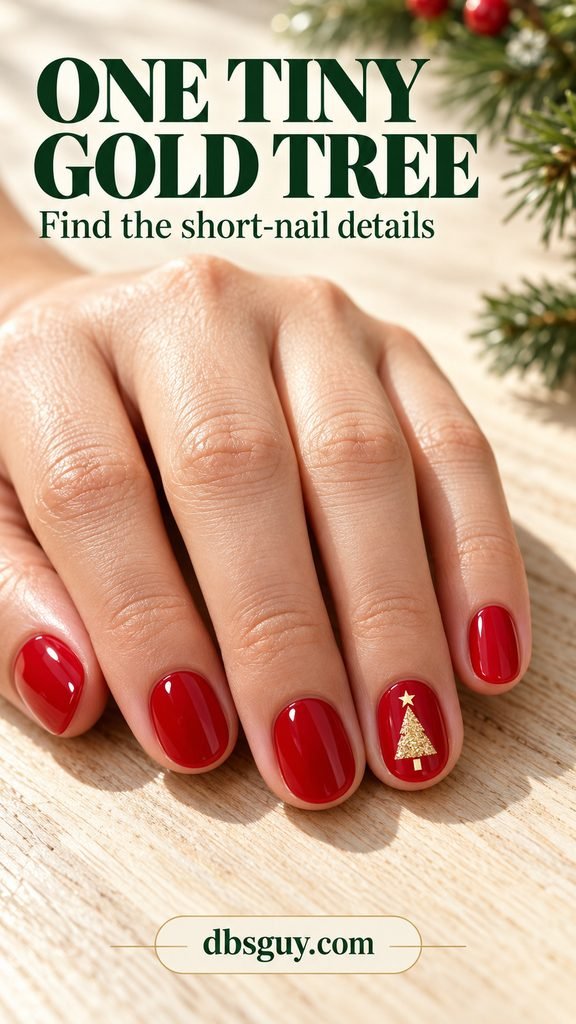
Leave a red margin around the tree and a little separation below the star. That space helps the silhouette stay readable. If the nail is too short for all three details, simplify to a triangle with a small trunk. A correctly sized tree decal is a practical home alternative to painting and filling a miniature outline. Choose the decal size before painting the full set.
Also read: 27 Christmas Nail Ideas From Classic Red to Unexpected Twists.
13. Cherry Red With Small Gold Polka Dots
Gold polka dots give red Christmas nails a playful finish without intricate linework. Keep the dots small, round, and separated. The reference spreads them across every nail; using them on just one or two nails is a quieter variation.

For a home version, practice with a nail dotting tool and metallic gold lacquer over a fully dry red base. Use a light touch and reload for similar-sized dots. Start with three dots on a short nail, then check the spacing before adding another. Avoid placing them directly against the sidewalls, where a round dot can look clipped. These are painted circles, so raised studs are not needed.
14. Sheer Pink With a Red Swoosh and Gold Curve
This asymmetrical design leaves a generous sheer-pink center, with a red sweep curving along one side and around the tip. A fine gold line traces the inside of the red. It is a lighter alternative to full red coverage and a more fluid shape than the French tips above.

Ask your artist to keep the center open and repeat the same direction of curve across the hand. On a short nail, make the red sweep narrower so it does not consume the pink. Bring a close-up of the curve: asking only for “red tips with gold” could produce the symmetrical French version instead.
15. Scarlet and Gold Checkerboard Accents
Large alternating squares turn the same holiday palette into a graphic party pattern. Put the checkerboard on the middle and ring nails and leave the others scarlet. The illustrated gold has a softly textured metallic appearance, which separates it clearly from the glossy red squares.
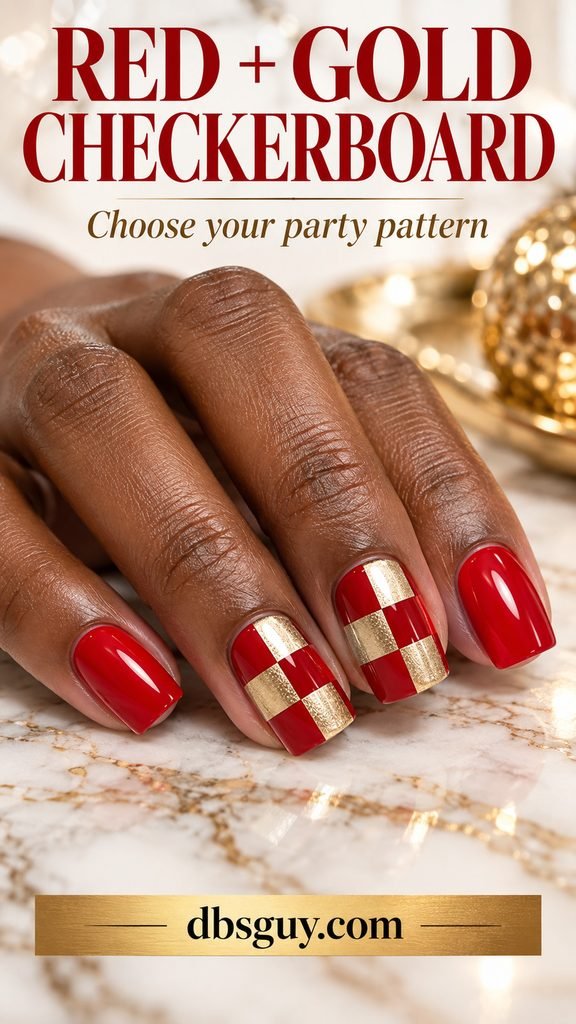
For the square reference, two columns and three rows give the pattern room to read. On a smaller nail, reduce the number of rows rather than making every square microscopic. This is a precise brushwork request, so send the reference when booking and confirm that the appointment includes the two patterned nails. Correctly sized checkerboard wraps are another option if you prefer applying a ready-made pattern.
Also read: 25 Christmas Nails That Steal the Show at Every Holiday Party.
Make the reference useful at home or at the salon
For a home manicure, the single glitter accent, ruby glitter base, and sparse polka dots are sensible starting points. Fine French borders, two different surface finishes, tartan, and checkerboard call for more control. Pick the design you can manage on both hands, or simplify it to one accent.
For regular lacquer, use the base coat, color, and top coat according to the product directions, with thin coats and drying time between layers. OPI recommends dabbing chunky glitter to position the particles rather than relying on long brush strokes; its nail polish application guide explains the lacquer process. Gel products need their own compatible system and curing instructions; regular lacquer drying directions do not substitute for those.
A useful salon brief includes your usual length, preferred shape, exact red, type of gold, and number of accent nails. “Short squoval, glossy cherry red, one champagne-glitter ring nail per hand” gives much clearer direction than “festive red.” Send the image beforehand and confirm the service, nail-art time, and total price with the salon.
Questions about red, gold, and glitter Christmas nails
Which design works best on very short nails?
Start with the single gold accent, slim cuticle crescent, or sparse polka dots. Each uses a simple placement that does not depend on a long free edge. If you want the tree, choose one small silhouette and leave red visible around it.
Do I need gel for these designs?
Several can be interpreted with regular lacquer, including the glitter accent, polka dots, and painted gold lines. The reference shows the design rather than proving a particular product system. Ask your technician which service can create your chosen finish, or select nail-art products explicitly intended for the lacquer you use.
Is gold foil the same as gold glitter?
No. The foil idea uses larger irregular metallic pieces. The glitter looks use many smaller reflective particles. Show a close-up and name the finish you want; replacing one with the other changes the appearance even when the colors match.
Can these nails work after Christmas?
The glitter fade, gold-edged French, matte corners, and checkerboard do not depend on a Christmas symbol. Choose one of those if you want the same design for a New Year’s gathering. The bow and tree make a more specific holiday statement.
Save the look with the placement you like most, then decide how much of it to repeat. One gold detail on a red manicure can be enough; the useful reference is the one that shows exactly where you want it.