
Keep the shine you loved on New Year’s Eve, then give it a little more breathing room. January holiday nails can be a sheer manicure with champagne tips, navy with tiny silver stars, or a smoky velvet finish that catches the light when you reach for your coffee. You can keep the celebratory detail without building the whole set around a countdown.
These seven looks take sparkle into back-to-work mornings, winter dinners, and the weekends after the decorations come down. Each includes a placement note and a way to adjust the design to your nail length. Keeping the sparkle going means carrying the style into your next manicure; it does not mean stretching one set through the whole month.

The images are AI-generated manicure concepts. They show intended colors, placement, and finishes rather than completed salon work or wear-tested results. Your nail artist can adapt the references to your nails and their products.
Choose How Much Sparkle You Want to See
Start with where you want the shine, rather than choosing every detail at once:
- Just along an edge: champagne tips (1) or silver crescents (3) leave most of the nail quiet.
- Against a deep winter color: navy stars (2) and burgundy foil (5) give a small metallic accent more contrast.
- Across the surface: the icy fade (4) has visible glitter, while pewter velvet (6) gives a softer, more continuous reflection.
- A lighter color with a little party detail: milky lilac confetti (7) keeps the flakes on two accent nails.
If you are starting with a favorite party reference, decide which one feature you want to carry forward: its color, its metal, or its finish. Our New Year’s nail ideas offer more evening-focused options; the designs below bring the decoration down to a scale you may prefer for January.
1. Champagne Micro-French Tips for the First Week Back
A sheer warm-pink base and a narrow champagne-glitter tip keep the warm flash of party nails in a much smaller space. From a distance, the set reads as a light French manicure. Up close, the little gold particles become the detail.

The important choice is the width of the tip. Ask for a slim curve that follows the nail’s outer edge, with plenty of pink left visible. Fine glitter gives a more continuous line than a topper filled with large flakes. The reference uses short almond nails, but the same curve can follow a rounded or squoval shape.
For very short nails, request a delicate painted edge rather than a wide band that tries to imitate a longer French tip. A pale champagne can read almost silver, so compare the actual swatch with a warmer gold before choosing. If you paint at home, try the edge on one accent nail first; keeping the curve narrow takes more control than an all-over glitter coat.
Salon request: “Sheer warm pink with very fine champagne-glitter micro tips. Keep the gold narrow and the center sheer.”
2. Midnight Navy With Two Tiny Silver Stars
If you still want a dark manicure, use navy as the main color and let the decoration suggest a winter night. Fine silver specks across the set add a little light, while two four-point stars on one ring nail create a clear focal point.

Notice how much navy remains between the stars. That space matters more than making the two shapes identical. For a shorter or narrower nail, one small star is enough; keep the other nails to fine shimmer so the accent stays easy to read.
Choose a navy that still looks blue in the light where you spend most of your day. An almost-black shade is a good option if you like that depth, but it will give the set a different mood. Flat silver nail decals can offer the same placement without raised stones. Ask to see their size against your nail before committing to two.
Salon request: “Short squoval navy nails with fine silver sparkle, plus two tiny flat silver starbursts on the ring nail.”
3. Silver Crescents Around a Milky Blush Base
Move the sparkle to the base of the nail and leave the tip plain. A slender silver crescent frames a translucent blush center without filling it, making this a useful choice when you want a light manicure with one precise detail.
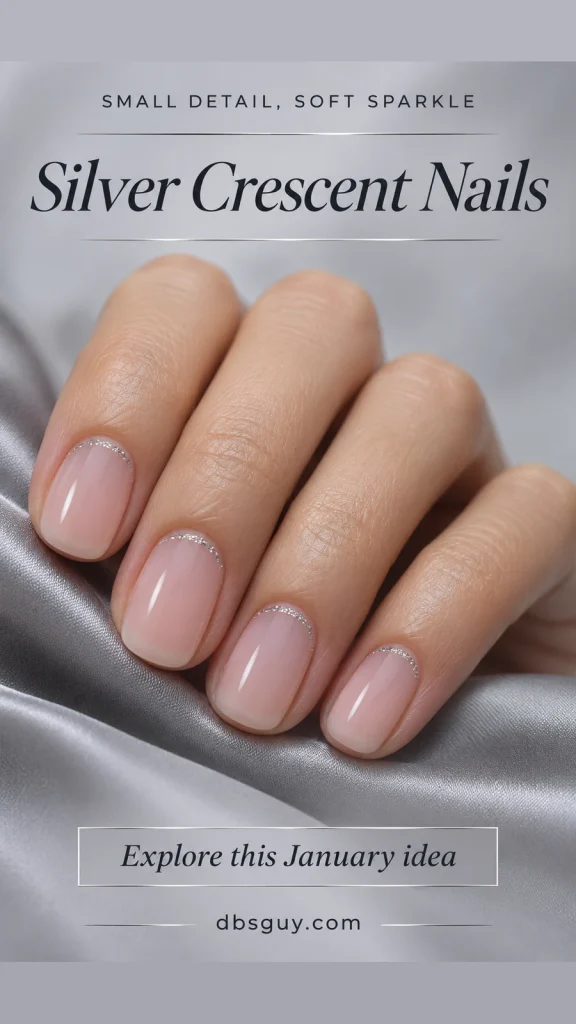
The crescent belongs on the nail plate, following the curved lower edge with a small clean gap from the skin. It is a fine glitter arc, rather than a row of crystals or a full silver outline. The reference uses softly rounded short nails; there is no need to add length for the placement to show.
Ask for the line to remain thin at the sides. A thick band can swallow the pale base on a small nail. You can also keep the crescent on the two middle nails and leave the others plain blush if repeating the border on every finger feels too formal.
Salon request: “Milky blush with a delicate silver-glitter crescent near the base. Leave a clean gap from the skin and no glitter at the tips.”
Also Read: 15 Elegant January Nail Art Ideas to Pair With Your Winter Jewelry for more ways to choose a small metallic detail.
4. An Icy Blue Glitter Fade With a Soft Edge
A pale blue base gives silver glitter a winter setting without needing a snowflake drawing. Concentrate the sparkle at the tips, then let it thin out toward the middle. The blue near the base should remain mostly clear of glitter.

This is the option to choose when a crisp French line feels too exact. Its uneven, feathered boundary is part of the design. The reference keeps the same direction on every nail, so the set feels connected even though the particles do not land in matching positions.
On short nails, keep the densest sparkle close to the outer edge. If the glitter reaches evenly from base to tip, you will get an all-over glitter manicure instead of a fade. A clear-base silver nail topper over blue regular polish can give a home interpretation; check a practice swatch to see whether the topper leaves the blue visible.
Salon request: “Short oval icy-blue nails with fine silver glitter fading inward from the tips. Keep the cuticle-side area mostly blue.”
5. Burgundy With One Small Gold-Foil Accent
You can keep a rich holiday red and change the artwork around it. Here, deep burgundy covers the whole set, while a few irregular gold-foil fragments sit along one side of the ring nail. The color does most of the work; the foil supplies a small flash.
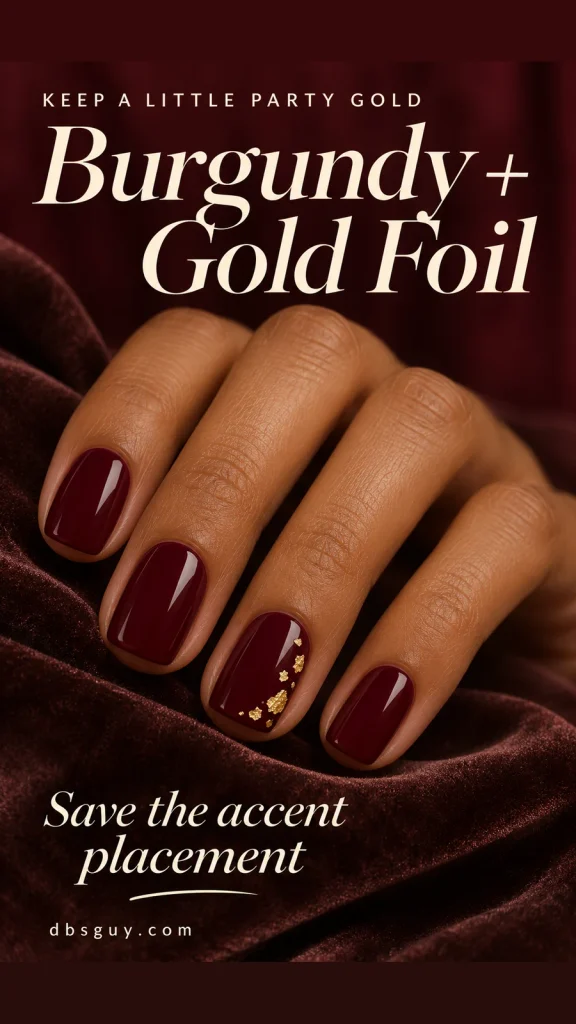
Ask for separated fragments near the outer corner, rather than a solid gold stripe. Burgundy showing between the pieces makes the accent look scattered instead of heavily outlined. Leaving the other nails plain also gives you a clear answer when choosing between more foil and more color.
A short squoval shape suits this compact placement. On a narrow nail, reduce the cluster rather than wrapping the fragments around both sides. Specify a flat, sealed finish if you want the visual texture of foil without raised embellishments.
This is an easy reference to take to a January dinner appointment when you already know you like dark red. Compare a wine shade and a browner burgundy on a swatch; the gold will sit differently against each.
Salon request: “Glossy burgundy, with a small broken cluster of flat gold foil on one side of the ring nail. Keep the remaining nails plain.”
6. Smoky Pewter Velvet for Shine Without Drawings
Pewter velvet puts the interest in the reflection. A smoky gray base and broad silver glow give the manicure movement without stars, outlines, or foil accents. Choose it if you want every nail to share the same finish.
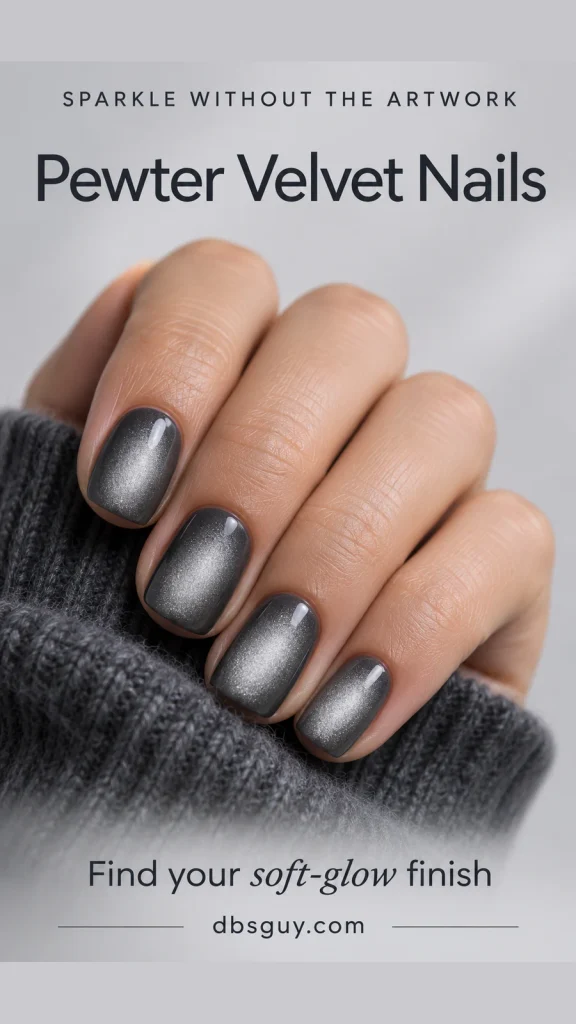
The reference shows a diffused, softly rounded highlight with darker gray around the edges. Ask for that broad glow if you prefer it to a sharply defined cat-eye stripe. Magnetic polish uses a magnet to arrange its responsive particles; “velvet” describes the visual effect, not a fuzzy surface.
Check the salon’s sample as it tilts, since one still image cannot show how the reflection changes. The result depends on the polish and magnet technique. A fine silver-gray shimmer polish is a simpler alternative when you mainly want the color, though it will not reproduce the same magnetic effect.
Salon request: “Short rounded-square pewter magnetic nails with a wide, diffused silver glow. I prefer a soft center highlight to a sharp diagonal band.”
7. Milky Lilac With Sparse Silver Confetti
For a lighter change after dark party nails, try milky lilac with a little silver confetti on two nails. The pastel base shifts the mood of the set while the small metallic flakes keep a connection to the sparkle you enjoyed in December.
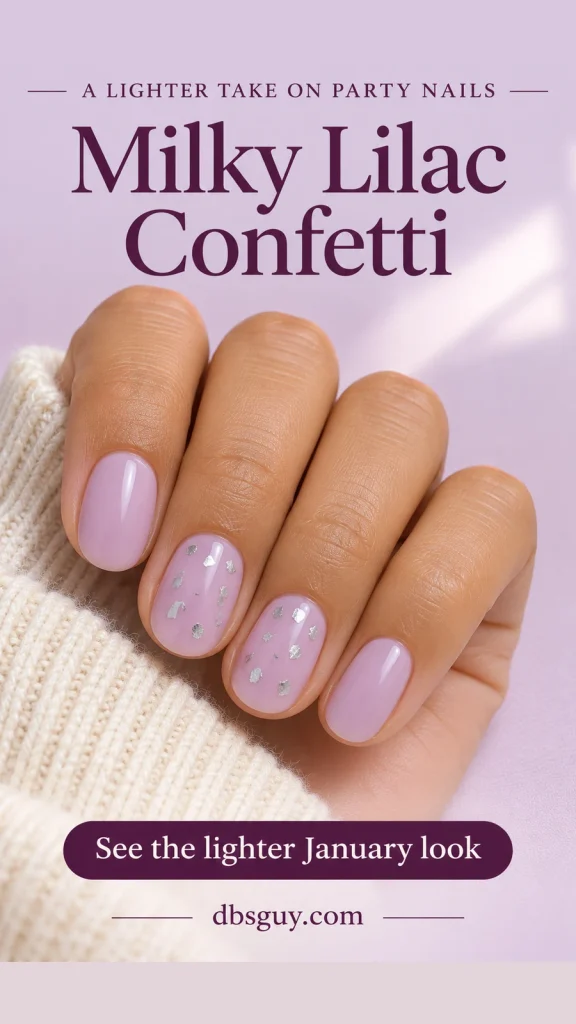
Keep the middle and ring nails as the accents, with clear lilac gaps between the pieces. The reference uses irregular flat silver flakes rather than colored dots or shaped glitter. That distinction is worth showing your artist: a densely packed topper will create a much busier finish.
On very short nails, use just a few tiny pieces on one accent nail. If you prefer a home version, test a sparse silver-flake nail topper over your lilac first. You want the base to remain the main color, so choose the topper for its spacing as well as its shine.
Salon request: “Short milky-lilac nails, with sparse flat silver confetti on the middle and ring nails. Leave plenty of lilac showing and keep the other nails plain.”
Take a Clear Reference to Your Appointment
Save the image you like, then point out the detail you want to keep. “I want that narrow tip, but on my usual rounded nails” is more useful than asking for January nails alone. Confirm the base color, placement, amount of sparkle, and whether you want the surface smooth or embellished.
Choose your length before the artwork. Small stars and foil clusters can be reduced to one accent; an all-over finish can stay the same at a shorter length. If you want a more manageable painting project at home, the January nail-art practice guide breaks simpler details into individual exercises.
January Holiday Nail Questions
Can I wear holiday sparkle after New Year’s Eve?
Yes. There is no date you need to stop wearing glitter. If you want the design to feel less tied to the party, keep one element you love and simplify the rest: a narrow gold tip, a silver star, or a reflective finish can carry the idea into an everyday manicure.
Which option is best for very short nails?
Pewter velvet does not need extra space for artwork. Silver crescents also leave the free edge plain. For navy stars or burgundy foil, use one small accent and keep the other nails simple. Choose by the room on your actual nail, rather than copying the number of details in a reference.
Can these looks be made with regular nail polish?
Several can be interpreted with regular air-drying polish, fine glitter toppers, or suitable flat nail decals. Magnetic velvet requires a magnetic formula and the matching technique; ordinary gray shimmer gives a different reflection. Follow the directions for the products you choose, and treat lamp-cured gel as a separate system.
Should I add glitter over my existing New Year’s manicure?
For a fresh regular-polish look, removing the old color and starting again gives you more control over the base and placement. If you have a salon gel or extension set, ask your technician about its condition and the appropriate refresh or removal. A decorative change does not reset the age of a manicure.
How do I remove regular glitter nail polish?
Use a remover appropriate for your lacquer and follow its directions. OPI’s glitter-lacquer removal guide shows remover-soaked wraps holding the pad against the nail before removal. That guide is for glitter lacquer; gel, dip, and extensions need the removal method specified for their own system.