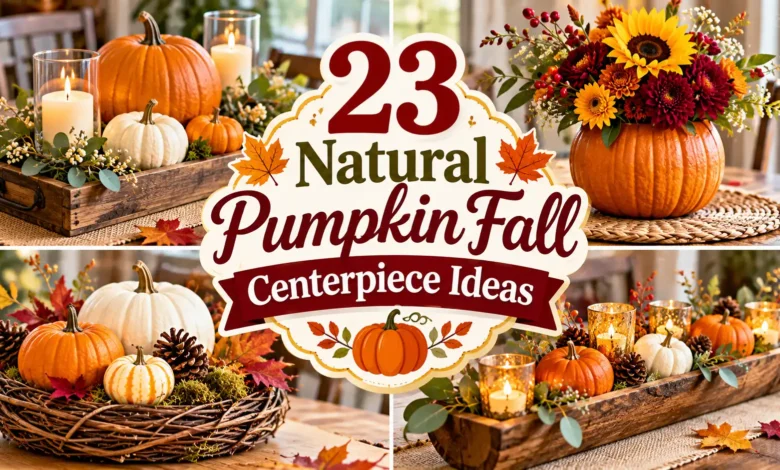
Three small pumpkins on a linen runner can be enough for an everyday fall table. A flower-filled pumpkin makes a stronger dinner-party focal point. The right choice depends on what needs to fit around it: breakfast bowls, a few place settings, or the Thanksgiving serving dishes.
These 23 natural pumpkin fall centerpiece ideas use real, unpainted pumpkins. Choose one arrangement, borrow a container you already have, and adjust the number of pieces to the space left after setting the table.
The images are AI-generated styling concepts. They illustrate the arrangements and do not document completed or tested projects.

Choose a Centerpiece That Fits Your Table
- For a quick, no-cut setup: start with the linen trio, dough bowl, or single pedestal pumpkin in ideas 1, 2, and 5.
- For a small round table: look at the shallow basket or open glass vessel in ideas 3 and 16.
- For fresh flowers: choose the lined pumpkin vase in idea 7 or separate bud vases in idea 8.
- For a full holiday meal: use movable trays or divide the decoration between the ends, as in idea 22.
Put out the actual plates, glasses, and largest serving pieces before choosing a base. Then sit down: you should be able to see the person opposite you and reach a shared dish without brushing the decoration. The quantities below describe the illustrated arrangements, not a required shopping list.
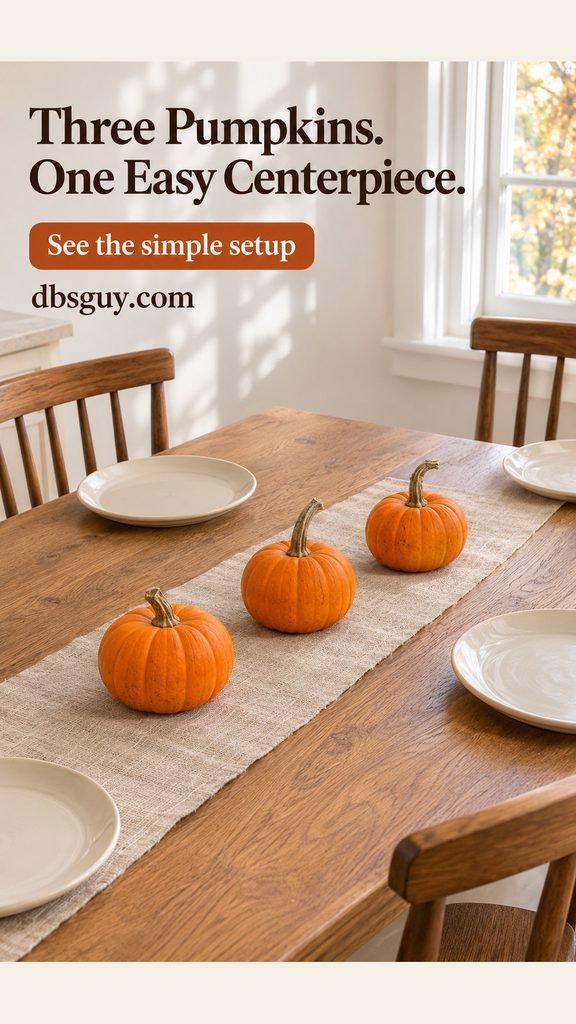
1. Space Three Mini Pumpkins Along a Linen Runner
For one of the easiest fall centerpieces for a table, gather three mini orange pumpkins and a narrow oatmeal linen runner. Space the pumpkins in a single line, leaving enough exposed fabric that each shape reads clearly. Plain white dishes let the orange do the decorating.
A folded, clean tea towel can replace a runner on a short table. Set each pumpkin on a flat stretch of fabric, rather than a ridge that makes it rock. If you need the center for dinner, lift the pumpkins away and leave the linen in place.
2. Fill a Shallow Dough Bowl with Pumpkins and Pinecones
A wooden dough bowl gives loose pieces a boundary and makes the arrangement easy to move. Start with three small cream pumpkins, placing the largest near the middle. Tuck dry pinecones into the remaining gaps without covering the bowl’s wooden rim.
Keep the contents in one low layer; stacking them makes this heavier-looking and harder to lift. Choose a bowl whose shape you like even when it is partly empty. An oblong serving bowl works too. Check that the bowl and pumpkin bases are dry, and use an appropriate protective layer beneath the bowl on a delicate table.

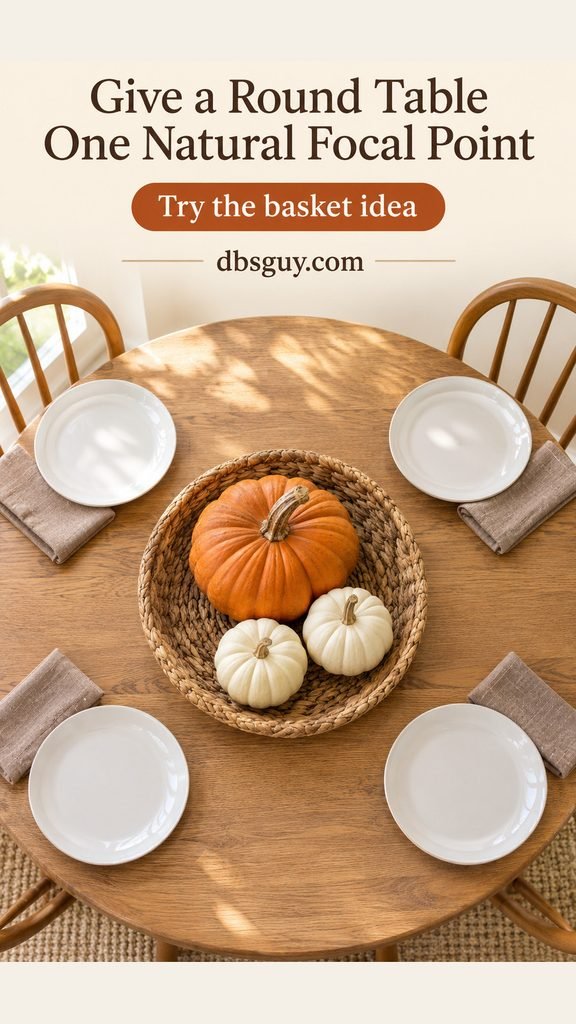
3. Make a Compact Pumpkin Basket for a Round Table
A shallow round basket echoes a circular table without sending a runner through the place settings. Nestle one squat orange pumpkin beside two mini white pumpkins, keeping them supported by the basket’s bottom rather than perched on one another.
Look for low sides that reveal the pumpkins and let you grip the basket. If the handle or rim rises into your view, use a flatter basket or woven tray. Set out a glass at every seat before deciding where the basket belongs; a compact centerpiece still needs a comfortable ring of usable table around it.
Also Read: 23 Last-Minute Simple Fall Tablescape Ideas
4. Arrange a Runner of Naturally Colored Heirloom Pumpkins
Let the rinds supply the palette: cream, pale peach, warm terracotta, muted green, and blue-gray. Arrange a loose row of squat pumpkins along a long table, placing similar colors beside each other for a gentle progression. The appeal comes from their different ribs and shapes as much as their color.
Shop for the natural colors available locally instead of trying to match a photograph exactly. Keep visible gaps between the pumpkins. On a narrower table, use smaller specimens or shorten the row to three; a large heirloom display suits a buffet more easily than a crowded dinner table.

5. Put One Ribbed Pumpkin on a Low Pedestal
One small, deeply ribbed pumpkin deserves a little space around it. Center it on a low stoneware pedestal with a wide foot and a shallow, broad top. Pale peach against cream creates a soft focal point without extra foliage.
Test the pumpkin’s fit before using the stand: its base should rest securely, with no balancing on the rim. Avoid a tall cake stand for a heavy pumpkin. This is a good option when you want the rest of the table to stay plain, or when patterned dishes already provide plenty of detail.

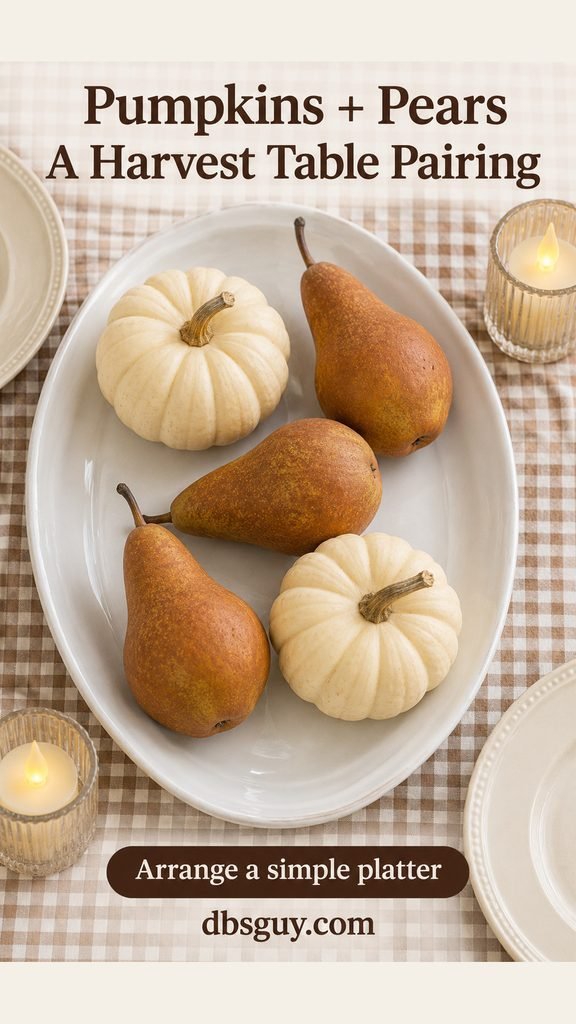
6. Pair Mini Pumpkins with Whole Pears on a Platter
Two cream mini pumpkins and three brown Bosc pears make a quiet harvest arrangement on an oval platter. Lay everything in one layer, turning a few pear stems in different directions. Their elongated shapes break up the round pumpkins without another decorative material.
Choose a clean, food-safe platter if you plan to eat the pears afterward. Keep decorative sprays, glue, and loose craft materials out of the display, and remove fruit as it ripens or bruises. Use an existing neutral platter; the low outline matters more than a special purchase.
7. Make a Pumpkin Vase with a Separate Water Jar
A real pumpkin can form the outer shell of a flower arrangement, but a separate watertight jar should hold the water. Choose a squat pumpkin with a flat base and a clean jar that fits inside. Short golden mums make a compact bouquet that still shows the pumpkin.
- On a stable cutting surface, cut an opening slightly wider than the jar. An adult should handle the cutting.
- Remove the seeds and loose pulp, then wipe away loose moisture inside the shell.
- Set the pumpkin on a waterproof platter and lower the jar into it. The jar must stand securely without being forced into place.
- Add water to the jar, remove leaves that would sit below the waterline, and trim the flower stems so the bouquet stays low.
Leave the cut lid on the platter beside the vase or omit it. Treat this as an event arrangement: inspect the shell frequently, keep the jar from leaking, and replace the pumpkin if it softens or develops mold. An intact pumpkin beside a vase is the simpler choice for an ongoing display.

8. Curve Three Bud Vases Behind an Intact Pumpkin
For flowers without carving, place a whole ivory pumpkin toward the front of a round tray. Curve three short glass bud vases behind it, each holding a single rust-colored bloom in water. Leave their bases visible so the arrangement feels light rather than like a dense bouquet.
Use a pumpkin small enough that it does not hide all three flowers. Remove the jars from the tray when changing the water, then dry their bottoms before replacing them. This setup also lets you swap flowers independently while keeping the pumpkin untouched.

9. Frame a Gray-Green Pumpkin with Dried Hydrangeas
Set a squat gray-green pumpkin directly on a broad platter. Arrange dry hydrangea heads loosely around its outer edge, creating a low ring of tan and faded mauve. The pumpkin should carry its own weight on the platter; the delicate flower heads are a frame, not a cushion.
Start with a few heads and turn their fuller faces outward. Stop before the ring climbs high enough to hide the rind. Use flowers that are already dry rather than enclosing damp blooms beneath the pumpkin. A rimmed platter catches the small petals that may fall as you handle them.

For a lighter setting around a pale pumpkin, borrow the linen and dish combinations in 17 All-White Fall Tablescape Ideas.
10. Lay Short Wheat Bundles Beside an Orange Pumpkin
Instead of an upright sheaf, lay two small tied bundles of wheat diagonally beside one squat orange pumpkin on a narrow tray. The grain heads add fine texture while the pumpkin supplies the weight and color.
Trim the stalks to fit inside the tray before tying them with plain twine. Turn the cut ends inward and keep the grain away from place settings. If the bundles shed heavily, use fewer stalks or move this arrangement to a sideboard. Skip candles here; the low, dry materials already give the tray a complete harvest look.

11. Make a Low Fan of Oak Leaves
Place a small cream pumpkin beside a short, heavy jar containing two brief oak twigs. Fan the rusty leaves sideways so they make a backdrop rather than a tall screen. An oval tray connects the jar and pumpkin while containing any fallen leaves.
Use clean branches gathered where collecting is permitted, and inspect them before bringing them indoors. Put fresh cut stems in water inside the jar; they may still curl or drop leaves, so check them before a dinner. Trim the arrangement from a seated viewpoint, keeping twigs clear of glasses and sleeves.

12. Alternate Mini Pumpkins with Potted Rosemary
Two tiny orange pumpkins and two small rosemary pots make a kitchen-table arrangement with living greenery. Alternate them along a short tray so the fine leaves stand out against the smooth pumpkin rinds. Terracotta brings the materials together without a separate garland.
Choose compact plants and put each pot on its own saucer. Take the pots off the table to water them, let excess water drain, and return them only when their bottoms are dry. Move the rosemary back to a suitable growing spot between meals if the table does not provide enough light.

13. Give Each Mini Pumpkin a Terracotta Saucer
Three little ivory pumpkins, each on a separate terracotta saucer, create a repeated detail down the center of a table. This works especially well when you want clay-colored accents without covering the wood with a runner.
Choose saucers just wide enough to leave a visible border around each pumpkin. Use clean, dry ones and protect the tabletop underneath as needed; unglazed clay is not a waterproof barrier. Move an individual saucer when a serving bowl needs its spot. The pumpkins stay visually connected even when the spacing changes during dinner.

14. Group Pumpkins Between Two Flameless Hurricane Lights
For an evening table, arrange three tiny orange pumpkins between two low glass hurricanes holding flameless LED pillars. A single oblong tray keeps the group contained. Leave the glass clear, without stuffing leaves or pinecones around the lights.
Choose broad, stable hurricanes and LED pillars that fit their openings. Check the lights’ instructions for enclosed use and access to the switches before setting the table. Match their warm light rather than adding more decorative colors. The lamps should stay low enough that the person opposite remains easy to see.

15. Carve a Simple Pumpkin Lantern for an LED Light
A single arched opening gives a small orange pumpkin a lantern-like shape without a Halloween face. Put it on a waterproof platter and use a battery-powered LED light designed for pumpkin or damp-environment use. Keep the lid off while it is lit.
Cut and hollow the pumpkin on a stable work surface, with an adult handling the tools. Make the front opening large enough to position the light without reaching blindly into the shell. Remove loose pulp and surface moisture, then place the light on a stable, dry base according to its instructions.
Remove the light for cleaning and storage. Inspect the cut pumpkin before each use and retire it if it becomes soft or moldy. For a table you decorate daily, the whole-pumpkin lighting arrangement in idea 14 needs less preparation.

16. Display a Tiny Pumpkin in an Open Glass Vessel
Give one mini white pumpkin its own display area in a low, wide, open glass cylinder. Choose a vessel with room around the rind and enough height that the pumpkin sits below the rim. Keep the top open and omit lights or other fillers.
A small dry cork pad can cushion the glass bottom, but check beneath it rather than letting moisture collect unnoticed. This is a compact option for a breakfast table or coffee table. The glass should frame the pumpkin, not squeeze it; if you cannot lift the pumpkin out easily, choose a wider vessel.

17. Combine Pumpkins and Dried Corn in a Stoneware Trough
A low stoneware trough holds a harvest arrangement in a clean, narrow outline. Place three small orange pumpkins along it and lay two short ears of dried decorative corn lengthwise between them. Tuck the loose husks inside the rim so they do not reach into dinner settings.
Set the pumpkins down first and add the corn where it naturally fits. Avoid stacking a pumpkin on a rounded cob. If the vessel feels crowded, remove an ear of corn rather than extending the display across the table. The contrast between gray pottery, orange rinds, and papery husks supplies enough detail.

18. Build a Woodland Tray with Bark and Dry Moss
Pair a cream pumpkin with a smaller green one on a shallow wooden tray. Add a few loose curls of dry birch bark and a little dry moss around their bases. Leave parts of the tray visible so the result feels like a small woodland still life.
Rest the pumpkins on dry protective pads instead of wet moss. Use purchased loose bark or naturally fallen pieces collected with permission; do not peel it from a living tree. Inspect the materials for insects and moisture before arranging them. Keep everything loose so you can lift the pumpkins and check their undersides.

19. Surround a Pumpkin with Separately Potted Succulents
Three small succulent pots can frame one peach pumpkin on a round tray. Gray ceramic pots and low rosette-shaped plants keep the arrangement compact, while the separate containers make plant care straightforward.
Choose pots with suitable drainage and individual saucers. Keep them separate from the pumpkin instead of gluing plants onto the rind or filling a pumpkin with potting mix. Remove each pot for watering, drain it, and dry the outside before returning it. Between meals, give the plants the light their varieties need; the dining table may be only a temporary display spot.

20. Add Burgundy Pomegranates to a Low Pumpkin Compote
Two tiny cream pumpkins and three whole burgundy pomegranates bring a richer color to a neutral table. Use a low, broad compote and keep the pieces in a shallow layer so the fruit stays contained.
The foot should be wide enough to support the filled bowl without wobbling. If you only have a tall, narrow pedestal, use a regular bowl instead. Leave the pomegranates whole to avoid exposed juice around linens. Check and remove fruit as its condition changes, and use a clean, food-safe vessel if you plan to eat it later.

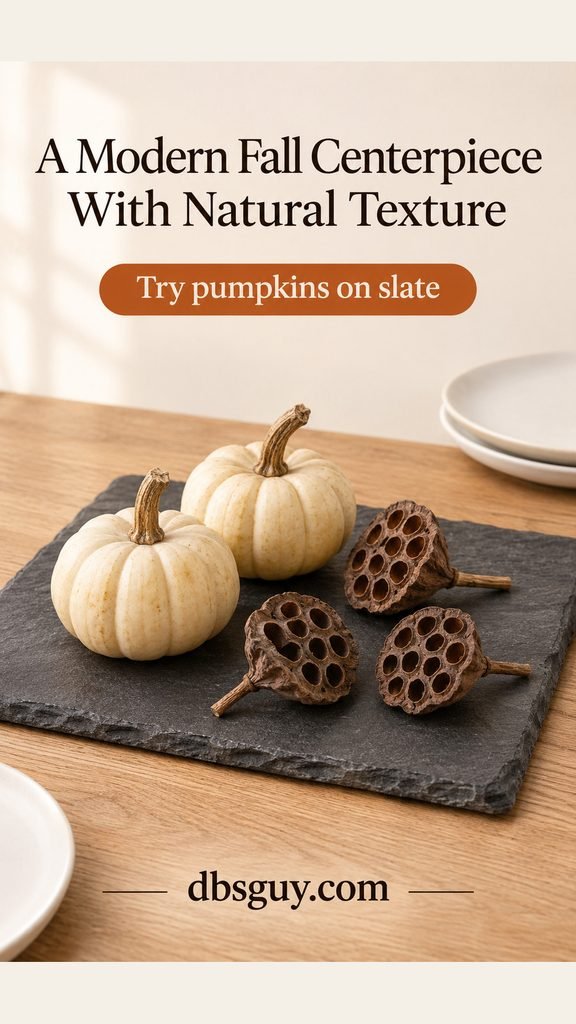
21. Contrast White Pumpkins with Slate and Seed Pods
For a modern fall centerpiece, put two mini ivory pumpkins on a rectangular slate board with three short-stemmed dried lotus pods lying flat beside them. The pale pumpkins stand out against the dark surface, and the pods introduce a different shape without a floral arrangement.
Turn cut stems inward and leave a band of slate visible around the objects. Check that the board has suitable feet or protection for your table; a rough underside can mark a finish. Plain dishes and unpatterned napkins help this small, graphic arrangement remain the focal point.
Also Read: 21 Sleek Modern Fall Tablescape Ideas
22. Divide the Pumpkins Between Two End Trays
When Thanksgiving serving dishes need the middle, split the decoration into two small trays near the short ends of a rectangular table. Put two mini orange pumpkins and one cream pumpkin in each tray. Repeating the same combination makes the two groups feel connected.
This layout suits a table with guests seated along the long sides and unused end space. If someone will sit at either end, move that tray to a sideboard. Rehearse with the empty serving dishes before dinner; the useful part of this arrangement is the clear middle, not the number of pumpkins.

23. Fill a Cornucopia with Small Pumpkins and Gourds
A low woven cornucopia gives a Thanksgiving table a recognizable harvest shape. Rest it horizontally on a broad oval tray, then arrange two orange mini pumpkins, one cream mini pumpkin, and two small green gourds in and around the opening.
Keep every piece within the tray rather than letting rounded gourds roll toward glasses. Fill from the opening inward, using only what the horn supports securely. Turn it slightly across the tray so the curved tip remains visible. If the whole display interrupts conversation, move it to the serving table and let it greet guests there.

Keep Real Pumpkins Looking Their Best
Choose firm pumpkins with intact stems and no soft, leaking, or moldy areas. Carry them from underneath rather than using the stem as a handle. Remove dirt gently and let the bases dry before arranging them. Keep whole pumpkins out of direct sun and away from radiators, and avoid trapping moisture beneath bowls, moss, or fabric.
UC Davis pumpkin and winter squash guidance recommends moderate humidity, ventilation, and roughly 55–59°F for optimum storage. A heated dining room is a display space, so those storage conditions do not promise a particular lifespan on your table. Check the pumpkins regularly, especially underneath, and remove any that begin to soften or mold.
Cut pumpkins need closer attention than intact ones. Keep flower water inside a separate jar, use a waterproof base, and check the shell before each display. None of these arrangements needs a bleach bath, rind coating, or drilled fastening to look finished.
Questions About Natural Pumpkin Centerpieces
What is the simplest DIY pumpkin centerpiece?
Three small pumpkins on a narrow linen runner need very little assembly. If you want to clear the table in one move, group the pumpkins in a shallow basket instead. Start with a base you already own and buy only enough pumpkins to fit it comfortably.
Can I make a fall centerpiece without orange?
Yes. Choose naturally cream, peach, green, or blue-gray pumpkins and repeat one of those tones in a bowl or napkin. Availability varies, so build around the unpainted pumpkins you can find rather than planning a precise shade match.
How tall should a dining-table pumpkin centerpiece be?
Judge it from the chairs you actually use. Sit across from someone and check that the pumpkin, flowers, and container do not hide their face. A squat pumpkin on a shallow base usually gives you more flexibility than a large pumpkin on a tall stand.
Can I leave a natural pumpkin centerpiece out all season?
Keep the container and refresh the perishable pieces as needed. Pumpkin condition, room temperature, moisture, and whether the rind is cut all affect the display. Inspect instead of relying on a fixed number of days, and use a no-cut arrangement when you want the least maintenance.