How to Decorate a Christmas Tree Like a Designer: Ribbon, Bows & Ornament Placement


To decorate a Christmas tree like a designer, work in layers: shape the branches and add lights, tuck in ribbon, make and place your bows, then hang ornaments at different depths. Finish by checking the topper, the base, and the balance of the whole tree. That order gives every piece a place instead of leaving you to squeeze ribbon around ornaments at the end.
The biggest difference is placement. Ribbon needs a little room to billow. Bows need space around their loops. Ornaments need to sit both inside the greenery and toward the branch tips. Here is a six-step method you can adapt to a real or artificial tree, using champagne ribbon, burgundy bows, and ivory-and-gold ornaments as the working example.

The visuals in this tutorial are AI-generated decorating concepts, including close-ups of the techniques. Use them as styling references; actual ribbon behavior and branch strength will vary.
What to gather before you decorate
- Your tree in a stable stand, plus indoor-rated lights if it is not pre-lit.
- One wired ribbon for the loose cascades and a coordinating ribbon for bows.
- Ornaments in at least two sizes, with a few larger pieces if the branches can support them.
- Green chenille stems or appropriate reusable ties, ornament hangers, scissors, and a measuring tape.
- A topper that fits your ceiling clearance, and a skirt or collar that fits the stand.
Lay out what you already own before buying anything. A coordinated ribbon can pull mixed ornaments together, so you may only need a new roll rather than an entirely new collection. In October or early November, this is a useful job to do before you start setting up the tree for the holiday season.
1. Build the foundation: palette, branches, and lights
Choose one thing to lead the design. It might be a burgundy velvet ribbon, a favorite ornament, or the colors already in your living room. For this example, burgundy supplies the strong accent, ivory keeps the tree light, and antique gold adds warmth. The champagne ribbon bridges the ivory and gold without introducing another bold color.
Put a ribbon sample beside a few ornaments and look at them under the lights you will actually use. A cool silver ornament may look different next to a warm gold ribbon at night. You do not need a perfect match, but the combination should look intentional from across the room.
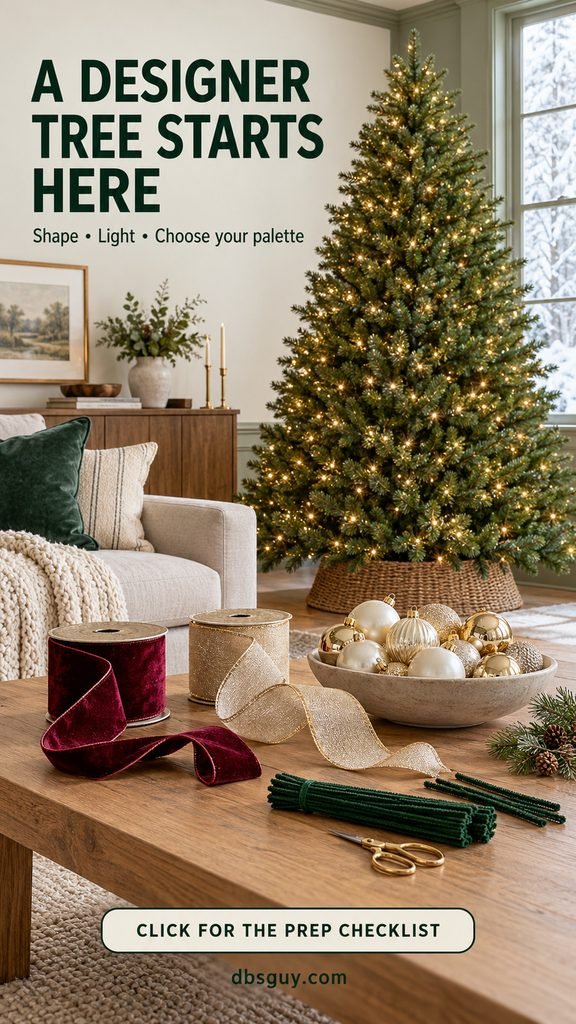
Shape the tree before using decorations to fill it
On an artificial tree, work section by section, separating compressed branch tips and changing their direction enough to cover obvious openings. Follow the tree manufacturer’s shaping instructions, especially around built-in wiring. Look for the outline first: if a whole side looks flattened, fix the branches before hanging anything.
With a real tree, let the branches settle in its stand and use the natural spacing. Avoid forcing them into the symmetry of an artificial tree. An open area can become a good place for a hanging ornament rather than something you must hide.
Check the glow from your usual viewing spot
Test lights before decorating, then distribute them through the branches rather than keeping every bulb on the outer surface. Step back to check for dark patches. With a pre-lit tree, check all sections and connections before covering the wiring with ribbon.
The National Fire Protection Association’s tree safety guidance recommends keeping the tree at least 3 feet from heat sources, leaving exits clear, and adding water daily to a cut-tree stand. Use lights listed by a qualified testing laboratory, follow their connection limits, replace damaged strings, and turn tree lights off before leaving home or going to bed.
Ready for the next step? The stand is steady, the outline looks good, the lights work, and your ribbon and ornaments look right together. Keep access to a real tree’s water reservoir when you add the base covering.
2. Add ribbon in loose sections that disappear into the branches
For the softly cascading look shown here, wired ribbon is easier to shape than an unwired ribbon. The edges let you lift the fabric into a rounded curve without pulling it tight against the greenery. Balsam Hill’s ribbon guide also recommends placing ribbon after the lights and before ornaments, when you can still reach the interior branches.
A 2½-inch-wide ribbon is a manageable starting point for this sample design on a 6- to 7½-foot tree. Try a piece on your tree before committing: dense branches can swallow narrow ribbon, while a slim or open tree can be overwhelmed by very wide fabric.
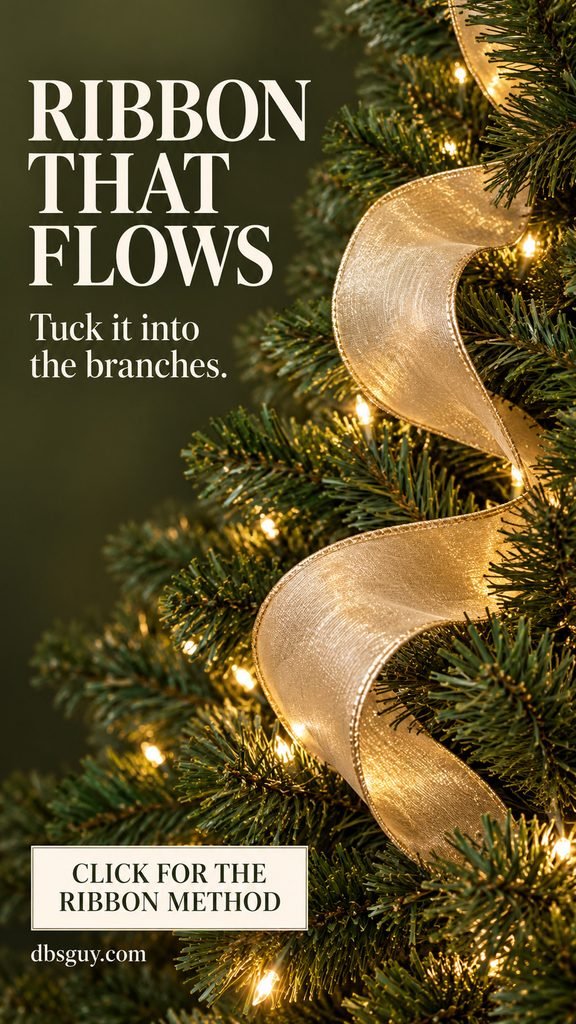
Make one sample section before cutting the roll
- Start with about 30 inches. This is a practice length for the illustrated loose sections, not a fixed size for every tree. Leave yourself enough ribbon to tuck both ends and form one or two billows.
- Hide the first end. Pinch it and fasten it to a sturdy interior branch with a green chenille stem. Wrap the tie around the branch, clear of light cords, and tuck the tie ends out of sight.
- Bring the fabric forward. Let it curve out between the branches. Keep the attractive face visible and open the wired edges gently with your fingers.
- Return it into the greenery. Pinch the ribbon at the next anchor point and secure it farther down and slightly to one side. The curve should feel relaxed, with no tension pulling the two anchors together.
- Finish or form another billow. If enough length remains, bring the ribbon forward again before hiding the final end. Otherwise, stop after one curve and start a separate piece elsewhere.
Follow the branch openings rather than measuring an identical drop each time. When the sample looks good, cut a few more pieces, place them, and reassess. Hidden ends let separate pieces read as a flowing path without requiring you to handle a whole roll inside the tree.
Create movement without covering the whole outline
Start with a few sections in the upper area, then add others lower down at changing heights. Aim for a gentle downward movement through the tree. Leave visible greenery between the ribbons; you should still see the tree’s shape.
If ribbon looks flat, release the lower anchor and give the curve more slack. If it droops, shorten the span or adjust the wired edges. If it disappears completely, move the billow forward while keeping its attachment hidden. Finish the visible front and sides, then decorate any back area people can see.
Estimate ribbon from the pieces you plan to use
For a sample layout covering the main front and sides, 12 cascade pieces at 30 inches each use 360 inches, or 10 yards of champagne ribbon. Six bow blanks at 48 inches each use 288 inches, or 8 yards of burgundy ribbon. That is 18 yards before any center wraps, extra bows, or adjustments; allowing another 2–3 yards across the two ribbons gives you some flexibility.
This is a worked calculation, not a guarantee of coverage. A wider tree, a fully decorated back, longer tails, or more billows will need more ribbon. Multiply the number of pieces by your successful sample length, divide inches by 36 to get yards, and round up to the roll sizes available. Keep the two ribbon totals separate when shopping.
3. Make a simple two-loop bow
You do not need a complicated florist bow for this tree. One loop on each side and two tails give a clear, classic shape that is easy to repeat. Wired velvet works well for a structured bow like the concept below; soft unwired velvet will create a more relaxed result.
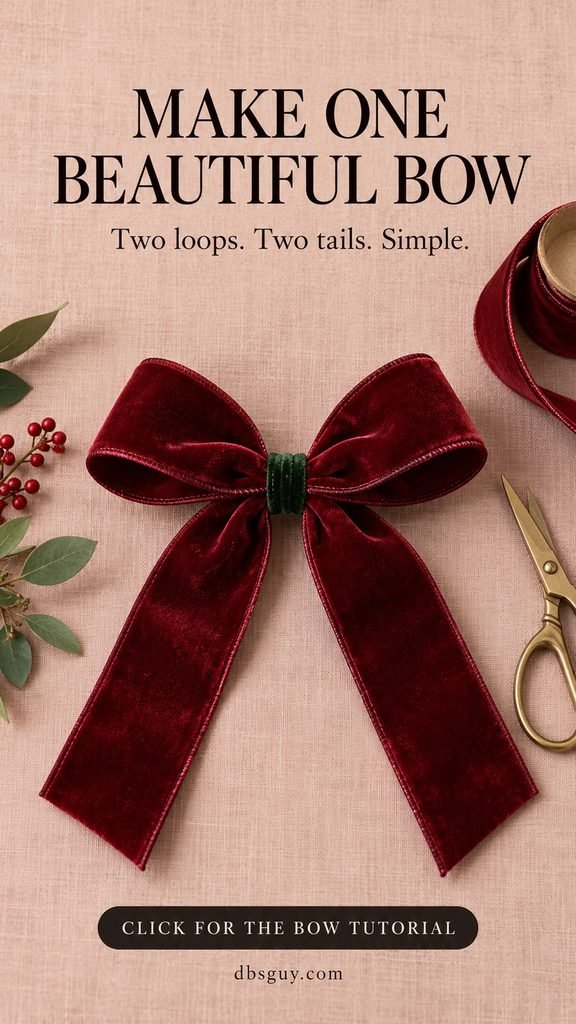
Use a sample bow to set the size
Start with a 48-inch length of ribbon for practice. Aim for loops extending about 4 inches to either side of the center and tails around 10–12 inches long. These are styling suggestions for a medium bow; hold the sample against the tree and adjust before cutting a batch.
- Leave the first tail. Measure about 12 inches from one end and pinch the ribbon there. Hold that pinch as the center of the bow.
- Form the first loop. Fold the long end back to the pinch so the loop extends about 4 inches from the center. You will use roughly 8 inches of ribbon for that out-and-back fold.
- Form the opposite loop. Keep the first loop pinched, then fold another loop in the opposite direction. For single-sided ribbon, twist at the center only as needed to keep the good side facing forward.
- Secure the center. Wrap a green chenille stem firmly around the gathered middle and twist its ends together at the back. Leave enough tie length to attach the bow to a branch.
- Shape and trim. Open the two loops into rounded curves, bring the remaining ribbon down as the second tail, and trim both tails to the length you want. Straight or angled ends work; a small V-cut is optional.
The green center tie is visible in the instructional concept so you can see the construction. For a finished bow, you can conceal it with a short matching ribbon wrap secured at the back. Include that extra ribbon in your quantity estimate.
Place the sample on the tree before making the others. If its loops hide the surrounding branch shape, reduce their size. If it barely reads from across the room, enlarge them a little. Consistent loop sizes help the bows belong together; the tails can vary slightly to suit their locations.
4. Place bows at changing heights, with room around each one
Hold off on ornaments until your bows are in place. Bows occupy more space than they seem to on a table, and placing them now saves you from covering a favorite ornament or squeezing a loop behind it later.
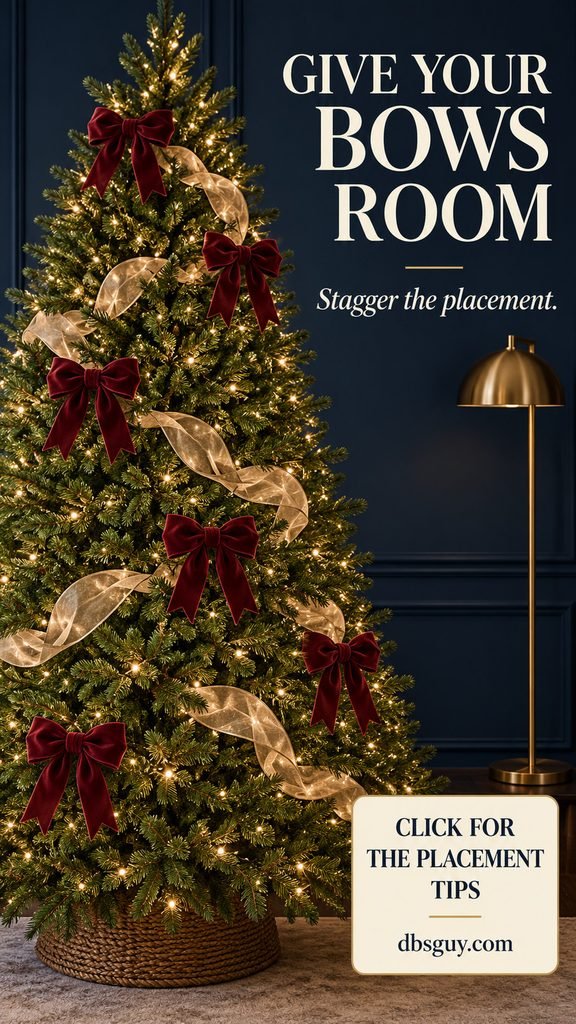
For the illustrated front-and-side arrangement, start with six medium bows. Place one in the upper area, another lower on the opposite side, then continue alternating their position as you move down. Use this as a first pass rather than an exact pattern; a narrow tree may need fewer.
Attach each bow’s rear tie to a branch that supports it without sagging. Keep the center secure, lift the loops forward, and let the tails lie where they do not cover the next bow. A bow can sit near a ribbon tuck, but it does not need to sit on every tuck point.
Judge spacing from across the room
Look at the dark bow shapes together. Do three make a straight horizontal line? Move one higher or lower. Is one side much darker? Shift a bow toward the lighter area. Do two neighboring tails overlap? Shorten a tail, angle it gently, or move one bow to another opening.
Leave a little greenery visible around the loops so each bow keeps its shape. The goal is repeated accents with some breathing room, not a measured grid. Check from the sofa and doorway, because the arrangement can look balanced head-on and crowded from the side.
On a slim tree, smaller bows usually give you more flexibility than the same large bow repeated all the way down. On a tree viewed from several directions, distribute the accents around those visible sides before filling the front with extras.
5. Place ornaments in layers: inside, middle, and tips
A tree can have plenty of ornaments and still look flat if they all hang at the same distance from the trunk. Use some of the interior openings, then hang other pieces farther forward. Balsam Hill’s ornament layering advice describes this approach: larger pieces deeper in the foliage, with smaller pieces nearer the front.

First, place the larger ornaments
Find sturdy branches with enough open space for the ornament to hang freely. A large gold ball set partway inside a lower or middle opening can add color behind the ribbon. It should remain visible rather than disappearing against the trunk.
Distribute these larger pieces before adding medium ones. Put some on each visible side, avoiding a cluster of large ornaments at one height. Branch strength matters more than the styling plan: if a branch bends noticeably, choose a lighter piece or another location. A large lightweight ornament and a heavy glass ornament need different support.
Next, repeat your main colors through the middle layer
Add medium ivory and gold ornaments between the ribbon curves and bows. Work with one color at a time for a few pieces, then step back. If ivory collects in one area, spread it to another part of the tree before reaching for more gold.
Use a mix of matte, ribbed, and reflective finishes if you have them. Similar colors can still look varied when their surfaces catch light differently. Place shiny pieces where they pick up the lights, while keeping the ribbon and bows visible.
Finally, hang small and special ornaments toward the tips
Use smaller ornaments in the outer openings and upper branches where they fit comfortably. Give finials and other long shapes enough clearance below them. Turn detailed keepsakes toward the room rather than letting them face a wall or disappear behind a bow.
You can keep family ornaments that do not match the palette. Give each one a visible opening, then repeat the main ribbon and colors nearby so the collection still feels connected. Avoid adding a bow directly in front of a keepsake simply to make that area match.
Stop by looking, not by emptying the box. There is no universal ornament count for a finished tree; Balsam Hill’s decoration guide notes that the tree and desired coverage change the amount needed. When the colors repeat through the visible areas, the branches remain readable, and your special ornaments have room, you may already be done.
6. Finish the topper, base, and overall balance
The topper and base should finish the same design you have been building. In this example, a gold star repeats the ornaments’ warm metallic color, while an ivory skirt softens the stand. Cream wrapping with burgundy ties carries the palette down to the floor without adding more decorations to the branches.

Fit the topper to the tree and ceiling
Check the available height and the topper’s attachment before decorating. If installing it requires reaching through the crown, fit it earlier and make the final alignment check now. Follow the topper’s instructions, use suitable support, and avoid balancing a heavy piece on a weak tip.
Look from the doorway to check that it stands upright and relates to the size of the tree. If the crown feels crowded, remove or lower an ornament near it before adding anything else. You do not need extra sprays around a topper that already finishes the outline well.
Keep the base neat and accessible
Smooth the skirt around the stand, or check that the collar closes properly without pressing on branches or wiring. Keep cords accessible and arranged where they will not create a trip hazard. For a real tree, preserve an easy route to the water reservoir; a tidy base should not make daily watering difficult.
Use this final check before adding more
- Outline: Does the tree still look like a tree, with some greenery between decorations?
- Ribbon: Are the curves loose, with attachment points and cut ends tucked away?
- Bows: Can you see each pair of loops, and are the dark accents spread through the visible sides?
- Ornaments: Are pieces hanging at different depths, with no obvious color clumps or strained branches?
- Finish: Is the topper secure, the base tidy, and the lighting working throughout?
Take a quick photo from your usual viewing spot. A photo can make a dark patch or crowded area easier to notice. Make one change at a time—move a bow, shift a bauble, or open a ribbon curve—then look again. An attractive tree does not need every available gap filled.
Christmas tree ribbon, bow, and ornament FAQs
Should ribbon go on before or after ornaments?
For the tucked ribbon method in this tutorial, place it after the lights and before bows and ornaments. You need access to interior branches to hide the anchors. If the tree is already decorated, remove a few ornaments where you want to work rather than pulling a long ribbon through fragile pieces.
Do I need to cut the ribbon?
No, but separate sections are easier to adjust for this billowing look. They also let you reuse short lengths in different openings next year. Keep one practice piece intact until you are happy with its length, and avoid cutting the whole roll before seeing how it behaves on your branches.
Can I use unwired ribbon for the bows?
Yes. Expect a softer shape and more relaxed tails. The structured wired bow pictured here will hold open loops more readily. Test your fabric first: if unwired loops collapse, reduce their size or enjoy the draped effect rather than trying to make them stand up.
How do I make a sparse tree look polished?
Respect its open shape. Use shorter ribbon sections, smaller bows, and ornaments that fit the spaces without pulling the branches down. Open greenery can be part of the design. Avoid burying every gap under fabric just to make the tree resemble a denser one.
How can I improve the tree without buying more ornaments?
Redistribute what is there. Move some ornaments inward, spread the strongest colors across the visible sides, and uncover any bows or ribbon curves hidden behind baubles. Check the branch shape and lighting, too. A change in position may solve the problem before another decoration does.
How should I store the ribbon and bows afterward?
Remove ties carefully without pulling on light cords. Roll ribbon sections loosely, label useful lengths, and pack bows where their loops will not be crushed. Keep a photo of the finished tree if you want to repeat the arrangement, but leave yourself room to change the placement next season.