For glitter French tip Valentine nails that feel light, keep most of the nail sheer and put the sparkle at the free edge. A ruby micro tip gives you a clear flash of red; rose gold looks softer against blush; and a champagne fade leaves room for one tiny heart.
These six designs change the shape and placement of the glitter, so you can choose more than a different color. Each includes details to take to a nail appointment and an adjustment for the space you have.
The visuals are AI-generated manicure concepts for dbsguy.com. Use them as references for color, shape, and placement, rather than photographs of completed salon work.
Choose Your Edge Before Your Glitter Color
The smile line is the curved boundary between a French tip and its base color. A crisp line makes the tip look graphic; a fade softens that boundary. Decide which effect you want before choosing a glitter polish.
- For short nails: start with the ruby micro tip or the ivory tip with its silver outline. Keep the band narrow enough that the pink base remains the largest area.
- For a softer finish: choose the rose-gold edge or champagne fade. Both work with a translucent rose base, without needing a full-nail shimmer layer.
- For a more defined pattern: try the red-and-pink split tip or diagonal berry wedge. Ask your nail artist to map the placement on one nail first.
For the fine lines shown here, choose small glitter particles that fit within the intended band. A large flake can extend beyond a micro tip and change its outline. Check the actual polish swatch: shimmer can look like a smooth glow, while visible glitter gives the edge separate points of sparkle.
1. Ruby Glitter Micro Tips on Short Squoval Nails
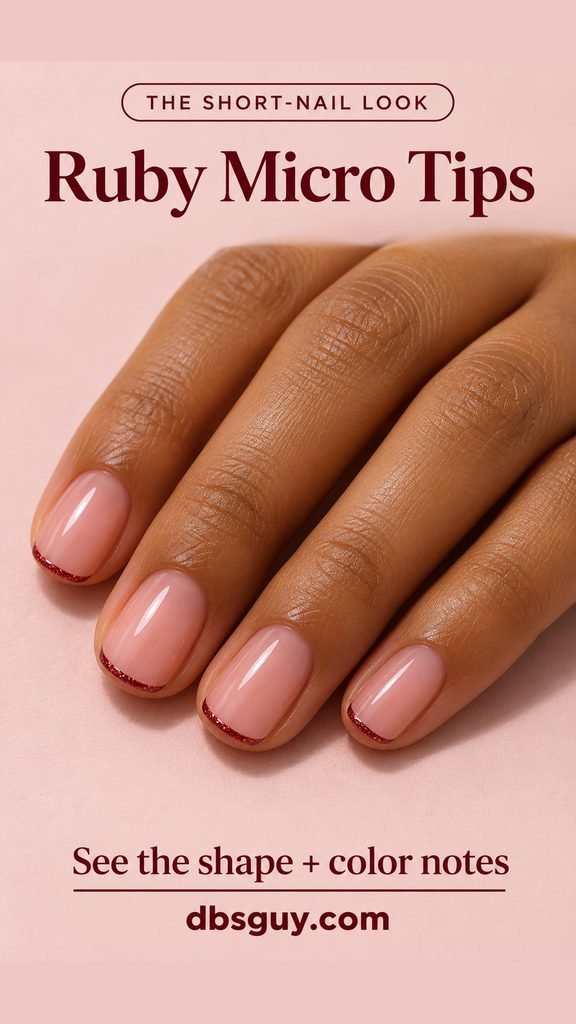
A squoval shape combines a mostly straight edge with rounded corners. Here, a tiny ruby-glitter band follows that edge without extending far down either side. The red is easy to see, but it takes up very little of the nail.
At your appointment, ask for a translucent rose base and a fine red-glitter micro French. Have the artist show you one finished tip before repeating it across the set. The goal is a similar visual weight on each nail; making the pinky band as deep as the thumbnail band can overwhelm the smaller nail.
For a regular-polish version, a fine detail brush gives you more control over the narrow border than a wide bottle brush. If your glitter looks sparse, use a matching red tip color underneath rather than repeatedly widening the line to add more sparkle. Leave off extra hearts so the small red edge stays the focus.
Also Read: Valentine Nails on Natural Nails: Simple Ideas Without Extensions
2. Rose-Gold Glitter Edges on Blush Almond Nails

Rose gold brings a warm copper-pink sparkle to a pale blush base. On almond nails, the glitter follows the tapered tip in a slender curve. Keep the center of the nail free of glitter so the warm edge remains distinct.
Look at the glitter swatch beside your chosen pink before committing. Some rose-gold shades read strongly copper, while others look almost pink. Pick the pairing you like in ordinary light, since a bright salon spotlight can make either finish appear more reflective.
Ask for a slim, continuous rose-gold French band with a glossy finish and no added gems. If you want this look at a shorter length, use a soft oval and keep the same narrow border. The warm metal color carries the design; you do not need to create a longer point just to fit the glitter.
3. Ivory French Tips With a Fine Silver-Glitter Outline

This version keeps the pale French tip and uses glitter as its outline. The silver belongs along the inner smile line, where the ivory meets the sheer pink. It does not replace the ivory band or run around the cuticle.
Ask your artist to leave enough ivory showing beyond the silver line that you can still distinguish both finishes. If the tip is already very small, a heavier silver border can swallow the white. In that case, reduce the glitter line rather than making the whole French tip deeper.
Choose ivory if you want the contrast to stay gentle, or ask to see a brighter white swatch if you prefer a sharper result. Keep the base glossy and the rest of the nail plain. The two narrow bands already provide the detail.
Also Read: Valentine Gel Overlay Nails: Pretty Art at Your Natural Length
4. Red-and-Pink Split Glitter French Tips
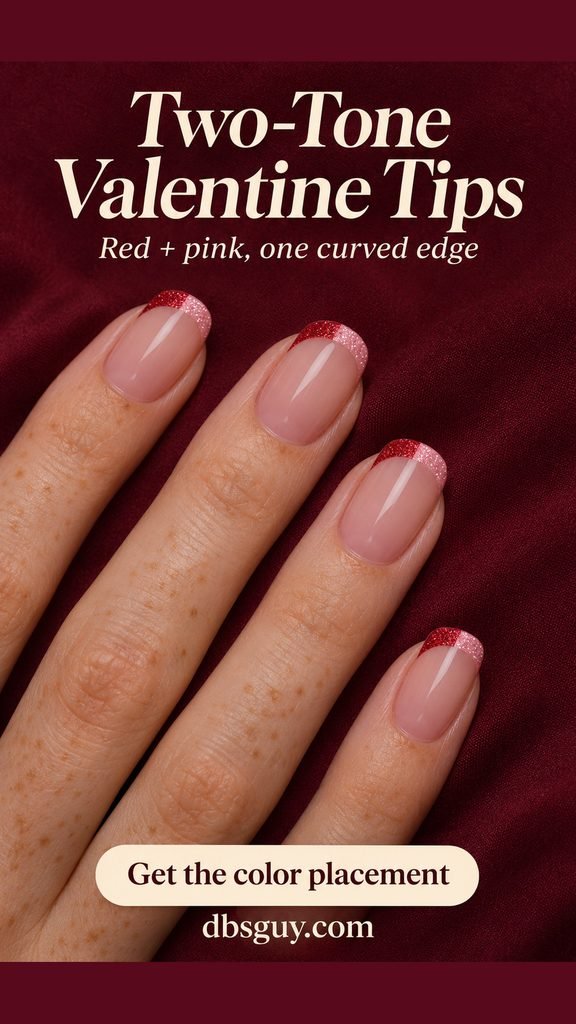
Give a single French band two colors: ruby red on one half and pale pink on the other. In this concept, the red sits on the left of each nail as viewed from above, and the pink sits on the right. Keeping that direction consistent makes the set feel deliberate.
The join should sit near the center of the free edge, with both halves following one continuous smile line. Ask for a clear color division, rather than a blended gradient. A softly squared tip gives you space to see the split without making the band especially deep.
Choose red and pink glitters with a similar particle size. If one side is smooth and densely packed while the other contains a few oversized flakes, the halves may look uneven. For narrower nails, simplify the join and skip a separate outline or heart; the color split is the main detail.
5. Diagonal Berry-Glitter Side Tips
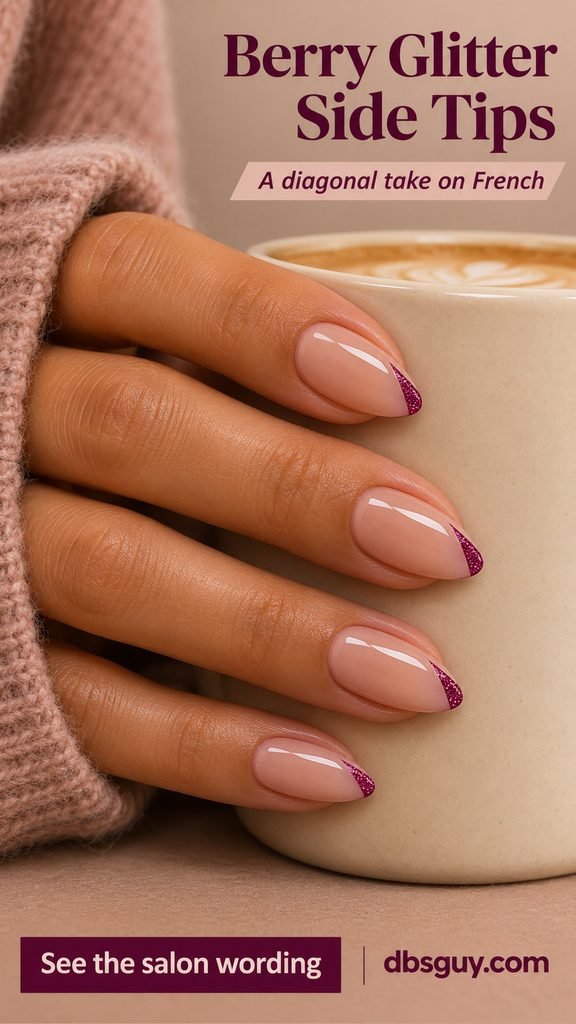
A side French moves away from the symmetrical curved band. Here, berry-magenta glitter forms a small diagonal wedge across the point of an almond nail, rising slightly along one side. The slanted boundary is what separates it from the other designs.
Tell your artist, “Sheer beige-rose base, a small berry-glitter wedge at the tip, and the same diagonal direction across the set.” Point out which side you want the wedge to rise toward. Saying only “side French” can leave its depth and direction open to interpretation.
Keep the wedge near the tip rather than carrying it halfway toward the cuticle. On a shorter oval nail, ask for a shallower diagonal patch so a clear area of pink remains behind it. A deep berry shade gives the little wedge definition even without a second color.
Also Read: Valentine Gel-X Nails With Heart Tips and Romantic Details
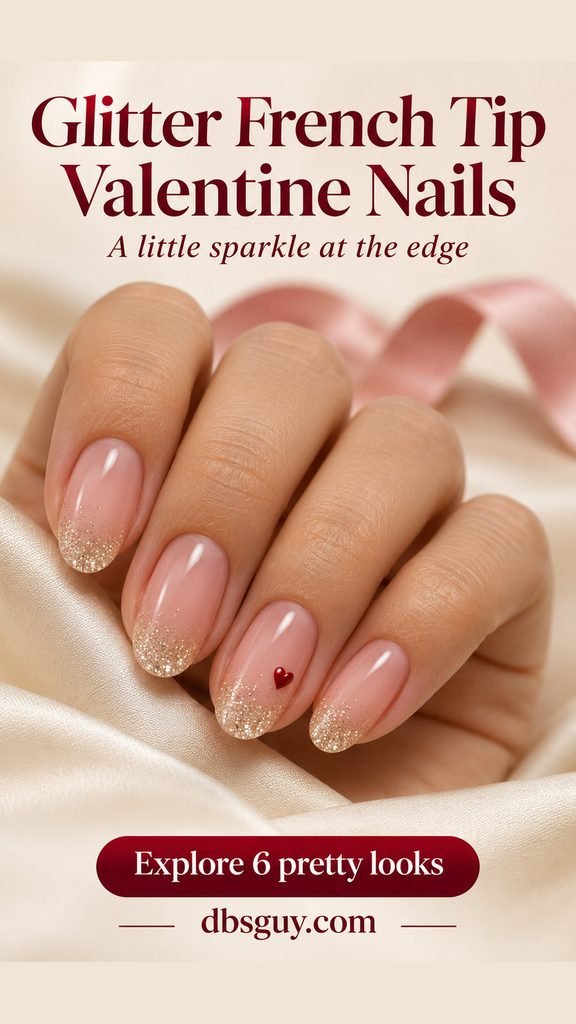
6. Champagne Glitter Fade With One Tiny Red Heart
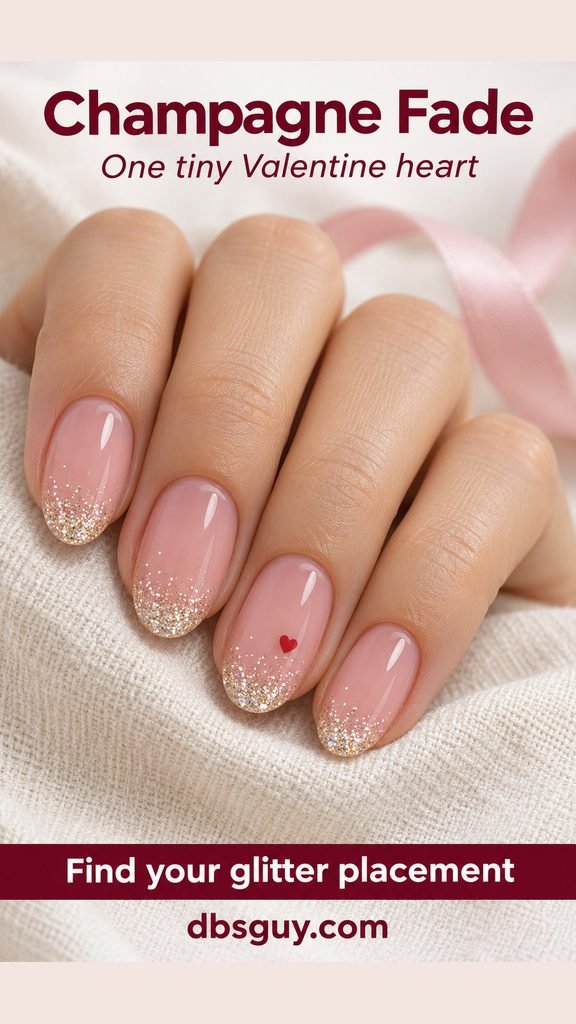
For a softer French effect, concentrate champagne glitter at the free edge and let the particles become sparse as they move back onto the pink. Keep the fade within the tip area so the result still reads as an edge treatment.
The tiny red heart sits on the ring nail, in the pink space just behind the glitter. Leaving a little clear pink around it makes its shape easier to read. A flat painted heart or small nail decal suits this placement; a large charm would change the scale of the design.
Ask for a gradual change in glitter density, with no hard line across the nail. If you use regular glitter polish at home, unload most of the brush before placing the sparse flecks behind the edge. Stop while you can still see a transition from dense sparkle to a few separate particles. This look does not need an all-over glitter top coat.
Make the Finish Match the Reference
Bring your selected image and name three things before the service starts: the base color, the tip depth, and whether the glitter boundary should be crisp or faded. Ask to see the glitter over the actual base shade on a sample tip. A glitter that looks opaque in its bottle may look scattered over pale pink.
With regular polish, let the base and tip layers dry according to their product directions before adding the next layer. Use thin applications, and finish with a compatible top coat. Allow extra drying time when you build up glitter; adding more wet polish to fill every gap can leave a bulky tip. There is no single drying or curing time that applies to every polish system.
If you choose gel, follow that system’s product and lamp instructions. The American Academy of Dermatology’s gel-manicure guidance recommends protecting hands with broad-spectrum, water-resistant SPF 30 or higher, or dark opaque fingertip-free gloves, before UV curing. It also advises against picking off gel and recommends moisturizing nails and cuticles between manicures. Do not let a manicure service include cutting your cuticles.
Questions About Glitter French Tip Valentine Nails
Can I get this look with regular nail polish?
Yes. These are color-and-placement ideas, so you can request them in regular polish rather than treating gel or extensions as essential. For a home manicure, the single-color ruby tip is a simpler starting point than the two-color split or the fine silver outline. Use products labeled for nail application and follow their directions.
What if my nails have almost no free edge?
Keep the color as a very narrow line along the visible tip. You can paint a French-style boundary on the nail plate; it does not have to match the natural white edge exactly. Ask to see the placement on your shortest nail first, since that nail sets the space available for the rest of the design.
How do I keep the glitter from looking too heavy?
Choose a narrow band or a short fade, keep the base sheer, and skip full-nail glitter accents. Small glitter particles give you more room to control a fine outline. For the heart design, keep the heart in the clear pink area instead of piling it over the glitter.
Do I need hearts for the nails to feel like Valentine’s Day?
No. Ruby, blush, and rose gold can give the set a romantic color palette on their own. Choose the champagne fade if you want one small heart; choose the micro tip if you want the holiday color to stay entirely at the edge.