Glitter Valentine Nails: Fine Sparkle, Confetti or a Full Accent Nail?

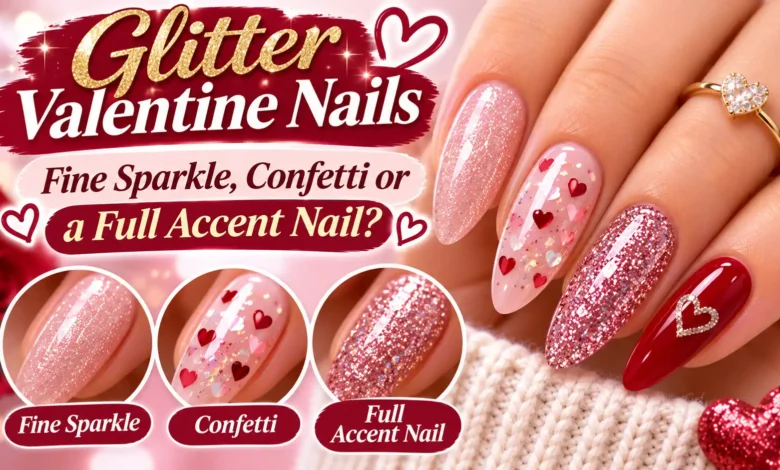
Choose fine glitter for a light, even twinkle, confetti for separate pieces you can see against the base color, or a full glitter accent nail for one concentrated patch of sparkle. For glitter Valentine nails, the most useful decision is how much pink or red you want to leave visible.
There are two choices hiding in the title: fine glitter and confetti describe the particles; an accent nail describes where you put them. You can use fine glitter to fill an accent nail, too. The three looks below give you clear starting points, with different amounts of sparkle across the hand.
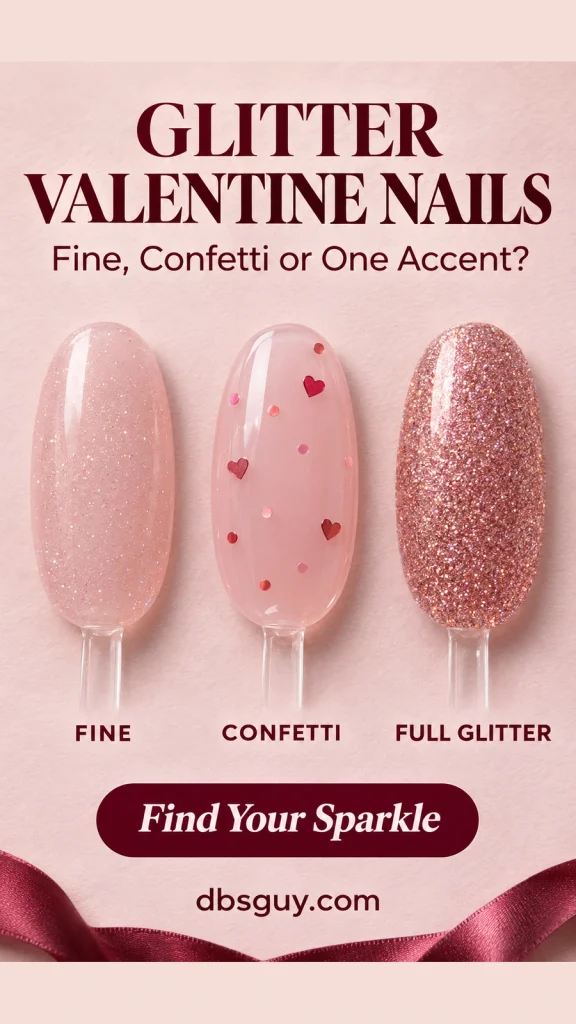
The images are AI-generated manicure concepts for comparing particle size, color, and placement. They are not photographs of completed salon work or exact product swatches.
Which Glitter Valentine Look Should You Choose?
- Fine sparkle: choose this if you want blush pink to remain the main color, with tiny points of light across every nail.
- Confetti: choose this if you want recognizable little hearts or reflective dots, separated by visible pink space.
- A full accent nail: choose this if you want a strong glitter detail while keeping the rest of the manicure plain.
Before choosing a bottle or booking the art, look at a finished swatch both close up and at arm’s length. A shimmer that looks obvious under a bright salon light may become much quieter in an ordinary room. Decide whether that softer effect is what you want.
1. Fine Sparkle: Sheer Blush With Tiny Glitter Points
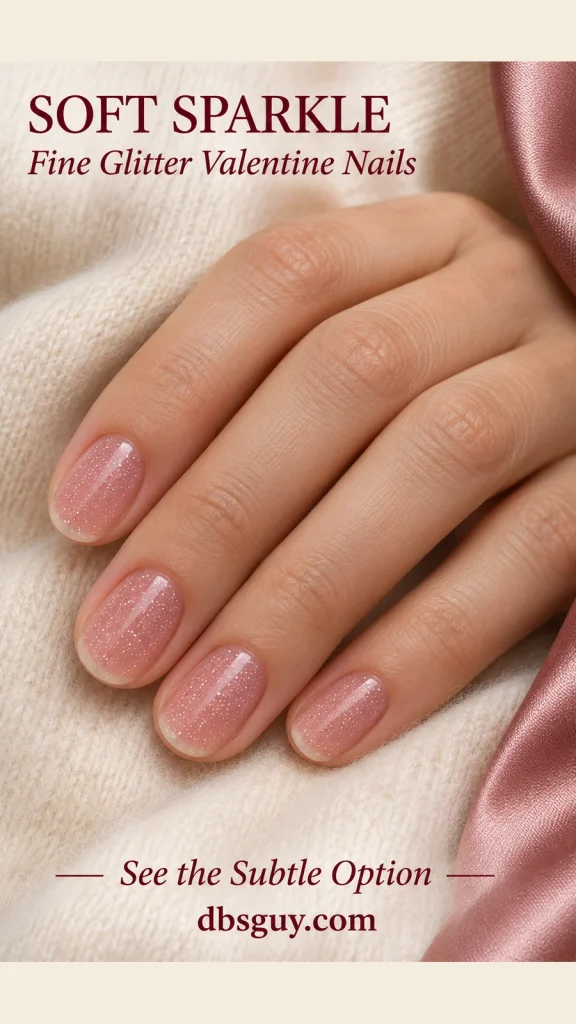
This version keeps the same sheer rosy pink and fine sparkle across the whole set. You can still see a little of the natural tip; the glitter appears as small, separate pinpoints. There are no large flakes, hearts, or contrasting accent nails.
It suits someone who likes a pink manicure already and wants a small change for Valentine’s Day. The effect comes from the size and spacing of the particles. A polish packed with tiny glitter can still look very bright, so check density as well as the word “fine” on the label.
For a home version, look for a sheer pink glitter lacquer or a clear-based fine glitter topper over your preferred blush. Check a sample over that actual base: the tint in a topper can change the pink beneath it. Keep the application within the product’s directions rather than adding coat after coat to chase the bottle’s appearance.
On short nails: an even veil of small particles needs no room for a motif. Keep the rounded or oval shape you already wear; extra length is not necessary for this look.
Ask at the salon: “Short oval nails in sheer rosy blush, with tiny silver-pink glitter evenly scattered on every nail. I want pink showing between the particles and no large flakes.”
Still deciding on the base? Compare blush, cherry, and wine Valentine nail colors before choosing the glitter.
2. Confetti: Pink and Red Pieces With Breathing Room

Here, the confetti is the artwork. Flat red and rose-pink hearts and dots sit over milky blush on the middle and ring nails. The other nails, including the thumbs, stay plain pink. Keeping the decorated nails together makes the placement easy to explain and leaves a clear view of the base.
The useful detail is the space between pieces. Each heart should be small enough to sit entirely inside the nail, with pink visible around it. A few separated pieces will read more clearly than an overlapping pile, especially when the nail is short.
For this airy result, compare a clear-based confetti polish with flat nail-art pieces intended for your chosen polish system. A mixed glitter polish may include fine sparkle as well as larger shapes; check whether you want that extra background twinkle. The reference keeps the surrounding pink quiet.
On very short nails: reduce the number and size of the pieces. Fit the layout to the smaller nail first so both hands can have similar spacing. Leave out a piece that crosses the sidewall instead of forcing it into the design.
Ask at the salon: “Milky blush on every nail, with a sparse mix of small red and pink heart-and-dot confetti on the middle and ring fingers only. Leave gaps, keep every piece inside the edges, and finish the surface smooth.”
If you are keeping your natural length, see these Valentine nails on natural nails for more ways to scale small details.
3. A Full Accent Nail: Cherry Red With One Rose-Gold Nail

Paint the thumb, index, middle, and pinky nails glossy cherry red. Give each ring nail dense rose-gold glitter across its entire polished surface, leaving the usual clean margin beside the skin. The difference from the confetti look is coverage: the accent reads as one sparkling nail, with no large empty patches.
This is a useful choice when you want glitter to be obvious without repeating it across all ten nails. The plain cherry nails make the placement easy to see. Keeping the remaining nails free of hearts, stones, or glitter lets that one change in texture carry the design.
For a regular-polish version, choose a glitter formula intended to build coverage. A sparse topper may leave gaps even after several layers. A coordinating rose-gold base can reduce visible gaps beneath the glitter, but it changes the finish; compare a real sample before committing.
On short nails: fill the ring nail evenly within its edges. You do not need a longer accent nail or a different shape. The reference uses short squoval tips—mostly square with softened corners—throughout.
Ask at the salon: “Short squoval cherry-red nails, with one fully covered rose-gold glitter ring nail on each hand. Keep all the other nails plain and glossy, and match the length across the set.”
Check the Formula and Finish Before You Commit
These are design choices, so start by deciding whether you want air-drying regular polish or a salon gel service. For a home lacquer version, use compatible base, color, glitter, and top-coat products. The glitter’s appearance does not tell you whether a product needs a lamp; read the directions.
OPI’s nail-lacquer application guide recommends thin color layers and a dabbing motion for placing chunky glitter. Follow your own formula’s drying and sealing instructions. Repeated brushing can shift the pieces you just positioned, while a heavy coat can leave more wet polish than the design needs.
For confetti or a dense accent, ask to see the finished surface from the side as well as from above. If pieces visibly stick up, request a flatter or smaller option and discuss how the chosen system seals it. A photograph can show sparkle; it cannot tell you how the surface feels.
Plan removal when you choose the service. For regular glitter lacquer, follow the remover label and give it time to soften the polish before wiping; OPI’s guide describes using remover-soaked wraps. For gel or extensions, ask for that system’s removal method rather than treating it as regular polish.
Questions About Glitter Valentine Nails
Which option looks the most understated?
Start with the sheer blush fine-sparkle look. Choose small particles with pink showing between them. A dense fine glitter can be bold, and a few large confetti pieces can be restrained, so judge the finished coverage rather than particle size alone.
Do glitter Valentine nails need hearts?
No. The fine-sparkle and cherry-red accent looks here use no hearts. The blush, red, and rose-gold palette supplies the Valentine connection. Choose the confetti version when you specifically want a visible heart motif.
Can I make these looks with regular polish?
Yes, using air-drying products made for the effect you want. Fine-glitter lacquer is the most straightforward starting point. For confetti, check the mix and placement on a sample; for the full accent, check that the glitter can give the coverage you expect. See our Valentine regular-polish guide for basic prep and painting guidance.
Does a full glitter accent mean chunky glitter?
No. “Full” describes how much of that nail is covered. Fine glitter can create a dense accent, while larger confetti can be spaced sparsely. Tell your nail artist both the particle size and the coverage you want.
If you are torn between the three, choose the detail you want to notice first: soft pink with a twinkle, separate little shapes, or one bright glitter nail. Take the matching image and the salon wording with you, then compare a real swatch before the full set.