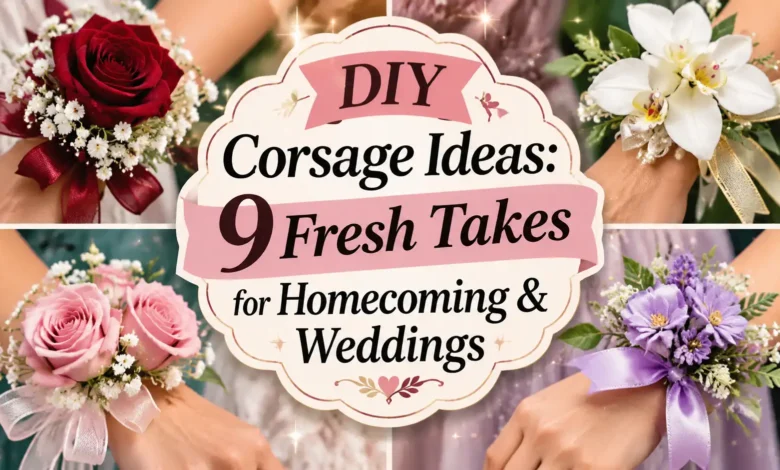
The easiest DIY corsage to start with is a small cluster of spray roses on a ready-made florist wristlet. But you do not have to stop at roses and a ribbon bow. A single orchid, a meadow-like mix of daisies, or a stitched fabric rosette can give the accessory a completely different personality.
These nine ideas cover homecoming and weddings, with fresh, dried, faux, and fabric options. Choose the pearl wristlet for a classic look, school-color ribbons for a dance, or the faux anemones if you want to finish the project well before the event. Here, “fresh takes” means new styling directions—not that every design uses fresh-cut flowers.

The visuals are AI-generated design concepts, not photographs of corsages made or wear-tested for this article. Use them to plan color, scale, and placement; test your actual materials before the occasion.
Choose the Base Before You Buy Flowers
A corsage has to feel comfortable when you move, not just look good in a close-up. A ready-made florist wristlet with an attachment platform gives a beginner a more useful starting point than a loose fashion bracelet. Check the fit before decorating it. The base should stay in place without pinching, and the flowers should sit above the wrist rather than across the bend of your hand.
For a ribbon-tie version, buy a florist mount designed for ribbon ties, with slots or attachment points. A thin ribbon alone is not a stable platform for a heavy flower cluster. For a pin-on design, choose a florist corsage backing with a secured clasp, and check whether the garment can support it without sagging.
As an editorial starting size, aim for a flower cluster roughly 3–4 inches long on an adult wrist, then scale it to the wearer. That is a design allowance, not a rule. Small blooms, short foliage, and an unobstructed clasp matter more than an exact measurement.
A Small Supply Kit
- Your chosen wristlet, ribbon-tie mount, cuff, or pin-on backing.
- The flowers and accents listed under your chosen idea. Quantities below are starting recipes for one corsage; buy a few spare blooms.
- Sharp floral snips, ribbon scissors, and a protected work surface.
- Cold floral adhesive labeled for fresh flowers and compatible with your base; follow its handling and drying directions.
- Floral stem tape for bundled stems, plus thread and a needle for ribbon or fabric details where needed.
- A clean vase, flower food used at its labeled dilution, and a rigid box deep enough to protect the finished flowers.
Before buying supplies for just one corsage, total the whole purchase: flowers, base, adhesive, ribbon, and tools you do not own. DIY is not automatically less expensive than a florist-made piece. Sharing a bunch of flowers and a ribbon spool across several corsages makes better use of leftovers.
The Basic Fresh-Flower Assembly
Make a practice version early enough to change the base or flower choice. For fresh flowers, keep the stems in clean water with correctly mixed flower food while they hydrate, following your supplier’s guidance. Do this before cutting them into short corsage pieces.
- Fit the empty base. Check wrist movement or test the pin-on backing on comparable fabric. Take it off before adding adhesive.
- Arrange a dry layout. Place foliage around the platform, then the focal flowers. Keep the central weight over the mount and leave the closure clear.
- Trim gradually. Shorten stems enough for the flowers to nest against the platform, leaving a small attachment area. Preserve each flower’s base; do not cut into the petals just to make it flatter.
- Attach in layers. Work on dry contact surfaces. Secure foliage and any tied ribbon details first, then attach flowers with the labeled floral adhesive. Support each bloom until it holds; add filler only where the platform remains visible.
- Let the adhesive dry fully. Follow the product directions before boxing or cooling the design. Do not use household superglue or assume a craft glue works on living flowers.
- Do a gentle movement check. Once dry, put it on, bend your wrist, and move your arm. If it rotates, reduce the flower weight or change the base fit. Tightening it until it pinches is not a solution.
For adhesive technique, the OASIS guide to gluing wearable flowers explains contact points, dry surfaces, and why the bond should dry before cooling. Follow the label on the product you actually use, work with ventilation, and keep adhesive off your skin.
1. Ivory Spray Roses on a Pearl Wristlet
A pearl wristlet lets the base become part of the design. Keep the flowers clustered on top so the pearl rows still show at the sides. This is a good starting point for a mother-of-the-couple corsage or a homecoming outfit that already has lace, sequins, or a strong color.
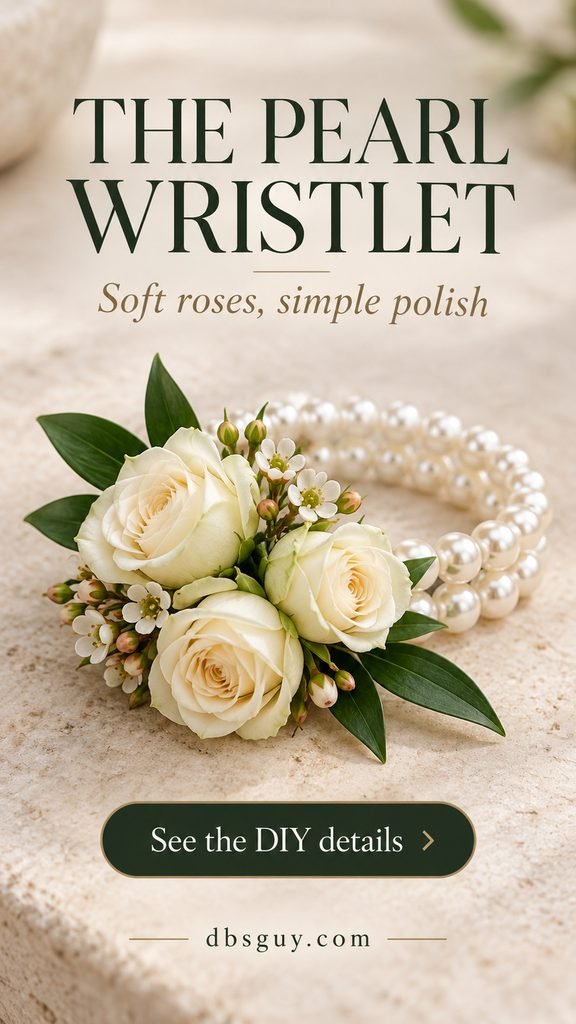
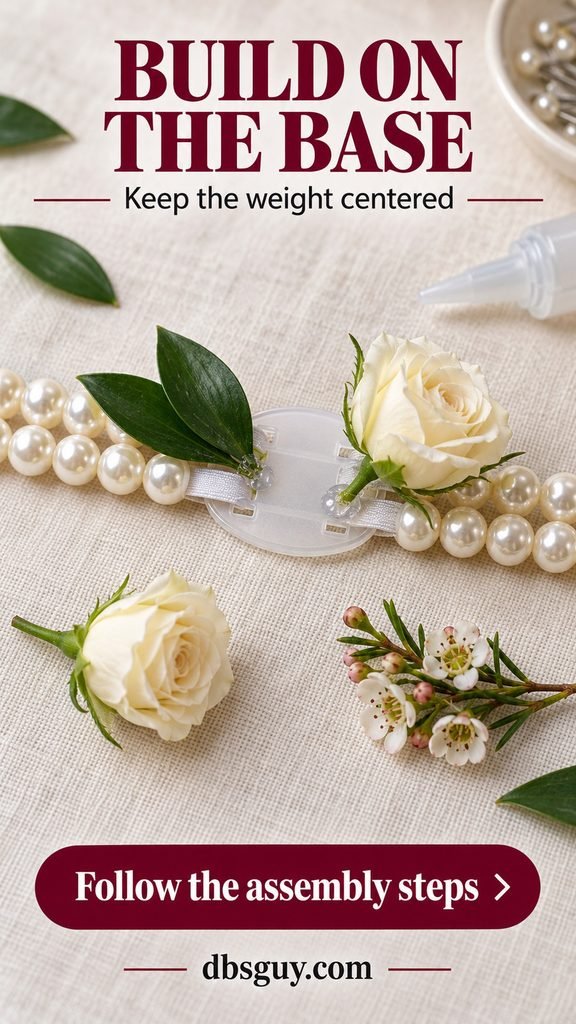
Start with three small ivory spray rose blooms, two tiny waxflower sprigs, a few ruscus leaves, and a pearl florist wristlet with a mounting platform. Arrange the roses as a shallow triangle rather than stacking them into a tall mound. Turn the outer blooms slightly outward, and tuck the waxflower into two gaps.
Use the shared assembly method, keeping adhesive on the platform and attachment points rather than coating the pearl strands. If three roses crowd the wrist, use two smaller blooms and leave more of the base visible. A large bow would hide the detail that makes this version special.
Also Read: Simple Bridesmaid Bouquets Ideas: Easy and Elegant Options for Your Wedding Party
2. A Blush Rose With a Bow That Leads the Design
Here, the ribbon supplies the volume. One small rose is enough when it sits against a generous satin bow, making this a useful option if you prefer a soft, romantic accessory without a dense flower cluster.
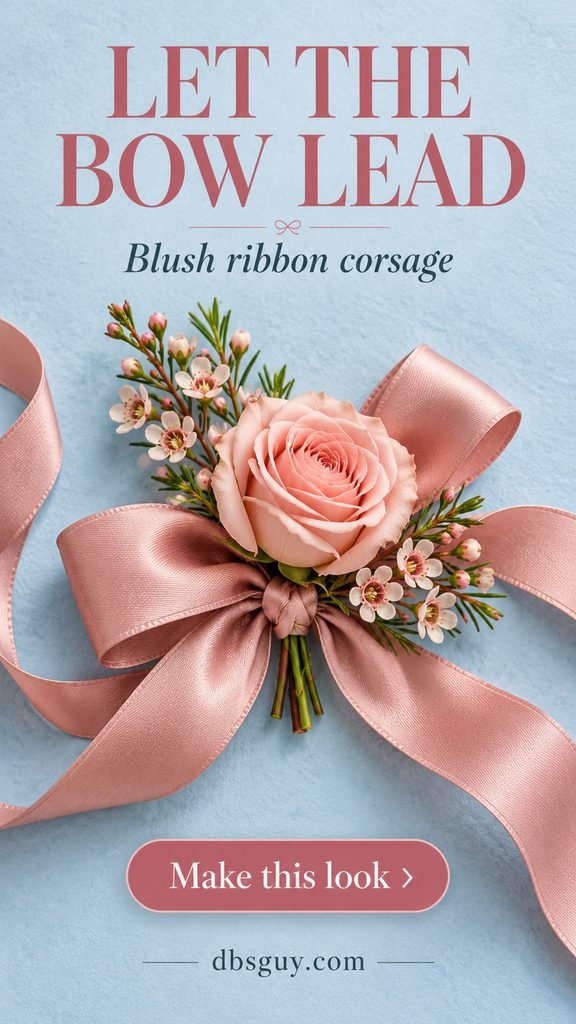
Use one blush spray rose, two small waxflower sprigs, a ribbon-tie florist mount, and dusty-rose satin ribbon about ¾–1 inch wide. Start with roughly a yard for the ties and bow, then adjust to the mount and wearer before cutting more. A soft ribbon is easier to wear than stiff wired ribbon.
Thread the wrist ties through the mount’s slots and secure them as its instructions specify. Make a separate bow and stitch or tie its center to the top attachment point. Glue the rose and waxflower onto the mounting area in front of the bow, keeping the rose’s face visible between the loops.
Ask someone to tie it while you hold your wrist relaxed. Trim the tails after the fit is right so they do not trail across your palm. If the bow overwhelms the flower, shorten the loops rather than adding more blooms.
3. A Small Meadow of Daisies and Purple Statice
For an informal garden wedding or a playful homecoming look, use daisy-form spray chrysanthemums rather than trying to shrink a full wildflower bouquet. Their little yellow centers give the design a clear focal point, while purple statice changes the outline.
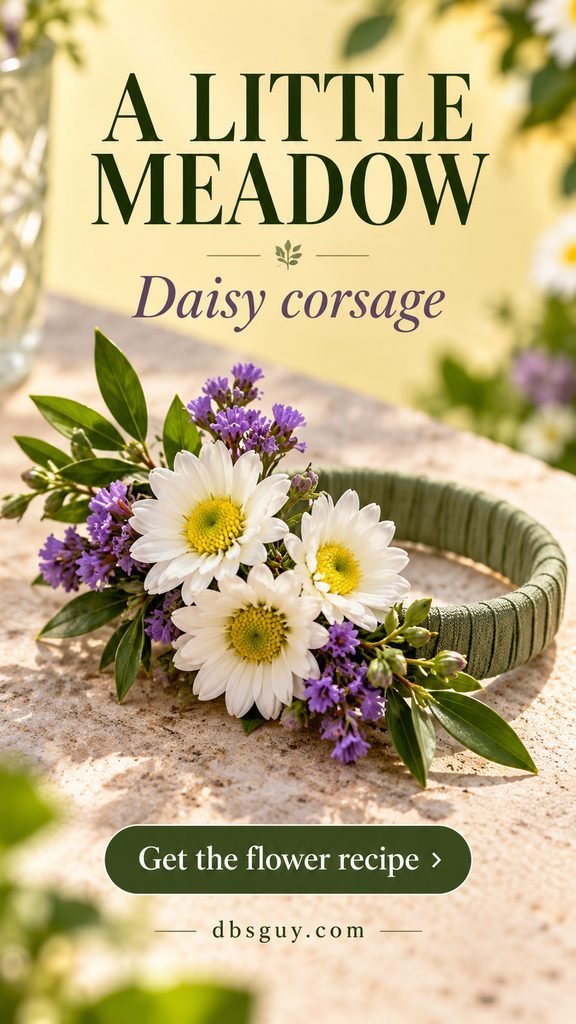
Gather three small white daisy-form chrysanthemum heads, two short statice sprigs, a few narrow ruscus leaves, and a sage wristlet. Keep the daisies at slightly different angles, with the statice appearing at the ends rather than filling every space between petals.
Build a low oval cluster using the fresh-flower method. Let a few leaves extend just beyond the blooms, but trim any stiff tip that rubs the hand. The “meadow” effect comes from the mixed shapes; long, fragile stems are not necessary.
Choose commercially supplied flowers you can identify. A handful of unknown roadside plants creates uncertainty about irritation, insects, and how they will behave out of water. For a more restrained version, keep the daisies and use only one small purple accent.
4. One Orchid on a Minimal Gold Cuff
A single orchid has enough shape to carry a corsage by itself. The open cuff and visible metal make this feel closer to jewelry, especially with a plain dress or clean-lined jumpsuit.
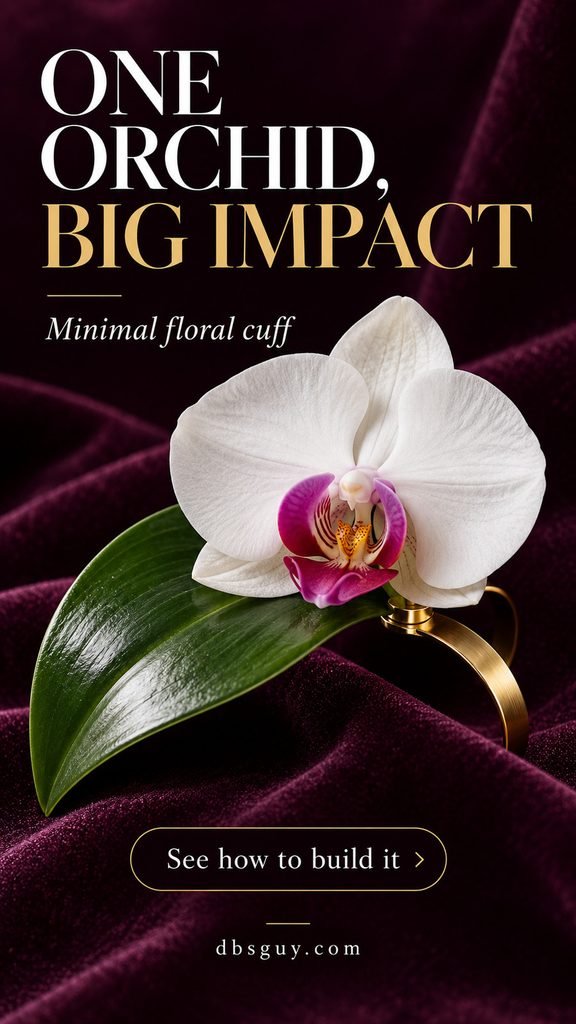
Choose one small white phalaenopsis bloom with a colored throat, one glossy leaf, and a florist cuff with an appropriate attachment pad. Test the empty cuff for comfort first. A regular smooth bangle may spin under the flower’s weight and offers little surface for attachment.
Attach the leaf to the pad, then position the orchid so its face points up and outward. Keep the pad beneath the central part of the flower, leaving the petal edges free. Handle the bloom by its base and avoid pressing the petals while the bond sets.
This is the design to discuss with your flower supplier before making it ahead: tropical orchids need different temperature handling from roses and carnations. Do not put it into an ordinary cold refrigerator by default. If your travel or storage setup is unsuitable, use a small faux orchid and follow the faux-material attachment guidance in idea eight.
5. School Colors in the Ribbon, White Flowers on Top
For homecoming, ribbon is an easy place to put an exact school-color combination. White flowers keep the arrangement readable even when the colors are bold. Royal blue and gold are shown here; substitute your own pair without trying to find matching dyed flowers.
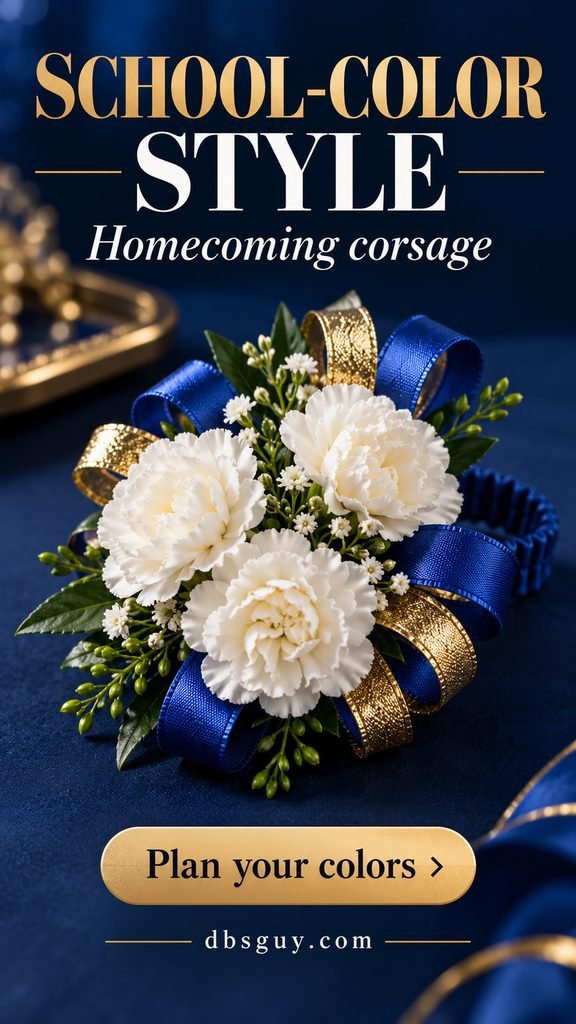
Use three white miniature carnation blooms, a few short leaves, two tiny white waxflower sprigs, a florist wristlet, and two narrow ribbons. Make several small loops in the main color and fewer in the accent color. Tie their centers together with thread and secure them to the platform before adding the flowers.
Space the carnations over the center, leaving ribbon loops visible around the edges. Trim tails short enough to clear the fingers. This is a compact dance corsage, not a large homecoming mum with long streamers.
Lay the ribbon against the actual outfit in daylight before committing. A dress and ribbon described as “blue” can still be very different shades; choosing white blooms gives you more room to adjust. Coordinate one ribbon color with a date’s boutonniere if you want the pieces to relate without matching every detail.
Also Read: Best Homecoming Nails to Try
6. A Burgundy Pin-On Corsage for a Jacket or Structured Dress
A pin-on corsage keeps the wrist free, which may suit someone who dislikes bracelets or wears long, detailed sleeves. Give this version a narrow vertical outline so it follows a lapel instead of looking like a wrist corsage turned sideways.

Start with two burgundy miniature carnations, a small purple statice accent, two short ruscus leaves, narrow velvet ribbon, floral stem tape, and a florist pin-on backing with a locking clasp.
Stagger the flowers, with one slightly above the other. Gather their short stems with the foliage and statice, and wrap the bundle with gently stretched floral tape. Fasten the bundle to the backing using its intended attachment system; if it has tie holes, secure it through those points with strong thread. Wrap the visible stems neatly with velvet, securing the ribbon to itself.
Cover any rough stem ends and keep the clasp fully accessible. Test on a similar fabric before the event. Thin chiffon, delicate silk, or an unsupported neckline may sag or show pin marks; use a wrist version if the garment cannot take the weight. Pinning while the garment is off makes it easier to keep the point away from skin.
7. Terracotta Dried Flowers With Short, Tidy Texture
Dried strawflowers give you a warm, papery texture that works with rust, cream, and muted green. This option suits a wedding palette with dried elements and gives you room to assemble before the rush of the event.

Use two small terracotta strawflower heads, a little cream dried statice, tiny dried ruscus pieces, and an oatmeal ribbon-tie mount. Choose flowers with sound attachment bases. Avoid loose, crumbling heads, and leave out long grasses that brush the hand or catch on sleeves.
Place the foliage and statice close to the mount, then attach the strawflowers using adhesive labeled for both dried botanicals and the base material. Support them by their bases rather than squeezing their papery petals. Thread and secure the ties through the mount as directed.
Once the bond has cured, gently check for shedding over a dark cloth. Remove loose fragments and replace any flower that keeps crumbling. Store this corsage dry in a protective box, away from humidity and crushing. It may be kept after the event, but dried flowers remain fragile; “keepsake” does not mean indestructible.
Also Read: Fall Wedding Flowers That Hold Up in Real Weddings, Not Just on Pinterest
8. Faux Anemones With a Graphic Black Bow
Ivory anemones with black centers make a crisp contrast against a black grosgrain bow. Using faux stems makes the preparation schedule more flexible, especially when the corsage must travel or match an outfit before fresh flowers are available.
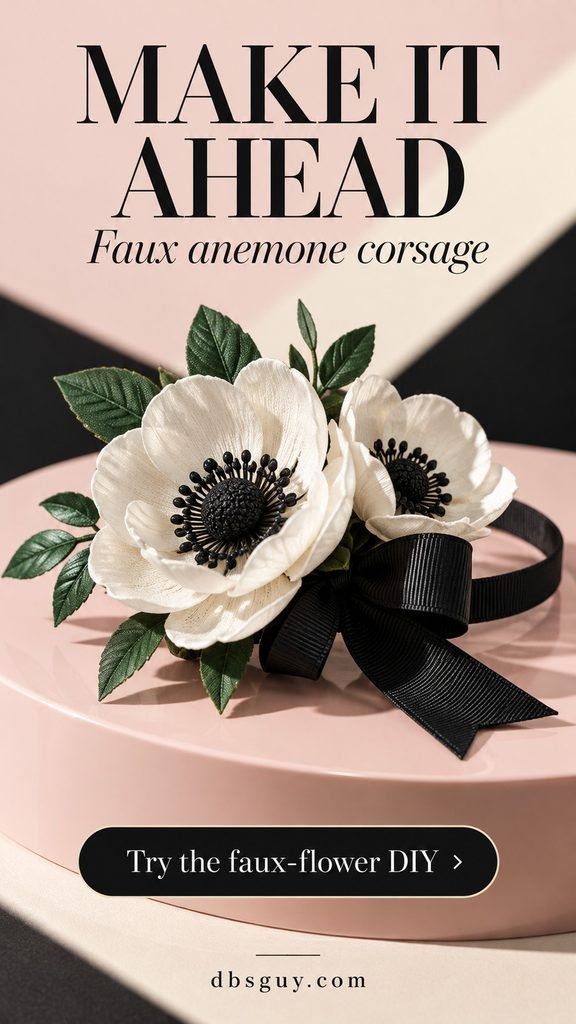
Choose two small fabric anemones, sparse faux greenery, a black florist wristlet, and narrow grosgrain ribbon. Look at the flowers from the side as well as the front: bulky plastic backs can make them stand awkwardly high above the wrist.
Use wire cutters for wired faux stems and cover every cut wire end with floral tape. Dry-fit the flowers on the platform, then secure them with adhesive explicitly compatible with the flower backing and mount. Material combinations vary, so test a spare piece first. If the product calls for hot glue, assemble off the body and let everything cool fully before fitting.
Tie a small bow and attach it at the base without hiding both black flower centers. Remove visible glue threads, then check the underside for scratchy edges. Keep the finished piece in a rigid box; flattening it in a suitcase defeats the advantage of making it ahead.
9. A Gathered Fabric Rosette You Can Stitch in Advance
A fabric rosette is the most different option here: no fresh stems, dried petals, or floral adhesive are needed. Dusty blue ribbon with sage felt leaves gives it a soft, handmade finish. It is also an option for someone who would rather avoid cut flowers, although fabric and dye sensitivities still matter.

For a starting version, gather 24–30 inches of soft ribbon about 1½ inches wide, matching thread, a needle, a small felt circle, two felt leaves, and a separate wrist-tie ribbon. These are trial allowances for a rosette about 2½ inches across; ribbon thickness and gathering change the final size.
- Turn the short raw ends inward and fold the ribbon in half lengthwise. Sew a running stitch along the paired open edges, then pull the thread to gather that edge. The folded edge will form the soft petal rim.
- Coil the gathered edge into a spiral, stitching through the base as you go. Keep the outer edge loose so it forms petal-like folds.
- Stitch the rosette and felt leaves to the felt circle. Sew the wrist-tie ribbon securely to the back, with several stitches on each side of the center.
- Cover rough stitching with a second small felt piece if needed, taking care not to sew through the loose ties. Knot the thread securely and remove the needle.
Fit it before trimming the ties. If the rosette tilts forward, make it smaller or use a wider tie; adding another heavy layer will usually make the balance worse.
When to Make It—and How to Get It to the Event
For a first fresh-flower corsage, plan to assemble on the event day when possible. Making it the day before can work with suitable flowers and storage, but a practice run with your actual blooms is more useful than a promised number of hours. A flower’s vase-life estimate does not tell you how long it will look good on a wrist without water.
Roses, carnations, and chrysanthemums generally need cool storage. Ask the supplier for the right conditions for your flowers, let the adhesive dry first, and use a clean, roomy corsage box. Keep fresh flowers away from ripening produce and from refrigerator walls or vents that might freeze them. Orchids require separate advice; do not apply the same storage routine to all nine designs.
Keep dried and fabric versions dry, and store faux pieces according to their materials. Transport every version in a rigid box with enough headroom that the lid cannot press on the flowers. Support the base so it cannot slide around. Carry it in the temperature-controlled passenger area, and put it on close to the event rather than leaving it in a parked car.
Questions Before You Start
Which DIY corsage is easiest for a beginner?
The pearl wristlet is a straightforward fresh-flower starting point because the ready-made base handles the wrist attachment. Use small spray roses and practice the adhesive bond first. If timing is your bigger concern, the faux anemone version gives you more room to fix mistakes in advance.
Which wrist should a corsage go on?
Try the nondominant wrist first, then let comfort decide. Check how it feels with a watch, sleeves, and the movements you expect to make. There is no practical benefit to following a side convention if the flowers keep bumping your hand.
Can floral tape attach the whole corsage to a bracelet?
Use floral stem tape to bind and cover stems. Do not rely on a loose wrap of it around a smooth bracelet to carry the whole arrangement. Choose a florist platform with the appropriate attachment system, or a compatible adhesive bond, and test it after drying.
Can I match several corsages without making them identical?
Repeat the flower color and one ribbon detail, then adjust the size and base for each wearer. A pearl wristlet and a pin-on version can belong to the same wedding palette without forcing everyone to wear the same format.
What should I do if the finished corsage feels too heavy?
Remove extra flowers and trim projecting foliage before changing anything else. Keep the weight centered over the mount. If the base still rotates or the garment sags, change the base or switch formats. A corsage should not need an uncomfortably tight band to stay upright.
Choose one design, lay its materials beside the outfit, and make a small trial before the occasion. A comfortable base and a few clearly arranged blooms will do more for the finished look than another layer of ribbon or filler.