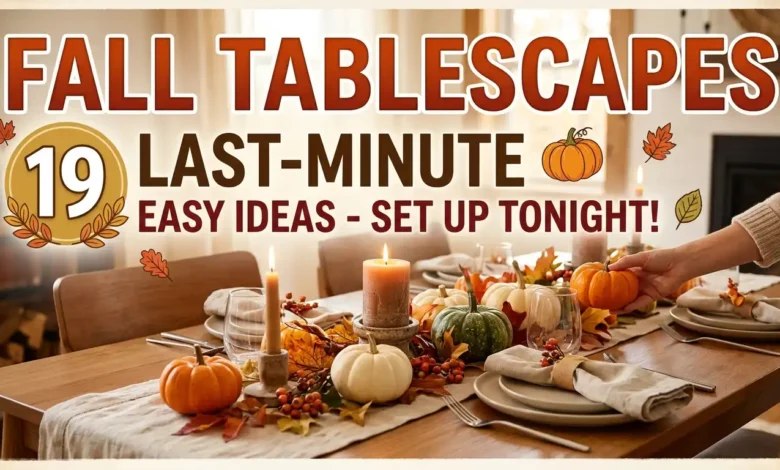
A last-minute table needs a clear decision more than another decoration. Choose one thing you already have—a warm-colored napkin, a pretty serving dish, a few pieces of fruit—and let it carry the setting. You can leave the rest of the table surprisingly plain.
These 19 fall tablescape ideas are built around changes you can make tonight, without painting pumpkins, sewing linens, or waiting for glue to dry. Pick the one that fits both your supplies and the way you plan to serve dinner.
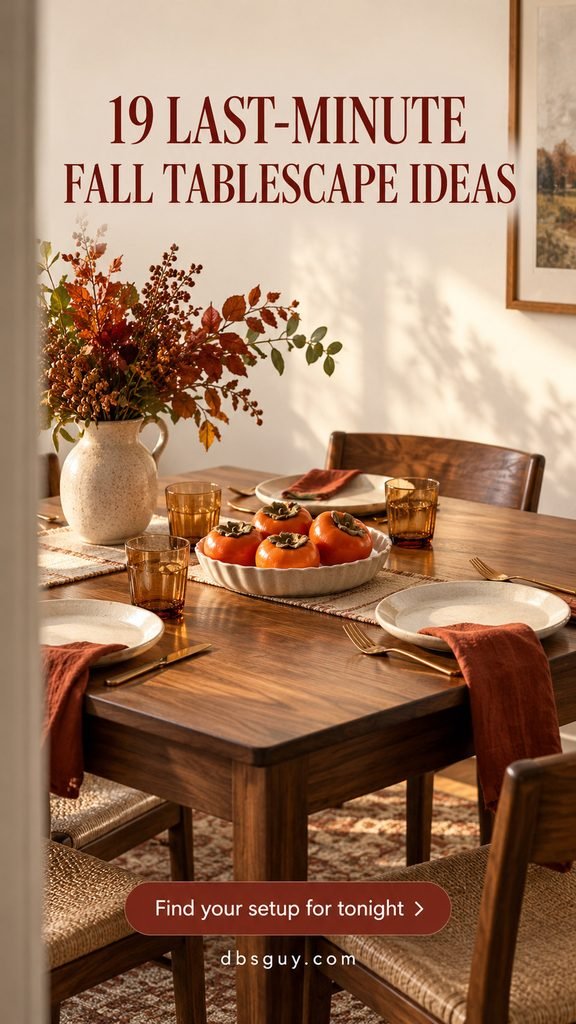
The visuals are AI-generated styling concepts, not photographs of completed or tested setups. Background accessories are optional; follow the featured arrangement rather than trying to reproduce every prop.
Choose Your Setup Before You Start
- About five minutes available: drape napkins in idea 1, bring out amber glasses in idea 6, or use a ribbon stripe in idea 14.
- No seasonal decorations: use fruit, kitchen herbs, dinner, or the breadbasket in ideas 2, 5, 10, and 11.
- The middle needs to stay open: choose the place-setting details in ideas 4, 12, 13, or 18.
- Several dishes to serve: start with the buffet arrangement in idea 19.
All setup times below are planning estimates for four places with supplies already clean and within reach. They exclude shopping, laundry, cooking, and other meal preparation. Extra seats and unfamiliar folds will take longer.
Put out the dinner plates and empty serving pieces first. Then check the space left for glasses, hands, and serving utensils. If a decoration makes someone reach awkwardly, move it before guests sit down. A narrow table may suit the arrangements in 17 Small Space Simple Fall Tablescape Ideas better than a full centerpiece.
1. Drape Rust Napkins Under the Plates
Estimated setup: 3–5 minutes. Gather four cloth napkins in rust, cinnamon, or another warm shade.
Fold each napkin into a long rectangle. Place its upper portion beneath the dinner plate and let the lower end fall straight over the nearest table edge. Repeat the direction at each seat so the bands of color look deliberate.
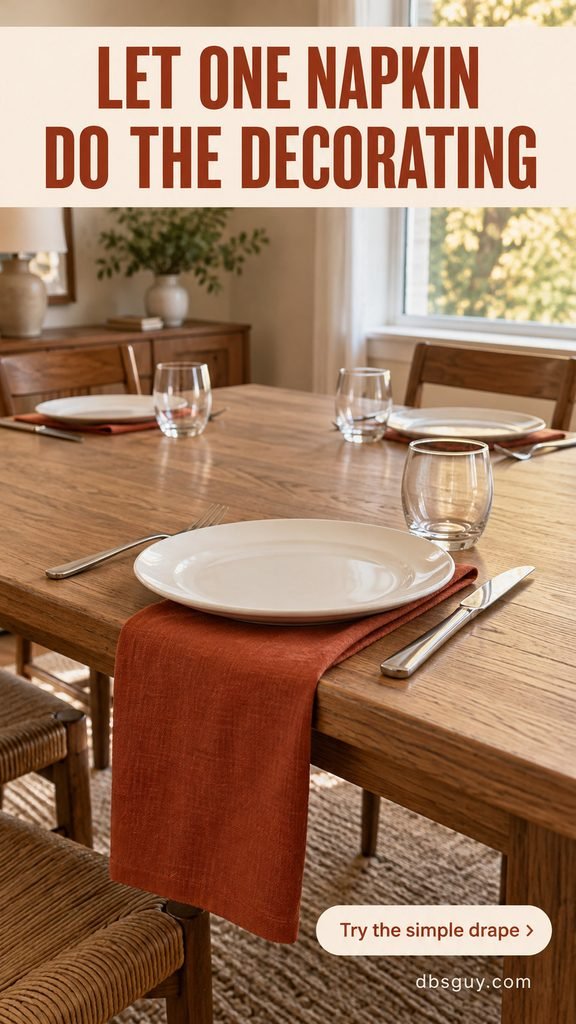
This is useful when every inch of the center belongs to dinner: the seasonal color sits at the edge instead. Adjust the hanging length so it stops clear of the seat. Smooth thick folds before adding the plate; a dish should rest flat rather than rock on a bulky seam.
2. Fill a Footless Pie Dish with Persimmons
Estimated setup: 3–5 minutes. Use a shallow pie dish and enough whole persimmons to make a loose single layer.
Five fruits fill the dish in the concept, but the useful quantity depends on your dish. Leave their leafy tops visible and keep the fruit below eye level. Orange against cream ceramic gives you a fall focal point without arranging flowers.
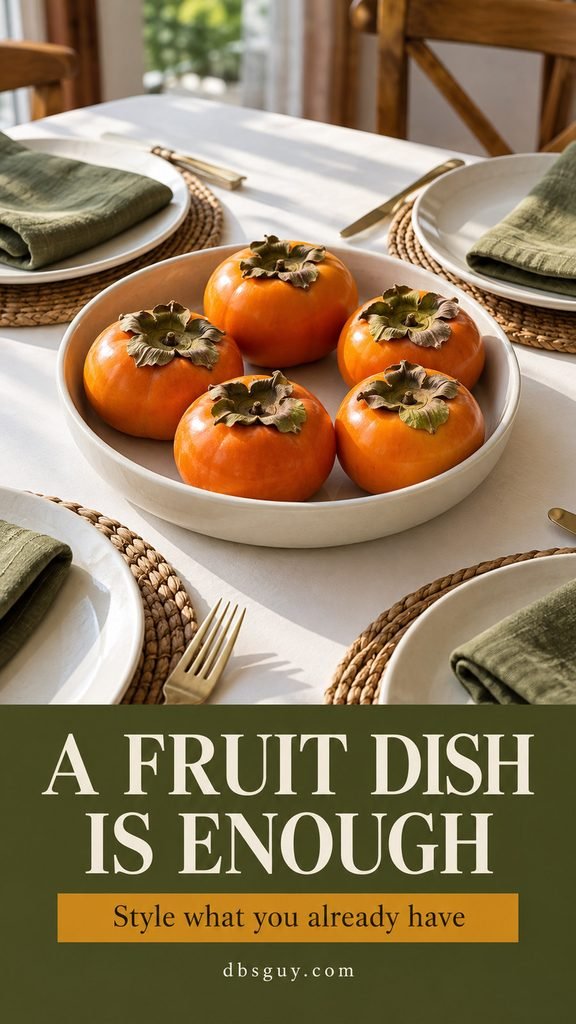
Choose fruit that can sit securely without being squeezed or stacked. Keep it separate from decorative sprays, paint, and glitter if you intend to eat it. If persimmons are not already in your kitchen or easy to find locally, use whole apples; a special shopping trip defeats this particular shortcut.
3. Shorten One Bouquet into a Low Bowl
A bouquet you already have can become a table arrangement if its stems suit a shorter container. A small opaque serving bowl hides the stems and gives rounded blooms somewhere to rest.
- Fill a clean, watertight bowl partway with fresh water.
- Remove any leaves that would sit below the waterline.
- Trim a few sturdy stems first and rest their flower heads near the rim.
- Add the remaining stems until the arrangement feels balanced, keeping it low.
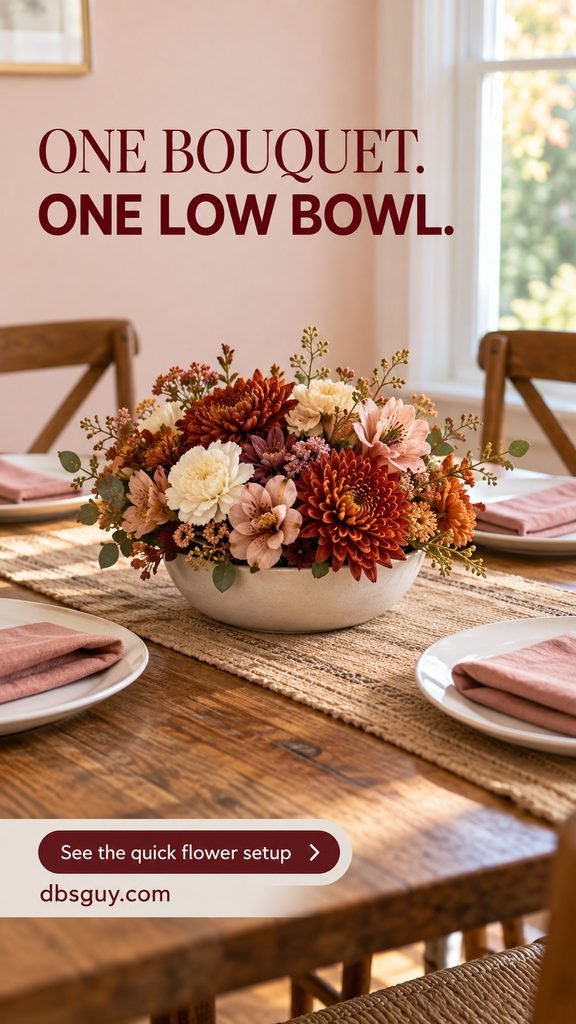
Allow roughly 10–15 minutes. Rust chrysanthemums, cream carnations, and soft pink blooms create the mood shown. Work with the flowers you have rather than chasing that exact mix. If a sparse bunch keeps falling sideways, use a narrower container instead of adding complicated floral mechanics. Check the finished height from a chair and keep blooms away from glasses.
4. Make an Apple Place Marker for Each Guest
Estimated setup: 5–8 minutes. Gather one whole apple per person, small pieces of cardstock, and a pen.
Fold each card into a little tent and write the guest’s name. Place the apple just above the dinner plate with the card beside it. The fruit provides the autumn color, while the card gives the decoration a useful job.

Use apples with stable bases and keep both pieces outside the eating surface. There is no need to cut a slot in the fruit or attach a tag. On a crowded table, move the apple to a counter after everyone finds a seat and leave the little name card in place.
5. Tuck Rosemary into a Loosely Tied Napkin
Estimated setup: 8–10 minutes. You need four napkins, plain kitchen string, and four short sprigs of culinary rosemary.
Fold the napkins flat, wrap the string around each middle, and tie a loose bow. Slide one washed, dried sprig beneath the string. Keep it short enough to fit within the napkin rather than extending into a neighboring glass.
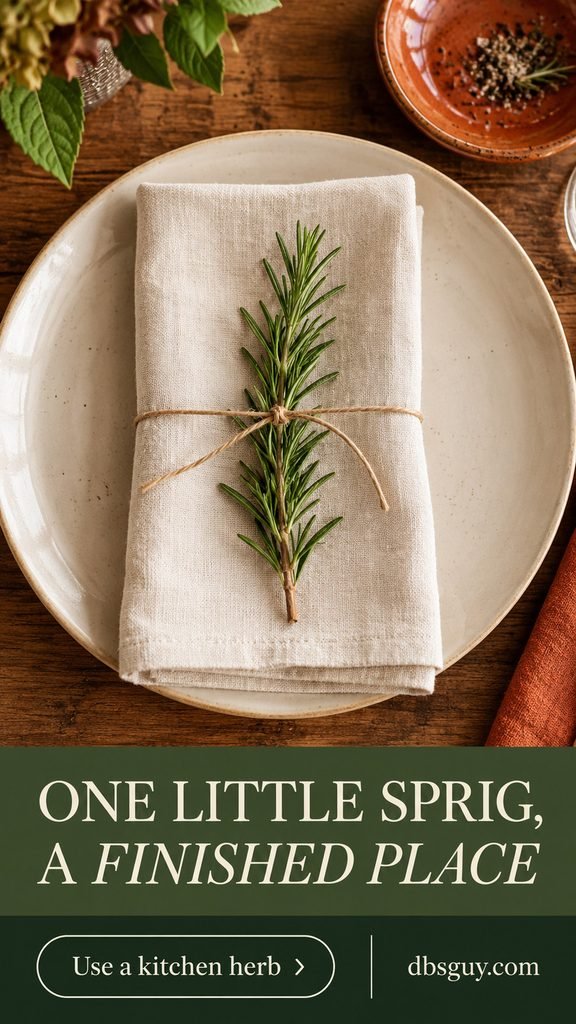
The straight sprig is quicker than making a miniature wreath. Ivory fabric, green rosemary, and a warm wood table supply enough contrast on their own. Use culinary herbs rather than unidentified garden foliage, and skip the herb if a guest dislikes the scent. Guests should be able to loosen the string in one easy pull.
6. Let Amber Water Glasses Supply the Color
Estimated setup: about 3 minutes beyond setting the dishes. Bring out the amber tumblers you already own and keep the surrounding pieces quiet.
Place one glass at each setting, with plain white or cream plates and simple napkins. Repeating the same warm glass color around the table gives you a coordinated look without anything in the center.
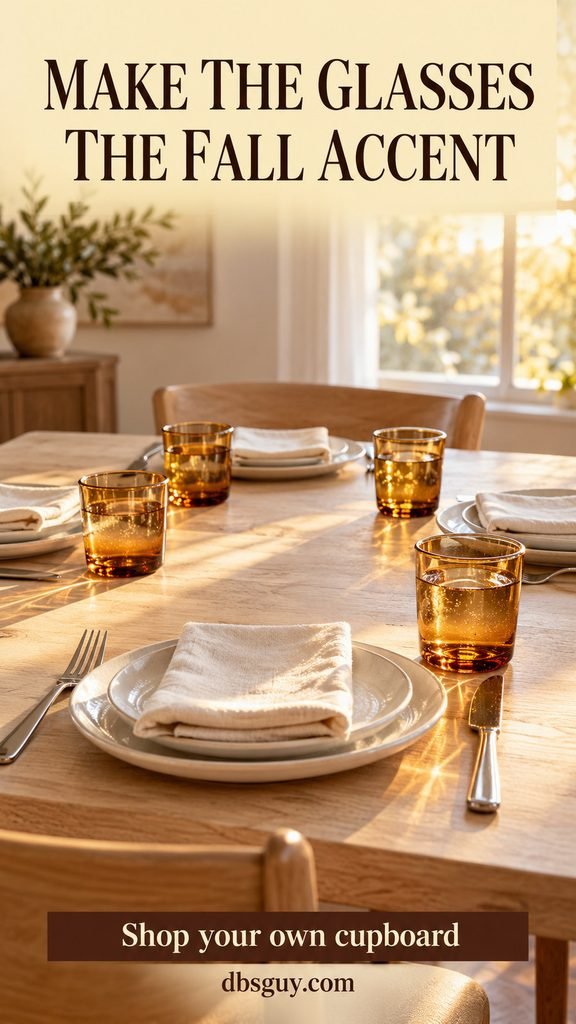
This works especially well when patterned plates would compete with a busy tabletop. The glasses still need to be comfortable to hold and appropriate for the drinks you are serving. If you only have two amber tumblers for four people, use the clear set tonight and choose a different accent instead of giving guests noticeably uneven drink sizes.
7. Use a Plaid Tablecloth as the Whole Theme
Estimated setup: 5–8 minutes with a clean cloth ready. A rust-and-cream plaid already contains the pattern and color a simple fall table needs.
Center the cloth, straighten the checks, and add plain dishes and napkins. Leave the middle empty until the food arrives. The repeated pattern makes a bare center look intentional rather than unfinished.
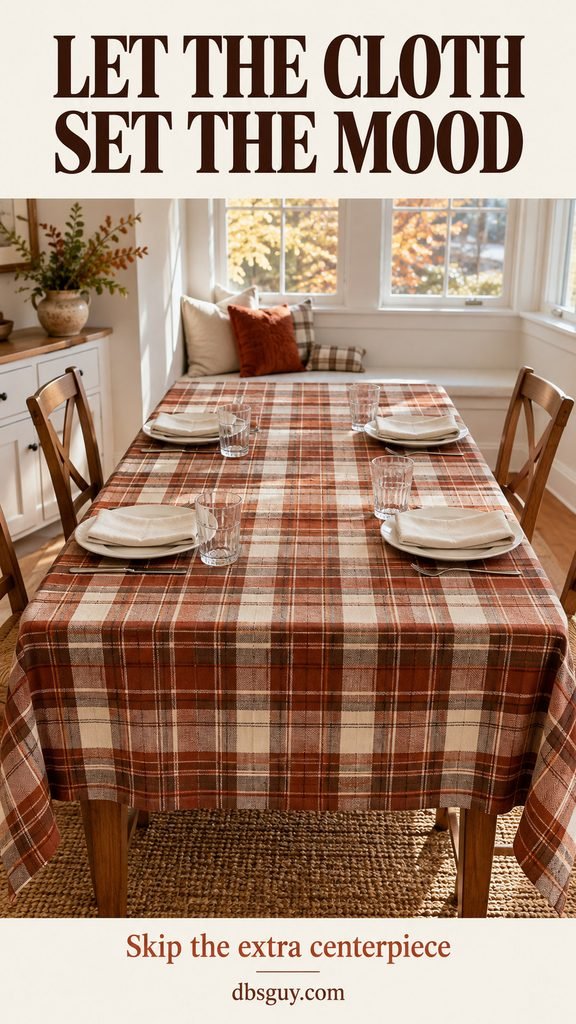
Check that the overhang does not bunch on seats or trail into someone’s lap. Skip patterned chargers and another checked napkin; they make the table busier without helping dinner. If the cloth needs laundering or extensive pressing, use a smaller clean textile or the napkin idea instead. The fastest choice is the one already ready to use.
8. Give Two Mini Pumpkins a Low Cake Stand
Estimated setup: about 4 minutes. Borrow a small cake stand with a broad, short base and add two mini pumpkins.
One ivory pumpkin and one orange pumpkin make the pair easy to distinguish. Rest them securely on the stand with a little empty surface around them. The stand provides a defined shape, so you can leave out scattered leaves and extra little gourds.
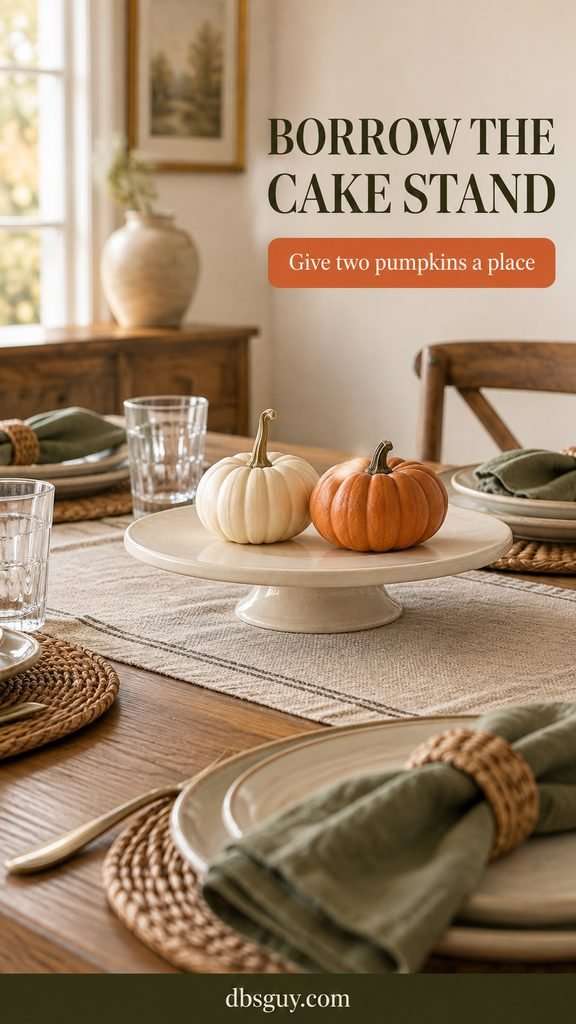
Check the combined height from a seated position; a tall pedestal plus tall stems may block conversation. Use only a stable stand suited to the weight, and keep the pumpkins away from its rim. If the stand is needed for dessert, decide where the pumpkins will go before the cake comes out.
9. Use Only a Short Section of Faux Garland
Estimated setup: 5–8 minutes. If you already own a flexible fall garland, you do not have to stretch it the full length of the table.
Fold its length back loosely into one short, tidy section, or use a separate short piece you already have. Set it between two shallow serving dishes, leaving open tabletop at both ends. Copper and russet leaves show well against wood and ivory dishes.
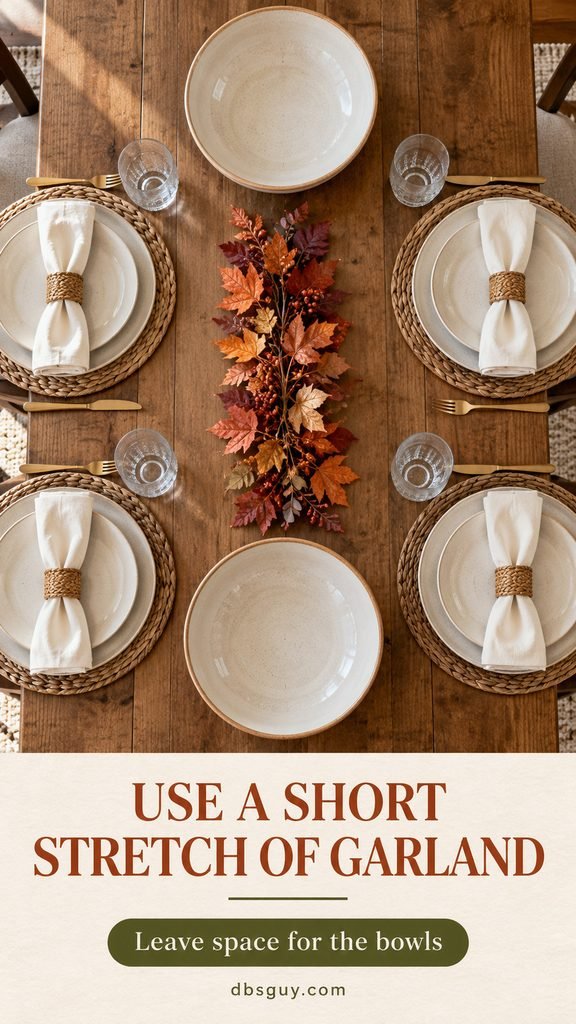
Test an approximately 18-inch section first, then shorten it to fit your actual serving layout. Tuck exposed wire ends inward and remove loose shedding pieces. Keep foliage out from under plates and serving dishes. A flat, contained accent is easier to work around than a garland threaded between every bowl.
10. Let the Dinner Dish Be the Centerpiece
Estimated table setup: about 5 minutes; cooking time is separate. Choose this when your planned meal already has autumn color, such as roasted squash or a hearty casserole.
Set out the serving dish’s proper trivet first, then arrange the places around its footprint. Add the serving utensil and a clear landing spot for a lid or serving towel. Brown napkins and cream dishes keep attention on the food.
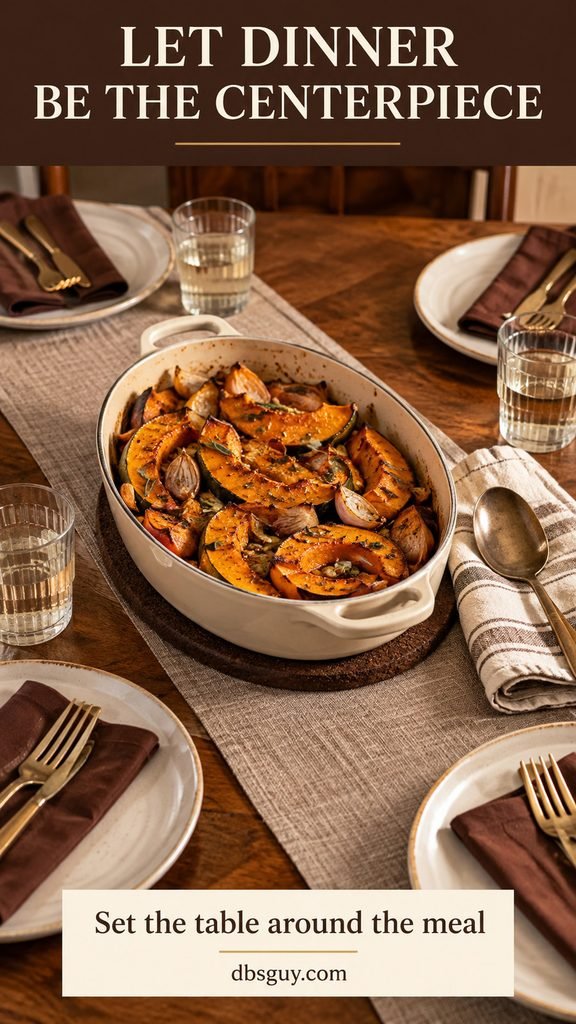
Bring the hot dish to the table when you are ready to serve, following its handling instructions. A decorative runner is not heat protection. For a heavy casserole, have the host serve it rather than asking guests to pass it over glasses. You have created a fall table and a serving plan with the same object.
11. Line the Breadbasket with a Checked Tea Towel
Estimated setup: 3–5 minutes. Use a shallow basket, a freshly clean cotton tea towel, and the bread you intend to serve.
Open the towel inside the basket, add the rolls, and tuck its corners inward so they do not trail over the tabletop. A rust-and-cream check brings pattern into the middle without a full tablecloth.
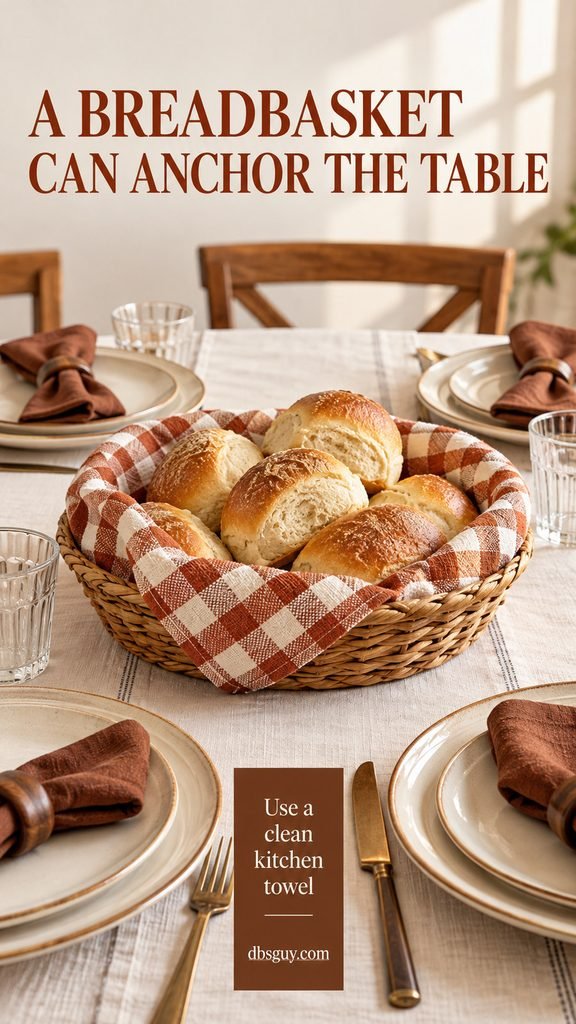
The shallow basket is easy to see over and easy to move. Leave space beside it for butter or other accompaniments rather than surrounding it with decorations. If your basket is oversized for tonight’s meal, line a smaller food-safe bowl instead. A few rolls will look more settled in a container that fits them.
12. Make Paper-Napkin Cutlery Bundles
Estimated setup: 8–12 minutes. Gather four paper dinner napkins, narrow strips of kraft paper, and kitchen string.
Use terracotta, mustard, or burgundy napkins to supply the color. Fold each loosely around the utensil handles, leaving the upper ends visible. Wrap a paper strip around the middle, then secure it with a loose string bow. The string holds the overlap, so glue is unnecessary.
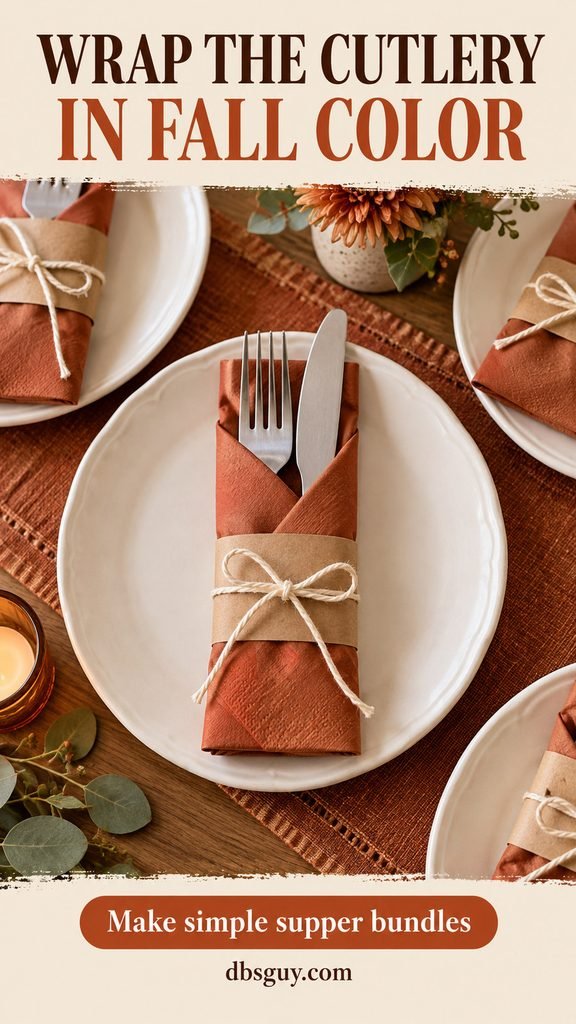
Make one bundle before cutting all the strips; a thick napkin needs a longer wrap. Set the bundles on plates for a casual supper, or beside a plate stack for guests to collect. Skip extra flowers and candles if time is short—the repeated paper packets are the featured detail.
13. Add a Small Fall Conversation Card
Estimated setup: 8–10 minutes. Fold four cream cards and write a short prompt such as “One good thing this fall…” across each front.
Rest a card on each napkin and place a pencil beside it. Mustard napkins give the simple stationery a warm background. You can keep the center clear; the small detail is meant to be discovered when someone takes a seat.
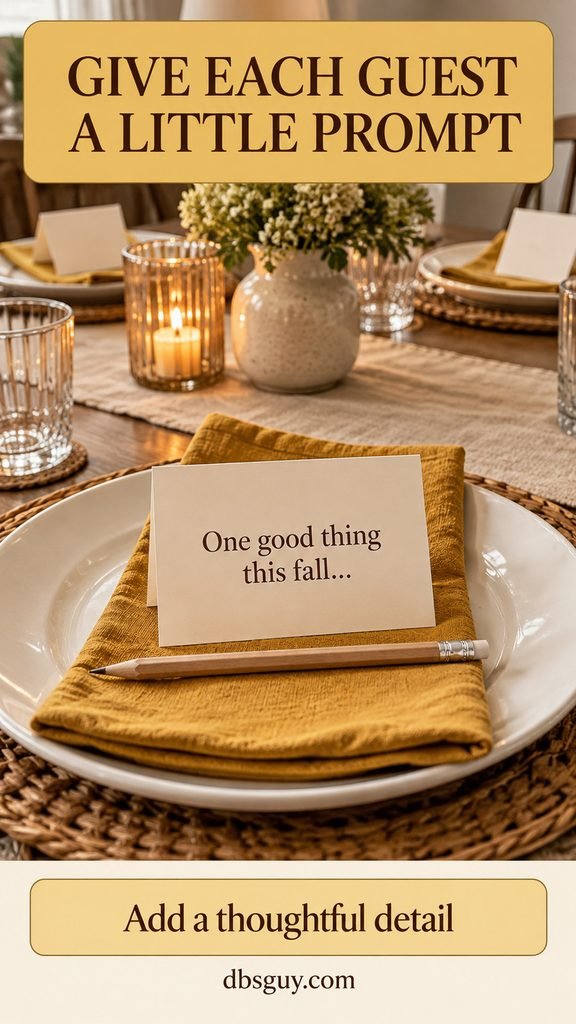
Leave the inside blank for a note, and make sharing optional. This suits a relaxed Friendsgiving or family supper where a formal menu would feel unnecessary. Move cards and pencils above the plates before serving food. Extra flowers or lights in the concept are optional; the cards work without them.
14. Unroll a Wide Ribbon Down the Center
Estimated setup: 3–5 minutes. A clean roll of wide fabric ribbon can make a narrow stripe when you do not own a runner.
Lay a single length of rust grosgrain down the long axis of the table. About 3 inches wide gives the visible band shown here. Cut the ends so they stop on the tabletop, and smooth the ribbon flat before adding dishes.
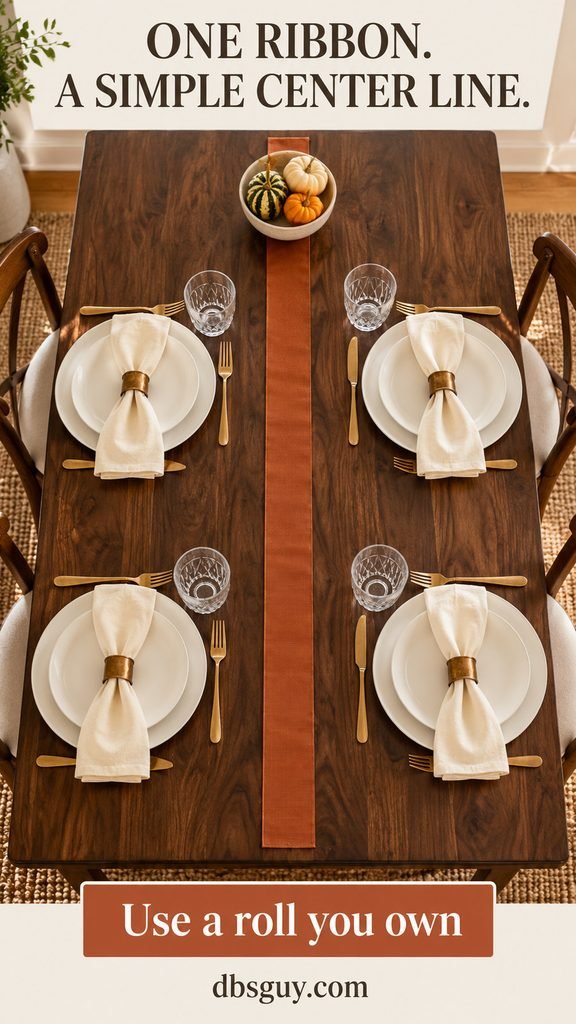
Choose unwired, non-shedding fabric ribbon and skip bows. The concept includes a little bowl of gourds near one end; it is optional, and the stripe can stand alone. Keep proper trivets under hot serving pieces, and move the ribbon if it makes a dish sit unevenly. This shortcut suits a roll already in your drawer.
15. Put Whole Walnuts in One Low Bowl
Estimated setup: about 3 minutes. A shallow bowl of unshelled walnuts creates a brown, textured focal point without orange decorations.
Use a dark bowl against a cream cloth, or a pale bowl against bare wood. Fill it loosely rather than building a tall mound. Keep every walnut inside the rim; loose shells and rolling nuts do not help a dinner table.
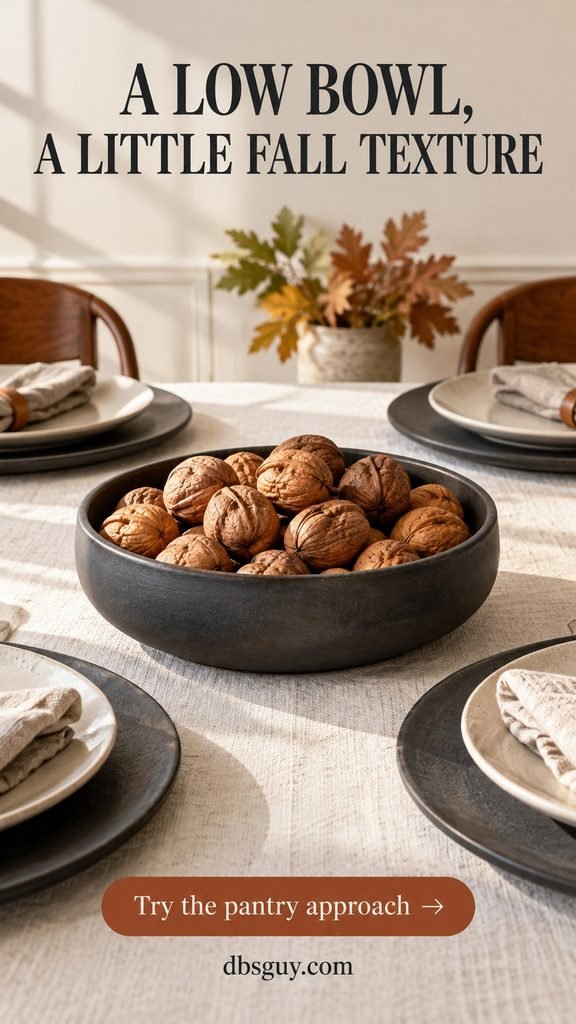
This is a use-what-you-have choice, not a reason to buy specialty nuts. Skip it when a guest has a nut allergy or when nuts are unsuitable for your household. If you intend the walnuts only as decoration, do not add a nutcracker that suggests everyone should start cracking shells during dinner.
16. Switch On One Compact LED Lantern
Estimated setup: about 5 minutes. Put one battery-operated pillar inside a small lantern and make the light the table’s main feature.
A black frame looks clear beside white dishes and cinnamon napkins. Keep the lantern low enough to see over and test its glow with the room lights on. You still need enough light to see food and place settings comfortably.
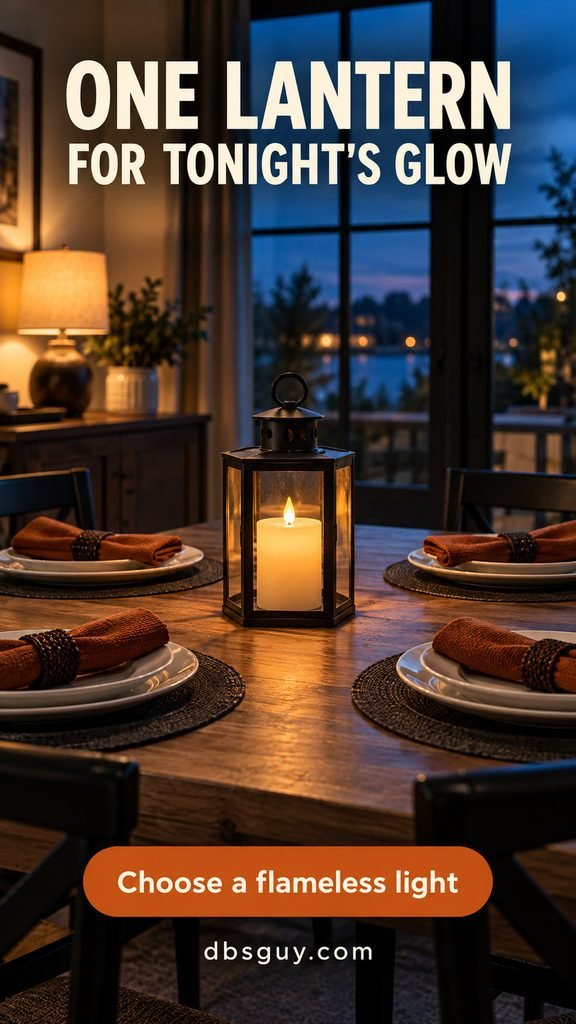
Use a flameless candle, including for any optional candle accents shown in the other concepts. The U.S. Fire Administration’s candle guidance recommends considering battery-operated candles; burning candles need stable holders and at least 12 inches of clearance from anything that burns. A glass enclosure does not remove that clearance requirement.
17. Turn a Small Square Cloth on the Diagonal
Estimated setup: about 5 minutes. A smaller cloth can give a square table a finished center while leaving its wood corners visible.
Rotate the cloth into a diamond and center it on the tabletop. Aim for its points to stay on the table, then arrange the settings around it. This creates a different outline from a full tablecloth without cutting or hemming fabric.
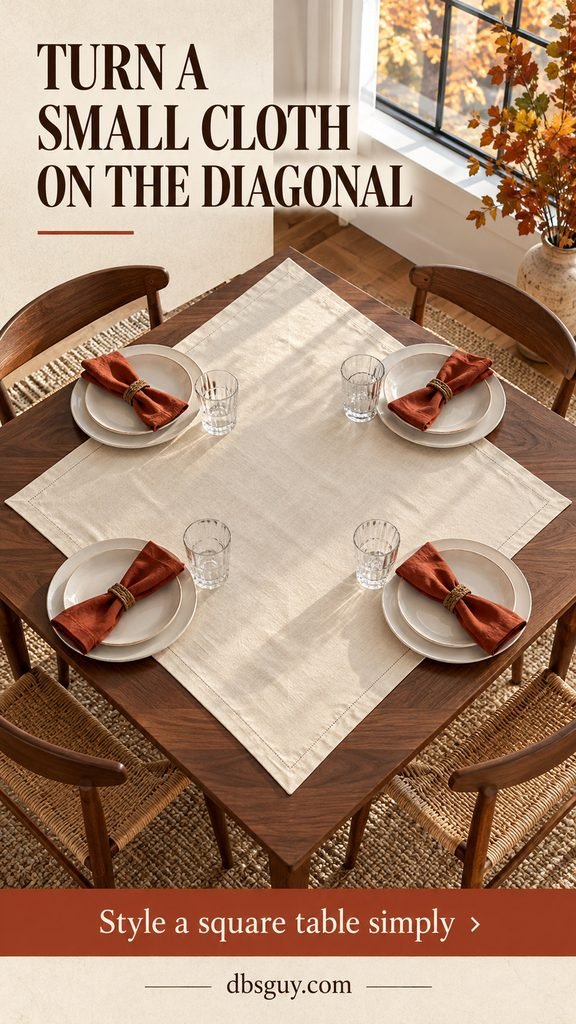
Check the cloth’s diagonal span, not just the length of one edge. A square cloth about two-thirds the table’s width is a useful starting point, then adjust by eye. Keep every plate fully supported and the fabric flat underneath. If it bunches at a setting, use the bare table rather than forcing the geometry.
18. Show a Flat Faux Leaf Through a Glass Side Plate
Estimated setup: 5–8 minutes. Use a clean, flat fabric leaf, a clear glass bread plate, and a slightly larger plain plate beneath it.
Place the leaf on the lower plate, then set the clear plate over it. The silhouette becomes visible through the glass while staying underneath the surface that will hold bread. A rust leaf against ivory supplies an autumn shape at each seat.
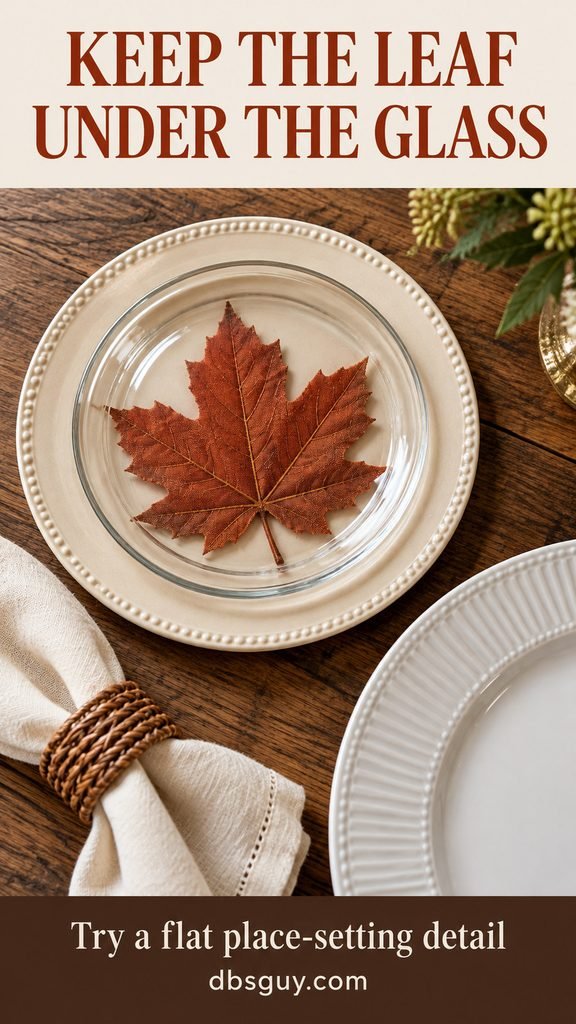
Test the stack before repeating it: both plates must sit level and stable. Avoid thick stems, raised wire, glitter, and shedding decorations. Keep the leaf entirely beneath the glass, and remove the decorative layer before clearing or washing. If your side plates are opaque, choose another idea rather than putting craft foliage on a food-contact surface.
19. Build a Fall Buffet and Keep the Dining Table Open
Estimated arrangement time: 10–15 minutes; food preparation is separate. Use a clear console or counter when the dining table cannot hold both guests and serving dishes.
Start with the plate stack, then place the food on suitable trivets. Group napkins and utensils beside the plates where guests can collect them easily. Keep drinks at a separate end so someone filling a glass does not block everyone serving food.
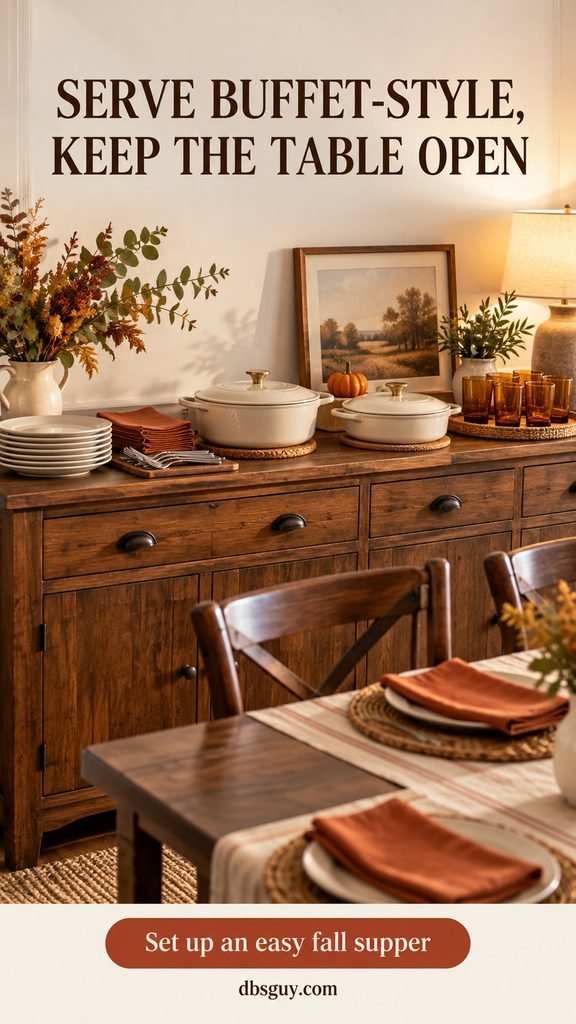
Rust napkins, amber glasses, and one small pumpkin at the back connect the buffet to the season. Leave room for lids and serving spoons before adding flowers or other props. Test the route from the kitchen and back to the seats. Keep cords, branches, and decorations clear of that path, and bring out the food close to serving time.
A Quick Check Before Everyone Sits Down
Look at the table with the serving pieces in place. Remove anything that blocks a face, crowds a glass, hides a utensil, or leaves nowhere to set down a lid. Turn on any LED lights and put spare supplies back in the kitchen. Once the table works for the meal, stop adding things.
FAQs About Last-Minute Fall Tablescapes
What can I use if I have no pumpkins or flowers?
Warm napkins, amber glasses, a checked textile, whole fruit, or a useful serving basket can carry the setting. Pick the object you already have in good condition. Simple fall tablescapes do not need a seasonal ornament at every seat.
Which ideas work best for a full Thanksgiving dinner?
Choose the napkin drape, apple place markers, conversation cards, or leaf-under-glass detail when serving dishes need the middle. For a larger spread, use the buffet layout. These Thanksgiving tablescape ideas are easier to live with when decoration has a clear place outside the serving area.
How do I decorate without buying a new set of dishes?
Keep the plates and glasses you have, then repeat one available napkin color or textile. You can borrow an idea’s main move without matching its entire palette. If you do plan to buy a few pieces later, 19 Budget-Friendly Fall Tablescapes Under $30 offers a separate budget-planning approach.
Can I set the whole table earlier in the evening?
Yes—arrange clean linens, tableware, cards, and empty serving pieces first. Add food when it is time to serve, keep flower containers watertight, and check the batteries in lights before guests arrive. Leave yourself a clear spot to move a centerpiece if the meal needs more room than expected.