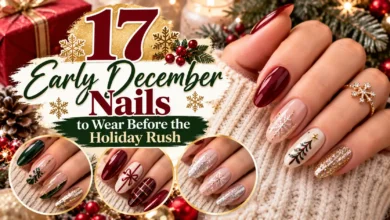
The easiest way to keep Christmas nails simple is to decide where the sparkle stops. Give it one nail, one narrow edge, or one small metallic detail, and leave the surrounding color clear. You get the festive feeling without a different design on every finger.
These 15 simple Christmas nails range from a single shimmer polish to small bows, stars, and striped accents. Start with ruby shimmer if you want the least artwork, gold dots if you enjoy an easy detail, or a fine French border if you prefer a more precise finish. The tiny motifs have decal alternatives, so you can choose the look without committing to freehand painting.
The images are AI-generated manicure concepts, not photographs of tested salon work. Use them to discuss color, placement, and finish; the result will vary with your nails, products, and lighting.

Choose Your Sparkle Before You Choose the Art
For the quietest result, pick one of these approaches: a fine shimmer within the polish, a small metallic shape, or sparkle confined to an edge. A fully glittered accent nail is more noticeable, but keeping the other nails plain balances it. These are styling choices, so adjust the amount to what you actually enjoy wearing.
Short round, oval, and squoval nails all suit this collection. Match the artwork to the space you have: reduce the number of dots or branches before making every detail impossibly small. If you are booking a salon visit, send the reference and mention how many accent nails you want so the salon can confirm the service and price.
1. Ruby Red With Fine Shimmer
Ruby red already carries the Christmas mood, so the only extra detail here is a fine shimmer woven through the color. Choose a polish that still looks red from across the room, with little points of light appearing when you turn your hand. Short rounded nails give the color a neat, uncomplicated outline.
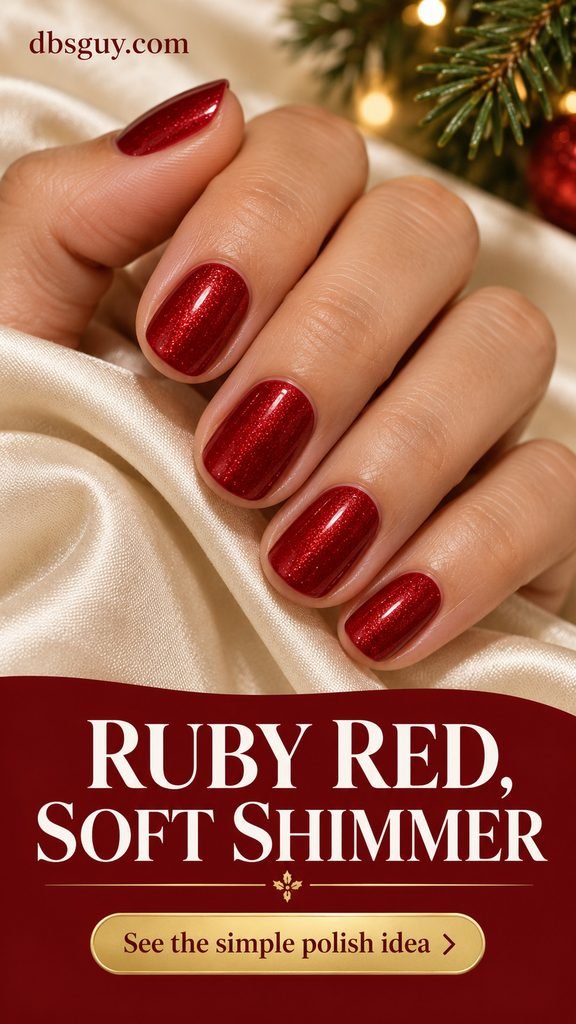
This is the most straightforward home option in the list: one color, the same finish on every nail, and no artwork to match between hands. Compare a painted swatch with a chunky glitter polish before buying. For this look, you want a softly sparkling surface rather than clearly separated pieces of confetti. Skip the accent nail; the finish is doing enough.
2. Sheer Pink With a Champagne Tip Fade
A champagne fade keeps the sparkle at the ends while the pink base stays light. The reference has a few visible flecks mixed with finer glitter; the concentration thins out as it moves toward the middle. That gradual transition is what separates this look from a solid glitter French tip.
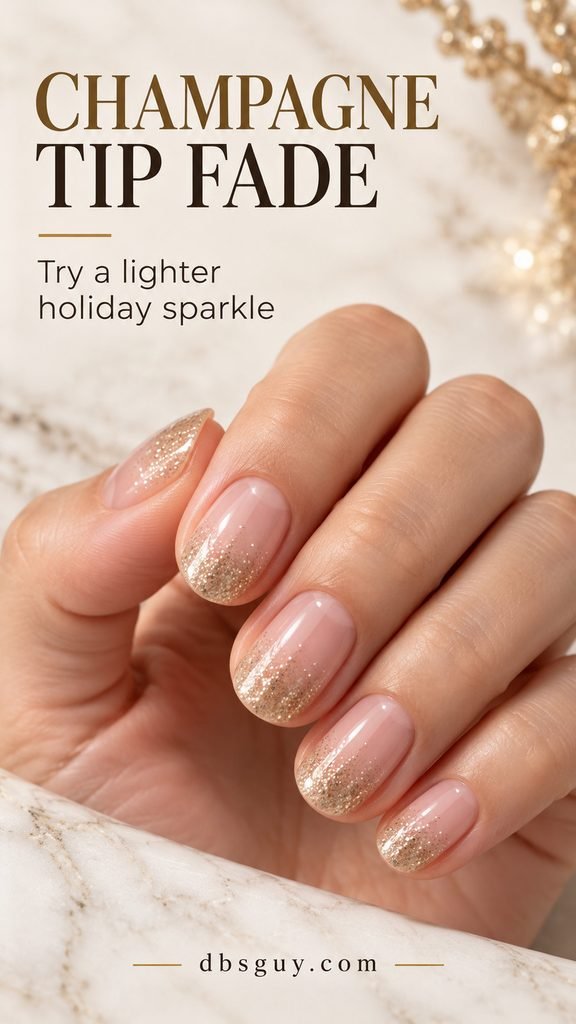
Use a sheer pink base and a nail-polish glitter topper. With most of the excess wiped from the brush, place a little sparkle at the free edge, then lightly feather the remaining particles inward. Let the product dry as directed before deciding whether the tips need more. For an even quieter version, stop the fade closer to the edge and leave more pink exposed.
3. Evergreen With Tiny Gold Dots
Deep green and a single gold dot on each nail have the feeling of a tiny ornament without drawing an actual bauble. The dots sit near the base, with a visible gap between the polish detail and the surrounding skin. A short squoval shape—square with softened corners—gives the set a tidy outline.
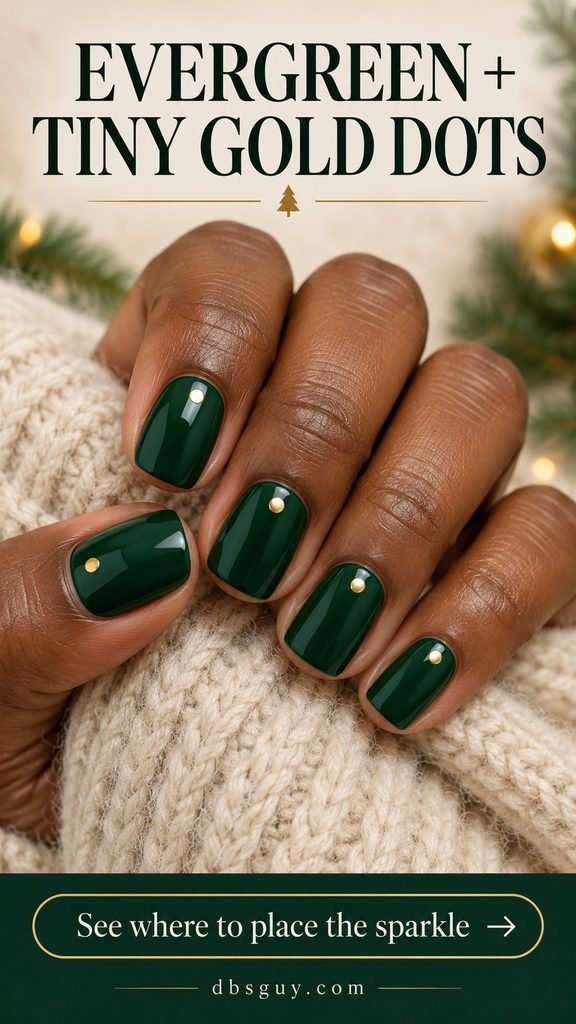
A small dotting tool and metallic gold nail polish are enough for the accent. Practice on a spare tip or disposable surface first so you can judge how much polish the tool picks up. Keep the dots smaller than you think you need; a large circle changes the balance. If repeating ten dots feels too decorative, use one on each ring finger instead.
Also read: 21 Short December Nail Ideas That Make Tiny Details Stand Out.
4. White French Tips With a Silver Edge
Start with a familiar pink-and-white French manicure, then trace the meeting line with silver shimmer. Keeping both the white tip and silver border narrow leaves the pink center visible. It is a festive option when you like a classic manicure but want something that catches the light at dinner.
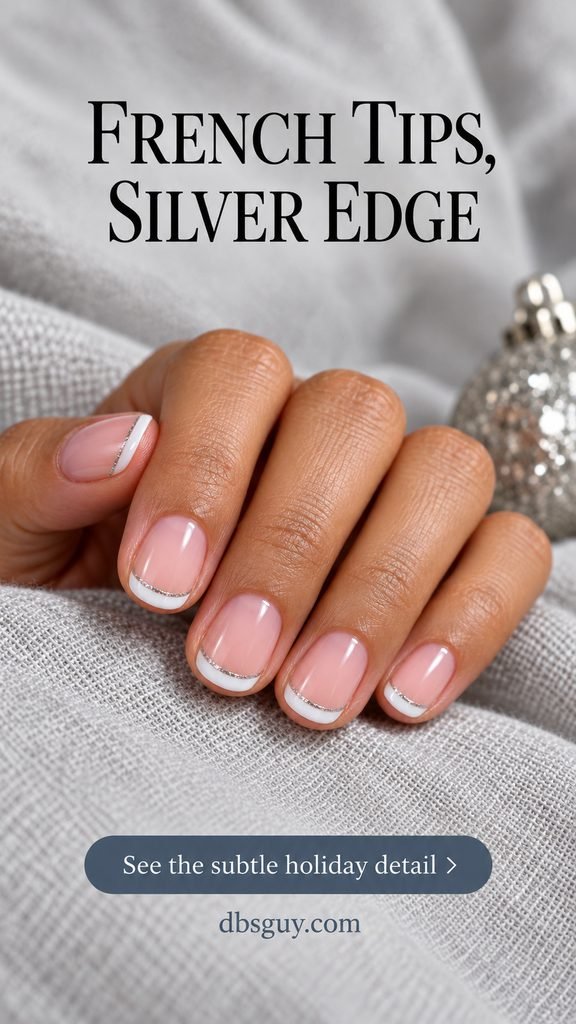
Show your nail artist the width of the white band and the silver line separately. A thick silver stripe can overwhelm the white, especially on short nails. At home, a fine nail-art liner gives more control than the wide brush in a polish bottle. If a full set feels fiddly, add the silver border to two nails and leave the remaining French tips plain.
5. Milky White With One Silver Snowflake
One silver snowflake gives milky nails a clear winter detail. The pale background keeps the contrast gentle, while the branching shape makes the accent recognizable. Leave the other nails plain so the snowflake has room to stand out.
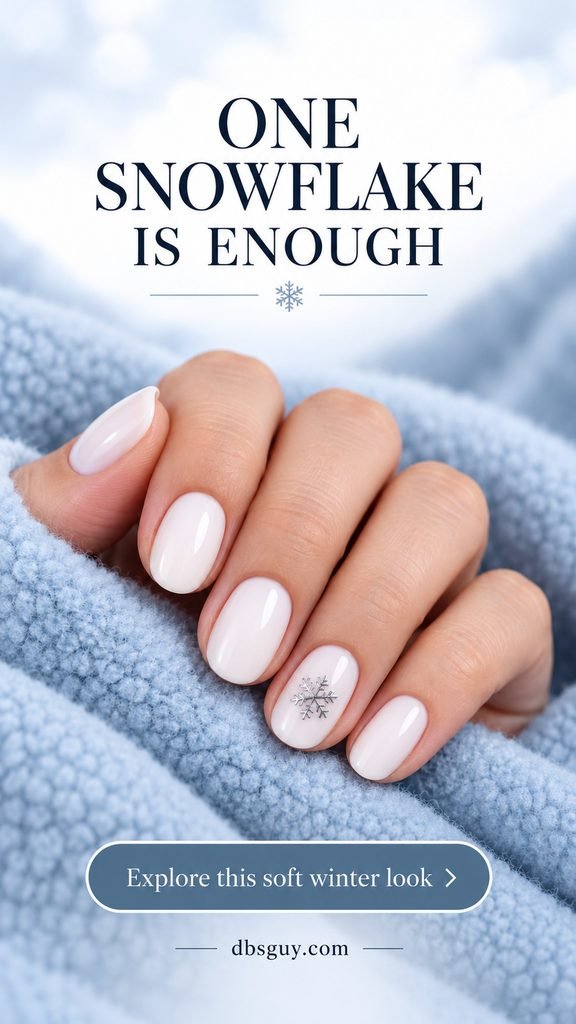
A small nail-art decal is a practical shortcut to freehand branches. Check the actual motif against your nail before applying it: the full shape should fit with white space around every point. The concept has a metallic, slightly dimensional appearance; ask for a thin flat decal or painted version if you prefer a smoother finish. On very small nails, a simple six-arm outline is easier to read than lots of tiny branches.
6. Burgundy With One Champagne Accent Nail
If you want visible sparkle without painting delicate lines, give it one whole nail. Burgundy cream on the surrounding fingers makes a champagne-gold ring finger feel like a small piece of jewelry. The reference uses fine shimmer rather than oversized glitter pieces.
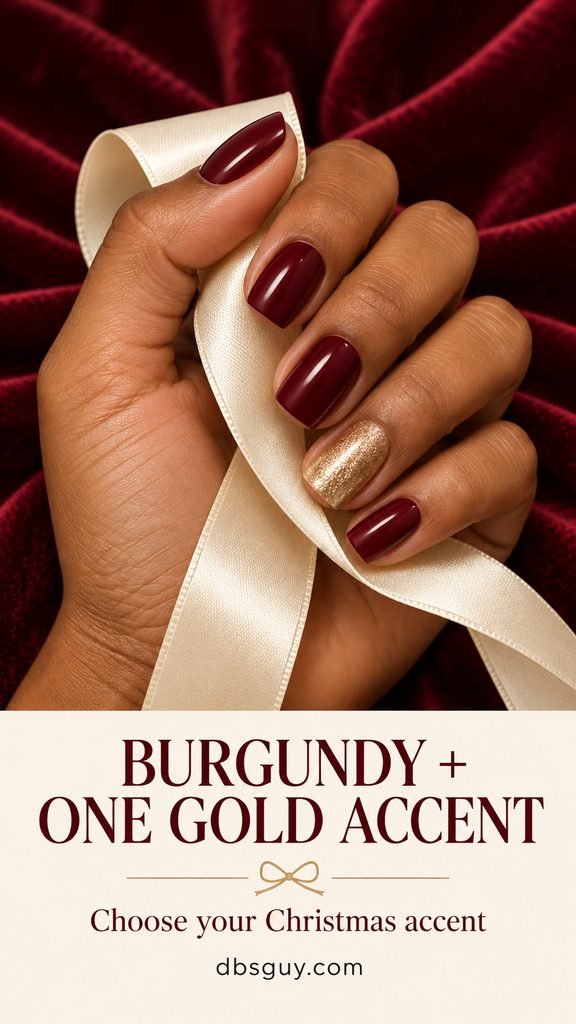
Choose the burgundy and gold together. A soft champagne shade gives less contrast than a bright yellow gold, which may suit you if your holiday outfit already has sequins or metallic fabric. Repeat the same accent placement on the other hand for an orderly result. You can use regular polish for both colors; check the gold swatch for coverage so you are not trying to turn a sheer topper into an opaque accent with heavy layers.
7. Blush Pink With a Tiny Red Gift Bow
A little red bow on blush pink feels festive without becoming a whole gift-wrap pattern. Two loops, two tails, and a gold center are enough. Keeping the bow on one nail also leaves you with a mostly plain pink manicure.
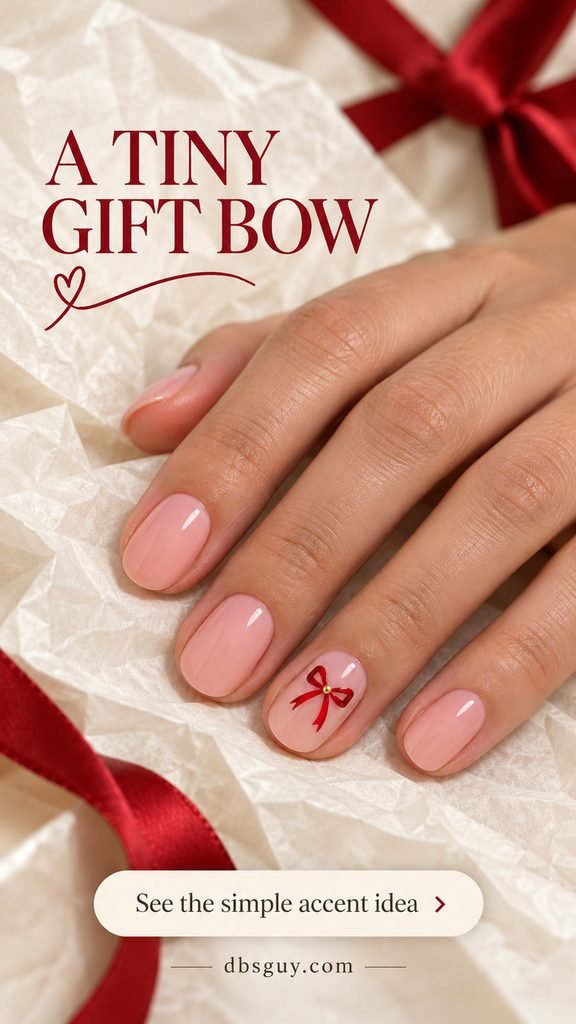
For a home version, use a small bow decal and add a metallic gold polish dot at the center if needed. The illustrated knot has a rounded, slightly raised look; a painted gold dot is the smoother interpretation. Keep both loops inside the nail edges rather than enlarging the design to fill the whole surface. Ask for a small painted motif if you want to avoid a separate bow charm.
8. Creamy Beige With One Little Christmas Tree
A simple tree shape makes beige nails Christmassy while keeping the palette calm. Three stacked green tiers suggest branches, and a little gold star supplies the only metallic detail. You do not need ornaments, snow, or lettering around it.

Place the tree on one ring fingernail and keep the other nails creamy beige. For a narrow nail, make the tree slimmer rather than squeezing the branches against the sidewalls. A decal is an easy way to keep the tiers distinct. Choose a star that is small relative to the tree; a large topper can become the main shape instead. The pale base leaves enough contrast for the dark green to read clearly.
Also read: 19 Neutral December Nail Ideas That Go With Every Holiday Outfit.
9. A Candy-Cane Corner With a Silver Border
This is the striped option for someone who does not want a whole candy-cane nail. A small white wedge at one tip corner holds two red stripes. A thin silver border separates that patterned corner from the milky pink base, while all the other nails remain plain.
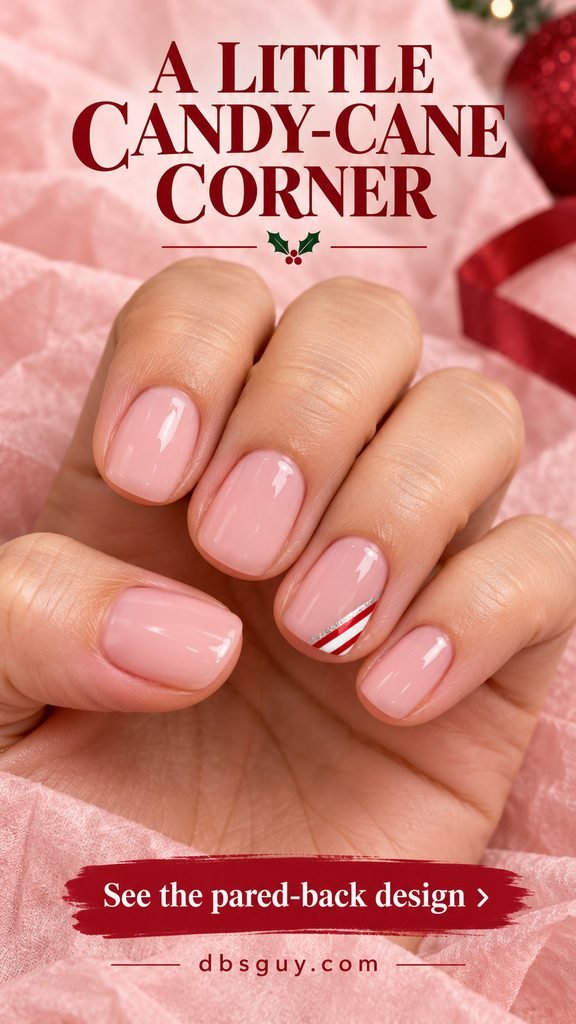
Keep the wedge small enough that pink still covers most of the accent nail. Let the white area dry according to the polish directions before adding red so the stripes stay distinct. A fine brush helps with the corner and border; this is more precise work than the dot designs. For an easier interpretation, choose a striped nail-art sticker that can fit entirely within the corner and add a silver liner beside it.
10. Translucent Beige With Gold-Foil Side Accents
Tiny irregular gold flecks along one side of two nails give a neutral manicure a broken, light-catching edge. The middle of each nail stays mostly beige. Unlike a painted stripe, the foil has gaps and uneven outlines, which are part of the design.
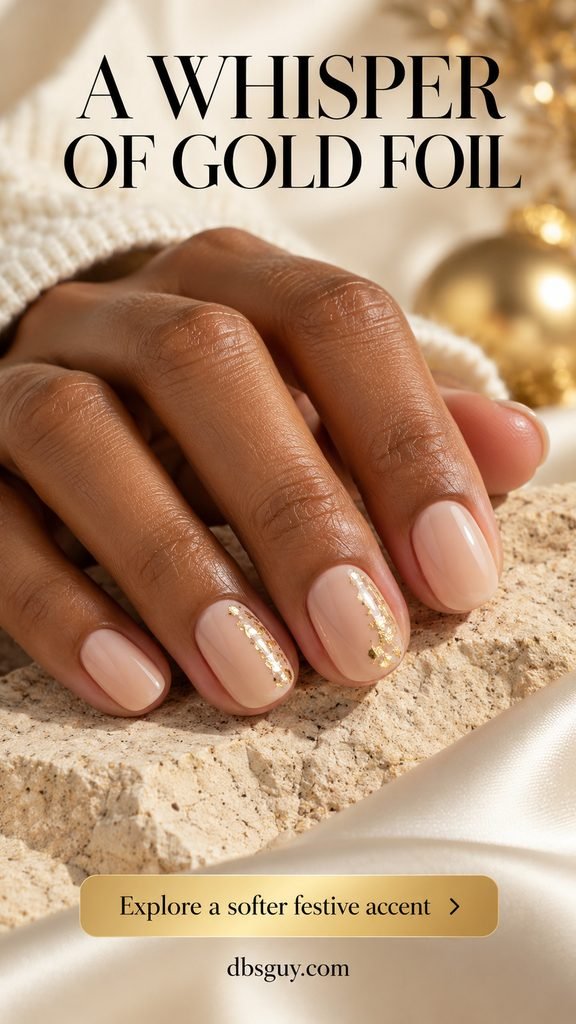
Ask for nail-art foil in small separated pieces on the middle and ring fingers, with the other nails left plain. Follow the foil system’s application instructions; different products attach in different ways. Avoid filling every gap, because a continuous gold patch makes a much bolder accent. If foil placement is awkward at home, sparse irregular gold nail-art decals can suggest the same effect. Choose a translucent beige you like on your own hand rather than assuming one nude shade suits everyone.
11. Ice Blue With Fine Silver Base Crescents
Powder blue and silver give you a frosty palette without red or green. Here, a narrow silver curve follows the base of each nail. It is a fine outline, with the blue still covering almost the entire surface.
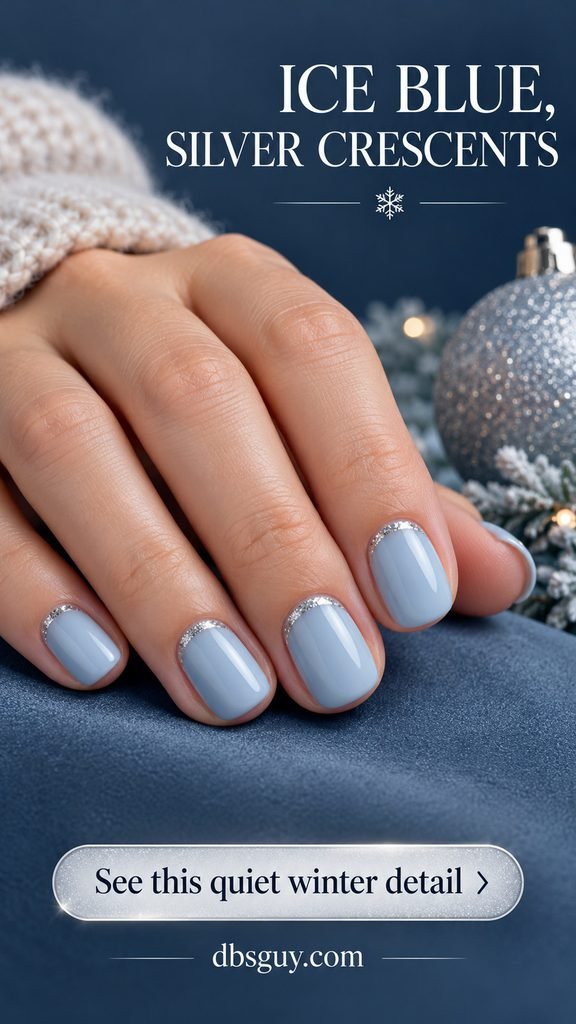
Tell your nail artist you want a line at the base, not a silver French tip or a filled half moon. Show the first crescent before repeating it so the width feels right. Keep the silver on the nail plate and away from skin. A fine liner is useful for this curved placement; at home, you can simplify it to one crescent per hand. Leave out extra snowflake artwork so the curves remain the only decoration.
12. Forest Green With One Diagonal Gold Line
A single diagonal line changes a plain green manicure without adding a drawing. Put the gold stripe across one ring fingernail and keep the rest glossy forest green. The slant gives the accent a ribbon-like feel, with no need for a bow.
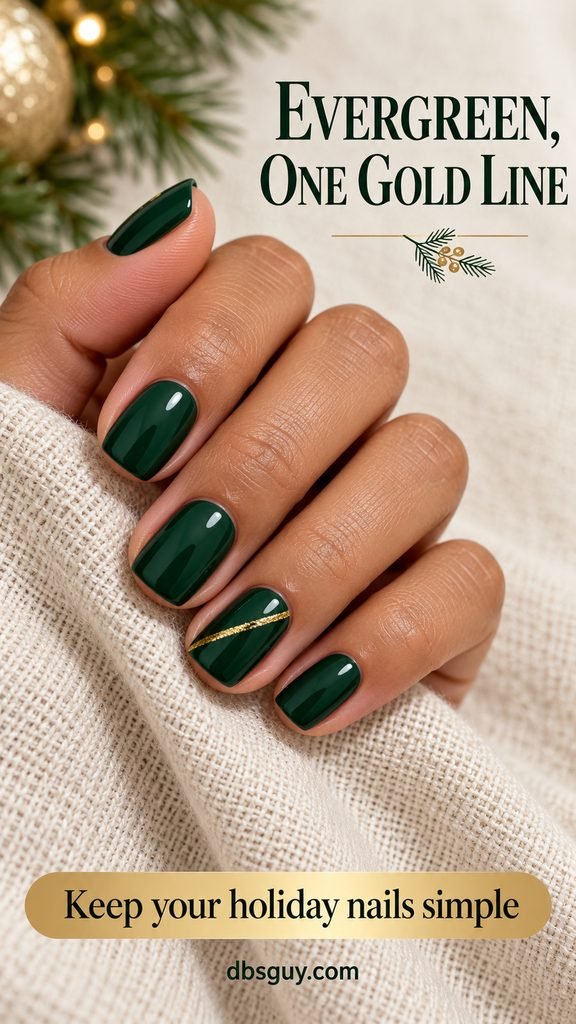
The important choice is line width: green should remain the dominant color on both sides. A fine gold nail-art liner works for a painted version. If you use a nail-art strip, follow its directions and keep its ends within the nail edges. For an especially small nail, angle the line gently across the center rather than trying to create several intersecting stripes. One clean stroke fits this look better than a grid.
Also read: 27 Christmas Nail Ideas From Classic Red to Unexpected Twists.
13. Cocoa Brown With One Gold Starburst
Warm cocoa and one small gold star make a cozy alternative to the traditional Christmas palette. A four-point starburst keeps the silhouette simple. Because the gold is concentrated in one place, the brown still reads as a mostly solid-color manicure.

Choose a flat metallic nail sticker or ask for a painted star on the ring finger. Leave brown visible around every point; the star should not touch the sidewalls. If the cocoa looks too close to your skin for the effect you want, compare a lighter or deeper swatch before committing. Skip the surrounding glitter dots so the single star stays the focal point. This is a useful choice with cream knits, camel coats, or a gold evening bag.
14. Muted Mauve With Rose-Gold Half Moons
Rose gold brings a softer metallic note to muted mauve. These are small filled half moons at the nail bases, rather than thin curved outlines. Keeping the sparkly shapes low leaves a broad area of plain mauve above them.
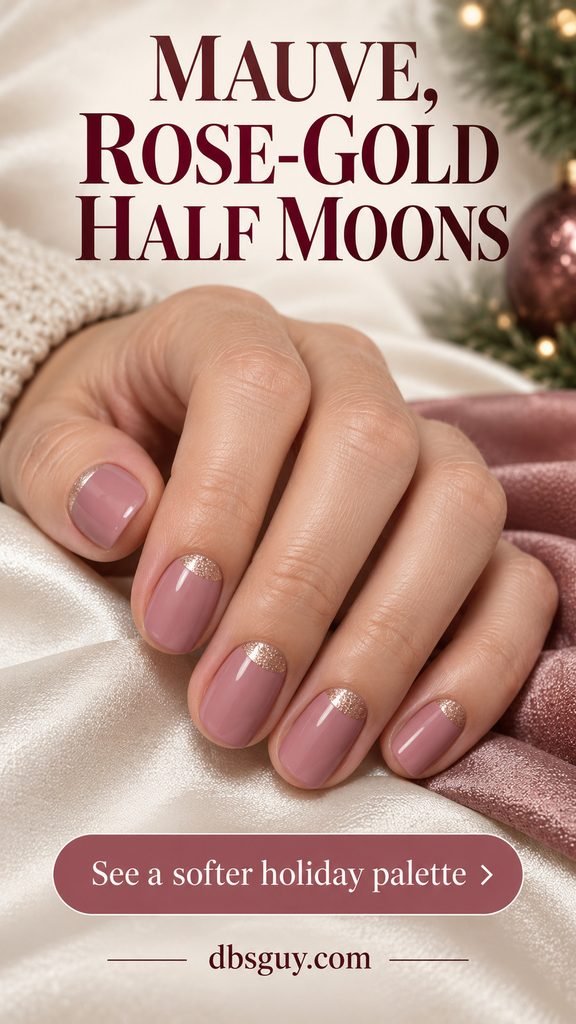
Ask for shallow rose-gold half moons, and check the first nail before the rest are painted. They should look like a small base accent rather than a second large block of color. Curved nail-art guides may help with a regular-polish version, but use them only as directed on a sufficiently dry base. If repeating the shape on every nail feels too dressy, limit it to the ring fingers. This palette also works after the Christmas decorations come down.
15. Sheer Nude With Tiny Festive Confetti Tips
Little red, green, and gold dots make a playful Christmas finish without a literal holiday drawing. Scatter them near the tips over sheer nude pink, leaving the lower part of each nail clear of decoration. The gaps matter as much as the colors.
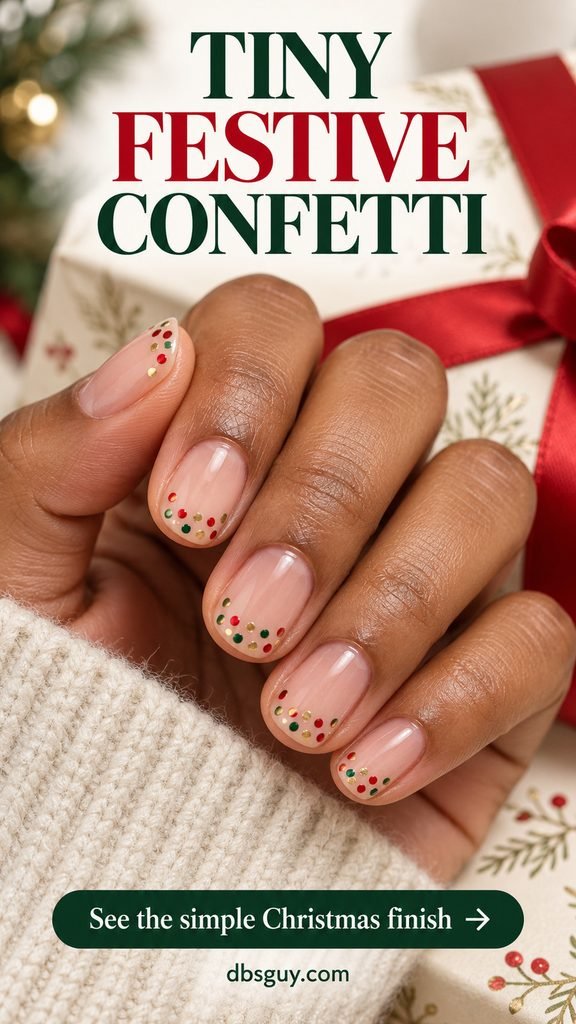
Use a small dotting tool with red, green, and metallic gold nail polish. Start with a few dots, then stop and look at the whole hand before adding more. The reference has several dots near each edge; a quieter version needs only one or two of each color. Avoid joining them into a continuous band. Let the colored dots dry sufficiently before applying your compatible top coat so the pattern does not drag into streaks.
A Simple Home-Manicure Plan
For the regular-polish interpretations, gather your base color, base and top coats suited to your polish, and only the accent tool your chosen design needs. Gold dots need a dotting tool; fine borders need a liner; a bow or snowflake can use a nail-art decal. You do not need every tool for every look.
- Shape the nails to a comfortable length, then prepare clean, dry nail plates according to your polish instructions.
- Apply base coat and thin color coats as directed. Give the base the drying time it needs before adding artwork or using adhesive guides.
- Add the accent to one nail first. Check its size against the plain nails before repeating it.
- Finish with a compatible top coat according to the polish or decal directions. Avoid repeatedly brushing over delicate lines while they are still soft.
The designs do not require gel: ordinary polish can create these color and placement ideas. If you choose a gel service, ask your technician to use the product’s specified system and curing process. Do not treat air-drying polish directions as gel instructions.
Keep preparation gentle. The American Academy of Dermatology’s manicure guidance advises against cutting or forcefully pushing back cuticles and recommends moisturizing nails, particularly after polish removal. For a salon visit, ask how tools are cleaned.
Questions About Simple Christmas Nails
Which design is easiest for a beginner?
Ruby shimmer involves the fewest separate tasks because there is no artwork. One champagne accent nail is another approachable choice. If you want a small pattern, try gold dots before a curved French border or candy-cane corner, which need more control.
How do I keep glitter from looking too heavy?
Check both particle size and coverage. Fine shimmer gives a more continuous glow; larger pieces create obvious sparkles. For a subtle topper, begin with a sparse layer and add more only where you want the focus. Concentrating it at a tip or on one nail leaves the rest of the manicure calmer.
Can these work on very short nails?
Yes—choose a single dot, a small star, or a full shimmer color if there is little room for artwork. A snowflake needs enough width for its branches to remain separate. If your chosen motif loses its shape when reduced, put it on a wider nail or choose a simpler detail.
What should I show my nail artist?
Bring the image and specify the base color, the number of accent nails, and whether you prefer a smooth painted detail or a raised embellishment. Point out where the sparkle belongs. “A thin silver curve at the base” communicates a different request from “silver tips,” even when the colors are identical.
Also read: 25+ December Nail Ideas to Match Your Mood, From Cozy to Party-Ready.