21 Christmas Nail Art Ideas With Ornaments, Bows and Details Worth Zooming In On

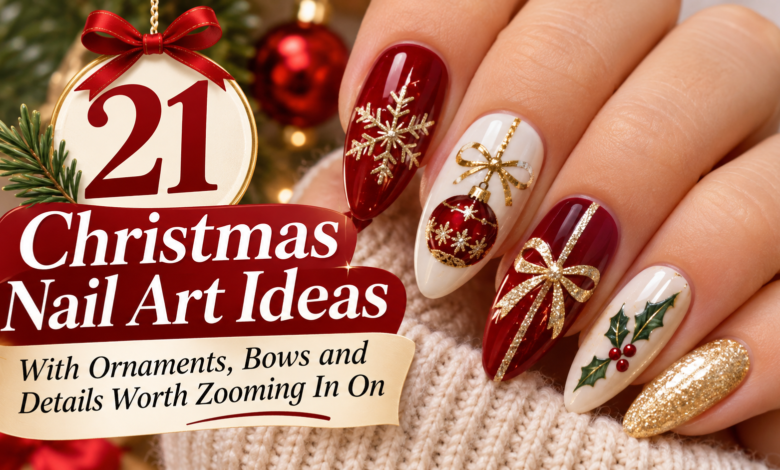
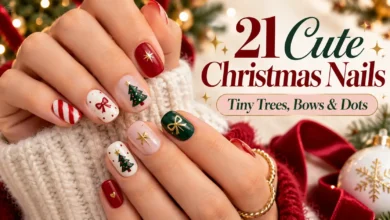
A tiny gold cap is what turns a red circle into a Christmas ornament. An open loop makes a bow look like ribbon instead of a red blob. Those are the details to look for in these Christmas nail art ideas: small, deliberate marks that give a manicure its holiday character.
Start with the ruby bauble for a simple accent, the vintage mint ornament for something nostalgic, or the black ribbon on pearl ivory if your Christmas outfit already has plenty of color. Each of the 21 designs below includes the detail to preserve and a way to adjust it to your nail length.
Image note: These are AI-generated design concepts, not photographs of completed or tested manicures. Use them to discuss color, scale, and placement with your nail artist; lighting and products will change the finished effect.
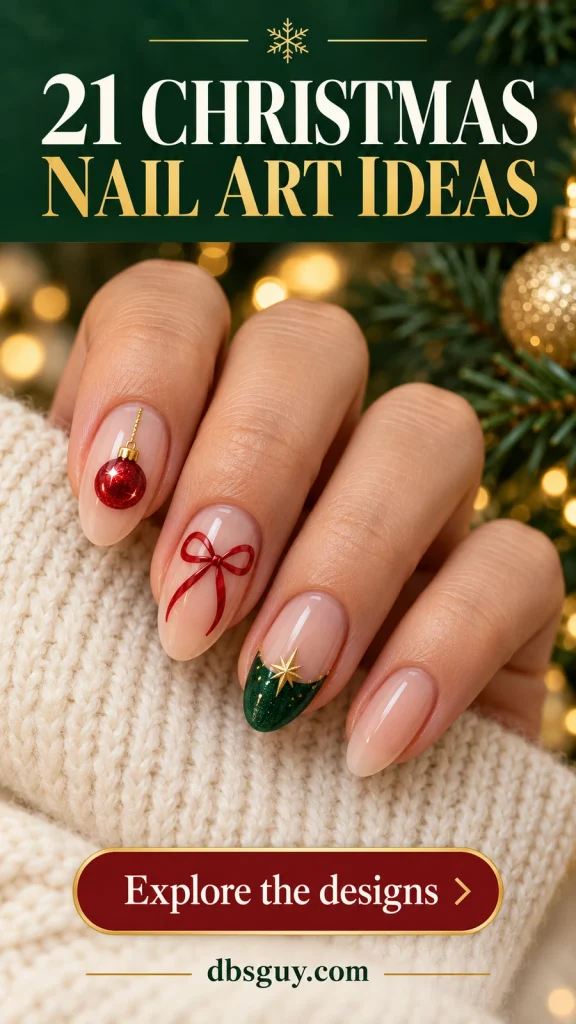
Choose the Detail Before the Color
- For short nails: try one ruby bauble (1), a holly corner (11), or a small strand of lights (14). Keep the outline recognizable before adding decoration inside it.
- For a dressed-up dinner: gold bows on burgundy (2), champagne ornament art (8), and pearl ivory with black ribbon (21) pair a quiet layout with a noticeable finish.
- For a playful Christmas look: the mint finial (3), pink peppermint ornament (10), and miniature snow globe (20) have a clear little story.
- For a home manicure: a small, flat decal over plain polish is a practical alternative to painting miniature loops, needles, or snowflakes on both hands.
Decide whether you want a smooth painted design or raised embellishments. A shiny concept image can make painted shading look dimensional, so confirm the actual surface with your artist.
1. A Single Ruby Bauble on Sheer Blush
One red ornament gives a sheer blush manicure a clear Christmas focal point. The little gold cap and fine hanging line matter as much as the circle: without them, it can read as an ordinary red dot. A small white highlight adds the suggestion of a glossy bauble.
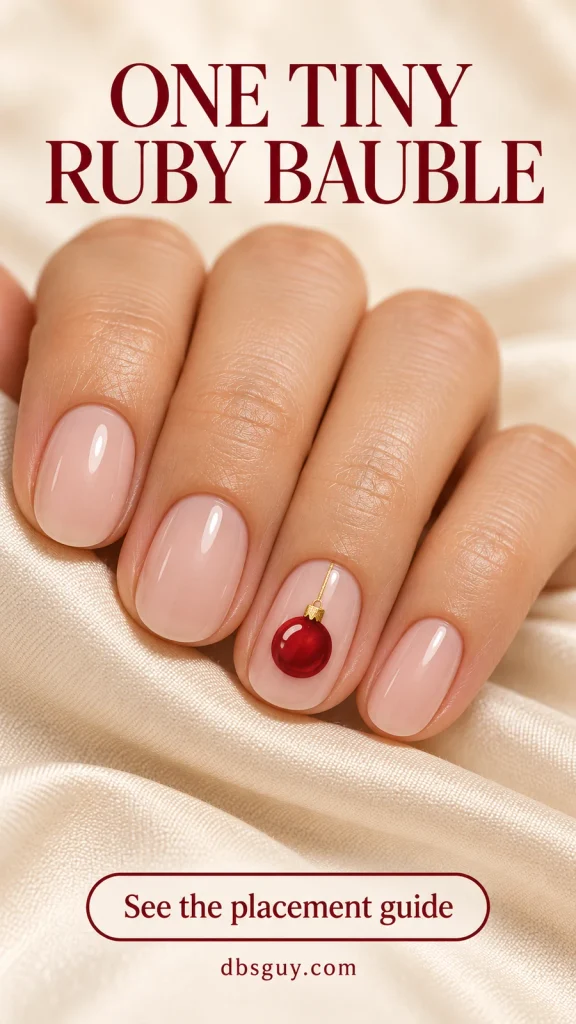
Choose one accent nail and leave a visible blush border around the ornament. On a short oval, make the bauble smaller before shortening its hanging line out of existence. Ask for a painted circle or flat decal if you want a smooth surface; a domed charm is a different interpretation.
2. Fine Gold Bows on Burgundy
Deep burgundy gives thin gold ribbon enough contrast to show up without a pale accent nail. The reference keeps the bow on one finger, with two open loops and loose tails. It is a useful choice when you want a holiday detail that also feels at home with evening clothes.
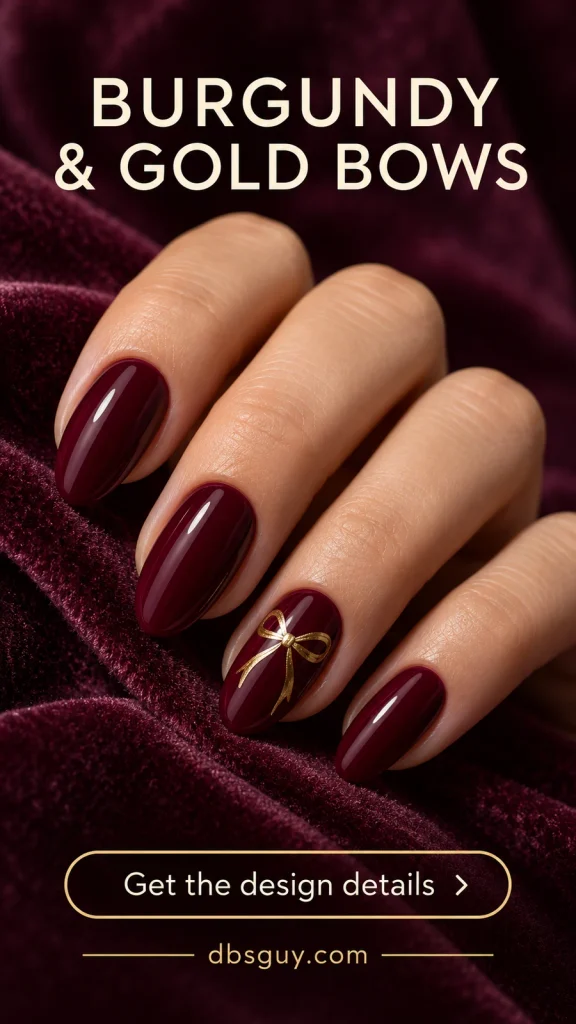
Ask for a fine metallic outline rather than a solid gold bow silhouette. Burgundy should remain visible inside the loops. If your nails are shorter than the reference, shorten the tails and keep the knot small; squeezing every line into the same space can close up the bow.
3. A Vintage Mint Finial Ornament
The pointed bottom gives this mint ornament its vintage character. A creamy ivory base makes the unusual shape easy to see, while warm metallic bands suggest the decoration on an old glass finial. This is the option to save if round baubles feel a little too familiar.
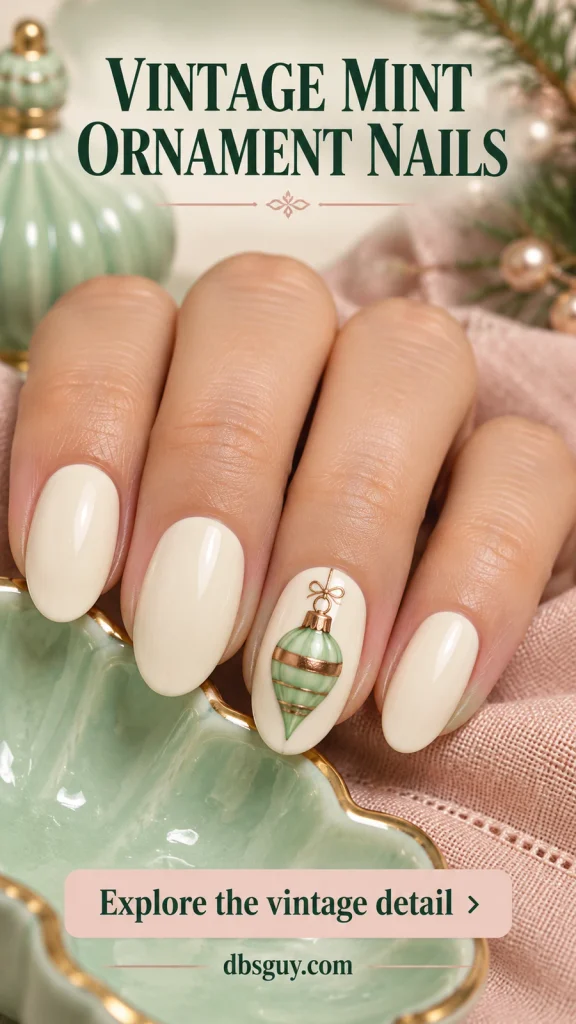
An oval or almond accent offers room for the tapered end. Tell your artist that the mint outline is the priority, then simplify the bands if needed. On a very short nail, use a shorter teardrop shape with one metallic band instead of trying to fit the full elongated ornament.
4. Red Gift-Wrap Ribbons on Ivory
Here the entire accent nail becomes a wrapped present. Two slim red bands cross over ivory, and a small bow sits at their intersection. The unpainted-looking ivory spaces are important: they separate the ribbons and stop the design from becoming a mostly red nail.
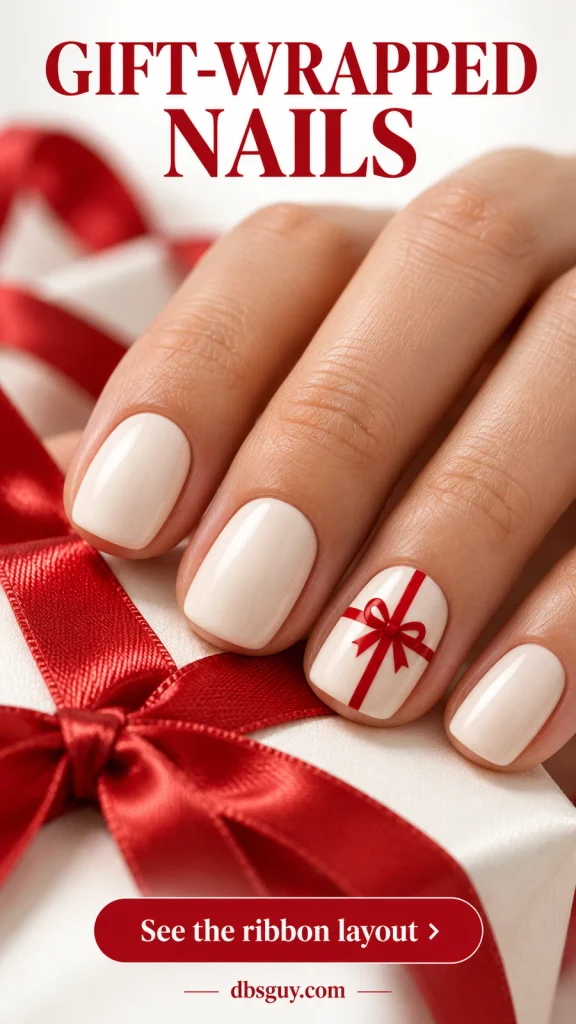
Place the crossing slightly off the middle if you want the layout to feel less rigid. Keep the bands narrower than the open ivory areas beside them. For a home version, a single gift-wrap nail sticker can keep the bow and crossing aligned; check its dimensions against your nail before applying it.
5. Silver Celestial Baubles on Navy
Two silver ornaments hang at different heights against midnight navy, with a few small stars in the remaining space. The dark base gives the silver a night-sky setting. A subtle navy shimmer, as illustrated, adds depth without needing a separate glitter accent.
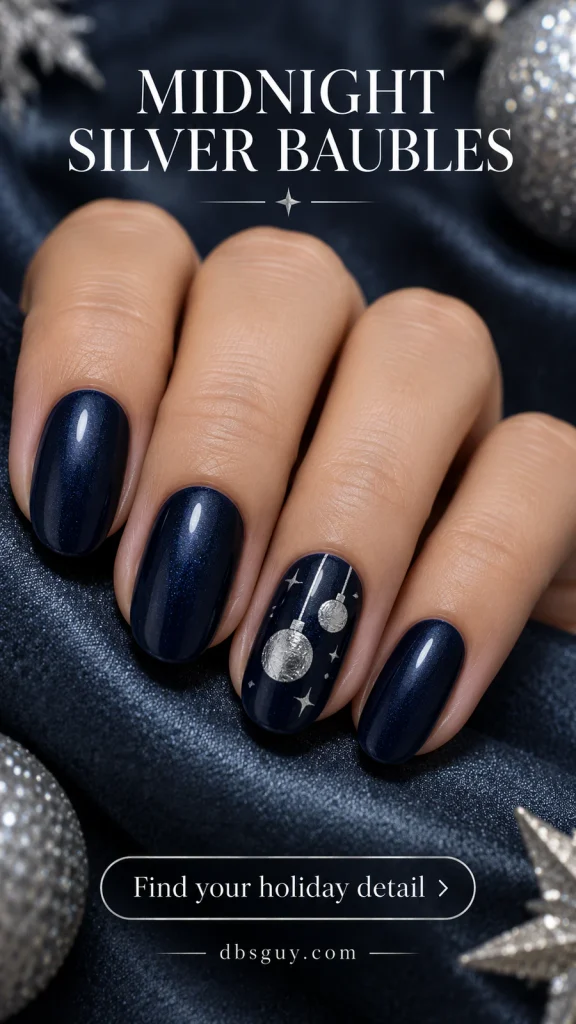
Keep the strings separate and give each ornament its own outline. On a narrower nail, use one bauble and one star instead of shrinking both ornaments until they merge. Request a silver painted or flat-decal finish if you want the design without raised jewelry.
6. Tiny Red Bows Above White French Tips
A small red bow changes the mood of a white French manicure while leaving most of the pink base visible. In this reference, the bow floats above the white tip with a clear gap between the two. That separation lets you see the ribbon tails and the French edge individually.
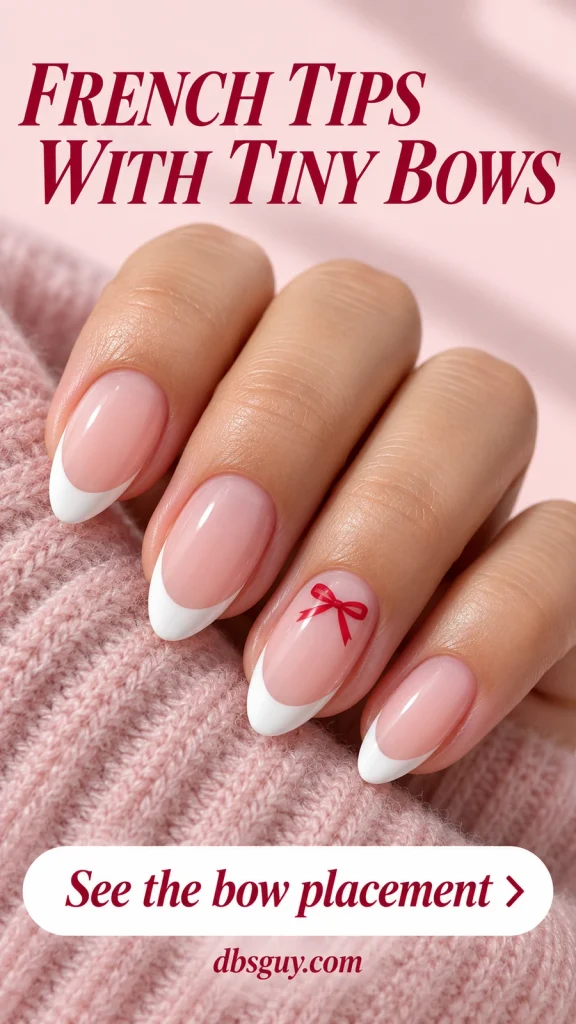
Show your artist where you want the knot to sit before the loops are added. On short nails, choose either a narrower tip or shorter bow tails so the two details do not collide. One accent bow is enough to carry the idea across the whole manicure.
Also Read: 21 Short December Nail Ideas That Make Tiny Details Stand Out for more ways to scale a motif to a smaller nail.
7. A Mini Wreath on Sage
Sage makes a soft background for a darker green wreath. Small red berry clusters and a bow break up the leafy circle, giving it the look of a Christmas decoration rather than a floral border. Keep the center open so the ring remains the first shape you notice.
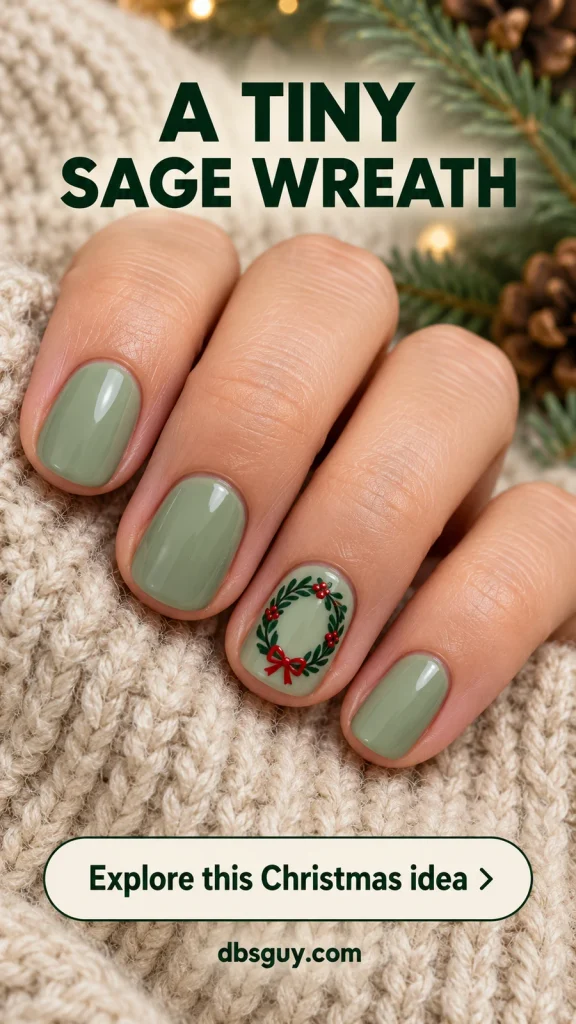
This design depends on contrast between the base and the leaves, so compare those greens together before choosing them. A short round nail can take a simpler wreath with fewer leaf strokes. If the artist needs to simplify further, keep the circular outline and bottom bow and reduce the berry clusters.
8. A Champagne Bauble With a Glassy Look
A fine gold outline, a pale crescent highlight, and a few interior flecks suggest a transparent ornament on a beige base. Leaving the middle mostly the same color as the surrounding nail is what gives this version its glassy look. It does not require a clear glass charm.
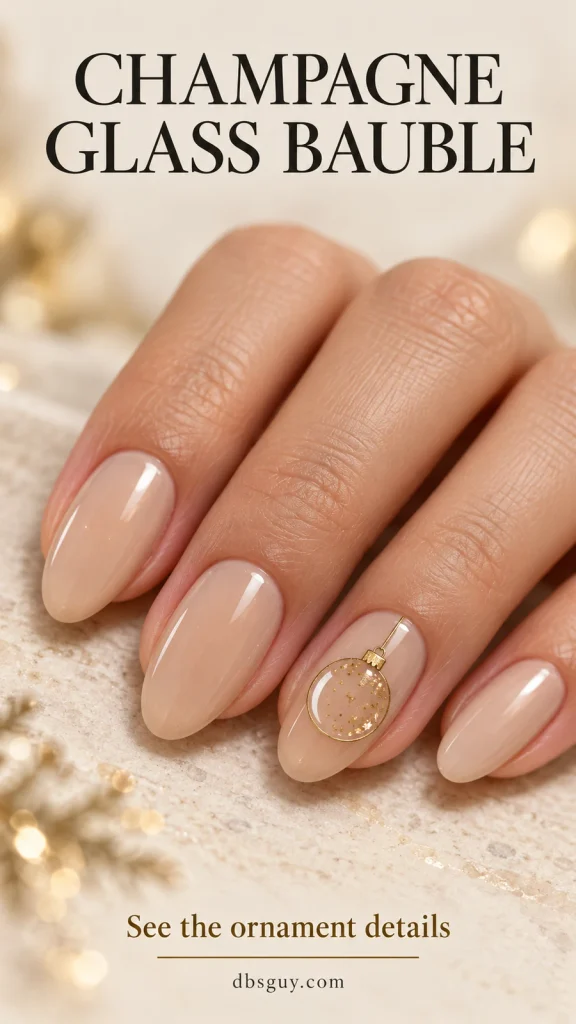
Ask for a translucent-looking painted illustration with a smooth finish. The circle should remain distinct from the gold flecks inside it. For a quieter version, leave out the flecks and keep the outline, cap, string, and one highlight. Choose a beige base against your own hand rather than treating this reference shade as universal.
9. Painted Pearl Garlands on Forest Green
A curved row of ivory dots borrows the look of a pearl garland without needing a literal ornament. The forest-green background gives the pale dots a crisp edge, and the shallow drape makes them look strung across the nail rather than scattered at random.
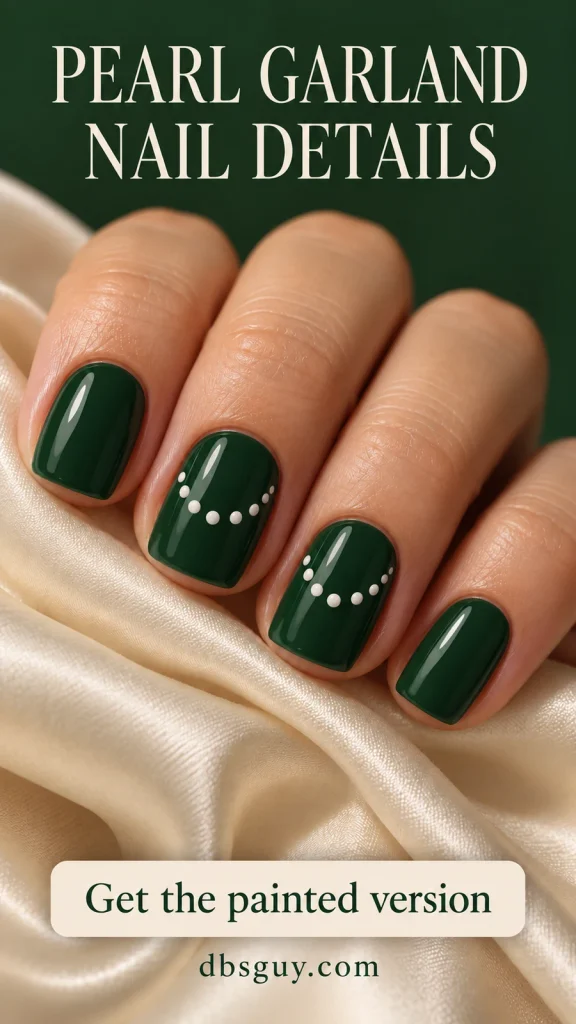
For the painted version, ask for separate dots in a gentle U shape and a smooth top coat. Start with the lowest central dot, then place the others upward toward either side. Follow your polish directions between layers. Use fewer dots on a small nail so the spaces between them stay visible.
10. A Pink Peppermint Ornament
Pink and white curved wedges turn a round ornament into a peppermint-inspired detail. The silver cap and hanging line separate this idea from a regular candy-swirl accent. Plain pink nails around it keep the tiny spiral from competing with another pattern.
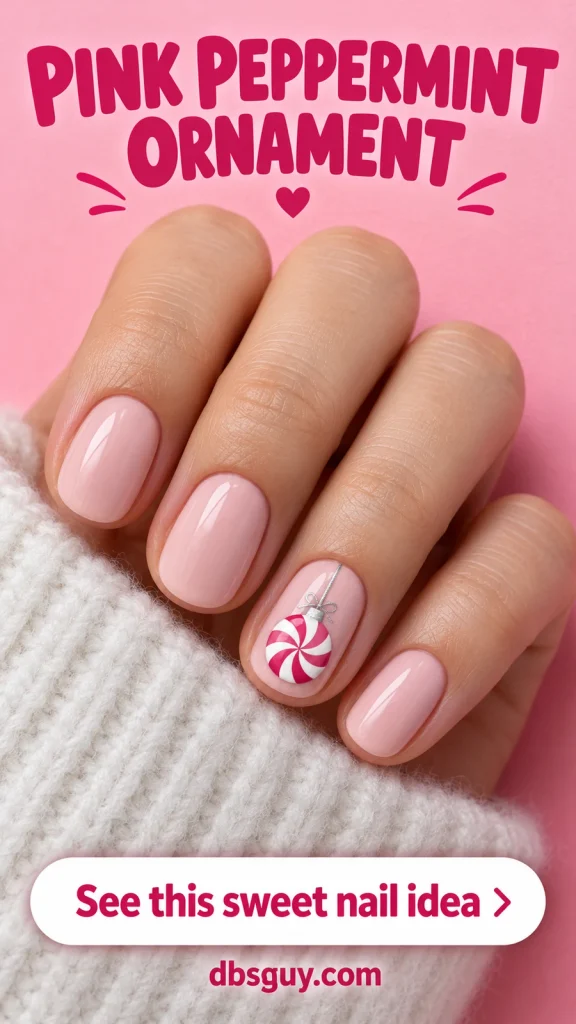
Give the circular outline enough room for a clear center. On short nails, use fewer, broader curved wedges rather than adding very fine stripes. This is a good candidate for a small decal if drawing a consistent spiral would be frustrating. The pale pink background can be sheer or opaque; choose the coverage you prefer first.
11. Holly Tucked Into One Corner
Two pointed leaves and three red berries make a compact Christmas accent on milky white. The sprig sits near a corner at the base of the nail, leaving a long sweep of white below it. That placement suits someone who likes recognizable holiday art but wants very little coverage.
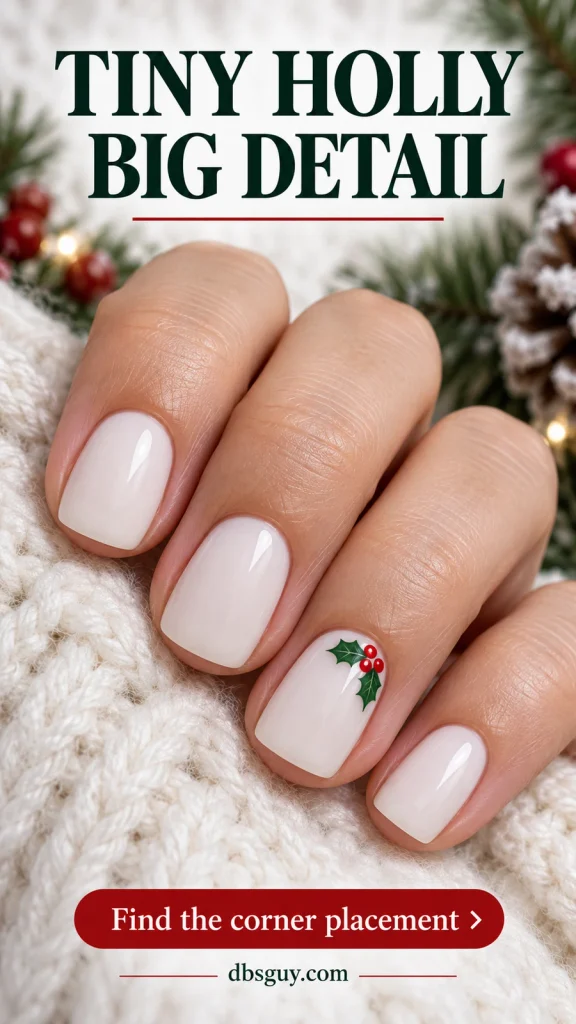
Keep the berries separate instead of joining them into one red patch. On a narrow nail, let one leaf extend sideways and the other point downward, following the corner. A small holly decal can preserve the leaf shape at home. Keep the design inside the nail edge, clear of the surrounding skin.
12. An Evergreen Branch With Mini Ornaments
A diagonal pine branch makes the hanging ornaments part of a miniature scene. Short green needle strokes create the branch, while two red baubles hang beneath it. The blush background gives the fine needles room to show; an opaque dark base would change that delicate effect.
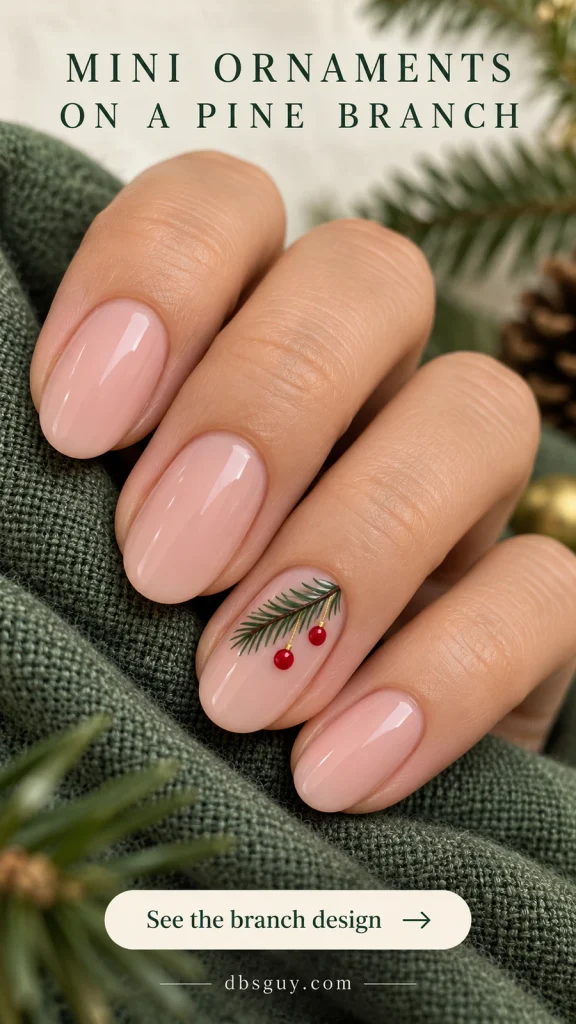
Save the direction of the branch as well as its colors when showing the reference. It should run across the nail without filling the whole surface. For a smaller nail, use one short branch and one bauble. The little gold attachment line is the detail that connects the red dot to the greenery.
13. Two Tiny Gold Bells on Emerald
Gold bells offer a different silhouette from round ornaments. Flared bottoms, dark openings, and tiny clappers make the pair recognizable, with a red ribbon joining them above. Emerald provides a rich background that works particularly well if you prefer full-color nails to a sheer base.

The illustration uses shading to suggest dimension. Ask for painted bell artwork or a flat decal if you want that visual effect on a smooth surface. On short nails, request one bell with a small ribbon, since two crowded outlines can lose their shape. Confirm that the service is artwork rather than attached bell charms.
14. A Loose Strand of Christmas Lights
A fine green curve and a few red, gold, and green bulbs make a little strand of Christmas lights. Using two neighboring accent nails lets you repeat the idea without covering every finger. The loose curve feels more like a draped wire than a straight stripe.
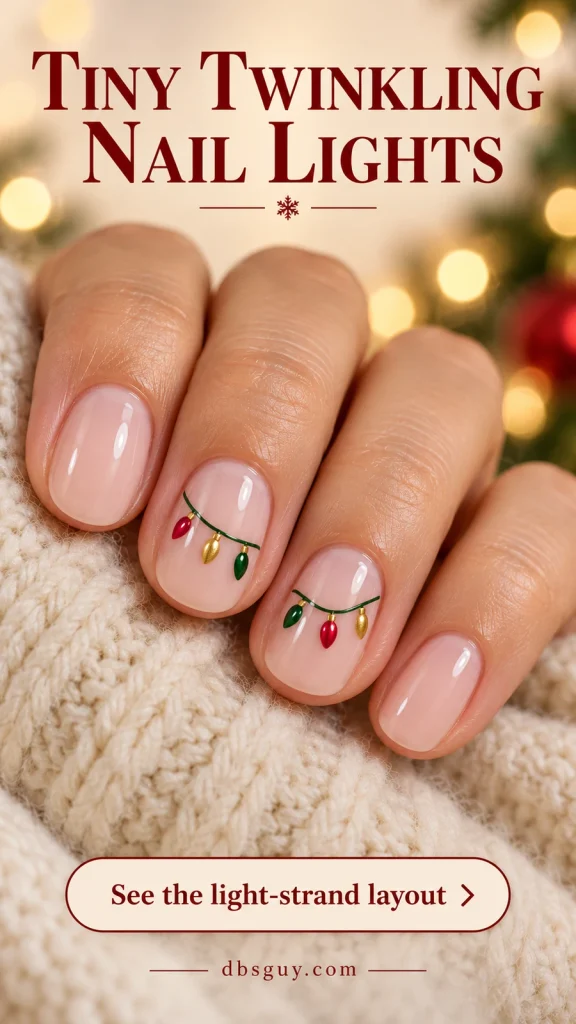
Keep each bulb attached to the line with a tiny cap or short stroke. Separate the colored shapes so they do not become a row of touching dots. You do not need the wire to align perfectly across two fingers; each nail should still make sense on its own. A shorter strand with three bulbs is a manageable adaptation for a small nail.
Also Read: 25 Christmas Nails That Steal the Show at Every Holiday Party if you want to compare these small accents with bolder party finishes.
15. Gingerbread Icing Edges
Caramel nails with white scalloped edges suggest decorated gingerbread without a miniature character. The open brown center keeps the reference closer to a cookie border than an all-over pattern. Small dots at the sides continue the icing detail without filling the nail.
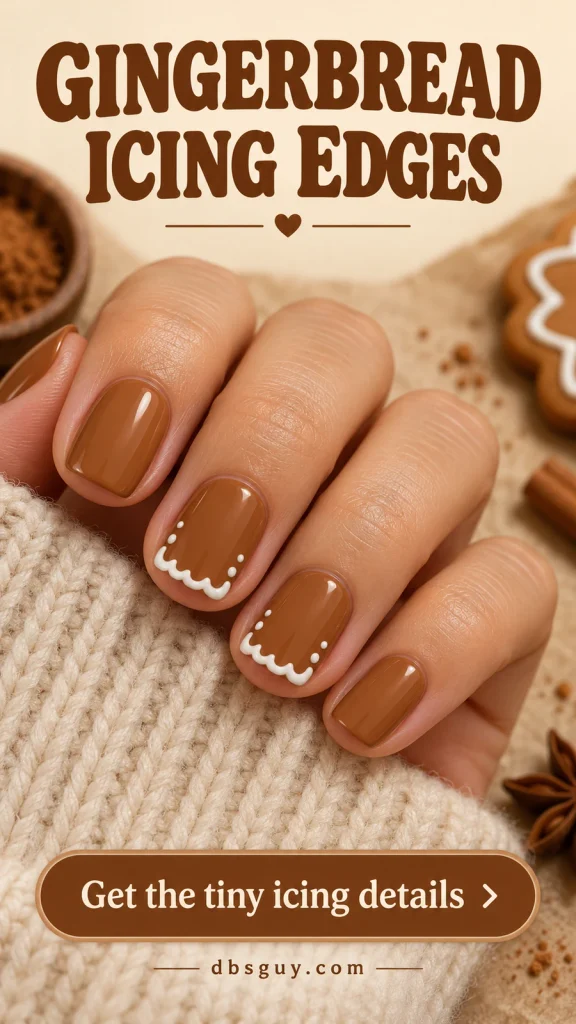
The concept shows icing-like definition; ask for flat painted scallops if you prefer a smooth surface. A squoval tip gives the little curves a clear edge to follow. For a simpler home interpretation, use a white dotted border instead of connected scallops, leaving caramel visible between the marks.
16. A Snowflake-Patterned Red Ornament
This bauble has a second detail inside it: a white snowflake against deep red. Ivory around the circle gives the ornament a border, while the fine gold cap and string keep its identity clear. The contrast makes it a stronger focal point than the open champagne version.
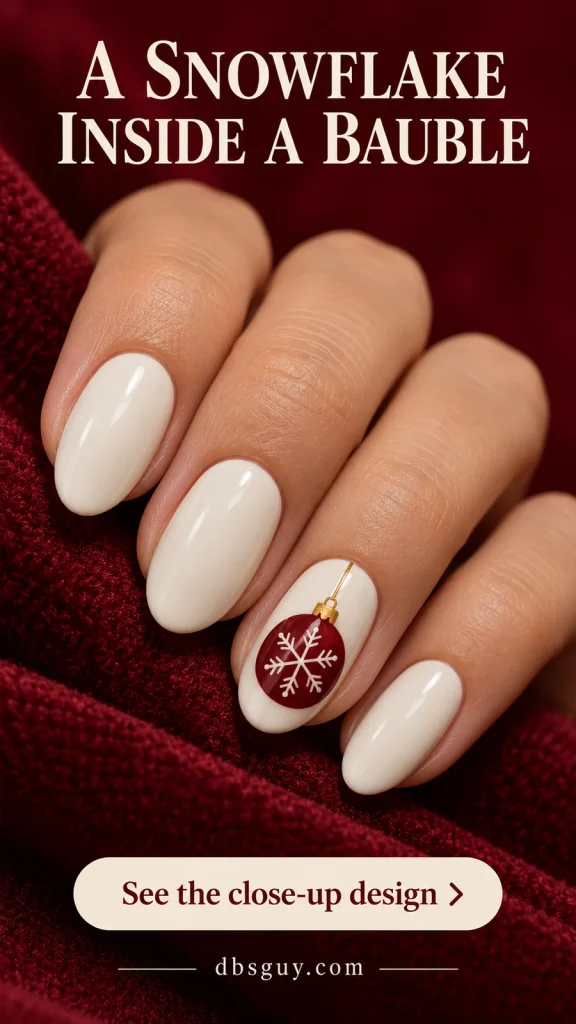
Let your artist size the circle before deciding how many snowflake branches it can hold. On a small nail, keep a simple six-arm flake and skip the extra twigs. If the white lines start touching the ornament edge, simplify the snowflake rather than making the red circle cover the whole nail.
17. A Flat Knit Stripe With a Red Cuff
A slim taupe stitch pattern down one ivory nail suggests a sweater panel. The narrow red band at the free edge acts like a cuff, making the Christmas reference a little clearer. Because the pattern stays in one strip, the neighboring plain nails still belong to the same quiet set.
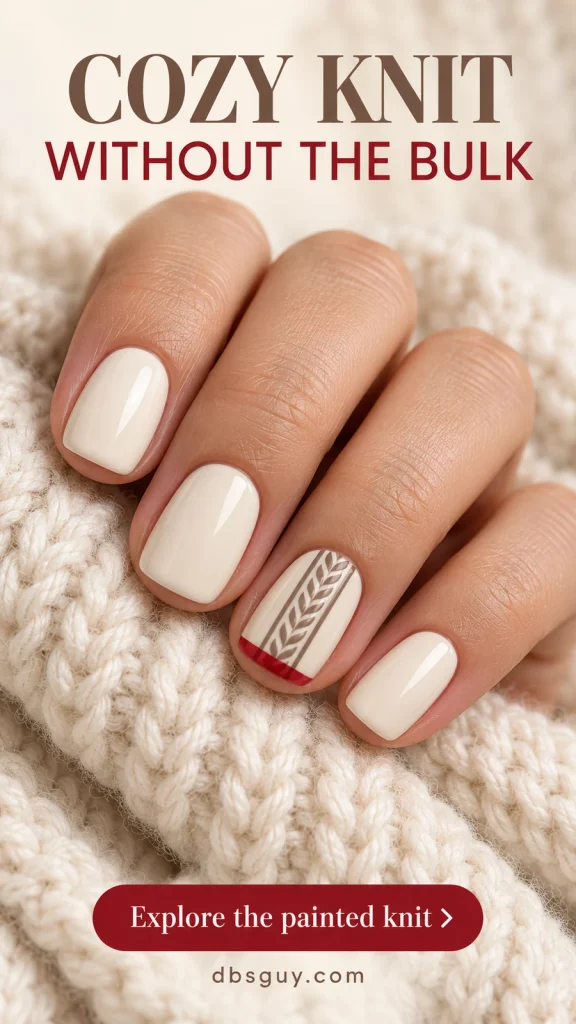
Specify a painted knit pattern if you want this smooth version. Raised sweater texture is a separate request. On short nails, reduce the number of stitches and keep ivory visible on either side. The central alternating diagonal marks matter more than adding extra parallel borders or a second knit column.
18. A Gold Star at the Edge of a Red French Tip
A single gold star sits where the red tip meets the pink base, slightly to one side. That placement links the little accent to the French curve. It is a useful compromise when you like a recognizable holiday sparkle but do not want a full ornament illustration.
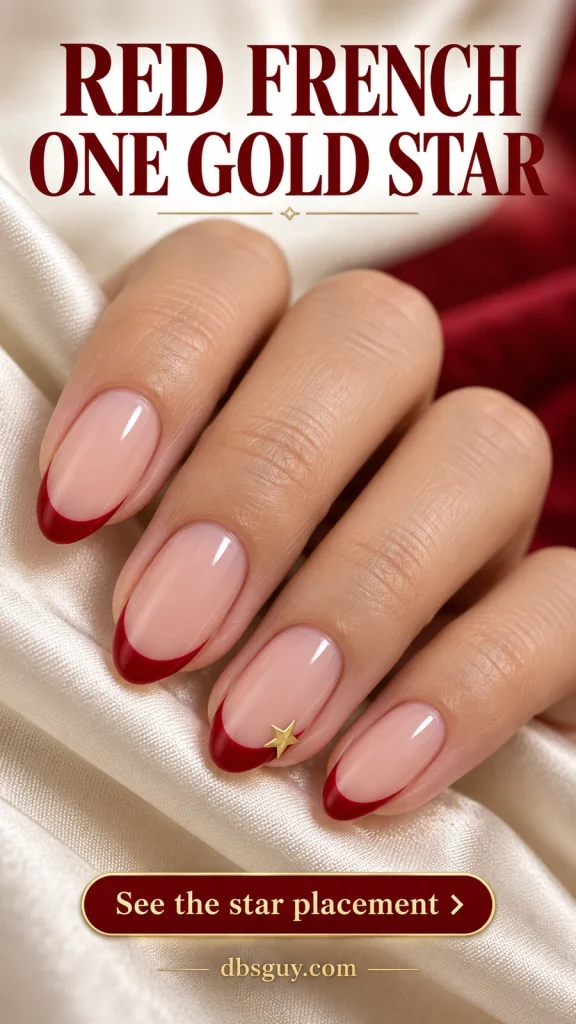
Choose the red-tip depth before adding the star so it does not swallow the pink center. The reference gives the star some visual dimension; a flat metallic star decal offers a smoother interpretation. Check that all its points fit within the nail edges. Keep the other tips undecorated so the placement remains intentional.
19. Silver Tinsel Arcs on Charcoal
A silver sweep with short outward strokes suggests a strand of tinsel on charcoal nails. The fine trailing marks distinguish it from an ordinary metallic stripe. Two accent nails give the silver room to move, while the solid dark nails prevent the set from becoming all glitter.
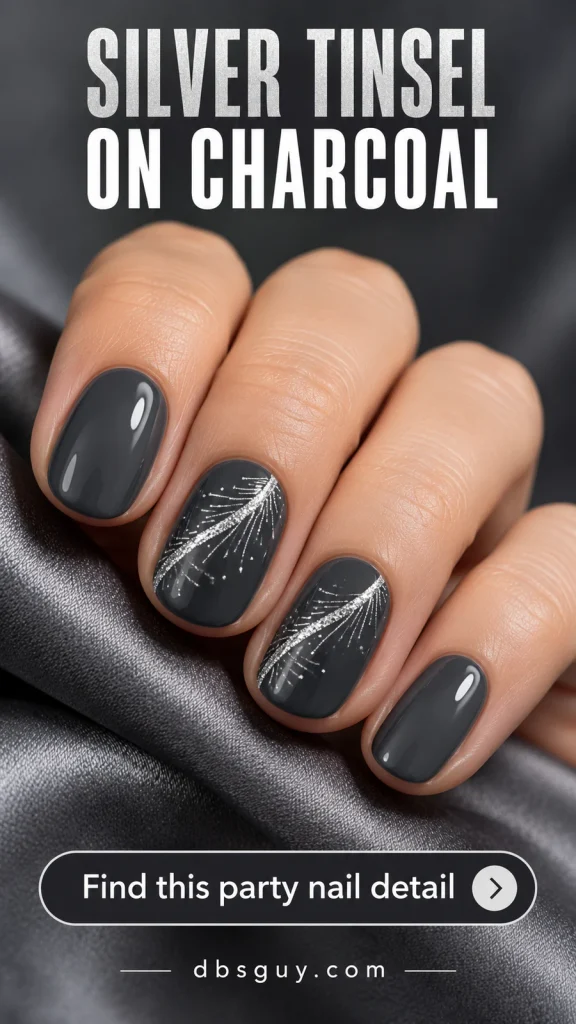
Ask for one arc per accent and keep the fine strokes pointing loosely away from it. On short nails, trim the length of the strokes instead of packing them closer together. Use nail-art polish or a suitable decal to interpret the pattern; the effect comes from the drawing, not loose decorative tinsel.
20. A Tiny Snow Globe on Ice Blue
A white circle, a green tree, a few snow dots, and a gold pedestal create a miniature snow globe. Ice blue connects the little scene with the surrounding nails. The pedestal is essential: without it, the circle can look more like another hanging bauble.
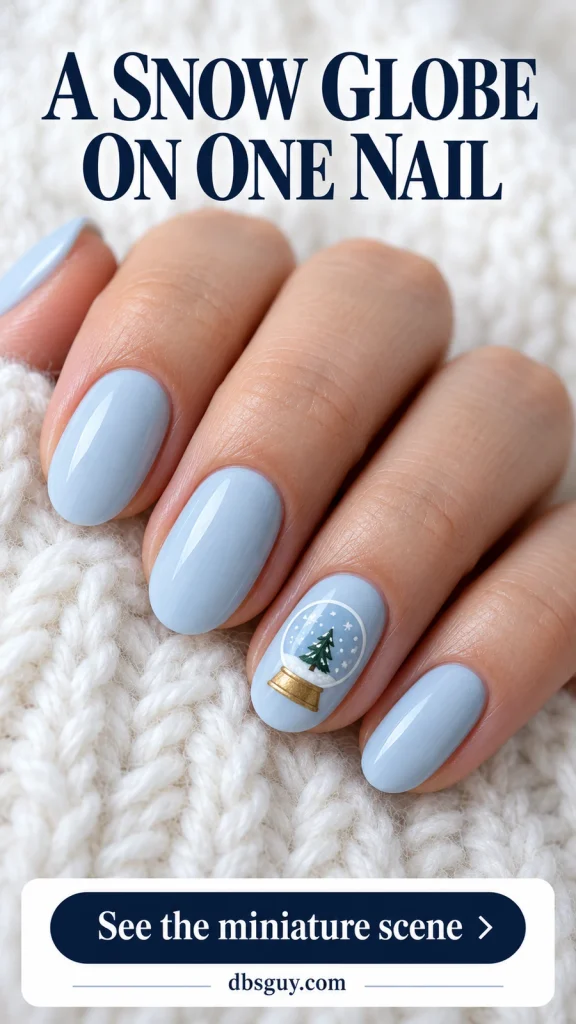
Choose one accent nail with room for the whole outline. Keep the tree simple and leave blue around it before adding the snow. If your nail is too short for the pedestal and circle to stay separate, use a smaller globe decal or keep just the tree-and-snow detail rather than crowding in the full scene.
21. A Black Ribbon Bow on Pearl Ivory
Pearl ivory and black ribbon give Christmas nail art a dressier, less traditional palette. The fine bow has open loops and long curved tails, so the pearly base remains visible through the shape. It pairs naturally with black velvet, an ivory sweater, or a monochrome holiday outfit.
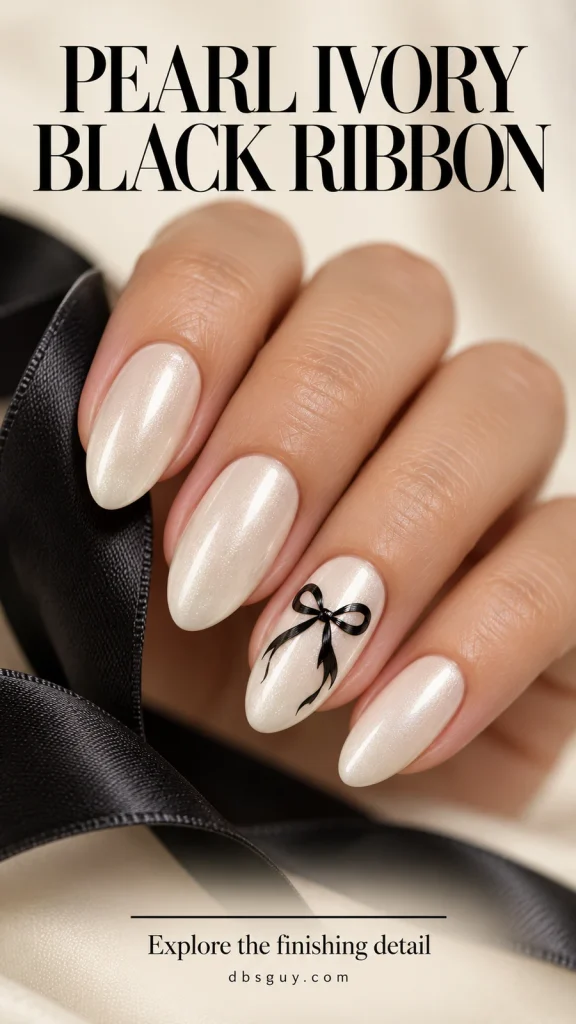
Ask to compare pearl and glitter finishes: a soft sheen creates a different background from visibly sparkling particles. For shorter nails, shorten the tails before reducing the loops. A painted bow or thin decal keeps the ribbon shape without requiring a sculpted embellishment. Carry the same ivory finish across the other nails.
Also Read: 21 December Nails From Early Sparkle to New Year’s Eve for ideas that move through the rest of your December calendar.
Turn the Reference Into a Clear Salon Request
Send your favorite image when you book and say which part you want to keep. A useful request sounds like this: “Short oval, sheer pink, one painted red bauble per hand, a fine gold hanging line, and a smooth surface.” Mention any existing product that needs removal so the salon can plan the appointment.
Ask the artist to show the motif size on one nail before repeating it. A close-up image exaggerates the available drawing space; the best adaptation may have fewer branches, shorter tails, or only one ornament. Confirm the price and whether the artist offers that level of detail when booking rather than assuming all nail art is the same service.
A Few Care Details Before You Choose Gel
These designs do not all require gel. Plain colors, simple painted accents, and suitable decals can be interpreted with regular polish. Follow the directions for the exact products you use; a reference image cannot tell you the right application or removal process.
The American Academy of Dermatology’s gel-manicure guidance recommends asking about tool sterilization, leaving cuticles alone, and avoiding picking off gel. For UV-cured manicures, it recommends broad-spectrum, water-resistant SPF 30 or higher on your hands, or dark, opaque gloves with the fingertips removed.
Christmas Nail Art Questions
How do I make a painted ornament look like a bauble?
Keep the little cap and hanging line. Those features give the circle its Christmas identity. A curved highlight can suggest shine, while the cap can be a tiny metallic rectangle. Leave enough background visible to separate the outline from the nail edge.
Which designs are easiest to simplify for very short nails?
The single bauble, holly corner, and short light strand are good starting points because each has a clear outline. Keep one focal detail and remove decoration inside it. For a wreath, fewer leaves can be clearer than many tiny strokes; for a bow, preserve the open loops and shorten the tails.
Can I get the bow look without a raised charm?
Yes. Ask for painted ribbon art or a flat nail decal, and say explicitly that you want a smooth surface. Bring the reference for its silhouette and placement. A sculpted bow, an attached charm, and painted shading can look related in a photograph while feeling different on the nail.
What should I use for tiny details at home?
A fine nail-art liner suits strings and ribbon tails; a small dotting tool suits berries and garland dots. For miniature ornaments or bells, a correctly sized flat decal is an alternative to drawing. Follow the polish and decal directions, including their drying and top-coat instructions, and start with one accent nail.
Should every nail have a different Christmas design?
Only if that is the look you want. One repeated accent per hand makes these small details easier to see. If you combine motifs, share a base color and one metallic shade—for example, blush with a red bauble and a red bow—so the set still feels connected.
Choose the detail you would miss if it disappeared from the reference: the pointed mint ornament, the open ribbon loops, or the little snow-globe stand. Keep that feature clear, and let the rest of the manicure give it room.