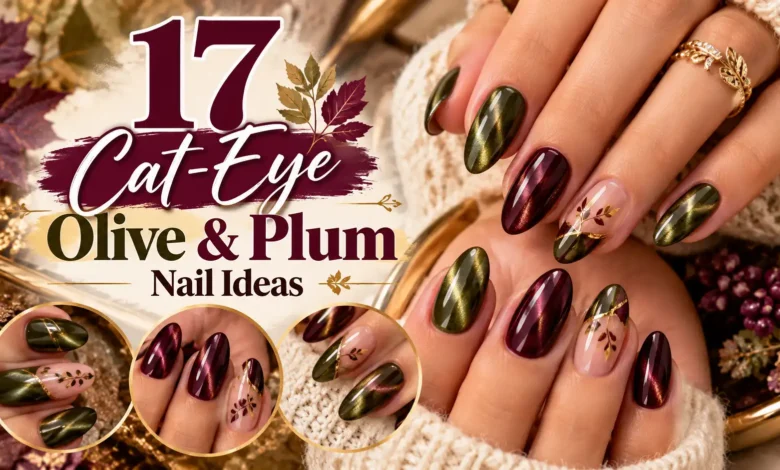
Olive and plum nails work best when you decide where each color belongs before adding the shimmer. Alternate them for a straightforward two-color manicure, keep the color at the tips for a lighter look, or use one small pattern to make the set feel personal. The 17 designs below give you a specific color map to bring to your nail appointment.
For this palette, picture a muted, yellow-brown olive beside a berry-purple plum. A very dark pair can read almost black indoors, so ask to see both swatches together in ordinary light. Choose the contrast you like before choosing the magnetic effect.
The images in this guide are AI-generated design concepts. Use them to discuss color, placement, and finish with your nail artist; actual magnetic reflections change with lighting and movement.
Choose Your Color Placement
- For a simple first set: try the alternating diagonal cat-eye in idea 1 or the short velvet finish in idea 2.
- For less all-over color: look at the double French tips in idea 3 or the sheer diagonal tips in idea 9.
- For a focal detail: choose the checkerboard, botanical sprig, or moon accent rather than combining all three.
1. Alternating Almond Nails with Diagonal Cat-Eye Beams
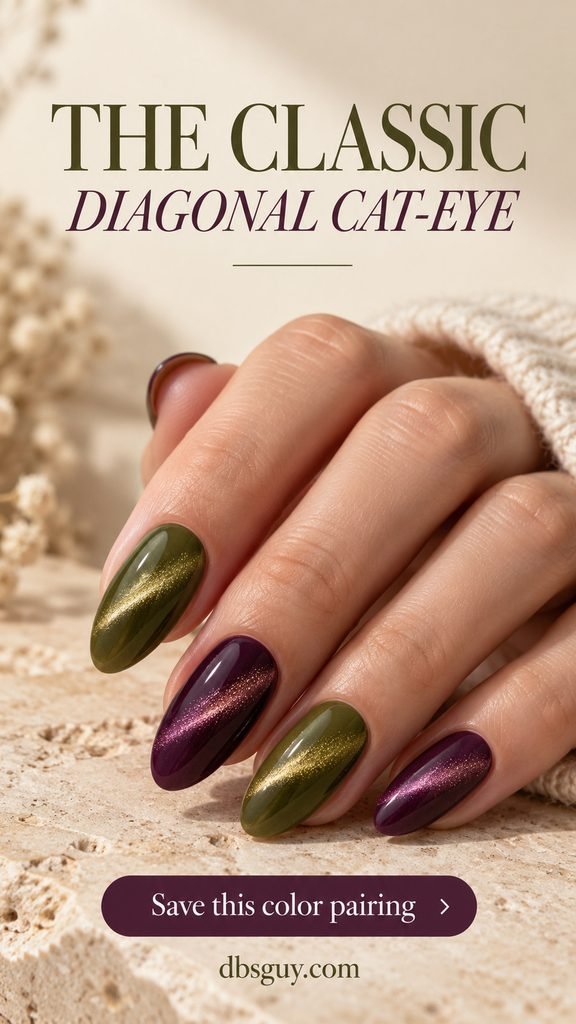
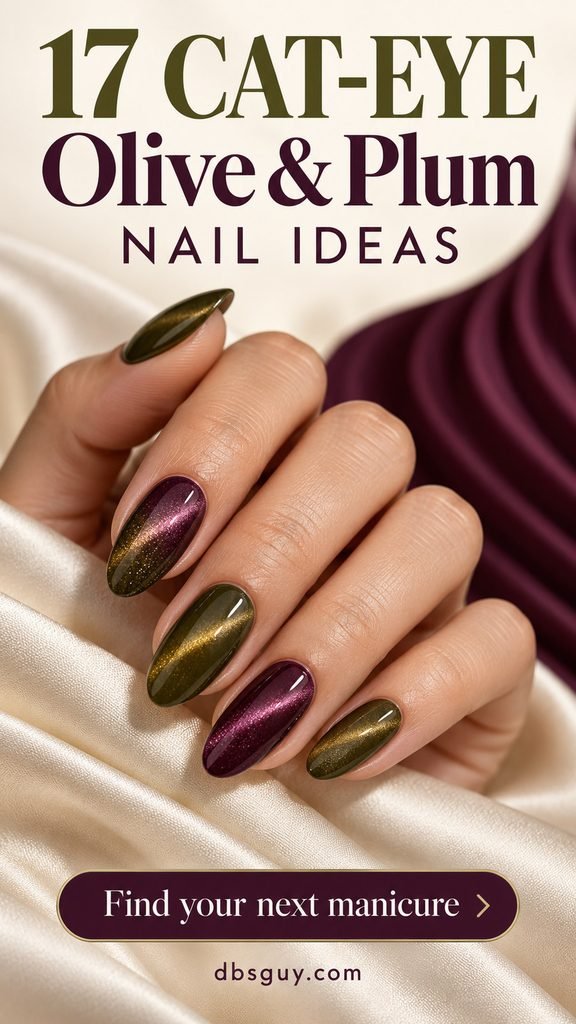
This is the clearest way to enjoy both colors: alternate olive and plum across a medium almond set, then give each nail a narrow diagonal magnetic highlight. The repeating shape ties the different colors together without any painted art.
Ask your artist to keep the beams traveling in the same direction when your fingers rest side by side. Olive with a warm golden reflection and plum with a rosy reflection keep the pair distinct. If you shorten the nails, keep the color map and simplify the beam rather than squeezing in another detail.
2. Short Squoval Nails with a Soft Velvet Glow
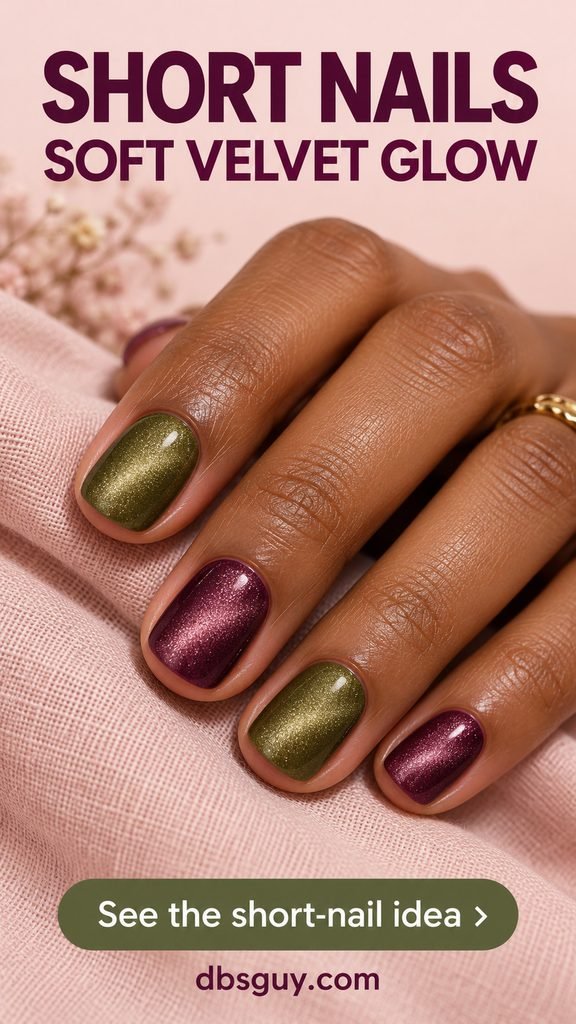
Short nails can carry the whole palette without a long free edge. Here, rounded square corners and alternating olive and plum keep the outline tidy, while a broad, diffused magnetic glow supplies the detail.
Show your artist that you want a soft reflection across the nail, rather than the concentrated diagonal stripe in the first design. Leave these nails free of foil or line art so the velvet effect stays visible. This is a useful starting point if your earthy nail inspo folder is full of rich colors but you prefer a compact shape.
Also read: October nails short inspiration for your autumn manicure.
3. Olive Cat-Eye French Tips with Plum Outlines
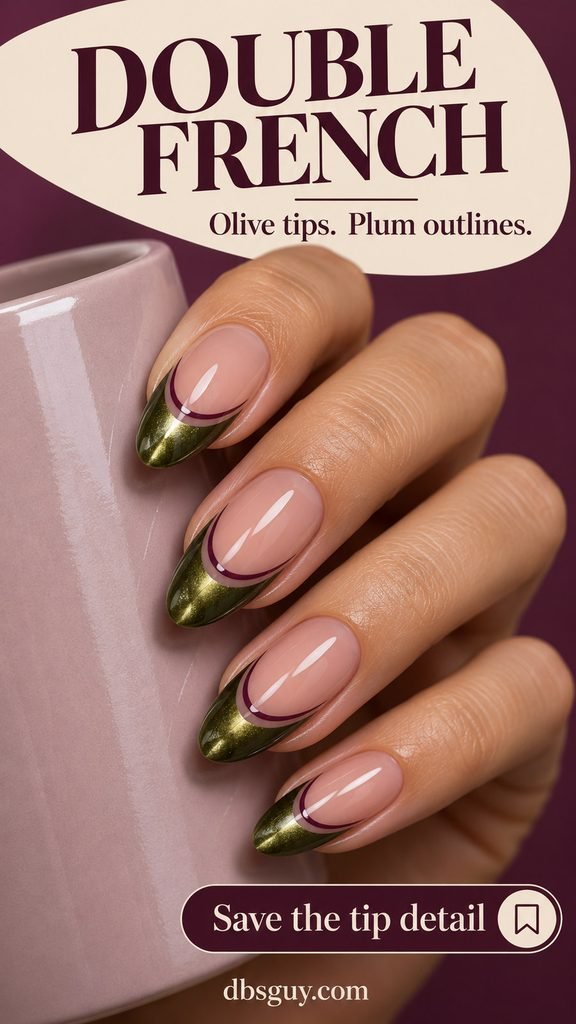
A sheer rosy base gives the two dark colors some breathing room. Put the olive cat-eye effect in a deep French tip, then trace a slim plum curve immediately beneath its smile line. The plum should read as an outline, with the olive doing most of the visual work.
Bring a reference for the depth of the tip as well as the colors. On shorter nails, reduce the olive area and keep the plum line especially fine. A thick second band changes the balance and can crowd the small amount of sheer nail left visible.
4. Plum Velvet Nails with Olive Cuticle Crescents
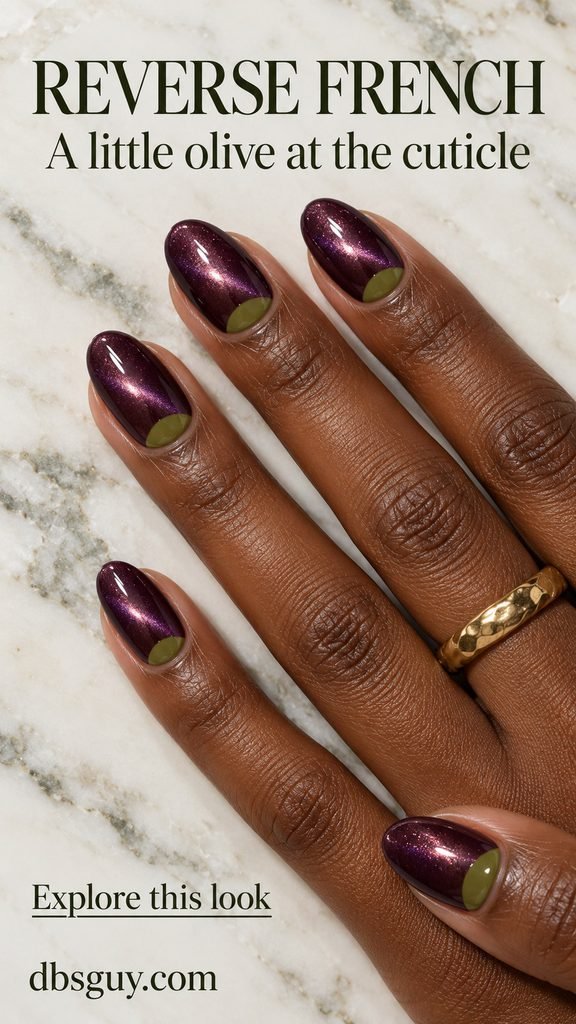
Move the contrast to the base of the nail. A small olive crescent sits near the cuticle beneath a much larger plum magnetic field, making this reverse French design feel different from a colored tip.
Ask for a narrow, tidy crescent painted within the nail plate, with the same depth repeated across the set. If your nails are short, shrink the olive shape so it does not compete with the plum. Keep the rest of the nail plain: the cuticle detail is already the focal point.
5. A Clean Vertical Olive-and-Plum Split
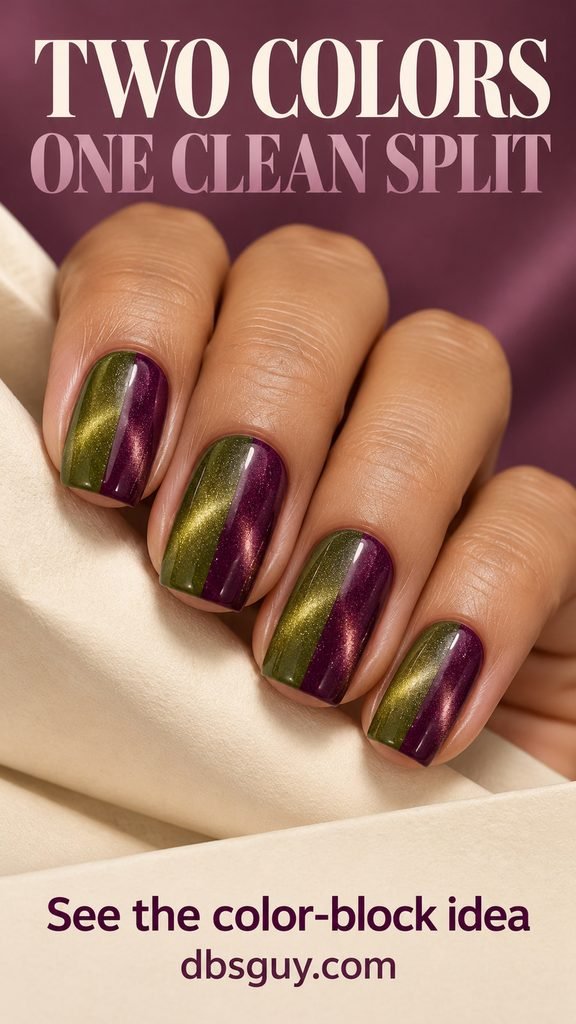
Divide each nail lengthwise, placing olive on one side and plum on the other. A medium square shape gives the center seam a clear, graphic setting. Unlike alternating colors, this version puts the complete pairing on every finger.
Request an even split with a crisp boundary; a blended middle would turn it into a different design. Decide whether you want the olive side repeated consistently or mirrored between hands. Keep the magnetic reflection fairly soft so the dividing line remains easy to see.
6. Olive-to-Plum Cat-Eye Ombré
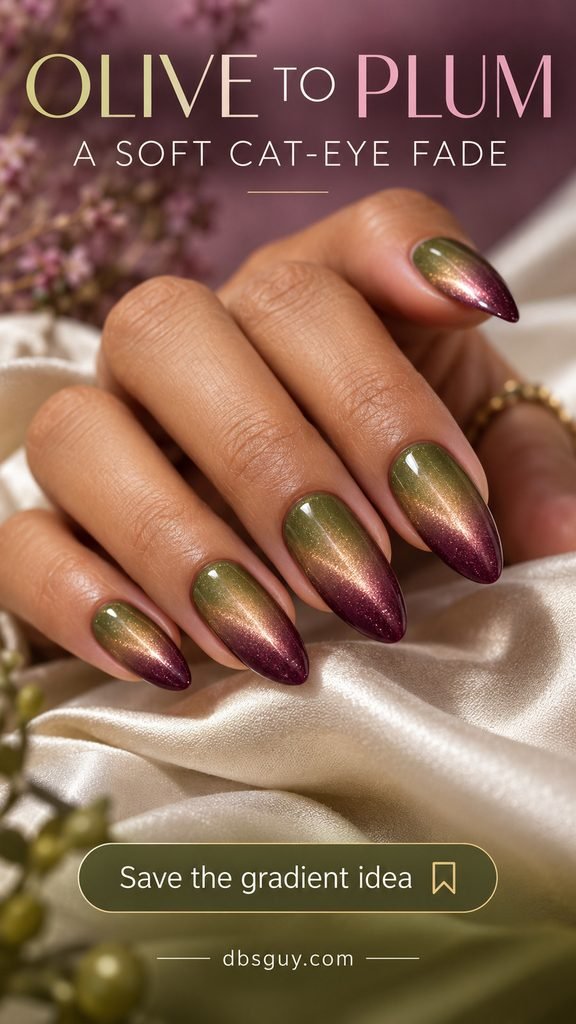
For a softer transition, let olive begin near the cuticle and fade into plum at the tip. A luminous magnetic sheen runs through the blend, giving the gradient more depth than two opaque blocks of color.
Ask to approve a sample nail first. These two shades can blend into a brownish middle, and you may prefer a shorter transition that preserves more of each original color. A medium almond shape leaves room to see all three zones: olive, the blend, and plum.
7. Glowing Plum Centers with Fine Olive Frames
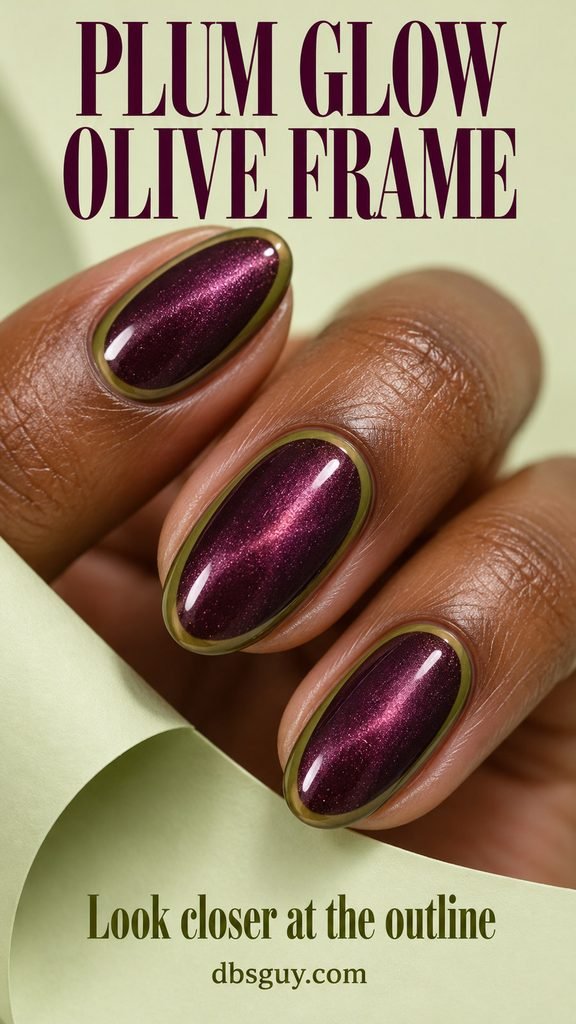
Treat each oval nail like a tiny framed stone: a glowing plum center surrounded by a fine olive border. Most of the surface stays plum, so this is a good choice when you want purple to lead the palette.
The border needs enough contrast to remain visible beside the dark center. Ask for a slim, continuous outline inside the nail plate, with no extra gold edging. On a smaller nail, a slightly lighter olive is a cleaner adjustment than making the border much thicker.
8. Matte Plum with One Glossy Olive Velvet Accent
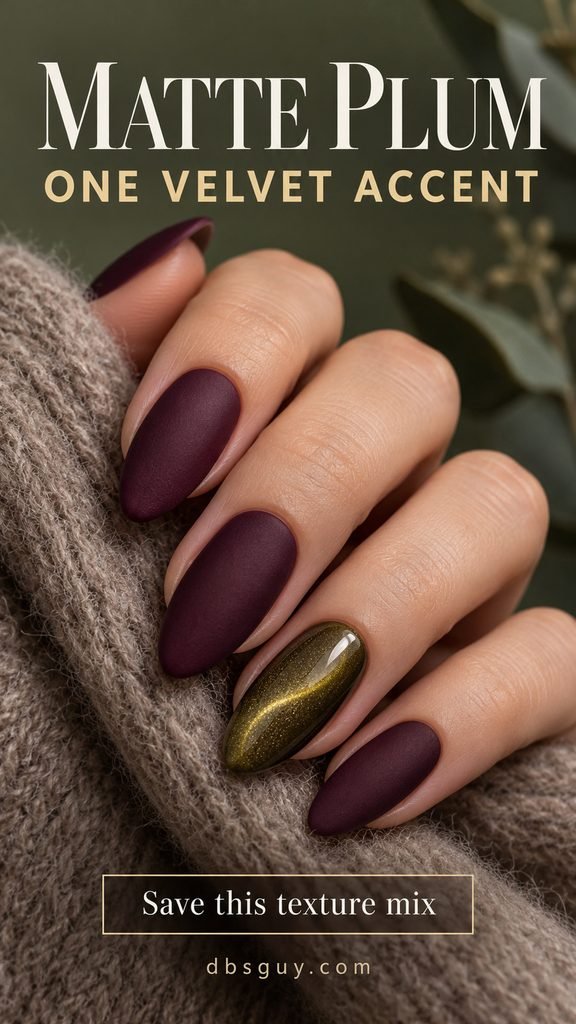
Here, texture separates the colors. Most nails are plain matte plum, while one olive nail carries the glossy magnetic glow. The contrast makes the single shimmering nail the focal point without adding a pattern.
Be specific about which nails stay matte and which stay glossy. The olive accent needs its reflective finish for this particular look. If you prefer a quieter set, choose a less bright olive reflection rather than adding matte finish over the accent. Keep the plum nails solid so they provide a calm background.
Also read: October Nail Colors Ideas to Refresh Your Fall Nails.
9. Sheer Nails with Diagonal Two-Color Tips
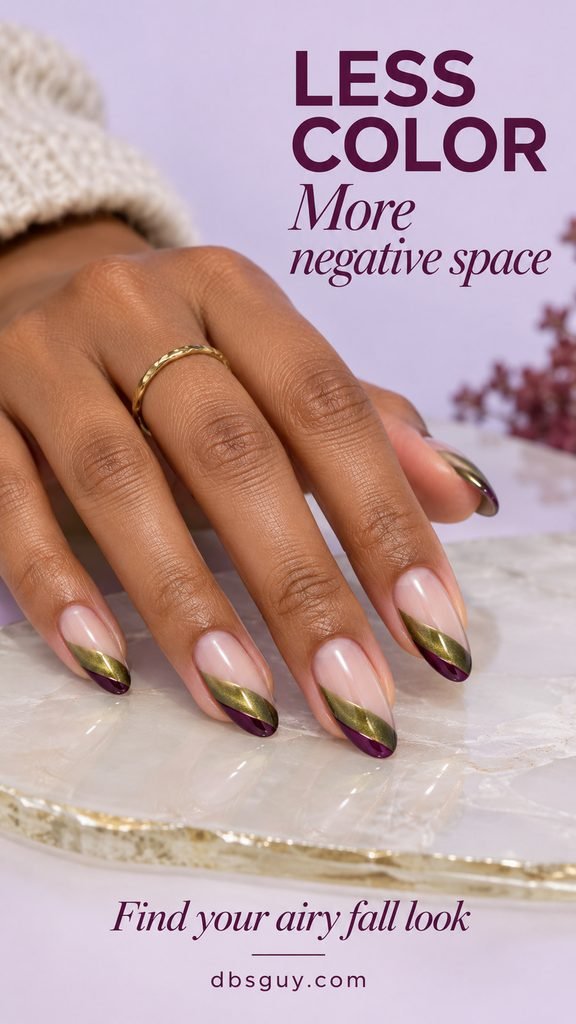
Leave most of the nail sheer and sweep the color diagonally across the free edge. A broader olive magnetic band sits beside a slimmer plum band, creating a slanted tip instead of a traditional curved French smile.
Ask your artist to preserve a generous open area through the center of each nail. The angle can be steeper on an almond shape or shallower on a short rounded nail. Choose a sheer base that you like against your own skin rather than trying to match the reference hand exactly.
10. Plum Ribbons over Olive Cat-Eye
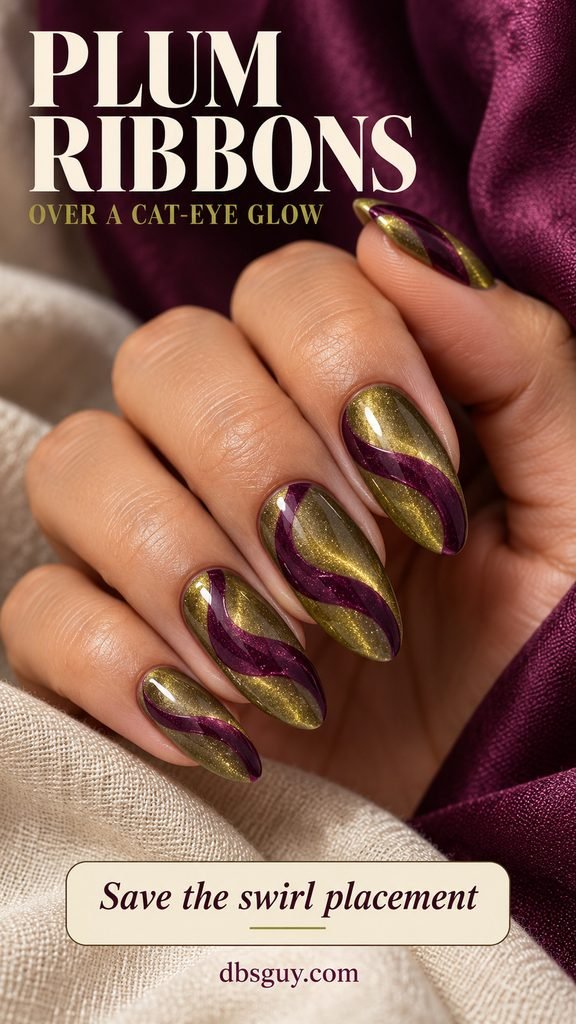
Broad plum ribbons give an olive magnetic base a flowing, graphic finish. Let the curves change slightly from finger to finger while keeping their thickness similar. The result feels coordinated without requiring identical tiny drawings.
Request one or two smooth curves per nail and leave plenty of olive visible between them. Dense swirls would hide the shimmer you chose the magnetic base for. If you want to simplify the appointment, use the ribbons on two nails and leave the others plain olive cat-eye.
11. Olive and Plum with One Tortoiseshell Accent
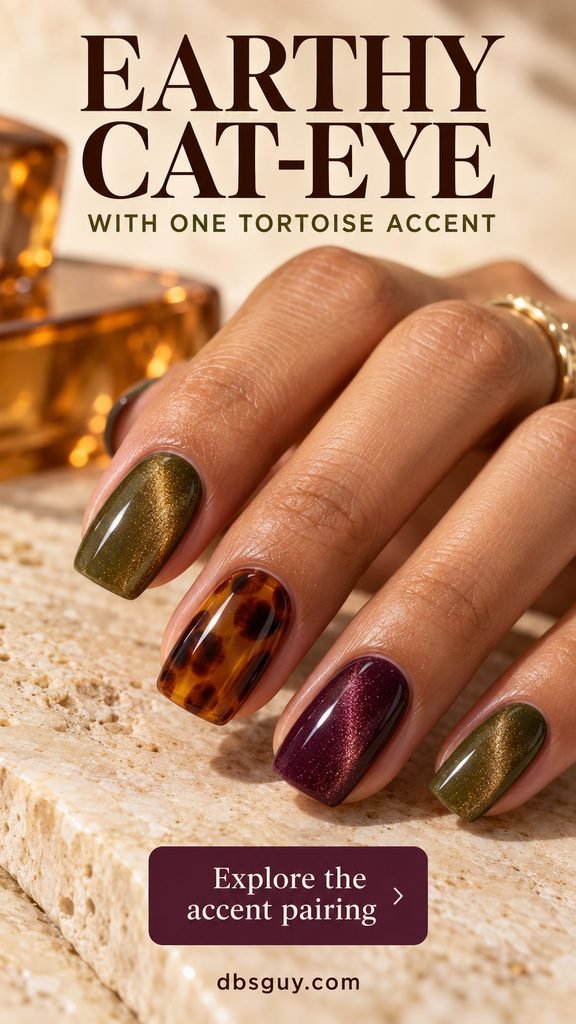
An amber tortoiseshell nail introduces a warm third color while the surrounding olive and plum nails keep the original pairing recognizable. Limit the mottled pattern to one finger so the manicure still reads as an olive-and-plum set.
Ask for translucent-looking amber with irregular brown patches, rather than a flat brown base covered in evenly spaced spots. Rounded square tips suit the broad pattern shown here. If you want fewer colors, skip the tortoiseshell and choose another design; removing the amber would change what makes this one distinctive.
12. Tiny Gold-Foil Flecks along the Sidewalls
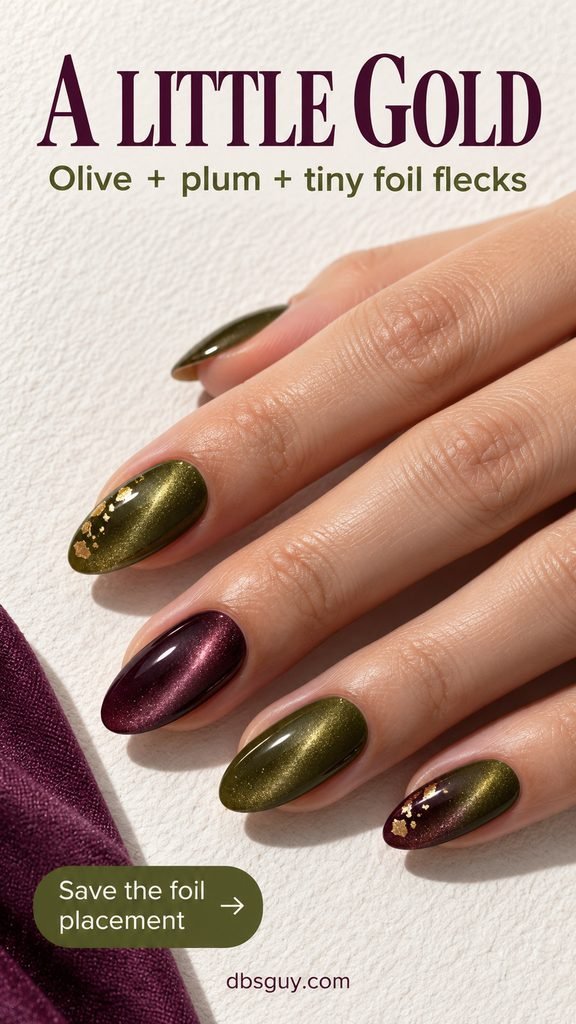
Small, irregular gold-foil pieces give olive and plum cat-eye nails an extra focal detail. Place the foil near one side of just two nails so it looks scattered rather than like a metallic French tip.
Show your artist the amount of foil you want, not simply the words ‘gold accents.’ A few tiny flecks and a fully covered gold nail create very different sets. Keep the central magnetic highlight clear of foil, and choose a warm antique-gold tone if you like the earthy feel of the reference.
13. One Olive-and-Plum Checkerboard Nail
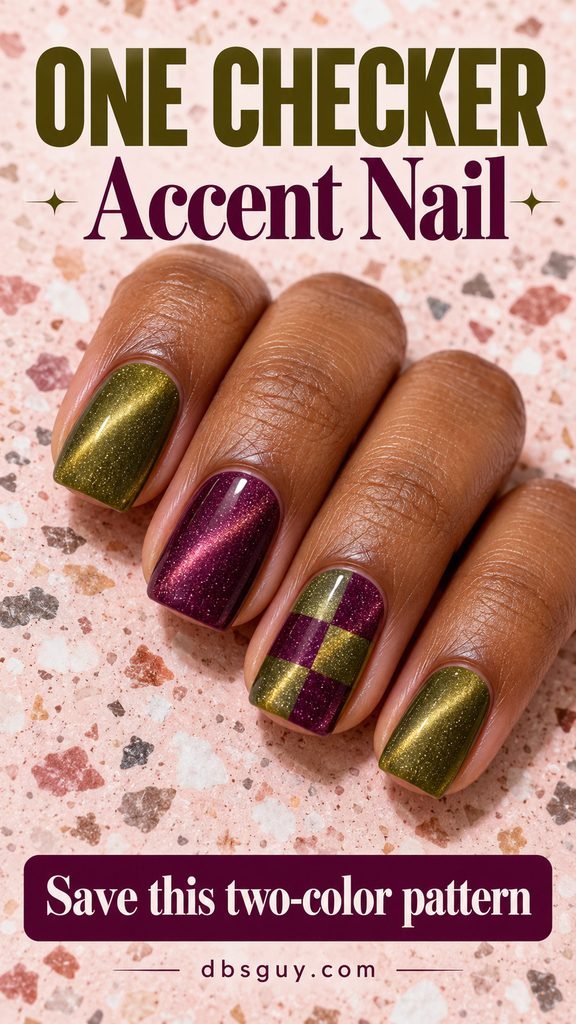
A single checkerboard accent turns the palette into a clear pattern. The concept uses two columns of alternating olive and plum squares on one nail, surrounded by plain magnetic nails in the same shades.
Keep the checks large enough to read at your chosen length. On a shorter nail, two rows may look clearer than forcing in three. Ask for straight boundaries and skip an additional outline around every square. A square or softly squared tip echoes the pattern, while the neighboring cat-eye nails supply the shine.
14. Berry-Plum Dots on Short Olive Cat-Eye Nails
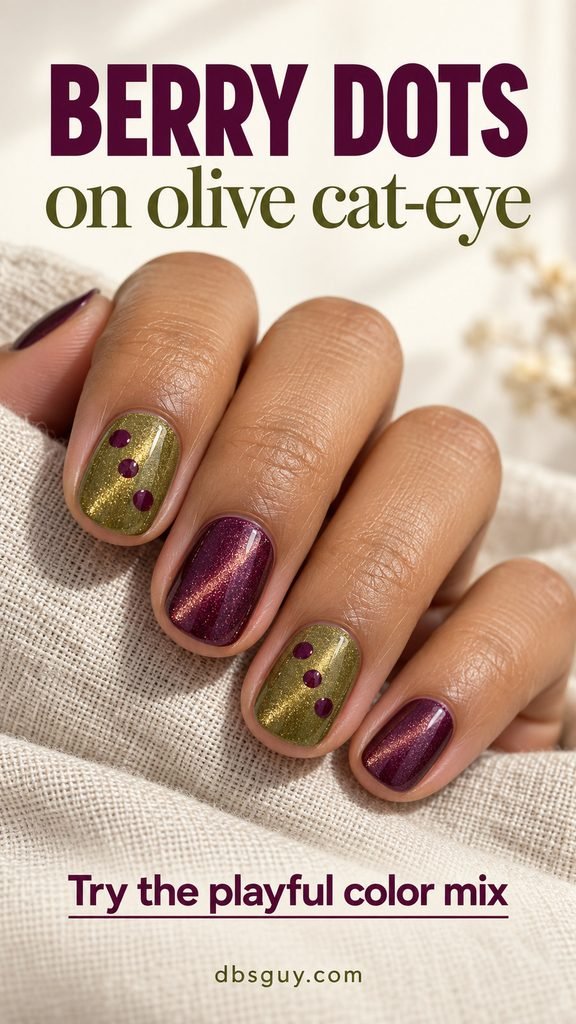
Sparse berry-plum dots make short olive nails playful without filling the surface. Pair the dotted olive nails with plain plum magnetic nails, keeping the dots small enough that the green glow is still easy to see.
If you arrived here looking for burgundy and green nails, this is the closest adaptation: ask for a redder, wine-leaning plum while keeping the olive muted. Compare the dot color over an olive swatch first. A very dark berry can disappear into the base, so a slightly lighter shade may give you the contrast you want.
15. A Tiny Plum Botanical Sprig
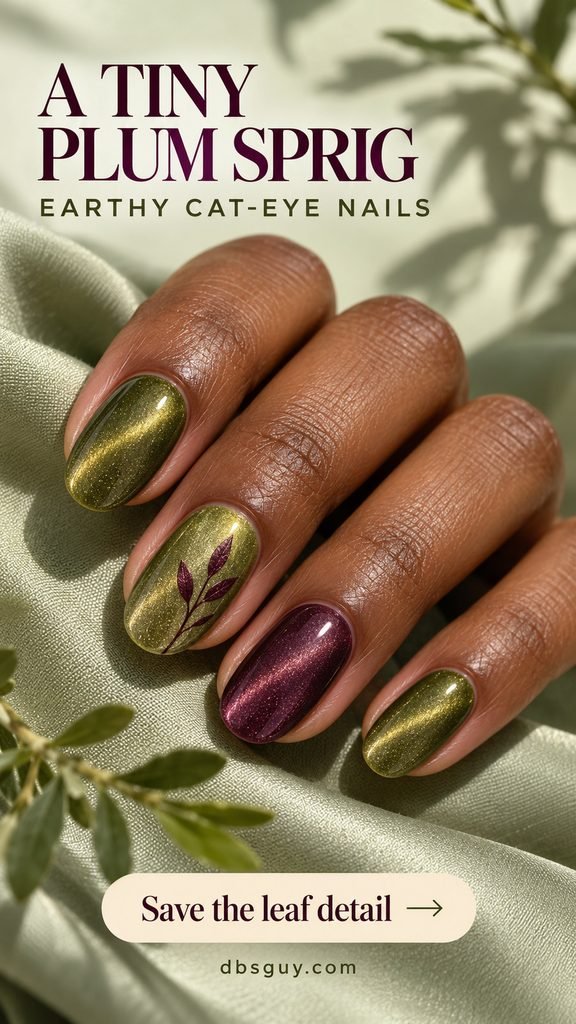
Paint one fine plum sprig over an olive magnetic nail, then repeat the two colors as plain nails around it. The small leaf motif gives the manicure a botanical direction without a full floral pattern.
Ask for a short stem and a few small leaves, leaving open olive space around the drawing. On a compact nail, reduce the number of leaves rather than making a crowded branch. Keep the sprig flat-painted if you want the smooth surface shown here; raised leaves would create a different effect.
16. Olive and Plum with a Gold Moon Accent
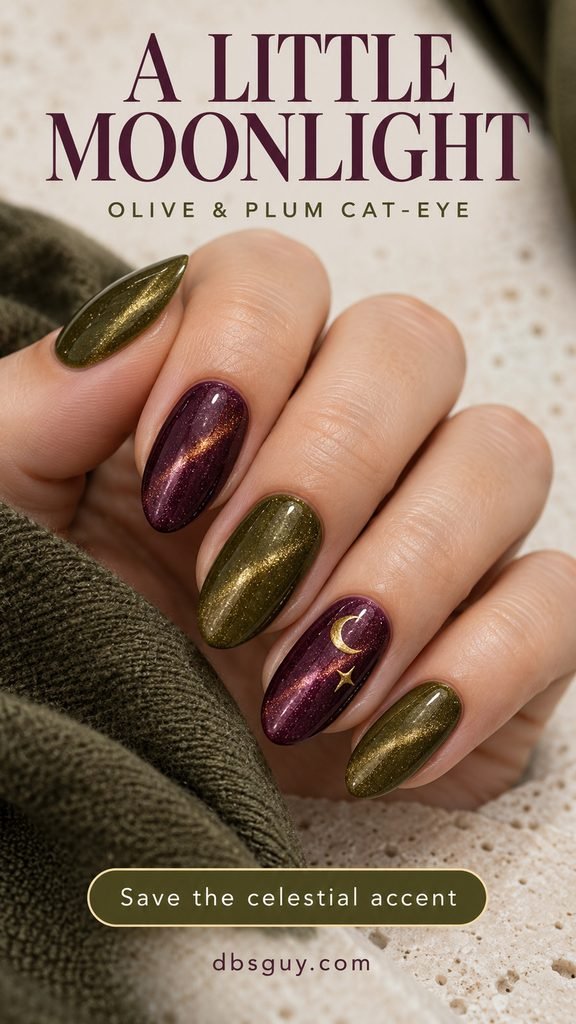
A tiny crescent moon and one small star give the palette a celestial detail. Place them on a plum nail and let the other olive and plum nails stay plain, with their magnetic reflections providing the background sparkle.
For a restrained version, request painted gold shapes instead of stones or dangling charms. Check the moon’s placement with your hand resting naturally so it faces the way you prefer. If you want this for a fall evening event, keep the gold detail small and let the deep colors carry the look.
Also read: Best October Nails Chrome Designs for a Chic Fall Look.
17. One Hand Olive, One Hand Plum
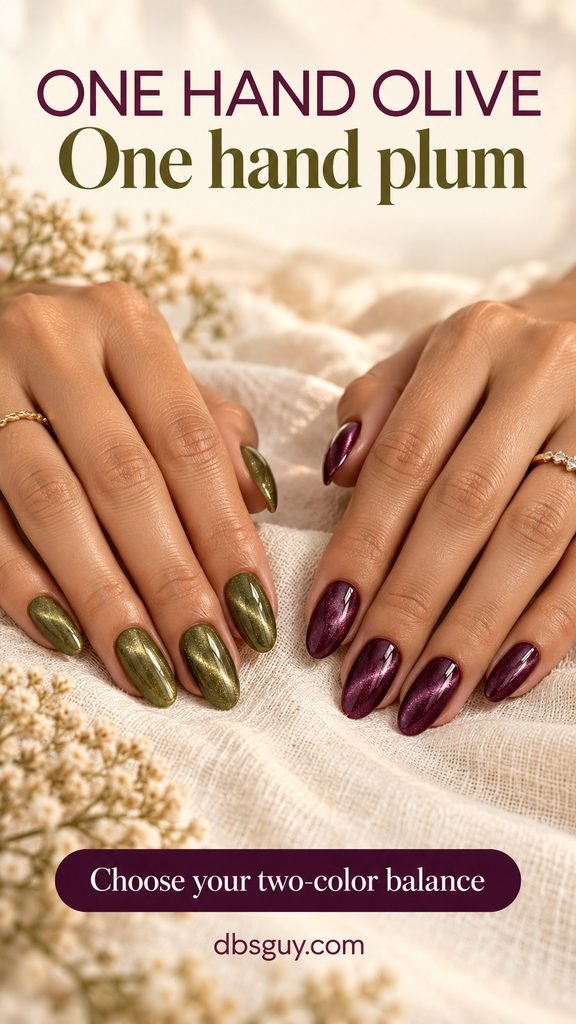
Give each hand its own color: all olive on one, all plum on the other. Matching almond shapes and a similar magnetic glow make the two hands feel like a complete set even though the colors never share a nail.
Ask to compare the two magnetic finishes side by side. A bright silver flash in one shade and a subtle glow in the other can make the hands feel less balanced. Choose a similar reflection strength, then decide which hand gets which color. This is the simplest option here if you love both shades but want no painted nail art.
How to Request Olive and Plum Nails at the Salon
Save the design image you like, then describe four things: the shape and length, where each color goes, whether the reflection should be a narrow beam or a diffused glow, and which nails get extra art. That gives your artist a more useful brief than a color name alone.
For example: ‘Short squoval nails, alternating muted olive and berry plum, a soft velvet magnetic glow, and no added foil or drawings.’ For the French version, add that the olive belongs at the tip and the plum is a fine curve beneath it. Ask for a sample if the outline, gradient, or magnetic effect matters more to you than an exact polish name.
Choose the Formula as Well as the Finish
The moving cat-eye reflection comes from magnetic polish shaped with a magnet while the coating is still workable. Regular magnetic lacquer and magnetic gel have different setting steps. Use the instructions for the actual formula: lacquer dries, while gel needs its specified curing system. A painted shimmer stripe can suggest the design but does not produce the same shifting reflection.
OPI’s magnetic French tutorial shows the effect being shaped before curing; its product-specific steps are an example, not universal timing for every gel.
Questions About Olive and Plum Cat-Eye Nails
Can olive and plum cat-eye designs work on short nails?
Yes. The short velvet set, sparse dots, and a single checkerboard accent all keep the main detail easy to see on a smaller surface. Reduce tip depth, pattern size, or the number of leaves to suit your actual nail length instead of copying every measurement from a longer reference.
Do I need a black base for cat-eye nails?
Do not assume every magnetic polish needs one. Base requirements depend on the formula and the look you want. Ask your artist to follow the product directions and show you the chosen olive and plum swatches; a darker base may also change how clearly the colors read.
Is a velvet finish the same as a sharp cat-eye line?
Both can be magnetic looks, but the visual brief differs. A classic cat-eye has a concentrated reflective band; the velvet looks in this guide use a wider, softer glow. Show the finish you mean along with the colors so your artist does not have to guess.
Which design should I choose for fall nails in 2026?
Choose by the detail you want to wear: short velvet for a simple two-color set, diagonal tips for more sheer space, or a single botanical or moon accent for a small motif. These are styling suggestions, not a ranking or a prediction of how popular a design will become.
Choose the color map you like most, then ask your nail artist to adapt its detail to your own length. A clear olive swatch, a clear plum swatch, and one agreed magnetic finish are the useful starting points for any of these sets.