15 Outdoor Christmas Lighting Ideas That Look Magical Without Climbing on the Roof


The Christmas glow people notice first is often close to the front door: a bright wreath, a softly lit planter, or a few lights leading up the walkway. Those details give the house a welcoming center, even when the roof stays dark.
These outdoor Christmas lighting ideas focus on porches, low shrubs, garden beds, and supports you can comfortably reach. Some use light strings you may already own; others work best with a ready-made outdoor decoration. Each idea includes a way to arrange it, a practical setup detail, and a tip for making the light look deliberate.
Choose a few that suit your home. A glowing wreath, two lighted planters, and a clear path can make a complete entrance. A small yard might need only one wrapped tree and a lantern corner. The goal is a display you enjoy looking at and can manage throughout the season.
Make a Simple Lighting Plan Before You Unpack Everything
Stand where visitors first see your home and choose the main feature: the door, a small tree, or a porch corner. Then decide where a little supporting light would help. Sketch the outlet locations and the cord routes before buying extra decorations.
Pick a main light color. Warm white creates a soft, traditional look; a restrained mix of red, amber, and green feels nostalgic. Compare your existing strings together after dark. Two packages labeled “warm white” may still look different, so put closely matched lights beside each other.
Measure the actual route the lights will follow, including the distance to power. A string’s total length is not always its lighted length; the lead from the plug or battery box may take up part of it. Check both measurements on the package.
Use the location label as your starting point. The U.S. Consumer Product Safety Commission’s holiday lighting guidance recommends outdoor-certified lights, inspection for damaged wires or sockets, and GFCI protection for outdoor electric decorations. An indoor string doesn’t become suitable for outdoor use because the porch has a roof.
Choose products tested by a recognized safety laboratory and read the supplied instructions. UL Solutions explains that indoor-only and indoor/outdoor decorative strings have different use markings. Check the actual product label, including the controller or power supply’s placement requirements.
Test each decoration before installing it, then disconnect power while arranging it. Follow its connection limits and use suitable clips that won’t damage the cable. Keep plugs, controls, and leads in the positions specified by the manufacturer. If a support is above comfortable reach, choose a lower decorating area; these looks can be created without roof access.
1. Let One Glowing Wreath Make the Front Door the Focal Point
A lighted wreath puts the Christmas glow exactly where guests are heading. It can be enough on its own when the door already has a strong color or a beautiful shape.
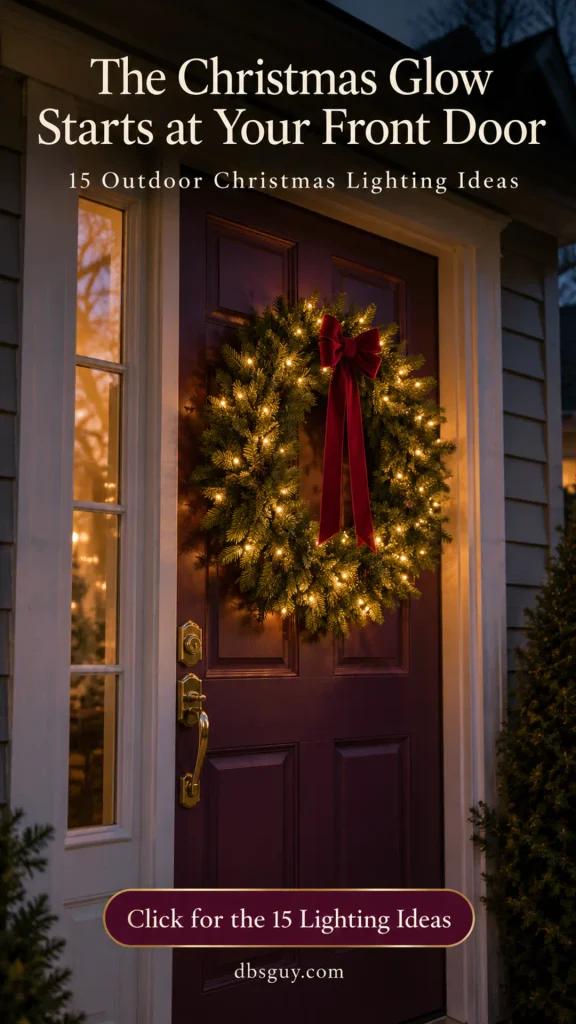
Choose: an outdoor prelit wreath, a suitable hanger for its finished weight, and an optional outdoor ribbon. A battery model can simplify the layout when there is no convenient exterior outlet near the door.
Hang the wreath at an accessible height, leaving the lock and handle clear. Position the battery compartment so you can open it without taking the whole arrangement apart. Close and secure it according to the product instructions.
Check the wreath after dark from both the path and the street. If it looks brighter on one side, adjust the greenery gently rather than bunching every light at the front. One bow usually provides enough daytime color.
Make it work for your entrance: open the door fully and check that the wreath doesn’t strike the frame, glass, or a nearby wall. A smaller, well-positioned wreath often suits a narrow door better than an oversized one. Keep any power lead out of the moving doorway; never shut a cord through the door to reach an indoor outlet.
2. Add Warm Lights to a Low Railing Garland
A lighted garland can make the porch feel connected from one end to the other. Putting it below the handrail keeps the glow visible while preserving the part people need to grip.
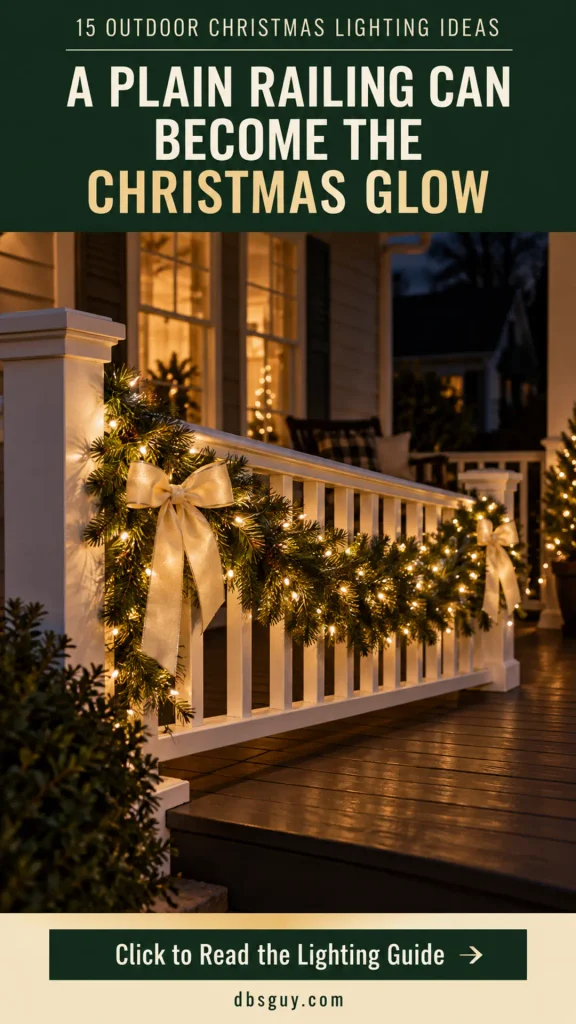
Choose: outdoor-suitable garland, compatible mini LED lights, soft fastening ties, and any protective pads needed for the railing’s finish. A prelit garland reduces the number of separate pieces to arrange.
Secure the garland to fixed supports first. Let it follow a simple line with a shallow drape, keeping it clear of gates, stair openings, and the usable top rail. The supports should hold the garland rather than asking the light wire to carry its weight.
Thread the lights loosely through the greenery, checking that bulbs show at regular intervals. Step away between adjustments; lights that seem evenly spaced up close can form a bright knot when viewed from the driveway.
For a cleaner finish: use a few matching bows and leave some greenery visible between them. Put the lead on the side closest to the planned power route. Avoid tails that reach the deck or can catch a visitor’s foot, and recheck the attachments after windy weather.
3. Spiral Lights Around Reachable Porch Posts
Light spirals give plain porch posts a festive rhythm. A pair can frame the entrance beautifully while leaving the rest of the porch simple.
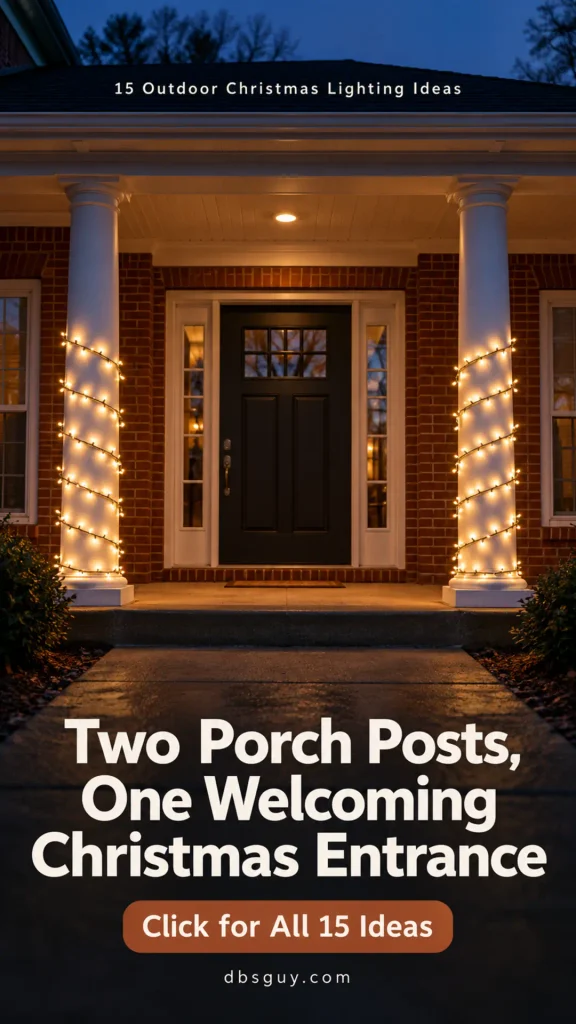
Choose: outdoor LED strings long enough for the lower post sections and suitable surface-compatible clips. Match the two strings in color and brightness before putting them up.
Wrap only as high as you can comfortably work from a stable standing position. Start with the first post, leave a useful lead for the power route, and make gently spaced turns around the support. Keep the cable loose enough that it isn’t pulled tight across corners.
Match the second post to the first by comparing the height and the gaps between turns. The upper sections can stay unlit. A consistent lower wrap looks more intentional than two columns decorated to different heights.
Think about the space between them: keep the route into the house open and run leads away from it. Use clips appropriate to the post material and follow their application directions. If the post is too wide for your available string, increase the spacing instead of adding an unsupported extension or improvising a splice.
4. Use Net Lights to Give Low Shrubs an Even Glow
Net lights are useful when you want a calm, even pattern across a compact shrub. They give a row of similar bushes a repeated shape without wrapping every individual twig.
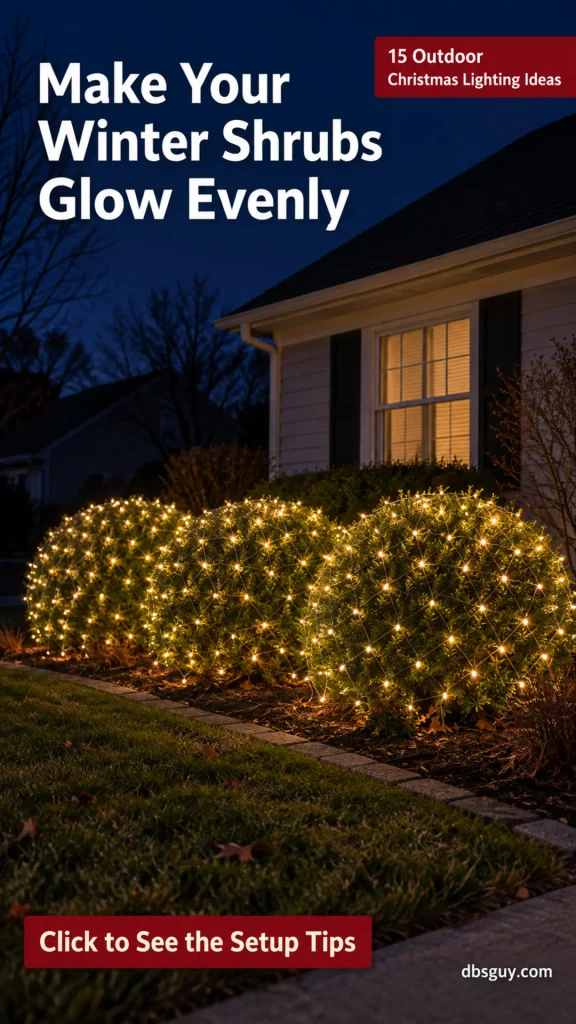
Choose: outdoor light nets suited to the approximate height and width of your shrubs. Measure the plants as they are now, not just the length of the garden bed.
Unfold and test each net on a work surface. Disconnect it, then lay it gently over the shrub, spreading the mesh without stretching it tight. Work around tender shoots and adjust the corners so the pattern follows the plant’s shape.
For a row of bushes, put the leads toward the same planned cord route. Follow the lights’ connection limits; the fact that sets fit beside each other doesn’t mean they can all be connected together.
A small design adjustment: cover only the shrubs that support the entrance rather than automatically lighting the entire foundation. If a plant has an irregular or open shape, a loose light string may suit it better than a net. Take the lights off carefully after the season so they don’t snag the branches.
5. Wrap a Small Tree Trunk at a Comfortable Height
A lit trunk brings a vertical feature into a yard without needing lights through a high canopy. The bark and a few lower branches provide the shape; the dark space above lets it stand out.
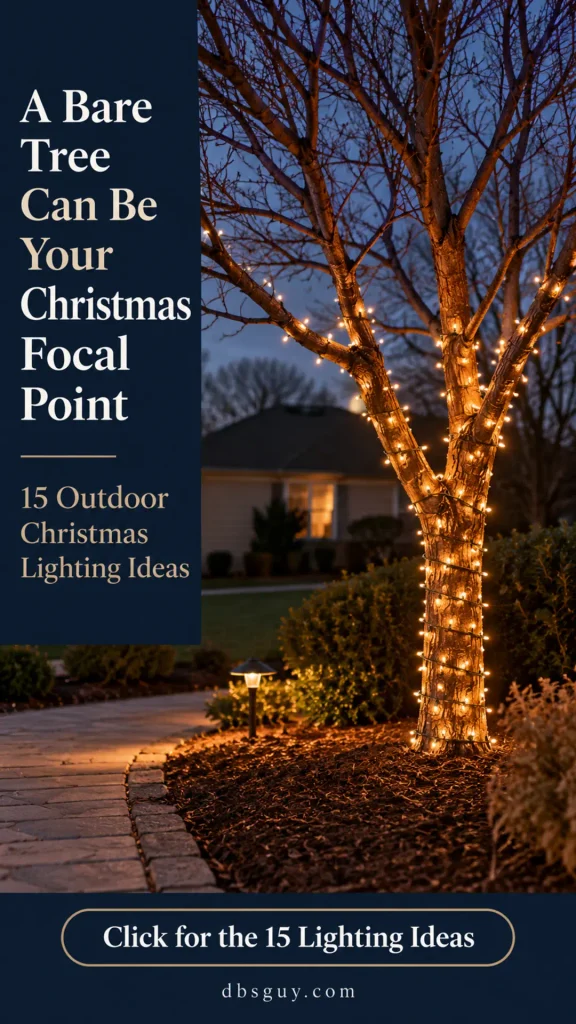
Choose: outdoor mini LED strings and a small tree whose trunk is accessible from level ground. Keep your setup away from overhead wires and choose another feature if the tree’s surroundings aren’t suitable.
Begin near the base with room for the lead, then wrap upward with even, loose spacing. Stop at a comfortable height. If a sturdy low branch is easy to reach, a short continuation along it can make the outline more interesting.
Keep wires free from sharp bark edges and don’t use fasteners that injure the tree or pierce the cable. Check the wrapping from a distance before deciding to add another string.
Let one tree lead: a single glowing trunk can anchor a small front yard. Leave nearby shrubs quieter so the display has a clear center. Treat the wrap as seasonal, inspect it during the display period, and remove it carefully rather than leaving wires to tighten as the tree grows.
6. Outline a Walkway With Larger LED Stake Lights
Larger stake bulbs make a path easy to read visually. Their separate points of light have a classic Christmas feel and can lead the eye toward the entrance.
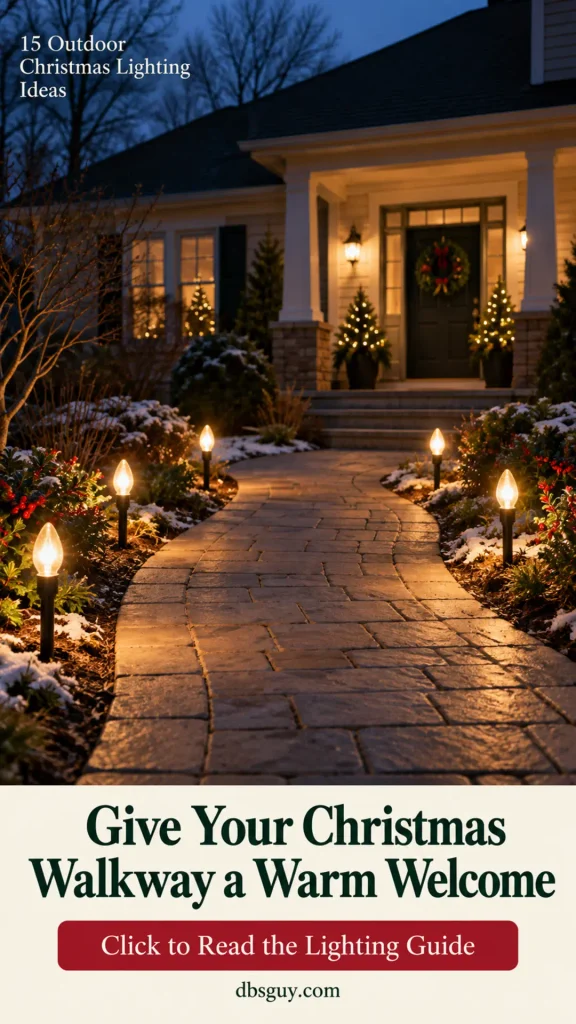
Choose: an outdoor LED stake-light system, its intended stakes, and a layout that keeps the fixtures beside the walkway. C7- or C9-style shapes give this look a familiar holiday outline; the exact size is a style choice.
Set out the unpowered lights first to judge the spacing. Place the stakes in appropriate ground beside the paving, following the installation instructions and keeping away from known irrigation or utility lines. Don’t force stakes into frozen ground.
Keep lights and their connecting cable off the walking surface. Follow the path’s curve rather than insisting on a rigid straight line. Leave enough room for snow clearing, garden maintenance, and visitors passing one another.
Use restraint: light one side if two rows would crowd a narrow approach. Decorative bulbs add atmosphere; keep your normal functional entrance lighting available so steps and changes in level remain easy to see. You should not have to step over a cord to reach the front door.
7. Thread Mini Lights Through Evergreen Porch Pots
Evergreen pots already have height and texture. A modest amount of light helps those shapes remain part of the entrance after sunset.

Choose: stable outdoor pots with existing greenery and outdoor mini LEDs or a suitable prelit arrangement. If using battery lights, check that the whole product is intended for the exposure it will receive.
Place the pots before adding the lights. Run a loose string through the main branches, following their direction and spreading the visible bulbs across the front and sides. Keep the arrangement open enough that you can still recognize the greenery.
Put controllers, battery compartments, and connections in the locations required by the product, where you can reach them. Don’t bury them in wet soil or hide them under greenery as a substitute for proper weather protection.
Make a pair feel coordinated: use the same light color and a similar distribution in both pots. They don’t need exactly the same number of branches. Check from the approach that one doesn’t look dramatically brighter than the other, then adjust the placement rather than adding lights everywhere.
8. Create a Lantern Corner With Outdoor Flameless Candles
Lanterns bring a quieter glow close to the porch floor. A small group feels welcoming beside a bench or in an unused corner, especially when the rest of the display uses simple light strings.
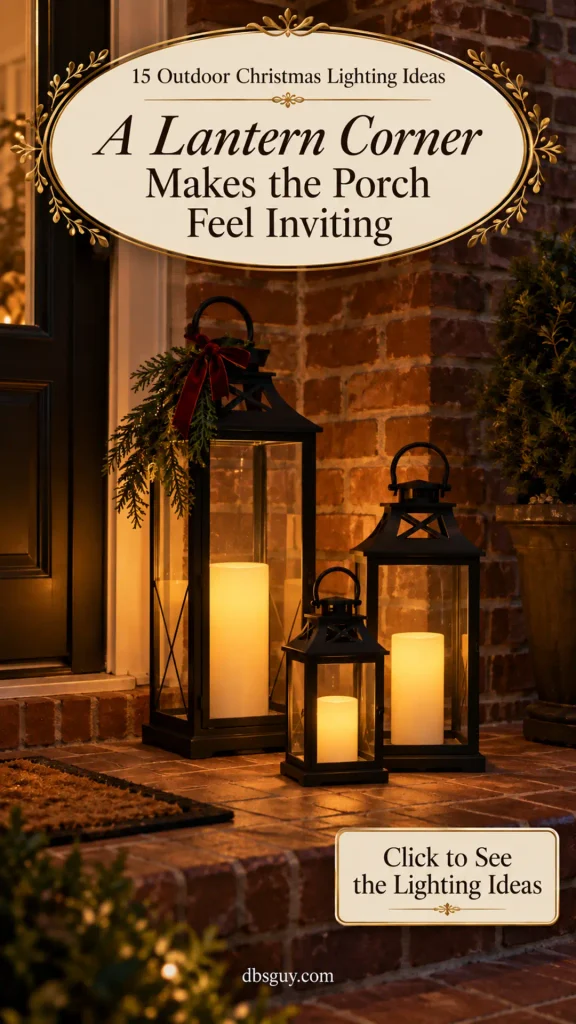
Choose: sound outdoor lanterns and flameless LED candles rated for the actual location. Check the candle separately; ordinary indoor battery candles aren’t made outdoor-suitable by placing them behind glass.
Arrange the lanterns on a broad, stable surface with the taller one slightly behind the smaller pieces. Keep the walking route clear. A pair is enough for a small porch, and the lanterns don’t have to be a perfectly matched set.
Place each candle so its controls remain accessible. Use the product’s timer if it has one, and follow the specified battery and weather instructions. Keep bows or greenery outside the lantern rather than filling the light compartment.
For a softer look: let the candles provide the main interest. One small ribbon on the tallest lantern can connect the group to your door decor. Choose an LED glow rather than a real flame for this arrangement, and take vulnerable pieces in when the conditions exceed their rated use.
9. Group Lighted Gift Boxes Beside the Entrance
A group of glowing presents gives a porch or garden bed an obvious Christmas theme. It works best as one little scene, with enough space around it to see the box shapes.
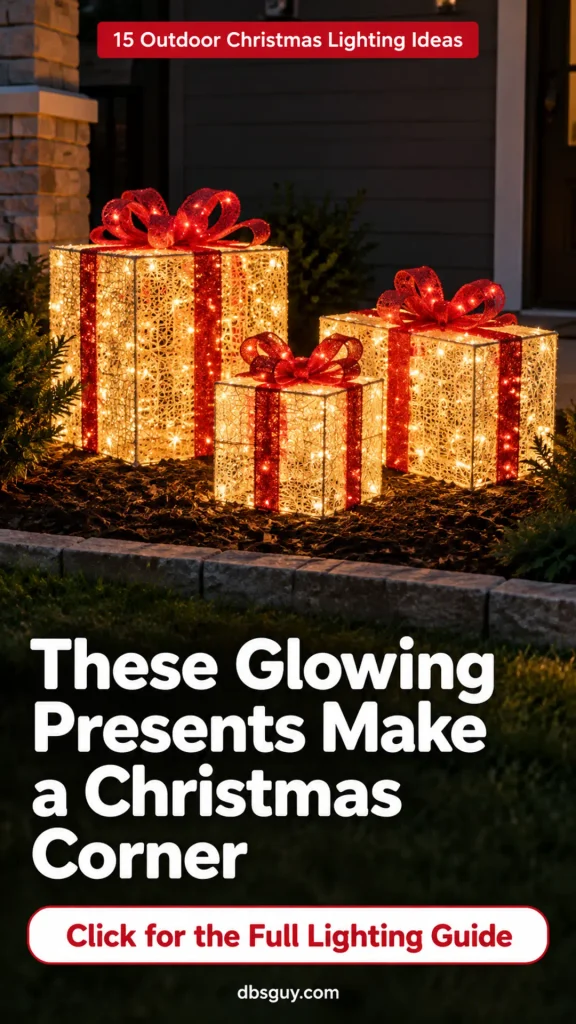
Choose: ready-made gift-box lights rated for outdoor use, their supplied bases or stakes, and a level display area. These ideas use complete decorative products; there is no need to add electrical components to homemade wrapping boxes.
Assemble and test the decorations according to their instructions. Set the largest box behind or beside the smaller pieces, with each standing on its own stable base. Secure them using the intended attachments rather than balancing one on another.
View the grouping after dark before finalizing the position. A bright wall behind it can flatten the glow, while a quieter backdrop helps the outlines show. Keep the red ribbon motifs or other accent colors close to the palette at the door.
Check the daytime view too: choose a location where the frames still look tidy with the lights off. Keep leads outside the entry route and connections accessible. A small group near the entrance often has more presence than several isolated boxes spread across the yard.
10. Stand a Pair of LED Cone Trees in a Bare Corner
Slim light trees add height without the visual weight of a full decorated evergreen. A staggered pair can turn an otherwise unused garden corner into a clear seasonal feature.
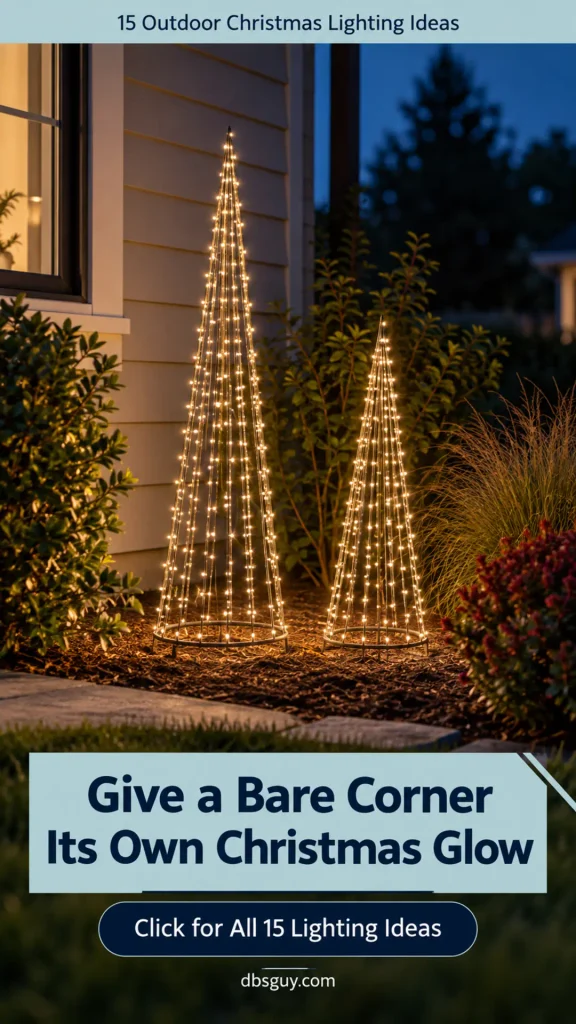
Choose: outdoor LED cone trees with their intended bases and anchoring hardware. Compare the assembled size with the space available, including room to get around them.
Place the taller tree slightly behind the shorter one so both silhouettes remain visible. Set them on an appropriate level surface and secure them as directed. The narrow outline doesn’t make a tall decoration immune to wind.
Use a light color that connects to the entrance. Leave ornaments off if the trees already have a strong pattern of light; their open shape is part of the appeal.
For a modest budget: start with one tree if a pair would require new cords, more anchors, and extra storage space. Put it where you can see the full silhouette from the street. Keep the cord route and base away from foot traffic, and check the hardware after weather changes.
11. Arrange Glowing Light Spheres in a Garden Bed
Light spheres give a winter garden a sculptural detail. Their curved shapes are especially attractive beside dormant grasses or low plants that are easy to overlook after dark.
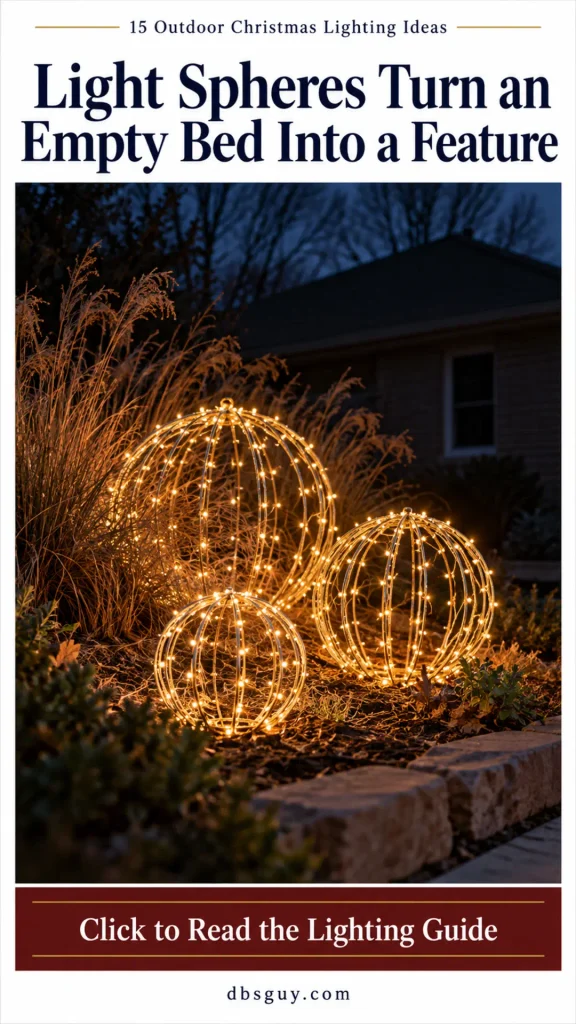
Choose: ready-made outdoor light spheres in a few sizes, supplied supports or suitable anchoring equipment, and a bed with room for the shapes to sit separately.
Set the spheres out before connecting power. Put the largest farther back and the smaller ones toward the front or side. Leave gaps between them so they read as individual shapes rather than one bright mound.
Secure each sphere according to the manufacturer’s directions. Keep the electrical components out of wet soil and follow the instructions for exposed connections. Avoid placing the decoration where snow clearing or normal garden work will strike it.
The styling trick: use a low grouping instead of scattering matching spheres across every bed. Let dark plants remain visible around the glow. This is a good idea to buy gradually: one attractive sphere can work now, with another added in a future season if the space calls for it.
12. Use One Contained Color Wash as a Backdrop
A small wash of red, green, or warm amber can connect a plain garden wall to the Christmas display. It can also provide interest without adding another freestanding decoration.

Choose: an outdoor-rated colored light or landscape fixture intended for the mounting position, with brightness and beam coverage suitable for a small target. Use the supplied mounting equipment and follow its weather and ventilation instructions.
Aim the light at a low section of your own wall or a chosen decoration. Adjust the position so the beam stays on that surface rather than reaching the road, neighboring windows, or the sky. Keep the fixture and cable away from the path.
Start with one color and a low output if the product allows adjustment. Check from the street and from nearby windows before deciding the result needs more brightness.
Make it a supporting layer: a soft red backdrop can sit behind warm-white lanterns or trees without taking over the whole entrance. DarkSky’s holiday lighting advice recommends keeping light targeted and no brighter than needed, as well as switching displays off at a reasonable hour. Don’t add an uplight that sends an open beam beyond its intended surface.
13. Add a Prelit Branch Tree to a Sheltered Porch
A simple branch tree provides a different kind of Christmas shape: airy, open, and easy to pair with a quiet porch palette. The light points follow the branches, so it can look complete with very little extra decoration.
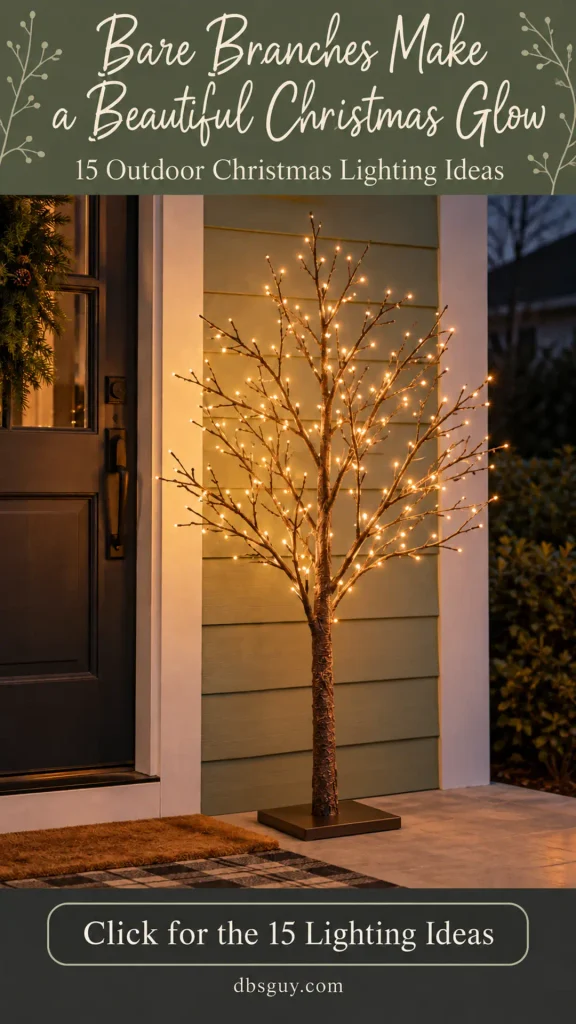
Choose: a ready-made prelit branch tree whose rating matches the porch exposure, including its base and power supply. “Prelit” describes the lighting, not permission to use an indoor tree outside.
Assemble the base and branches according to the instructions. Shape only the parts intended to be adjusted, keeping wires free from hard bends or tension. Position the tree beside a wall or in a corner where people won’t brush against its tips.
Keep the base stable and secured as directed. If you use a planter to soften the look, place it nearby rather than burying the tree’s electrical parts or improvising a support that the product wasn’t designed to use.
Let the branches show: leave most of the tree undecorated. A broad bow can overwhelm a small branch structure, while a single subtle accent nearby may be enough. A sheltered position also makes the delicate outline easier to see against a calm backdrop.
14. Hang One Lighted Star on a Reachable Wall
A lighted star gives a plain wall a recognizable Christmas detail. Because it has a clear silhouette, it can make an impression without a dense arrangement around it.
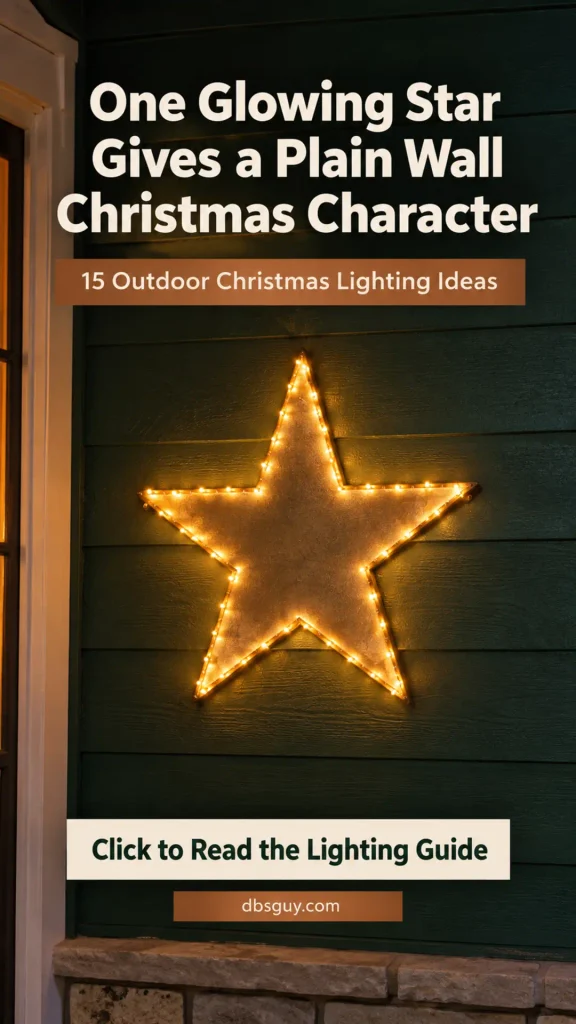
Choose: a star decoration rated for the location, a sound accessible mounting surface, and hardware compatible with the product’s weight and intended attachment points.
Decide on the position before installing the hardware. Keep the star comfortably within reach and outside the door swing. Mount it flush or in the orientation its instructions specify, with no loose loops hanging into the walkway.
Check the effect after dark. If the wall is strongly textured or busy, move the star to a calmer section rather than buying a brighter one. A dark background often lets a modest glow show clearly.
A useful small-space choice: use one star as the porch’s main feature, supported by a little light at the path or a planter. Keep the power lead discreet but accessible. Avoid attaching it to a moving window, light fixture, or surface that cannot support its finished weight.
15. Turn a Low Fence Into a Curtain of Christmas Light
A short light curtain can give a low fence a gentle, festive texture. It works particularly well around a garden sitting area or a side entrance where the fence is part of the view.
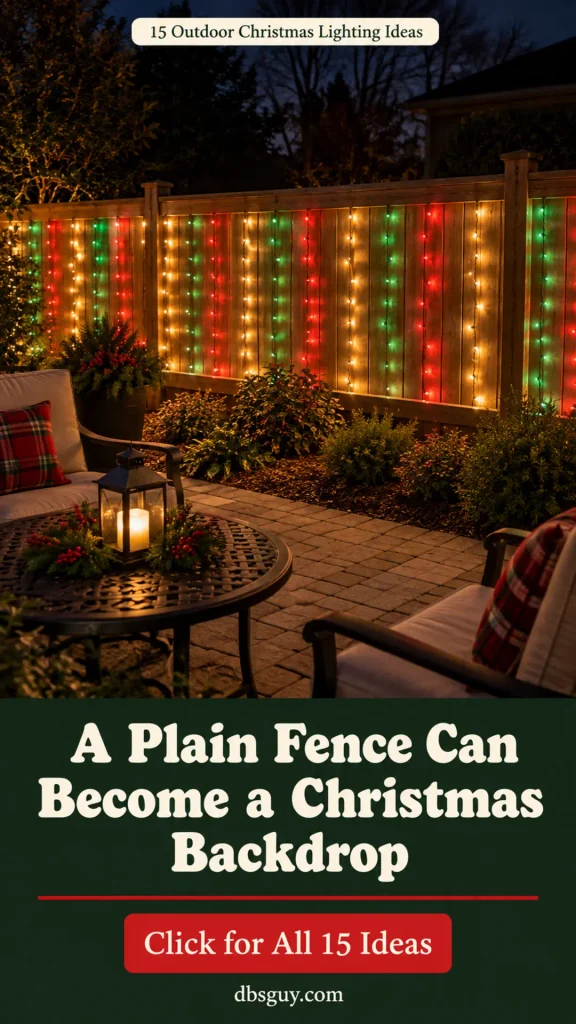
Choose: outdoor curtain lights with drops that fit the fence height, compatible clips, and an accessible power route. Choose a set that reaches the intended area without dangling long loops on the ground.
Secure the top cable to sound fixed supports, then position the drops as directed by the product. Keep them clear of gate hardware and fasten lower sections only where the instructions allow. Do not cut a standard light string to shorten it.
Use warm white for a quiet backdrop or a restrained Christmas color mix for a nostalgic look. A steady setting lets the pattern be enjoyed without the whole garden constantly flashing.
Keep it contained: decorate one useful section rather than the entire boundary. Make sure the fence remains functional and the lighting doesn’t shine directly into neighboring rooms. When taking the set down, release the clips gently and store the drops in order so next season begins with less untangling.
Three Simple Ways to Put These Ideas Together
For a Small Front Porch
Choose the glowing wreath as the main feature, then add one lantern or a pair of lighted pots. Keep the light color consistent and leave enough porch floor visible. If there is no exterior outlet nearby, suitable outdoor battery products may make this layout easier to manage.
For a Modest Front Yard
Start with one wrapped tree or a few net-lit shrubs, then add a restrained line of path lights leading toward the door. Check that the garden feature doesn’t become so bright that the entrance disappears behind it. A little repeated warm light at the door connects the two areas.
For a Garden Corner or Side Entrance
Use a cone tree or sphere grouping as the focus, with a short light curtain on an accessible fence behind it. Choose one element to be brighter and keep the other as a softer backdrop. Plan the power route before setting up the pieces, especially if the outlet sits on the opposite side of a path.
Choose LEDs and Estimate Running Cost From the Labels
LEDs are a useful starting point for a seasonal display because they generally use less electricity than comparable incandescent holiday lights. The Department of Energy’s holiday light explainer discusses that efficiency advantage. For your own setup, the wattage on the product label is more useful than a generic promise about how much Christmas lighting costs.
Add the input wattages of the decorations you plan to run, without counting the same product twice. Then estimate energy use with this calculation: total watts ÷ 1,000 × hours per night × number of nights = kilowatt-hours.
For example, a hypothetical display totaling 40 watts, running five hours nightly for 30 nights, would use 6 kilowatt-hours. At an illustrative electricity rate of $0.20 per kilowatt-hour, its electricity charge would be $1.20. Use your own product labels and your utility’s applicable rate; that example is not a promised bill for any particular set of lights.
The calculation estimates energy cost, not safe circuit capacity or permission to connect extra strings. Follow each product’s maximum connection limits and the ratings of every cord, timer, and outlet in the setup. Don’t judge electrical load by how small the bulbs look.
A compatible outdoor timer can keep the display on a useful evening schedule. Set an off time before you sleep, and follow its location and load instructions. Check the schedule after a power interruption or clock change if your timer requires it.
Keep the Glow Tidy Throughout the Season
Look at the setup again after wind, rain, or snow. Check for shifting decorations, loosened clips, and leads that have moved toward the path. Disconnect power before making adjustments, and follow the product instructions rather than trying to repair damaged cables yourself.
The Electrical Safety Foundation’s outdoor decorating guidance advises keeping light strings and extension cords clear of standing water and snow, avoiding cable damage and pinching, and turning decorations off before leaving home or sleeping. A neat cable route helps the display stay manageable as well as easier to walk around.
Keep weather-rated connection protection in the orientation and location its manufacturer specifies. Don’t rely on a grocery bag, buried connection, or indoor power strip as an outdoor solution. If you cannot provide a suitable power route, choose a different feature or appropriate battery decoration for that area.
Take a daylight photo before removing the display. It records where clips and decorations worked well. Store clean, dry pieces as directed, label matching strings, and keep the instructions with unusual decorations. The next setup becomes much easier when you don’t have to guess which lead belongs to which piece.
Questions About Outdoor Christmas Lighting
Can a house look festive without roof lights?
Yes. A door feature, a garden feature, and a little supporting light along the approach can create a clear display. Place lights where the shapes are easy to see, repeat a color, and let quieter areas provide space around the glow.
How many light strings can I connect together?
Use the exact limit printed on the lights or in their instructions. It varies by product and power system. Don’t assume two different brands can be mixed, and don’t apply one string’s limit to every decoration in the display.
Can I use indoor lights on a covered porch?
Use products marked for the actual location. A porch roof doesn’t eliminate dampness or wind-driven rain. Check the light string and its controller or power supply separately where the instructions distinguish between them.
Are battery Christmas lights a good choice outdoors?
They can be useful for a wreath, lantern, or other compact feature away from an outlet. Choose an outdoor-rated set, follow its weather and temperature instructions, and keep the battery compartment accessible. Check the glow and timer regularly; runtime depends on the product and conditions.
Why does my display look busy instead of welcoming?
Several equally bright features may be competing. Turn off one layer and look again from the street. Reduce color changes, spread crowded light points more evenly, or move a small decoration closer to the entrance. More light isn’t always the adjustment the scene needs.
Should I leave the lights on all night?
A useful evening schedule is usually enough for a decorative display. Set a timer or switch the lights off before sleeping, and consider how the glow looks from neighboring windows. Keep ordinary functional lighting separate so the entrance remains usable when the Christmas decorations are off.
Start With the Part of Your Home You Want People to Notice
Choose the door, the little tree, or the porch corner that already feels like the natural center of your home. Light that feature first, then add one or two details that lead the eye toward it.
A thoughtful group of outdoor Christmas lighting ideas can make the house feel warm, recognizable, and ready for visitors. Keep the setup within reach, give every decoration a clear place, and leave room for the glow to stand out.