Christmas Front Door Decor: How One Oversized Bow Can Transform Your Entrance

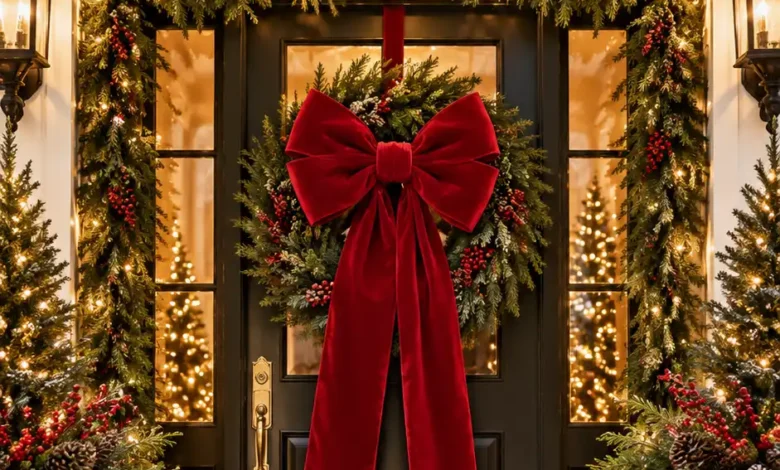
A generous Christmas bow changes the way a front door feels. The loops add softness, the tails give the eye somewhere to travel, and a strong color makes the entrance look ready for the season. Even a plain door suddenly has something worth noticing.
The best Christmas front door decor begins with the door you actually have: its color, usable space, hardware, and exposure to weather. An oversized bow should feel generous on that door while leaving the entrance easy to use.
This guide walks through choosing the size and ribbon, making a full bow, hanging it thoughtfully, and styling it with pieces you may already own. Start with one bow you love, then let the rest of the entrance support it.
One Bow Gives the Entrance a Clear Focal Point
A bow has a recognizable shape that reads from farther away than a collection of tiny ornaments. On a simple door, its loops and tails create enough movement to make the whole entrance feel dressed.
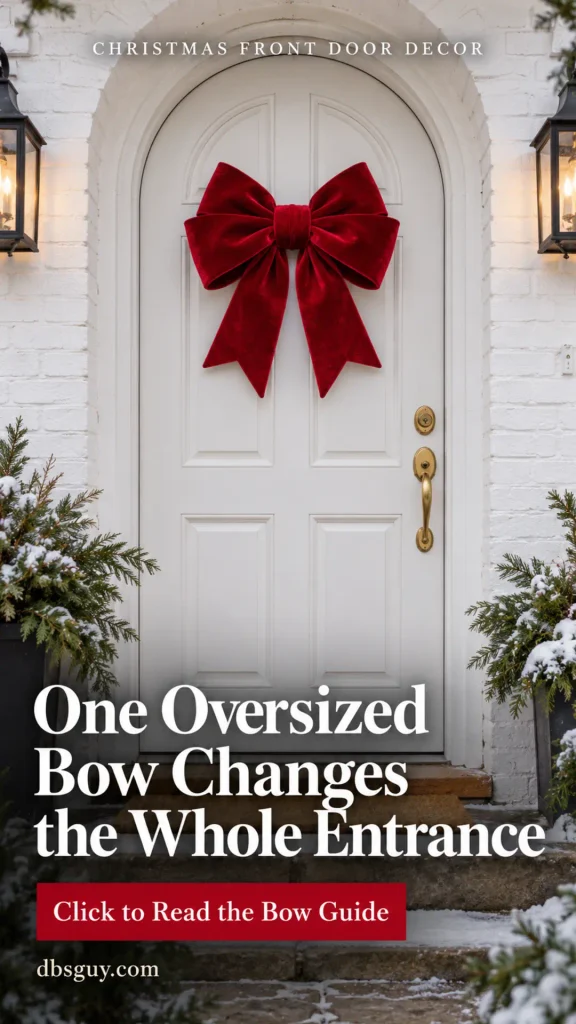
It also connects easily to what is already there. A red bow can pick up berries in a porch pot. A champagne ribbon can sit comfortably beside brass hardware. Plaid brings texture to a wood door without hiding the grain.
Give the bow a little breathing room. Leave some door surface visible around the loops, and keep nearby decorations quieter. Step back to the point where visitors first see your home; the main shape should still be easy to recognize.
Choose the feeling first: classic and cheerful, soft and understated, warm and rustic, or crisp and colorful. That decision makes the ribbon choice easier and reduces the temptation to keep adding unrelated accents.
Choose a Bow Size That Fits Your Actual Door
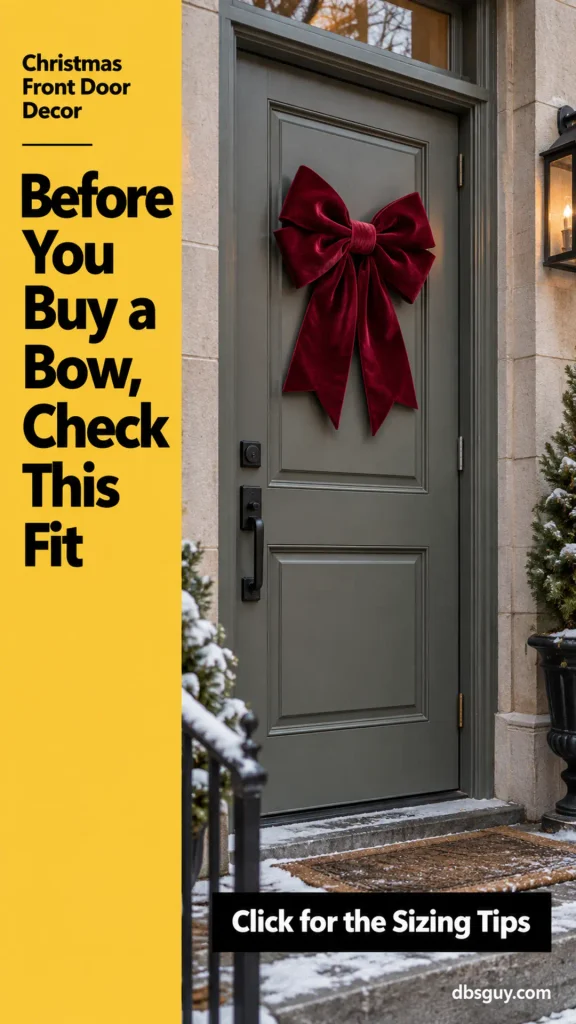
“Oversized” is relative. A bow that looks generous on a narrow townhouse door can look quite modest on a broad entrance. Check the finished bow’s width, total height including tails, and depth before buying or making it.
Start With the Door’s Usable Width
Measure the door leaf itself, then look at the area where the bow will sit. Raised panels, glass, a knocker, and a peephole can reduce the useful space. For double doors, plan around the individual leaf carrying the decoration.
As a styling starting point, a bow roughly one-third to a little under half the width of the door can feel substantial while leaving space around it. On a 36-inch door, you might begin by considering a finished width of about 12–16 inches (30–41 cm). These are design examples, not a universal installation rule; your panel layout and available clearance matter more.
Hold a paper outline of the proposed size in front of the door with someone else’s help. Look from the porch and then from the approach. This small check is especially useful when a product photo shows the bow on a much larger entrance than yours.
Set the Tail Length Around the Hardware
Choose the center position before deciding how long the tails should be. On many doors, the upper solid panel provides a useful place to begin, but the right spot depends on the door’s details.
Let the tails finish where they add movement without covering the handle, lock, knocker, address numbers, or door viewer. For a handmade bow, start a little longer and trim after checking the placement. Two gently curved tails often look fuller than very long strips hanging straight down.
Check the Space in Front of the Bow
Open the door through its normal swing. Consider any nearby wall, porch furniture, screen door, or storm door. A plush bow can fit across the panel and still be too deep for the space available.
If there is an outer storm door, check its clearance before buying a dimensional bow for the door behind it. A flatter bow may suit that space, or the outer door may offer a better location if its surface, mounting system, exposure, and everyday use allow it. Keep both doors operating freely.
Choose Ribbon for Both Shape and Exposure
The ribbon determines the bow’s outline as much as its color. Before choosing a beautiful spool, check whether it can make the kind of loops you want and whether it is intended for the place you will hang it.
Use Wired Edges for Loops You Can Shape
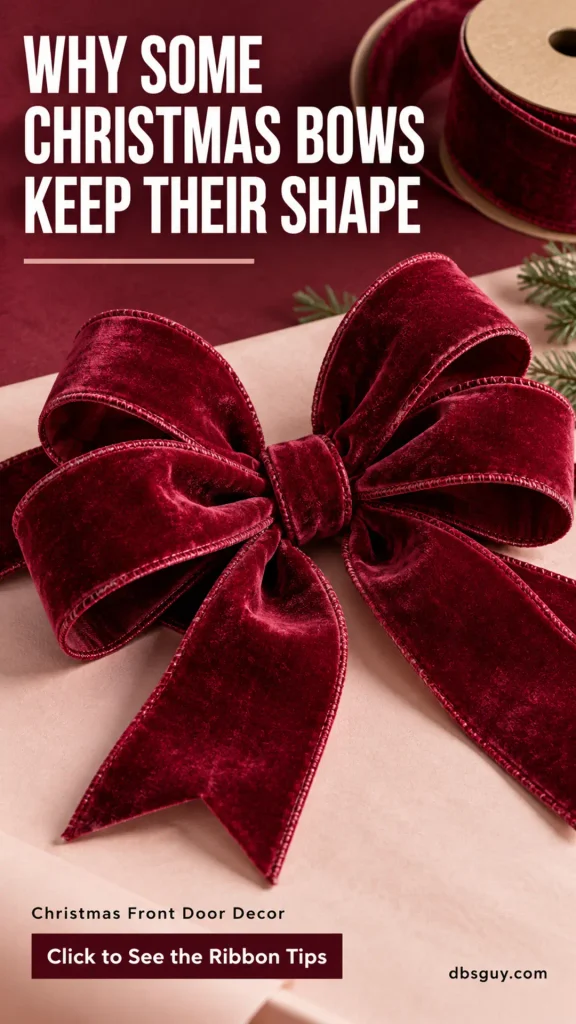
Wired ribbon is a useful choice for a full, sculpted bow because you can open the loops and gently adjust the edges. For a home-size statement bow, ribbon around 2½–4 inches wide (6–10 cm) is a practical range to consider. A wider ribbon gives broad surfaces; a narrower one may need more loops to create similar fullness.
Soft unwired ribbon creates a more relaxed drape. That can be lovely, especially on a sheltered entrance, but it behaves differently from a structured bow. Choose it for the falling fabric and softer silhouette rather than expecting sharply rounded loops.
Check the Outdoor Label Separately
Wired does not mean weatherproof. Look for ribbon or a finished bow specifically intended for your outdoor location, and read its care instructions. Velvet appearance, metallic finish, and fabric color do not establish how a product handles rain, sun, or dampness.
A covered porch can still receive wind-driven rain. For an exposed entrance, choose a product intended for that exposure and plan to remove it when conditions exceed its stated use. A protected location also gives delicate fabrics a better chance of looking tidy through the season.
Look at the Ribbon Beside the Door
Check a sample or an existing piece against the door in daylight. Deep red may appear richer against white, while a pale ribbon can disappear against a light wall. A patterned ribbon often looks best when one of its colors repeats something already in the entrance.
Notice the backing too. If a ribbon has one decorative face, keep that side outward when forming the loops. A pale backing exposed across several folds can change the finished look more than you expect from the spool.
Decide Whether to Buy or Make Your Bow
A ready-made bow is useful when you want a very specific shape or have little patience for holding loops together. Check the finished dimensions, outdoor-use information, hanging attachment, and whether the loops can be reshaped after delivery.
Making your own gives more control over the tails, width, and ribbon pattern. It is especially worthwhile when you already have a suitable spool or want a color that connects to existing greenery. Count the ribbon, fastening materials, hanger, and storage needs when comparing the two options.
If you buy one, unpack it before installation day and follow the maker’s shaping directions. A compressed bow may need its loops opened individually. Arrange it on a clean work surface first so you can see the full outline without working around a door.
Make a Full Bow With a Simple Loop-and-Wire Method
This version uses separate loop pieces, which lets you arrange the shape on a table before securing the center. You can adjust each loop without holding an entire spool in one hand.
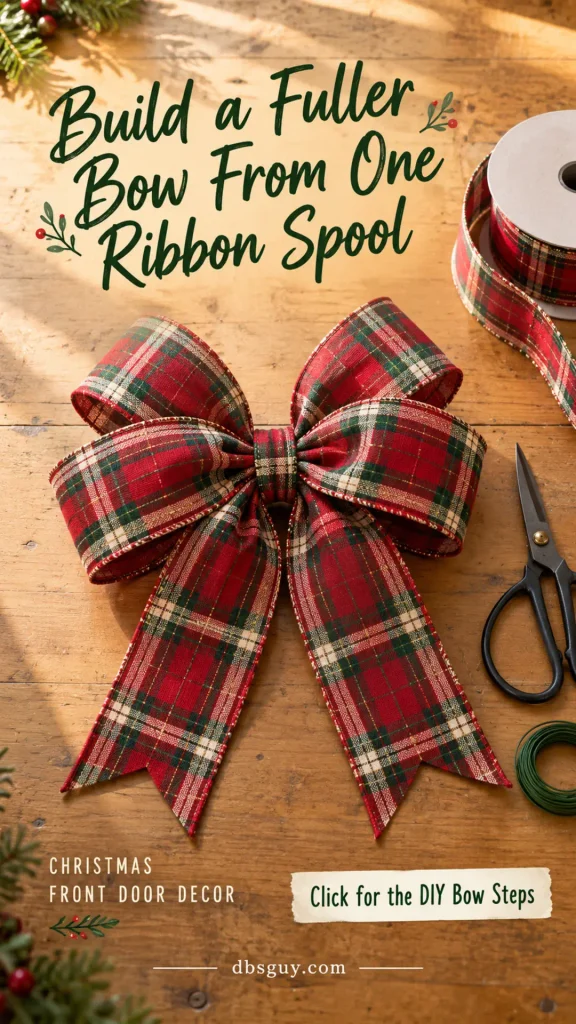
Gather the Materials
Have suitable wide wired ribbon, a tape measure, sharp craft scissors, floral wire, small clips or clothespins, a needle and matching thread, a short piece of sturdy hanging cord, and the mounting equipment appropriate to your entrance. Use wire cutters if the wire requires them; don’t damage your fabric scissors trying to cut stiff wire.
For an illustrative bow around 14 inches wide, plan six loop pieces about 15 inches long, two tails about 20 inches long, and a short center-cover piece about 8 inches long. That adds up to 138 inches, or about 3.8 yards (3.5 m), before adjustments. A 5-yard spool gives some allowance for changes. Treat those quantities as a starting example: ribbon thickness, overlap, and your preferred fullness affect the finished size.
Make One Trial Loop
Cut one loop piece. Bring its ends together with the decorative face outward, overlapping the ends by about an inch. Pinch the overlapped ends into a narrow base and hold them with a small clip.
The rest of the piece forms an open loop extending away from that pinched base. Check its size before cutting all the remaining pieces. Two opposing loops establish most of the bow’s overall width, so changing this first piece changes the finished proportions.
Prepare the Remaining Loops
Once the trial size looks right, make five more similar loop pieces. Keep the decorative face outward and clip each pinched base. You can make the front pair slightly smaller if you prefer a layered shape.
Set the loops on the worktable with three pointing left and three pointing right. Their pinched bases should meet in the center. Angle the upper and lower loops gently apart so the bow has an open outline rather than looking like a single flat strip.
Add the Tails and Secure the Center
Pinch the top of each tail piece and place those ends behind the gathered loop bases, with the tails falling downward. Hold the stack together, remove the temporary clips as you gather it, and bind the pinched center firmly with floral wire.
Twist the wire ends at the back until the pieces stay together, checking that no loop slips out. Keep cut ends tucked away from fingers and the door finish. If managing all six loops is awkward, start with four and adjust the shape before adding another pair.
Cover the Fastening and Open the Loops
Wrap the short center-cover piece around the gathered middle with its decorative face outward. Overlap its ends at the back and join them with a few stitches through the fabric. The covering makes the front tidy; the inner fastening should already be holding the loops and tails.
Pass the sturdy hanging cord around the bound center at the back and tie its ends securely to form a small hanging loop. Keep the knot and fastening ends away from the door’s finish. Lift the bow gently by that loop over the worktable and check that the assembly stays together before mounting it.
Work from the back loops toward the front, opening each one and gently shaping the wired edges. Give the loops space to show. Keep checking both sides as you go; slightly different angles look natural, while one dramatically larger side can make the bow seem crooked.
If you prefer a bow-making tool to hold the ribbon, Bowdabra’s own large-bow tutorial demonstrates a different layered method with its tool. Follow the instructions for the method you choose rather than mixing fastening steps halfway through.
Finish the Tails After a Placement Check
Hold the finished bow at the planned position and check the tail ends against the hardware. Trim them gradually. A simple diagonal cut works well; a centered V-shaped cut gives a familiar Christmas finish. Keep any cut edge wire contained.
Give each tail a gentle curve if the ribbon supports it. Then check the back of the bow and its hanging attachment before mounting. The decorative center band should not be the only part supporting the assembled bow.
Hang the Bow With the Door’s Finish and Clearance in Mind
Choose the mounting method before the final shaping session. A beautiful bow is easier to position when you already know where its support will sit.
An Over-the-Door Hanger
A suitable wreath hanger can work for a lightweight bow or a bow-and-wreath assembly. Check the hanger’s door-thickness fit, load rating, protective contact surfaces, and intended use.
Try the empty hanger first and close the door gently. It should latch normally without forcing the top edge or compressing the weather seal in an unintended way. If the fit is poor, choose a mounting method suited to the door instead of bending the hanger or forcing the door shut.
An Outdoor Adhesive Hook
For a compatible smooth surface, an outdoor-rated adhesive hook may provide a lower-profile option. Check the complete decoration’s weight and follow that product’s surface, application-temperature, and waiting-time instructions.
Command’s manufacturer guidance distinguishes outdoor products from ordinary indoor strips, identifies surface restrictions, and directs users to the package’s weight limit and application instructions. It also cautions that adding extra strips does not automatically increase the allowed load. Other brands have their own requirements.
Leave any required removal tab accessible. Choose the support position with the door’s panel shape and hardware in mind, then attach the bow through its sound hanging loop or intended attachment. Check that the back fastening stays clear of the painted surface.
Do a Final Everyday-Use Check
Open and close the door as you normally would. Use the handle and lock, look through the viewer if you have one, and check the route past the entrance. Keep the whole bow and its tails on the intended door surface, away from moving edges and hinges.
For double doors, keep the decoration on the leaf carrying it rather than bridging the gap. Recheck the attachment when weather changes or the bow starts moving around. If an exposed position repeatedly pulls at the mounting, a smaller profile or a more sheltered location may work better.
Style the Bow to Suit Your Door
Keep a Red Bow as the Main Christmas Color
Red is an easy starting point for a traditional entrance. Against white or cream, it gives a clear focal point; against a dark door, its texture becomes especially noticeable in daylight.
Repeat that red in one existing detail, such as berries in a planter or the edge of a doormat, if it suits the space. Leave room around the bow so the loops are easy to see. A plain green accent nearby can be enough to connect it to the rest of the porch.
Use Plaid to Bring Warmth to a Wood Door
A broad tartan ribbon sits beautifully beside wood grain. Red, evergreen, and cream create a familiar holiday palette with enough pattern to make the bow interesting up close.
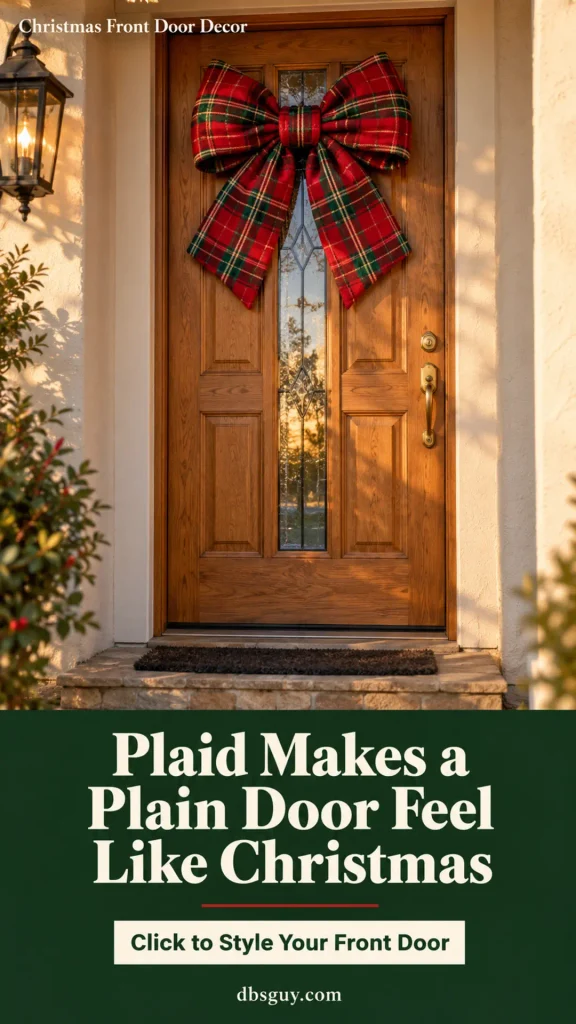
Choose a larger, readable check if the entrance is viewed from across the yard. A tiny pattern can look like one muted color at that distance. Keep the center wrap aligned with the pattern where possible, then let the loop angles provide the movement.
Pair the look with the porch’s existing natural textures: a coir mat, a simple pot, or a stone step. If nearby textiles already have strong patterns, repeat one color rather than introducing another competing check.
Try Champagne for a Softer Look on a Dark Door
A champagne-colored bow makes a dark door feel softer while keeping the entrance quiet. Broad loops provide the interest; a slight sheen can connect neatly to brass or warm metal hardware.
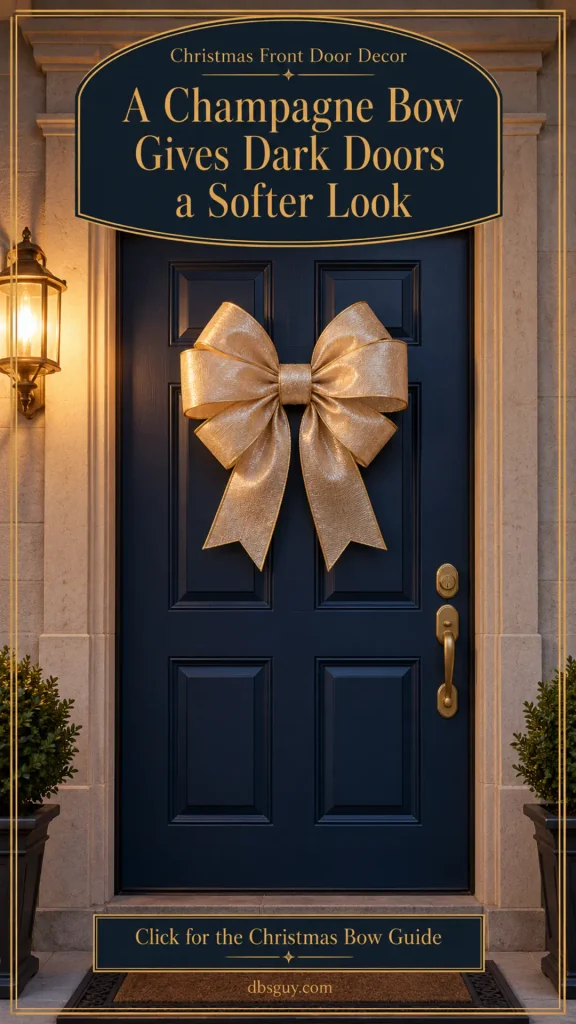
Check the actual ribbon under your porch light as well as in daylight. Pale gold, cream, and silver-toned champagne can look quite different after dark. Choose the version that still stands out against the door.
Leave the surroundings simple. If you already have a planter, use greenery or another restrained texture beside it. The bow should remain easy to recognize when viewed from the approach, especially if the door is set deep within a shaded porch.
Use Emerald as a Clear Contrast on a Pale Door
A rich green bow can give a pale entrance a strong Christmas accent while letting the door’s original color show. It works especially well when your porch already includes green plants.
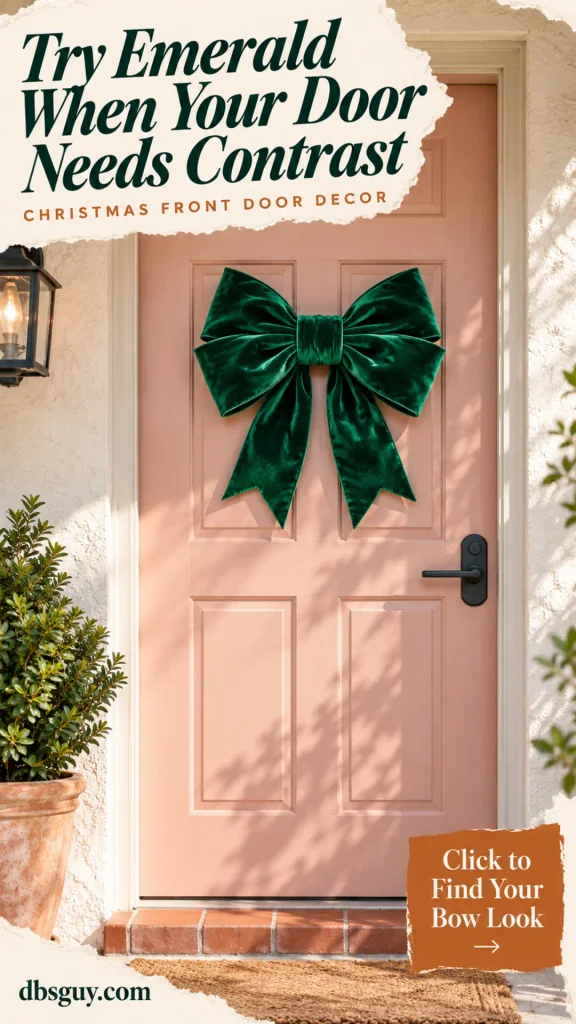
Hold the ribbon against the painted surface before committing to it. A deep emerald creates a different effect from sage or olive, and a very dark green may lose its outline in a shaded entrance.
Shape the loops so the fabric catches a little light, then keep the supporting palette limited. A warm metal detail or an existing terracotta pot can bring enough contrast without adding several more decorations.
Give an Existing Wreath a New Focal Point
If you already have a simple wreath, changing its bow can refresh the entrance without rebuilding the greenery. A generous bow near the top gives the arrangement a clear visual center.
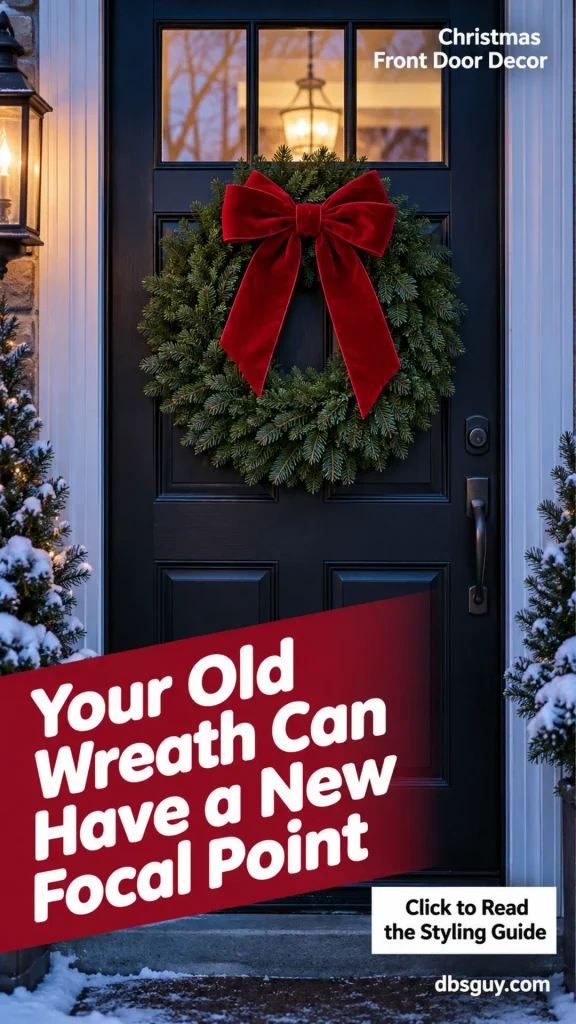
Check the wreath’s condition first, including its frame, existing hanging attachment, and anything loose. Fasten the new bow to the structural frame or an attachment intended for that purpose, keeping cut wire away from the door. Decorative branches alone may not provide a sound support.
Let the tails follow the wreath’s shape rather than hanging straight across its opening or over the lock. Use the finished combined weight when choosing the hanger, and check the added depth against any storm door.
The bow doesn’t need to match the wreath’s full width. Start with a size that creates a clear accent while leaving plenty of greenery visible. Look at the complete arrangement from the approach before adding ornaments or another ribbon.
Add a Little Supporting Decor Where It Helps
Once the bow is in place, look at the entrance as a whole. A pot of greenery, a tidy mat, or one existing lantern can connect the door to the porch floor. Use what already suits the space.
Repeat one color or texture, then pause. A tall pot on one side may balance an off-center doorway; a pair can suit a symmetrical entrance if there is enough room. Keep the walking route generous and the everyday lighting useful.
Take a photo from a visitor’s viewpoint. The photo makes it easier to notice when a small object competes with the main bow, or when a large empty area actually gives the display a welcome sense of space.
Small Adjustments That Make the Bow Look More Finished
The Bow Disappears From a Distance
Check contrast before increasing size. Move a ribbon sample into the actual light at the door. A pale bow on a pale background may need a richer color; a dark bow in a deep porch may need a softer, lighter tone. Keep the shape clear against what sits directly behind it.
The Loops Look Flat or Crowded
Open the loops one at a time, starting with those at the back. Separate their angles and gently shape wired edges. If too much ribbon is packed into the center, removing a pair can give the remaining loops a better outline.
The Tails Make the Arrangement Look Crooked
Check the center fastening and mounting first. A bow hanging at an angle can make evenly cut tails appear uneven. Once it sits properly, curve the tails and trim only what needs adjusting. They can have natural movement while finishing in a balanced position.
The Back Rubs Against the Door
Take the decoration down and inspect the contact points. Tuck fastening ends into the assembly and follow the hanger’s protective-contact instructions. Reposition or replace unsuitable hardware rather than leaving it to scrape the finish each time the door moves.
Help the Bow Look Good Through the Season
Check the attachment and shape after windy or wet weather. Bring the bow down for adjustments so you can inspect the center and back properly. Follow the ribbon or bow maker’s care directions for cleaning and drying.
If the material becomes wet, let it dry fully in a suitable place before storing it. Avoid folding the loops flat while damp. Do not assume heat, steam, or a household spray is suitable for every velvet, metallic, or coated ribbon.
At the end of the season, support the bow’s loops loosely with clean tissue and place it in a box that leaves room around the shape. Store it clean and dry as directed. Keep the mounting instructions with it so the next setup starts with the right hardware information.
If using an adhesive hook, follow its specific removal method. Command’s hook removal instructions call for stretching the strip along the surface rather than pulling it outward. The bow and many hooks may be reusable, while adhesive strips can require replacement for the next installation.
Questions About Oversized Christmas Door Bows
Can I use one bow without a wreath?
Yes. One well-shaped bow can be the main door decoration, especially when its color contrasts with the background. Give it a clear position, keep the tails tidy, and let a small existing porch accent connect it to the rest of the entrance.
How large should a Christmas bow be?
Use the actual door’s usable width and clearance. About one-third to a little under half the door width is a styling starting point, then adjust for panels, glass, hardware, and the space in front. Check the total height and depth as well as the width.
Can an oversized bow work with a storm door?
It depends on the gap, bow depth, mounting system, and how both doors move. Measure before choosing a plush bow. A flatter silhouette may fit better, or a suitable decoration can go on the outer door when its intended use and mounting requirements allow it.
Will ordinary velvet ribbon work outside?
Check the specific product’s outdoor-use and care information. Velvet describes a look and texture, not a guarantee of weather performance. Choose for the actual exposure and remove the bow when conditions exceed what the maker allows.
How do I keep the bow from looking too busy?
Choose one main ribbon and keep the shape readable. If the ribbon is patterned, repeat one of its colors nearby instead of adding another strong pattern. Remove a competing accent, step back, and see whether the main bow becomes easier to notice.
Do I need to buy new porch decorations to match?
Start with what is already there. Greenery, a simple mat, or existing metal hardware often provides enough connection. A new bow on a sound wreath can also refresh the look while letting you keep the pieces you enjoy.
Choose the Bow That Makes Your Entrance Feel Like Yours
Begin with the door’s proportions, then pick the color and texture you would enjoy seeing every day. Make or buy the bow, shape it on a work surface, and give its placement a careful check before adding anything around it.
Thoughtful Christmas front door decor can begin with that one clear gesture: a generous bow, a visible entrance, and enough room for the ribbon’s shape to shine.




