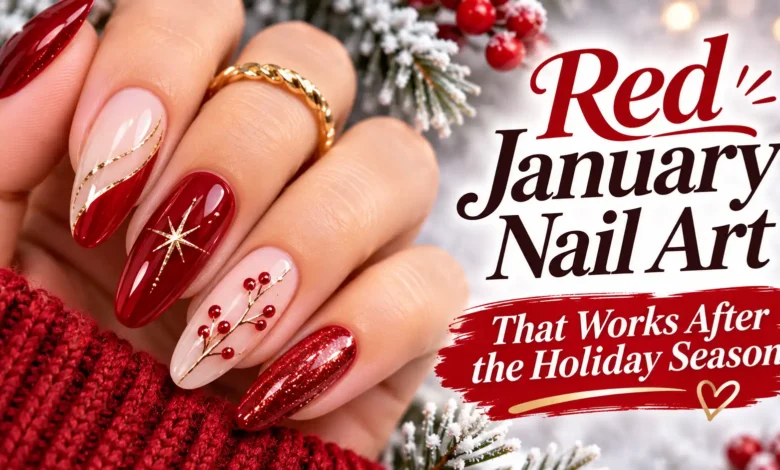
Red January nail art can start with the polish you already love. Change where the color sits, or give it a different finish: a narrow garnet tip, a small nude half-moon, or one glossy curve over matte oxblood. You can keep a rich winter red without carrying candy canes, ornaments, and Christmas color combinations into your next manicure.
These six designs range from a tiny dot you can place at home to a magnetic velvet look to discuss with your nail artist. Pick the amount of red you want to see first; the shape and detail can follow.

The visuals are AI-generated design concepts for dbsguy.com. They illustrate color, placement, and finish rather than documenting completed or tested manicures. Use them as references; actual polish shades and results will vary.
Choose How Much Red You Want
- Mostly red: Start with cherry red and one tiny dot, brick-red half-moons, or matte oxblood.
- Mostly a sheer base: Choose garnet micro French tips or a single crimson side curve.
- Light-catching color: Try wine-red velvet with a broad, soft glow.
For the after-holiday look shown here, keep the artwork to one detail per design. That is an editorial styling choice, not a rule about what you can wear in January. Bright red is still an option if deep burgundy feels too dark.
1. Cherry Red With One Tiny Nude Dot
This is the closest option to a straightforward red manicure. Short, rounded nails carry a glossy cherry-red base, while one beige-nude dot near the base of the ring fingernail gives you a small detail to notice up close. The pale dot breaks up the red without adding another strong color.

For a regular-polish version, apply your base coat and red according to their labels. Once the red is dry enough for detail work, pick up a little opaque nude polish with the smallest ball end of a dotting tool. Touch down once and lift straight up. Leave a slim border of red between the dot and the cuticle, then finish with a compatible glossy top coat when the detail is ready.
On very short nails, make the dot smaller rather than moving it onto the skin. Keep it to one nail per hand so it remains a quiet accent.
Salon wording: “Short rounded cherry-red nails, high gloss, with one tiny nude dot near the base of each ring fingernail.”
Also Read: January Nail Art for Beginners: Simple Designs to Practice at Home
2. Garnet Micro French Tips
A micro French lets red act as an outline. Ask for a sheer pink-nude base and a narrow garnet band following the free edge. The reference uses a soft almond shape, but a short rounded or squoval nail can carry the same idea.
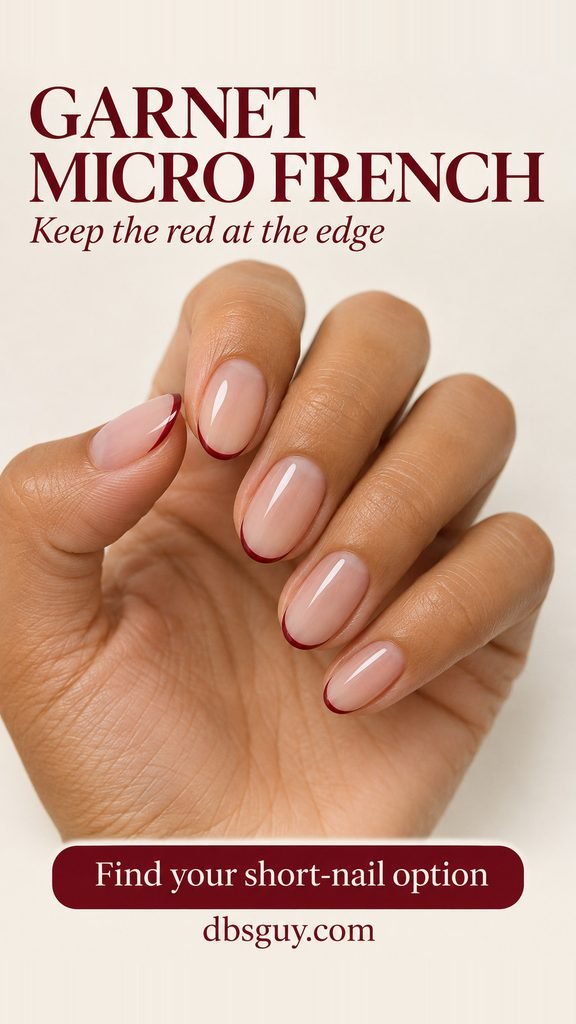
Start with a band about 1 millimeter wide as a visual reference, then scale it to your nail. The nude center should remain the main part of the design. If the tip becomes a large red block, ask for a thinner line before repeating it across the hand.
On nails with almost no free edge, a nail artist can paint a fine curved tip within the nail surface. You do not need extensions just to add the red border. For a home attempt, use regular polish and a fine liner brush; practice the curve on a spare nail-art tip first.
Bring two references: The image for the line width, plus a red swatch you like. Here, “garnet” means a deep red that still reads red, rather than a purple-looking berry.
3. Brick Red With Nude Half-Moons
Brick red brings a warm red-brown color into the set. A small nude semicircle at the base of each nail leaves a clear break between the cuticle area and the colored section. Unlike French tips, the red here covers the tips and most of the nail.
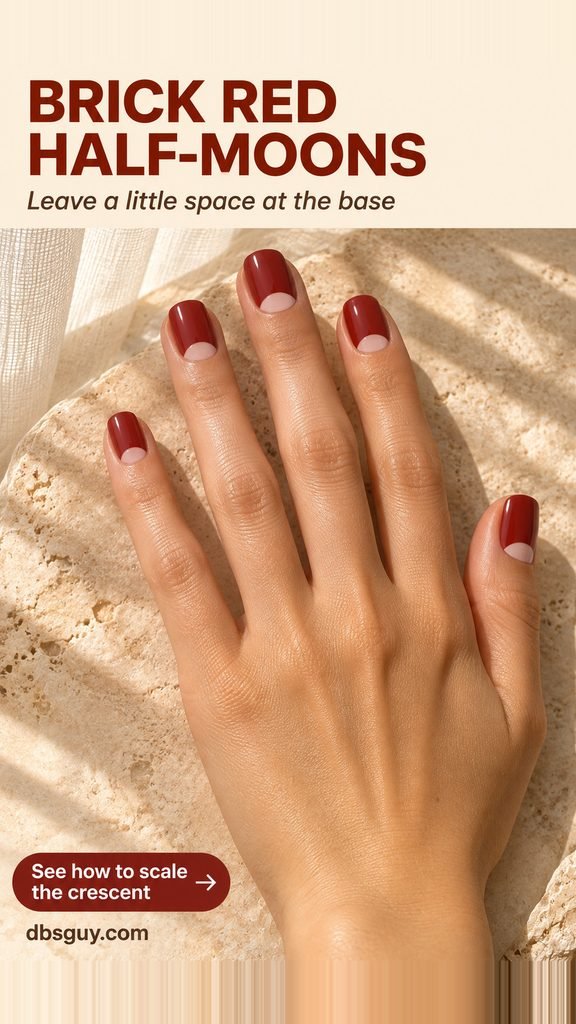
The short squoval shape in the image gives the semicircles a wide, tidy setting. Aim for a nude area roughly one-sixth to one-fifth of the nail length as a starting point, with smaller moons on the smallest nails. These are design proportions, not measurements you need to match precisely.
Choose a sheer base that you like against your own skin; the nude in the reference is only one option. Ask your artist to outline each crescent before filling the red area. At home, this takes more brush control than the single-dot design, so try one accent nail before committing to all ten.
Keep an eye on: The curved boundary. Similar proportions across the hand matter more than making every crescent the exact same size.
4. Matte Oxblood With One Glossy Arc
This design changes the reflection rather than the color. A matte oxblood base covers each oval nail, and a single glossy arc crosses the upper half of the ring fingernail. From a distance, the manicure looks almost solid. The curve appears when light catches it.
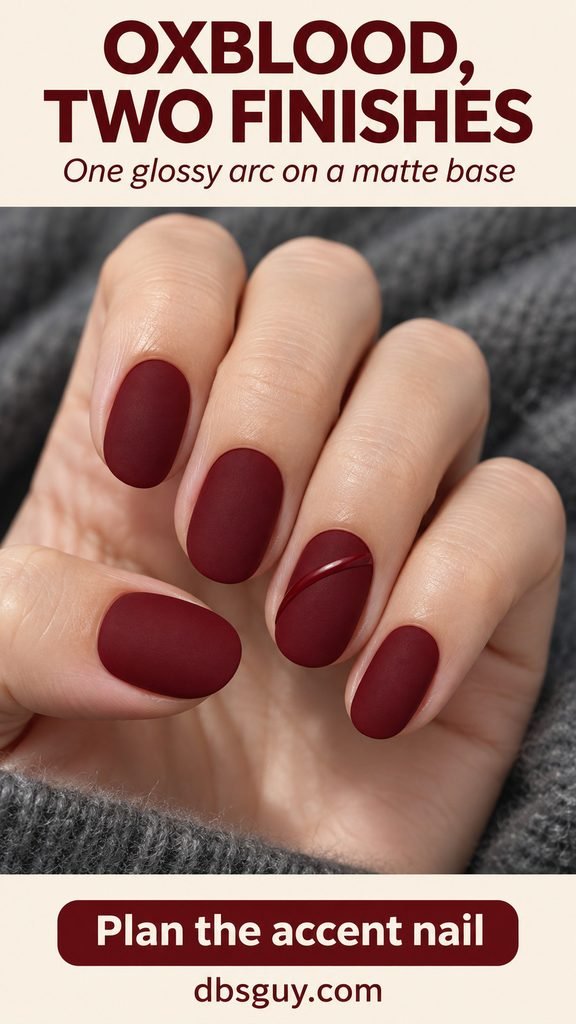
Ask for the accent to stay the same red as the base. A white or metallic stripe would create a much stronger contrast than the finish-only detail shown here. Keep the arc narrow enough that a generous area of matte color remains visible above and below it.
For a regular-polish version, use compatible matte and glossy finishes according to their directions. After the matte layer is ready, paint the accent with a fine brush and clear glossy top coat. Do not add an all-over glossy coat afterward, because it would remove the contrast you are creating.
Short-nail adjustment: Use a shallow arc, leaving space around both ends. On a small nail, a wide sweep can read as a shiny patch instead of a line.
Also Read: 15 Elegant January Nail Art Ideas to Pair With Your Winter Jewelry
5. One Crimson Curve on a Sheer Base
If you want red artwork with plenty of uncovered-looking space, try a single side curve. The crimson starts narrow near one side of the base, travels along the edge, and widens as it bends toward the tip. Most of the sheer pink-nude center stays visible.
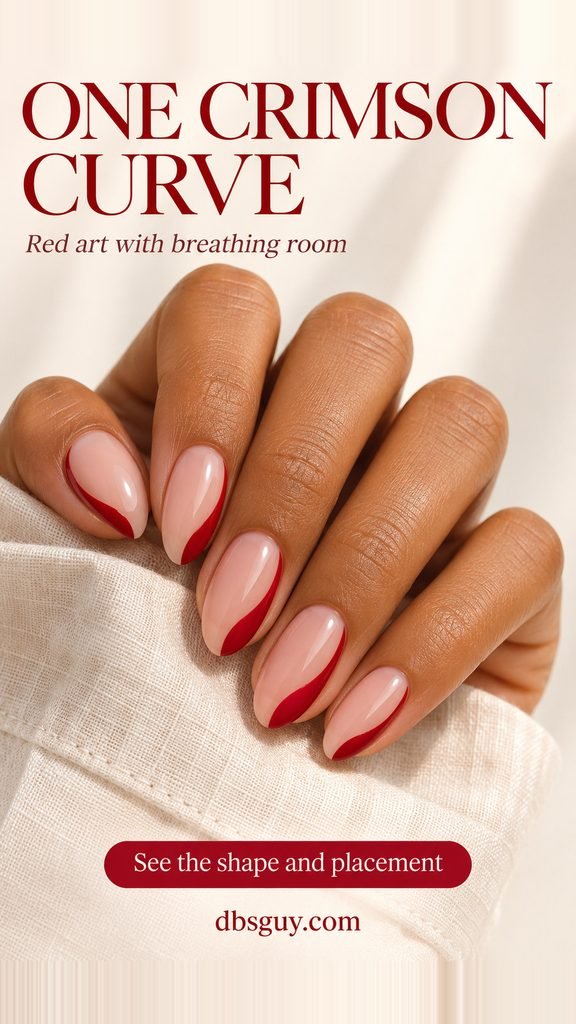
Use the image to show your nail artist the difference between a side swoop and a French tip: this red shape runs down one side rather than forming a complete band across the free edge. Repeat the same general movement on each nail, adjusting the width to fit.
A soft almond gives the curve a longer path. On shorter rounded nails, keep the swoop slimmer and let it end before it fills the whole tip. If you are painting with your less steady hand, choose one accent nail and leave the others in the same sheer base. You will still get the red-and-nude balance.
What to avoid: Repeatedly widening the red to fix a shaky edge. Use a smaller brush and refine the boundary while leaving the center open.
6. Wine Red With a Soft Velvet Glow
Wine-red velvet is the option for a manicure that catches light without extra artwork. The short oval nails in the reference have dark burgundy edges and a broad red glow through the center. Fine magnetic shimmer creates the effect; there are no added gems or chunky glitter pieces.
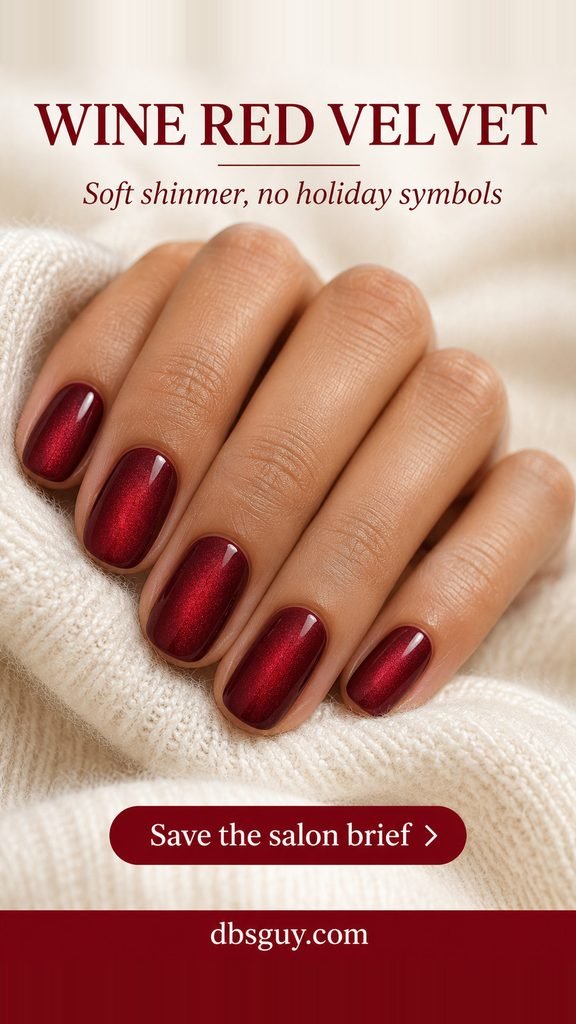
Ask for a soft, spread-out velvet reflection rather than a sharp diagonal cat-eye stripe. Both are magnetic effects, but they create different focal points. Show the reference to your artist and ask to see a finished sample tipped toward and away from the light before choosing the shade.
This look needs a magnetic polish formulated for the effect. Ordinary red cream polish will not respond to a magnet. If you use a magnetic gel system, follow that system’s application and curing directions with its recommended lamp; this design reference is not a universal gel tutorial.
Salon wording: “Short oval wine-red velvet nails, a broad soft glow, and no added decoration.” Check the sample away from the brightest salon light, too, so you like the darker red it shows between reflections.
Turn Your Favorite Image Into a Clear Manicure Request
Save the single design you want, then settle three details before painting starts: your comfortable length, how sheer or opaque the base should be, and where the accent goes. If you love the art but prefer your current shape, ask the artist to scale the detail to that shape.
Compare red swatches beside a sleeve or coat you often wear. Cherry red gives a stronger color contrast against gray or cream; brick red makes a warmer pairing with camel; wine and oxblood offer a deeper option beside black. These are outfit ideas to compare, not rules based on skin tone.
For home nail art, regular polish can create the first five designs with suitable brushes and finishes. Use the dot as the easiest starting point. The micro French, half-moon, and side curve need more control over a clean boundary.
Before You Replace Your Holiday Manicure
Remove the old manicure using the method intended for that product. Do not peel off lifting gel to make room for a fresh set. The American Academy of Dermatology’s gel-manicure guidance advises against picking gel, recommends moisturizing between manicures, and suggests broad-spectrum, water-resistant SPF 30 or higher on the hands before a gel appointment, or dark, opaque gloves with the fingertips removed.
If your nails are brittle, peeling, or sore after removal, pause before covering them again. A new color is optional; persistent nail problems deserve advice from a board-certified dermatologist.
Questions About Red January Nails
Can bright red nails work in January?
Yes. You do not have to switch to burgundy after Christmas. For the look in this article, use a clean shape and one small detail instead of seasonal symbols. The cherry-red dot design is the brightest example.
Which design should I choose for very short nails?
Start with the tiny nude dot because it needs little space. A fine French tip can also work if you like a mostly sheer nail. Keep half-moons shallow so the red still occupies most of the nail.
Do I need gel or acrylic extensions?
No. The shapes and placements can be adapted to natural nails. The first five designs can be made with regular polish and appropriate finishes. The velvet option needs a magnetic polish; choose its application system separately from the nail shape.
Can I just paint over my Christmas nail art?
A new layer will not necessarily hide raised decorations, uneven glitter, lifting product, or the old design. Remove or have the existing manicure serviced as its product system requires, then begin on a suitable surface. Do not peel or scrape off gel to speed up the change.
If you want one place to begin, choose the cherry-red dot for the simplest home detail, the micro French for less red coverage, or the velvet look for a salon finish with movement. Save that image and decide the length before adding anything else.