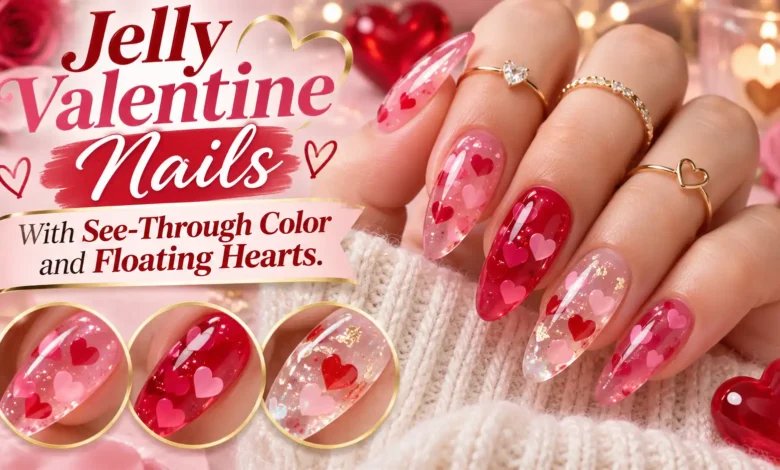
For jelly Valentine nails, start with a tint you can still see your natural nail through, then leave space around the hearts. A tiny red heart on rose jelly is an easy place to begin. For more depth, place some hearts beneath a sheer wash and others above it so they seem to sit at different levels.
These five designs show different ways to use that effect, from a short manicure with one accent to clear extensions with hearts suspended in the tips. Choose the placement first; you can adjust the color to suit your hands.

The visuals are AI-generated manicure concepts for dbsguy.com. They illustrate color, shape, and placement, rather than completed salon work or tested wear results. Actual polish coverage will vary.
Choose the Sheerness Before the Heart Art
“Jelly” describes the translucent finish. You can get it with regular air-drying lacquer or a lamp-cured gel product; the word alone does not tell you which system you are buying. Check the label before choosing your base coat, artwork, and top coat.
Ask to see the color on a swatch with the intended number of coats. A white or opaque nude base will hide the natural nail and change the see-through effect. If you want full coverage of your nail line, that is a different finish to discuss rather than something to chase by piling on more jelly.
- Very short nails: choose the single-heart rose design so the artwork has room.
- More visible Valentine color: try cherry jelly with pale heart trails.
- A layered effect: compare the softened and crisp hearts in the lavender set.
- Transparent tips: bring the clear-extension reference to your nail artist.
- A darker palette: keep smoky jelly sheer and use open pink outlines.
1. Rose Jelly With One Small Floating Heart

Keep short squoval nails—mostly square tips with softened corners—in a translucent rose pink. On each ring nail, put one tiny crimson heart slightly off-center in the upper half. The remaining nails stay plain, so you notice the little red shape without losing the soft pink wash.
This version gets its floating effect from the clear-looking space around the heart. It does not need thick layers or a raised charm. Request a flat painted heart or a thin nail-art decal compatible with the polish system, followed by a glossy finish.
If your ring nail is especially narrow, place the heart nearer the center and leave a visible pink border. Check the notch and point before sealing: the shape should read as a heart, rather than a red dot. For more ways to work at your existing length, see Valentine Nails on Natural Nails: Simple Ideas Without Extensions.
2. Cherry Jelly With White and Blush Heart Trails

Use a transparent cherry red over medium almond nails, then add three small hearts down each of the middle and ring nails. Alternate white and blush, with a little side-to-side movement so the hearts form loose trails. Leave the other nails in plain cherry jelly.
The pale hearts matter here: red artwork could disappear into the red base. Have your artist place the intended white and blush beside the finished cherry swatch before committing. The base can be rich while the free edge still lets light through.
Keep the hearts separated by visible red. On shorter ovals, use two hearts per accent instead of squeezing in three. If you love the saturated color but want less art, decorate only the ring nails; that keeps the cherry finish as the main feature.
3. Lavender Jelly With Hearts at Two Depths

This is the design to choose when you want the layered effect to be the detail. On medium ovals, use translucent lavender with white hearts on the middle and ring nails. Put some hearts underneath a sheer lavender wash, where they read as soft violet, and leave another white heart above the wash.
Separate the positions so the crisp heart does not cover the softened ones. The reference keeps the other nails plain lavender, making the difference in depth easier to see. White is useful for the lower hearts because the tint can change their color while leaving their silhouettes visible.
Before repeating the design, check one practice tip. If the lower hearts disappear, use a sheerer color rather than adding larger, thicker artwork. If every heart looks equally sharp, the tint may be too faint to create the contrast you want. For another take on translucent color, explore Korean-Inspired Valentine Nails With Syrup Layers and a Soft Blush Glow.
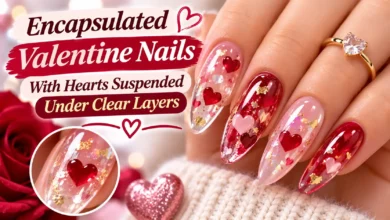
4. Clear Almond Tips With Suspended Red Hearts

For this salon reference, the nail beds have a barely rosy finish and the almond extensions remain clear beyond the fingertips. One small ruby-red heart sits inside the transparent free edge on each middle and ring nail. A clear border surrounds the artwork, including its point.
Point to the location when booking: you want the heart beyond the fingertip, in a transparent tip. A natural white free edge under sheer polish will still show; it will not look like the clear extension in this image. Ask your artist which clear extension system can achieve the reference at a length you can comfortably wear.
Avoid making the heart fill the whole tip. The visible clear space is what gives it that suspended look. Have your artist show you the proposed length from the side and explain the maintenance and removal plan. If you are considering that service, read Hard Gel Valentine Nails: Design Ideas for Overlays and Extensions.
5. Smoky Jelly With Open Blush Hearts

A sheer charcoal-gray tint gives this set its darker mood while letting the natural pink nail bed show underneath. On the middle and ring nails, add one hollow blush-pink heart each. The open center leaves the smoky color visible inside the outline.
Keep the pink line narrow enough that the heart stays open, but visible when you look down at your hands. Ask for the outline on a finished smoky swatch; a pink that seems strong in the bottle can look much quieter beside gray. Plain index and pinky nails give the two accents their own space.
Stop building color while the base still looks translucent. An opaque black finish changes the entire effect. On shorter nails, reduce the heart’s overall size while preserving its open center. If you want a more elaborate dark manicure, see Goth Valentine Nails With Black Lace and Dark Red Hearts.
How to Create the Floating-Heart Effect With Regular Polish
For an at-home version on natural nails, use air-drying products throughout. Gather a sheer jelly lacquer, an opaque nail-art lacquer or compatible thin heart decals, base coat, clear top coat, and a small dotting tool or detail brush. A practice nail tip helps you judge the tint before doing both hands.

- Start with the base. Shape your nails to a comfortable length and apply your base coat according to its directions. Keep cuticles uncut and avoid forceful pushing.
- Add a thin jelly layer. Follow the bottle’s drying directions before placing artwork. Check the color on your natural nail; there is no universal coat count for every jelly formula.
- Place the lower hearts. Use small flat decals as directed, or make a painted heart from two close dots joined to a point with a fine brush. Practice on a tip first, and leave tinted space around each shape.
- Veil the art if you want depth. Once painted hearts are dry enough to recoat, apply one thin, even jelly wash across the whole nail. Avoid repeatedly brushing over the heart. The wash should soften its color without hiding its shape.
- Add the foreground detail. After that layer dries as directed, place a crisp heart in a different spot if you are making the two-depth design. For a single sharp heart like design 1, skip the tinted layer over the artwork.
- Seal without dragging. Let the artwork dry as directed, then apply a compatible clear top coat with light strokes. Allow the finished manicure its full drying time before handling objects.
If you see a streak, do not keep scrubbing the wet layer. Let it dry before deciding whether another thin coat is needed. If a decal sticks up or its edge will not lie flat, choose a smaller or thinner decal rather than burying it under a heavy pile of polish. The regular-polish Valentine nail tutorial walks through a simple painted heart in more detail.
If You Prefer a Gel Appointment
Bring one reference and name the three things you want preserved: the sheerness, the heart placement, and a smooth surface. Ask the artist to show you the tint and artwork together before completing the set. Layered art should be planned within the product system’s instructions, rather than made by adding arbitrary thick coats.
The British Association of Dermatologists warns that uncured nail products touching skin and insufficient curing can increase allergy risk. Gel needs the manufacturer’s recommended lamp and curing instructions; do not substitute the air-dry steps above.
For a lamp-cured manicure, protect your hands with broad-spectrum, water-resistant SPF 30 or higher, or dark, opaque gloves with the fingertips exposed. Do not pick or peel gel off. If your nails or surrounding skin become persistently irritated or change unusually, seek a dermatologist’s advice.
Questions to Settle Before You Paint or Book
Can jelly nails be done without gel?
Yes. Regular jelly lacquer air-dries and can create translucent color and layered heart art. Check the label: a glossy or “gel-like” appearance is not the same as a product that needs lamp curing.
Will my natural white nail tips show?
Usually, some of the nail line will remain visible through sheer color. That is part of this finish. Compare a swatch on your own nail if you are unsure how much contrast you will like. For the transparent free edges in design 4, discuss clear extensions with a professional.
Why do my hearts look buried or blurry?
The tint over them may be too opaque, the artwork may have smeared before drying, or the hearts may be too close together. Test a sheerer wash over dry artwork and give each heart its own space. For crisp outlines, place the art above the final colored layer and seal with clear top coat.
Are floating hearts the same as raised jelly charms?
No. These designs use flat hearts and translucent color to create the impression of suspension. Ask for flat artwork with a smooth finish if you want the look shown here.