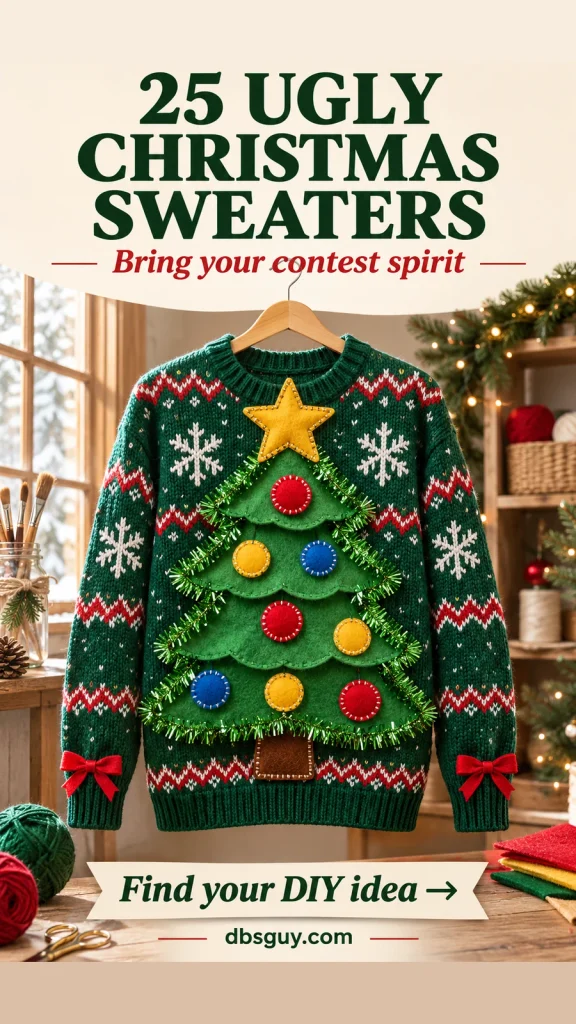
The strongest ugly Christmas sweater ideas have a joke you can see before you read a slogan: a snowman reduced to a puddle, a cat dismantling the decorations, or an entire fireplace on your chest. Choose one big idea, give it room, and make the details look deliberate.
These 25 designs are DIY starting points for a contest entry, from a simple ribbon-covered sweater to a detailed holiday vending machine. They are creative recommendations, not a record of 25 verified winners, and no design guarantees first place. Your event’s rules, judging categories, and voters decide the result.
Need a quick choice? Pick the gift-wrap disaster for a short materials list, the melting snowman for an easy visual joke, or the pocket advent calendar if you enjoy small sewing projects. For a more elaborate centerpiece, try the gingerbread house or the vending machine.
The images are AI-generated design concepts, not photographs of products we bought, sweaters we tested, or actual contest winners. The instructions below are suggested assembly approaches; adjust them to your garment and supplies.
Before You Decorate: Check the Entry Rules and the Fit
Ask whether the contest accepts sweatshirts, cardigans, or vests; whether an entry must be homemade; and whether attachments, lights, or interactive features are allowed. Some events count only decorations attached to the garment. Put the main idea on the sweater rather than relying on a hat or a handheld prop to explain it.
Start with a garment you can comfortably sit in and lift your arms in. A firm sweatshirt gives appliqués a steadier surface than a very stretchy, open knit, if your rules permit one. Use a sweater you are willing to alter: glue, needle holes, and trim can leave permanent marks.
For these projects, gather paper for a mockup, scissors, felt, a needle, thread, and your design’s trim. Try the paper shapes against the garment while wearing it, then take it off before attaching anything. Keep the neck opening, cuffs, and areas that need to stretch free of stiff decoration.
Assemble complicated motifs on a separate felt backing first. Hand-stitch the backing to the garment at several points, adding support where a motif sags. If you choose fabric adhesive for flat, lightweight pieces, check that its label permits your materials, test a hidden area, and follow the full curing time. Keep a barrier between the garment’s front and back while gluing. Never use hot glue on clothing while someone is wearing it.
1. Become a Walking Christmas Tree
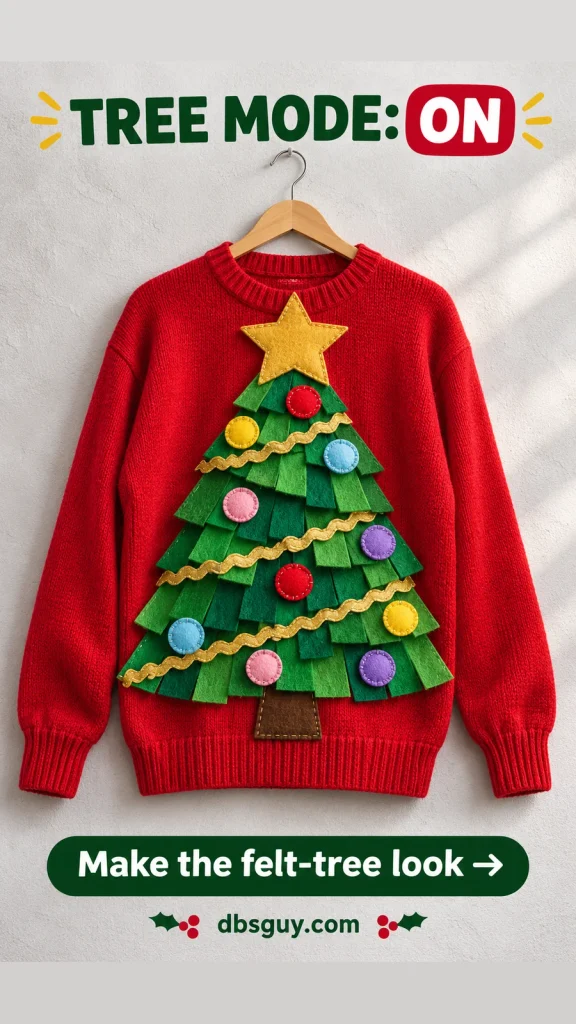
A tree is a good choice when you want a recognizable shape from across the room. Use a red base so the green branches remain visible instead of disappearing into the garment.
Cut a broad felt triangle, then cover it with short, overlapping green strips, working from the bottom upward. Add a brown trunk, a gold felt star, and large colored felt circles for ornaments. Lay gold ribbon in a loose zigzag across the branches and stitch it down without tightening the garment.
Keep the bottom branches above the ribbed hem. If the star tips fold over, use two layers of felt rather than a hard cardboard insert.
2. Wear the Fireplace and the Stockings
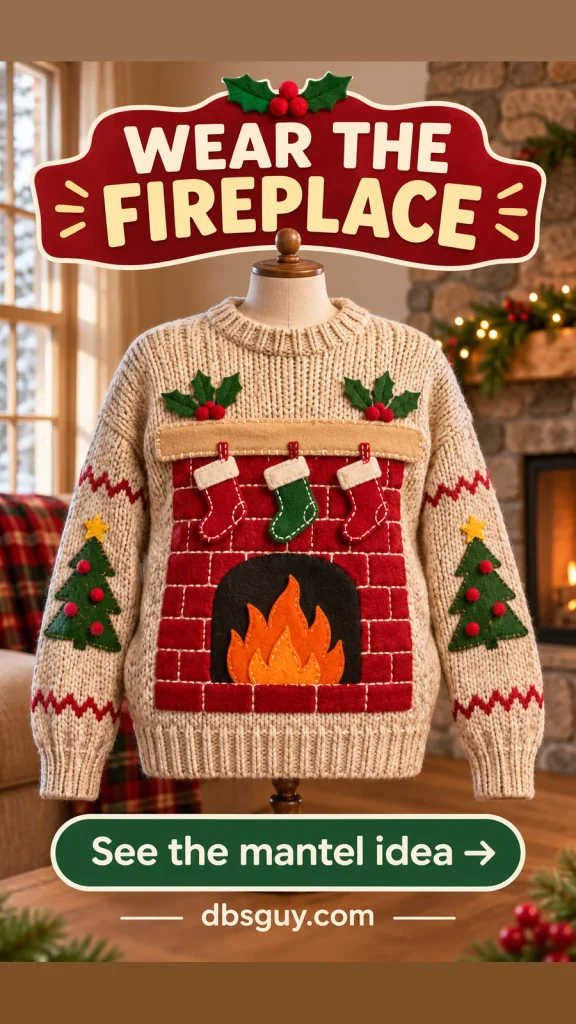
This is a small Christmas living room you can take to the party. The stockings give judges an up-close detail while the red fireplace supplies the big shape.
Build a rectangular red felt surround on a backing, leaving a black center. Add pale mortar lines with narrow felt strips or stitching. Layer orange and yellow felt flames inside the opening, then place a tan mantel above it. Sew three miniature stockings to the mantel edge so they stay attached.
Keep everything on the torso; extending the mantel across both sleeves makes ordinary movement harder. The flames are fabric only. A little holly above the mantel is enough finishing detail.
3. Make a Soft Snow Globe
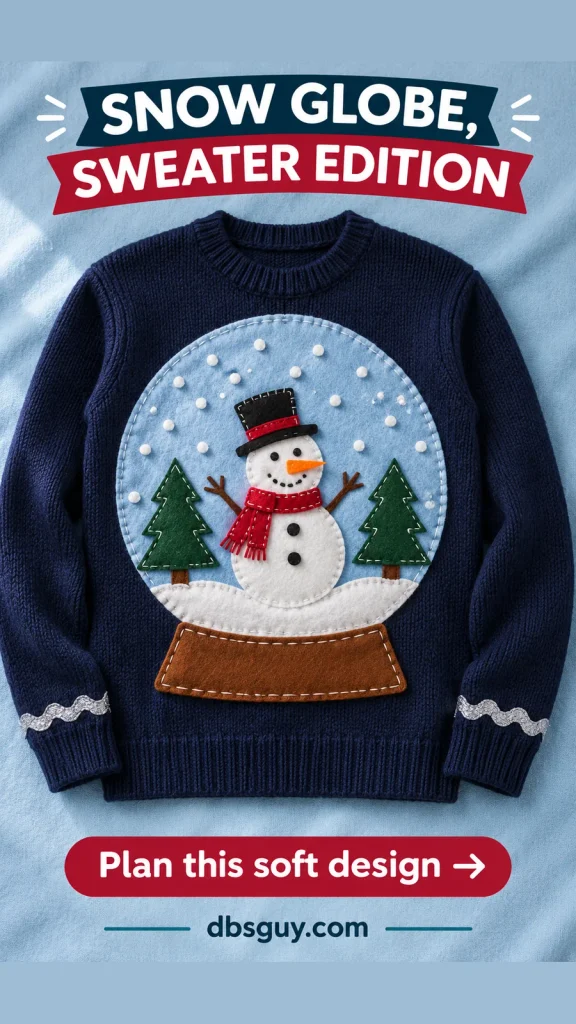
Get the snow-globe outline without wearing a plastic bowl. A pale blue felt circle and a brown pedestal are enough to establish the shape on a navy sweater.
Arrange a white snowbank, two green trees, and a snowman inside the circle before attaching it to the garment. Leave blue space around the figures so the scene stays readable. Add individually attached white felt dots for falling snow and a few large stitches around the edge.
Silver trim at the cuffs can echo the winter palette. Skip loose glitter, beads, or fake snow; the sewn dots give the effect without spilling when you move.
4. Build a Gingerbread-House Front
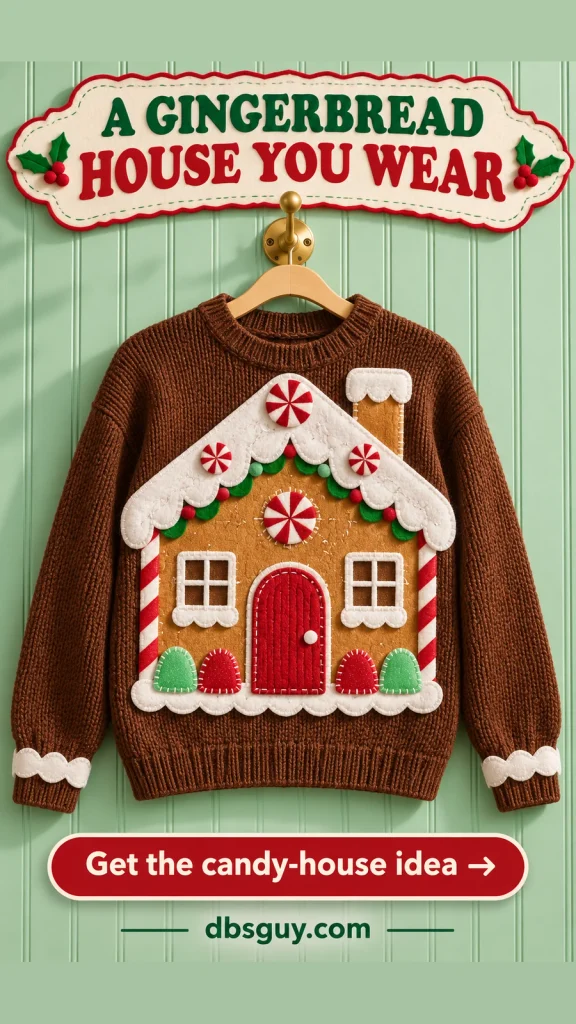
A brown sweater does some of the color work for you. Give it one large gingerbread cottage instead of scattering tiny cookies over the entire front.
Use tan felt for the house, a red door, white scalloped roof icing, and flat peppermint disks. Assemble the roof and walls together on a backing before sewing the house to the sweater. Make the candy accents larger than you think you need; very small gumdrops can vanish against a textured knit.
Repeat the white icing trim at the cuffs if you want a finished look. Use felt candy throughout so the design stays light and does not depend on edible decorations.
5. Open a Three-Reindeer Stable
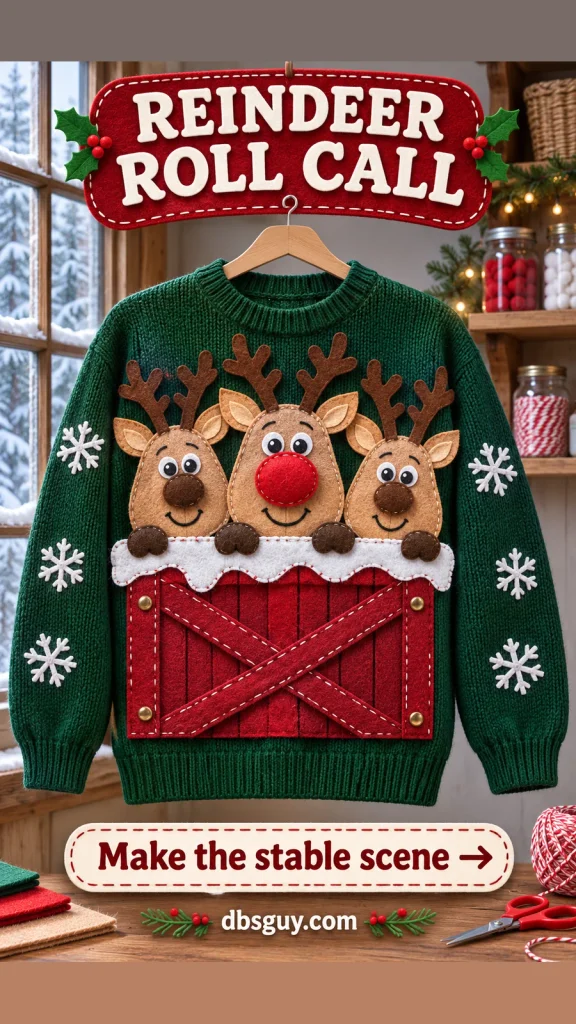
Three reindeer peeking over one stable door create a funny little lineup. The middle face gets a large red nose; the other two can look mildly unimpressed.
Cut three matching head shapes, then change the eye placement or eyebrows for different expressions. Give every head two ears and flat felt antlers. Attach the faces behind the upper edge of a barn-red felt door, with a white snow cap across the top.
Use a dark green base and keep the sleeves quieter than the chest. Build the antlers as part of the flat backing rather than projecting them outward where they can flop or catch.
6. Blame the Cat for the Decorations
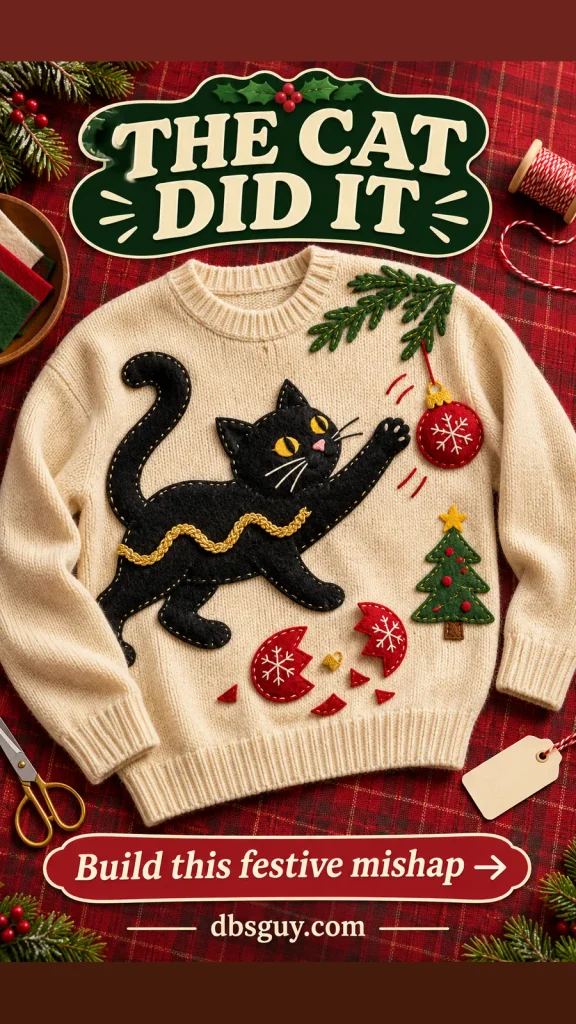
The joke is familiar to anyone whose cat treats a Christmas tree as an activity center. A black cat stands out sharply against a cream sweater, with one paw reaching toward a red ornament.
Sketch the cat’s silhouette first, including a curved tail and a clearly separated raised paw. Add a short wavy line of gold braid across its body and sew that line down along its length. Place broken red felt ornament shapes below the cat.
The gold trim represents the mess; keep it away from the mouth and avoid loose strands. Use felt slivers for the broken ornament so there are no actual sharp pieces.
7. Let the Snowman Melt
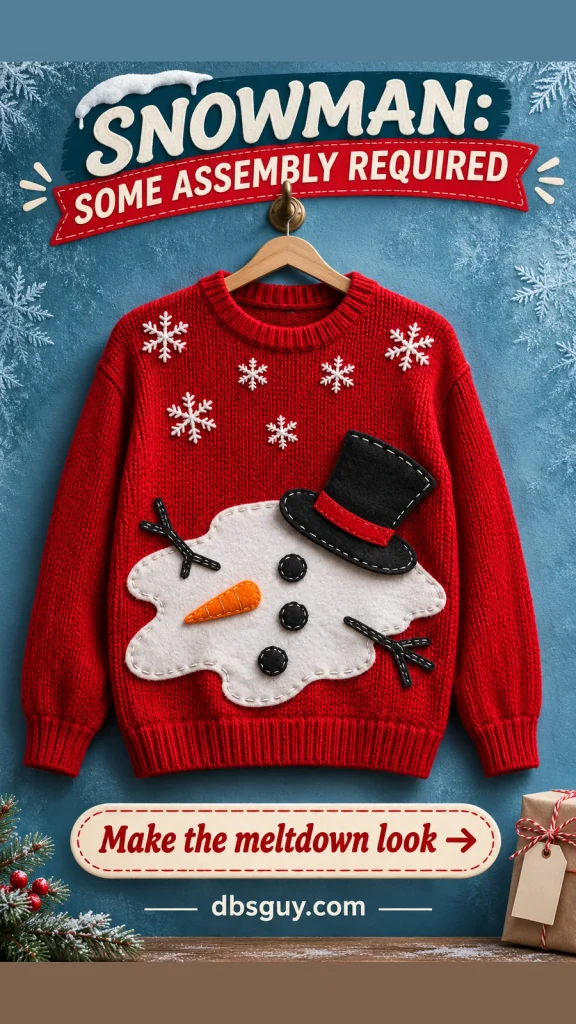
This is one of the simpler funny ugly Christmas sweaters because it needs only a few bold pieces. The snowman has already had a difficult afternoon.
Cut an irregular white felt puddle for the lower chest. On it, arrange a tilted black hat, an orange carrot, black felt coal, and two flat twig-arm shapes. Spread the features slightly so they look abandoned rather than assembled into a face.
A few white snowflakes above the puddle make the holiday connection clear. Use black felt for the coal instead of real buttons if you want a softer, flatter finish. Keep the entire puddle above the garment’s hem.
8. Sew a Pocket Advent Calendar
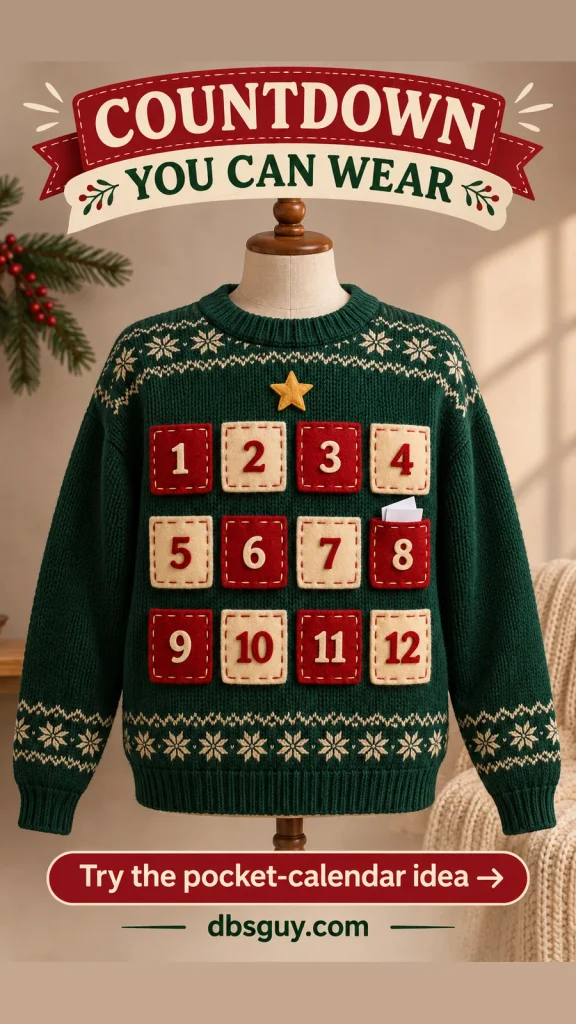
Choose this if you would rather make a detailed sewing project than wear a large three-dimensional attachment. The concept uses twelve pockets for a short party countdown, not a full December calendar.
Arrange three rows of four red and cream felt rectangles on the sweater. Fit the grid to your torso, leaving gaps so the knit can move. Sew each pocket along the sides and bottom, then add contrasting numbers from 1 through 12.
Tuck one lightweight paper joke into a pocket for your introduction. Skip candy and gifts that weigh the pockets down, and let people read the slip without reaching into your clothing.
9. Lose a Fight With the Gift Wrap
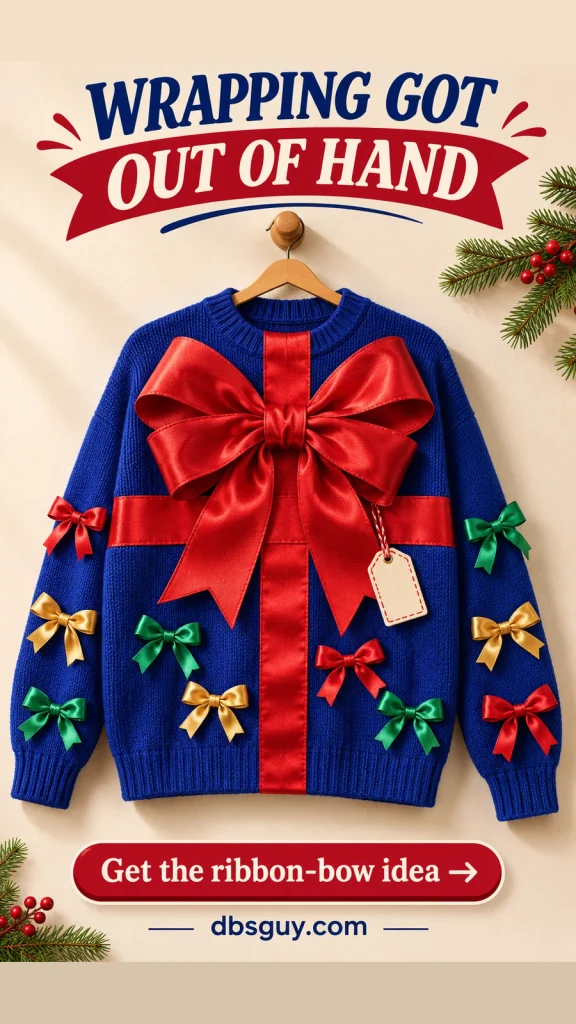
If your supplies are mostly ribbon, make that the entire theme. One enormous red bow on a blue sweater gives the design a focal point before you add the wrapping-room chaos.
Attach a vertical ribbon to the garment front and a horizontal piece across it. Secure a soft bow where they meet, then add smaller bows in a loose trail across the torso and sleeves. Use separate short ribbon pieces rather than wrapping a tight band around your body.
Add a small blank fabric gift tag or a short handwritten message. For a coordinating party display, borrow a color idea from our red bow Christmas decor guide.
10. Overload a Retro Cardigan With Ornaments
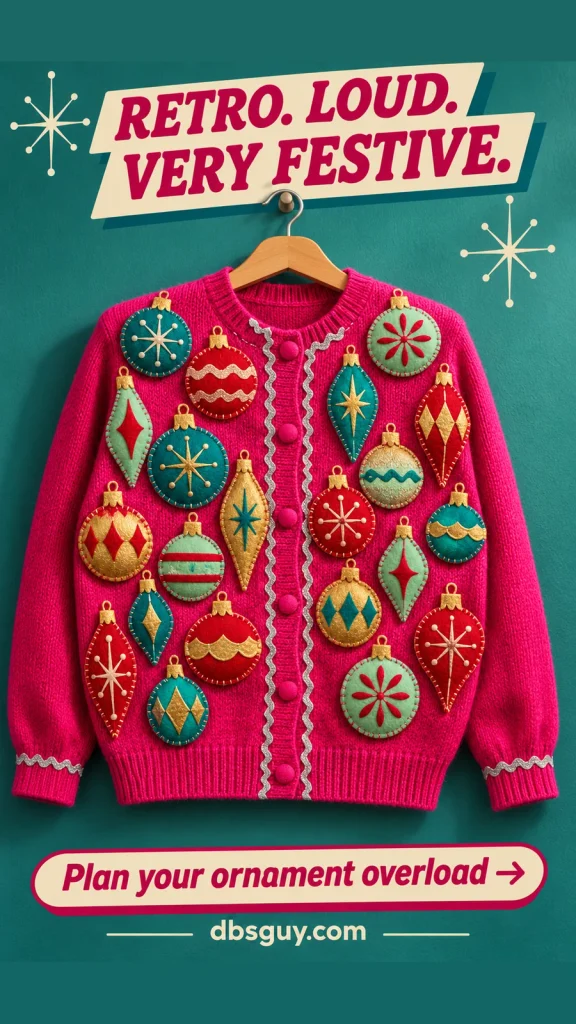
This is the choice for someone who wants the sweater itself to feel gloriously overdecorated. Pink, turquoise, mint, and gold give it a vintage Christmas-card palette.
Cut round and teardrop ornaments from felt. Use paired layers with a little soft filling for gentle dimension, then stitch them across a cardigan front. Alternate sizes and leave the button placket usable. Silver ricrac along the opening and cuffs ties the colors together.
Work around the chest and shoulders before filling the lower areas; otherwise the weight can pull the cardigan downward. Use textile ornaments instead of glass baubles, and keep the back mostly plain for sitting.
11. Wear the Tangle Without the Wires
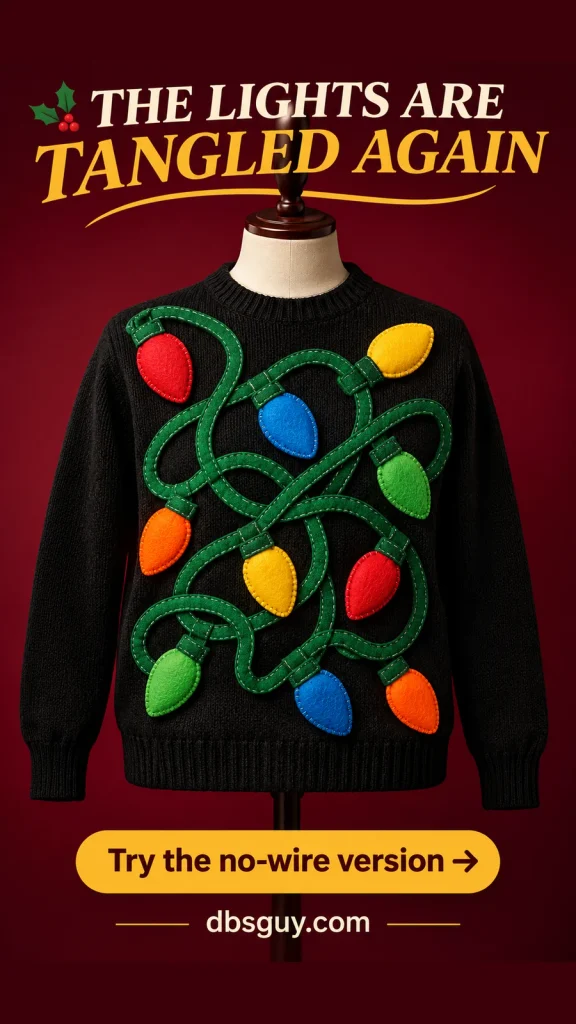
A knot of Christmas lights is a complete visual joke, even when none of them light up. Black fabric makes the red, blue, yellow, orange, and green bulb shapes stand out.
Lay a long green felt strip into several overlapping curves on a separate backing. Add large teardrop bulbs with small green bases along the route. Stitch the cord down at the curves so the tangle remains flat, then attach the finished motif to the torso.
Keep every loop inside the sweater outline. If you use real wearable lights instead, follow the manufacturer’s clothing-use instructions and the checks near the end of this post.
12. Run the North Pole Mailroom
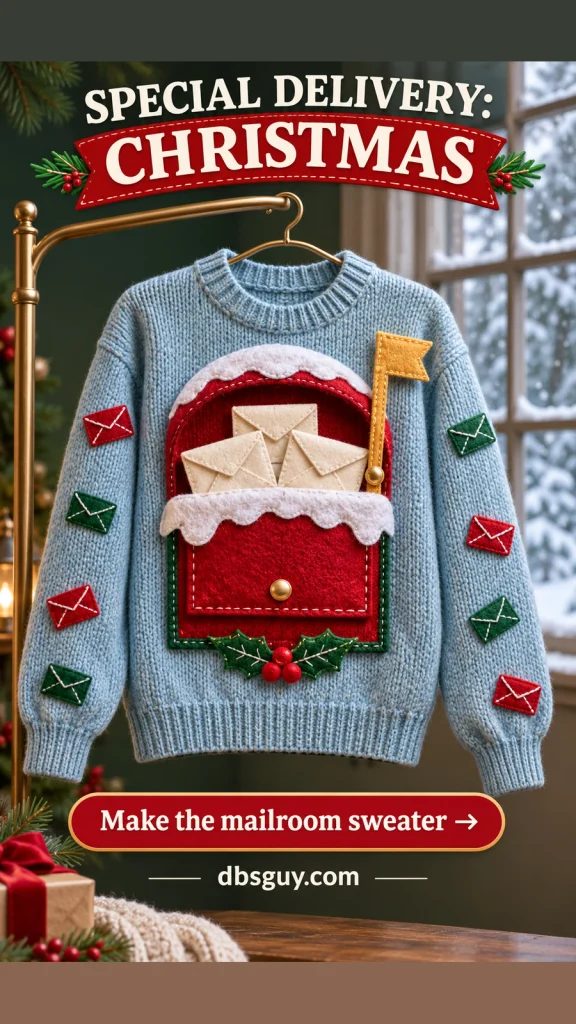
A red mailbox with letters spilling out gives this sweater a miniature job to do. It suits an office contest because the theme stays friendly and does not need a long slogan.
Create a rounded red mailbox silhouette, a white snow cap, and a small gold flag. Layer three cream felt envelopes behind the front panel, using stitched diagonal lines to show the flaps. Add smaller red and green envelope patches to the sleeves.
Make the letters appliqués rather than loose contents so the picture stays intact when you sit. A real message can go on a separate paper slip if your introduction needs one; the sweater should read without it.
13. Put Tiny Sweaters on Your Sweater
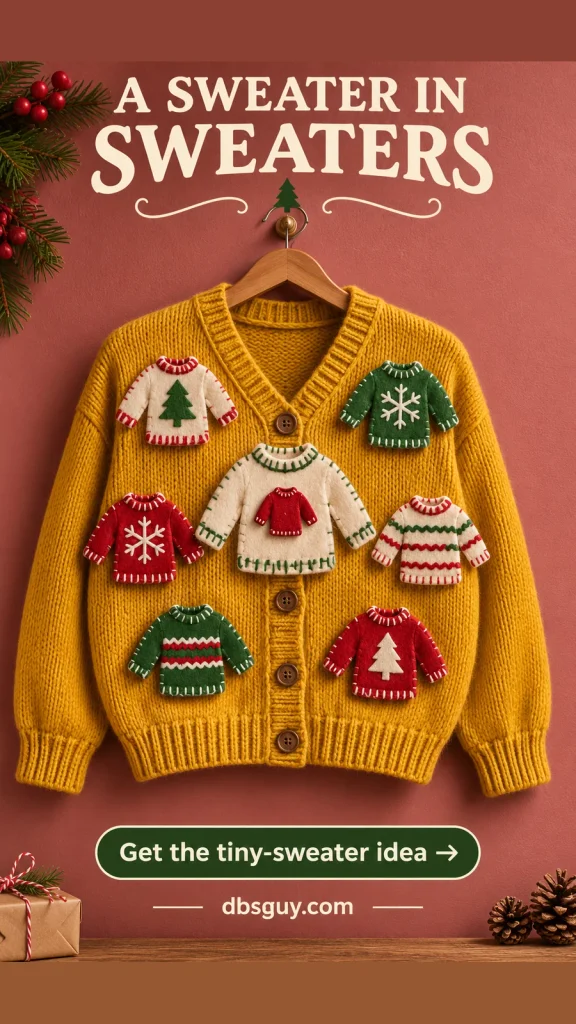
This design rewards a closer look: your ugly sweater is wearing ugly sweaters, and one of those is wearing another one.
Make a paper template with a clear neckline, two sleeves, and a straight hem. Cut seven small versions in red, green, and cream felt. Decorate them with broad stripes, simple trees, or snowflakes, then arrange them around a mustard cardigan’s buttons. Make the center miniature a little larger so there is room for its extra tiny red sweater.
Use appliqués instead of actual doll clothes to avoid bulky seams. Repeat a few colors, but vary the little patterns so the collection feels delightfully mismatched.
14. Become the Christmas Snack Board
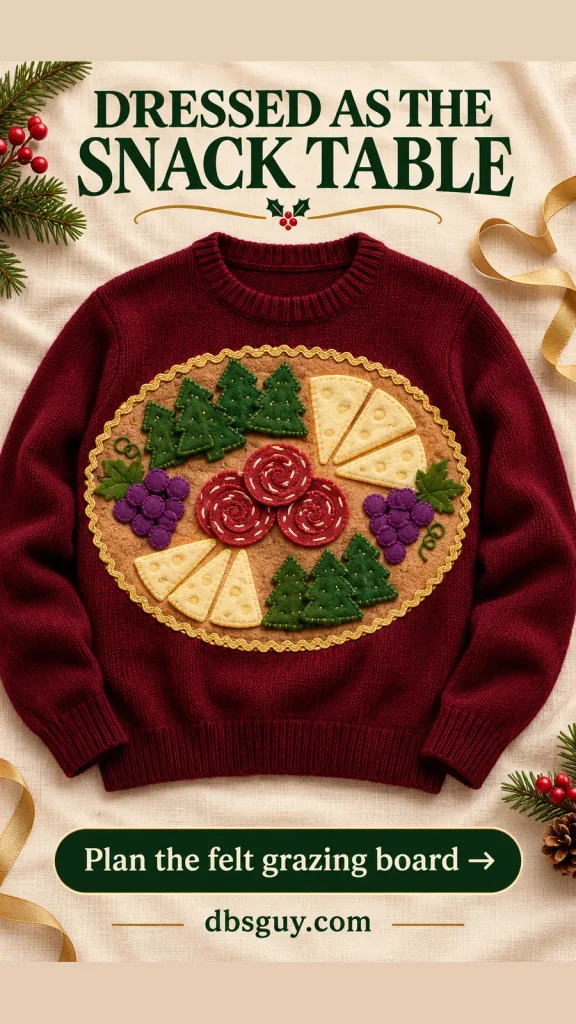
Dress as the table everyone gravitates toward. A tan oval of felt becomes the board, with soft cheese triangles, salami swirls, purple grapes, and green tree-shaped crackers.
Build the arrangement on the oval while it is off the sweater. Group matching foods instead of spreading every piece evenly; the clusters help it resemble a grazing board. Sew the finished board to a burgundy base and outline it with a narrow gold trim.
No real food or wooden board belongs on this version. If you are also bringing actual snacks, our Christmas charcuterie board ideas cover the serving-table project separately.
15. Send Penguins Down the Slopes
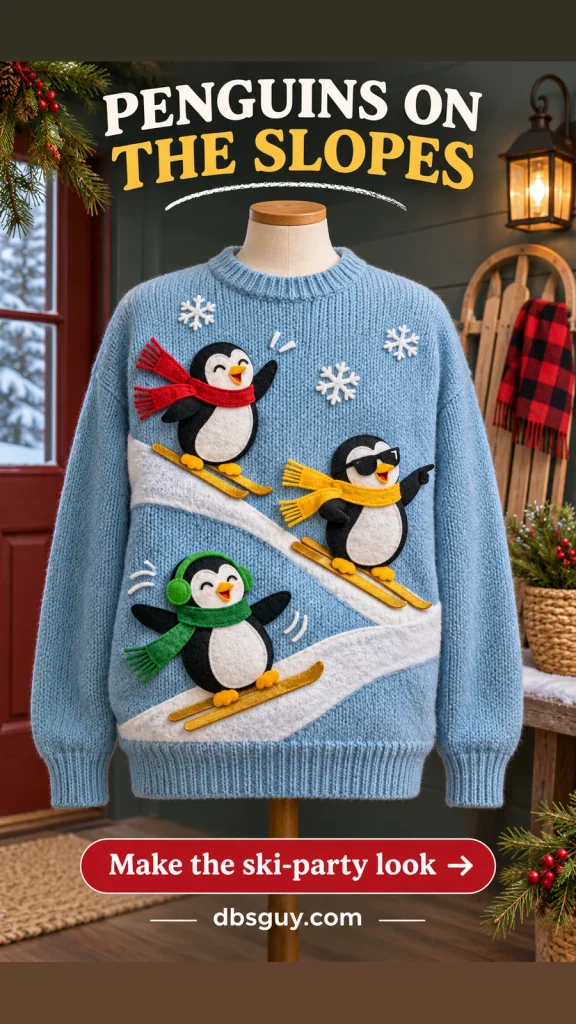
A penguin ski party gives you movement without moving parts. Three penguins at different angles make the sweater feel like a small, very unqualified ski team.
Layer diagonal white snowbanks across an ice blue front. Cut black bodies and white bellies, then add orange beaks and feet. Give each penguin two flat gold felt skis and a different scarf color. Assemble each bird before positioning it on the slope.
Keep the ski strips within the backing shape, with no stiff tips sticking out. A red scarf on one penguin supplies a Christmas accent; a few white snowflakes finish the scene without crowding it.
16. Decorate a Christmas Cactus

For a desert Christmas twist, decorate a cactus as though it were the family tree. The tall green shape and terracotta pot are recognizable even before you add the ornaments.
Cut a broad cactus with two upward arms and mount it on a cream sweater. Add short pale stitched lines for spines, a red felt bow at the pot, colorful flat baubles, and a small gold star at the top.
Keep the arms wide enough that the felt does not curl into narrow tubes. Use embroidery for the prickly details rather than toothpicks, wire, or actual spines. Gold ribbon can suggest garland without winding around the sleeves.
17. Give a Flamingo a Holiday Shift
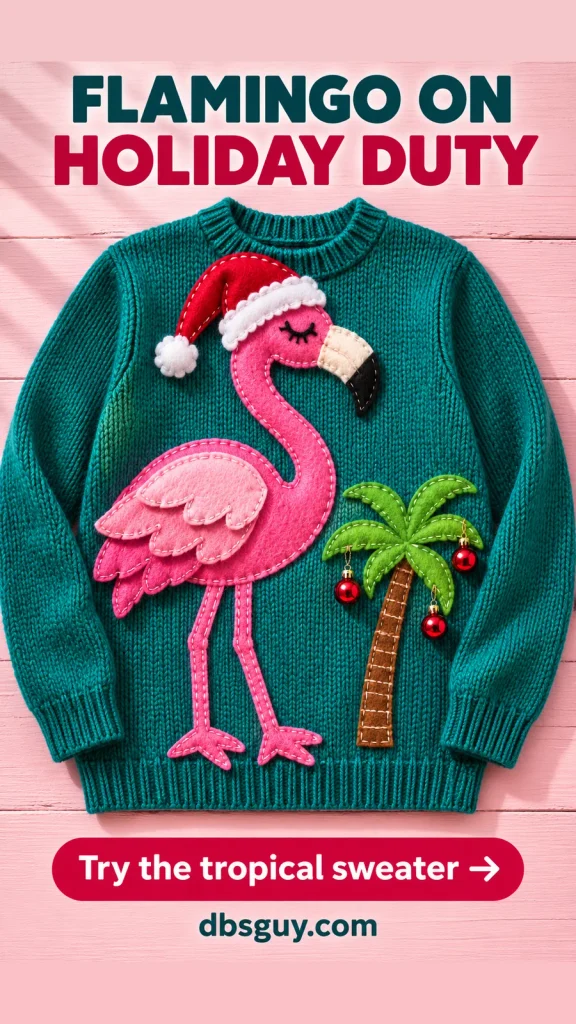
A flamingo in a Santa hat is a useful option for a warm-weather party or anyone tired of snowflakes. Teal fabric lets the pink bird do most of the visual work.
Build the flamingo from an oval body, curved neck, black-tipped beak, and long flat legs. Sew it to a backing before attaching it to the garment, then add a red-and-white felt hat. A small palm tree with a few red baubles provides the holiday setting.
Keep the flamingo’s thin legs stitched down along their length. One tropical bird and one palm are plenty; extra beach props can make the Christmas connection harder to spot.
18. Bring the Christmas Disco

For a contest that welcomes sparkle, turn disco balls into Christmas ornaments. A black sweater, silver textile circles, and red bows make the connection without a slogan.
Cut three large felt circles, then cover them with small squares of silver metallic fabric. Keep the squares close together but let narrow dark seams suggest the disco-ball grid. Add soft gold hanging strips and red bows above the circles, plus a few gold felt stars.
Use a fabric adhesive approved for both materials or stitching that suits your trim. Skip real mirror tiles and sharp sequins. Check that the finish still reads under the venue’s ordinary lights.
19. Drive the Tree Home
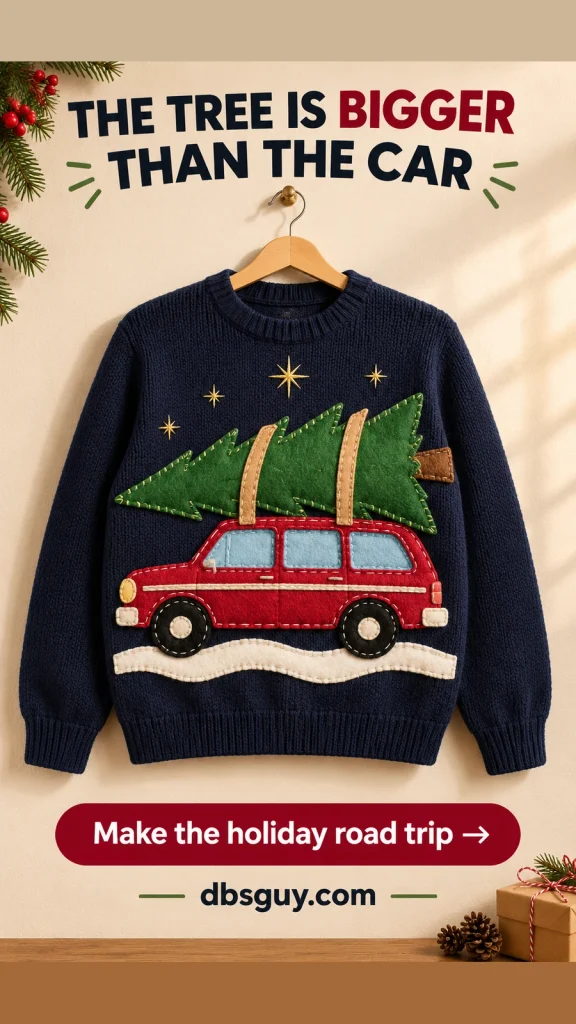
A red station wagon hauling a tree brings a little Christmas-road-trip nostalgia to the sweater. The oversized cargo gives it the comic exaggeration an ugly-sweater entry needs.
Cut a simple car profile with two black wheels and pale windows. Place a green tree horizontally above the roof, with a brown trunk extending toward the rear. Cross two tan felt straps over the tree and attach them to the car motif.
Leave space around the roof load so the car and tree stay separate shapes. Use a snowy white road beneath them rather than adding a full landscape. Everything can remain flat enough for sitting.
20. Turn Yourself Into a Nutcracker
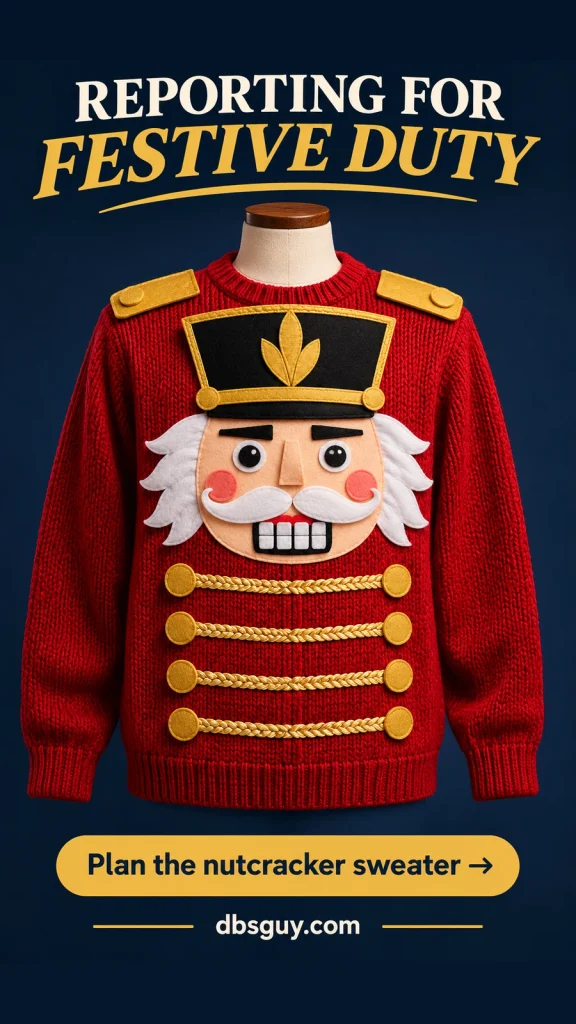
This design uses the sweater as a toy-soldier jacket, with a nutcracker face on the upper chest. Gold braid gives the lower portion a deliberately overdone ceremonial look.
Start with a red base. Assemble a peach felt face, white mustache, black eyebrows, a simple toothy mouth, and a black-and-gold hat. Below it, sew parallel gold braid rows with felt button disks at the ends. Add matching flat shoulder tabs if they do not interfere with the sleeve seams.
Keep the face below the neckline so you can pull the garment on normally. The mouth is a flat appliqué, not a hinged mechanism.
21. Get Santa Stuck in the Chimney
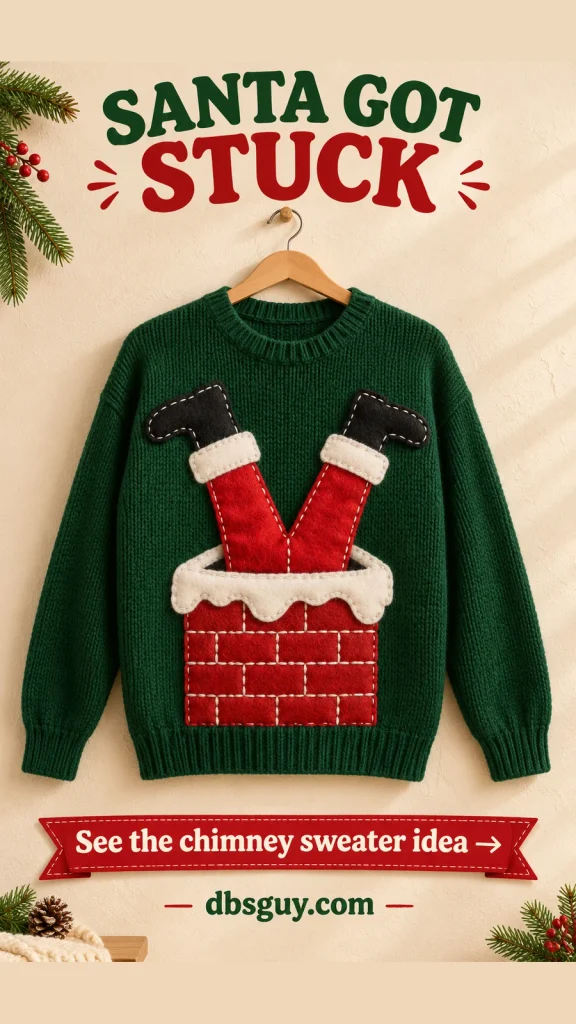
Santa has reached the chimney and misjudged the landing. Unlike the fireplace design, this scene focuses on an upside-down delivery rather than a cozy room.
Make a short red brick chimney on the lower torso with a dark opening at the top. Place two red felt trouser legs above the opening, add white cuffs, and finish with black boots tilted in opposite directions. A white felt snow cap frames the chimney rim.
Build the legs flat on the same backing so they do not flop forward. Leave the surrounding green sweater relatively clear. You want the boots, opening, and chimney to be understood in that order.
22. Leave a Snow Angel Behind
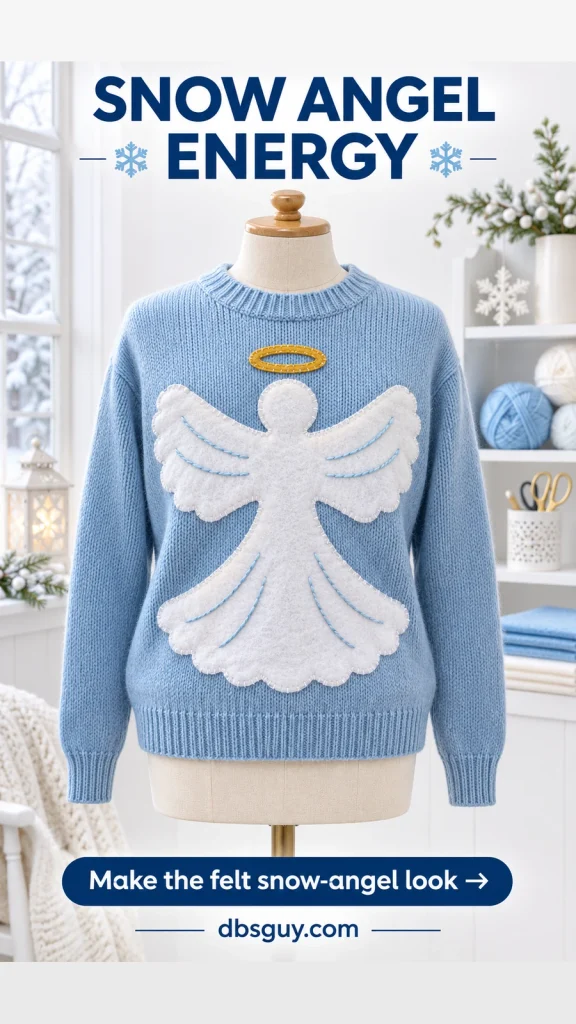
If intricate faces are not your thing, a snow angel gives you a large graphic shape with fewer parts. White felt against blue fabric does the work.
Sketch a small round head, broad scalloped wing impressions, and a flared lower snow shape as one connected silhouette. Cut it from white felt and sew it to the torso. Use pale blue stitching to suggest the swept lines in the snow, then add a small gold felt halo above the head.
Check the paper version from several steps away. If it resembles a butterfly, narrow the center and lengthen the lower sweep before cutting the felt.
23. Install a Holiday Vending Machine
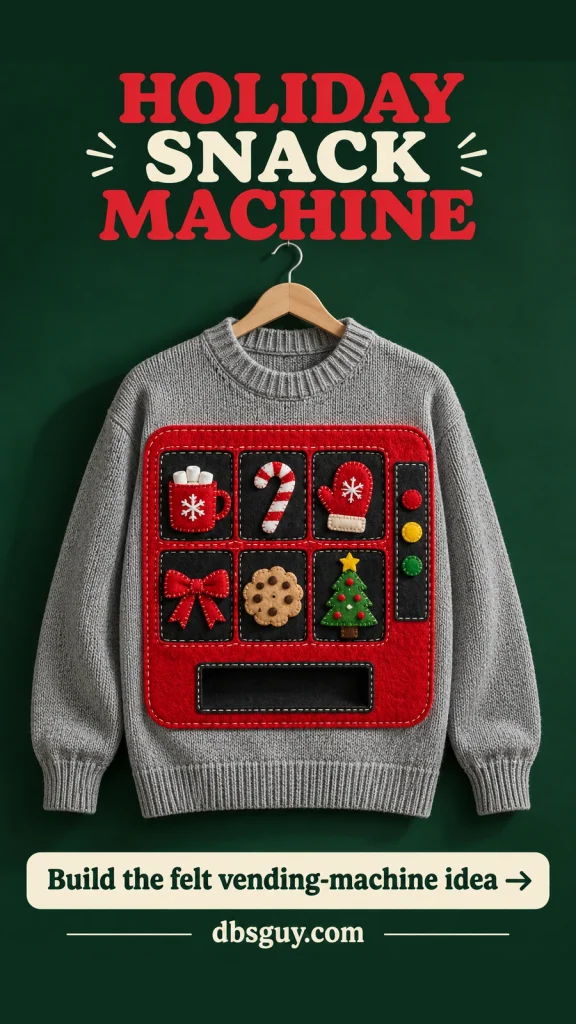
This is the detailed option for someone who enjoys inventing a tiny world. A holiday vending machine can offer felt cocoa, a candy cane, a mitten, a bow, a cookie, and a miniature tree.
Make a red rectangular frame on a gray sweater. Inside, arrange six dark display panels in two rows of three, each holding one oversized felt icon. Add a narrow control panel on the right and a black collection slot below. Assemble the entire machine on a soft backing first.
Keep the items decorative and attached; this version does not dispense food. Contrasting panel edges matter more than tiny prices or labels that nobody can read.
24. Wear the Christmas Cookie Tray
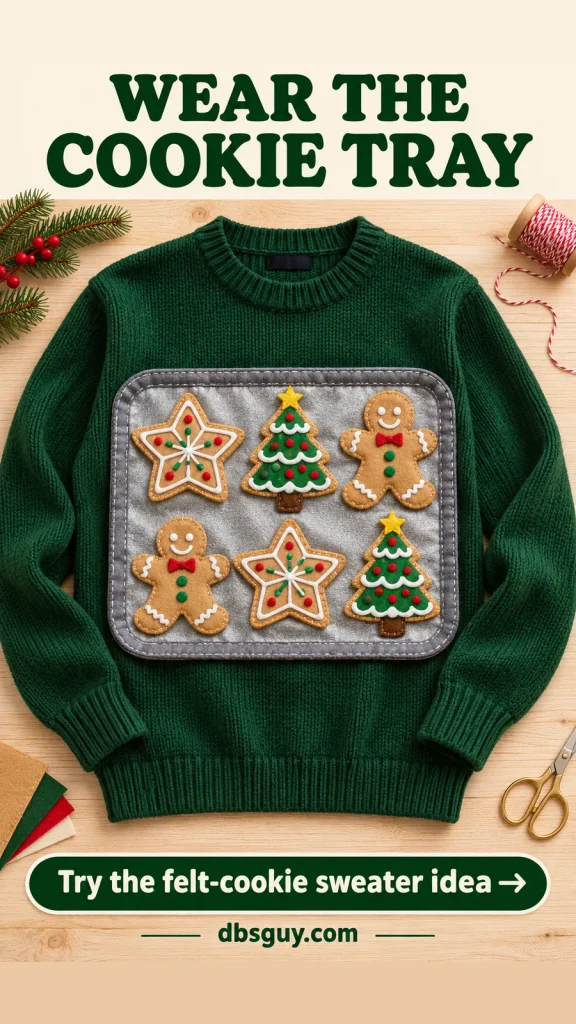
The baking-tray sweater gives a cookie decorator somewhere to put all those felt icing ideas. Six large cookies are easier to recognize than a whole crowded batch.
Cover a felt rectangle with silver fabric for the tray, adding a darker soft border to suggest its rim. Arrange two rows of three tan cookie shapes: stars, trees, and gingerbread people. Sew broad white icing lines and colored felt sprinkles to each cookie before mounting them.
Attach the finished soft tray to a green sweater. Skip actual metal bakeware, foil with exposed edges, and real cookies. Keep the tray above the waist bend so its corners do not fold under when you sit.
25. Run a Christmas Train Along the Hem
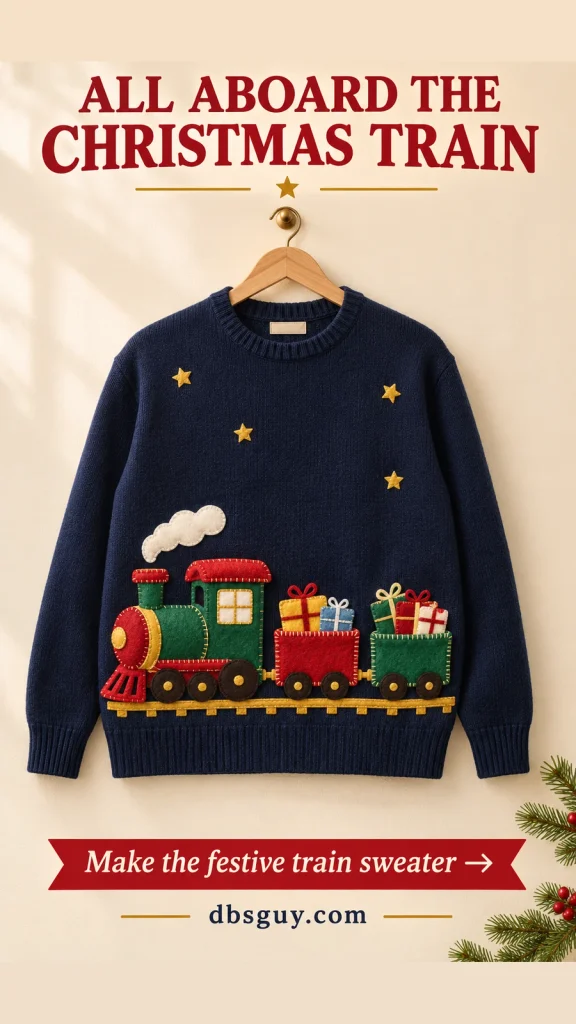
A train is a good way to use the lower front of a sweater while leaving the upper chest relatively open. Make the engine noticeably larger than the gift cars so the direction is obvious.
Sketch a flat green-and-red locomotive, two small cars of felt presents, and dark wheels. Arrange them on a short gold felt track just above the ribbed hem, then add a small white felt puff over the engine. Sew each carriage down separately so the garment can still flex.
Do not wrap a stiff track around your body or use a moving toy train. A few scattered gold stars on the upper chest can balance the low scene.
Give Your Sweater a Better Chance at Judging Time
Once the design is attached, try it on and take a straight-on photo in ordinary indoor light. Look at the photo as a small thumbnail. Can you recognize the idea? If not, enlarge or simplify the main shape before adding more trim.
- Match the category. A craft-focused award may give you a reason to show the stitching; a humor category needs a joke that lands quickly. Use the organizer’s actual rubric.
- Check the finish. Remove visible glue strings, trim uneven edges, and secure any lifted corner. Deliberate tackiness still benefits from careful assembly.
- Rehearse normal movement. Sit down, reach forward, and put on your coat. Reposition anything that digs in, catches, or pulls the neckline.
- Keep your introduction short. One sentence such as “The cat decorated this year” can support the picture. Let people see the sweater before explaining every detail.
If your group is decorating the room as well, our Christmas door decorating contest ideas offer separate projects for an approved display space.
A Note About Lights, Attachments, and Cleanup
The felt-light design above works without electronics. If you prefer illumination, choose a finished light accessory whose manufacturer explicitly permits use on clothing, and follow its instructions. Household or tree-light suitability does not establish that a set is wearable. Do not improvise wiring or use a wall-powered light string on your sweater.
For basic light inspection, the CPSC’s holiday safety guidance says to use lights tested for safety and discard sets with broken sockets or frayed wires. That general advice is not an approval of a particular wearable setup. Keep any permitted battery pack accessible, secure it as directed, and remove all electronics before cleaning.
Use soft, lightweight attachments, keep trim clear of the neck and hands, and avoid dangling loops. These are adult design concepts; small detachable decorations need a different approach around young children or pets. Follow the garment and adhesive care instructions, and remove detachable motifs before washing when their construction requires it. A decorated sweater may need careful spot cleaning rather than its original wash routine.
Ugly Christmas Sweater FAQs
What makes an ugly Christmas sweater contest-worthy?
A clear theme, a memorable joke or silhouette, and construction that holds together give an entry something specific to show. The useful question is what your contest rewards: homemade effort, humor, holiday spirit, or audience appeal. There is no universal winning formula.
Can I decorate a sweater without sewing?
For flat, lightweight felt pieces, a fabric adhesive may work if its label covers both the garment and decoration materials. Test first and allow the full curing time. Adhesive-only construction is a poor choice for a heavy, projecting motif. Choose a simpler design if you cannot add the support it needs.
What is the easiest idea to make from supplies I already have?
The gift-wrap disaster uses ribbon and bows; the melting snowman uses a few felt colors; the snow angel mainly needs white felt. Check your existing materials before choosing. A full advent grid or vending machine requires more separate pieces even when the supplies are inexpensive.
Can I start with a store-bought Christmas sweater?
Yes, if your contest allows it. Look for a quiet area where a new motif will remain visible, or choose a base whose colors support your idea. Avoid layering a detailed scene over a busy chest graphic. Do not buy a sweater specifically for the contest until you have checked eligibility.
How do I keep the decorations from sagging?
Reduce the weight first. Use flat felt instead of hard ornaments, put complex designs on a backing, and distribute the attachment points across that backing. Try it on before the adhesive has become your only plan. If the neckline pulls or the motif folds, simplify it or use a steadier garment.
Choose the design whose main shape you can make clearly, gather only those supplies, and finish the movement check before party day. A sweater you can comfortably show off gives your idea the best opportunity to be seen.