A dorm photo wall works best when you choose its shape before printing the pictures. A tidy grid suits a small study nook; a corner ribbon uses an awkward patch of wall; a standing memory board gives you somewhere to display photos when wall attachments are off-limits.
These 15 dorm photo collage and gallery wall ideas include both wall layouts and portable alternatives. Start with the space you have, then choose the photographs you actually want to see every day.
The images are AI-generated design concepts. They illustrate arrangements, not completed dorm installations or tested mounting methods.
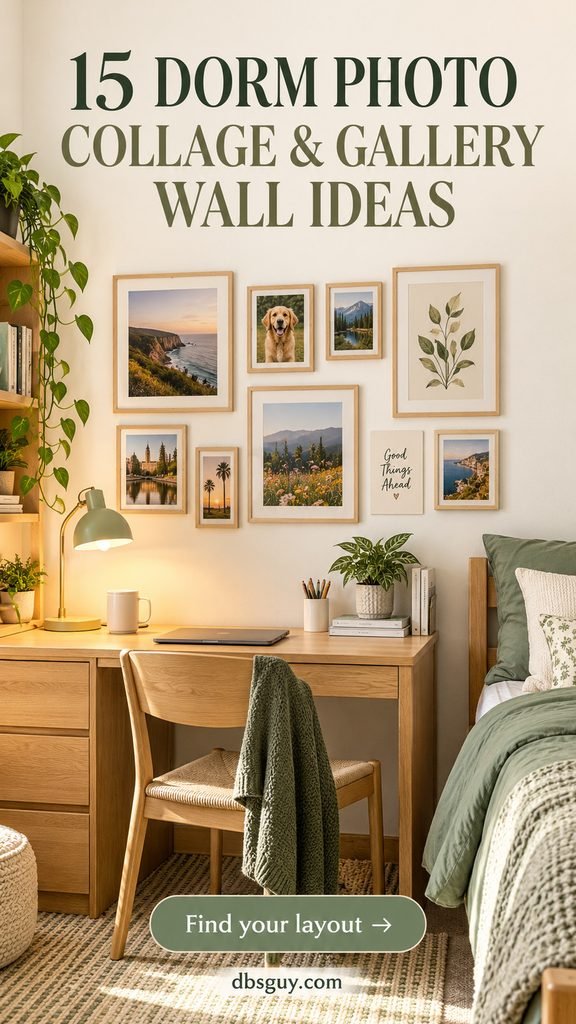
Before You Print or Hang Anything
Read your residence hall’s decorating rules for your specific building and wall surface. Check permitted fasteners, paper coverage limits, and whether boards or fabric displays are allowed. Western Kentucky University, for example, prohibits adhesives on drywall in certain halls while permitting some light adhesives on concrete in others. “Removable” on the package does not mean approved by your school.
Choose a spot clear of windows, vents, heaters, outlets you need to reach, and fire equipment. Measure the usable rectangle above a desk or dresser rather than assuming the entire wall is available. Keep framed displays away from sleeping areas.
If your hall permits Command picture-hanging strips, follow the manufacturer’s application and removal instructions for the exact product. Its picture-strip guidance says not to hang items over beds, on wallpaper, or with valuable or irreplaceable contents. Check the supported surface, frame size, and weight limits; do not combine products and guess the capacity.
For standing displays, choose a board with a compatible, stable stand and measure its footprint, including the back support. It should leave room for studying and opening drawers. If a large board crowds your desk, a small dresser-top frame is a better choice.
1. Make a Clean 12-Photo Grid
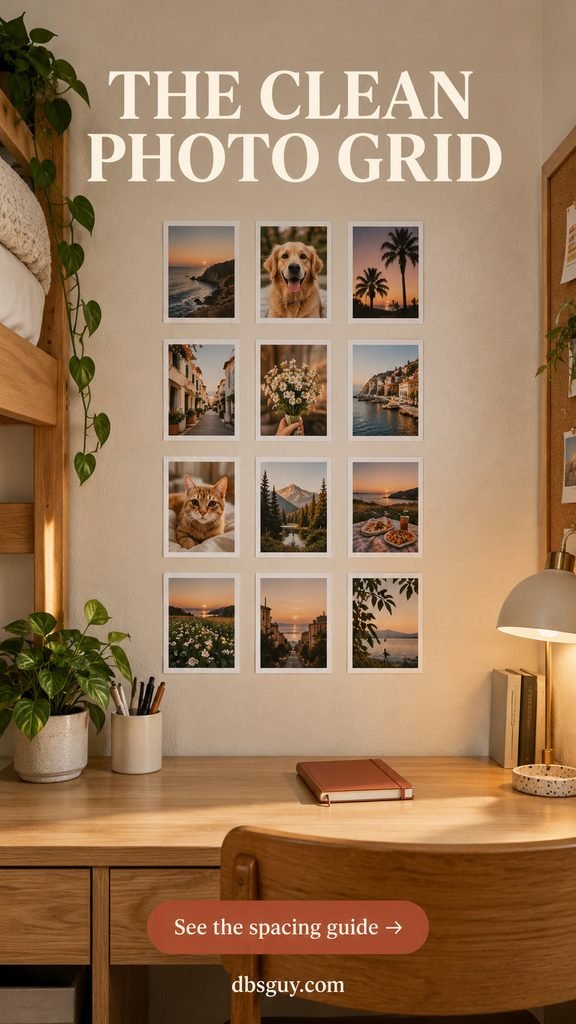
Choose this layout when your photos are colorful but you want the wall to feel orderly. Print 12 pictures on matching 4-by-6-inch portrait sheets, including any white border within that finished size. Arrange them three across and four down.
With 1-inch gaps, the finished grid measures 14 inches wide by 27 inches tall: three print widths plus two gaps, and four print heights plus three gaps. Measure that rectangle before ordering. Leave additional clear space around it.
Lay the prints on a table first, using a ruler or a 1-inch scrap of cardboard as a spacer. Spread similar colors across the grid instead of putting every dark picture in one corner. Transfer the arrangement using only your hall’s approved photo-mounting method; do not assume frame-hanging strips are suitable for bare paper.
2. Shape a Heart From Photos of Home
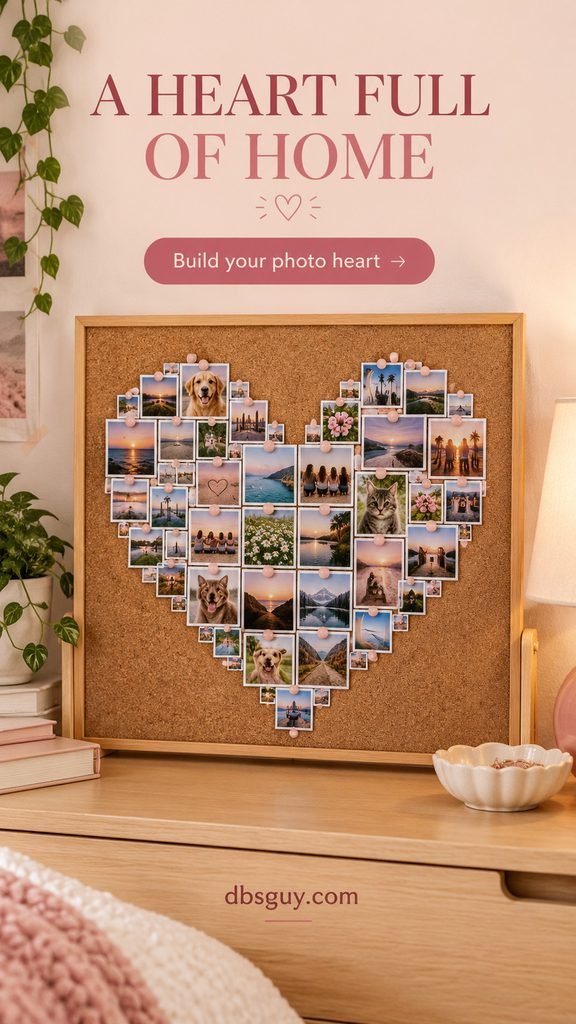
A heart collage makes family, friends, pets, and familiar places feel like one collection. Build it on a corkboard rather than trying to perfect the outline directly on a wall. The pictured version mixes print sizes, with smaller copies filling the curves and tapered bottom.
Start with two rounded clusters at the top, leave a visible dip between them, and bring the lower rows toward one point. Step back before pinning: the outline matters more than perfectly matching every print size. Keep faces away from overlapping edges.
Use copies of your photos, since pins and overlapping papers can mark them. A stable standing board keeps the shape together when you move. For a pink backdrop to the rest of the room, borrow a palette from the related dorm guide.
Also read: 15 Pink Dorm Room Ideas That Are Anything But Basic.
3. Put Photo Strings Inside a Standing Clip Frame
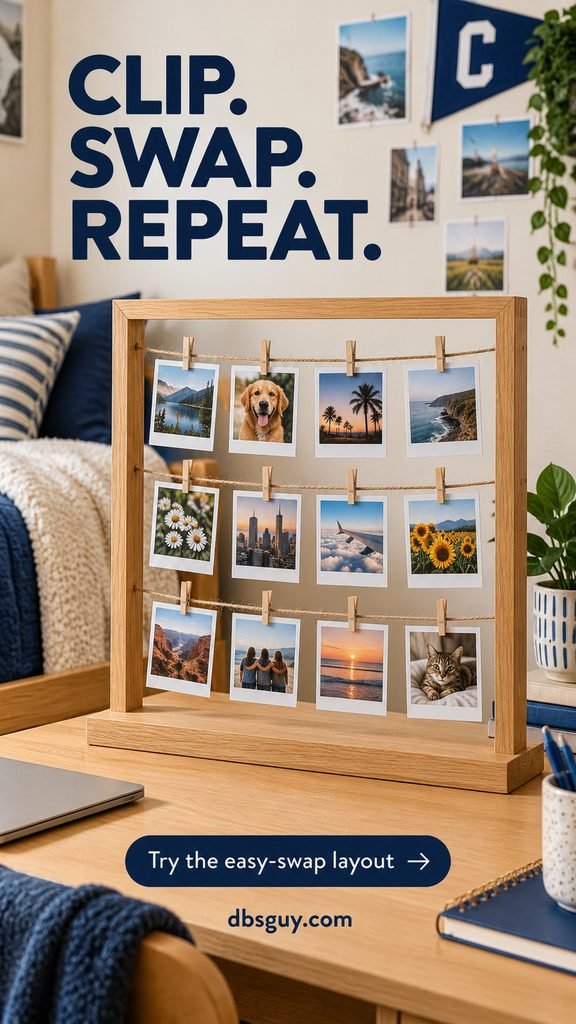
For pictures you want to change often, use an open frame with photo strings built into it. The concept shows three rows of clipped prints. The frame stands on its own base, so the strings do not need separate wall anchors.
Choose the frame around your print size. Four 3-inch-wide prints need at least 12 inches of usable width before allowing for gaps and clips. Leave enough distance between strings for the lower edges of one row to clear the row beneath it.
A ready-made standing clip frame is the straightforward option. If assembling your own, secure the strings to your frame, never school furniture, and use a base designed to support it. Keep the bottom prints above the desktop so they do not curl against it.
4. Fill a Narrow Gap With One Filmstrip Print
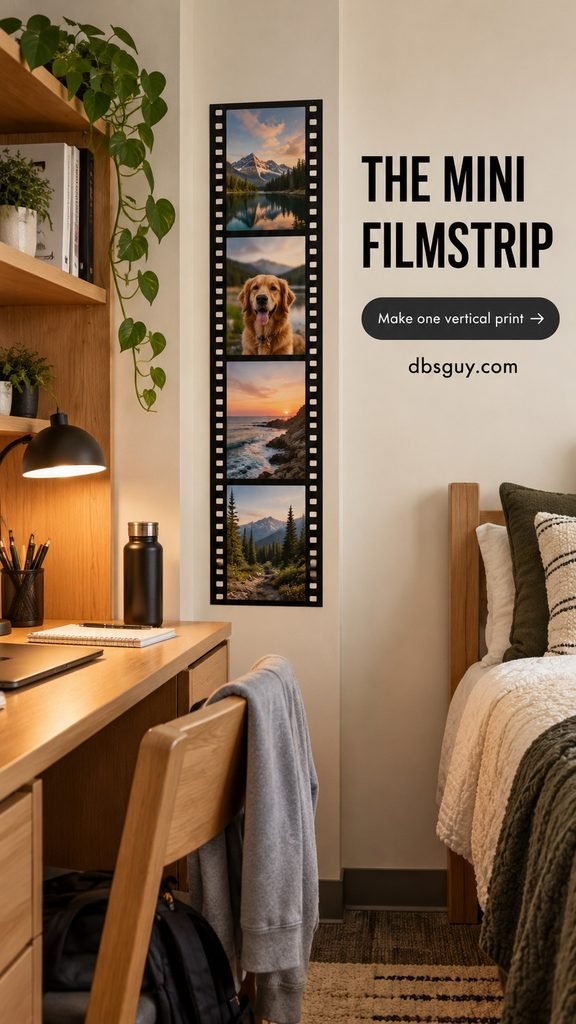
A slim wall beside your desk may fit a vertical collage even when it cannot take a full gallery. Combine four pictures into one tall digital design, add a dark filmstrip border, and order it as a single matte print.
Crop the photos to the same shape before stacking them. Keep small faces and important details away from the outer border. Check the printer’s available sizes and preview the complete design at that exact size; an automatic crop can cut off the top or bottom panel.
This gives you one piece of paper to position rather than four separate frames. If the hall does not allow paper on the wall, make a shorter version for a standing frame. Keep the narrow strip beside the study area instead of over the bed.
5. Turn an Inside Corner Into a Photo Ribbon
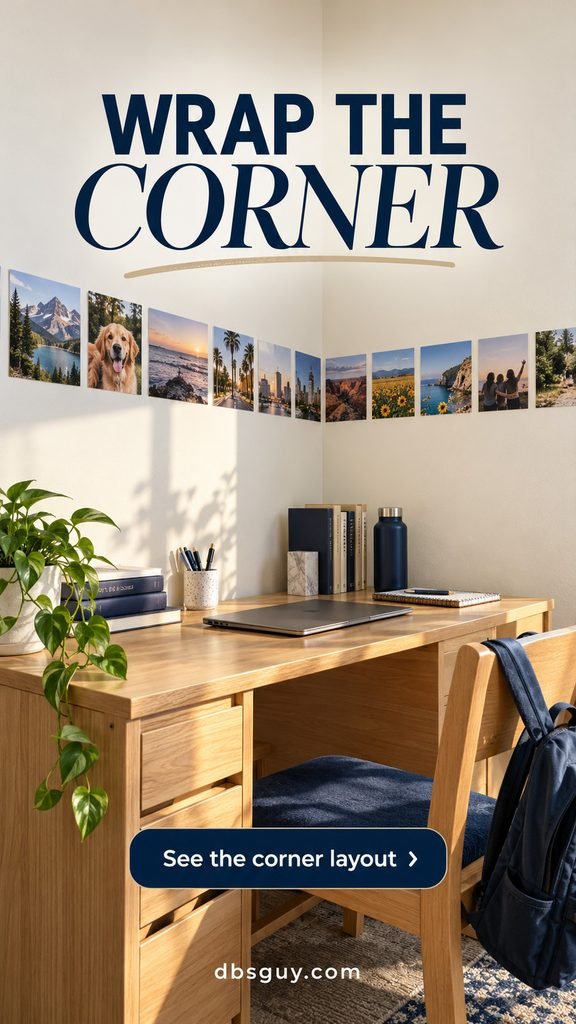
Use one horizontal row of pictures across two adjoining walls to connect an otherwise empty study corner. The turn is the feature: keep the row at the same measured height on both walls.
Choose matching print heights and similar gaps. Stop the last print on one wall just before the corner and start the next print on the other side; do not fold a photograph around the joint. A shallow row leaves more blank wall than a full collage, although it still counts toward any decorating limit.
Measure up from the floor on both sides rather than following a desk that might be uneven. Only use this layout where attaching paper to both surfaces is permitted, and stop before windows or your roommate’s agreed space.
6. Build a Scrapbook on a Corkboard

A scrapbook board suits the things that do not fit a neat photo grid: ticket copies, a note, a small drawing, or a postcard. Give one larger photograph the center, then arrange smaller keepsakes around it.
Let a few edges overlap while leaving patches of cork visible. Put tiny items near a larger photo so they read as a group instead of scattered debris. The mountain image in this concept gives the smaller snapshots a clear starting point.
Use reproductions of sentimental tickets and remove barcodes, addresses, or account details you do not want on display. Push pins only into a board designed for them. On a tabletop, use the board’s proper stand rather than balancing a heavy frame against the wall.
7. Start a Small Gallery With Five Pieces

For a gallery that combines photos and art, start with five pieces: one larger anchor photograph, two smaller photos, and two drawings or art prints. The larger piece gives you a center of attention without requiring every frame to match.
Try an 8-by-10-inch print for the anchor and smaller prints around it, but plan with the outside frame measurements, not the image sizes. Mats and frame borders add width. Arrange everything on the floor, leaving roughly 2 inches between neighboring frames as a starting point, then adjust the whole group to your wall.
Limit the frame finishes to one or two so the mix feels connected. Use lightweight frames with acrylic fronts where suitable, and a permitted mounting system rated for each complete frame. Avoid valuable originals.
Also read: 27 Living Room Gallery Wall Ideas That Look Designer. Borrow the arrangement principles and scale them to your dorm’s approved display area.
8. Keep It Simple With a Photo-and-Type Triptych

Three aligned pieces give a small wall a clear stopping point. Put one short phrase in the middle and a photograph on either side. An ocean image and a pet portrait make the pictured trio personal without filling every inch.
Use the same outside frame size and line up the tops. As an example, three frames that each measure 8 inches wide, separated by two 2-inch gaps, need 28 inches of width. Check the actual frames before marking the layout.
Choose your own words rather than buying a phrase you do not connect with. Keep the type large and brief. If frames are not permitted, combine the same three panels into one print or put them in standing frames on a dresser.
Also read: 13 Blue Dorm Room Ideas for a Calm, Coastal Vibe.
9. Let a Semester Timeline Grow Month by Month
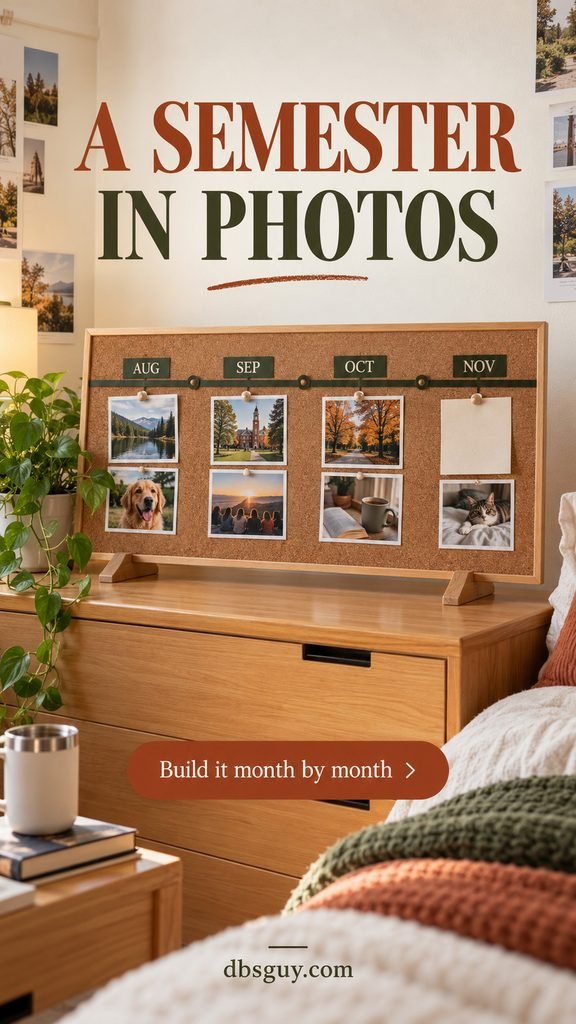
Instead of choosing all your photos at move-in, reserve space for the semester as it happens. Divide a wide board into four month columns and place one or two pictures beneath each heading. Adjust the months to your own term dates.
The pictured board runs from August through November, with one blank space still waiting for a photo. That unfinished spot is useful: it lets the display grow without squeezing new pictures between old ones.
Add a short caption on the border or a separate card when a memory needs context. Keep daily schedules and private information elsewhere. At the end of the term, photograph the arrangement before packing the pictures into an envelope labeled with the semester.
10. Connect a Hometown Sketch to Favorite Photos
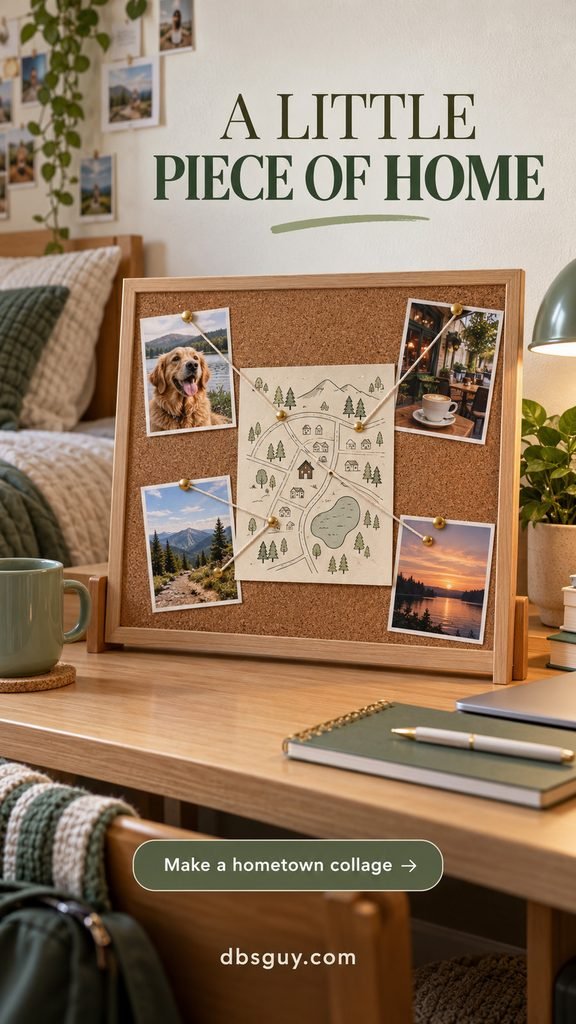
Give a home-themed collage a center by placing a simple town or neighborhood sketch among your photos. It does not need to be a precise street map. A favorite park, café, walking route, or house symbol is enough to suggest the places you miss.
Choose four pictures with specific connections to those places. On a corkboard, use a few short lengths of thread between the map and photos; keep every attachment on the board. Too many crossing lines can hide the map, so one connection per photo is plenty.
Leave your exact home address off the display, especially if it might appear in room-tour photos. This idea works well on a standing board you can take home between terms.
Also read: Homesick in College? 17 Ways to Feel Better That Actually Work.
11. Turn a Black-and-White Contact Sheet Into One Poster

If you like a photo grid but dislike aligning separate prints, design the entire arrangement as one contact-sheet poster. The concept uses 12 pictures in three columns and four rows, with consistent gutters inside one dark outer border.
Convert the images to black and white and compare their brightness before exporting. A very dark snapshot beside a washed-out one can distract from the collection. Use original files rather than screenshots, then inspect every panel in the printer’s preview.
The tradeoff is flexibility: changing one photograph means reprinting the poster. Choose this for a settled collection, such as favorite summer memories. The grid in idea 1 is better when you want to replace individual prints.
12. Give Roommates Matching Boundaries, Different Photos
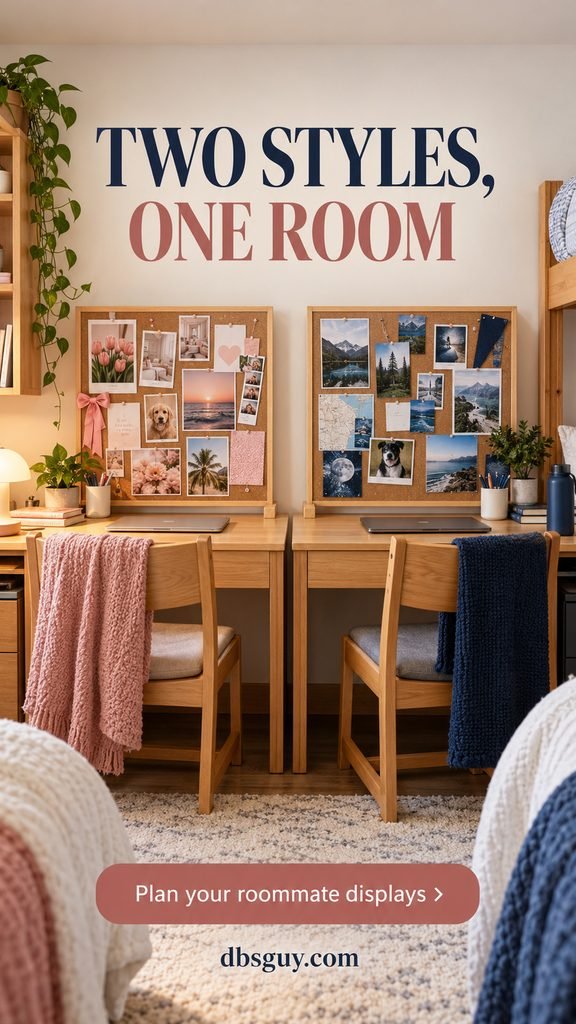
Two identical boards can make a shared study zone feel coordinated while leaving the contents personal. One roommate can use warm blush tones, the other cool blue, without either person having to adopt the other’s photos or style.
Agree on the board size and location together. Measure both desks and the boards’ support feet before buying; matching boards are not useful if they leave one person without room for a laptop.
Keep each collection inside its own border and ask before displaying photos of the other person. In a room with limited surface space, use smaller boards or place each person’s collage in a compact standing frame. Shared furniture and decorating space should be a joint decision.
13. Use a Standing Wire Grid for Fast Photo Swaps

A freestanding wire grid gives paper keepsakes a place to clip without pins or wall adhesive. Unlike a fixed photo-string frame, its openings let you move clips sideways and vertically to fit different print shapes.
Start with three photographs, a small art card, and one note. Leave some of the grid visible so each piece has a clear edge. Choose clips that grip the paper without covering faces; make a spare copy if a clip leaves a mark.
Look for a grid sold with a stable tabletop base. A wall panel balanced on its bottom edge is not the same thing. Keep it for lightweight paper rather than hanging bags, mugs, or other objects from it.
14. Tuck Prints Into a Ribbon Memory Board

A fabric board with crossed ribbons gives small photos a softer backdrop. Tuck the corners beneath the ribbons, leaving the main subject visible. The gingham version adds pattern without needing wallpaper or anything attached to school furniture.
Choose a memo board designed to hold paper under its ribbons, with a compatible stand if it will sit on a dresser. Test one copy first: loose ribbons may let a glossy print slide, and very tight ones may bend it.
Keep the arrangement light enough to see the fabric between photos. If fabric boards are restricted in your hall, use a permitted cork or wire display instead. Check the rules before buying a board for its looks alone.
15. Make a Dresser-Top Gallery With No Wall Attachments

When the walls are off-limits, use three small easel-back frames on a dresser. Put the tallest toward the back and two smaller frames slightly forward, angled so you can see every picture from the room’s entrance.
Measure the depth with the easel legs fully open. Keep every foot on the furniture, away from the front edge, and leave space for the objects you use each morning. Position the frames where opening drawers or reaching for a bag will not knock them.
Use different frame sizes but repeat one finish or color. Three favorites are enough for a small surface. This is also the simplest version to pack: close the legs, protect the fronts, and move the gallery with you.
Print Once, Arrange Twice
- Choose the display first. Count the spaces, measure the board or wall area, and decide whether you need square, portrait, or landscape crops.
- Gather the original files. Use your own photos or images you have permission to print. Save a cropped copy so the original stays intact. Keep faces clear of borders and clip positions.
- Check the order preview. Confirm finished paper size, orientation, white borders, and whether the service crops or fits the image. Do not assume a phone photo fills a 4-by-6 print without cropping.
- Test the arrangement off the wall. Use actual prints or paper cut to their finished sizes. For frames, use the outside dimensions. Take a phone picture of the layout so you can recreate it.
- Install only after checking permission. Follow the approved mounting product’s instructions, or use the display’s compatible stand. Keep removal tabs accessible where the product requires them.
To keep spending under control, start with prints you already have and a board or frames you can reuse. Compare the complete cost of printing, delivery, supports, and approved mounting supplies before choosing between lots of small prints and one poster.
Dorm Photo Collage FAQs
What can I use to hang photos without damaging dorm walls?
There is no universal adhesive that is approved for every hall or guaranteed to leave every finish intact. Ask housing which method is allowed on your wall surface. If adhesives and pins are prohibited, use a stable tabletop display rather than testing another tape.
How many photos do I need?
Count from the layout you choose. The separate-print grid uses 12 photos; the hometown board uses four around a map; the dresser gallery uses three. A heart’s photo count depends on the board, print sizes, and overlap, so build its outline with paper copies before ordering extras.
How do I stop a collage from looking cluttered?
Decide what stays consistent: spacing for a grid, one outer boundary for a scrapbook board, or matching frame sizes for a triptych. Remove anything that hides another photo’s main subject. A smaller group with visible edges is easier to read from across the room.
Can I use string lights to hold or surround the photos?
Only if your hall permits that lighting and the product is intended for the setup. Do not treat ordinary electrical wire as a photo string or clip paper onto it. The clip-frame idea uses plain twine inside its own frame, so it does not need lights to work.
How should I take the display down at move-out?
Check housing’s checkout instructions first; some halls want staff to handle certain adhesives. Where you are responsible for removal, follow the exact product directions rather than pulling decor away from the wall. Pack boards with their pins contained and protect photo surfaces from rubbing against frame hardware.
Pick the layout that fits your room and how often you want to change the pictures. Print a small group, arrange it before attaching anything, and leave space for a few memories you have not made yet.